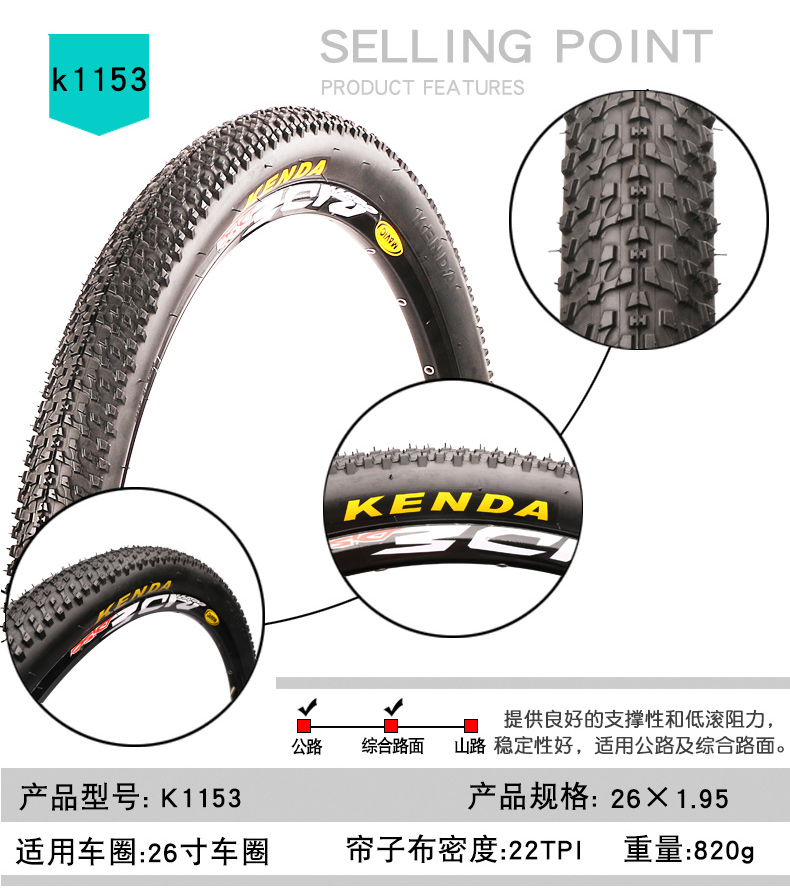
Having the right PSI in your bike tires can make a world of difference. However, it would be an oversimplification to say that less air offers a more comfortable ride and more air makes you go faster. While this is true in many instances, the fact of the matter is that proper inflation for optimal performance depends on the individual rider and his or her bike.
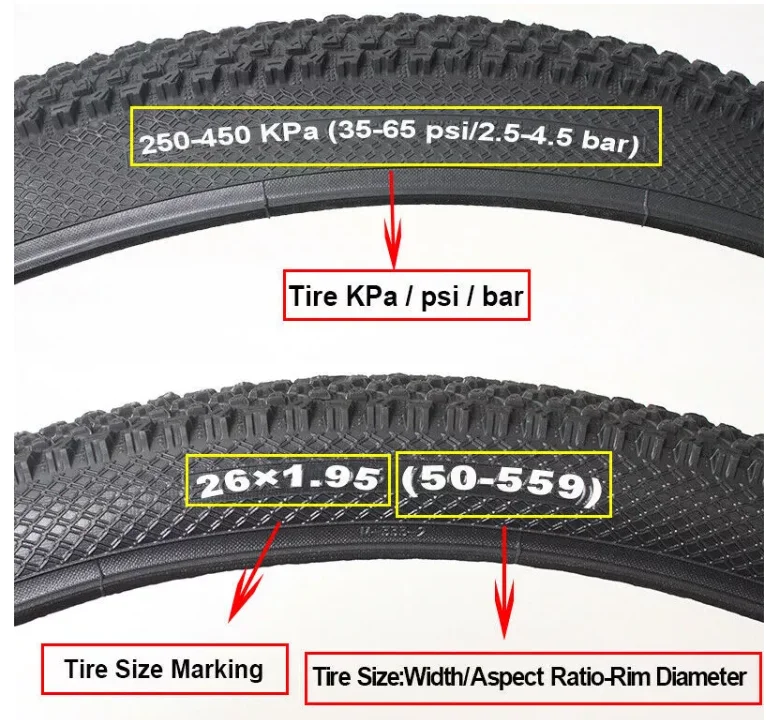
Every tire has a recommended psi printed on its side close to where it touches the rim. This is usually written as a range (for instance, "90 to 115 psi") since there are reasons why you'd want to be on the higher or lower end, which we'll get into shortly.
Basic rule of thumb if your tires happen to not indicate a recommended pressure: pump them up until they're firm but still slightly squeezable. Alternatively, there are generally-accepted ranges based on bike type:
| Bike tire type | PSI range |
| Kids' bike tires | 20–40 PSI |
| Narrow tires / road bikes | 80–130 PSI |
| Medium tires / hybrid bikes | 50–70 PSI |
| Thick tires / mountain bikes | 30 PSI (off-road) 50 PSI (on-road) |
Road bikes and tires are built for speed over smooth surfaces. Higher air pressure lets them roll easier and faster. A typical range for these would be between 80 and 130 psi, although racers can sometimes go as high as 160 psi. Quick tip if you're caught inflating a road tire without a gauge and need to ballpark it: at 100 psi, a tire can barely be compressed with your thumb.
Unlike roadies, mountain bikes are flying over loose, bumpy terrain. Tires with too much air lead to too much bounce, making for a jolty ride. Lower pressure helps with shock absorption while also giving you more traction since more of the tire comes into contact with the ground. MTB manufacturers recommend between 30 and 50 psi on most of their bikes since this is a nice balance between on-road (closer to 50) and off-road (closer to 30) riding.
Hybrid bike tires require pressure levels between those of road and mountain bikes. This is usually in the 50 to 70 psi range. Kids' bikes have the lowest recommended inflation, typically 20 to 40 psi.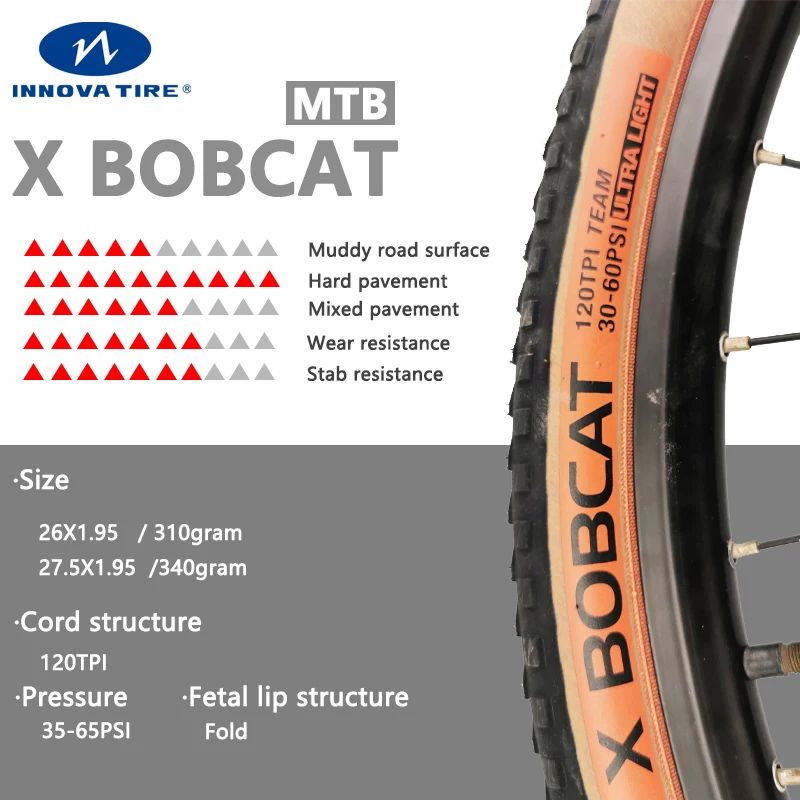 Keep in mind that these are called "recommendations" for a reason, though. A number of factors go into the inflation process beyond just your style of bike.
Which leads us to…
Because nothing in life is ever as simple as it should be, we've included a few more things to ponder when it comes to making sure everyone's tires are in good shape for their next ride.
As a general guideline, more weight = more pressure. Whether you're competing in the Tour de Whatever or shredding up the backcountry, heavier riders should use a higher psi than lighter ones to see the same performance in their tires. For perspective, someone weighing in at 200lbs will probably want to pump in around 20 more psi than someone who's 160. There's no real slide rule for this, so just play around with the pressure and see what feels best for you. Also keep in mind that rear tires tend to carry more weight than those in front, so adjust accordingly as necessary.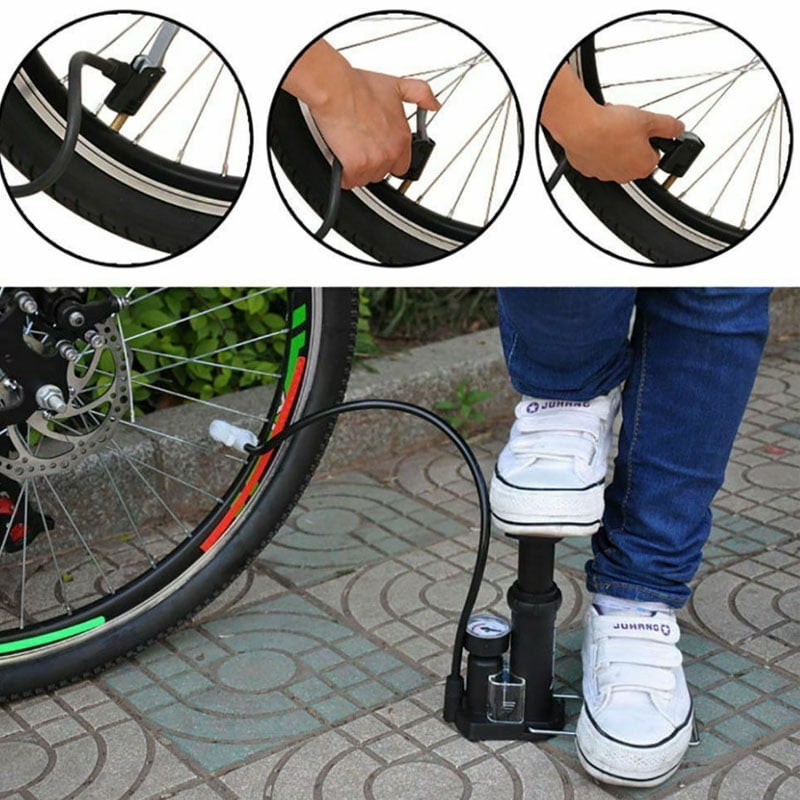
We know through physics that temperature affects air pressure. So, all else being equal, people biking in Miami in August are going to have higher pressure in their tires than people biking in Boston in January. In addition to weather, sustained deceleration using rim brakes generates friction that can increase temperatures inside the tube significantly. Fortunately, they also cool off relatively quickly, but it's something to keep an eye on during long descents. It may also be worth mentioning to your burgeoning roadster as he or she is learning the basics of hand braking.
In short, don't do either. If you overinflate, you run the risk of blowing the tube either while pumping or while riding due to sudden or constant impact. If underinflated, the low pressure could cause pinch flats. This occurs when the tube becomes squeezed between the rim and tire casing by hitting a bump with an underinflated wheel. Not only does this damage the tire, it can also hurt the rim. Plus, flat tires slow you down and make you pedal harder, which is just no fun.
"How often should I inflate my tires?" is a common question among many casual bikers. The answer depends on how often and how hard you ride. Some people break out the pump every few days, others once a week, and still others even less regularly than that. Even if you or your kids have left your wheels in the garage for months, air tends to seep out slowly, anyway. Therefore, as a bike-safety best practice, just like a car it's certainly never a bad idea to check your tires before each ride. Especially if it's been a while.
The pro's choice, floor pumps do a great job. They are easier to pump and attach, and will pump your tires up much quicker than a hand pump will. Some come with gauges, which eliminate 1) the need to switch back and forth between a pump and standalone gauge, or 2) if you're really lazy, outright guesswork.
However, some expert cyclists are cautious of floor pumps with gauges, as the accuracy of the gauge can svary and may be off by as much as 10 PSI. On the plus side, if the gauge is consistent you can calculate the difference and adjust your target PSI to compensate.
It may be tempting to simply use the air compressor at your neighborhood Exxon, but these are less than accurate and can often overinflate your tires (it's a gas station, they're meant for cars). For serious riders whose circuits take them far from home, a small hand pump can help you change a flat on the fly. Carbon dioxide inflators accomplish the same thing if you're an air-in-the-can kind of guy.
Essential for any enthusiastic cyclist, hand pumps are harder work to fill the tire with, and aren't as quick. But they're transportable, so you always have your pump with you. It's simply foolish to embark on any long distance bike ride without your trusty hand pump and puncture repair kit.
So there you go, we hope this quick guide to bike PSI pressure was useful. To recap: figure out what feels most comfortable based on your particular cycling style. Go with that. Keep an eye on your pressure, and check it before every ride. You'll get a feel for it over time. Like, literally.
Gone are the days of simply pumping up your road bike tyres to the maximum pressure permitted and hoping for the best. Not only are excessively high pressures uncomfortable, they’ve also been proven to slow you down.
Optimising the tyre pressure on your road bike is, therefore, one of the simplest – and cheapest – ways to improve the performance and comfort of your bike.
Equally, for beginner cyclists, it’s not always clear what pressure you should pump your tyres up to. While most tyres have a recommended pressure range printed on the sidewall, there’s rarely any more guidance than that.
Ultimately, the pressure you need to run will vary depending on the rider, bike and road conditions, but it’s fairly easy to get into the right ballpark. Whether you’re just starting out or you’re an experienced rider looking to optimise performance, we’re here to help.
So, how can you find the right tyre pressure for your bike? In essence, it’s all about finding a balance.
You need your tyre pressure high enough to minimise energy losses from the deformation of the tyre and to offer predictable handling through corners. But you also need it low enough to absorb, rather than bounce over, imperfections in the road.
In this article, we’ll run through why tyre pressure is so important, what factors influence finding your optimum pressure, and how you can find a pressure that works best for you.
If you’re just starting out, we’ve also got an explainer on how to pump up a bike tyre, as well as a guide to inner tubes, with everything you need to know about tube sizes, valve types, materials and so on.
We’ve also got a guide to tubeless setup, if you’re considering making the switch, and buyer’s guides to the best road bike tyres and best tubeless tyres if you’re looking for new rubber.
Before we get stuck into the details, here are four key things to consider when it comes to road bike tyre pressure.
If your tyre pressure is too low, you could pinch the tyre against the rim, causing a puncture or damaging the wheel.Russell Burton / Immediate Media
On a basic level, getting your tyre pressure right will make your rides easier, more comfortable and lower your chances of punctures.
From a performance standpoint, optimising tyre pressure is critical to reducing rolling resistance and improving comfort. Rolling resistance is the force resisting the motion of your tyres rolling on the ground.
If your tyre pressure is too low, more energy will be lost in the deformation of the tyre casing and friction between the tyre and the road.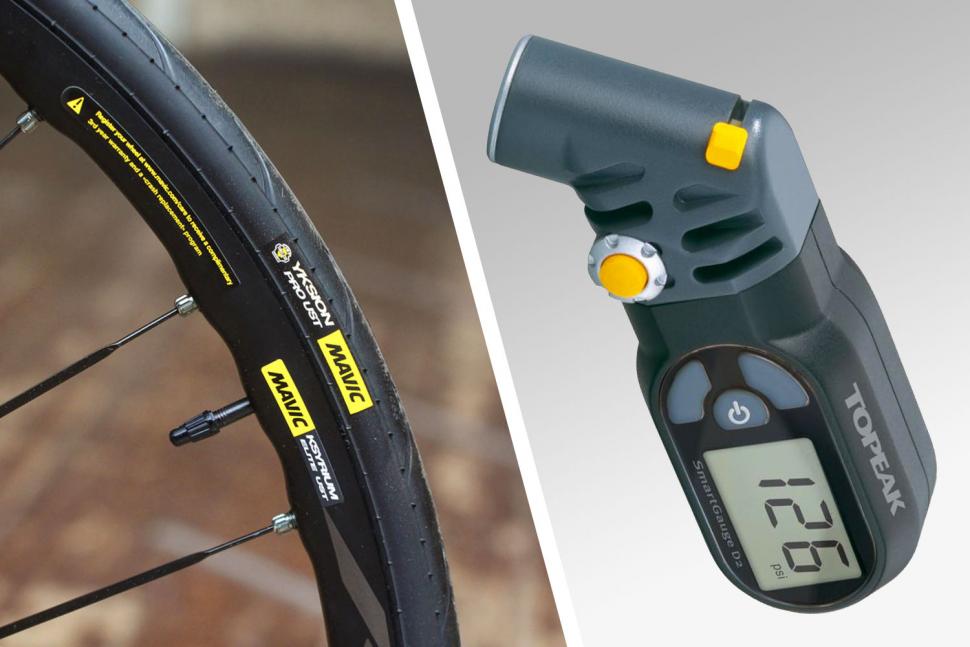 It also increases the chance of pinch flat punctures.
If your tyre pressure is too high, the tyre will be so stiff your bike will begin to vibrate over imperfections in the road surface, negatively affecting comfort and wasting energy.
Very high tyre pressures might feel fast, but they’re not.
Once you go past a certain point, adding more air to your tyres actually decreases grip, increases high-frequency vibrations and causes extra muscular fatigue. All of these things slow you down.
Getting your tyre pressure right is both faster and more comfortable.
In order to set the right tyre pressure on your road bike, you’ll ideally have access to a track or floor pump with an in-built pressure gauge. You don’t need to spend loads, but given how much you’ll use it in the long term, getting something high-quality makes sense.
If you really want to fine-tune your tyre pressures, one of the best tyre pressure gauges is a worthwhile investment, too.
When it comes to road bike tyre pressure, err on the side of ‘too low’ rather than ‘too high’.
According to testing by Silca, performance decreases rapidly once you go past the optimum pressure for a given setup. Being a little too low only brings a relatively small speed penalty, but should be noticeably more comfortable on rough roads.
BikeRadar’s technical writer, Simon von Bromley, puts around 65psi in his 28mm tyres.Russell Burton / Immediate Media
Helpfully, some tyre manufacturers offer pressure recommendations or pressure calculators for their range of road bike tyres, and we can take these as general starting points for dry days on smooth tarmac.
As we’ll come on to, you should pay close attention to the actual size of your tyres when inflated because this can change optimum pressure for any given rim and tyre combination.
If the actual inflated tyre width is larger than the labelled width, the tyre will need slightly less pressure than recommended by these tables and vice versa.
Likewise, the optimum tyre pressure will be higher for heavier riders, or for riders carrying loads on their bikes, and lower for lighter riders.
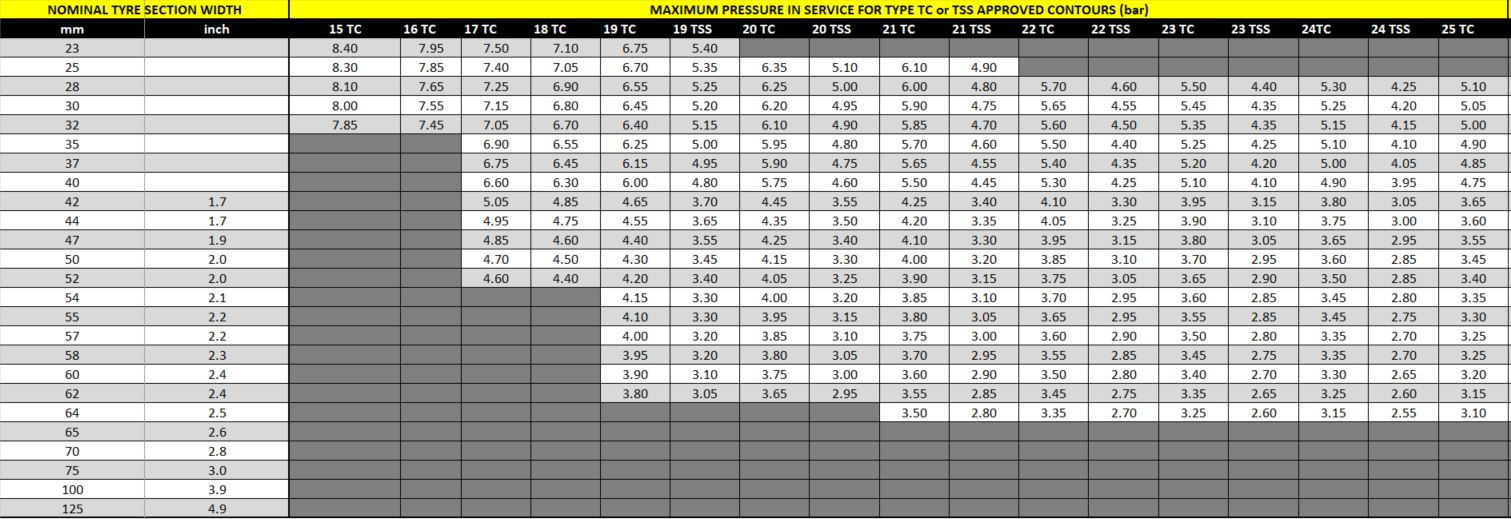
As a final caveat, it’s important to adhere to the pressure limitations set by the manufacturers of both your rims and tyres, particularly with regards to the upper limits. These are typically printed on the tyre or rim sidewalls.
If you have a set of wheels with hookless rims, the maximum permitted tyre pressure may also be much lower than with hooked rims.
| Rider weight | Recommended pressure | Rider weight | Recommended pressure | ||
| ≤ 50kg / ≤ 110lb | 84psi / 5.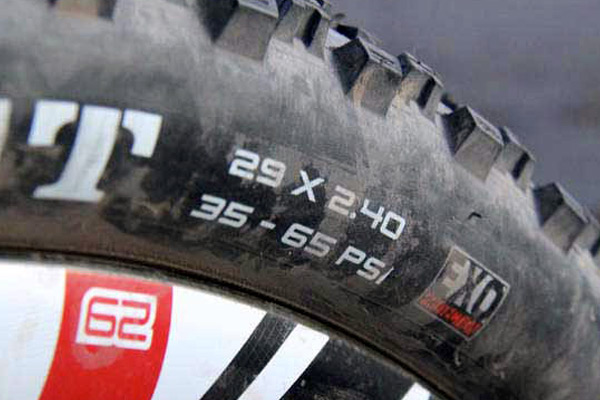 8bar 8bar | ≤ 50kg / ≤ 110lb | 73psi / 5bar | ||
| 51-57kg / 112-126lb | 90psi / 6.2bar | 51-57kg / 112-126lb | 78psi / 5.4bar | ||
| 58-65kg / 128-143lb | 96psi / 6.6bar | 58-65kg / 128-143lb | 83psi / 5.7bar | ||
| 66-73kg / 145-161lb | 102psi / 7bar | 66-73kg / 145-161lb | 88psi / 6.1bar | ||
| 74-81kg / 163-179lb | 106psi / 7.3bar | 74-81kg / 163-179lb | 93psi / 6.4bar | ||
| 82-88kg / 181-194lb | 110psi / 7.6bar | 82-88kg / 181-194lb | 98psi / 6.8bar | ||
| ≥ 89kg / ≤ 196lb | 115psi / 7.9bar | ≥ 89kg / ≤ 196lb | 103psi / 7.1bar | ||
| ≥ 96kg / ≤ 212lb | Use 700x25c tyre | ≥ 96kg / ≤ 212lb | 108psi / 7. 4bar 4bar | ||
| On a 19mm rim: lower pressure by 0.4bar / 6psi | On a 21mm rim: lower pressure by 0.3bar / 5psi | ||||
The following recommendations are from Pirelli for its TLR tubeless road tyres, but are good starting points regardless of the brand of tyres you’re using, providing you take the various factors we’ll run through later into account when going on to fine-tune tyre pressure.
| Rider weight | Recommended Pressure | Rider weight | Recommended Pressure | ||
| ≤ 50kg / ≤ 110lb | 65 psi / 4. 5bar 5bar | ≤ 50kg / ≤ 110lb | 58psi / 4bar | ||
| 51-57kg / 112-126lb | 70psi / 4.8bar | 51-57kg / 112-126lb | 61psi / 4.2bar | ||
| 58-65kg / 128-143lb | 75psi / 5.2bar | 58-65kg / 128-143lb | 65psi / 4.5bar | ||
| 66-73kg / 145-161lb | 80psi / 5.5bar | 66-73kg / 145-161lb | 70psi / 4.8bar | ||
| 74-81kg / 163-179lb | 85psi / 5.9bar | 74-81kg / 163-179lb | 74psi / 5.1bar | ||
| 82-88kg / 181-194lb | 90psi / 6.2bar | 82-88kg / 181-194lb | 78psi / 5.4bar | ||
| ≥ 89kg / ≤ 196lb | 95psi / 6.6bar | ≥ 89kg / ≤ 196lb | 83psi / 5.7bar | ||
| ≥ 96kg / ≤ 212lb | 100psi / 6.9bar | ≥ 96kg / ≤ 212lb | 87psi / 6bar | ||
On a 21mm rim: lower pressure by 0.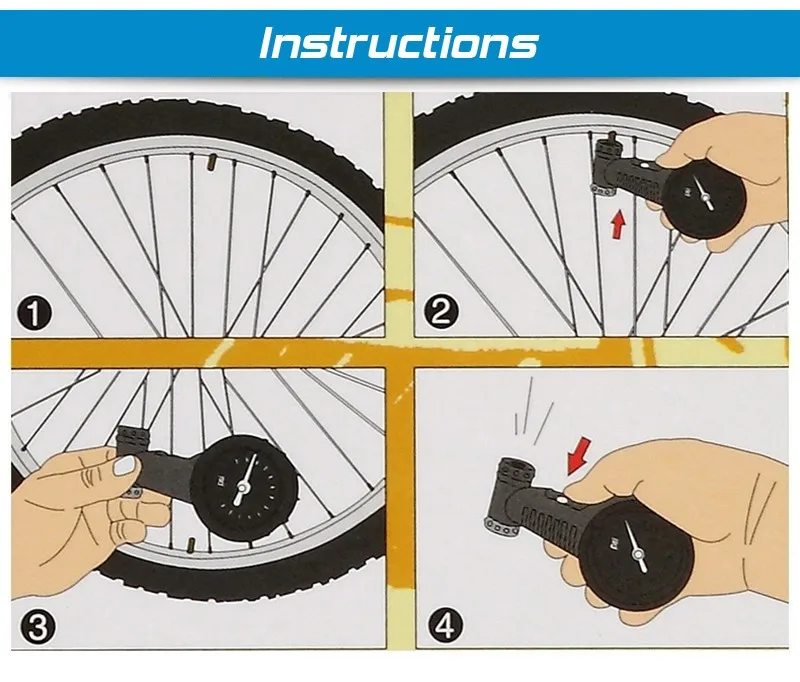 3bar / 5psi 3bar / 5psi | On a 21mm rim: lower pressure by 0.3bar / 5psi – On a 23mm rim: lower pressure by 0.4bar / 6psi | ||||
Advice from other brands may vary, but Pirelli recommends riders who weigh over 96kg / 212lb should use 700 x 25c tyres or larger because the recommended tyre pressure for a rider of this mass would exceed the maximum permitted pressure for a 700 x 23c tyre.
As always, it’s vital not to exceed the maximum pressures indicated on your tyres or rims.
How do Pirelli’s recommendations stack up against what tyre pressures I personally use? Let’s have a look at some examples.
To give these pressures some context, I weigh around 63 to 64kg.
Time trials are a personal favourite of mine. On my time trial bike, I use 23mm tyres on 19mm rims, but their actual inflated width is closer to 25mm.
Given most time trials tend to take place on fairly good roads without too many potholes, I run around 90psi front and rear.
However, on my Giant TCR Advanced Pro 2, I’d typically be running 28mm tyres on 19mm rims. For this, I’d normally use pressures of around 65psi because the roads I ride on most often tend to have rough or broken surfaces.
Getting your tyre pressure right on a road bike is very different to a mountain bike, where tyres (and wheel rims) are significantly wider, the terrain is looser and you have trail obstacles to contend with.
If you ride off-road, we’ve got a separate guide to mountain bike tyre pressure.
Russell Burton / Immediate Media
As already noted, the above recommendations are intended as general starting points. They’ll get you in the right ballpark, but there are a number of factors beyond tyre and rim size and rider weight that affect your personal optimum road bike tyre pressure.
A tyre can inflate wider – or narrower – than its nominal size, depending on the internal rim width of the wheel it’s mounted on. Russell Burton / Immediate Media
Accurately determining your tyre size is crucial to calculating optimum pressure.
Despite most bicycle tyres being labelled with a specific size, such as 700 x 25c, the actual inflated size of any given tyre will depend on both the design of the tyre and the internal rim width of the wheel.
Most new road tyres are designed around a 19mm internal rim width. A wheel with a wider internal rim width, as pictured here, will likely increase the measured width of a tyre when inflated.Russell Burton / Immediate Media
Most new tyres are now designed around the latest 2020 ETRTO (European Tyre and Rim Technical Organisation) standards with a 19mm internal width, so wheels with an internal rim width wider than this will likely increase the measured width of a tyre when inflated to a given pressure (and vice versa).
The optimum pressure is, therefore, likely to be lower than if you were running the same tyre on a narrower rim.
Riding a lightweight, go-fast road bike? Your tyre pressure will need to be lower than a heavily laden touring bike, assuming all other variables are the same.Russell Burton / Immediate Media
While the rider makes up the vast majority of the total system weight – and, as we’ve already covered, a heavier rider will generally need to run higher pressures than a lighter rider – the weight of your bike and any kit you’re carrying also count.
If you’re riding a sub-4kg weight weenie optimised road bike and don’t have it loaded up with heavy gear, then you might need to lower your tyre pressure by a few psi.
The opposite is also true. If you’re riding a heavy touring bike or a road bike loaded with bikepacking bags, you may need to add more air to your tyres.
With road bikes, the rider’s weight is generally not evenly distributed across both wheels. The exact split will be different for every rider, depending on riding position and bike, but it’s usually the case that the rear wheel takes slightly more of the load than the front.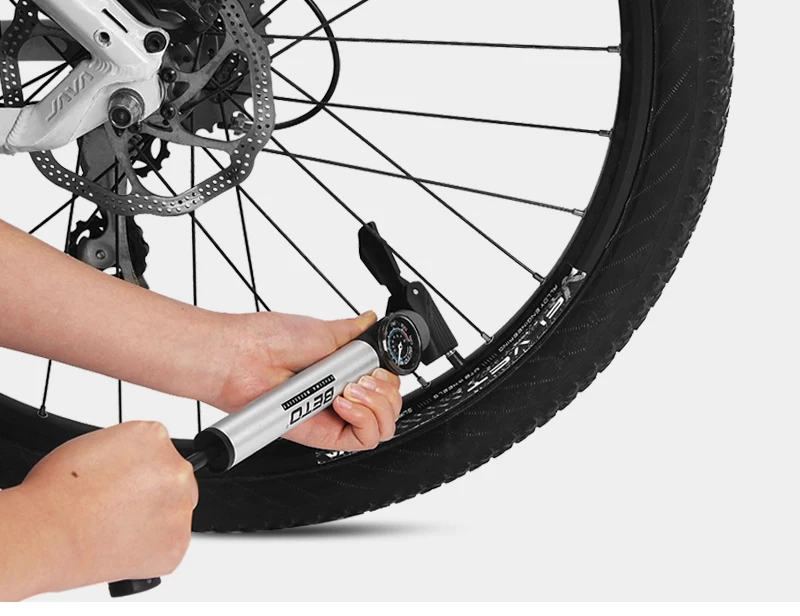
As a rule of thumb, it’s worth putting a few psi less in the front tyre than in the rear.
The condition of the roads you ride will have an impact on the ideal pressure of your tyres.Russell Burton / Immediate Media
If you’re riding on a perfectly smooth velodrome, higher pressures are faster. However, on imperfect surfaces, such as roads, very high pressures simply increase vibrations and can slow you down.
As roads get rougher, with bigger holes and bumps, the optimum tyre pressure decreases further.
When roads get very rough, smaller tyres (anything 25mm or smaller) running at a relatively low pressure may not be able to provide enough protection for the rim or inner tube – especially for heavier riders – which can lead to pinch flats or even rim damage.
If you ride on rough roads, or roads with a generous coating of gravel, dropping your tyre pressure can help improve comfort and reduce the likelihood of pinch flats. Russell Burton / Immediate Media
Switching to larger tyres will give you a greater amount of tyre volume to play with, so you can fine-tune the pressure to account for both rolling resistance and comfort on rough roads.
This is why the pros switch to 28mm+ tyres for cobbled races such as the Tour of Flanders and Paris-Roubaix.
Dropping your tyre pressure a little in wet conditions might give you more grip.Russell Burton / Immediate Media
When road surfaces are wet, or if it looks like it might rain during your ride, it’s worth dropping pressure by around 5psi on both tyres. This helps increase the amount of rubber in contact with the road, which should improve grip.
Higher temperatures, whether ambient or induced by rim braking, can also increase tyre pressure.
If you’re riding long descents on hot summer days on a bike with rim brakes (particularly one with carbon clincher wheels or latex inner tubes), be careful to not over-inflate your bike’s tyres. Doing so could lead to dangerously high pressures building up inside the inner tubes or tubeless tyres, if too much excess heat is introduced to the system.
The materials and construction of a tyre can also affect the optimum pressure.Russell Burton / Immediate Media
The materials and construction methods a road bike tyre manufacturer uses can also affect the optimum pressure, to a small degree.
Road bike tyres designed for racing or summer use tend to have casings that use a higher number of thinner nylon or cotton threads (this is what the Threads Per Inch or TPI number of a tyre refers to), and only a thin layer of rubber tread on top. This makes them easier to deform under pressure, making for a smoother and faster ride.
Conversely, winter road bike tyres typically have stiffer, more durable casings with fewer, thicker nylon threads. The rubber tread on top also tends to be thicker for improved mileage and puncture protection.
Given this, you may need to drop your road bike tyre pressure slightly when moving across to winter tyres because the optimum pressure for comfort and grip is likely to be a few psi lower.
Running tubeless tyres removes the risk of pinch flats.Russell Burton / Immediate Media
If you’re using tubeless tyres, it’s worth remembering that the absence of an inner tube means you can safely run lower pressures without the risk of pinch flatting the tube.
Because lower tyre pressures can improve off-road grip, running tubeless tyres can be particularly useful if you’re riding a road bike with relatively large tyres and looking to take in some light off-road or gravel riding.
No one likes to be stuck at the side of the road fixing a puncture.Russell Burton / Immediate Media
So, you have all the information at your fingertips, but how do you actually go about fine-tuning tyre pressure? The simple answer is experimentation.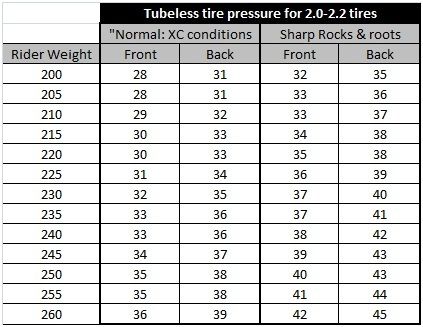
Start with the recommendations above and then consider what the road conditions are like where you ride. Do you have miles and miles of freshly laid tarmac? If so, the above recommendations are probably close to optimal.
If you don’t – perhaps because you live somewhere such as the UK – start with the above recommendations and experiment with taking a little pressure out of the tyres each time you go for a ride.
Start with small steps in pressure of around 5psi, and, if you pay attention, you should eventually be able to determine a sweet spot for speed and comfort.
You’re looking for a pressure that feels smooth, without feeling like the tyre is collapsing underneath you when cornering. And, as already mentioned, erring on the side of too low rather than too high is a good thing to keep in mind.
If you’re really serious, you could conduct some basic field testing with a power meter to try to find your optimal pressure.Simon Bromley / Immediate Media
Alternatively, if you have an accurate and reliable power meter, you could do some basic field testing yourself.
Find a long, steady climb with an average gradient of over 5 per cent, and see how different tyre pressures affect the power required to ride at a certain speed, or how fast you travel for a set power output.
The data you acquire should enable you to hone in on an optimum tyre pressure for the setup and road conditions you’re using when testing.
You’re looking for the tyre pressure that requires the least power for a set speed, or enables you to travel fastest for a set power.
As with any testing, it’s important to keep all other variables (e.g. system weight, riding position, traffic, weather, etc) the same for each test run, otherwise, you can muddy the results.
Simon von Bromley is a senior technical writer for BikeRadar.com. Simon joined BikeRadar in 2020, but has been riding bikes all his life, and racing road and time trial bikes for over a decade. As a person of little physical talent, he has a keen interest in any tech which can help him ride faster and is obsessed with the tiniest details. Simon writes reviews and features on power meters, smart trainers, aerodynamic bikes and kit, and nerdy topics like chain lubricants, tyres and pro bike tech. Simon also makes regular appearances on the BikeRadar Podcast and BikeRadar’s YouTube channel. Before joining BikeRadar, Simon was a freelance writer and photographer, with work published on BikeRadar.com, Cyclingnews.com and in CyclingPlus magazine. You can follow Simon on Twitter or Instagram.
You may ask how many psi for my carbon road wheels ? What is the appropriate tire pressure? The article contains information to help you get the recommended tire pressure.
Another thing is when you get the recommended tire pressure between clincher wheel tires and clincher wheel tires .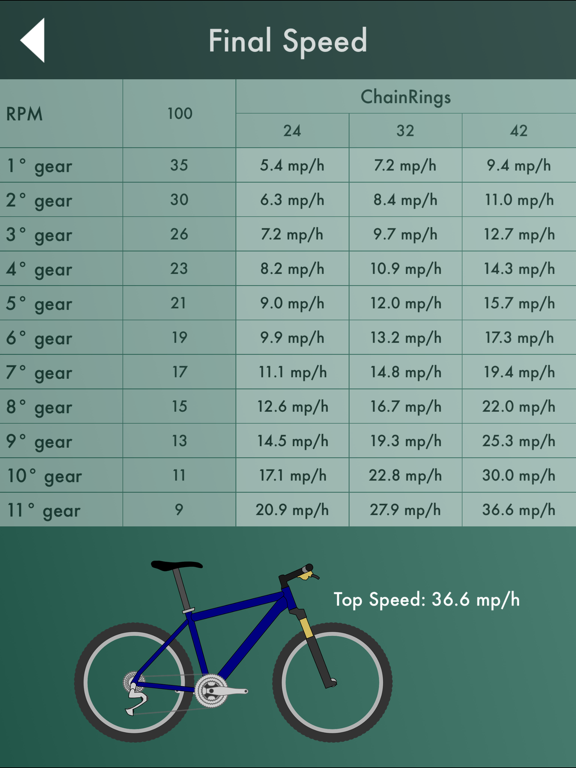
Standard tubed clincher tires.
The maximum pressure to use our tube mounted clincher wheels is 120 psi, however we believe the best performance is achieved below 110 psi for all riders. The recommended pressure for clincher tires is slightly higher than for tubeless tires to prevent pinching.
Tubeless
The maximum pressure to use our wheels with tubeless tires is 100 psi, however we believe the best performance is achieved below 100 psi for all riders. The recommended pressure is lower than the clincher to achieve the lowest rolling resistance, and it is clear that pressure flats are not a problem.
The table below shows our recommended tire pressures.
| STANDARD CLINCHER TIRE WITH INNER TUBE | TUBELESS TIRES | |
|---|---|---|
| ≤ 65 KG PIECE | 23 mm - 95/100 psi Inch 25 mm - 90/95 psi Inch 28 mm - 85/90 psi Inch | 23 mm - 90/95 psi Inch 25 mm - 85/90 psi Inch 28 mm - 80/85 psi Inch |
| 65 - 75 KG JACKER | 23 mm - 100/105 psi Inch 25 mm - 95/100 psi Inch 28 mm - 90/95 psi Inch | 23 mm - 90/95 psi Inch 25 mm - 85/90 psi Inch 28 mm - 85/90 psi Inch |
| 75 - 85 KG HEAD | 23 mm - 101/106 psi Inch 25 mm - 96/101 psi Inch 28 mm - 91/96 psi Inch | 23 mm - 95/98 psi Inch 25 mm - 90/95 psi Inch 28 mm - 85/90 psi Inch |
| 85 - 95 KG HEAD | 23 mm - 104/109 psi Inch 25 mm - 99/104 psi Inch 28 mm - 94/100 psi Inch | 23 mm - 95/99 psi Inch 25 mm - 90/95 psi Inch 28 mm - 88/95 psi Inch |
IMPORTANT INFORMATION - Please check and never exceed the maximum recommended tire pressure on the side of the tire.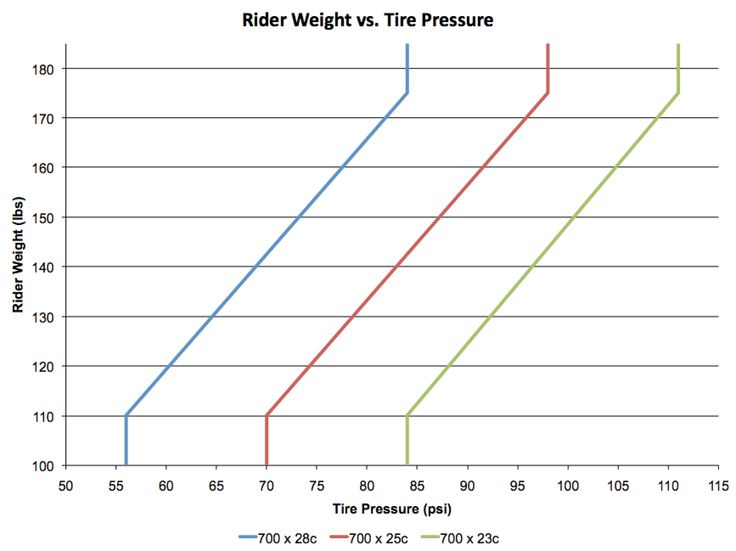
If you already know your weight and tire size, you can get the recommended tire pressure. See the tire pressure chart to see how many psi( psi ) for your tire below.
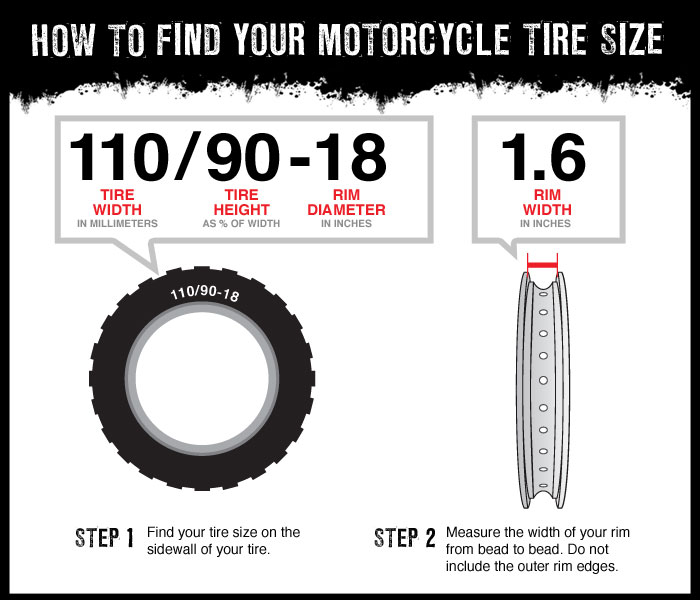
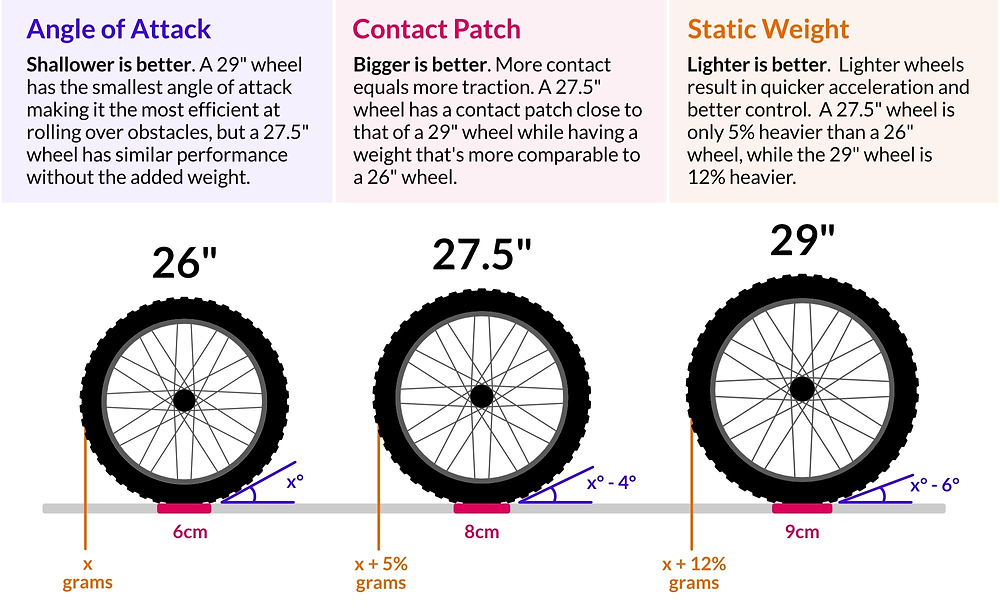
A unit of measurement0109 Ever since John Dunlop patented his experimental "pneumatic tire" in 1888, cyclists have been lining up to buy his miraculous invention. The tires were first glued on and then mounted on the rim. It took several years for the automotive industry to accept Dunlop's invention, by which time rubber tires had been extensively researched on bicycles. Larger wheels rolled better than small ones, and thicker tires provided better traction than thinner ones. The fat tires resisted the inevitable evil of punctures, but pedaling wasn't easy. All these contradictions had to be solved by tire companies. In the end, a number of compromises were found. Racers used thin tires with smooth tread and flexible sidewalls, inflated to high pressure, expressed in pounds per square inch (psi). Manufacturers have printed an extremely wide range of minimum and maximum tire pressures on the tire sidewalls - information that was useless to the individual cyclist, but now the old myths have been debunked over the past fifteen years as the MTB industry has closely examined the pressure the individual cyclist requires for the desired combination of stability on road, speed and comfort. The first legend to be destroyed was that thin, high-pressure tires meant speed. Scientific experiments have shown that a rider weighing, say, 155 pounds using 28mm tires at 60 psi will completely outperform his old-fashioned opponent from the 1980s who lost at 120 psi in 20 mm hard surfaces. Tire with lower pressure and larger cross section for superior comfort, road holding, speed and puncture resistance. But what is a hobbyist to do if he or she wants to find the optimum pressure for a particular tire? There are many easy-to-use applications for calculating tire pressure on the Internet. Enter your exact weight, the diameter of the tire you are using, then press CALCULATION . You can calculate your bicycle tire pressure here. A petite lady weighing about 110 pounds will be told to use fatbike tires at just under 20 psi. And the 200-pound bruiser will get a 130-psi recommendation for its 23mm road tires. Please note that these numbers require fine tuning. Use this approximate psi value as a starting point and experiment using more or less 5 psi until the process produces the desired pressure. When buying a bicycle, many do not even think about the fact that the convenience and comfort when riding it is achieved by correctly selected tire pressure. The service life of the bicycle, the speed of riding, the degree of tire wear, safety, control of the two-wheeled friend depends on how the wheels are inflated. Many cyclists believe that inflating the tires is only necessary for a good bike ride. When inflating your tires, you should always consider the type of terrain or surface you will be driving on. If the walk is supposed to be on an asphalt road, the tire pressure of the bicycle should be close to the maximum allowable value. Elastic wheels on a flat surface will provide a smooth rolling and high speed of movement. For cross-country riding with unpaved paths, it is better to set the tire pressure to medium tolerable so that you can ride long distances in comfort and convenience. At high pressure, the grip of the wheel with the road will be minimal, respectively, all holes, pebbles, and bumps on the road will be sensitive. And with flat tires, the likelihood of damage to the wheel or puncture of the chamber increases. In order to protect yourself on the road, as well as to keep the bike or its individual parts intact, you need to know exactly the lower and upper limits of permissible values, to what pressure the bicycle wheels can be pumped. Information about tire pressure gives you an advantage when cycling: Forget the old "old-fashioned" way to check the wheel with your fingers. No need to rely on tactile sensations, trying to feel with your hand the degree of rubber penetration on the tire. The air leaves the wheel gradually, through the pores in the rubber. Within 2-3 weeks, the pressure decreases by 0. There are three standard values in which bicycle tire pressure is measured. kPa = 14.504 PSI All these units are used to some extent - in different countries, by different manufacturers. For residents of Russia and the post-Soviet space, the change in bars is more familiar, since this unit is clearly associated with the pressure of the 1st Earth's atmosphere at ocean level. In America and Western Europe, a popular unit is PSI, as they actively use pounds and inches in measurements. Manufacturers indicate on the sidewall of the tire how many atmospheres to pump the bicycle wheels. Specifies the range within which the owner of the "iron horse" determines the desired values, depending on the specific factors of riding his bike. Values in the range are labeled from min to max, in two or all three dimensions. Numbers up to 10 are atmospheres (or BAR), tens-hundreds are PSI, and six-digit values \u200b\u200band with the prefix “k” / kilo are Pascals. When inflating a tire, you must strictly follow the manufacturer's recommendations and try not to go beyond both the minimum and maximum pressure levels indicated on the tire. Moreover, it is better to leave a small margin of 0.2-0.5 BAR, both in one direction and in the other, so that the tire does not burst. The pressure in the wheel is kept by the tire, not the tube, so there is no single standard for its value. There are several significant factors that determine how much you need to pump the wheels on a bicycle. The type of tire is determined by the surface of the track on which the cyclist will predominantly ride. Accordingly, the level of inflation of the bicycle wheel will be different. There is a direct dependence on the roughness of the tread and the width of the wheel - the more lugs and the wider the wheel, the lower the pressure should be. Empirically, cyclists quickly determine how many atmospheres should be in the tires of their bicycle Many cyclists do not realize that air temperature affects the pressure level in bicycle tires. From the course of school physics, we recall that when heated, bodies expand. This means that in hot sunny weather, the pressure inside the air chamber will increase without additional pumping. It is important to consider the load on the bike created by the weight of the rider, especially the fact that most of it is on the rear wheel. Therefore, the degree of its pumping should be slightly higher than the front, the optimal difference is 10%. To calculate the optimal tire pressure for a bicycle, given the weight of its rider, you can use the table: Rider weight (kg) Pressure (atmosphere) Pressure (PSI) The nature, riding style and type of bike also affect tire pressure. Buyers who prefer an active pastime often opt for mountain bikes with 26-inch wheels, which ride well both on city streets and in rough terrain. To understand to what pressure to inflate the wheels of a bicycle, it is necessary to take into account the features of both the bike itself and other, at first glance, weightless factors. For example, weaving threads on a tire, rim thickness, driving style. The likelihood of a tire coming off a wide rim is much less than a narrow rim, because a wider rim will hold the tire better than a thin one. Mountain biking already by its name suggests the presence of a difficult surface on the track, with possible obstacles and bumps. The driving style is more aggressive than on a smooth, calm trajectory, it obliges you to increase the tire pressure to a level slightly less than the upper limit. The diameter of the wheel will also influence the selection of the optimal pressure value, since the larger it is, the higher the volume of air pumped will be. However, for mountain bikes it is not so important whether the wheel diameter is 26 or 29 inches, it is much more necessary to pay attention to the parameters of the rider's weight and the type of track.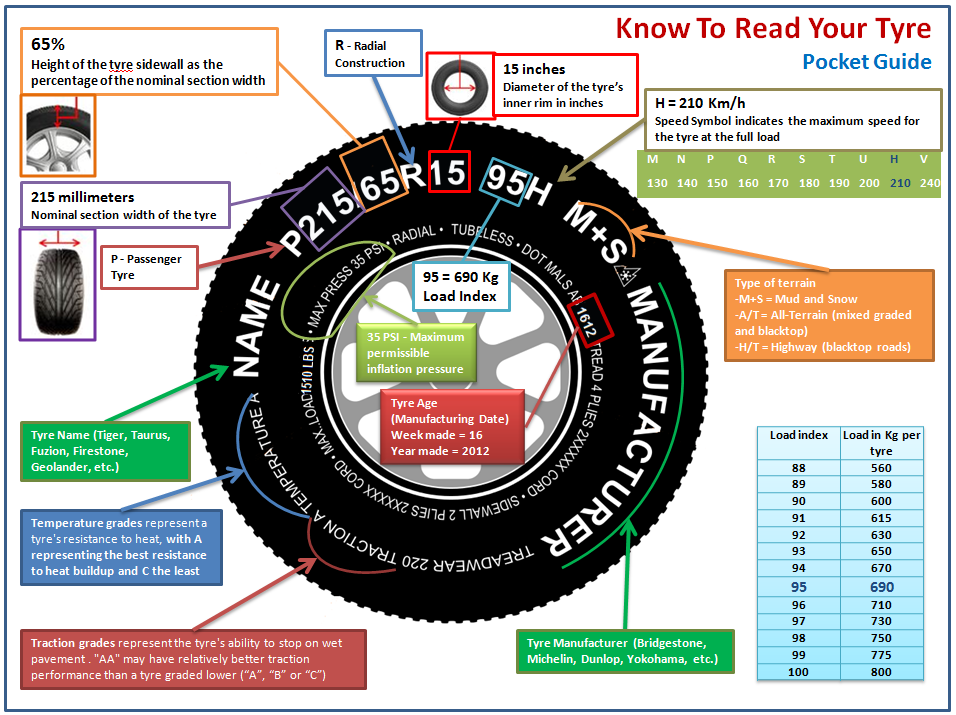 Butcher Boy needed fat tires for puncture protection at lower pressures and long life when carrying heavy loads. The postman's bike was somewhere in between the two extremes. And a number of myths have arisen based on tire pressure.
  These days, professional road builders ride tires, sometimes even 30mm wide, that are suitable for the surface they will be racing on. And they do so under pressure determined by their own weight—or the weight of the bike and rider combined.
  This fine-tuning process will need to be increased another 1.5 psi from the bottom end if you are using tubeless. And hookless tubeless tires are worth a try at pressures up to 5 psi less than what applications expect.
 What pressure should be in bicycle tires, how many atmospheres a pressure gauge should show
Why you need to know tire pressure information
 However, flat tires have a wider area of contact with the road, which means that grip will be better, but it will be very difficult to accelerate to a speed of 30-35 km / h on such tires.
How to measure tire pressure
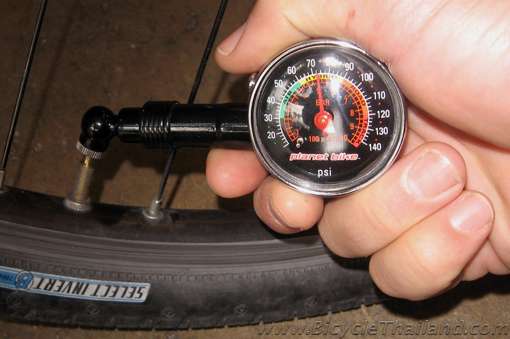
 1-0.2 atmospheres, but you cannot determine this with your fingers. The exact value at any time will help determine the pressure gauge that every cyclist should have in his arsenal. With its help, it is simple, with a minimum error, the level of pressure in bicycle tires is measured. A pump with a pressure gauge (floor or manual) will become an indispensable tool for cyclists.
 Pascals are the least used unit of measurement, but the most modern. Some bicycle manufacturers write data on the wheels about the allowable pressures in all three systems.
 Marking on bicycle tires
Dependence of pressure indicators
Tire type and rubber surface
Air temperature
 Conversely, on cold winter days, a decrease in tire pressure is quickly felt due to low temperatures. So, when going for a bike ride in the cold season, the pressure indicators need to be adjusted a little higher than usual, and in the summer heat, let the air out a little. It is worth noting that when going on a bike ride, you should always take into account the weather conditions.
 Weight of the rider
Type of bike
