A leaky tubeless value is one of the most annoying things that can happen to a cyclist. It can be a tricky fix to stop air leaking out, and diagnosing the problem can additionally be tedious. Of course, some say it’s easy and can simply be fixed with a quick bit of tape.
However, without knowing what to look for, it’s challenging to identify the root cause of the problem. That means you need to remove the tire and take a proper look at the issue. And, of course, that makes the whole operation a lot more complicated.
This post might contain affiliate links for which we may make a small commission at no extra cost to you should you make a purchase. Learn more.
Even if you’re experienced in fixing a leaking tubeless valve stem, it can still be a tricky fix. Here are the reasons why it happens and some top tips to fix it.
Why does it happen?A leaking tubeless valve stem is mainly caused by two issues – a damaged or incorrectly installed tape, or a value that is not set up properly.
If the tape around the tubeless value stem is in any way compromised, then air will leak into the rim, which in turn will usually be released through the valve stem hole. This air leakage can occur because the valve stem isn’t sealed tightly so it’s the logical option for the air to escape.
If you can hear the air pressurising out of the valve stem, the first step is to make sure the valve stem is set up correctly. If the valve stem is installed correctly and is tight, but the air is still leaking, the cause will be damaged or poorly installed tape.
How tubeless systems workBeing tubeless, there is no inner tube to hold the air inside your bike tire. Instead, the tire is sealed by an airtight fit between the rim and the tire, preventing air from leaking out.
For that to be successful, there needs to be a layer of rim tape that closes the rim spoke holes and helps seal the air in. Hence one of the main causes of air leakage being damaged tape. Because the rim spoke holes are quite large and sharp, the tape is normally pretty rugged and durable.
The tubeless valve is an additional part that is normally sealed with rubber close to the valve hole on the rim. The valve stem is tightened by a locknut, which can be seen on the outer side of the rim.
The tubeless tapeTires need to be ‘tubeless ready’, so normal bike tires can’t be used on a tubeless set up. This is because tubeless tyres have stronger side walls so they don’t leak air without an inner tube.
Tubeless tires hold the air much the same as an inner tube does, with the tire’s bead sticking to the rim and rim tape to seal the air in completely.
If there are any gaps, tubeless tyres typically have a sticky sealant poured inside the tire to plug the holes effectively. That helps if you get a puncture as the sealant works to close the damage.
Some riders use double layers of rim tape to create a stronger seal inside the tire, however, it can add extra weight to the wheels and is also harder to replace. To perform properly, tubeless rim tape must be sticky.
If the rim tape isn’t sticky enough or is made of poor quality, it’ll leave air bubbles and gaps between the tape and rim, causing air leakage. It also needs to mix well with the sealant inside the tire.
Additionally, tubeless rim strips are made specifically for certain rims, with a fitting for a tubeless valve. However, that can be a problem as they need to accommodate the valve and properly fit the rim they are on.
Because of the incompatibility with different rims and tubeless valves, tubeless rim strips aren’t particularly common anymore.
The tubeless valveAs mentioned, the tubeless valve is usually sealed by rubber. This is pretty effective at keeping air in, but can be damaged. For instance, if the whole valve twists, then the rubber block sealing it will get damaged and create a leakage gap. So they need to be treated carefully.
The other sealant options are a metal block with a rubber seal and a cone-shaped rubber seal. The metal block with rubber has issues with compatibility, so it’s often seen on modern bikes, but the cone-shaped rubber seal is a more popular option today.
If the sealant is a cone-shaped valve, then the first thing to check is if the rim tape valve hole is completely opened. Make sure there is no extra room there by pushing in the valve and increase the tension with the locknut to try and seal all the gaps.
If the tubeless valve stem is still leaking, it’ll likely be a tape issue. It could be there are gaps in the tape installation, or there may be damage to the tape near the valve hole. If that’s the case, you can add tape to a small part of the damaged rim tape to form a patch and close any gaps.
If the problem is the valve stem itself, you can either change the valve stem or attempt to seal the gaps another way. That’d be a DIY option but you could use an old tube or rubber to create o-rings.
This isn’t advisable, however, as they are usually too thick and difficult to morph into the shape needed to plug the gap. Adding patches to the rim tape is another option, especially if the rim shape isn’t smooth.
The added thickness of the additional rim tape can help squeeze the gaps and seal the valve better. You could also add more sealant into the tire and spin the wheel once the valve is back on to try and create another inner layer of the goo.
Rim tape leakage caused by damaged tape is just as likely as leakage from the valve stem. If it’s because the rim tape isn’t sticky enough, then the only proper option is re-installing rim tape with a stronger and more robust option.
For cuts or splits in the tape, a patch of new tape will do the job. Split tape is unfortunately pretty common as the rim edges can be sharp.
Remember, never tighten a valve stem with pliers. It’ll damage the stem and cause further problems. If the valve stem is seated properly and tight, but the air is still leaking, you’ll have a breached tape.
If you’re trying to pump air into the tire, be careful not to force air through in case the tire blows off the rim. Additionally, if sealant is leaking out of the rim, particularly at the valve stem hole, you need to remove the tire and thoroughly re-visit the taping.
Check the tape, fix it if required, and ensure the valve stem isn’t faulty and is seated firmly in the rim hole.
Putting your air leakage problem behind youAir leakage in tubeless wheels, unfortunately, happen. The good news, however, the problem doesn’t need to be an end-of-the-world event.
In order to prevent the problem from happening, ensure the rim tape being used is a well-recommended, good quality option, and take care when installing it, and use proper tubeless tyre sealant to help seal the tyre and the rim. This should be replaced at least once a year.
Chris Smith
Founder of Vivi Nation, the cycling, running and active living brand. Chris is a sports enthusiast, occasional triathlete and experienced cyclist, having led multiple cycle tours across Europe.
Tubeless valve stem leaking air might be the most annoying thing to service for most folks. I could say it was for me as well for a very long time. Luckily, with experience comes a different approach and much better analysis. Now, I can pretty much say what’s wrong with it in the first minute of looking at it, but some problems still require more work to figure out.
One of those problems is the tubeless valve stem leak. Some people will say it’s easy; they will claim that it’s something with the tape or the valve itself. However, you can only guess the problem unless you remove the tire and take a perfect look at it. And that is the problem because you end up removing and reinstalling the tire several times until you get it right.
Although, if you have some experience with tubeless valves leaking air, you can get it right the first time by taking all the precautions when installing tubeless on your wheels.
That is why I’m writing this article to explain all the possible things that can cause this problem and fix it. Or even better, prevent it altogether.
Tubeless valve stem leaking has two causes.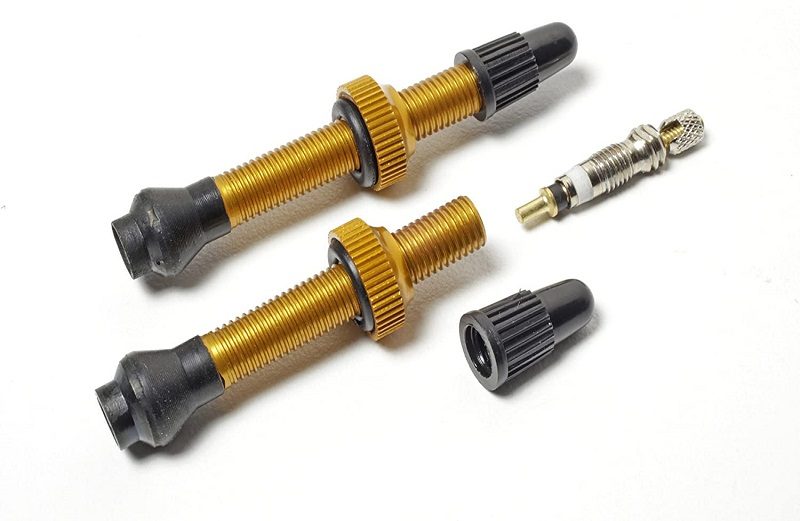 The tape is damaged or improperly installed, or the tubeless valve is not sealing airtight. To prevent it from leaking, the tape needs to be checked and fixed if necessary, and the air gap around the valve needs to be sealed properly.
Now that I’ve given you a short answer about tubeless valve leaking, it’s time to go into details. But first, we should start by explaining how tubeless works in the first place for people who are new to this.
The tubeless system doesn’t have a tube to hold the air but instead seals the whole space between the rim and tire to prevent air from getting out. There needs to be a rim tape or a rim strip that will close the rim spoke holes to seal the air. Those holes usually have sharp edges and are quite big, so the tape must be durable enough to last.
A tubeless valve is a separate part with a sort of a rubber seal to close the valve hole on the rim and seal it completely. It’s tensioned from the other side of the rim by a locknut, which you can usually see on tube valves as well.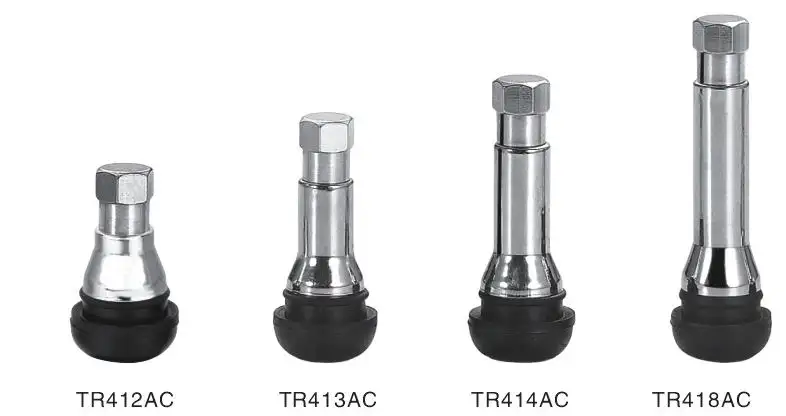
When it comes to the tire, it has to be tubeless-ready. Normal tires have weak sidewalls, which often leak air unless paired with a tube. Tubeless ones hold air in the same way as a tube does, while the tire’s bead sticks to the rim and preferably to the rim tape as well to seal the system on that end.
If there are still any tiny gaps left, there is a sealant that you have to pour inside to seal those off. Not only that but if you get a puncture, the sealant will close the hole as it transforms into a rubber.
To understand the problems that occur with tubeless setups and prevent them, we must look at which tapes and tubeless valves work best and why.
I won’t give you a list of the best tubeless tapes, mainly because I always use two layers of Gorilla Tape. I find it the easiest to install properly, and it works amazingly well. However, it has some drawbacks like weight, and replacing the tape can be difficult because it’s so sticky.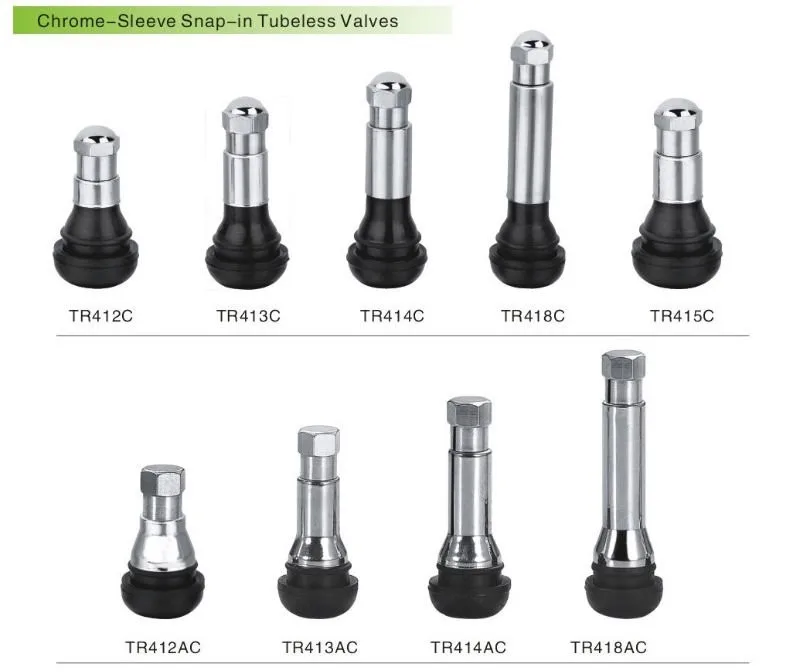
I will try to explain and categorize rim tapes and rim strips to decide for yourself which are the best.
The problem with tubeless tapes on the market is usually the weight saving over quality the manufacturers prefer. So basically, the best tubeless rim tapes will be the ones that come in the middle of these weight-saving low-quality ones and the robust ones like Gorilla Tape.
What is the most important about tubeless rim tape is that it’s sticky enough. Some of these tend to leave a lot of air bubbles and gaps between the tape and the rim, which causes air leaks sooner or later.
The second most important thing is how well it mixes with sealant. Because the sealant is liquid, it will dissolve the tape’s glue if there is any gap left. In time you have a problem because it will slowly become a bigger and bigger surface where there is no glue anymore, and it will start leaking air.
When it comes to material quality, it will be good enough for mountain bikes if it is made for tubeless.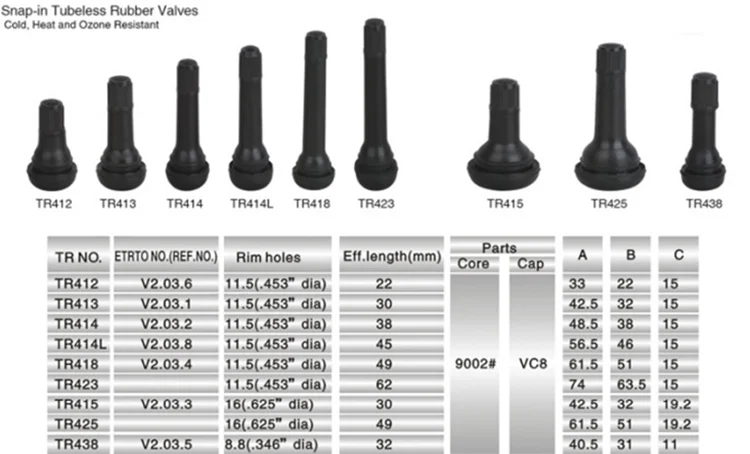 All you need to make sure is that the tape is wide enough for your rim. You can always cut it to fit the rim as long as it is the right size or bigger than your rim.
I found that most of those “best” tubeless rim tapes that everyone praises on the internet are actually the worst and are praised by the people who never really tried multiple tapes.
Tubeless rim strips are the best if you can find the right one for your rim combined with a fitting tubeless valve. That is their main issue. They need to fit the rim they are used on. That’s why tubeless rim strips are slowly disappearing from the market, with too many compatibility issues.
However, some rim and bicycle manufacturers put them with their products and have them available for purchase. If you ever decide to go with these, here is what you need to be careful about.
As already mentioned, the size must fit your rim flawlessly. Without that, you won’t make it work because they are not as soft as rim tapes, and the tire won’t sit properly.
The second issue can be tubeless valve compatibility. That part of the valve that seals the hole from the inside comes in lots of shapes. Rim strips are kind of sensitive to which shape it is because they don’t flex at all.
Once again, not a list but a categorization of what is good and not about certain tubeless valves.
What it really comes down to is the part that seals the hole. As mentioned above, it can cause a lot of trouble with tubeless rim strips. However, the same goes for the rim shape as well.
There are three common types of tubeless valve seals.
The oldest one is probably in the shape of a rubber block. It’s basically a Jack of all trades but master of none. The seal is good, but the shape can cause problems, especially when you try to tension it. If the whole valve turns, the rubber block will either damage the tape or create a gap for the air to flow out. So that’s the one thing to be careful about with them.
A bit rare these days, the second one has a metal block with a rubber o-ring seal on it.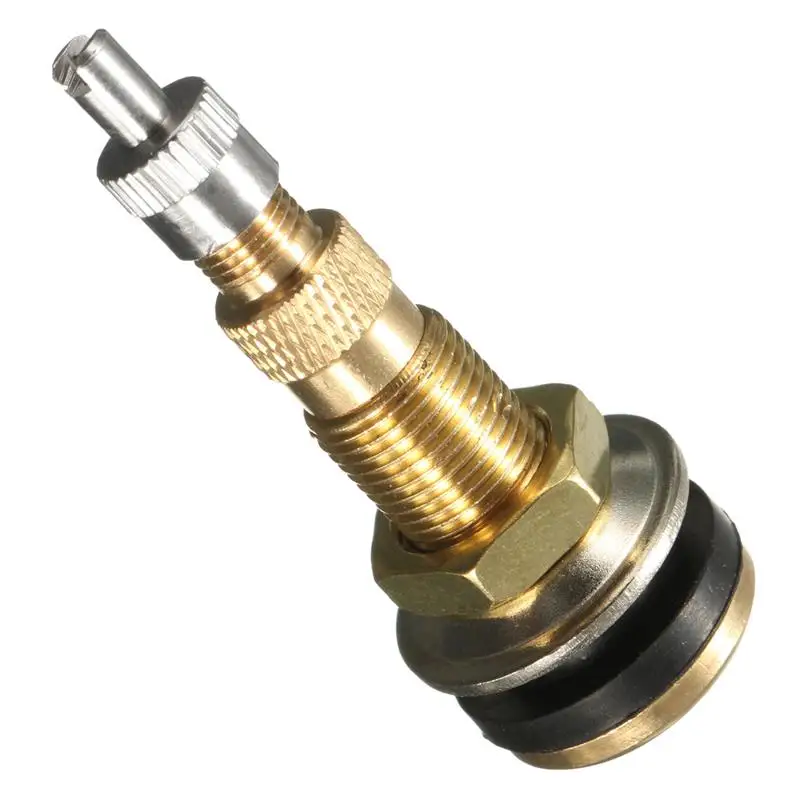 The seal on this valve is perfect, but the shape again causes way more problems than the rubber block one. That’s probably the reason why we don’t see it so often anymore.
And third, most popular these days, the cone-shaped rubber seal tubeless valve. This one is amazing, but it has one problem that often happens during installation on rim tapes. On rim tapes, you need to open a valve hole by yourself, and if you don’t open it wide enough, the cone will get loose all the time. Sometimes it starts leaking air and sometimes doesn’t, depends on the sealant. An easy way to prevent this is to make sure the hole is opened all the way to the edges of the valve hole on the rim. That way, it can’t widen anymore, and the cone will fit perfectly with any tubeless rim tape or rim strip.
Now that we have gone through all the types of both rim tapes and valves, you can quickly check which ones you have and what could be the problem with them.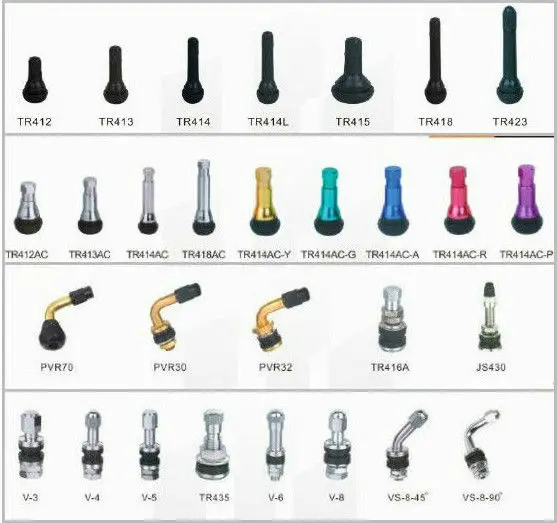 The most common problems that I found as a bike mechanic are either the tape is badly installed because it doesn’t stick to the rim well enough, or the valve isn’t sealing properly for one of the reasons mentioned in the text above.
If any of that looks completely fine, try checking if your rim tape is broken somewhere. It should be a very tiny hole or a barely visible cut.
Most of these problems can be fixed and prevented, and here is how.
If it’s a cone-shaped valve seal, then first make sure the rim tape valve hole is opened completely. Try to push the valve with your finger to see if there is any more room there. At the same time, turn the locknut on the other side clockwise to tension it. That will make sure the gaps are sealed.
If it is all the way in and there are leaks, there may be a small cut on the rim tape just next to the valve. As the cone is pressured in and the tape hole widens, sometimes it can break if it gets jammed a bit.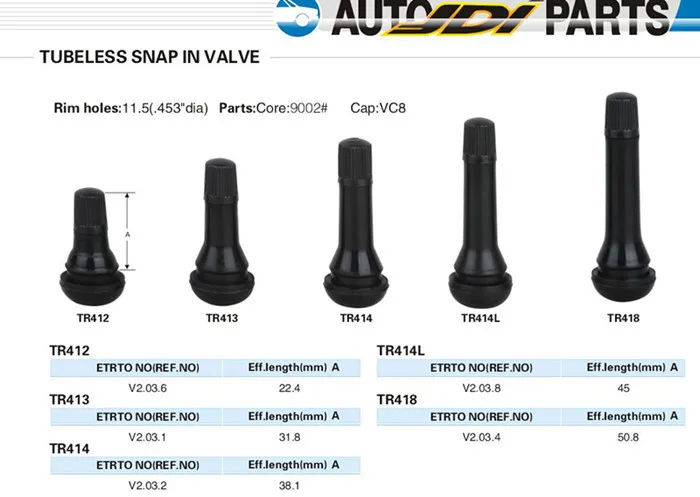 Check if that’s the case, and if it is, you can always tape a small part of the rim with a patch of new tape to close it off.
If the valve seal shape prevents the valve from sealing airtight, you have two choices. Changing the valve or adding something that will seal the gaps. I like to use small rings that I cut from an old tube. You can cut them in different widths and shapes to fit properly and sometimes add more than one. You can use O-ring seals, but sometimes they are too thick and can’t bend properly to the shape you need.
If you can’t get it right because the rim shape is horrible, you can always add a patch or two of rim tape just on the hole area. That way, the thickness you get from the tape can be squeezed by the valve seal better and seal it that way.
It might be that the valve stem leak is actually caused by rim tape leaking, as I already explained. As a matter of fact, it happens to be so in like 50 percent of cases.
If the tubeless rim tape is coming loose because the glue isn’t good enough you will have to change the whole tape. There is simply no way to fix this, at least not long term. Try with a stickier tape this time.
If the tape is cut or broken somewhere, you can clean its surface and tape a patch of new tape over it. The tape usually breaks over spoke holes on the rim because the edges can be sharp. While you are at it, check the other spoke holes as well. If there is one, there might be more. At some point, it might be easier to tape a whole new circle or replace it altogether.
All in all, air leaks in tubeless valve stem setups are not something to be bummed about. It happens a lot, even to us that installed thousands of them. To prevent this from happening, I always have a few O-rings or custom-made ones that I can put on the valve if I feel it could cause trouble. Also, taking real care when installing the tape will lose you a few more minutes but you save yourself a lot of trouble in the future.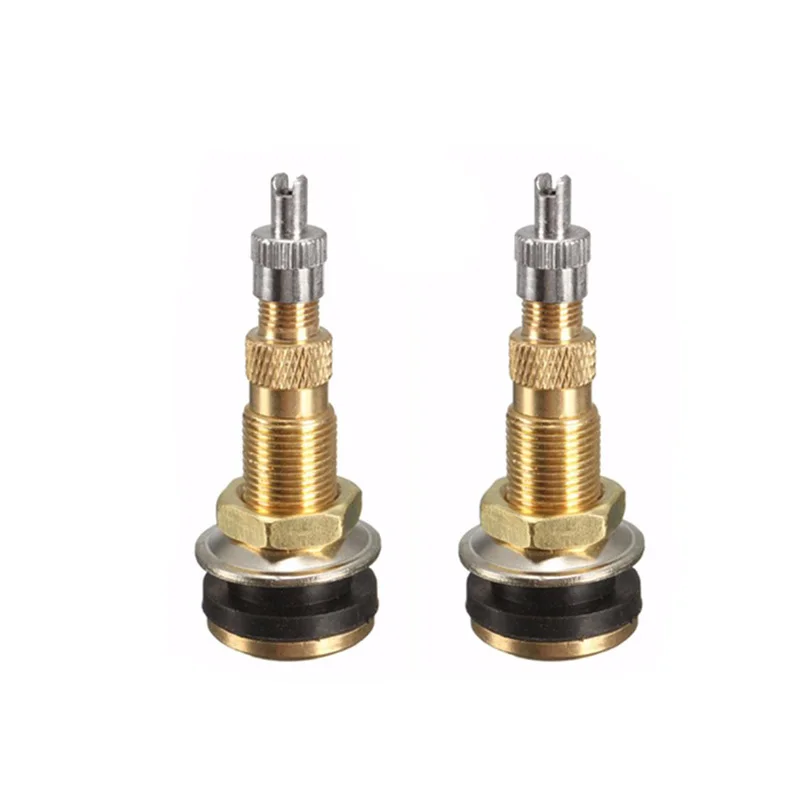
· Subscribers 0
TUBELESS?: Compatible with most ready-to-use tubeless wheels and tires, these valves are the perfect companion to keep your rims fresh. NO MORE LEAK: We know how frustrating it can be to have a leaky tubeless valve, which is why we designed these premium aluminum valves to prevent leaks and prevent flat tires. EASY TO INSTALL: Presta Muc-Off tubeless valves come with a 4mm hex key slot for easy installation and a built-in valve core removal tool so you can easily…
View More
Want a valve stem to fit Spank Oozy discs? That's all!
Scott C. Clayton
Level 1
732 Review
48 Karma
I had trouble sealing valve stems on Spank Oozy rims for a while. The rim has a pretty good burr in the middle of the inside of the rim for strength, which is very hard to seal.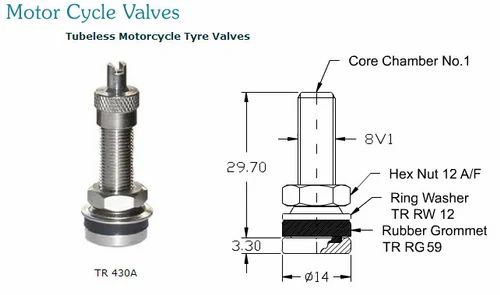 These Muc Off valves fit perfectly. I used a rectangular spacer and just tightened it by hand and BOOM, easy, no leaks! You also get a very secure fit on the rim so they don't wobble. Do yourself a favor, get them! ✔️🤙
View Review completely
Sport
Miscellaneous
9000
Level 1
737 Reviewed
31 Karma
Edited: Well, that's a little embarrassing. I first gave them a negative review due to one valve not holding air even after valve reinstallation/tape replacement. I went back and looked at the tape again and found that the entire roll had an error and still had a faint trail leaving air in the spokes on one side. I replaced the tape with a new roll and the second valve worked perfectly. TL: DR they are a little more expensive but they fit well and the colors are nice. Trust your vanity and just buy them, they are only $10 more than Stan's.
View Review completely
valves
Compatibility
One valve rod worked, an empty waste of time, island and seats 9000. W. Washington
1 Level
1278 Review
50 Karma
I bought these valve stems because of their reputation and brand name. I changed the tires on my Axis gravel bike to tubeless and ran into a lot of issues with these stems. The front wheel worked great, the stem went straight through and didn't cause any problems. The rear wheel was a pain, I had to re-tap and try to install the wheel 3 times. Each time there was a small leak around the valve stem. I always thought it was a bad install on my part so I contacted my LBS and asked them to install it for me.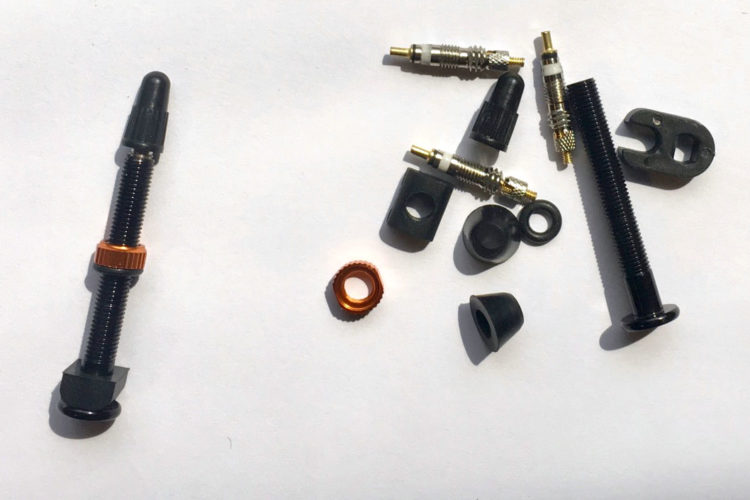 They said the valve was leaking and needs to be replaced. They installed Stan Valves. Wish I could go ahead and buy a stun instead of choosing Muc Off
View full review
Tires & Tubes
Dear
Park Tool BBT 19 2 Bottom Bracket
6 Отзыв
Banjo Brothers Handlebar Bag Medium
7 Отзыв
Stop Puncture Thorn Resistant No Flat Bicycle
7 Отзыв
GPMTER Anti Skid Universal Lightweight Cycle Cross
8 Review
FOSER National Dancing Fan(Left Gradual
3 Review
TOESOX Womens Bellarina Non Slip Pilates
9 Review
7idp 2019 SAM Hill Pads 3
4 Subscribes
Esprlia Womens Tankini Swimsuits 9000 400000 9000 9000 9000 9000 » Miscellaneous » How to check tire pressure correctly
Hello. I am glad to welcome everyone to the site Question Auto. Today, under the heading "How to check?", We will talk about tire pressure. You will learn why to observe the correct tire pressure, as well as how and how to check tire pressure. Tire pressure, as in any other place, must be strictly observed, because non-compliance is fraught with unpleasant consequences, which depends on the particular device. Incorrect tire pressure is fraught with big troubles, such as:
The correct pressure is usually indicated by the automaker in the owner's manual, as well as on special commemorative plates, which are most often attached to the driver's door pillar, in the glove compartment or near the gas tank cap. This plate contains information about the load index, tire pressure in cold weather, as well as tire size.
The correct tire pressure is the pressure at which the manufacturer guarantees a comfortable ride, safety, good handling and minimal fuel consumption. In addition, the correct tire pressure is the key to uniform wear and minimal stress on the suspension elements. Even the smallest deviation in tire pressure (-0.2 bar) is fraught with increased tire wear ~ 15%. Reducing the pressure by 0.6 bar below the permissible norm will cause the tires to wear out twice as intensively.
Actual: Critical tire wear: what is it, why is it dangerous and how to prevent it?
 Reducing the contact patch also means poor tire grip, poor handling, increased braking distance, and the risk of an accident.
 Tire pressure should be checked at least once a month (every two weeks in winter). Before proceeding with the test, it is necessary to allow the tire to cool if you have just left the road. While driving, the pressure in the tires, as a rule, increases by 15-20%.
Recommend: How to choose mud tires for SUVs? What to look for when choosing?
Most car owners are accustomed to checking tire pressure the old fashioned way (by eye, kicking the wheel, etc.), but this method is extremely inaccurate and does not allow accurate determination of tire pressure. The maximum that can be determined "by eye" is very flat tires, which should not be driven in any case; for more accurate measurements, there are special devices. To measure tire pressure, there is a special device called a pressure gauge, which I talked about in one of my previous articles. For those who are interested in learning more about this device, as well as understanding how to choose the right pressure gauge, use the link above.

Related: What is better: tube or tubeless tires? Understanding!
To avoid confusion with the measurement, use the following table of pressure units, it will help you find out what this or that value is.
Note!
There are situations where a deviation from the manufacturer's recommended tire pressure is permitted. For example, when you need to overcome a difficult section of the road or in case of a heavy vehicle load. In such situations, you can deviate from the rules and pump up the tires or lower them to the required level. This must be done with an understanding of what you are doing, and after you have overcome a difficult section or reduced the load, the tire pressure must be put in order, in accordance with the requirement of the automaker.
In case of sudden changes in weather, also be sure to check the tire pressure, cold weather will lead to a decrease in tire pressure, and warming, on the contrary, will increase it.
Source: vopros-avto.ru
Maintaining proper tire inflation is relatively simple and important to the overall performance of your vehicle's tires. A properly inflated tire will provide longer life, faster steering response, better fuel efficiency and a smoother ride than an improperly inflated tire. Both under-inflation and over-inflation can cause headaches such as premature tread wear and possible tire failure. The best way to ensure you get the most out of your tires is to check your tire pressure monthly.
Knowing how to use the tire pressure sensor is very simple. Here's how to check your tire pressure and fill your tires.
Items needed to check tire pressure
Your gauge can be digital or standard. Auto parts stores usually carry both. Many auto parts stores sell portable air compressors that run on a car battery or 12-volt power supply. Alternatively, you can use the air compressor found at most gas stations. They usually cost $0.50 or $1.00 to use.
Car manufacturers list PSI - literally "pounds per square inch" - assuming the tires are cold. Tires are considered cold if the vehicle has been parked for three hours or more, or if the vehicle has been driven less than a mile (1.6 km) at a moderate speed. PSI is the unit of measure your gauge uses to take readings.
Look at your driver's side door jamb or your owner's manual to find the recommended cold tire PSI for your front and rear tires. If you can't find one, you should check with the dealer, manufacturer, or a qualified tire technician.
If your front and rear tires require different pressure levels, write down the correct PSI for each so you don't get confused when driving around your tire pressure checking vehicle.
Remove the valve cover from one of your tires. Then place a gauge on the valve stem and push hard enough that the hissing sound disappears and your gauge reads. When using a standard gauge, air pressure will push a small strip out of the bottom of the gauge. The units of measurement are engraved in the bar. The digital gauge will show you the readings on the screen.
Record readings and repeat this process for all four tires.
Use an air compressor to fill any low pressure tires. Many air compressors are different, so read the instructions carefully to make sure you are using them correctly.
If you are using an air compressor at a gas station, be sure to park so that the hose reaches all four tires. Insert the shift into the machine until you hear the engine running. Fill each tire by placing the end of the hose on the valve stem and depressing the lever.
Using the gas station's air compressor means your tires may be hot. If it is necessary to adjust the tire pressure when the tires are "hot", set their pressure to 4 psi (14 kPa) above the recommended cold pressure. Recheck tire pressure when tires are cold.
After filling the tires, use the pressure gauge to check the pressure again. At this point, it's OK if you've overfilled your tires because you can always bleed some air back out. Never drive with inflated tires. Excessive inflation can result in reduced traction, premature wear and poor shock absorption.
Make the above procedure a monthly ritual. Checking your tire pressure regularly is the best way to make sure your tires never drop below their optimum PSI.
Accuracy matters and you should keep this in mind when choosing a sensor. For just a few dollars, you can find a quality, accurate tire pressure gauge that gives accurate readings. If you're not sure which one to get, check with the professional technician he or she prefers.
A digital tire pressure gauge will provide accurate readings, but remember that it is battery operated. If you think changing the battery will prevent you from using it, your best bet is to use a stock sensor.
It is best to use your own personal tire gauge versus the ones attached to the air hoses at service stations. Of all pressure gauges, they are the most weathered and possibly inaccurate.
,
Proper tire care ensures your safety and the maximum efficiency of your vehicle. One of the most important - and often overlooked - regular maintenance you should be doing is having your check your tire pressure regularly. .
Car tires must not be punctured to allow air to pass through. And unlike your gasoline, most cars don't alert you to check your tire pressure. In this guide, you will learn how to properly check your tire pressure and why you should keep it up to par.
Under-inflated tires have a higher risk of damage and failure, according to the National Highway Traffic Safety Administration. Not only will wear faster than when under-inflated, but faster wear can also result in reduced handling of your vehicle, tire emissions, and crashes.
In addition to safety, there are also for Eco and for Economy help keep your tires filled with air. Gasoline mileage is reduced by 0.2% for every 1 psi (psi) tire pressure below the recommended level. By keeping your tires properly inflated, you can save up to 3% on mileage, depending on your vehicle and driving habits.
Not only are you saving more money on reduced gas pump visits, but you are also ensuring that our planet continues to grow and prosper for the drivers of tomorrow.
Open your car's glove box, pull out the owner's manual and look for "tyres." You should find parts including front and rear PSI listings. PSI stands for psi . This number is determined by your vehicle manufacturer and is how you can tell if your tires are properly inflated.
PSI based on your car:
It is important to note that you should always use the pressure recommended by your vehicle manufacturer for optimum vehicle performance. This means that you must ensure that your tires match your vehicle and that the PSI recommended for the tires matches what your vehicle manufacturer recommends for your vehicle.
Even new tires with minimal wear constantly lose air. Factors that can affect tire pressure:
Most tire and vehicle manufacturers recommend checking tire pressure every month as they can lose several pounds of pressure during that time from simple daily use.
In addition, it is important to check the pressure, as the temperature of heats up to . Tires react quickly to temperature changes, and an increase in temperature can lead to a rapid loss of pressure.
Leaky valve systems, low leakage punctures and other often hidden damage can also reduce air pressure - another reason to check your tires regularly.
Checking tire pressure is easy. You can do it right at home or at a gas station. Just make sure you check the pressure when your tires are cold , or have not been ridden for a few hours. This will give you the most accurate reading.
The most important piece of equipment you need is the precision pressure gauge . You can find the battery powered digital gauges or the more traditional rod type gauges found at most gas stations. A good track shouldn't cost you more than $15 - a good investment for longer tire life.
Make sure you have the manufacturer's PSI when you check your tire pressure, then follow these steps:
All in all, checking your tire pressure should only take a few minutes and is well worth the savings and protection you get!
Checking your tire pressure once a month will give you an idea of how they are performing. If your tires are fairly new, and continue to leak air, you should check with your dealer or mechanic. You may have a faulty valve or other damage that is difficult to detect... which, unfortunately, may result in the need for a complete tire replacement. But with proactive maintenance, you can catch a problem before it becomes a problem, and end up needing a little repair.
For more suggestions to keep your car running at its best, check out our library of car maintenance tips.
Each vehicle comes with the manufacturer's recommended tire pressure range. Tire or air pressure is measured in pounds per square inch (psi). It is a common misconception that tire side PSI is the recommended level. This is incorrect The PSI on a tire is the MAXIMUM level a tire can handle. Also, a PSI setting that is too low can lead to devastating tire wear, which can lead to poor fuel efficiency and flat tires.