You may have decided to inflate your car tires at home rather than going to a gas station.
Or, maybe your car tires have betrayed you just before you are going to start a long drive, you don’t even have time to go to a gas station.
Whatever your trouble is, we are going to help you to fix it. After reading this, you’ll get a clear answer of how to Put Air in Car Tires at home.
See, what’s exactly there for you.
What Things Will You Need?Only three items you will need to inflate your tires. Let’s see what are those-
That’s it! Let’s go for the steps.
Table of content:
We will show you how to inflate a car tire without a pump. This will be easy and won’t take much time. Now, Look over the following steps.
Eyeballing isn’t enough, use a pressure gauge to check the tire pressure. There are three types available pressure gauge in the market-
We recommend you to use the last one, digital type pressure gauge. This one will provide you the accurate readouts of current pressure.
Step-2: Find the recommended pressure levelIn this step, you will need the user manual that was given by the manufacturer. You can also find it on a yellow sticker in the door jamb on the driver’s side.
The normal range is from 195 to 250 kPa (kilopascals) or from 28 to 36 psi (pounds per square inch).
Step-3: Check the tire pressureBefore you start inflating the tires, check their pressure with the tire gauge you picked before. How to do this?
A black/silver colored valve stem cap is positioned on your car tire. Remove the cap and keep it in your pocket so that you don’t lose it.
Now, press down the open end of the tire gauge onto the valve stem. You have to hold it firmly before getting a hissing sound because of releasing a little amount of air. Note down the readings that are shown by the tire pressure gauge.
For details, you may learn how to check tire pressure yourself.
Step-4: Calculate how much pressure you need to addIt’s time to determine how much air you will add to the tires. You have to compare the recommended PSI (set by the manufacturer) with the pressure you found in the gauge.
Subtract the current pressure readout (you’ve got from the gauge) from the standard PSI. You will find the needed amount of pressure.
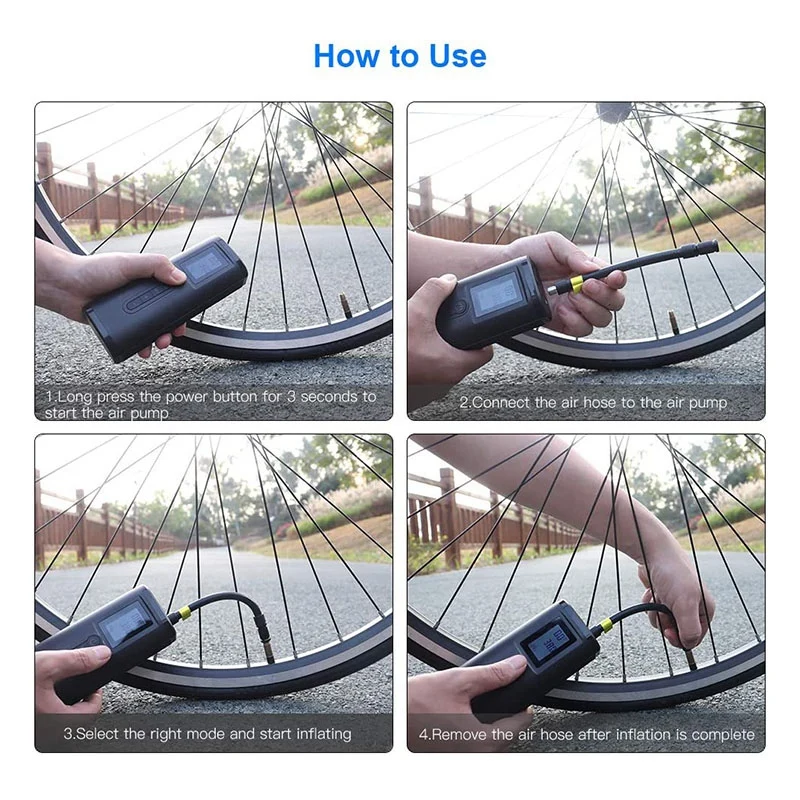
Step-5: Inflate the tiresBefore inflating, two more words for you. We are using a tire inflator here instead of a compressor. Because tire inflation doesn’t demand a higher PSI. Moreover, the tire inflators are handier and cheaper than air compressors. Now, turn on your tire inflator. Place the air hose nozzle fitting on the valve stem and press the lever down. You will hear a hissing when the air starts flowing through the hose.
But, if you notice the air is going around the valve then sorry, you don’t have a tight connection. Make it tighter and go for the other three tires.
Step-6: Read the air hose gaugeRead the gauge now to know whether you’ve reached close to the right amount or not. We mentioned the recommended level earlier. More specifically, the perfect amount of pressure is about 32 psi.
Step-7: Replace the stem capLastly, you need to replace the stem cap if the tires are properly inflated. Now sit back, buckle up and enjoy your ride.
6 Additional Hacking Tips for YouThese tips will help you to be aware of some factors that you must need before inflating your car tires.
1. When you check the tire pressure, make sure the tires are cooled down.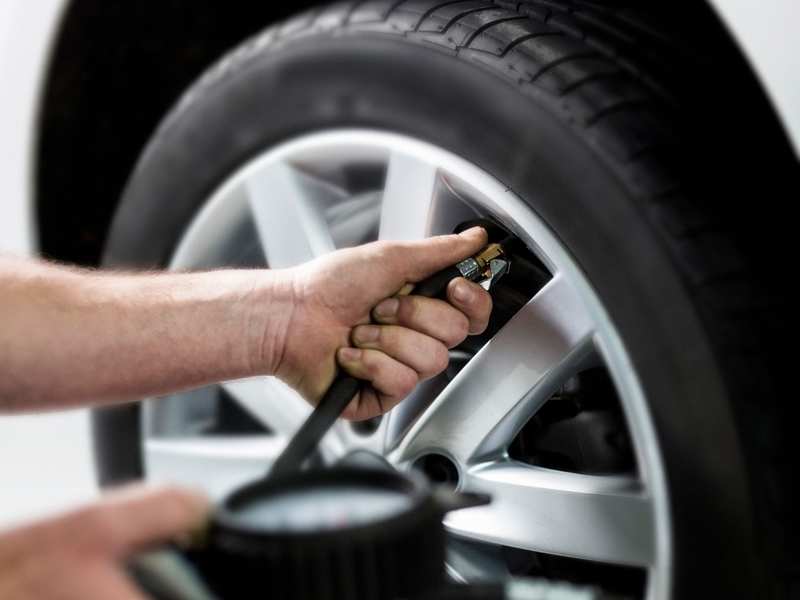 Tires get hot on the road (for the fraction). So what? Well, warm air will add false pressure readings in your tires.
Note it down that, at least 30 minutes needed to cool down the tires. So, check after 30 minutes from stopping the car.
2. Under-inflation causes permanent damage for your tires. When the tires get too hot, the rubber begins to degrade which leads to a rupture in the sidewall of the tires.
So, be careful and inflate the tires exactly when it’s needed.
3. In case you carried cargo or carpool today, we recommend that you fill in some extra air in your car tires to offset the extra weight.
Remember, whenever you add extra pressure to the tires, don’t ever exceed the level that is provided by the car manufacturer.
4. Check the pressure at least once in a week and run the pressure a bit higher than recommended, about 15% higher.
5. Suppose, the max pressure for your car tires is 44 PSI. Don’t go by the max, go by the recommended pressure. It will offer you to get slightly better gas mileage. Moreover, the car will have less traction as less tire surface is in contact with the road.
6. In case, you inflate pure nitrogen gas into the tires instead of air, no need to think much. The ways are the same as inflating air into it.
But yes, there are several compelling reasons to use pure nitrogen gas. Surety of more stability of your tire pressure over the long term is one of them.
ConclusionWe are at the cut-off point. We hope the information will help you to get the job done.
In the end, you surely have a crystal clear idea about how to put air in car tires at home. Read the instructions carefully and keep your eyes open while going through the steps, okay?
Happy DIY day!
Written by D.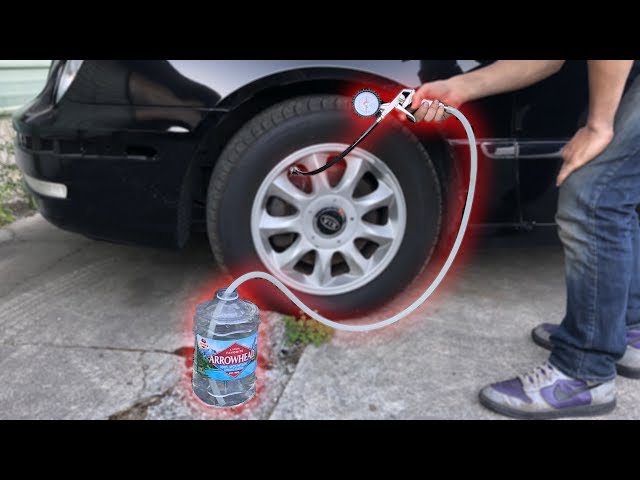 Hahnin Life hacksLast Updated April 30, 2020
Filling your tires up with air is not a priority until they get low…
We show you the 7 genius hacks to put air in your tires and a list of places you can fill them up for FREE!
Check it out…
So the question here is – do you know how you can inflate air in tires? Well, we guess you want to learn more about it and that is why you are here. Don’t worry we will provide you the ultimate guide on how you can put air in tires.
OverviewProperly inflated tires will help to save gas and money, plus it will allow you to reach your destination safely. But before you start a trip or a long journey you need to have certain things in mind as well as in your trunk.
Before leaving, check your tire pressure. Don just look at it or use your fingers, instead what you will need is a gauge.
 Your tires will take about half an hour to cool down after an hour’s drive
Proper tire inflation is a must because it helps in tire’s durability, reducing the chances of blowouts and accidents, reducing carbon footprints and providing better fuel economy.
Let us read more about inflating air in tires:
At gas stationItems you will need – air gauge.
Follow the steps to successfully inflate air in tires at the gas station-
Step 1 – Park close to the pump.Park your car near the air pump so the air hose could reach each of the tires. (Park within 5 feet of the pump)
Step 2 – Know your PSI.
There is a manufacturer’s recommended air pressure printed on the driver’s door jamb. If it is not mentioned there you can look in your gas tank door, owner’s manual or glove box.
Step 3– Remove the valve cap – and remember where you place it.Step 4 – Check your tire 1st to get baseline PSI.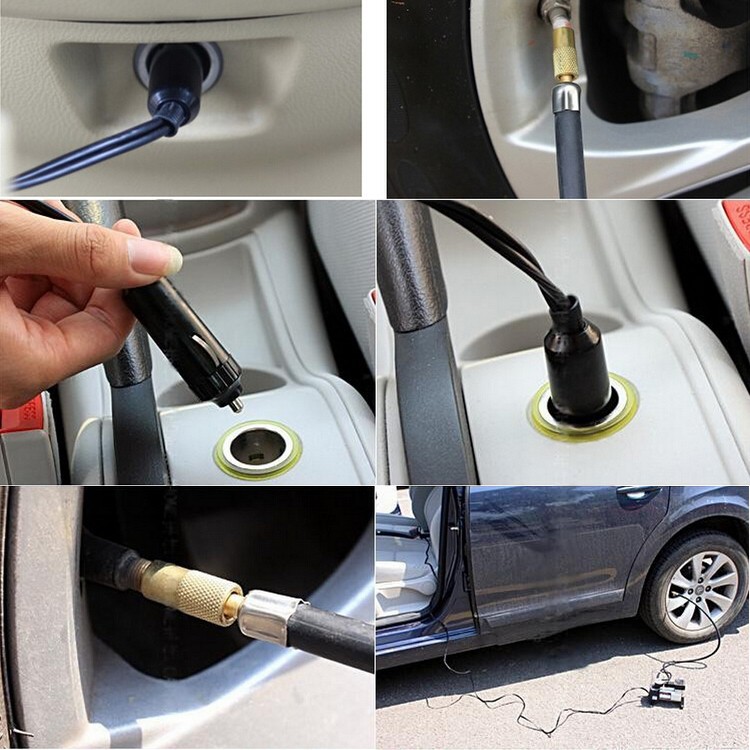
You’re Done!

During summer seasons, the temperature of the tire rises faster. Here is a bit of math – driving = friction (road and tire) = heat and since the atmosphere is already high the tire pressure will eventually get affected and increase faster.
So what you can do to avoid tire pressure? You can follow these advises and save your tire from getting burst due to high pressure.
1: Check your tire regularly during summers.
It is recommended that you check your tire pressure (spare included) every 14 days. Check in the morning when they are still cold.
2: Inflate to a recommended pressure.
You can find the recommended air pressure mentioned on a sticker in the door jamb or you can also find it on your owner’s manual. Avoid maximum’ pressure.
3: Never ever reduce the pressure of warm tires.
In winterIt becomes very important to keep your tires at a proper pressure in winter seasons in order to avoid any risky conditions, here is what you need to keep in mind:
Your tire may gain or lose 1 to 2 pounds per sq. inch (PSI) in every 10 degrees Fahrenheit change. If you calculate, your tire may lose about 4 PSI in one week if there is a drop in the temperature by 20 degrees Fahrenheit.
This is why it is important for you to regularly measure the tire pressure. (Once in a week)
NOTE: Do not deflate your tires thinking it will provide grip in ice or snow. Deflated tires may burst as they will generate a lot of heat.
How to Check Tire Pressure in Winter– Pro Tip: Have a flashlight in your car and use it in the Winter or when inflating tires in dark situations. It is really hard to read the air gauge, especially if they are manual pump gauges. You would be surprised how just a few pounds of air difference can impact the steering on your vehicle. Using a portable air compressor pump can be an advantage for you to keep your tire pressure in check. It is actually a 3 in 1 tool which consists of – compressor tube, LED light and a tire pressure gauge. It is a device that every driver should carry with them. Air compressor pumps will not only help in regular maintenance but will also come in handy while traveling for inflating tires. What to look for in air compressor pump? Tire Pressure Monitoring System or TPMS warning lights will glow to warn that one or more tires have gone 25% below recommended air pressure. If your TPMS lights are still ON even after inflating tires, you will need to recheck and adjust it to the proper pressure. If the pressure is low and your lights are still ON, this means that your tire is leaking air and need to be replaced or fixed. NOTE: During cold weather, your TPMS will glow, which indicates that your tire has low pressure. You will need to add air in the tires but be sure not to fill them too much. Here is a list of ten places where you will not have to pay for inflating tires and you can easily save money for gas and other maintenance of your vehicle. BONUS: Use a compressor (DIY) Sources: https://itstillruns.com/properly-inflate-p26570r17-tires-7409947.html https://itstillruns.com/inflate-tires-cold-weather-5836249.html https://moneysmartfam
At home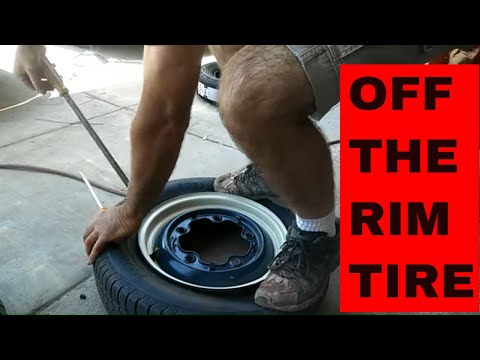
But the light still ON
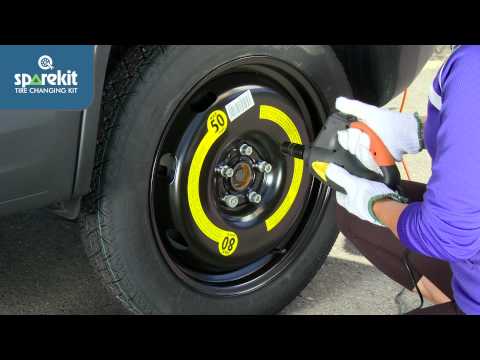
Filler UP – Places that provide free air for tires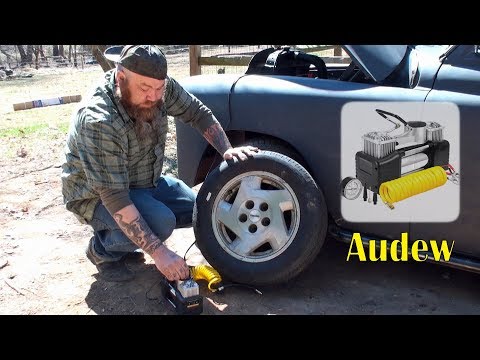
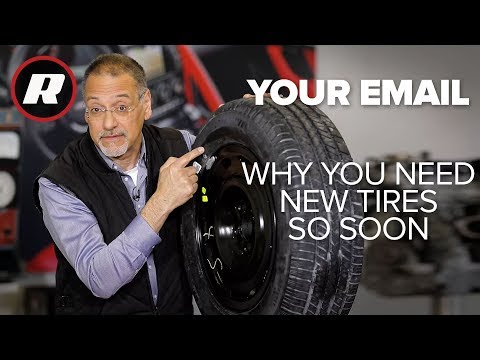
How to Check Vehicle Tire Pressure and Inflate Tires
How to Inflate Car Tires at Home
Crash Proof Retirement®: Thrive in any market 2022
What you should know about crash-proof retirement? 1. It is a means to protect your retirement fund from market crashes. 2. An exclusive Crash Proof Retirement® System provides you an option...
Continue Reading
link to BEST RETIREMENT COMMUNITIES IN ARIZONA: SEE THE 8 CITIES THAT MADE THE CUT 2022!BEST RETIREMENT COMMUNITIES IN ARIZONA: SEE THE 8 CITIES THAT MADE THE CUT 2022!
Your retirement is fast approaching, and you’re ready to make a move. Where do you intend to settle? How do you want to live during your retirement years? How much savings do you...
Continue Reading
Contents
On the way home, many motorists encounter unexpected situations, such as a punctured tire.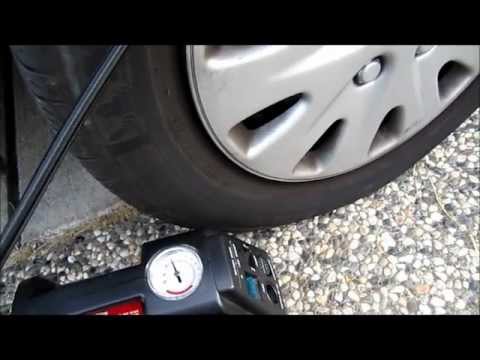 You can solve the problem by simply replacing it. Doing tire fitting yourself is better than going to specialized service stations for this help. The work of specialists in this topic will sometimes cost a lot of money. And if you change tires according to the season, you can run into huge queues for tire fitting.
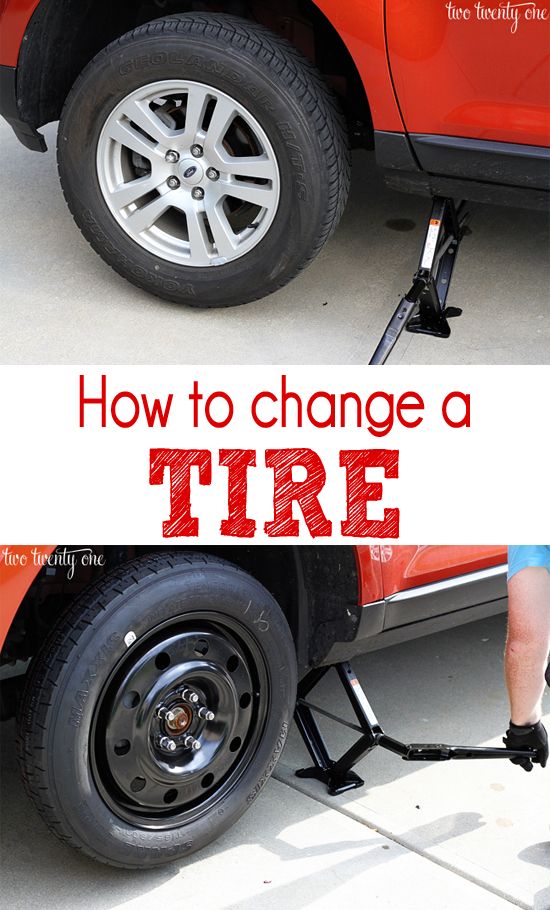
The first signs of a punctured wheel: reduced driving speed, extraneous noise, sudden pull to the side. If the problem is not detected in time, this situation can lead to serious consequences, such as damage to rubber, damage to the disk, and sometimes even more deplorable situations. In this case, it is necessary: to stop moving, to stop on the side of the road.
When the car is stopped, put on the handbrake, set the emergency stop sign and turn on the alarm. Let's move on to changing the wheel. Under it we put recoil shoes. Jack up the side of the punctured wheel. Remove it and replace it with a spare. We're going home.
It can be taken to a service station and repaired there, or made at home. Home tire fitting is done in a car garage. To disassemble and assemble the wheel, you need a specialized mounting tool (chisels). You can’t make a larger tool, as you can damage the rubber.
It is good to use a homemade tire changer. Tire fitting starts with stripping the wheel. One of the rubber beads is removed from the rim of the disk. The side of the tire is pryed off with a pry bar and supported by a small shaft (screwdriver) to prevent the rubber from sliding back, after which one side is pulled out of the rim.
To facilitate the process of removing rubber from the rim, it is necessary to lubricate with soapy water. Approximately at a distance of 15-20 cm, the second mount is inserted and moves to the side until it is completely removed from the board. The second part of the tire is removed in the same manner. The installation of new rubber is carried out in the following order. One of the sides of the tire bead is put on behind the rim of the disk.
A mounting blade is installed between the disc and the tire, with the help of which a part of the bead is installed beyond the edge of the disc. In the interval of 15-20 cm, the edge of the next section of the tire is set with another blade. The other side of the rubber is installed in the rim in the same way. After installing the rubber on the disk, it must be pumped up.
Home tire fitting is allowed with the assistance of a special tool, it is sold in auto shops. And you can also make the necessary tool yourself.
On the Internet there are many different schemes and drawings on this topic. The tire fitting machine is a structure of two handles. One of the handles is movable with a lock, and the other is fixed.
The pressure on the lever forces and facilitates the process of removing the tire from the rim. With the help of a disk with a gear, rubber is removed. When moving with a key, you can remove the tire thrown over the disk.
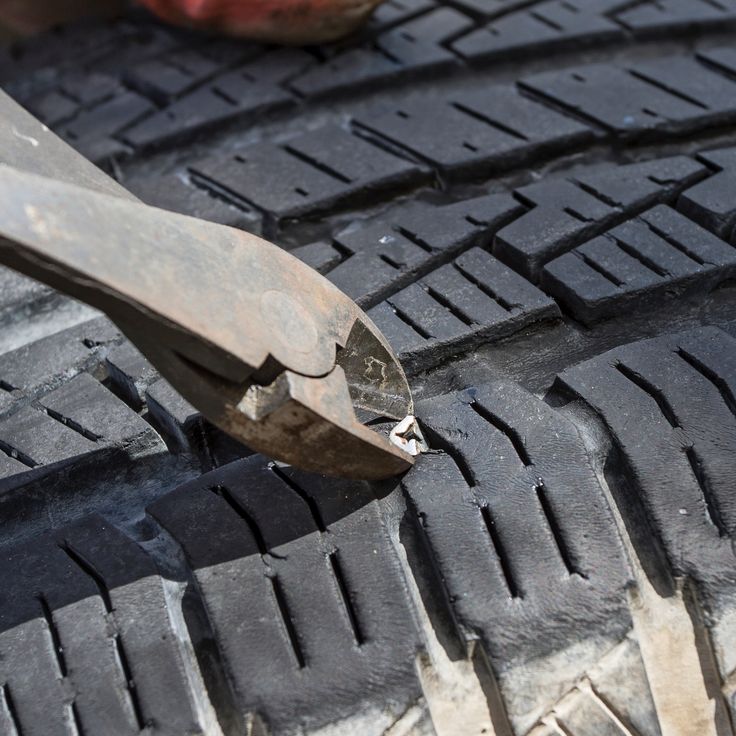
Putting on the tire is done in reverse order. This process does not take long. Next, let's look at how to repair damaged rubber at home.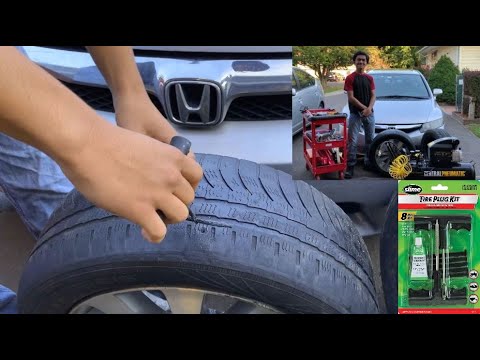 To do this, you need to have a special repair kit on hand. You can buy them at any auto shop.
Before repair, it is necessary to deflate the wheel, remove the foreign object from the puncture site. We take the awl from the kit and grease it with glue (from the same kit). We introduce the awl in a circular motion into the puncture on the tire. We continue to rotate so that the glue gets on all the walls of the hole. Next, we take the tourniquet and remove from its protective film on the dyne, which is necessary.
Remove the awl from the hole and, leaning the tourniquet, insert it back. The harness must be installed correctly (two ends of the harness on the outside, and the center inside). We sharply remove the awl from the puncture site and evaluate the tightness of the rubber by pumping it up. If everything is fine, cut off the ends of the bundle, leaving 2 mm above the tread. One of the criteria for a good wheel is its balancing. After all, an unbalanced wheel leads to damage to the chassis and rapid wear of the rubber itself.
There are two types of wheel imbalance - static and dynamic.
Static imbalance - vertical imbalance, the difference in weight can affect the banal nipple.
The weight on the nipple side is greater and when touching this side of the road, there will be a shock, and at high speed there will be vibration.
Dynamic unbalance is a weight difference shifted in or out of the wheel which also results in vibration. To balance the wheel, you will need a jack and a set of weights (you can buy them at car dealerships). Let's start balancing. Jack up the side of the car and spin the wheel. If the brake pad interferes with you, then you should remove it from the brake, and also remove it from the transmission. We spin the wheel.
When stopping, mark the lower part of the wheel with chalk. We turn further. If it stops again with the mark down, it means that this part has more weight than the upper part. Install the weight on the top of the wheel. And scroll until the wheels stop in an arbitrary position.
Tire pressure is an important factor that affects handling, stopping distance, tire wear, fuel consumption and comfort. It would be best to look at the manual for your car and pump up the wheel according to these recommendations.
Information on tire pressure can be found on the driver's door pillar, if not, look on the glove compartment lid or on the gas filler flap.
However, in fact there are times when you want to reduce the pressure a little. Of course, if you are driving on ideal surfaces, there is no point in reducing the pressure. But you yourself understand that the problem with the roads still remains, and the size of the pits is sometimes just scary. This is where you have to adapt to the situation.
For example: for a Daewoo Lanos (Chevrolet Lanos) car, the following figures are indicated in the instruction manual for wheel dimensions 175/70 R13 or 185/60 R14, the optimum tire pressure on the front and rear wheels is 220 kPa (2, 1 bar). And you know, it gets harsh, especially when there is only one person in the car. In this case, try lowering the tire pressure to 1.9-2.0 bar.
It will be much more comfortable to move around the city, the tires will work out bumps better, less work for the suspension, let the tire absorb shocks. When the car is fully loaded or when leaving the highway (high speed mode) if there is a long road ahead, then return the pressure declared by the manufacturer.
Naturally, experiment without fanaticism, greatly reduced pressure is also harmful, find a compromise, everything should be within reason. We are not saying that you need to do it this way, just try to reduce the pressure by 5-7% under certain conditions, feel the difference and decide for yourself whether it is worth doing this or not.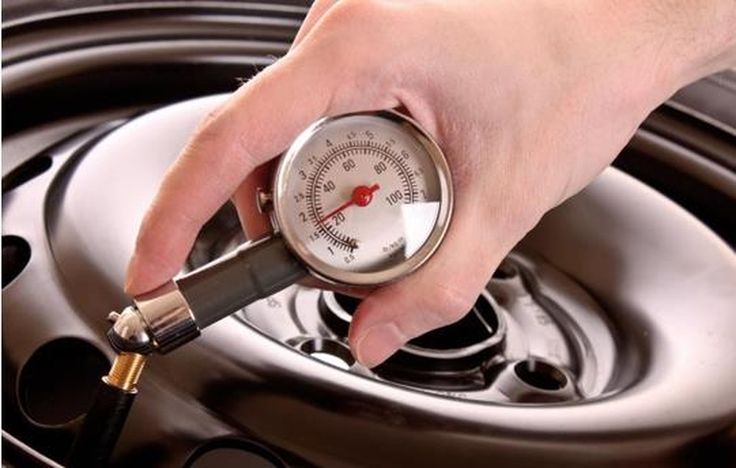
Low tire pressure will give you a more comfortable ride and less bumps in the road. The tire becomes softer, the braking distance decreases. However, there is a caveat:
Many people do this for the sake of fuel consumption. Indeed, the consumption will decrease (not much, of course), the car will roll easier, but there are more disadvantages than advantages, namely:
Check the pressure before driving when the wheels are cold, as the readings on warm tires will be distorted.
The most common unit of pressure is Bar (bar). Approximately equal to one atmosphere. Another common standard is PSI and kPa, below is the calculation, for example, if or kPa is indicated, you need to convert to Bar.
Tire pressure is measured with a pressure gauge, they are of various types. Common dial gauges are simple and inexpensive. Pretty accurate, but they can not be dropped, the spring in the middle of the device may deteriorate and the readings will not be accurate.
Such pressure gauges are recommended for constant verification, especially if they work in high loads. Electronic pressure gauges have a display, convenient and most accurate.
Pump the pressure correctly, (no need by eye) follow the recommendations of the car manufacturer, since the tire itself does not say what pressure to pump.
Modern services are increasingly offering the service of tire inflation with nitrogen. This innovation came to Russia from Western countries. Tire inflation with nitrogen was first used in Formula 1 racing.
Air mixed with nitrogen was blown into the tires under high pressure. According to the rules, such an act was prohibited, but still there were craftsmen for whom "the rules are not written."
Atmospheric air mainly consists of nitrogen. There is little oxygen in it. Nitrogen molecules are much larger than oxygen molecules, so tire pressure deflates much more slowly when inflated with nitrogen.
Oxygen rushing out along the tire wall oxidizes the cord and disc. Thus, the rubber loses its strength, and it becomes unsafe to move on it.
When it comes to compressed air, the pressure releases after some time. This figure is approximately equal to 0.09 atmospheres per month. Oxygen molecules are small, so they leave the tire easily. It is impossible to stop this process, because it will continue until the same pressure is created. There is only one point: you can pump up the tire with pure oxygen. Due to this, the pressure will equalize, and the tire will stop flattening.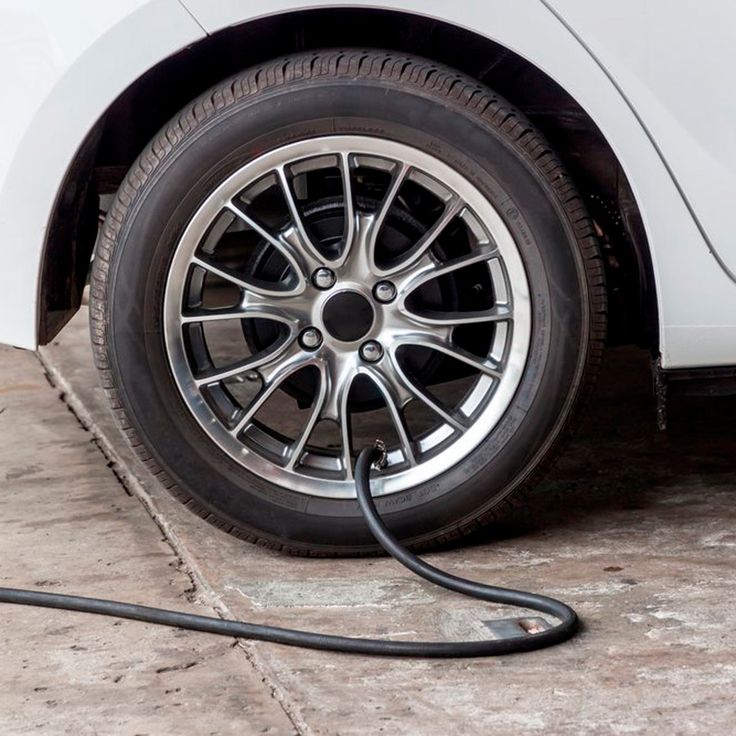
The most important plus, which is emphasized by service station workers, is the safety of tires inflated with nitrogen.
Inflate tires with nitrogen using nitrogen generators. They are a special installation that rotates the air mixture. But, before the air enters the tire, it is processed.
The generator is supplied with compressed air at a pressure of about 8 atmospheres. Further, the air is filtered at several levels.
At each level, the air is cleaned of dust, moisture, oil, and other impurities. Further, the filtered air is deprived of nitrogen molecules.
The whole procedure takes a long time. But all this is justified, because in the end you can get pure (95%) nitrogen. The remaining 5 percent is oxygen. It is this ratio of gases that is ideal for inflating car tires.
Inflation process: a nitrogen generator is connected to the tire valve and pressurizes the resulting mixture inside. If you inflate the wheels like this, then they will not let in oxygen or moisture. The disc will not rust, so it will last longer and will not “tear” the tire cord.
There are people who deny the usefulness of this procedure.
If you carefully read the positive aspects, then it is clear that the tires are inflated with nitrogen in order to protect themselves and make driving more comfortable. But there is a group of people who argue the opposite, referring to another marketing ploy:

Operation November 25, 2019
Content
To inflate a wheel without a pump, the driver must take into account that alternative methods may be useless and dangerous to health. Sometimes tools and spare parts are required, which are not always in the trunk.
To inflate the wheel, the cylinder is connected through the nipple. It is recommended to use propellants with compressed air, because when using cans of sealant or other substance, there is a risk that such contents will begin to dissolve or cement the tire.
This method is presented as more convenient and simple in comparison with how much effort and time it takes to inflate the wheel with a compressor. However, the volume of a car wheel is at least 20-25 liters, so more than 1 dozen cylinders will be needed.
Such material costs are not rational. This approach is also not practical because it will take no less time to pump than when using a hand pump.
The bicycle wheel has a smaller volume and you can expect that the compressed air from the cylinder is enough to inflate the tire.
To inflate the tires in this way, a hose must be connected to the air path (behind the turbocharger).
The turbo boost pressure is 0.6-1 bar and depends on what type of engine the vehicle is equipped with. If this is not a sports model, then there may not be enough pressure in the line between the compressor and the engine intake valves. Standard automotive pumps start at 2. 02 bar and go up to 20 bar. Therefore, it is recommended to use an alternative method only in the event of a malfunction or lack of a pump.
The use of the brake system is fraught with difficulties:
In some cases, in order to pump air into the wheel, use flammable liquids: gasoline or other fuel. According to motorists, hairspray is also suitable. Videos on the web create a false sense of security and ease of implementation of this method.
The wheel is carried more than 10 m away to eliminate the risk of flames on the machine. It is necessary to unscrew the spool, then spray the liquid inside the tire and set it on fire. It is assumed that the shock wave from the explosion should press the rubber against the rim and no further pumping is required. It remains to screw the spool into place.
There are controversial points in this theory:
Simple and effective way. A carbon dioxide fire extinguisher is used, since a powder extinguisher does not give the desired result, and its contents contaminate the inside of the tire.
The fitting of the instrument is connected to the nipple. To do this, you will have to assemble a device that includes a hose with an adapter. What will play the role of the latter, the driver comes up with himself, because. this part is not included in the standard kit from the manufacturer.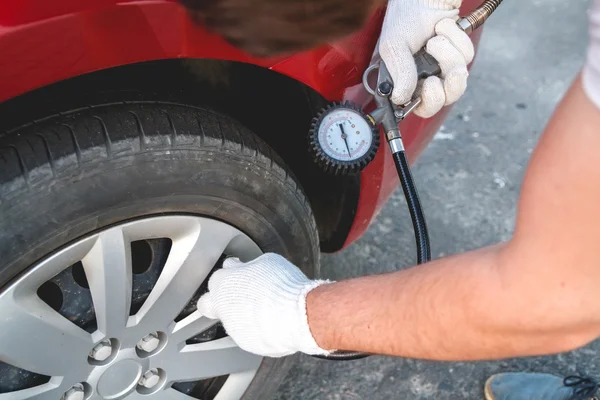
The tire is filled with carbon dioxide, which on contact with air is converted into a gas. The transition from a liquid to a gaseous state provokes a strong cooling of the tube, but the filling rate is higher than when using a compressor.
Carbon dioxide is recommended to be bled off as soon as possible, as it is not designed to fill tires.
Exhaust system capable of delivering pressures of 2 bar or more. To inflate, the hose is connected to the exhaust pipe, after which the gas pedal is pressed until the desired amount of air in the wheel is reached.
It is difficult to seal the joint of the hose with the exhaust pipe: the manufacturer did not provide for such a system. At home, improvised materials are used: nuts, washers, covers, electrical tape.
There is a risk of damage to the bellows and other components of the exhaust system during this procedure. Therefore, it is not recommended to give preference to it over inflating tires with a pump.