I’ve recently been getting back into driving a four wheeler but I forgot how to put it in reverse. So, I did some research about how to do it, and here’s what I found.
As a general rule, start in neutral, then squeeze the clutch, press the reverse button, and press the gear lever down. To get it out of reverse squeeze the clutch in and pull up with your foot to put it in neutral. In some 4 wheelers and ATVs, you put it in 1st gear first before you press down again with the reverse button pressed in.
The tricky part is that on virtually all 4 wheelers reverse is the exact same gear as the first gear. The major difference is that before putting it into first gear, you first hold down the reverse button. The reverse button is almost always located on the left handlebar, close to where your thumb would rest when you’re holding the handlebar normally.
If you already know how to put in first gear, it is exactly the same as putting it in first gear, however, you just hold the reverse button at the same time.
In this article, I will explain everything there is to know about changing gears on a four wheeler or ATV.
So you have a good idea about how to put a four wheeler in reverse. However, you may be wondering how all the gears work in general. So, here’s how to change the gears on a four wheeler:
To change gears you squeeze the lever on your left handlebar to engage the clutch. From neutral – you should always start your four wheeler in neutral – you press the foot lever on your left to put it in first gear. To go into second gear, and each gear after that you pull up with your foot rather than pressing down like you did to go into first.
To change down gears, you hold in the clutch and press down on the foot lever. The one tricky thing about going from first gear to second is that as you go up to second gear you go through neutral. So you need to give it a bit of pressure to go up through neutral and click into second gear. Here’s a diagram to show how it works:
3rd and higher gears
↑ – pull up with your foot
2nd gear
↑ – pull up with your foot
Neutral
↓ – press down with your foot
1st gear – but also Reverse if you press in the reverse button at the same time
↓ – press down with your foot
No other gears, nothing happens
But, reverse is a bit different. From neutral, you hold the special reverse button that is located on the left handlebar while squeezing the clutch. And press down with your foot on the gear lever.
Just remember when you get to 2nd if you press down softly it will click into neutral. To go from 2nd to 1st you need to push down through neutral into 1st gear.
The most important thing to remember is to always hold the clutch in when you want to change gears. The clutch is virtually always the left squeeze lever on the left handlebar. It looks the same as the front and rear brakes on a bicycle.
The same squeeze lever on your right handle is the handbrake. Interestingly, you hardly ever use the handbrake when riding and only typically only when you’re parking your 4 wheeler. The normal brake that you’ll use consistently is the right foot lever that you press down.
It’s a bit tricky to get used to changing gears on a 4 wheeler in the beginning. When I was first learning I would get it wrong a lot, and it’s fine to stall the engine while you’re learning.
The most common thing that would happen is that I’d forget to go down two clicks when going from 2nd to 1st, and end up in neutral. Then I’d rev the engine but because it wasn’t in gear I would just rev the engine.
If you do this yourself, it actually ends up being quite funny especially if you’re riding with others or when others are watching because they’ll think you’re trying to show off by revving the engine.
The other thing that takes a bit of getting used to is the right speed for each gear. For example, you might change it into 2nd gear but you’re going too fast for 2nd gear and you need to almost instantly change it up to 3rd gear.
It takes a bit of getting used to because a motorbike is much quicker off the mark than a car. You might have noticed this if you’ve been at the traffic lights and there has been a motorbike in the front of your lane. When the light goes green they take off WAY faster than a car. And are miles away before the cars have barely gotten rolling.
A major difference between the clutch on a 4 wheeler/ATV and a car is that you can’t skip a gear. For example, you can’t go from 1st gear to 3rd gear in one go. You have to first click it into 2nd gear, and then pull up again with your foot to switch it into 3rd gear.
The other major difference is the positioning of the gears. But, other than that it works virtually the same as a car. You release the clutch slowly and make sure you’re giving it some gas. And try to get a good balance between giving enough gas, and release the clutch at the same time.
If you’re giving it too much gas it will jerk forward, but if you’re not giving it enough the engine will struggle to stay going and can stall out. When that happens just brake or roll to a stop and start the engine again.
One of the first things you’ll need to know to drive a four wheeler is how to put it in neutral. Here’s how to do that on virtually all four wheelers.
Either go down one gear from second gear or go up one gear from 1st gear to neutral. Neutral is located between 1st gear and 2nd gear. Always remember to squeeze the clutch as you’re changing gears. The clutch is a squeeze lever on the left handlebar. When a four wheeler is in neutral, the neutral light on the dashboard will stay on.
It’s always best to put your four wheeler in neutral before turning it on, and when you turn it off. Like a car, if you attempt to start the engine in a gear, the four wheeler will lurch forward which can be a bit dangerous.
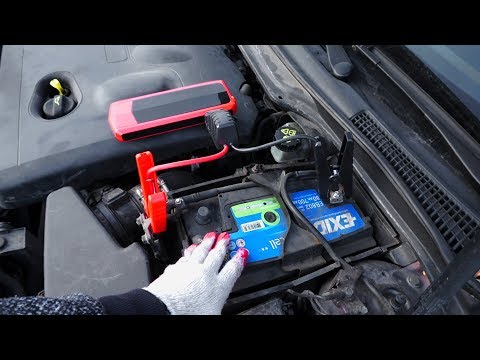
There are a few exceptions for example if you’re trying to start a 4 wheeler that has a flat battery. In that case, you will have a friend push the 4 wheeler with you on it and you’ll try to start the engine while in first gear.
Well, that about covers everything you need to know about how to put a four wheeler in reverse, and how to change gears on a four wheeler or ATV.
by Lee
Putting an ATV in reverse can be tricky, especially if it’s a manual transmission.
Shoot, I’ve even had people have a hard time getting an automatic ATV to go into reverse because they didn’t know the trick.
Let me show you how to put your ATV into reverse.
Before I show you how to put your ATV in reverse, you need to know if it’s automatic, manual, or even semi-automatic. Learn more about ATV transmissions here.
An automatic ATV will have a gear selector on the side of the ATV that you move with your hand. It will be labeled P, R, N, H, L, as shown in the picture below.
A manual transmission ATV will have a gear selector that you move up and down with your left foot. You will also have a clutch on the left side of the handlebars.
A semi-automatic transmission is a combination of automatic and manual. You may have a gear selector at your left foot but won’t have a clutch on the left side of the handlebars. Another option may be a push-button for selecting gears, often located with an up and down button on the left side of the handlebars.
To put a manual transmission ATV into reverse is simple once you know the trick.
The reverse gear is below the 1st gear, but you get into that gear by pressing a button or moving a lever/switch. You will need to make sure you have your foot on the foot brake.
To explain this here is a great video showing you how to put a manual ATV into reverse.
Some manufacturers have the reverse release near the clutch, and others have it off to the side. You may need to refer to your owner’s manual for the exact location if you can’t find it.
To put an automatic ATV into reverse is very much the same as a car.
Put your foot on the brake and then move the gear selector by hand into the reverse gear.
Note: Most ATVs won’t start unless you’re in park, neutral, or on the brake. Also, make sure the kill switch is turned to run; this one gets many people.
If the gear selector is giving you trouble or feels like it won’t move into reverse, then you need to give the ATV a little shake back and forth. Sometimes a little wiggle is required to get the ATV to move into the correct gear.
If a little shake doesn’t work, sometimes the gear selector is off and needs to be corrected. Another possibility is that the gear selector or transmission is broken.
Semi-automatic ATVs are common on Honda ATVs, Yamaha, Suzuki, and older ATVs.
Models like the Honda use a footgear selector at your left side, and the handlebar has a reverse button, often on the brake lever; It’s a brake lever and not a clutch. This video below will show you how to shift into reverse on Honda’s like the Fourtrax models.
The other kind of semi-automatic ATV uses push-button shifters. It’s the same thing on the manual where you hold in the reverse button near the left side of the handlebars but you instead push the downshifter button to go into reverse.
One more type of semi-automatic ATV uses foot gear selectors but has another lever you pull to put it in reverse, but you instead put it in 1st gear, as this video shows.
Articles
02 Dec
Any wheeled vehicle - from a bicycle to a multi-ton truck - has a transmission in its device: a system that transmits rotation from the engine to the wheels. The operation of the transmission - and therefore the speed of travel - can be controlled by shifting gears.
Gear shifting is organized differently in each mode of transport. In the article below, we will tell you exactly how to shift gears on ATVs, and what gearboxes are found on such equipment.
Gearboxes for ATVs can be of two types:
 Similar to motorcycle gearboxes. They are put mainly on racing models, but in recent years they have also begun to be found on utility ATVs. They have a foot clutch or clutch with a lever on the steering wheel (in most cases it is), and a foot shifter. Manual transmission usually has 4 “forward” gears, neutral and reverse.
 Rare and mostly found in older models, but other variations can be found. For example - "automatic" with the ability to manually shift gears.
Manual ATVs are a little more difficult to drive (at least at first, until you get used to it), but you can more accurately select the appropriate mode. And vice versa: CVT "boxes" are much easier to operate, they are easy to master for a beginner who gets behind the wheel of an ATV for the first time. But on the other hand, with active driving along a route with variable difficulty, riding a CVT will be a little less convenient.
For example: you are driving on a flat packed dirt road on H and you see a large stretch of muddy road ahead with deep mud (or a steep hill, or bumps, or stones). You will have to come to a complete stop and shift to L, drive through mud, and when you get back on a dry road, come to a complete stop again and shift back to H. , like motorcycles, and a manual clutch lever on the handlebar on the left.
The foot lever device can be of two types:
The shift itself is carried out in the same way as on motorcycles:


When exactly to switch speeds up and down is determined by the tachometer, speed, road complexity, weight of the load taken and the characteristics of the ATV itself (power, weight).
CVT gearboxes are much more common on ATVs. The clutch in them does not need to be squeezed out, and the “mode” of driving forward is selected from two (most often) options: in high (suitable for driving on an easy route) or in low (for difficult sections, steep climbs and towing) gears.
An important difference from driving in a manual transmission: switching between L and H is carried out only when the ATV is completely stopped, with the brake applied. To select a mode, move the knob to the desired position. Switching between L and H on the go is impossible.
The rest of the gears - park, neutral and reverse - of course, are also included when the ATV is standing still.
Gears are transmission modes that allow you to adapt your ATV to different tasks and road conditions. Shifting increases traction or top speed.
In this article, we will tell you how to change gears correctly on ATVs with different types of transmission so as not to break anything and confidently overcome any routes.
The CVT is the most popular 4WD utility ATV.
The variator consists of two pulleys. A belt is stretched between them, which rotates along a larger or smaller radius as the engine speed changes. This ensures a smooth change in gear ratio. In fact, the same thing happens as when moving the gears in a manual transmission.
The principle of operation of the variatorThe variator is combined with the gearbox. The shift lever can be in five different positions:
L - downshift;
H - overdrive;
N - neutral;
P - parking lock;
R - reverse.
Downshifting allows the ATV to climb steep slopes, off-road or carry loads more easily and without harm to the CVT. In overdrive, the technique can develop maximum speed. It is recommended to use it for driving faster than 10 km/h.
There is no conventional clutch on an ATV with a CVT. Instead, a centrifugal automatic. Therefore, before each shift, be sure to come to a complete stop, apply the brakes and reduce the engine speed to idle.
To stop, just remove your finger from the throttle trigger - the ATV will quickly slow down and stay even in the H or L position until the driver again increases the engine speed.
For a long stop, it is better to switch to neutral. To prevent the vehicle from rolling away, you can apply a hand brake or a P gear.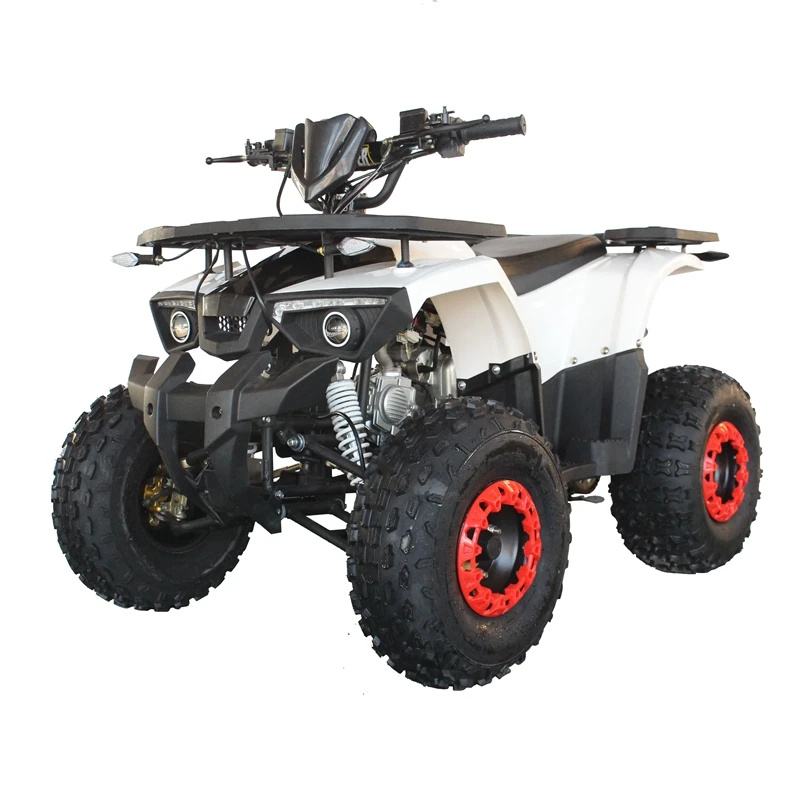
Manual transmission is commonly used on small displacement RWD ATVs. Structurally, it is similar to the transmission of a high-speed bicycle, only instead of sprockets there are gears. They are connected in different combinations depending on the selected gear.
In order not to break anything when changing gears, there is a clutch. This mechanism decouples the transmission from the engine and allows the gears to engage without load. To control the clutch there is a separate lever on the steering wheel.
On an ATV with a manual transmission, the gears are shifted by a lever located at the left footrest. How exactly depends on the specific model. Popular options:
N is a neutral gear, in which the vehicle will not go anywhere. R is reverse.
This is what a manual transmission looks like on an ATV0115
What is the difficulty. It can be difficult for a beginner to move off. If you release the clutch too quickly or add insufficient rpm, the engine will stall. If you give too much gas and drop the clutch, the vehicle will move with a jerk and may even jump out from under the rider.
What to do. At first, you can try to start without gas at all - just release the clutch smoothly and slowly. This will help you feel the moment when the ATV is ready to go and you need to increase the engine speed.
What is the difficulty. At first it is not obvious when to switch.
What to do. You can focus on the sensations. If vibration is felt, the ATV twitches and accelerates sluggishly, you need to switch down, and if the engine “roars”, up. Another option is to look at the speedometer.