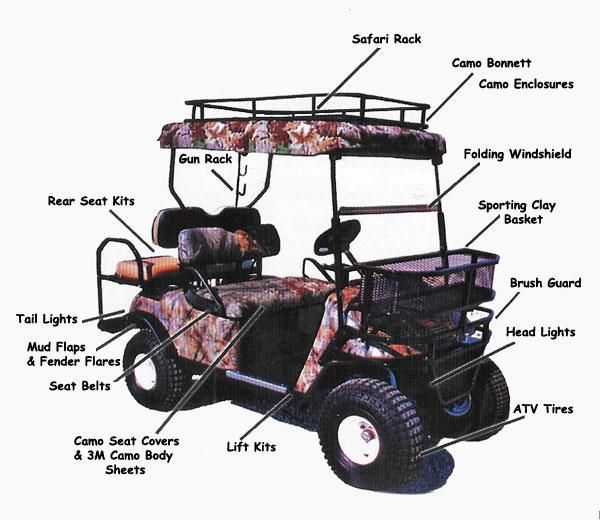
Replacing your golf cart engine is a lengthy process, and it’s something that will require a lot of careful steps to ensure that you get it right.
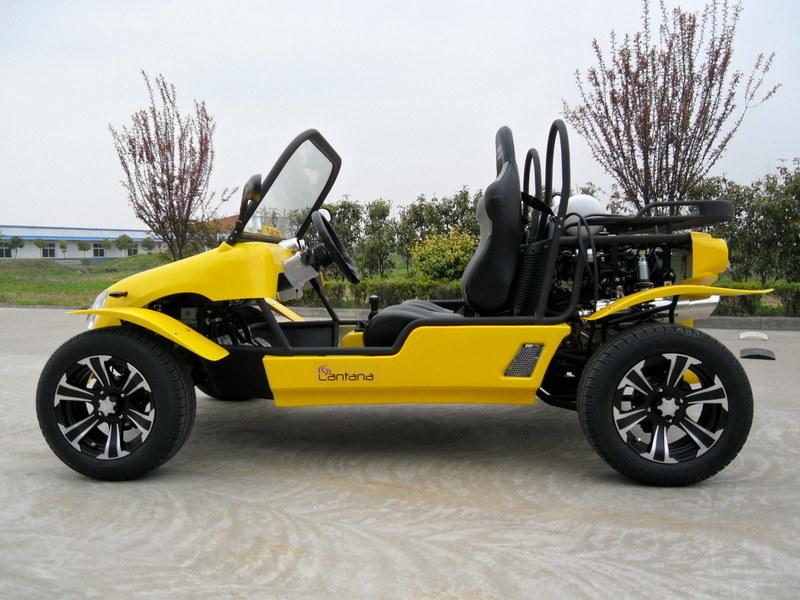
This complexity is greatly increased if you attempt to install a motorcycle engine in your golf cart instead of a standard golf cart engine.
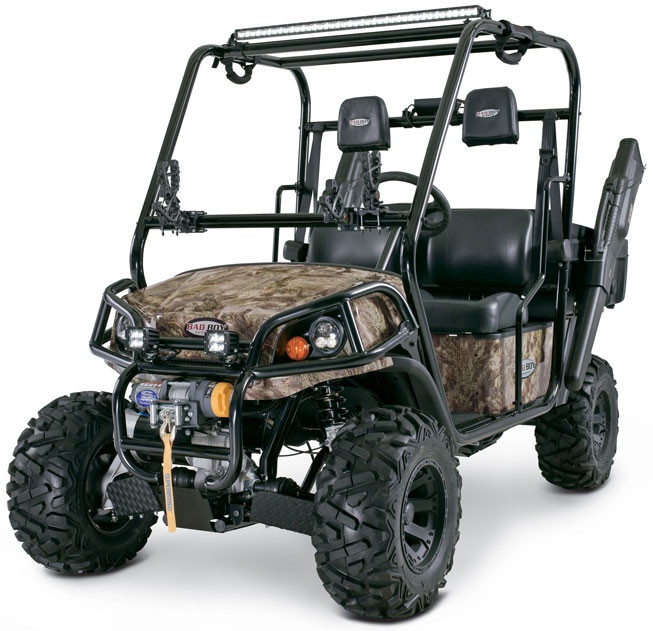
There are a few reasons that you may want to use a motorcycle engine instead of a standard golf cart option, including creating a more powerful golf cart.
For example, people who want to create a low-speed vehicle out of a standard golf cart need to add a motor that will allow it to reach the proper speeds.
Often, golf cart owners choose motorcycle engines because they have the type of compact power needed to reach these speeds but are also appropriately sized for your cart.
If you’re interested in this process, you need to read below to learn what steps need to be taken and what tools you’ll need to create a new and more powerful golf cart.
Make sure that you feel truly comfortable with these steps before you attempt them, as they can be tough for some people to do properly and may challenge you in ways that are unexpected and hard to understand.
How To Put A Motorcycle Engine In A Golf Cart
The steps involved with putting a motorcycle engine in a golf cart are fairly simple and include removing parts around the area where the engine is located, carefully removing the engine, and replacing it with a new one.
All of these steps are things that have to be handled carefully and should only be done if you feel confident working with engines in this way.
You also need to make sure that you fully understand how to hook up all of the elements of the engine and know how to sync it up to the vehicle smoothly and efficiently.
You’re going to need a handful of different tools that will help to make this process easier to handle and a few extra safety steps that you’ll perform before you start the engine replacement.
Taking these extra steps helps to ensure that you are protected and will eliminate the potential risk of damaging the cart, the engine, or yourself.
In the next section, we’ll discuss some of these tools and how you can use them to upgrade your engine in a way that makes sense.
Most of the tools that you’ll be using are quite easy to find at a car shop or even a carting dealer, where they may rent some tools to you as needed.
If you find this process to be too much to handle, or you don’t feel comfortable with any part of it, it is important to contact a professional to get help.
Doing so will help to cut back on the challenges that may occur otherwise and will provide you with the long-term help necessary to ensure your cart is in great shape.
Remember, too, that you need to identify a motorcycle engine that is the proper size for your cart, including the full CC rating of the engine and other elements.
We’ll give you some suggestions on how to approach this step and different ways that you can give yourself a little boost in this process to ensure that it goes as smoothly as possible for your needs.
Tools You’ll Need For This Process
The tools that you’ll need to add a motorcycle engine to your golf cart are fairly simple in design, inexpensive in most cases, and easy to find in most areas.
You’ll probably need to seek out some of these items before you start because you may not have them in your garage already.
However, there are others that the average cart owner probably has to perform simple maintenance steps, such as removing or replacing panels from your cart.
The following items are things that you need to seek out and identify for your needs and should be quite simple for you to find if you know where to seek them out in your neighborhood or online.
All of these tools should be fairly easy for most people to find and may even already be in your garage.
Few of the tools or items that you need to collect are specialized for this process and can be used in many different mechanical projects.
However, there are a handful of items that you’ll need to seek out to get the best results, specifically screws, nuts, and bolts.
Often, these may be included with the motorcycle engine that you purchase to replace your current engine.
However, many engines may have generalized connectors and don’t need this kind of specialized attention.
Make sure that you check with your dealer to see what you need to buy and to ensure that you don’t purchase anything you don’t need.
Doing so will help to prevent you from spending too much money on this process and will also help streamline everything to ensure you get it done properly.
Step One: Remove Parts To Get To Your Engine
There are a handful of different parts around your cart engine that must be carefully removed to get access to the interior of the cart.
These parts are pretty standard on most golf cart models but may vary in small ways, such as their exact location and their potential impact on your engine.
Take the time to examine where your engine is located, as some may be located more towards the front of the cart.
This location is quite rare, though, as most golf carts place their engine at the rear for more power and easier control.
Typically, you’ll see a front-mounted engine in older carts or those that haven’t been upgraded since they were initially purchased.
The steps that you’ll need to take in order to perform this removal and replacement include the following simple ideas:
If you removed the rear axle from your cart (which you’ll do in electric carts), then you’ve already removed the engine and the battery.
However, an engine in a gas-powered golf cart is more complex and larger, and it’s typically a bit more difficult to remove.
You should know pretty quickly if you have an electric or gas-powered cart, so make sure that you pay attention to this facet before you begin this process.
You also need to make sure that you choose the proper-sized tools and that everything is carefully measured out and prepared for your needs.
Just as importantly, it is critical to take the time to prepare for this process by laying down a blanket or a sheet that you can lie on while you work.
This sheet will not only help provide you with some extra support, but it will also collect any grease or parts that fall off as you work.
In this way, it should be simpler to carefully remove your engine without losing parts and spending half of the day looking for them before you finish.
Remove the golf cart’s old engine.
If the golf cart is electric, the engine will most likely be integrated into the rear axle.
In these cases, you will remove the rear axle and engine as a unit.
Step Two: Remove The Old Engine
At this point, you should be ready to take out your old engine and replace it with your new motorcycle engine, giving your cart more power.
That said, the steps here aren’t something that you should rush through or think that you understand without a little research.
Though we do believe most golf cart owners should be able to handle this process without much difficulty, we also don’t want people to do things that make them uncomfortable.
Make sure that you fully understand this process and that you know how to operate your tools, as you’ll need a moderate level of skill with them to perform the following steps properly.
Remember that if you are removing the engine from your electric golf cart, you don’t need to take these steps because the rear axle is usually where your electric engine is located.
By removing the rear axle before you take any more steps, you have already removed your electric engine.
Remember that some electric golf carts may not be capable of this type of upgrade because you’ll likely be replacing that engine with a gas-powered motorcycle engine.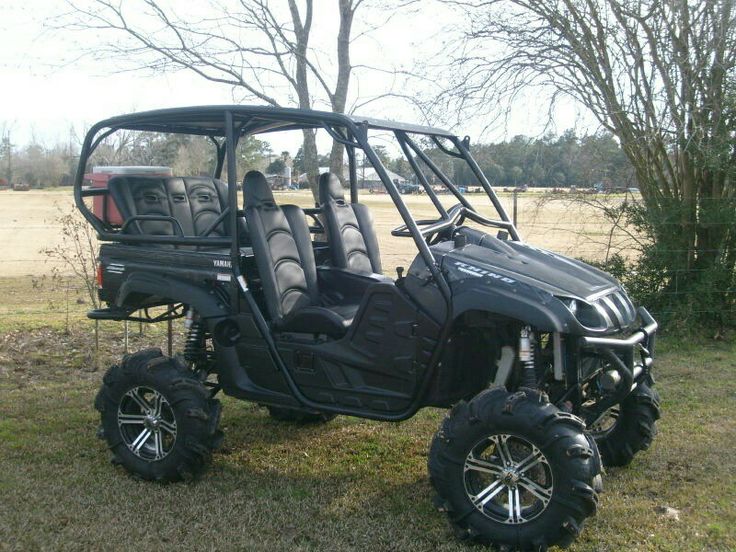
Though there are some electric motorcycle engines, they are fairly rare and don’t provide the same type of power as a gas-powered option.
Therefore, you might want to contact a golf cart mechanic or the manufacturer of your model before you attempt to replace an electric engine with a gas-powered one on your cart.
Step Three: Add The New Engine
At this point, you’ll be ready to add your new engine to your golf cart and get it operating as smoothly as possible.
Remember, though, that you’re adding an entirely new engine to your cart and that you’ll need to adjust its operation to ensure it runs properly.
The 17-step process outlined below will do the trick.

Do all of those parts and terms make sense to you, or do you feel confused reading any of them and aren’t sure what they mean?
If so, then you should hire somebody to install your new cart engine for you to ensure that it goes smoothly.
So heres one I've been thinking about weve got a 99 EZGO stock everything, and a almost new engine from a Polaris 800 ATV, and the chassis with the suspension, all the stuff I'll need to do the engine conversion with the EZGO golf cart. So what about putting a Polaris ATV engine in the ezgo and maby along with a "beefed up" drive chain ( don't really know what im going to do about that at the moment). Also if anyone has some do's and don't of stretching a ezgo please share.....
Thanks Dave
PS all I've done mostly is customizing carts, like paint and ascessories...so this will be a new area for me..
sure, clutch and all i would say, the rearend will handle it.
Any suggestions for a clutch, because the atv was a auto. . just a clutch that would be on the fourwheeler stock??
need to know the shaft size of the 800...
and i thought your dad made his own limos???? by cutting and lengthing the ezgos
Nah we've been getting some guy from Boulder city to Do them, but I'm interested in starting to do some myself. ...we mostly do body,roll bars,Crome,diamond plate, and things like that..not really a frame-up builder. And about the shaft size I'll let you know soon, I've done gone home for the day.
up to 25 km/h
2 seats
Gel or LifePo4
up to 80 km
Urbis is a universal platform and a unique Russian-designed chassis. At the moment, the platform is undergoing a development stage, and is already being produced in the format of golf carts from two to eight seats. In the second half of 2022, city electric vehicles with a cab for year-round operation and off-road buggies will be released on this chassis.
Passenger electric car "Concordia Urbis" is used in closed areas, such as park areas, hotel complexes, cottage settlements.
Domestic electric car has the richest package. It is equipped with headlights with low and high beam switching, taillights, driving shelter for passengers from wind and precipitation, built-in charger, seat belts, charger for gadgets, a full instrument panel and 14-inch car wheels already in the basic package.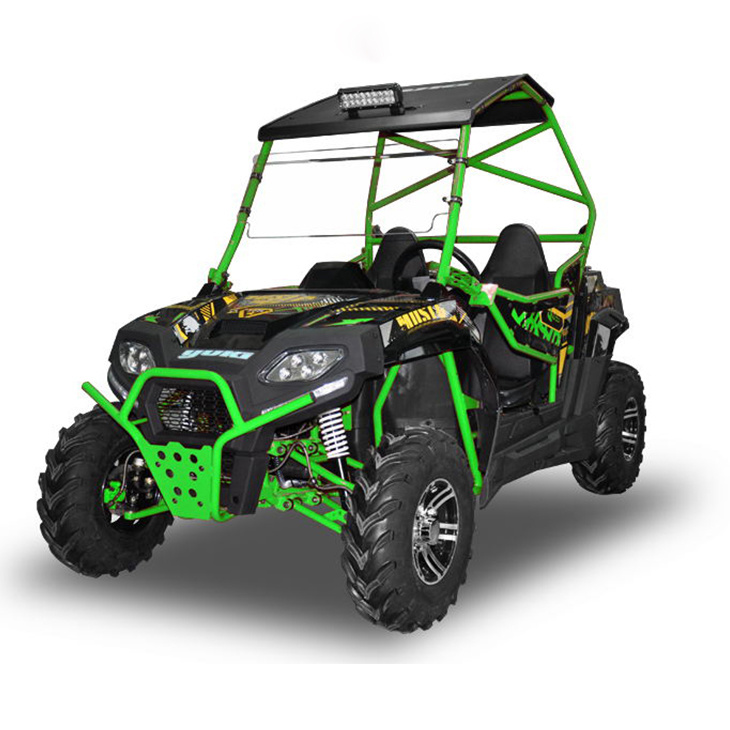
The ability to install winter, summer and off-road tires, allows you to move on roads with any surface and at any time of the year. A powerful brushless motor and efficient hydraulic brakes allow you to use the golf cart even on the most difficult terrain. As an option, it is proposed to adapt the machine to work at sub-zero temperatures and work in mountainous areas with extreme ascents and descents.
Producer LLC "Concordia", Russia
Warranty 36 months.
SPECIFICATIONS
BASIC EQUIPMENT
One-piece windshield, running shelter from wind and precipitation, roof with handles painted in body color, moisture-resistant seats with armrests, adjustable rear-view mirrors, lighting and signaling devices, instrument panel with battery charge indicator, speedometer and odometer, reverse horn, horn, 2-point seat belts, USB port, glove box, instruction manual in Russian, service book.
OPTIONS (not included in the price)
Engine 5, 7.5 or 10 kW, winter package, audio package, premium package, industrial package, underbody and interior LED lighting, parking sensors, branding, airbrushing.
It is possible to purchase electric cars and golf carts in other configurations and with other technical characteristics, please contact our managers for advice.
You can buy a Concordia Urbis 2 SUPERCARGO golf cart by clicking the "buy" button or by calling our managers. We make delivery in Moscow and Moscow Region by our own transport. Delivery of golf carts to Sochi, Crimea and other regions of Russia and the CIS by TC. An electric car is the best means of transportation in ecologically clean areas. All electric vehicles come with a manufacturer's warranty.
home
Articles
What do you need to drive and register a golf cart?
When buying golf carts, there are often questions related to their use and registration. How to arrange transport? Do you need a driver's license for a golf cart? Where can the equipment be used?
Within the framework of this article, we will briefly analyze the legal aspects regarding electric cars. The information is addressed to existing and future owners of such machines.
Golf cart refers to off-road self-propelled vehicles with an electric motor. To drive a vehicle that develops a speed of less than 50 km/h, as well as equipped with an engine with a power of more than 4 kW, category “A” license is required.
There are four tolerance classes for each type of equipment.
 Functional off-road vehicles with more than 8 passenger seats.
 To drive other cars, the rights of other categories are required.
| Equipment type | Power unit power | Category of rights |
|---|---|---|
| On wheels | up to 25.7 kW | IN |
| On wheels | 25.7–110.3 kW | WITH |
| On wheels | over 110.3 kW | D |
| On caterpillar | over 25.7 kW | E |
| Self-propelled, focused on agricultural needs | F |
Machines with motors up to 4 kW are not included in this gradation.
Requirements for registration of electric vehicles have a similar gradation with the rights to drive. If the machine is equipped with a motor with a power of less than 4 kW, it can not be registered.
The operation of golf carts within the playing field is not regulated by the current legislation. The driver has the right to use the car, observing the safety precautions and recommendations of the manufacturer.
Driving a golf cart without a driver's license and not registering it with the traffic police is allowed if the motor of an electric car is weaker than 4 kW. The only requirement for the driver is the presence of specialized skills.
The Golf-Store will help you buy golf carts for private and commercial use. Functional machines from the world's leading manufacturers are on sale. Most models are equipped with low-power motors and do not require additional documentation.
Along with electric vehicles are implemented:
There are many accessories available: smart sensors, starting mats, floor and mortise holes.