Written by Brent Huntley in ATVs
Buying new tires for your ATV or UTV can be a frustrating process. There are so many options. You have to figure out the size you want (see why some people like different sized tires in the front), pick a pattern, knob size and tread depth. While I was working on our awesome guide to picking the right tires for your ATV, the thought came to me as to whether you can use car or other vehicle tires on your ATV and whether that might save you some money or make it better for street use. With that thought in mind, I started doing some research to see if it was possible.
Can you use car tires and wheels on an ATV? Technically, you could, with a lot of work and modifications or some serious research and hunting, put car tires on an ATV, but practically, you cannot use car tires interchangeably on your ATV.
The biggest issue with trying to put car tires on an ATV is that most wheels simply do not fit. The lug nuts are not arranged in the same location on car wheels as ATV wheels so you cannot fit the wheel on without making modifications.
The reason most people wonder if they can put car tires on their ATV is to save money. However, the desire to save money is usually coupled with a specific goal as well. Most of the time, it is someone wanting to make their ATV street legal or to just get tires that are not going to wear out driving on the streets. Other times where someone may want to save money by using car tires are when they need a second pair of tires for special conditions, like studded tires, or not wanting to wear out expensive tires for frequent, but mundane, use. The problem is that it is hard to actually save money using car tires because the modifications can take a lot of work or extra money such that it is usually going to be easier and cheaper just to get ATV tires that will fit your goal.
If you really want to put car tires/wheels on your ATV, there are some ways to do it. If you use any of these methods, you will want to check your clearances first to make sure the tire will actually fit. You want to make sure the tires are going to fit underneath your fenders and that you aren’t going to cause any issues to your suspension as a starting point.
Probably the easiest way to make car wheels work on your ATV to buy spacers, on ebay or somewhere else, that convert the bolt pattern on the car wheels to that of your ATV.
If you get some decent luck, you can find some car tires that will fit on your ATV wheels. This can be a bit of a pain as you will have to mount the tire yourself, which is fine if you know what you are doing, but I wouldn’t recommend it unless you already know what you are getting into.
If you are willing to do a bit of hunting or get really lucky, there are certain car models that have wheels that will fit some ATV models. I have never tried these, but I have heard that the wheels from some old Mustangs, Civics, Geos, 250X or Escorts will fit some ATVs. You will want to check the bolt pattern for your specific ATV, but many ATVs have a 4×110 or 4×100 bolt pattern so those are the patterns you would usually look for.
If you are super good with tools, you can manufacture your own spacers, like the guy in the video below. I have no advise whatsoever on this as it is over my head. I would happy spend the money to not have to do this.
https://www.youtube.com/watch?v=uK-P2D28obM
If your goal is to just get a good tire for riding on paved streets and don’t want to deal with the hassle of one of the above options, there are some great ATV tires that are designed for street use. A great starting point is to look over our guide to ATV tires as there is a bit in there about street tires.
The big things you will get out of a street tire is better grip and traction on paved surfaces and thicker rubber that will last longer. The easiest way to see if the tires are good for paved streets, just check to see if the tires are DOT-approved.
Below are some of our favorite street tires:
Finally, if you are working on getting your ATV street legal, we have some great material that will help get you there. First, you will want to check out our street-legal guide that has specific information on whether and how you can get street legal in your state. Next, a look at our helpful guide to making your ATV street legal is worth the look to explore what else you need to get done.
My New Favorite Accessory for Winter Riding
Over the past several months, as the weather has gotten cooler, I have been testing out the Venustas Heated Vest for my cold-weather photography. I wrote all about it over at Photography &...
Continue Reading
link to How To Use An ATV SpreaderHow To Use An ATV Spreader
One of the greatest things about summer is yard work. As the heat and humidity rise, so do the plants and flowers. The advent of technology has made seeding and fertilizing, a job that used to...
Continue Reading
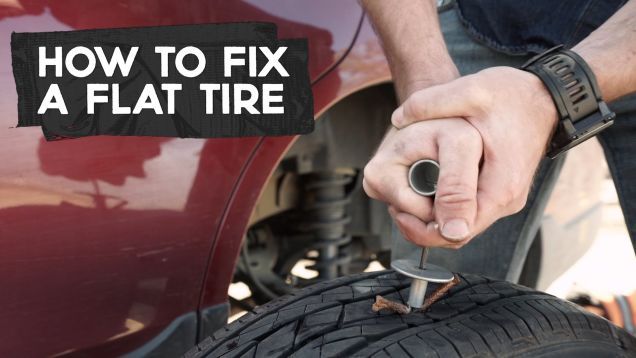
Changing the tire on your ATV or side by side is a pretty straight forward process. There are some specialty tools that can make the job easier, but you can also accomplish a tire change on your own with some cool little tricks.
The hardest part about mounting a tire is getting the old tire off the rim and the new tires on. There’s a couple ways to go about this and some tips to make your life easier. Balancing the ATV tire is really only necessary if you’ll be getting up to speeds over 45 – 50 mph.
Here’s the steps you’ll use to remove the old tire and mount the new tire, don’t worry I’ll go into more detail on how to do each of these step by step.
Always start with safety when performing maintenance on your machine.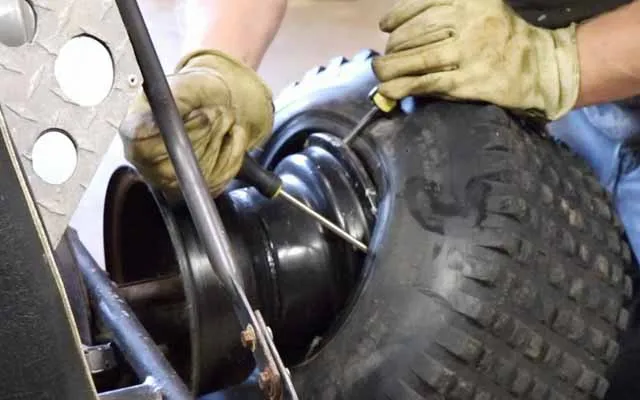 It’s best practice to wear gloves and eye protection when working on your quad.
First off, get the wheel off the quad and deflate the tire. It’s easier is loosen the lugs a little bit before you jack the quad up. Loosen and remove the lugs in a criss-cross pattern, the same way you would install them. Once you have the wheel off the ATV it’s time to deflate the tire for removal.
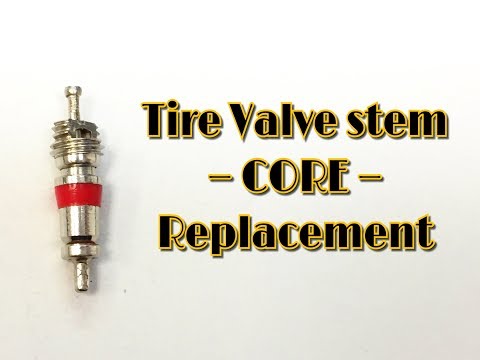
To deflate the tire, remove the cap and release all the air in the tire. Most tire pressure gauges will have a little notch on one side, that you can use to push in on the valve stem to release the air in the tire.
Or you could always use a screw driver or punch tool, basically you just need to push down on the valve stem to release the air somehow. Once all the air is released from the tire, you can use a valve remover tool to get the valve cores out.
Here is a link to a Tire Valve Stem Tool Remover & Installation Kit on Amazon. This kit has everything you need to deal with the valve cores of the tires. I highly recommend getting a tool like this if you ever plan on doing any type of maintenance to your tires.
You can try to remove the cores yourself with a wrench or something similar, but that option usually leads to damaging the valve cores beyond reuse. In fact, I’ve never seen this done successfully without a valve stem removal tool.
Once the tire has been deflated, it’s time to break the bead seal. This is sometimes the most difficult part of the entire process because the bead is set into the rim a lot more firmly on off-road tires than it is on car tires.
And to top it off, a lot of times there is some sort of bead sealer on the bead to keep the tire from popping off.
If you plan on changing a lot of tires, I suggest looking into getting a tire changer tool. This PowerLift Manual Tire Changer Base on Amazon is only about 55 bucks and makes this step so much easier. If you don’t want to spend the money, that’s ok, this can be done with basic garage tools as well.
A popular option to break the bead is to put the tire on a piece of plywood, or something so the tire doesn’t dig into the dirt.
Then place a jack on the tire near the bead, then simply jack up into something heavy like a truck bumper or hitch.
Repeat this process around the tire on both sides in places where the bead is till set.
Or you could build your own homemade bead breaker with a couple 2x4s like in this picture here.
I would use a chain or something connecting to a piece of wood underneath the tire instead of a car as leverage, but that’s the fun of doing it yourself, use your imagination.
The whole goal of this step is to get the bead off the rim so you can remove the tire.
However inventive you’d like to get is up to you. I’ve seen people use a giant clamp to pop the bead off the rim before. You could use two pieces of 2×4 on each side of the tire and a ratchet strap to pull them together to press the tire off the rim.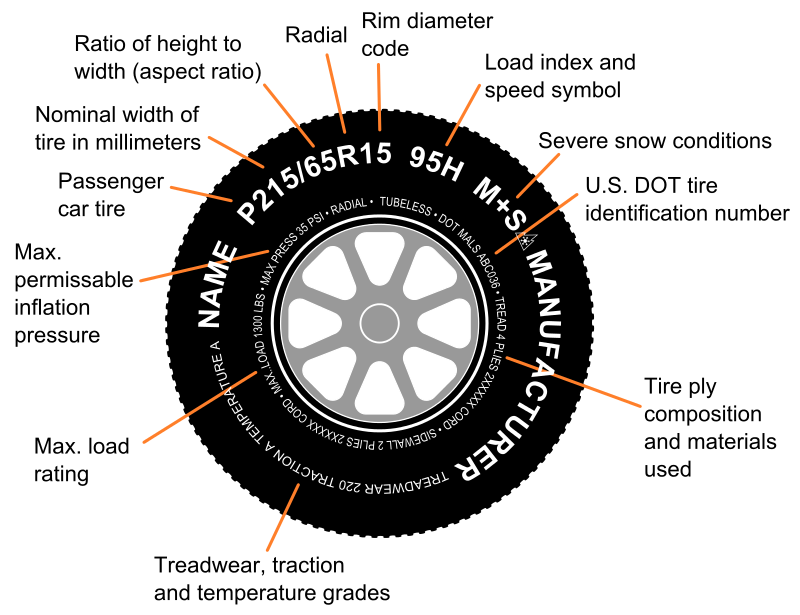
Now that you’ve got the bead of the tire unseated from the rim, it’s time to get the whole tire off the rim. This is sometimes called peeling the tire off the rim.
You’re going to want to take extra special care to peel the tire off the short side of the rim.
You can find the short side of the rim by looking at the depth on both sides of the wheel. The short side has a shallower depth and will be the easiest side to pull the tire off on.
The best tool for this step is a set of tire spoons or a tire changing tool set, like this Fasmov Tire Iron Tire Changing Tool Set. If you don’t have one of these, not to worry, they’re pretty cheap to buy a set, or you could just use a couple pry bars or something similar instead.
I would advise against a screw driver though, the larger ones may work pretty good, but be extra careful not to damage the tire or rim. Well, I guess you can damage your old throw away tires, but you need to do this later on to put the new tires on too.
Start by pushing the tire down into the open area near the rim. Use your tire tool or pry bar to pull the tire up over the rim. It’s best to use the the tool like a lever, sticking the tool down so that just a piece is under the tire and pressing down to pop it over the rim.
Hold that piece of tire over the rim and use the tire tool piece with a lip to work your way around popping the rest of the tire over the rim. Like you see in the picture above. It’s easiest when you use all three tools in the kit because the middle tool will get freed up with each new section of tire you pop over the rim.
Eventually you’ll get to a point where you can just pull the tire off by hand. Then you’ll use one of the tire tools to simply pop the tire off the other side of the rim.
Now that you’ve got the old tire off, you’re going to want to clean the lip of the rim where new tire bead will sit. It’s important to clean this area really well to be sure you get a good fit with the new tire.
You won’t always need to use a bead sealer, but will always want to clean the lip of the rim. You will only need to use a bead sealer if you think the tire bead won’t seal well enough on the rim on it’s own.
This is usually only a concern if the tire is real beat up around the bead or if the rim is bent up and gashed to the point where the tire won’t seal on the rim.
If you can get away with not using a bead sealer, than I wouldn’t use it. It makes it harder to remove the tires next time you do a tire change anyways.
You will have to clean and lube the tire bead to help with mounting the tire on the rim. To clean it, just make sure the bead is free of debris and gunk. Usually a new tire won’t have dried up sealer or other stuff in the bead yet.
After you’ve made sure the tire bead is clean, it’s time to lube it up and put the tire on the rim. They do sell nice and fancy expensive tire lubes, but I’ve found that some soapy water works just as good.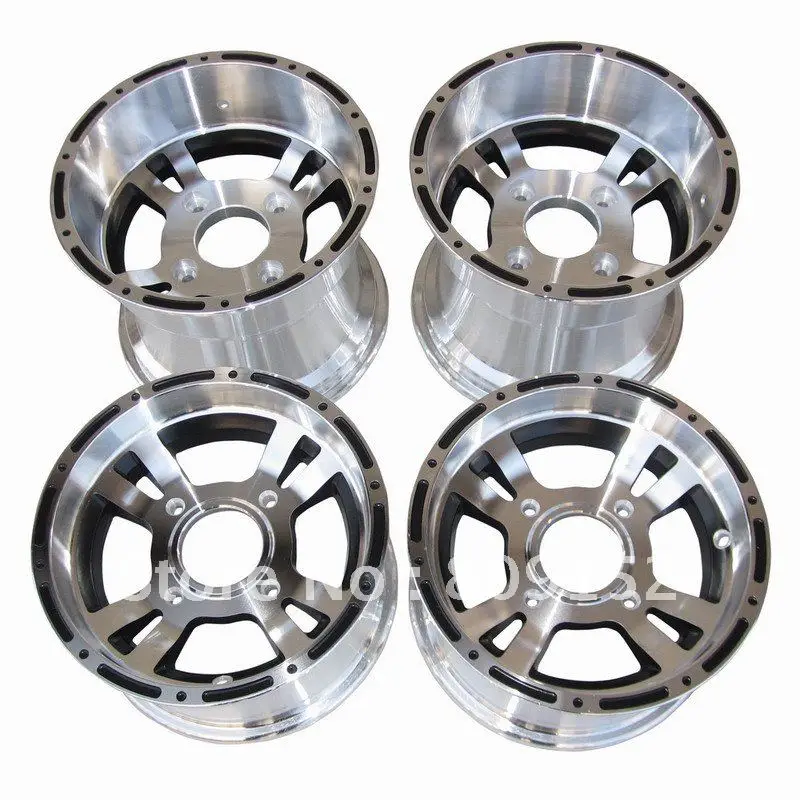 Lube both sides of the bead, inner and outer, if you don’t, it’s going to be really hard to get the tire on the rim.
Now’s a good time to check tire direction. Most ATV and UTV tires will not be directional, but they do make tires that should only be put on a certain way. This is because the tires is designed with groves facing a certain direction to help with traction.
You could look at the side wall of the tire for an arrow, or just decide for yourself by looking at the tread which direction you want the tire to be mounted on the rim.
Now to get the tire on the rim, remember to start with the shallow side of the rim. Place the rim on the ground, on something that will keep it from sliding away from you, with the shallow side facing up. Now poke the bead part of the tire into the shallow side of the rim and press down on the tire until it pops onto the rim.
Ok, you’ve popped the tire onto the rim, now you need to get it seated and the bead lined up correctly. You can kneel down on one section of the tire and use the tire tool or pry bar to seat the rest of the tire into place, as you can see in the picture.
Try using your knee to keep the tire from popping back up on the other end, your free hand will help with this as well. After you get to a little more than half of the tire pryed onto the rim, it will be easy to just push it the rest of the way on.
Now that the new tire is on the rim, it’s time to set the beads on both sides of the tire. If you have a small portable air compressor for airing up tires, that might not be enough to seat the beads.
You can try inflating the tire with the core out, to help you get more air in the tire more quickly to seat the beads. Then once the beads are seated, put the cores, or valve stems in and inflate the tire.
You will usually need a higher powered air compressor to seat the beads. The even make special designed Tire Seating Blaster Inflator Air Compressors made specifically with enough power to seat the bead of the tire.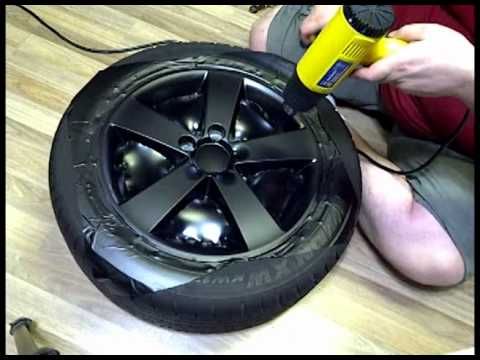 That’s because a compact portable air compressor doesn’t have enough power to do it.
Another popular option you could try is to spray starter fluid into the tire and light it with a lighter. The starter fluid burns all the air out of the tire and pulls the bead into place. To legally cover myself I am going to say to never do that. But, I’ve used this method plenty of times and it works like a charm.
Then once the bead is set, put the core back in and inflate the tire like you normally would using any air compressor you have. If you plan on riding at speeds over 35 mph, it’s a good idea to balance the tires at this point.
Check out my How To Balance ATV Tires article for the step by step instructions on how to balance your tires.
Sharing is caring!
Main Page→→
When choosing wheels for an ATV, you, unlike motorcycle wheels, will not depend on the size prescribed by the manufacturer of the ATV. The size and material of the disk here can be changed depending on the needs. Before talking about which ATV rims are best suited to your riding style, it is worth recalling the marking of ATV and UTV rims.
ATV disc marking
Let's demonstrate how to read the disc markings using a specific example: for example, the disc for an ATV has the designations 8x8, 3+5, 4/110. So its diameter, which is indicated in the first digit, is 8 inches. The second number is the inner diameter of the tire, it must match the diameter of the rim.
The next two digits are the offset of the disk, which shows the distance from the mating side of the disk and its conditional middle. At the same time, the marking of the disk on the ATV shows the displacement of the inner and outer sides, the difference between which determines the negative, positive or zero offset of the disk. In our case, the disk overhang is negative and is -2 (3-5=-2). The next figure shows the number of holes in the disc, in our example there are 4.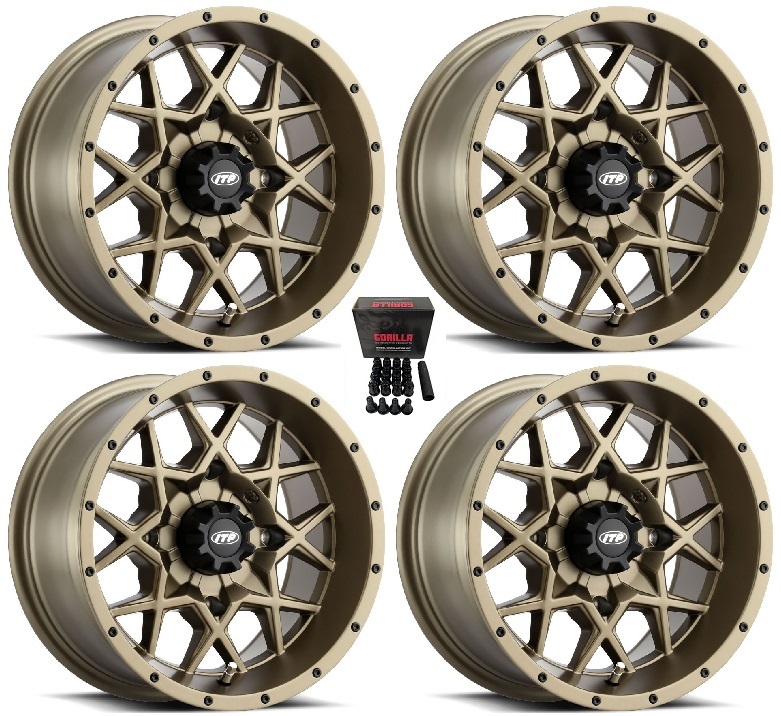 The last designation is the distance between the holes, measured in mm., In our case it is 110 mm.
Choose wheels for ATV
Alloy wheels for ATV have a number of advantages over stamped ones. Let's talk about them so that you can understand whether you need to focus on these pluses or leave stamping on an ATV more appropriate.
First, the alloy wheels on the ATV can be chosen wider than the standard ones. This, in turn, allows you to install non-standard tires on an ATV that will not get up "donut". On alloy rims, a wide ATV tire will increase the contact patch, which means flotation will increase. However, not only alloy wheels on an ATV solve the problem of increasing the wheel track - spacers for disks are also used for this.
The second advantage for which alloy wheels are chosen for ATVs is the reduction in the weight of the unsprung part of the ATV. ATV races are held in a variety of terrain, including relatively flat ground where speed is important and casting will have a distinct advantage here. In other cases, their disadvantage is emphasized - fragility. However, some manufacturers of ATV wheels, such as ITP, give a lifetime warranty on casting, the very fact of which speaks of great confidence in their products and makes them reconsider their attitude towards alloy wheels.
The third reason, which, oddly enough, also matters is the aesthetic side. Despite the fact that the ATV pursues purely utilitarian or sporting goals, many people like to combine functionality and attractive appearance, which can be achieved by choosing an ATV casting.
In addition, many ATV alloy wheels come with beadlocks, and the latter are simply indispensable when driving on flat tires. As you know, with a decrease in pressure, which is done to overcome off-road, the tires have a tendency to disassemble. The easiest and most reliable way to keep the tire on the rim is to use beadlocks that attach the tire to the rim. Badlocks are a steel ring with holes, in place and in number they are divided into two types: one-sided and two-sided.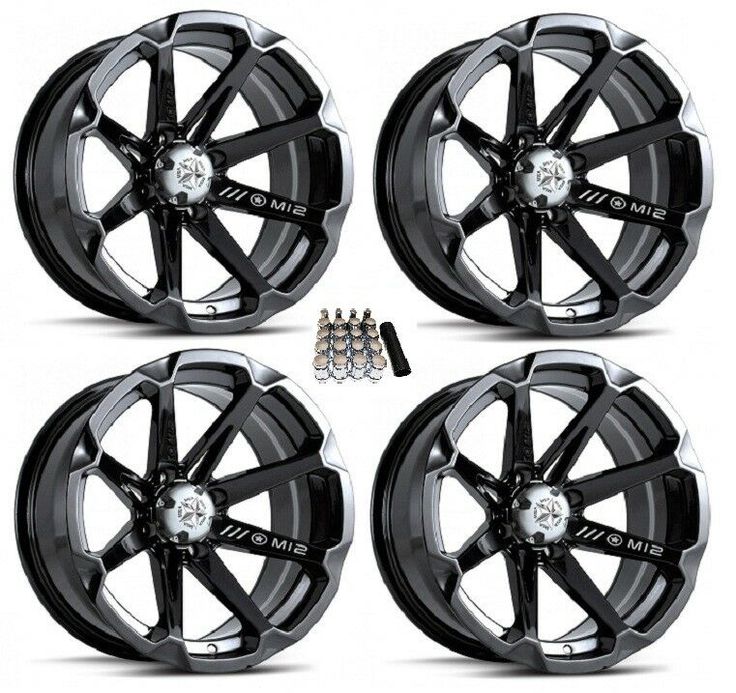 Moreover, it is usually enough to install a one-sided beadlock on a cast wheel for an ATV, since the load on the inside of the wheel is not large. Only hard off road on fully flat tires requires the installation of reversible beadlocks.
Of course, the use of beadlocks imposes certain restrictions: the speed, as a rule, should not exceed 60 km/h, it becomes much more difficult to balance the wheels with beadlocks, in addition, it is necessary to constantly monitor their condition - clean, tighten. Be that as it may, beadlocks have been produced since the 1980s and Off Road on an ATV is rarely done without. The cast rim and beadlock are welded on, the outer edge of the tire is not put on the rim, but is pressed with a beadlock ring, fixed with a large number of bolts. The inner edge of the tire, if the beadlock is one-sided, is kept as usual on the hump (annular protrusions at the edge of the disk).
ATV rim manufacturers
ATVs are nowhere near the popularity of cars and there aren't as many rim manufacturers here.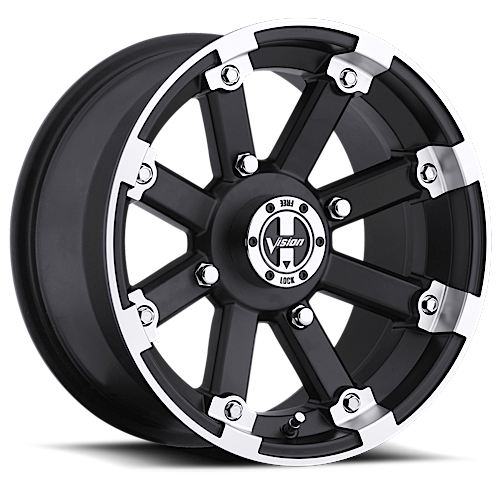 They are mainly represented by companies that produce off-road wheels for off-road. One of the leaders in the manufacture of alloy wheels for ATVs is the Canadian company ITP, which is famous for its excellent design and excellent durability of its products. The manufacturer is also interesting for its development of System Six, which allows you to select and replace the finish for the disk. ITP aluminum rims have a replaceable center insert, so if the old one is tired or out of order, you can choose another one in a different color scheme.
Also popular are Black Rock ATV rims, which come with a negative offset to increase road tread. Black Rock discs have a wide variety of colors, among the company's products there are alloy wheels for ATVs with beadlocks.
Well, of course, wheels for an ATV can be presented by a native manufacturer who manufactures it himself, or trusts a major player in the market. In addition, in extreme cases, car wheels of suitable size can also be installed on an ATV, if, of course, spacers are used.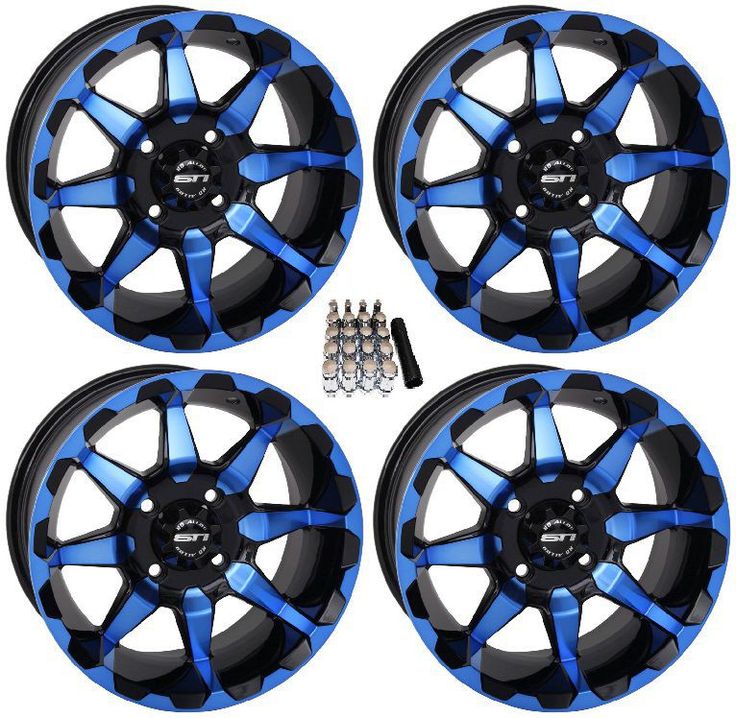
All tires and wheels for ATVs are broadly divided into two large groups: utility and sports. The former are designed for harsh operating conditions on any type of surface for a long time, and the latter are especially durable for high-speed driving on rather tough sports tracks.
We are more interested in utility tires. In order to maximize the pleasure of a trip along forest paths, mud, sand, water, snow and swamps, you need to initially take care of the most important thing - rubber suitable for each type of surface. Since each set of tires is quite expensive, you need to think about where you plan to ride most often and purchase tires suitable for these surfaces. Mud tires will get stuck in the sand, and sand tires won't work on the trail. Designers have been puzzling over the creation of the most versatile tires for many years, but so far, this is just a dream. True, universal tires have already been created that will ideally prove themselves on different surfaces, but for special cases you will have to fork out and buy a special set of tires.
Since ATV tires are subjected to significant stress during operation, they must be as strong as possible. Low pressure radial tubeless tires do this best. They are made in such a way that the carcass cord goes from one side to the other without crossing the fibers, and the outside of the shell is covered with a dense cord. These tires have excellent traction and do not lose contact with the surface when cornering. These tires are comfortable to use and easy to maintain.
Bias tires respectively have a diagonal design and are more suitable for soft surfaces such as mud.
Low tire pressure allows you to increase the contact patch with the surface, improving grip and increasing the quad's flotation. Depending on what surface you plan to ride on, for a harder surface, you need to reduce the contact patch by inflating the tire more, and for a soft one, increase it by lowering the tire pressure.
Tire sizes vary in both diameter and width, another indicator is the size of the rim on which these tires are mounted. For example, 25×8-12″ means that the tire is 25 inches in diameter, 8 inches wide and fits on a 12 inch rim. Moreover, in order to increase traction, it is necessary to install tires at the rear wider than at the front, so that the rear wheels do not fall into the front track, but lay a new one with a larger area of contact with the surface. Typically, utility ATVs are fitted with 25-26 inch tires and this is optimal. But some fans want to put more tires, for example, 27-28 inches. Unfortunately, the design of many quadras does not allow this. To install such tires, you need to tune the car, lift it, and this does not always have a good effect on driving performance.
Tires mounted on 12" or 14" rims. 12" is good for medium conditions and soft trails, and 14" for harder.
The different tread patterns are due to different tire applications. Tires with high, medium-hard directional lugs have excellent self-cleaning properties and are suitable for difficult trails.