Posted: January 30, 2013 in GMC truck, snowplowing
Tags: GMC Square-body pickups, Old Trucks, Tire chains
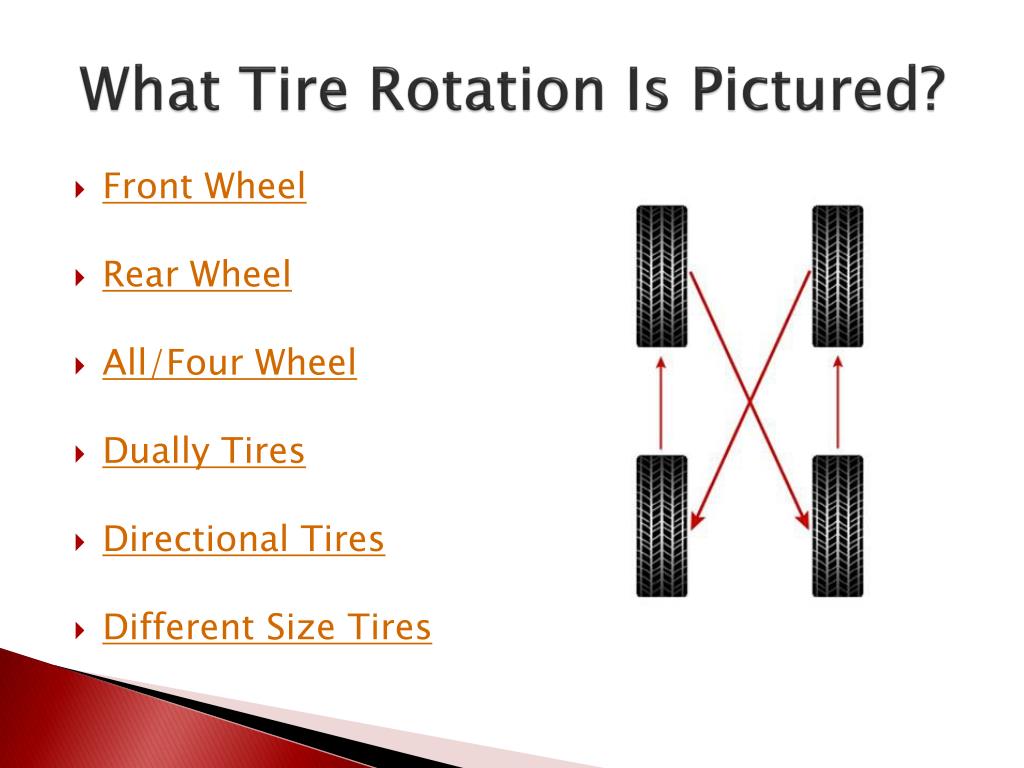
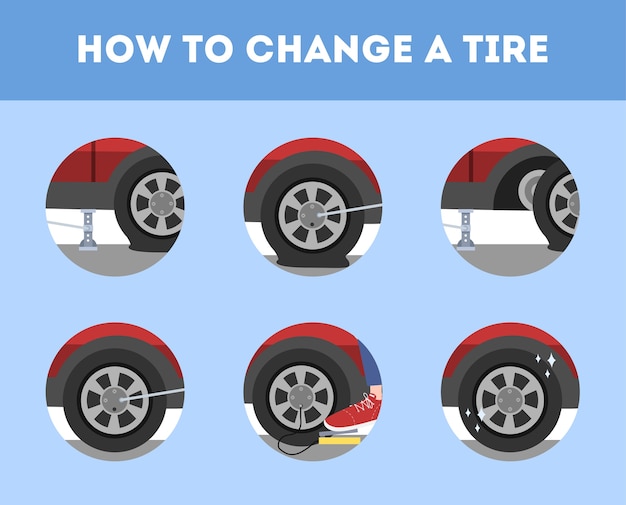
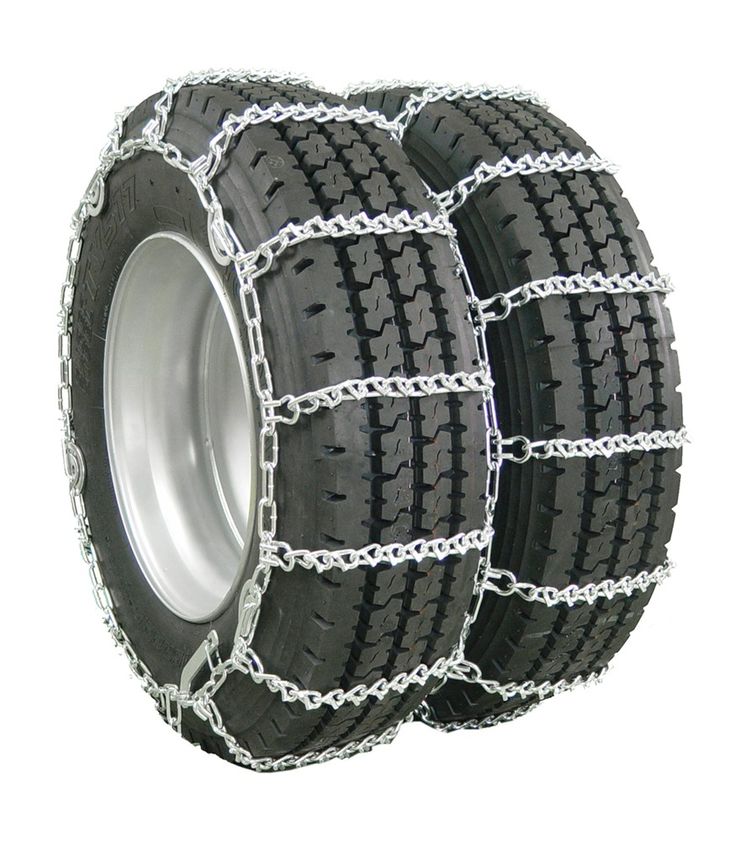
Welcome to the first in a new series of instructional, and we hope, inspirational “How To” articles here at Cool McCool’s Garage. Todays lesson is “How to install tire chains on your dually”, or, “Miserable Jobs, 101”. Note that we’re talking here about triple row chains, not those wimpy, girly man single chain sets you could throw on in the dark, in a blizzard, in a foot of snow. No sir, these are a MANS tire chains! Please forgive the lack of pictures of the first few steps, they’re really self explanatory.
First, gather your supplies. You’ll need the tire chains, a jack, a screwdriver, a large prybar, some tarp straps, a come-a-long, some chain binders, extra chain, a hoist, a floor jack, and a colorful vocabulary of “repair words.” Also, it’s important to pick a day when the weather is bad, so as to prepare you for what you’ll be in for when you REALLY need to put them on.
Ready? Lets get started!
Step 1: Get your tire chains out of the box they were shipped in. They will be in separate bags, so as to prevent them from getting tangled during shipping. Don’t worry, they’ll still be tangled inside their respective bags, so you’ll still get to unsnarl and untangle the heavy chains. It’s like a Rubik’s cube that weighs 50 lbs.
Step 2. Throw the chains over the tire(s) with the hooks on the cross links pointing up. This is important to keep the hooks from tearing the hell out of the side walls of your tires as you clank and vibrate down the road.
Step 3. Repeat step 2 about a dozen times, because the inside dual chain will, I guarantee, fall in between the duals, wedging itself in so hard, by gravity alone, that you’ll be nearly unable to get it out.
Step 4. Drag a heavy floor jack from your shop, out to the driveway (the truck won’t fit in your garage doors being too wide) and jack up one side. Then, with the transmission in “Neutral”, and the front tires blocked so it doesn’t roll down the driveway, and over you, drag a chain in front of the lifted tire(s) and using the tire as a lever, roll the chain over the tire so that the latches are hanging loosely on the back (or front, depending which way you started) of the tire(s). Now comes the fun part!
Step 5. Hook the inside latch, as tightly as you can, and tighten it. Now, go to the outside latch, and hook it, but don’t tighten it. Next, catch the center chain hook on a link, as far up as you can, so that all three chains are hooked. This will be impossible at first, because the center link will lack at least 2 inches from catching even the first link on the other end. Now, spend several minutes, lying on your back on the wet concrete, pulling violently on the upper part of the center chain. This will cause the tire to roll down, and the chain to get even further from being able to reach. Don’t give up! Keep pulling, using a screwdriver, prybar, or other sharp ended implement to use as a lever to pull the chains together. Colorful adjectives, or “repair words”, are handy to have available at this step…
Step 6. Now that you’ve gotten the center chain tantalizingly close reaching the first link, verbal encouragement and more tugging (with the trans now in “Park”), will let you hook the first link. Don’t worry, this won’t be NEARLY tight enough, but keep going! You’ll need to keep at this untill you can hook the chain on the second, or preferably, the third link. You may find it necessary to unlatch the inside chain to gain som slack, which some more violent tugging and pulling will gain you, but will also result in the tire rolling forward and unrolling the chains from the tires. Again, colorful expletives will be an invaluable aid at this point!
Step 7. Now that you’ve gotten the center chain hooked tightly, you can re-tighten the inside and outside latches. The chain will appear to be “loose”, but don’t worry, it IS TOO LOOSE! This is normal. Now, unlatch both inner and outer chains, unhook the center link, and attempt to get one more link. By having the chains latched and tightened, you (would think) you’ll now be able to get that extra link hooked in the center. Simply repeat step 6, having the chain again roll off the tire so that you have to start completely over.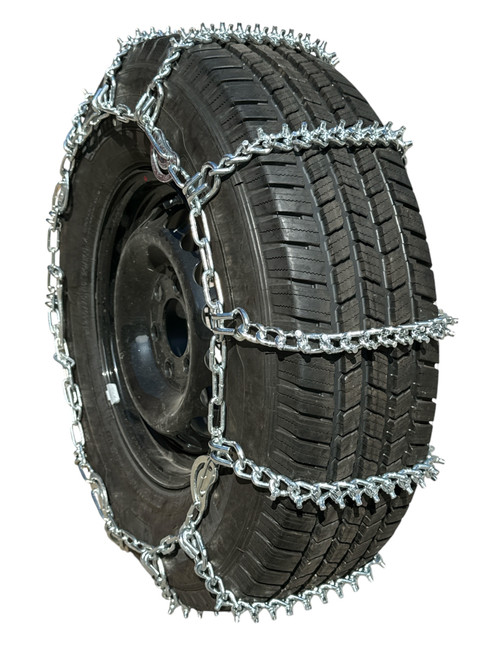 This builds character and appreciation for a good job well done! After several attempts, you’ll have the chain back where it was, too loose but at least on the tires. Good job!
Step 8. This is where those tarp straps come in. Of course, to do the job right, you need to make a trip to the hardware store to buy them, but we’ll skip that step. The tarp straps you have will be too long (of course), but don’t worry, a knot in the center will make them the perfect length to stretch across the center of the rim, thus tightening the OUTSIDE chain only. Of course, the inside is complicated by the brake backing plate and axle housing, so simply double the strap back on itself, don’t go completely across the backing plate. Two should be sufficient. Remember to catch excess chain dangling from the latches!The tarp straps give a nice “I don’t really know what I’m doing” appearance to the job, important for that “hillbilly” look. Plus, when it’s really cold, they loose all compliance and will soon rot and break.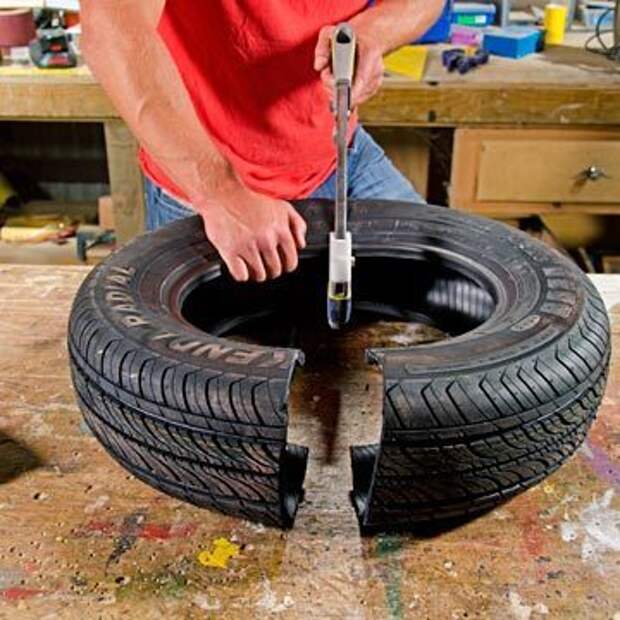
There, we’re done, and it only took two hours! A quick trip up and down the drive, or down to the corner on the tarmac if you’re brave, will reveal the interesting additional “square wheel” type ride quality your formerly almost unbearably rough riding one-ton pickup has. Twenty miles an hour should be fast enough to get anywhere, because the noise of the chains will convince you that they may actually tear the fenders from the box. They will flip the mudflaps up onto the tires, but a couple more tarp straps should fix that.
Now, let the lake effect snows begin! We’ll cover lifting a cement filled tire into the bed for weight on another installment of “Miserable Jobs 101”, some other day…
Like Loading...
California does not have any specific dates when vehicles are required to carry chains. When the road is posted with a sign requiring chains, all heavy-duty vehicles (over 6,500 pounds gross weight) must be equipped with chains mounted on the tires in order to proceed. Depending on the severity of road conditions, some vehicles (passenger cars, 4-wheel drive vehicles with snow tires) may not be required to install chains at that point. The exceptions will be posted on the sign.
Tire traction devices are defined in the California Vehicle Code (VC) Section 605 as “devices or mechanisms having a composition and design capable of improving vehicle traction, braking, and cornering ability upon snow or ice-covered surfaces,” and include conventional link-type tire chains and cable chains, as well as other less conventional devices such as “Spikes Spyder.” When the term “chains” is used here, it means any “tire traction device” unless it specifically states link-type chain.
Automatic Traction Devices (A.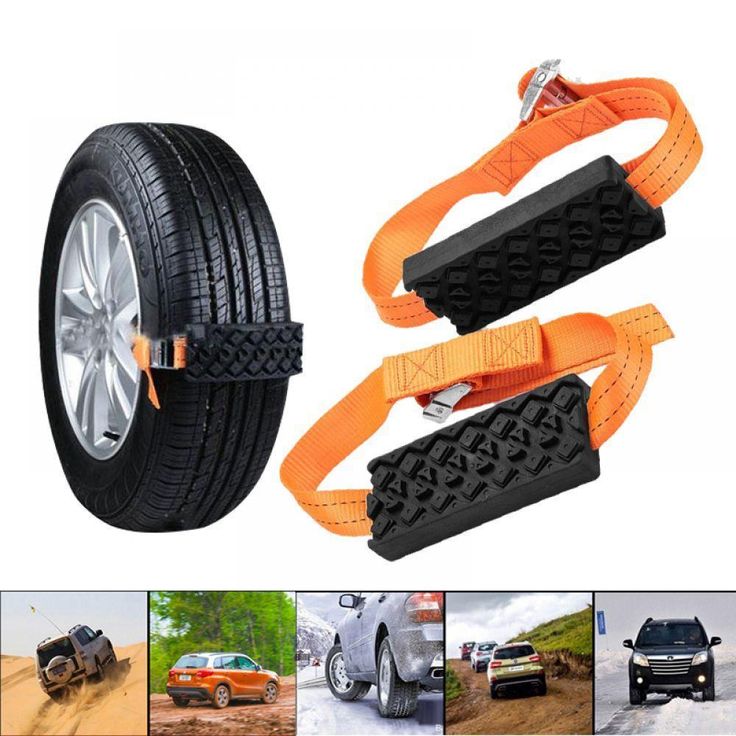 T.D.'s) are used primarily on commercial vehicles, emergency vehicles, and busses. ATD's are devices mounted under the vehicle that sling chain segments under the inside drive wheels. These devices can be deployed by the driver when the need for extra traction is required. While they are legal in California and have been approved as a direct one-on-one replacement for conventional chains, vehicles with only ATD's may be required to add additional chains to outside wheels to comply with the California Chain Requirements Chart.
Diagrams illustrating chain placement: Chain Requirements (PDF) .
There are some areas where such combinations are prohibited when chain controls are posted. These routes are marked with posted signs indicating the restriction.
Not usually, but under severe conditions, the California Department of Transportation (Caltrans) may require chains on the inside duals if conditions warrant. (If conditions are this severe, it may be better to postpone the trip.)
Chains are most often required in the higher mountain passes of northern California, such as Interstate 5 north of Redding, Interstate 80 over Donner Pass between Sacramento and Reno, Nevada, and US Highway 50 over Echo summit between Lake Tahoe and Sacramento. Chains are also sometimes required on State Route 58 near Tehachapi between Bakersfield and Mojave, Interstate 15 over Cajon Pass between Victorville and San Bernardino, and Interstate 5 over Tejon Pass between Los Angeles and Bakersfield. However, snow can fall unseasonably at higher elevations at many locations within California. Chains may be required at any time at these higher elevations when conditions warrant.
Motorists are advised to check the Caltrans website for current road conditions. Motorists may also call the Caltrans road information number at 800-427-7623.
They may be.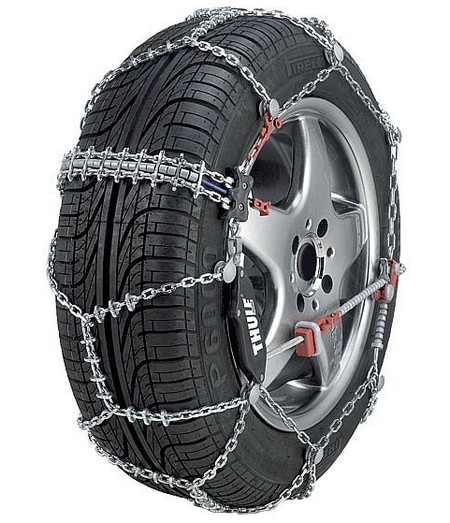 Snow tires have the designation “Mud & Snow” or an abbreviation such as “M-S,” “M+S,” or “M/S” marked on the tire sidewall. Tires without this designation are not considered snow tires. Snow tires must also have at least 6/32-inch (3/16”) of tread depth (about 1/2 of the original tread depth).
Usually. They are permitted for passenger cars and light trucks under virtually all conditions. Cables are not as effective as link-type chain under severe conditions at higher elevations and steep grades for “big-rigs” and may not be permitted depending on local conditions as determined by Caltrans. Whenever chain controls are posted over Donner Pass on Interstate 80, heavy trucks are usually required to have link-type chain on at least the main drive axle.
Vehicles without chains are not permitted to enter chain control areas and must return to a lower elevation where chains are not required.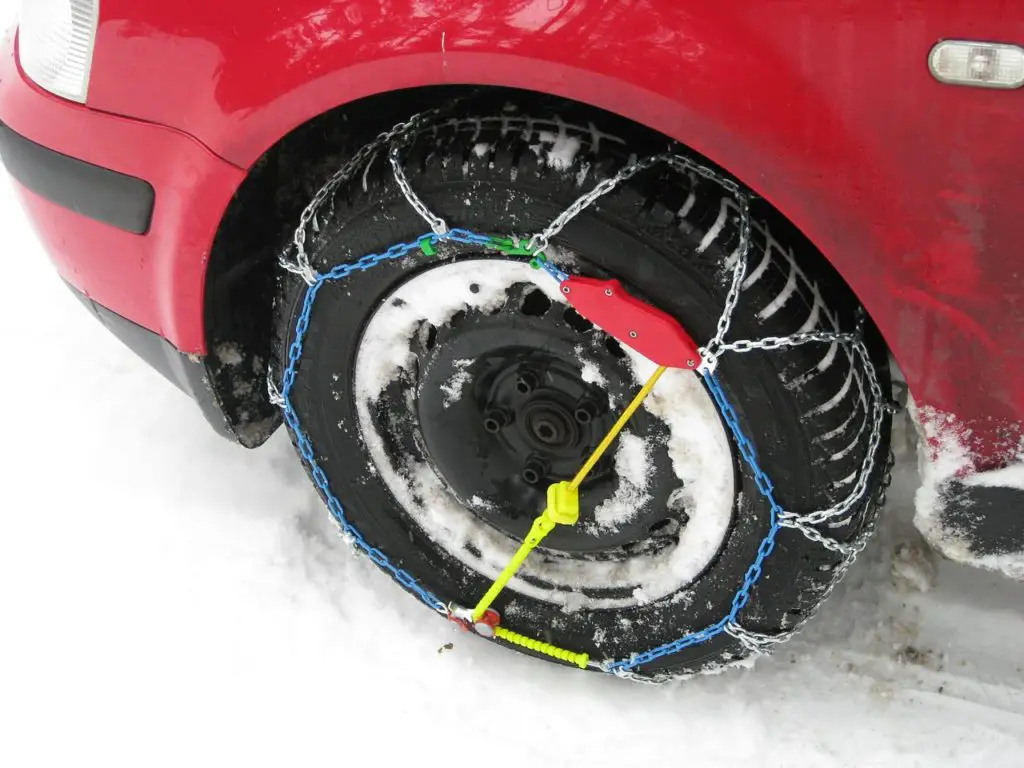 There is no provision to park vehicles at chain control check points.
During inclement or unsettled weather conditions, Caltrans may set up truck screening check points at approaches to major mountain highways. When these screens are present, all heavy-duty trucks must stop and show Caltrans personnel that they have the required chains on board to proceed. Trucks without chains will be directed to return to a lower elevation until weather improves. There is no room available at higher elevations to park trucks not equipped with chains.
Studded snow tires are permitted in California from November 1 until April 30 each year. During this time, studded tires are permitted in any location within the state. Studded snow tires are not considered tire traction devices and may not be used in lieu of chains.
Yes. Even though weather conditions may not warrant the use of chains on 4-wheel-drive vehicles at a particular time, to enter a chain control area, you must have a set of chains (for one drive axle) for your vehicle in your possession. If conditions worsen or you have trouble controlling your vehicle, you must stop and install the chains.
Yes. Even though weather conditions may not warrant the use of chains on passenger vehicles equipped with snow tires at a particular time, to enter a chain control area, you must have a set of chains (one pair) for your vehicle in your possession. If conditions worsen or you have trouble controlling your vehicle, you must stop and install the chains.
Yes. There is no exemption for heavy-duty commercial vehicles (over 6,500 pounds gross weight) equipped with snow tires. Chains must be installed on heavy-duty commercial vehicles whenever chain controls are posted.
Yes. Studded snow tires are not considered tire traction devices and may not be used in lieu of chains.
Yes. Even though all-wheel drive systems may differ mechanically from conventional 4- wheel drive systems, for the purposes of chain control, all-wheel drive is considered the same as 4-wheel drive.
Yes. Many vehicles which will not accommodate conventional link-type chains will accommodate cable chains or other devices such as “Spikes Spider.” If your vehicle is not equipped with some type of tire traction device, it is neither safe nor lawful for you to enter a chain control area. If you choose not to install tire traction devices on your vehicle, you may not enter a chain control area.
Chains must be installed on the drive axle. All-wheel drive vehicles and 4-wheel drive vehicles may have chains installed on either drive axle, but the rear axle is preferred, unless the vehicle manufacturer recommends the front axle.
Yes, always.
Yes.
You must have at least one axle chained if the trailer is equipped with brakes.
Although Caltrans does not post signs with these designations nor use them to announce chain controls to the public, they are used internally within Caltrans and the CHP as a kind of shorthand to describe chain restrictions and may be included in traffic reports disseminated by various news outlets.
There are three primary categories of chain restrictions, as shown below:
Requirement 1 (R-1): Chains are required on all vehicles except passenger vehicles and light-duty trucks under 6,000 pounds gross weight and equipped with snow tires on at least two drive wheels.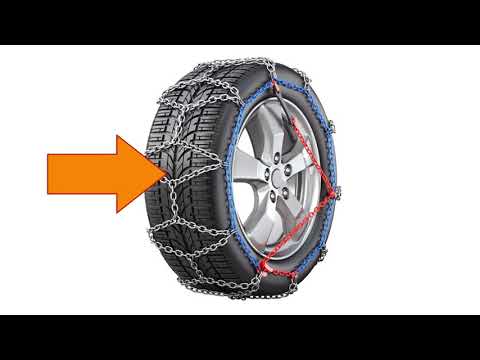 Chains must be carried by vehicles using snow tires. All vehicles towing trailers must have chains on one drive axle. Trailers with brakes must have chains on at least one axle.
Requirement 2 (R-2): Chains are required on all vehicles except four-wheel-drive vehicles under 6,500 pounds gross weight and equipped with snow tires on all four wheels. Chains for one set of drive wheels must be carried by four wheel-drive vehicles using snow tires.
Requirement 3 (R-3): Chains are required on all vehicles without exception.
R-1 and R-2 are the most common conditions. A highway will often be closed before an R-3 condition is imposed. Some local areas may use variations of these designations. You must follow the directions on the signs posted for chain controls or any instructions given by Caltrans or CHP personnel at chain control check points, even if these are at variance with broadcast road condition reports or information contained herein.
Chain requirements are covered in the CVC, Section 605 and Sections 27450 to 27503.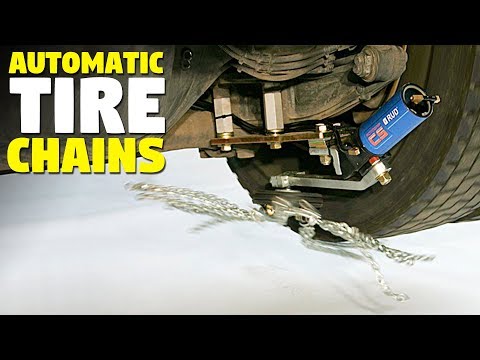 In addition, Section 26104 also covers laboratory testing (see below).
26104. (a) Every manufacturer who sells, offers for sale, or manufactures for use upon a vehicle devices subject to requirements established by the department shall, before the device is offered for sale, have laboratory test data showing compliance with such requirements. Tests may be conducted by the manufacturer.
(b) The department may at any time request from the manufacturer a copy of the test data showing proof of compliance of any device with the requirements established by the department and additional evidence that due care was exercised in maintaining compliance during production. If the manufacturer fails to provide such proof of compliance within 30 days of notice from the department, the department may prohibit the sale of the device in this state until acceptable proof of compliance is received by the department.
Snow chains are a valuable addition to your forklift. Snow chains are a device to be used in an emergency situation and, therefore, when using them, it is necessary to observe the precautions and the attached rules of use in order to obtain the expected results, as well as to avoid possible problems arising from incorrect use of the chains. nine0003
Anti-skid chains are designed to prevent wheel slippage and increase the passability of the loader when driving on difficult road sections - ice, rolled snow, virgin snow.
Before using snow chains, it is necessary to determine the possibility of their installation on the vehicle. Recommended minimum clearances between the wheel and various parts of the loader required for installation:
 nine0012
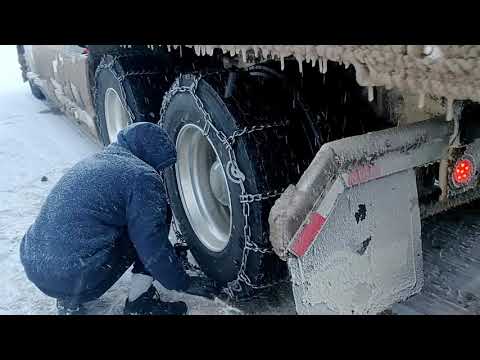
Anti-skid chains are mounted on the drive wheels of the loader. Installation of anti-skid chains must be carried out before entering a difficult road section.
For different manufacturers of wheels for loaders with the same wheel marking, the actual dimensions can vary significantly.
To take into account the difference in wheel sizes, an additional jumper (pos. 7) is provided in the anti-skid chains. It is attached with staples to the end links of the tail chain (pos.6). nine0045
The need for an additional jumper is determined during the first installation. If the anti-skid chain hangs freely on the wheel during tension, warps on its side and further tension does not give the chain a snug fit to the wheel, then the additional jumper should be disconnected.
1. Carefully straighten the snow chain (chain links must not be twisted). Lay snow chains on the road surface and run the drive wheels over them. The locking hook (pos.2) with the locking ring (pos.3) must be located on the outside of the loader. Secure the loader in a position that prevents spontaneous movement on the road. nine0003
2. Throw the free part of the chain on the wheel. Spread the transverse branches of the chain (pos.4) evenly around the circumference of the wheel.
3. On the inner side of the wheel, hook the locking hook (pos.1) to one of the links of the tail branch (pos.6). Hook hook only on odd tail chain links 1, 3, 5, etc. (for loaders with a small distance between the wheel and other parts).
4. From the outer side of the wheel, thread the locking hook (pos.2) into one of the end links of the tail branch (pos.6) and turn the locking hook towards the locking ring (pos.3). nine0003
5. Insert the locking ring into the groove of the locking hook. If necessary, make an additional tension of the chain (reattach the locking hook and the hook for the following tail links). Longitudinal and transverse branches should grip the tire tightly.
6. After passing a small area, make an additional tension of the chain by hooking the hook (pos.2) on one of the following links of the tail chain.
After the first installation, the extra tail links (not used) must be cut off or tied so that they do not touch the body or other parts of the loader during movement. nine0003
Removing the tool from the wheel is carried out in the reverse order.
Anti-skid chains are mounted on the drive wheels of the loader. It is advisable to install snow chains before entering a difficult road section.
For different manufacturers of wheels for loaders with the same wheel marking, the actual dimensions can vary significantly.
To take into account the difference in wheel sizes, an additional jumper (pos. 5) is provided in the anti-skid chains. nine0003
It is attached with staples to the end links of the tail chain (pos.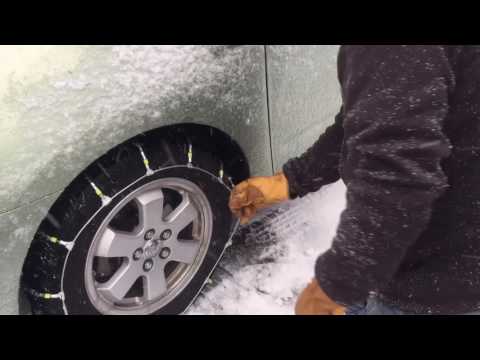 4). The need for an additional jumper is determined during the first installation. If the anti-skid chain hangs freely on the wheel during tension, warps on its side and further tension does not give the chain a snug fit to the wheel, then the additional jumper should be disconnected.
1. Secure the vehicle in a position that prevents spontaneous movement on the road. Put the snow chain on the wheel in such a way that the tensioning rings (pos.6) are on the outer side of the wheel, and the locking hooks (pos.1) and tail links (pos.4) are in the lower part of the wheel. Spread the transverse branches (pos.2) evenly around the circumference of the wheel. nine0003
2. Hook the locking hook (pos.1) on the inner side of the wheel for one of the links of the tail branch (pos.4), or for the ring, i.e. as close as possible to the other half of the snow chain.
3. Hook the locking hook (pos.1) on the outer part of the side of the wheel for one of the links of the tail branch (pos.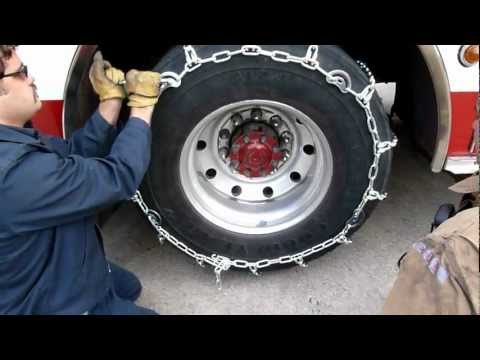 4), or for the ring, i.e. as close as possible to the other half of the snow chain.
4. Pass the tensioning chain (pos.7) through all the rings (pos.6), including the ring to which the tensioning chain is attached. nine0003
5. Attach the lanyard (pos. 8) to one of the tension chain links (pos. 7). Hook the lanyard hook (pos.8) to the tension ring (pos.6) from the opposite side. Make a stretch. The tension should be carried out until the snow chains fit snugly against the wheel. If necessary (with a weak chain tension), hook the lanyard over the next link of the chain for tension and re-tension. It is also possible to fasten the lanyard to the side ring for tensioning, and with the hook of the lanyard, alternately hook it to the chain links for tensioning. nine0003
6. After passing a small area, make an additional tension on the chain.
Removing the tool from the wheel is carried out in the reverse order.
Return to list
If you google the word "Mordovki", the search engines will first of all show links to the indigenous inhabitants of a place like Mordva, and only then they will show you coins with the same name. In general, until you tell the search engine what you mean by chains on wheels, you will not see muzzles in the right context. nine0003
Mordovki correctly called - snow chains.
The purpose of having chains on a wheel is to improve the grip of the wheel on the ground. Useful when driving on mud or ice. In the case when you do not have other tires (studded or mud), you can modify the wheel with muzzles for driving on the road, the grip on which you have without chains will tend to zero. Although, to be honest, the reviews about the chains, frankly, are different. nine0003
Plastic muzzles on motorcycles are rare, but they do exist! Plastic mounts are weaker in their characteristics, but they do not injure the wheel tire.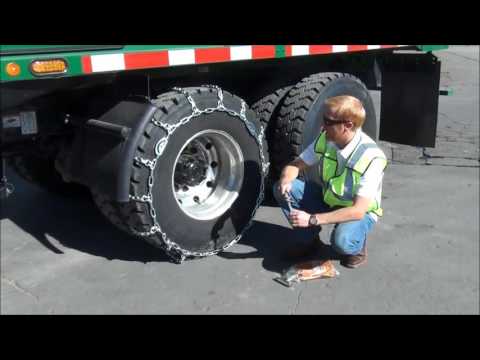 More often such muzzles are found in motorists. Traditionally, motorcyclists use metal chains, where stainless steel and titanium are considered the most reliable. They are strengthened and finalized when with spikes, when with bolts, when with additional fasteners. nine0003
The vast majority of motorcyclists make their own muzzles with a pattern of diamond, triangles, honeycombs or ladders. If you are one of them, then be sure to use a reinforced cable.
Why? Chains wear out quickly when riding on hard surfaces. This must be taken into account when you plan to ride them on ice, frozen ground or drive onto asphalt. The links of the chains are fixed with a reinforced cable so that when they are rubbed and broken, they do not fly off. A broken chain is fraught with getting into the moving parts of the motorcycle, as a result of costly breakdowns. nine0003
Ladder-patterned chains work well on the rear wheel and are believed to help the wheel to paddle in loose snow or mud. It happens that when driving through mud, muzzles are made from improvised means, wrapping the wheel diagonally or crosswise with thick ropes.
The diamond and honeycomb patterns are harder to make but more functional when driving around tight turns. The ladder has less surface for grip, but there is a “threshold” for a jerk, when the remaining two patterns have an advantage in inclined planes along the edges of the tire. Where the ladder can break off in a turn, a rhombus and honeycombs will show themselves from a much more interesting angle. nine0003
Thus, depending on the nature of the ride, you can change the pattern of muzzles. Although it may be a worthy plan to install a ladder on the rear wheel (as transmitting power), and on the front diamond or honeycomb, like a wheel that needs a lot of maneuvering.
By the way, there are simply brilliant people who thought of finding a use for old drive chains, installing them instead of muzzles on the wheel! By the way, if you read very ancient textbooks on motorcycles, then there is also such a method, only the authors still offer to strengthen the chain with short spikes from bolts / self-tapping screws. nine0003
It all depends on the design of the muzzles. Someone installs them without dismantling the wheel using tackles or by hanging the motorcycle on a jack. Some need to remove the wheel to secure the chains. Still others peep the method from motorists, rolling the motorcycle on chains so as not to put it on the jack.
When installing chains, it is especially important to consider whether the links will touch closely located parts of the motorcycle, rub against the swingarm or feathers and fenders? nine0003
Agree, if the use of chains on a motorcycle was the best solution, everyone would ride them, but as practice shows, this is not so. The disadvantages of using muzzles include: