Winter is coming! And if you live somewhere that attracts snow like a magnet, so is everything else that the cold season brings with it. Yep – it’s time to bring out the winter clothes, the floor heaters, and of course, snow removal tools!
Some people can get by with a snow shovel, but if you live in a deep snow zone like Michigan as I do, a snow blower is almost essential for snow removal on your driveway. And while most snow blowers can clear snow as is, if you get enough snow or have rough terrain, your blower may require some assistance.
This is where a tire chain may be the perfect solution.
But you can’t just slip on any old chain on your snow blower’s tires. We’re going to cover the best way to make the most of tire chains for your snowblower!
It’s vital that you properly fit the right chain size for your snow blower tires. Otherwise, not only will you fail to optimize the tires’ traction, you may damage them in the process.
The last thing anyone wants is a broken snowthrower in the middle of a snowstorm. So then, what is the proper way to measure your snow blower tire for a chain and fit it?
This is important: Not all snow blowers can accommodate tire chains. The model may not have enough clearance for the fitting of chains. Many manufacturers engineer these machines with low traction situations in mind, which means the equipped tires are designed to have better traction on ice or snow.
Some blowers can use the extra traction of snowblower wheel chains, especially if your driveway consists mainly of packed snow and ice. Whether or not you can fit a tire chain onto your snow blower’s tire can be found in each machine’s instruction manual.
If you’ve lost the manual and can’t find it online – a good rule of thumb to follow is you’ll need about 2 inches of clearance between the tire and the snow blower body to use chains. If there is enough clearance, you can move on to the next step.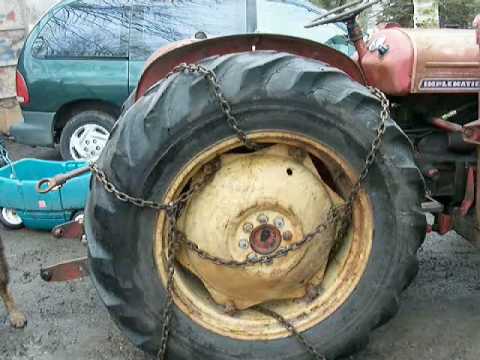
Measuring your tire sizes is a lot easier than it sounds. Great news!
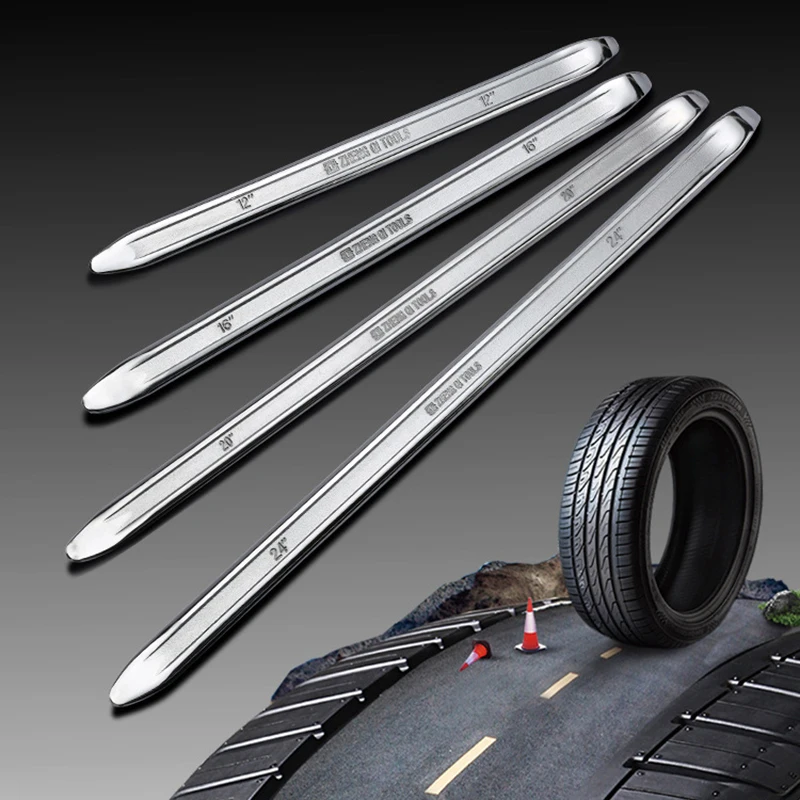
You won’t need a ruler or other tools to find out the correct size most of the time. Manufacturers will usually indicate the tire’s dimensions on its sidewall. You will find either two or three numbers divided by various symbols. These symbols are simply markers meant to separate the numbers and don’t have additional meaning for your tire size. These numbers will indicate the tire’s diameter, tire width, and rim diameter.
If there are two numbers on the sidewall, no matter what symbol is used to divide those numbers, the first number will measure tire width. The second number will measure the rim size. So whether you see 6/3, 6-3, or 6×3, these two numbers indicate that the tire’s width is 6 inches with a rim diameter of 3 inches.
If you have three numbers on your tire, don’t panic. The first number is the tire’s diameter. The second and third numbers will measure the tire’s width and the rim’s diameter, respectively. So a 12, 6, and 3 – regardless of which symbol divides them – would indicate a tire height of 12 inches, a width of 6 inches, and a rim diameter of 3 inches.
If, for whatever reason, your snow blower’s tires do not indicate the tire size, it’s a simple matter to measure these dimensions with measuring tape. Well, maybe not simple, but you’ve got the skills to do it. A flexible measuring tape will help significantly in this process.
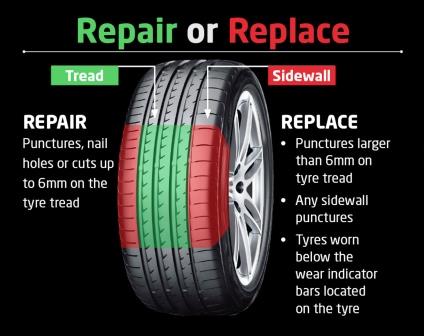
In addition to size, you need to look the type of tread on your tires to select the right tire chain. Not all snow blower chains will fit every kind of tire tread. If the chain does not correctly sync with the tire tread, the chain won’t work right.
Ensure the chain you are purchasing for your tires will work with the snow blower’s tire treads.
We need to emphasize – each make and model of snow thrower is unique.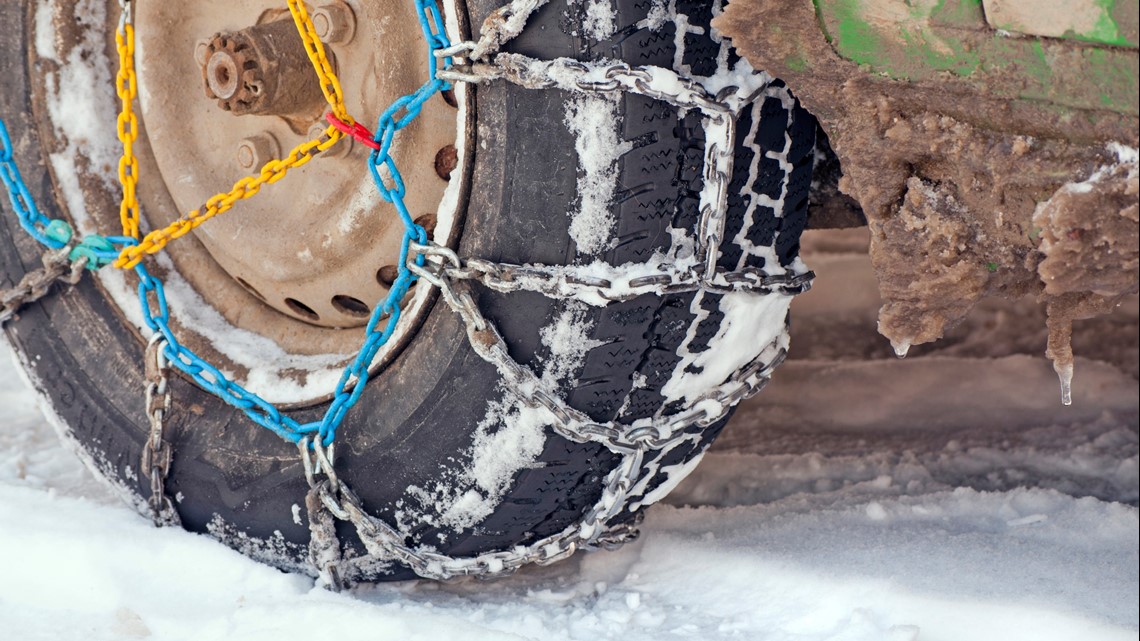 Therefore, you must refer to both the instruction manual for your snow blower and the installation instructions for your tire chain. Doing so can prevent big headaches down the line.
With that said, here is a step-by-step guide to fitting your tire chains:
Tire chains are commonly used to increase extra traction for vehicles but are equally viable for snow blowers. These chains are handy when your snow blower is clearing snow in icy conditions.
Absolutely! While many snow blowers, especially higher-end machines engineered for extreme weather conditions, are equipped with tires that have better traction, tire chains will give you that extra grip for particularly icy surfaces. Not all snow blowers are compatible with snow chains, however, so make sure to refer to your owner’s manual.
Yes. Just as your tires come in different sizes, snow blower tire chains are available in various sizes. Use our guide above to determine the size and tread of your tires and purchase the corresponding tire chains!
The closer the fit, the better your snow chains will function. You can’t expect a perfect fit, but the correct tire chains won’t be loose. It’s crucial to obtain chains that are as close in size to your tires as possible!
Your tire chains shouldn’t have a death grip on your snow blower tires.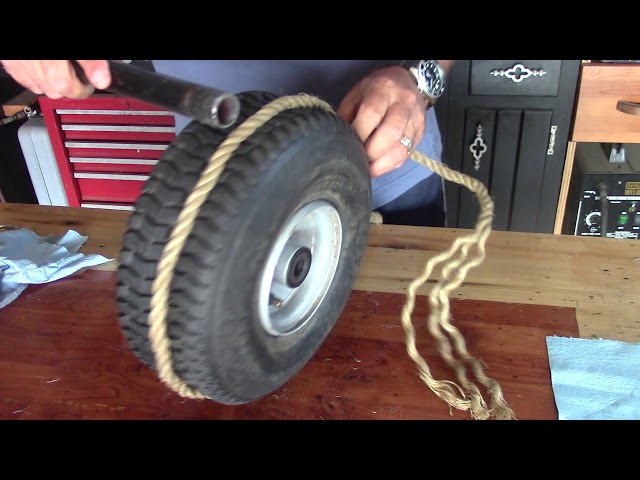 However, if they look loose enough to fall off, they need to be tightened. Snow blower tire chains typically have multiple links for adjustment purposes, so if the chains seem too tight or too loose, attach the hook one link up or down.
Whether you are in eager expectation or in dread of the coming winter, you must be appropriately equipped for the weather conditions headed your way. And a great snowblower is never a bad thing to have!
You want this beast of a machine to be able to handle everything winter might throw on your driveway, so make sure it is prepped. This might include equipping them with snow blower tire chains. Use our guide to ensure that not only are your tires getting the most extra traction possible but are also safe from damage. You’ll be glad you are prepared!
We hope this article was helpful. If you enjoyed it, make sure to share with others that need to brace themselves for the deep snow of the coming winter!
Skip to Main Content
Item#: 490-241-0029
$59. 99
99
Snow Blower Tire Chains
Item#: 490-241-0029
$59.99
Quantity
This part replaces:
Avoid frustration when buying parts, attachments, and accessories with the Troy-Bilt Right Part Pledge.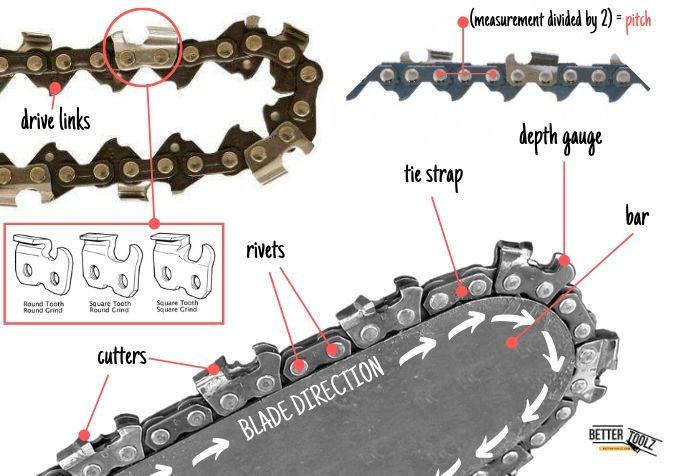 If you purchase the wrong part from Troy-Bilt or a Troy-Bilt authorized online reseller, Troy-Bilt, or your Troy-Bilt authorized online reseller will work with you to identify the correct part for your equipment and initiate a free exchange. See full terms and conditions.
Parts orders over $50 ship free.*All orders placed before 5 pm ship next day. Standard shipping averages 3 business days for delivery. Expedited shipping is available.
*Some exclusions apply. Read full shipping policy.
We'll make sure you get the right part. Enjoy 90-day returns for unused parts and we won't penalize you for ordering the wrong part when you follow our return policy.*
*Some exclusions apply. Read full returns policy.
Our outdoor power equipment experts are just one click away through Live Chat. Available Mon-Fri 9am - 7pm EDT.
Phone support also available:
1-800-828-5500
With the advent of winter, every motorist is faced with the need to equip the car with snow chains. This accessory serves as an additional tread and significantly improves the car's off-road capability, deep snow, mud and ice due to better grip of the wheel with the roadway.
Snow chains are an additional protection for any car, sometimes it becomes the only possible one, especially where even studded tires cannot help. Woven in the form of a mesh, the chains cover the entire surface of the tire and turn an ordinary wheel into a wheel capable of overcoming any obstacle and increasing the safety of the person sitting behind the wheel. The use of such protection is not difficult, even if the car is already on the road and you can remove them as soon as a difficult section of the road has been completed. Your car will feel confident both on snowy winter roads and on muddy country and forest roads.
The design of anti-skid chains consists of two separate chains connected by special devices - lugs or transverse chains to each other. If the weather conditions often change and the road ahead is difficult, this design is the only possible option for equipping the car. The result of its application will show itself at the first installation of the structure on the wheels.
Snow chains can be fixed, hard or soft. And each type is suitable for different conditions of use and has its own advantages and disadvantages.
Rigidly fixed chains are mounted on the outer side of the disc and wrap around the wheel tyre. Their service life is the longest among all types, and the only drawback is their cost.
In rigid chains, metal chains act as connecting cross-sections. Their advantage is the ability to overcome impassability, deep snow and mud.
But low profile tires are not suitable for hard chains.
Soft chains worn on the wheels of the car do not deprive it of the ability to reach high speed and are suitable for moderate road conditions. As cross-connectors, they use reinforced lugs - rubber or plastic.
Snow chains should be mounted before the start of difficult sections, the first time it should be done in a garage, in mud or snow it will be much more difficult. After the first or second time, this manipulation will turn out confidently and quickly. Having used the chains in a difficult area, when leaving on a flat, good road, they must be dismantled. In this case, you should stock up on a plastic case or bag; it makes no sense to pack dirty chains in the native case that comes with them. Upon return, the chains should be washed and dried, ready for subsequent use.
You should be aware that any chains can damage the rubber of the car during their operation. If, having put chains on a car, you try to drive in them on a well-packed good road, jerk sharply from a stop or slow down, then the rubber will definitely wear out faster.
The following may help as a guide to installing snow chains.
Starting to install the chains, remove the caps and put them in the trunk of the car.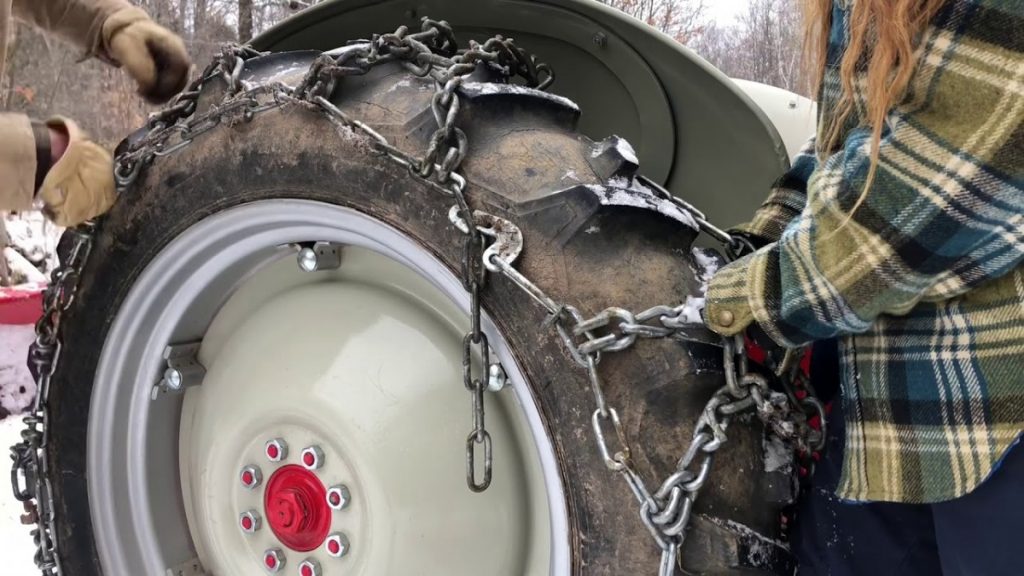
The chain attachment must not touch the rim.
Mount chains only on drive wheels.
If the car is four-wheel drive, mount chains on all wheels.
The maximum tension of the chains is what the car needs, they should be tightened periodically.
There should be no sudden braking, acceleration or turning while driving.
It should be borne in mind that snow chains significantly affect the balance of the wheels, so there is a speed limit - the maximum speed should not exceed 20 km / h.
It is not recommended to drive with chains and on hard surfaces, because the chains damage tires badly.
Tires are also subject to wear during heavy braking and acceleration, when the chain is too loose on the wheel.
Be careful if your car sits on the bottom of the chain instantly, deep holes are cut under the wheels and it can be very difficult to get out of such a trap.
Unnecessarily do not use snow chains, their margin of safety is not eternal.
Read the instructions for using purchased chains, they can help out in any weather and road quality.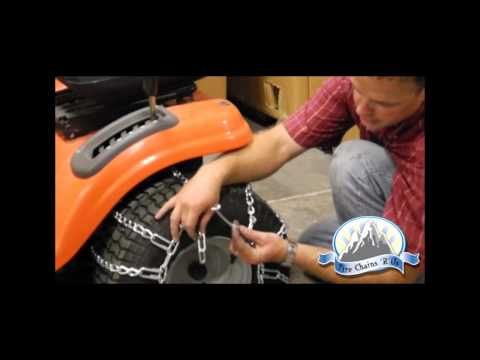
Online store "TuristShop" offers you anti-skid chains for cars, ATVs, all-terrain vehicles and loaders, as well as traction tapes.
Contents
Design and types of anti-skid means
Making a simple home-made chain for car wheels
Installation method without jacking up the machine
Alternative solutions
Things to remember
Any motorist with experience has experienced unpleasant moments when the driving wheels of the car began to slip in mud, ice or deep snow. It is often almost impossible to get out of such situations on your own - only with the help of another vehicle. How are our colleagues doing? Some people buy studded tires after such incidents, others simply put the car on a "fun" during natural disasters. But there is another category of motorists that uses homemade chains for wheels and, I must say, quite successfully.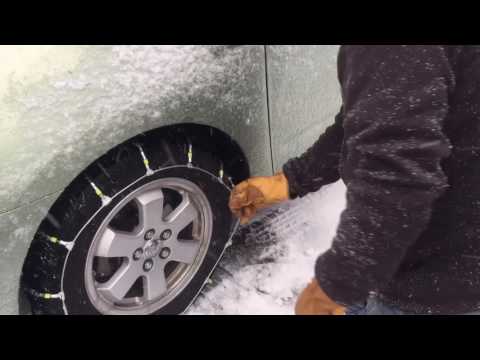
These devices are based on a simple design consisting of steel links or reinforced wire . A successful application lies in the uniform distribution of the elements along the entire radius of the tire. Failure to comply with this condition threatens to break the product and loss of anti-skid properties. The classic scheme, proven by more than one generation of motorists, consists of internal and external components that run around the entire circumference of the tire. They are interconnected by transverse parts, the so-called " grouser ". The manufacturing technology of do-it-yourself wheel chains is available even for beginners. Depending on the layout of the structural elements, there are three types of devices :
Each type has its own advantages and disadvantages. In terms of labor costs, the first option is the most accessible - "ladder" .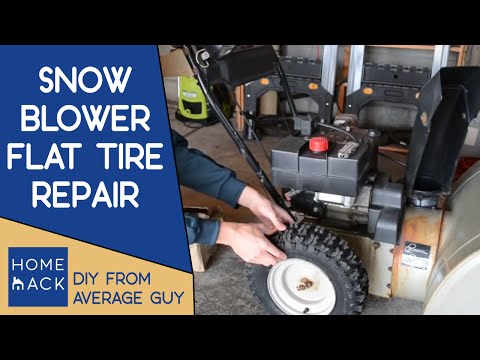
It is not always possible to purchase an anti-skid device - the high price and lack of availability of the right size makes car owners decide such issues on their own. I must say that this is a pretty good choice - all the necessary components are always available in hardware stores. In a critical situation, you can try to simply wrap the tire with a cable or a piece of metal rigging , but not everyone carries a similar set with them. Moreover, for a disc-type brake system, this option is absolutely contraindicated - such a design will disrupt the operation of the mechanisms. Therefore, it is worth preparing in advance homemade chains for wheels , for which will need :
The dimensions of the workpieces depend on the dimensions of the tire used, so it is important to measure the desired values in advance.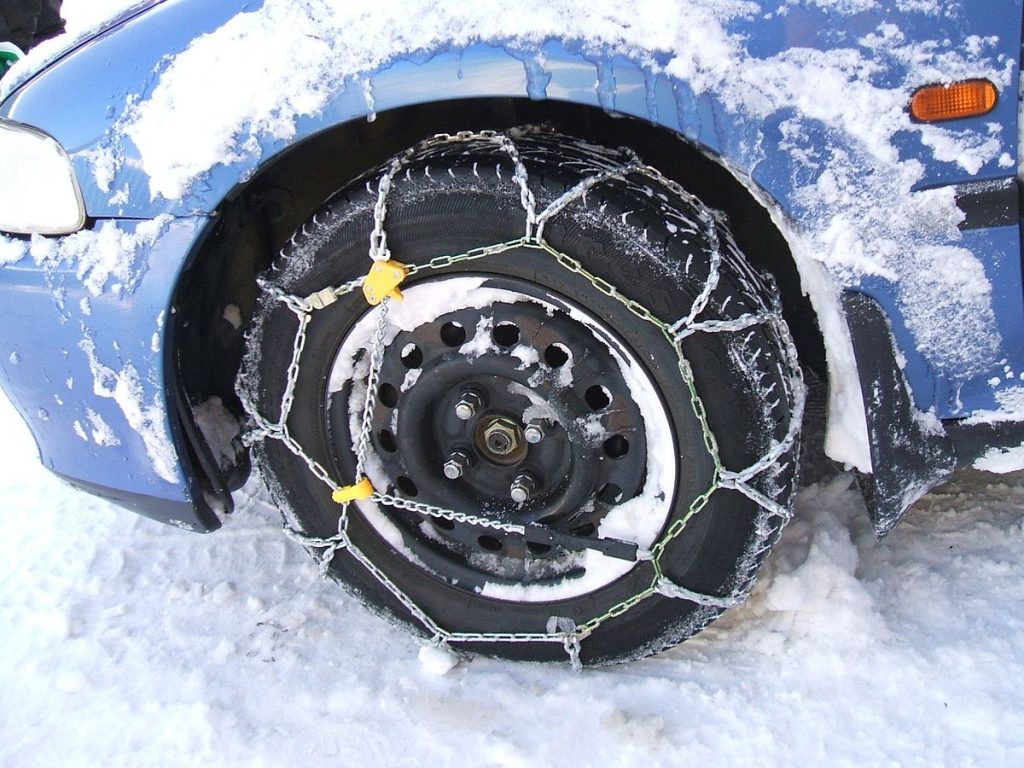 The number of transverse parts is also individual - craftsmen recommend making sure that there are two "crossbars" at once in the plane of contact between the tire and the ground. Thanks to this scheme, traction characteristics and reliability of the entire product will increase. Preparatory action process and do-it-yourself assembly of chains on wheels consist of items:
As can be seen from the description, with a certain skill and tool, the operation will take no more than 40 minutes. Those who have welding experience can put it into practice and refuse threaded connections, which will certainly affect the quality of the equipment.
Having checked the reliability of the finished product, it remains only to install it on the car.
The anti-skid device is mounted first of all on the drive pair and this is done in two ways :
The choice of method is up to the driver, but it is worth focusing on one recommendation - you need to think about installation in advance, even before entering a difficult area . Only in this way will it be possible to avoid annoying mistakes and save a lot of time.
Before proceeding with the operation of installing homemade chain on car wheels , carefully lay it, not allowing the links to twist. Further, we act according to the points:

Do-it-yourself installation of the chain on the wheels of a car using a jack is similar to the technology described above, its only advantage is to facilitate the task. For a better installation, you must first reduce the pressure in the tires, but after the operation, do not forget to restore normal parameters. This procedure will allow the product to fit as tightly as possible to the tire.
The idea of folk craftsmen does not stand still - and now they offer an alternative solution: anti-skid bracelets .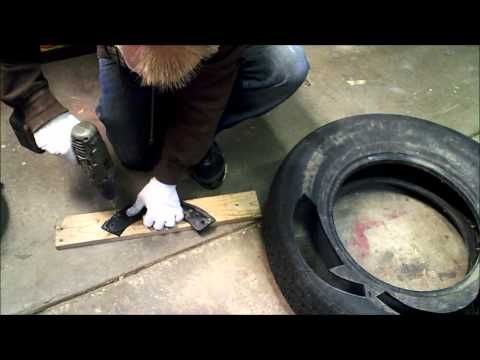 In principle, these are the same home-made metal chains for wheels , only with a difference in the absence of longitudinal elements . The advantages of bracelets are as follows:
So what is needed for the manufacture of :
For 195mm and 205mm tires you need about 4 meters of chain. As you can see, the costs are minimal, and you only need to cut the material to the required length. Another alternative option - kits for DIY wheel bracelets using chains , are quite affordable and of good quality (except for Chinese ones).
Set consisting of:
The kit is very easy to use and does not take up much space. An important plus is the possibility of using machines with disc brakes . Judging by the reviews, owners of expensive SUVs do not disdain to use them, which once again speaks of the practicality of the device.
For more information on how to make your own anti-skid bracelets, see the video:
Anti-skid chains must not be used when driving on paved roads (concrete, asphalt). In conditions of loose snow or soil, it is recommended to adhere to a speed of 10-20 km / h. Wheel slippage must not be allowed.
After installing the anti-slip device, after driving the first 100 meters, you should stop and check the reliability of its fixation, as well as the tension around the entire perimeter. A loose chain can cause damage to suspension and steering components.