You’ve planned a motorcycle road trip for weeks, but when you open the garage door, you see it. Your motorcycle has a flat. For an experienced rider who knows how to change a motorcycle tire, this might be a simple fix. If you’re not sure, it helps to learn what to do to replace your bike’s tire.
To get you on the road again, here’s how to change a motorcycle tire[1] in eight steps .
Raise the end of the bike to lift the wheel off the ground. Use a socket to loosen and remove the axle. Release the chain and remove the brake caliper. Put your axle back in place to hold the caliper’s position.[2] It’s a good idea to consult your owner’s manual to learn any steps to take that are unique to your bike’s make and model.
To deflate the tire[3], unscrew the cap on the valve and remove the valve stem core with a special tool. Some valve stems come with built-in caps instead of separate pieces.
When you wondered how to change a motorcycle tire, you might not have realized that you need motorcycle tire changing tools. However, you don’t want to damage your valve stem by trying to remove it with something random from the garage. If you don’t have one already, pause the project and head to your local auto supply store to get a valve core remover.
The bead is the inner edge of the tire where it meets the rim. At the auto parts store, you can also purchase a bead breaker tool to make the job easier. Try to find one with tire spoons, which you’ll use to wedge the tire off the rim.
Insert the tool between the tire and wheel rim and move the tool around the bead. Flip the tire over and repeat this process on the other side. You can use a spray silicone lubricant or glass cleaner to prevent the bead from re-sticking as you move the tool around.[4]
Carefully insert a tire spoon under the bead and push down to pull the tire up. Leave a tire spoon in the spot where you pulled up the tire in order to hold it in place.
Use a second tire spoon to pry the tire away from the rim several inches from the first tire spoon. Leave the second spoon in that spot. Retrieve the first spoon and move it a couple inches. Repeat this until the entire tire separates from the rim. Then flip the wheel and repeat the process on the other side.
Alternative step: If your tire has a tube, you’ll need to unbolt the valve stem from the rim and remove the old tube.
Wipe out the inside of the rim and the inside of the new tire to ensure there’s no debris. Coat the edges of the new tire with bead lube. Hand sanitizer or hand soap work in a pinch too.[5]
Alternative step: If your tire has a tube, insert the new, uninflated tube into the tire. Be sure to insert the valve stem into the hole in the rim.
Use the tire spoons to carefully wedge the entire tire under the rim on one side. Flip the wheel over and repeat this process on the other side.
Fill the tire until it’s completely sitting along the rim. Be sure to check the air pressure. You might have to inflate the tire past the recommended riding pressure number.[6]
Follow your user manual’s instructions to remount the wheel. Check the air pressure again and adjust the alignment of the rear wheel and chain tension.[7] Ensure that all the fasteners are tight before you head out.
Owning a motorcycle offers great recreational opportunities, but it also comes with responsibilities. From insuring your motorcycle to maintaining it, remember to set aside time to properly care for your bike and learn motorcycle riding safety tips. Before you head out on your next adventure, talk to an insurance agent to make sure your motorcycle has the level of insurance coverage you need.
[1] https://www.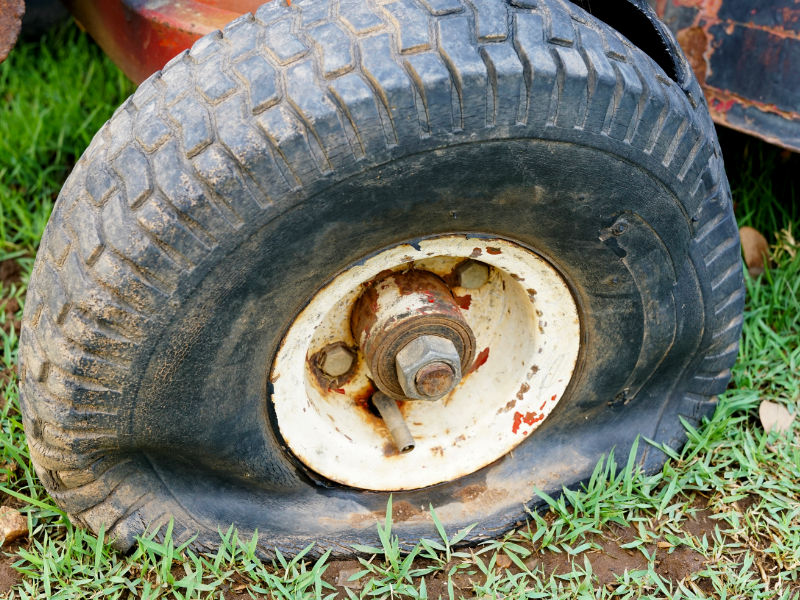 cycleworld.com/how-to-change-a-motorcycle-tire/
[2] “How to Remove Rear Motorcycle Wheel,” YouTube (September 4, 2016).
[3] https://www.rideapart.com/articles/245897/how-to-change-motorcycle-tires/
[4] https://www.cycleworld.com/how-to-change-a-motorcycle-tire/
[5] https://www.rideapart.com/articles/245897/how-to-change-motorcycle-tires/
[6] https://www.rideapart.com/articles/245897/how-to-change-motorcycle-tires/
[7] https://www.motorcyclistonline.com/how-to/how-to-check-front-and-rear-motorcycle-wheel-alignment-mc-garage-tech-tips/
If enjoying the cool, crisp air on your drives around Thornton is one of your favorite pastimes, you no doubt know how important it is to keep up with regular tire maintenance to make your tires last. Save yourself the hassle of reading guides on how to change to a motorcycle tire yourself, and bring it to Erico Motorsports near Westminister. Our skilled service technicians will do the job for you!
Putting a new tire on your bike can be a challenge. Fortunately, a call to our service center can get the job done quickly and without the hassle:
Remove the Wheel: We'll start by removing the tire and wheel from your bike and inspecting it to make sure the rim is sound enough for the new tire.
Deflate the Tire: We'll remove the valve stem core and completely deflate the tire to prevent damage to the rim.
Break the Bead: We'll break the bead to hold the tire to the rim with a special tool that allows us to remove the rubber safely.
Remove the Tire: Next, we'll get the used tire off the rim and set it aside.
Remove the Tube: We'll unbolt the valve stem and remove the tube from the rim.
Inspect the Rim: Once all the rubber is out of the way, we'll inspect the rim and make sure it's intact and ready for the tire replacement.
Coat the Edges of the New Tire: One of our technicians will put a generous coating of bead lube on the inner edge of the new tire to help it slip onto the rim.
Install Rim Strip: We'll install the rim strip if needed to protect the tire from your spoked rims.
Install the Tire: Using our special tools (and a good helping of elbow grease), we'll pop the new tire into place.
Add the Tube: For tubed tires, we'll install the new tube between the rubber and the rim.
Complete Installation: We'll use our tools to pop the other side of the wheel on the rim and install the valve stem.
Inspect the Tire: Before we re-inflate the tire, we'll check our work and make sure it's a job well done.
Inflate the Tire: Using the guidelines sent over by the manufacturer, we'll re-inflate the tire to the proper PSI.
You don't have to do the work yourself - and why should you when you could be on the road? Whether it's winterizing, oil changes, accessories, or washing instructions, the service center at Erico Motorsports near Aurora is here to help. Stop by or schedule your service online today.
Winters around Thornton bring plenty of snow, but that shouldn't mean you have to store your motorcycle away for the season. If you plan on riding a motorcycle in winter, check out our tips for how to winterize a motorcycle. As your trusted Denver motorcycle dealer, Erico Motorsports has the helpful hints you need! Learn More...
Read More
Our customers are really lucky to have a bonafide Ducati Master Technician, with extensive track experience, working on their prized possessions. A few days out of the month Erico bids Thomas "Godspeed" and sends him on his way to work on the race bikes of some of MotoAmerica's top riders. Here is a quick rundown...
Read More
What is considered high mileage for a motorcycle depends on the kind of used bike you're interested in purchasing. For example, a used sports bike could be considered high-mileage as early as 20,000 or 30,000 miles, while a larger motorcycle might be considered high-mileage around 50,000 miles.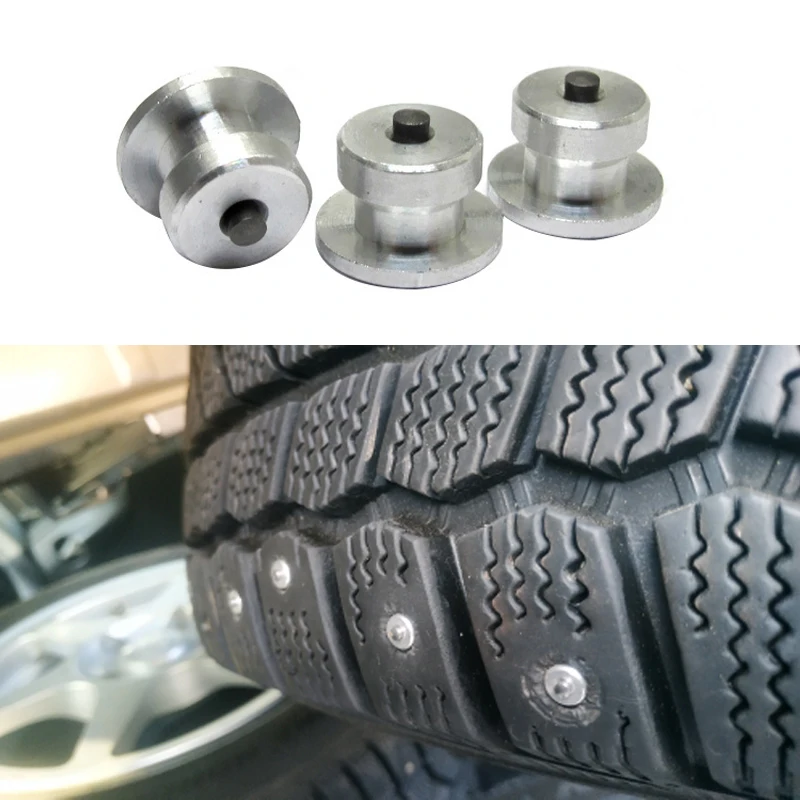 However, if you find a bike you like...
Read More
Hello.
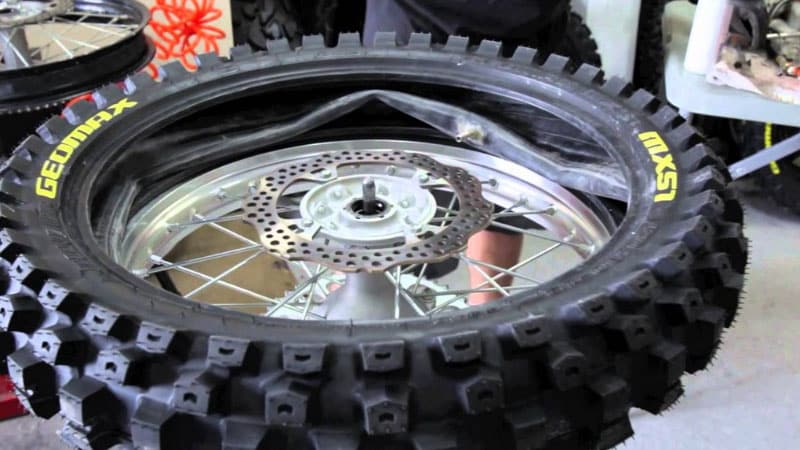
Owners of motorcycles with rims have to go to a tire shop to get new tires on their motorcycle. When replacing tires on such motorcycles with your own hands, the disc may bend and lose its presentation. On the other hand, if you have an enduro or any other bike with spoked wheels, it is quite possible to change the tires yourself. Moreover, any normal endurist simply must be able to change tires in the field with a pair of mounts, since off-road trips are often associated with long hauls on asphalt. In this case, it is advisable to go to the place of drowning in mud on road tires, take a set of "evil" rubber with you and put it on a motorcycle in an open field immediately before off-road. Today we will talk about changing the tires of a motorcycle with spoked wheels on your own.
We will talk about the types of motorcycle tires and indices in the names of rubber models, since this topic is worthy of a separate article, and maybe more than one. Today, within the framework of this article, I will give only one of the simplest classifications. Tires for motorcycles are chambered and tubeless. Tubeless tires are convenient, used everywhere on motorcycles with disc wheels. The disk inside is hermetically sealed, so it is enough to put new tires on, smearing the joints with a special sealant, pump up - and you can ride. Spoked wheels are not airtight inside, since the spokes pass through the wheel rim at one end. On spoked wheels, tires with tubes inside are used - it’s clear why.
Is it possible to put tubeless tires on a spoked motorcycle wheel by simply sticking a conventional tube inside? Yes, easily! Now I will just put tubeless tires with cameras on my motorcycle.
What is the difference between tube and tubeless tires? Everything is very simple.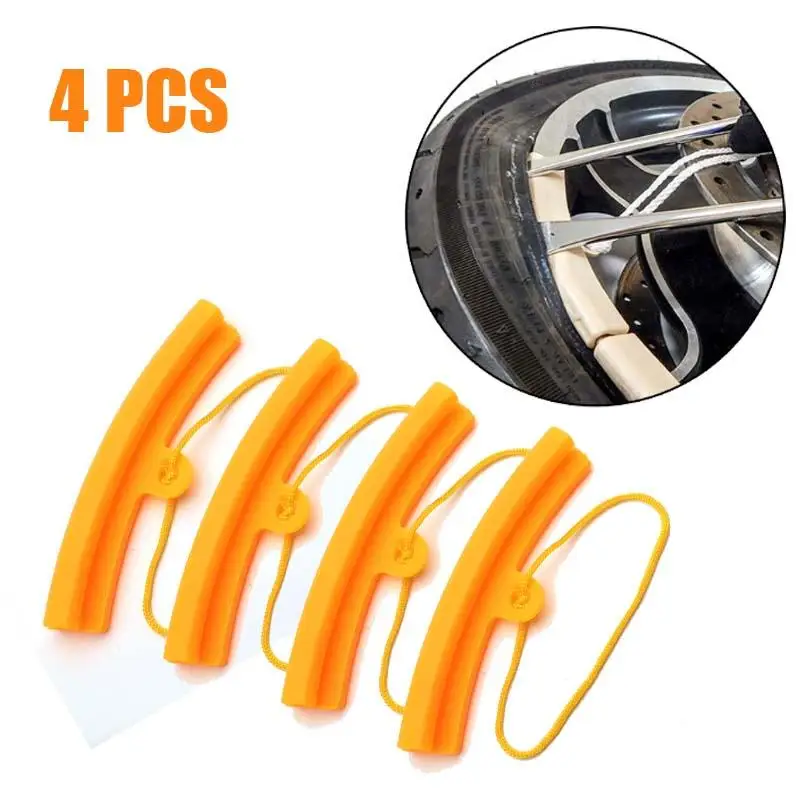 Tubeless tires have a special groove on the inside that acts like a "hook" and increases tightness.
Chamber rubber has no such "hook".
Also, many manufacturers claim that tubeless tires have a reinforced cord. I don’t see anything wrong if we ride a motorcycle with tubes in tires, and even with a reinforced cord 🙂 Especially since there is no difference at all between installing tubed and tubeless tires on a motorcycle 🙂
Let's go!
What you need to change tires on your motorcycle.
To change tires on a motorcycle, we need the following materials and tools:
1) New tires. In my case, the BMW F650GS is the Metzeller Tourance. By default, the Metzeller official website gives the tire sizes specified in the manual for the BMW F650GS motorcycle. Front - 110/90 - R19, rear - 130/80 R17. In principle, there is a lot of space left in front and behind, so I will put 120/9 on the front wheel0 with 19 radius, and I'll leave everything as it should be behind.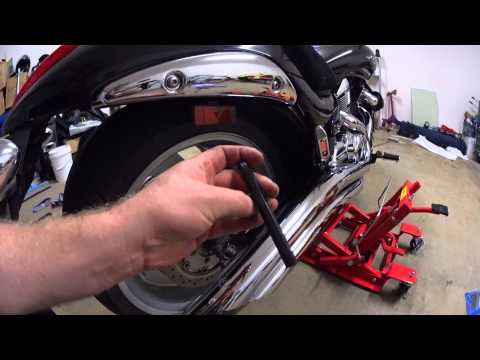
2) Crowbars (or crowbars, whatever they call it). I manage alone, but I have experience since Java. Better to use two.
3) Soap solution. It will be needed when putting on new tires, and when removing the old one, it can also come in handy. Without it, you can accidentally break a tire. I know that many people use Vaseline and other neutral lubricants. I don't even know where to buy Vaseline now, so I use soapy water. Soap in water should ideally not dissolve completely and be similar in consistency to snot 🙂
4) Metal cap on the nipple with hooks for unscrewing the nipple.
5) A set of tools to turn the screw nuts.
Do-it-yourself motorcycle tire replacement.
Front wheel example.
1) Loosen the wheel axle while the bike is firmly on the ground.
2) Hang the motorcycle on a stand or put it on the center stand and remove the wheel.
3) Unscrew the nipple and let the air out of the wheel. Then we need to "separate" the rubber from the wheel rim. To do this, you need to stomp her feet. You don't need to jump on it, there is a chance to bend the rim.
There is a little trick here. Sometimes the rubber sticks to the rim tightly. In your garage you can dance shamanic dances with a tambourine, jump on a wheel and separate, but what if you have to change tires in an open field, with a limited number of tools and time?
If you are traveling with a group, the easiest way is to use the side stand of the second motorcycle. Just put the wheel on the ground, fold down the side stand of the second motorcycle and put it on the camera near the wheel rim. Jump like a cutie! 🙂
4) Pry the tire on one side with a pry bar. Be careful not to push the crowbar too deep to avoid tearing the camera.
5) Insert the second mount.
And so on in a circle.
6) Pull out the camera.
And finally disassemble the wheel.
7) Check the condition of the rubber that protects the camera from the spokes. If it is worn or frayed, it must be replaced.
8) Now let's take a closer look at the new tires. We are interested in two markers that are indicated on any rubber. This is an arrow indicating the direction of rotation of the wheel.
And the marker against which the nipple should eventually be placed. Either two dots or one bold.
9) Then grease the new tire with soapy water.
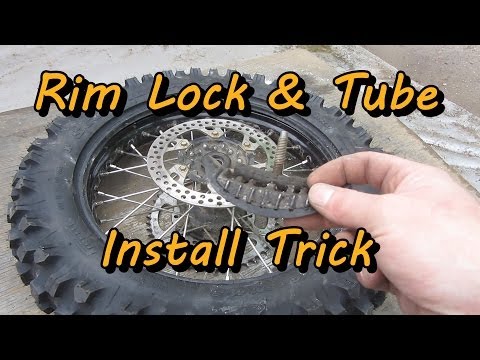
10) First we push in one bead, then we push the tube inside, aligning the marker against the nipple, then we fence the second tire bead. The camera must be pushed in so that it is not twisted anywhere, otherwise there is a possibility that it will fray itself after a certain number of kilometers.
11) Done. Put the wheel back on the bike.
With rear wheel by analogy.
How many atmospheres to drive into tires, usually indicated on the pendulum.
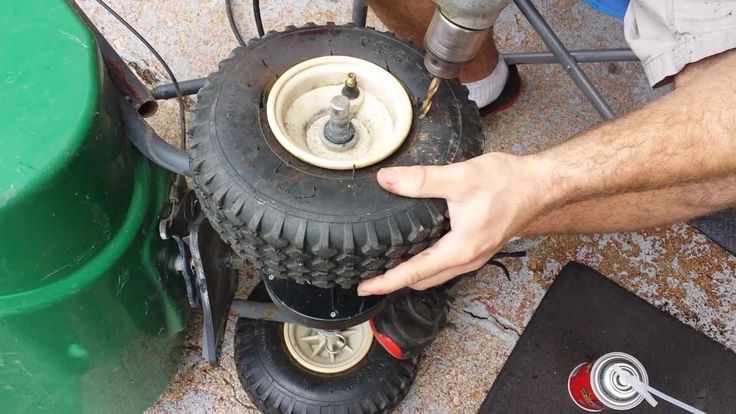
Wheel balancing on enduras and choppers is not as important as on sportbikes and other high-speed motorcycles - endurists and choppers usually ride like old grandmas 🙂 But later I will show how to do wheel balancing in handicraft conditions with your own hands.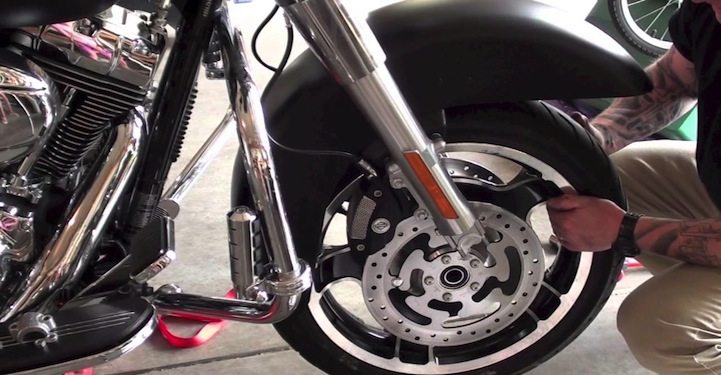 This process is not difficult, and with due patience and experience, you can achieve the same results as with professional equipment.
A couple more moments!
1) Please note that, as in any repair, cleanliness is the key to health! The inside of the tire must be kept clean, because in case any solid particles remain between the tire and the chamber, you have a chance to repeat my Rear Wheel Saga 🙂 I usually blow the inside of the chamber with a compressor and wipe it with a damp cloth.
2) In order not to pinch the camera with the mount, you can pump it up a little. It helps me, and you yourself think.
All.
This entry was posted in repair and maintenance and tagged BMW F 650 GS, motorcycle, report, repair, photo. Bookmark the permalink.
There is not always a way to call a tow truck, and driving on a flat tire, “chewing” the rubber and killing the rim is at least uncomfortable.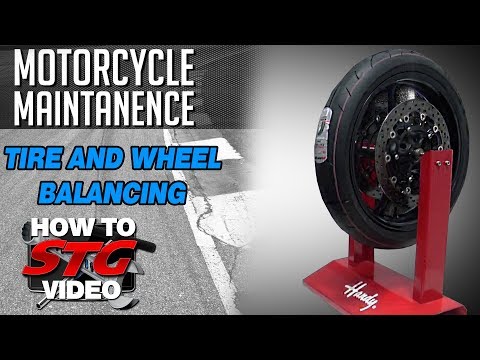
The very first replacement of rubber on a motorcycle or scooter gives reason to think - what is better in terms of quick repairs: tubeless ones that do not require wheel disassembly to eliminate a puncture, but leave the rider helpless if, along with damage, it “led” and flattened the edge of the disc? Or chambers - allowing sealing almost ring breaks (if only there were enough patches), but requiring the removal of rubber from the rim for this? The unequivocal answer is no. Few classics, straights or tourers today remain "loyal" to tube rubber models: tubeless tires are lighter, softer, warm up and cool down faster thanks to simplified heat transfer. In sports, more precisely - enduro and motocross, chamber - on the contrary, prevail: only spoked wheels can "play", withstanding strong alternating loads during landings and impacts.
The nuance is that a tire with a chamber can be put on any spoked or cast disc, and a tubeless one can only be placed on a cast one, because only it can ensure tightness.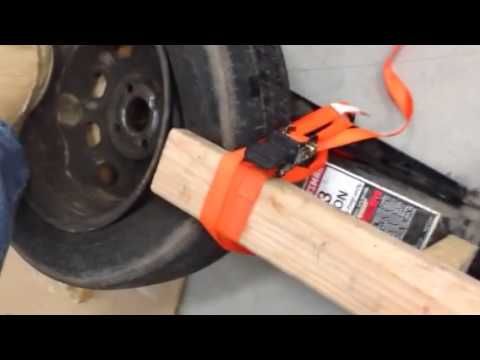 Tube – can be installed in a tubeless tire as an emergency measure. In case of major damage to the sidewall, cracks or curvature of the edges of the rim, this will make it possible, after pumping up the wheel, to reach the nearest tire service (and there already - straightening, balancing and other maintenance according to the rules). True, for such a focus, it is advisable to take a camera with a face value one less than the diameter of the disk, otherwise it will create folds inside that will rub for a couple of hundred kilometers. The resource of such a “treatment” is large - until the next puncture, like a new one.
It depends on the magnitude of the damage whether it will be possible to eliminate it on your own, or whether you will have to “surrender” to the motorized tow truck. In tubeless - holes up to 5–6 mm are patched, in chambers - as much as there is enough glue and patches, the main thing is the condition of the tire. To determine the extent of the disaster - find a place where you can safely stop without violating traffic rules (where it is prohibited - you will have to sacrifice tires and drive on).
If the wheel deflates slowly, and the object that pierced it is still inside, you can try to carefully drive to the tire shop. A completely deflated "pancake" will have to be resuscitated on the spot, or - remove the wheel and take it to the service.
To find a hole in a tubeless tire, if it is very thin and not immediately visible, the wheel must be pumped up, slowly pouring water - bubbles will go. In place, tubeless tubes can be “harnessed”, or filled with sealant inside, without removing from the motorcycle.
With the second type of tires - more difficult. A torn balloon must be removed from the tire to detect a defect and seal. In a good way, the wheel must be removed from the motorcycle and disassembled on a clean, flat, hard base. Suppose such a “patch” can be provided even off-road, but how to remove the wheel on a motorcycle if it does not have a central stand? And shooting is not required. The motor must be carefully laid on its side, after making sure that the faucet is closed, gasoline does not flow out through the tank cap (antifreeze does not flow from the tank if the motor is “dropsy”), and removing the plastic or wardrobe trunk with fragile contents (if any).
You will have to unscrew the wheel from the motorcycle only if you need to replace the tire, or it is decided to patch the tubeless tube with a “fungus”. In the absence of a central stand, this will also have to be done on a lying bike, or - make this stand from improvised materials (bricks, stump, car jack), placing them under the crankcase protection from below, the central tube of the frame, the duplex jumper (but not under the plastic, itself engine crankcase or attachments!), under both footrests - if they are not folding, or - under the pendulum. Before removing the rear wheel on a motorcycle, the front fork must be loaded with something, or an even higher lining is made.
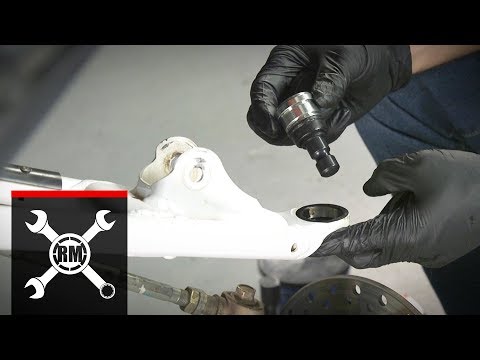
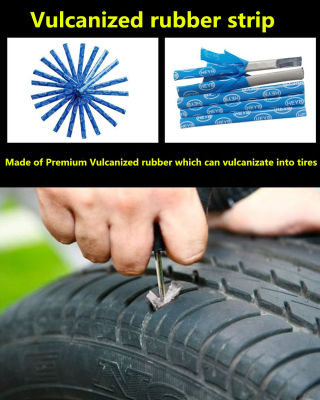
In a motorcycle tire fitting shop, tubeless tubes are repaired by cold vulcanization.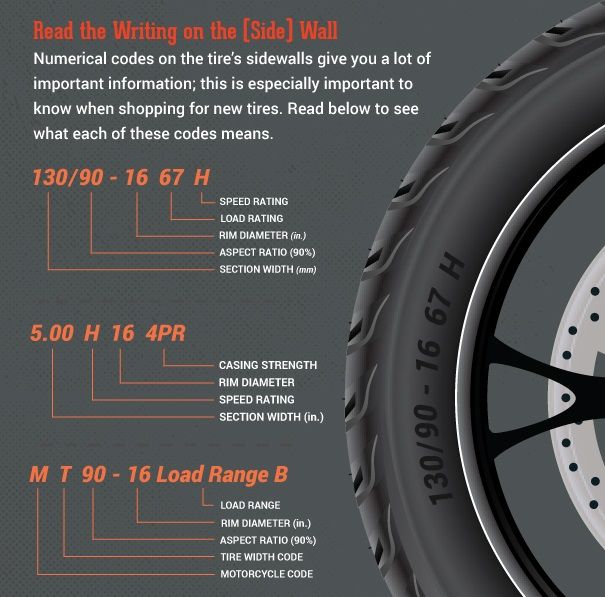 They are removed, disassembled, the puncture site is cleaned from the inside, degreased, lubricated with glue and a calibrated “fungus” patch is inserted into the hole from the inside. The fungus itself is a thin plate of rubber with a “leg” tube in the center. The leg - by the guide wire is dragged through the hole of the damage, and the "hat" seals it.
After half an hour - you can put the tire back. The reliability of such a repair is high, the patch does not cause a significant imbalance, the service life of a sealed tire does not decrease.
This method is also applicable on the road, the main thing is to have the necessary equipment and materials with you:
The fungus repair procedure does not require much experience.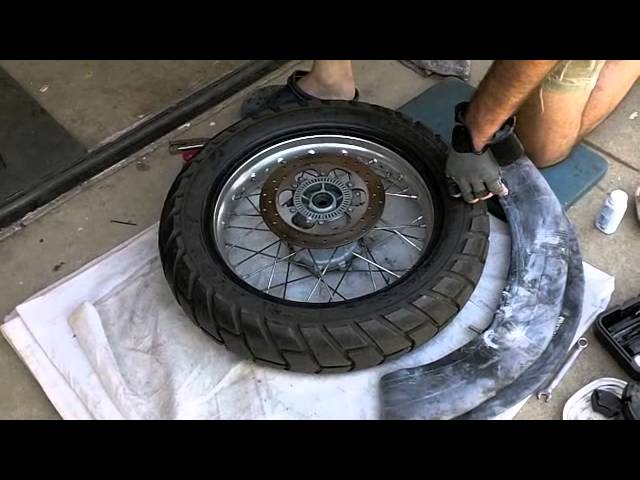 The main thing is to keep it clean, fully clean the place where the patch fits, let the glue dry slightly to a dull finish and press (roll) the surface of the fungus with high quality, expelling all the air between the layers. If necessary, you can degrease the place before gluing with gasoline, but without the rest of the above, it will not be possible to fully carry out repairs.
The compressor is sometimes replaced by a small cylinder of compressed air or carbon dioxide. Unlike a mechanical pump, it will immediately create a “throw” of pressure, pressing the tire beads against the rim flanges (in emergency cases, even a fire extinguisher was used to pump flat tubeless wheels). When connecting the compressor, start the bike's engine before you start inflating the tire - let it idle. Otherwise, the motor can "land" the battery, and you will not start.
Manometer - needed for control. It is undesirable to pump over the repaired tire. It is recommended to "inflate" 0. 2 atmospheres less than the nominal value. Inflating too little is also bad: a flat tire has a larger contact patch with the road, so the place of a fresh patch will deform more.
“Burning” a tubeless tube and sealing its internal cavity through a nipple are quick, simple methods that do not require special skills. To repair the damage, you only need the materials themselves, and how to pump up the wheel.
Now in Moscow, and not only, 6-5 varieties of cans with a sealant are sold - a quickly hardening "liquid rubber", with a volume of 800 to 250 ml.
Applying "Anti-Puncture" is simple: put a tube with a fitting on the nipple of the camera, turn the can over, and hold the button according to the instructions. Then - pump up the wheel, cleaning the nipple from the foam, roll it, making a full turn to distribute it.
The sealant is blown out with air into the puncture hole and clogs it, solidifying. After 20 minutes - you can go. Reliability of repair is high. Resource - until the next puncture.
If you have a compressor, start immediately pumping up the wheel, so it will be easier to work with a puncture, insert a patch, and it will swell faster.
Procedure:
You can go in 5 minutes, you just need to make sure that it doesn’t descend anywhere else.
Outwardly identical, repair kits for harnessing wheels can differ in price by almost half. This variation is explained by different configurations - one will have only three items, the other - six or seven.
A complete tubeless tire repair kit contains:
Regardless of the cost, you need to choose a kit in which the harnesses will be reinforced, and the awl - with a deep spiral winding (notch), and not a “needle file”. Inserting a flagellum is sometimes easier with a regular thin screwdriver. If there is no glue in the kit, or it has dried up, the flagellum is moistened with gasoline.
At motorcycle service stations and car services, holes in the chambers are closed by hot vulcanization: a layer of raw rubber is applied to the cleaned, fat-free puncture site and, after squeezing it well, it is heated with a special “iron”. Iron - burns, layers - are fused into a single whole. Reliability of repair is high. The resource will be almost like a new one.
Cold vulcanization (patching) - used if the workshop is not equipped with a vulcanizer. In this case, the quality of the service and the reliability of the repair will depend on the accuracy of the master. For the convenience of gluing, the camera is completely removed in the service, but, I repeat, this is not necessary. It can be repaired on the spot in the same way (there are no other options except for replacing the camera), but without removing it from the motorcycle.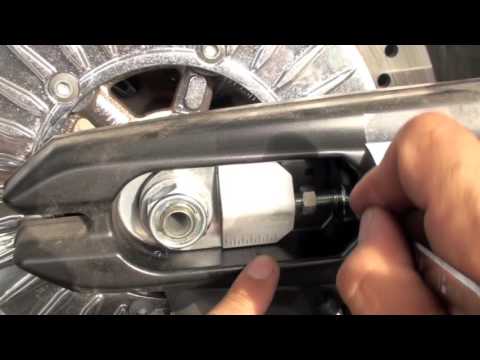
This can only be done if you have two metal mounting blades. At least one, the second can be replaced with another flat tool. You can still disassemble the wheel with a wide screwdriver and a “family” key wrapped with electrical tape. But this is only as a last resort, otherwise you can damage the cord.
Sequence of work:
 Let the glue dry for a minute.
 The fencing must be carried out twice as carefully and more slowly than dismantling, lubricate the side with water or soap, “help” more with your hands, otherwise there is a risk of picking up the edge of the chamber with a spatula and tearing it.
Important! If the wheels of the motorcycle are equipped with tow bars - before pressing the tire bead from the rim, you need to loosen this tow bar! But do not unscrew the nut completely, do not disassemble to the end.
A standard “first aid kit” (a set for repairing classic motor rubber) contains only patches and glue, so it is advisable to supplement it yourself with a piece of “skin” or a needle file. You can degrease with gasoline, or apply a little glue first and wipe off immediately, rolling up the dust with it.
Now there is no shortage of specialized motorcycle workshops not only in Moscow - in all major cities there are motorcycle helpers who help motorcyclists directly on the track, or tow to where you can quickly change the camera, or patch the tubeless correctly, so that there is no trace left. Where there is a guarantee.
Self-replacement of a tire on a motorcycle requires a certain physical condition, and for the first time - a “kilometer of nerves”. At the service station, instead of you, automation will “sweat”, which will not lock up the board and will not scratch the disc coating with a spatula. The main thing is to do it quickly (if you need to go urgently, the price sometimes does not matter).
Repair at the service - may be the only possible one if, due to driving on a flat tire, the tire nipple is turned and torn off. Especially if he flew off and got lost, but there is no spare. In mototiremontazhke - there is always a set of consumables for any wheel diameter. In the same place, in extreme cases, you can buy a new tire, or a used dokatka.
In addition to the patch, for normal operation of the wheel, balancing must be ensured. This is generally a useful procedure during any change of rubber, otherwise if there is a strong imbalance, the wheel bearing will inevitably break due to vibrations, and the hands will quickly get tired and “buzz” after long rides.
The first couple of tens of kilometers - do not drive, go at the speed of the flow.