Since ATVs invest the majority of their time outdoors, their plastic body ends up being discolored from the sunlight's rays, as well as surging around in dirt, mud, snow, and also water does not help. Plastics get messed up by boots or passing particles, and also splits can appear in the body or windshield.
There are a few choices for restoring your ATV's faded plastic so it appears like a showroom model once more. These alternatives differ in price as well as problem.
In this guide, we clarify exactly how to make your ATV resemble new. We provide you with some suggestions on exactly how to restore ATV plastic.
Table of Contents
Now that you understand what creates your ATV plastic to fade allow's take a look at the various ways you can recover your vehicle to its previous glory.
When it concerns restoring your ATV, there are many methods that can be made use of to take on discolored plastic, with everyone delivering different outcomes. So to help you at the same time, we have actually detailed the various techniques down below.
Before you restore your ATV plastic, you should keep your ATV clear. Wash the ATV completely using Dawn dishwashing fluid. Dawn helps get rid of oils and grease from the surface area. And afterward, completely dry the maker totally. If there are scratches, you will also require to sand its plastic surface.
Linseed oil can recover discolored plastic, however, it takes ages to dry. You need boiled linseed oil, rather. Note-- this does not imply you steam the linseed oil on your own! It implies that the linseed oil has actually been pre-treated to completely dry faster.
To speed up points along, choose boiled linseed oil and mix it with paint thinner. We advise a 40/60 proportion of linseed oil as well as paint thinner.
Begin by cleaning your ATV extensively. For best results, you'll intend to eliminate the rack as well as any other parts of the device that are covering the plastics.
Apply the mix to your plastics using a completely dry cloth. You'll discover the linseed oil will remove the oxidization that's causing fading. After you have actually used the blend to all the plastic, allow it a full day to dry.
If you maintain your ATV covered and do not use it on a daily basis, this restore will certainly last for a couple of months. If you continuously use your ATV outdoors, this treatment might be called for to be done again in 4-6 weeks.
The following video shows you how to restore ATV plastic with boiled linseed oil.
There are plenty of products in stores that declare to recover plastic. One of the most preferred is Solution Finish and CAR GUYS Plastic Restorer.
A look through customer testimonials shows that they work. How much time the remediation lasts differs from item to item, and just how well you protect your ATV. Yet most appear to last for a number of months.
When using a certain restorer, inspect the instructions of the application on the label. Also, the majority of these items are likewise helpful for plastic. If your ATV seat has a plastic cover, you can make use of these restorers to reverse fading.
First, you should remove the skid plates and racks. If they are drastically damaged whatsoever, you might intend to replace them totally. To enhance your better-looking new plastics, you may intend to strip or sand your racks and repaint them with a spray-on bed liner.
Next up, offer the ATV a good clean overall. Now, it's time to prepare the plastic for waxing. This means fining sand the plastic with fine sandpaper
, working your way up from the lowest amount of sandpaper to the highest. You can also use an oscillating device to quicken the process. Make certain you're wearing risk-free gloves, and finish up by fining sand with steel wool.
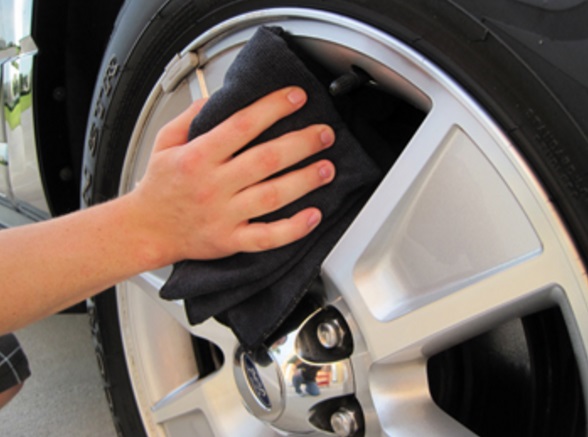
Use a vinyl flooring liquid wax to the plastic using a car and truck wax applicator. Using thin layers, you can service one area of the plastic while one more section dries. You will need to apply a number of coats, and polish the plastic after each application.
After the last layer is full and also bone dry, end up with an automotive wax for an added layer of luster.
This process is more complex than linseed oil and paints thinner restoration, but it usually has longer-lasting results.
This is the debatable one that we don't advise. It works such as this: you set the heat gun to the lowest setting and blow it a few inches away from the plastic, moving slowly over the discolored areas.
This approach generates instant outcomes. The faded plastic instantly appears new and also glossy.
While it functions, how it works is the issue. The heat partially thaws the top layer of the plastic, making it show up new.
Comparable to various other plastic restore methods, the heat gun method does not last forever. Oxidation as well as fading will certainly return after a number of weeks or months. So you need to duplicate the treatment.
The trouble is that every time you use a heat gun, the plastic gets more brittle as well as more probable to crack as you set about your riding.
So we do not suggest making use of a heat gun. Use linseed oil or a plastic restorer. If you want long-term remediation, see the last method below. You can watch the following video to learn how to restore ATV plastic with the heat gun.
 Paint
PaintFor the last approach, we are going to go over; we have selected an option that is arguably one of the most efficient when it comes to restoring ATV plastic. If you see that your ATV has actually begun to discolor, you can constantly battle the issue by repainting it.
You can do this by using spray paints ideal for ATV plastic, although you will need to apply a primer coat and a safety top layer for the best outcomes.
Like the majority of recovering approaches, paint is not permanent as well as will certainly start to fade with time. Nevertheless, it can last much longer than various other repair choices and can be quickly reapplied whenever the plastic begins to discolor.
If you want to learn more about paint, you can click here to get a guide for painting your ATV step-by-step.
Broken plastic is a little bit a lot more challenging to fix. If a piece of the plastic has come off, not simply a basic fracture, you may be much better off changing the whole plastic part.
However, if it's just a crack, there's hope. We discovered numerous feasible means to repair broken ATV plastic. Nonetheless, most of them, such as using epoxy or superglue do not work well. As quickly as you go out with the ATV once again, the sealed cracks are then loosened
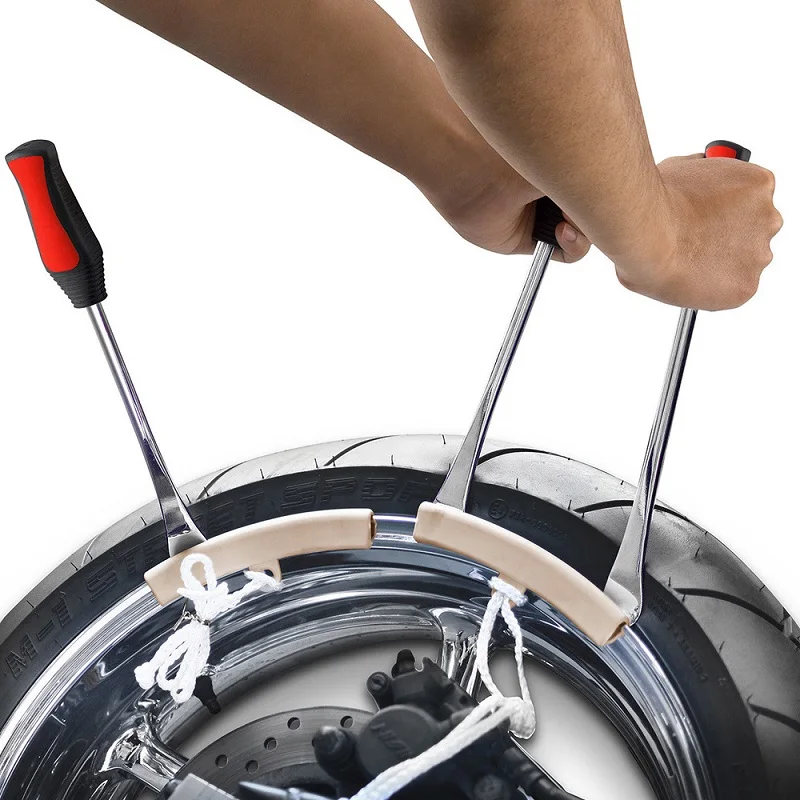
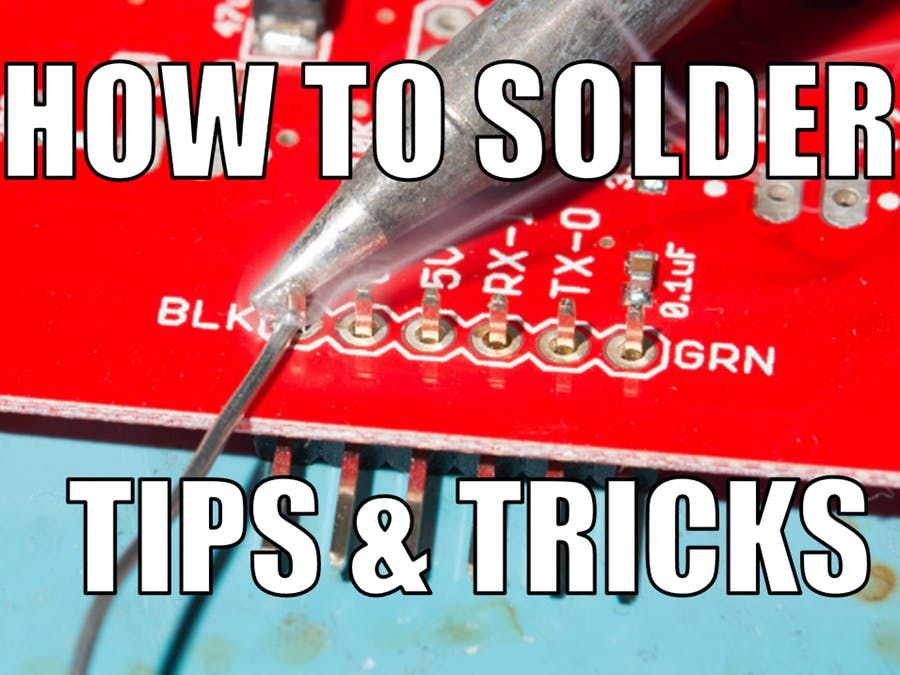
The solution that appears to work ideal is melting the plastic. You can use a plastic welder, heat gun, soldering iron, or some other source of heat to melt the plastic along the crack. You'll require to apply stress on both sides of the plastic up until the melted plastic remedies and holds.
For larger fractures, you may need to thaw an exterior plastic to fill the fracture. You can also get plastic welding rods or reinforcement plastic mesh.
When it comes to the windshield, because it is likely acrylic, an acrylic solvent concrete or an acrylic adhesive is the best option.
Adhere to the directions on the label. Keep in mind to clean the windshield before using any item.
Plastic burs very easy as well as wet fining sand will prevent that. With the 180 grit just sand the actually bad areas as well as get the deep scratches, nothing even more. After they have gone away, Use 220 on the overall vehicle. Sand up until the shade is also all over and the scratches are gone.
Brightening with Toothpaste or Sodium Bicarbonate Toothpaste and baking soda are both light abrasives that you can make use of to brighten plastic. For deeply etched or blemished plastic, capture non-gel toothpaste straight onto the surface and also buff it in a circular movement with a microfiber or cotton cloth.
WD-40 Multi-use product is excellent for most plastic surfaces that have actually had a great deal of exterior direct exposure, so it's great for garden furniture. It is very important to note that Polycarbonate and clear polystyrene plastics are among the very few surfaces where WD-40 multi-purpose products can be avoided.
The very best method I have actually located for removing light scrapes is to choose some 1500 Grit Wet Sandpaper. Just utilize the sandpaper over the locations with scrapes and also enthusiast it out when you're done. You can end up with a coat of the plastic restorer I discussed above to make it look new.
To restore the shine, apply a small amount of plastic or metal polish just enough to cover the dull areas, then apply it in a circular motion with a clean, dry cloth. You may need to repeat the process a few times, but eventually, the plastic will shine like new again.
The Most Comprehensive Motorcycle Camping Gear Checklist (Ultimate guide for you)
Rodney L Herron
Rodney L is a technical writer and product consultant with over a decade of experience in the motor industry. Rodney is a fan of performance machines that run fast and loud and an expert in all things custom. His numerous articles and write-ups are available at our knowledge base. Whether it’s something wrong with your motorcycle or you are building a custom bike, you can trust Rodney’s experience.
One of the most annoying things about owning an ATV or Dirt Bike is dealing with fading or cracked plastics. No matter how great it runs, if the plastics look bad it will be the only thing you notice. In this article we cover a few easy ways to refinish your plastics without breaking the bank.
Want to jump to the repair techniques? Choose your problem below:
It’s pretty obvious what causes a crack, but what causes your ATV and Dirt Bike plastic to fade is a bit more difficult to explain.
Plastic is made primarily from refined crude oil.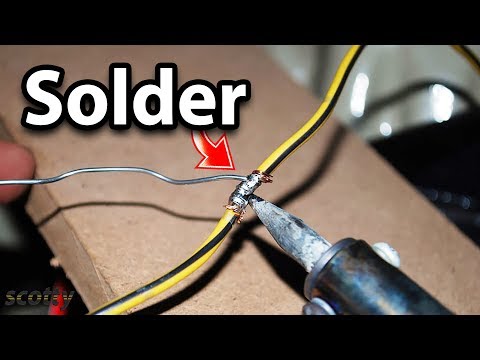 When it sits in the sun for extended periods, the surface level oils can evaporate and cause the plastic to dry out. Dried plastic loses its sheen and fades. Extremely dried plastics can even crack, making it very difficult to fix.
Plastic fade can appear differently depending on the color. Darker colors will develop a white layer on top of the plastic. It can be scraped off with a razor blade but leaves behind a dull color underneath. Lighter colors can yellow from sun exposure as the plastic dries out.
To refinish plastic fade, you have the unique challenge of adding back oils into the surface of your ATV or Dirt Bike. As difficult as it sounds, it actually is much easier using any of the four techniques we discuss below.
There are a litany of products online that claim to refinish plastics, but what ones actually work? Here are the three we’ve tried and their results.
CarGuys Plastic Restorer
This was the third plastic restorer we tried to bring back the original green color on our Yamaha Bruin 350. The first three did the job, but the CarGuys Plastic Restorer did it the best, and with the longest shine. It is easy to apply with the foam pad applicator included with the bottle. And if you don’t like how it looks, CarGuys offers a zero risk purchase. You can return the bottle for a refund, no questions asked. Something you don’t see that often these days.
TriNova Plastic Restorer
This was the first plastic restorer we tried, and really liked the shine it produced. It took a bit longer to dry but left a long term shine on the plastics. You need to keep it clear while drying because it will trap dirt and bugs in the finish. I would also suggest letting it sit in the sun for 12+ hours after application and wiping off the excess multiple times to reduce any streaking when it gets wet.
The easiest of the refinishing techniques uses focused heat to bring the oils inside the plastic to the surface. It is most commonly performed with a heat gun to ensure there is no direct contact between flame and the plastic. It also works best when applied in smaller areas, as it can be tough to get a uniform sheen with this method.
1. Test this method on the under side of a fender or somewhere with low visibility. It takes technique to know when to stop applying heat.
2. If you heat gun has multiple settings, start with the lowest heat first. Apply heat at a longer distance of 1 foot to gently warm the area.
3. Slowly move in toward the plastics with the heat gun, focusing on an area about the size of the heat gun. Let the plastic heat until you see it start to become shiny and smooth (almost looks like the plastic is melting.
4. Quickly remove heat and allow that area to cool. Check back to ensure the shine remains in that spot. If it becomes dull, it may 1 or 2 more applications to become more permanent.
5. Don’t try to over heat the plastics. It won’t expedite the process. You will likely melt the plastic and no matter how much heat you apply, you can’t fix that.
This is a method that has been floating around the forums forever and we can attest that it does work. Using a simple mixture of these two items, you can renew the shine of your plastics.
1. Pre-mix in a container or spray bottle 3 parts boiled linseed oil to 2 parts paint thinner.
2. Pour some of the mixture onto your plastics or on a rag, and wipe along the surface. It will be a bit runny so make sure you keep the rag moving. The secret here is to apply a thin layer to the entire surface area.
3. Let the mixture sit for about 20-30 minutes in the sun. The heat will open up the pores of the plastic, letting more of the mixture set in.
4. Wipe the plastics with a clean rag, removing the excess mixture. Let it sit in the sun for another 30 minutes to dry to the touch.
In our experience it is not permanent, but when applied a few times each year you can really make your plastics look new. The only downside to this method is i can be tacky after application, so dirt or grim can stick if you don’t wash down the vehicle first.
The most permanent but also the most time intensive option for refinishing your plastics is to sand and buff them. Sanding the plastics removes the dry faded area, exposing the underlying oils. Buffing then ensures a smooth finish, like it came from the factory floor.
1. Depending on the how bad the plastics are faded will determine which starting sand paper you want to use. Typically you will want to start with a 400 grit however if you are having trouble getting through the haze you can move down to a 220 grit. Anything lower and you will remove too much plastic, potentially sanding through the part all together.
2. All sanding should be done with wet sand paper, as well as continuous water on the plastics. This will ensure that the sand paper doesn’t gum up, and will create a smoother finish. I keep a bucket of water on hand and dip the sand paper in every 20 seconds or so. In this phase you want to remove the majority of the hazing.
3. After the area has been thoroughly sanded. Switch to 800 grit sand paper and repeat the process. This will remove the remaining haze.
4. Next finish with a 1200 grit sand paper to smooth out any minor scratches in the plastic.
5. Lastly you want to buff the area with a buffing compound to remove all scratches and create a mirror like shine in the plastics.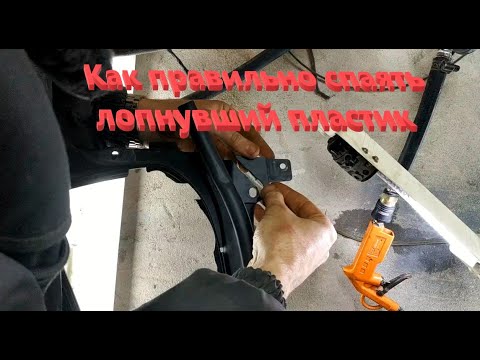
You should also consider how to remove any existing stickers on the vehicle. If the stickers have any clear sections, the faded plastic behind will show through unless you remove the sticker and sand behind it.
In the event that you crack a plastic or worse, break it, the first thing that crosses your mind is the cost of replacing the whole panel. That can set you back $100 to $500 if you find a used set. New plastics can be twice that much.
Welding plastic isn’t a perfect fix. It will close up any gaps, add rigidity and make the parts look good from a far. But when you get close, you will see the seam.
I set these expectations because some people will get upset when the plastic repair is done, and it doesn’t look brand new. If you need a good quality fix and don’t want to spend the money on a new part, then keep reading.
Plastic welding uses direct heat to melt the two ends of plastic so they can be pressed together and dried.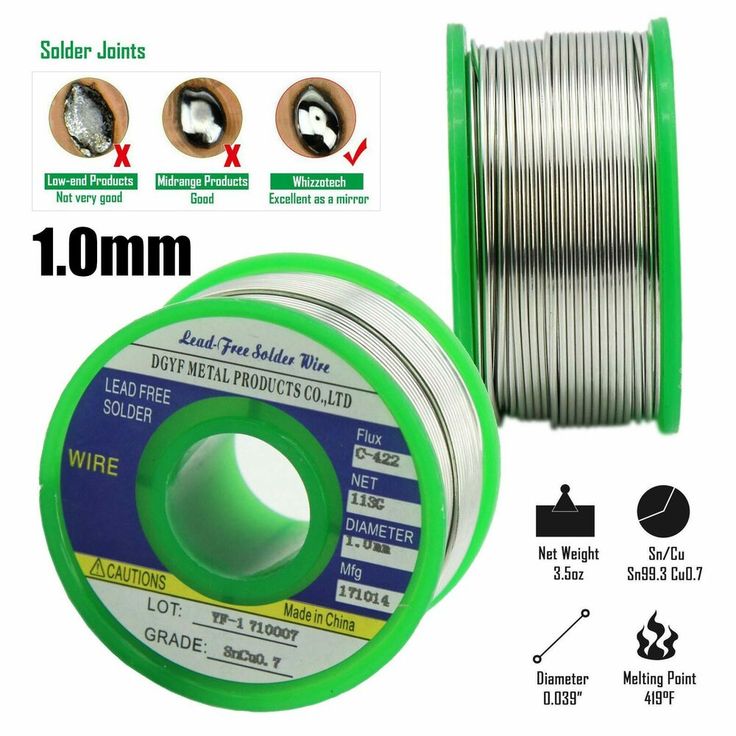 Often the weld is not strong enough by itself to hold up against moderate use, so a metal mesh is introduced to the weld to strengthen the bond.
In this video the speaker is using a heat gun instead of a plastic welder. As you can see, it works just as effectively but may require some additional time to get the plastic to melt.
1. Clean and sand each edge of the plastic you are bonding to create a good bonding surface.
2. Prepare your tools by plugging in the welder, and having the mesh on hand for easy use.
3. Slowly heat up the inside edges of both pieces, favoring the side of the plastic which is less visible normally. You don’t want to over melt any area as it will create bumps when pressed together, or worse it will create gaps.
4. Push the two pieces of plastic back together to create a bond that we can go back and strengthen. If you are not using mesh, use the welder to melt the plastic on the bottom side of the plastic, creating more surface area for the parts to bond.
5. Place a small piece of mesh over the entire length of the seam, overlapping about a half inch to an inch on each side. Use the plastic welder to push down on the mesh and melt it into the plastic. You don’t need to over do it, just enough that it holds firmly.
6. Complete this process across the entire mesh to strengthen the weld. If you are repainting the plastic you can use some bondo or high build primer to hide the weld on either side.
Professional repair and restoration of plastic products:
for all types of equipment:

We restore and repair:
We repair optics:

+ VIEW ALL SERVICES
We offer professional restoration and repair of automotive plastic products, as well as repairs and optics. A group of qualified professionals works in accordance with innovative technologies and guarantees quality. Work is done quickly. Individual solutions are developed for the client.
 But, we do not seek to mislead the client. The price list is open, and the cost of the work is known in advance.
GLASTS MERCEDES-BENZ
BMW windows BMW
headlights VW Touareg
headlights Skoda Kodiaq
we provide turnkey plastic and headlight repair1
SELECT A SERVICE
2
BOOK YOUR TIME
3
DRIVE YOUR CAR
4
READY! WE FIXED EVERYTHING
 Petersburg
 Why buy a new headlight at a three-price price if you can repair the old one at a profit.
Buying a new mirror is quite expensive. We save your money and repair mirrors before 90% new condition.
Did you know that you can repair or restore any motorcycle plastic part?!
Seeing once is better than hearing 100 times. Repair works wonders.
We will repair any complexity of your autobox qualitatively and quickly.
Did you know that any plastic element, be it a spare wheel or a grille deflector, is subject to repair!
Finding a new plastic part is not an easy task. We are happy to help you repair the plastic of your snowmobile.
It is always much easier to repair an ATV plastic part than to buy a new one.
We are happy to help you repair the body and plastic parts of your watercraft.
We are open to cooperation with both organizations and individuals.
We work with world brands Koito, Bosch, Hella and others.
We will help you choose a manufacturer of xenon lenses for your car.
Installing new lenses and upgrading the appearance of headlights on a turnkey basis.
Professional rear light repair can save you a lot of money.
We will repair headlight mounts of any complexity on all brands of cars, motorcycles and special equipment.
Specialists of our workshop will restore the headlight even after the most severe accident.
We guarantee 100% success in solving headlight fogging problems.
We work with proven world brands LED
We work with proven world brands BI LED
Repair of plastic parts of household appliances and any other plastic items
Why wait 4 days for a headlight mount repair kit and overpay 2 times more expensive if you can “quickly and cheaply” repair a broken headlight mount.
Evgeny I. St. Petersburg
“Good afternoon! I want to thank all the staff of the service for a competent approach to solving the issue. I had some trouble with my car, but the result exceeded expectations.”
Sergey Drozdov St. Petersburg
“The guys are just great. The coolest workshop in town. Very democratic prices. They will do whatever you want.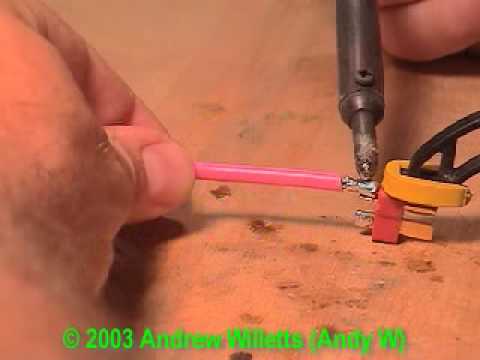 ”
”
Oleg P. St. Petersburg
“After the accident, the car had a lot of cracks and dents on the front bumper. The glass of the right headlight was also broken. I applied to several services, the prices "bite". Found the perfect value for money here. Recommend to everyone, you won't regret it!"
Vasily Petrovich St. Petersburg
“Guys, thank you for the high-quality installation of new bumpers and professionalism. Dropped off in the morning, picked up in the evening. No problem. And the price justifies itself. I recommend! "
Ilya V. St. Petersburg
“Guys, thank you for the quality work with my tired bumpers and professionalism. Dropped off in the morning, picked up in the evening. No problem. And the price justifies itself. I recommend!"
Ernest St. Petersburg
“It was necessary to replace the glass on the Peugeot headlights. Was pleased with the result. They also gave a guarantee. Thanks for the professional approach!”
A: We use special technologies and adapted equipment to eliminate the risk of such a repair.
A: Depending on its nature and size, the appropriate technology is selected. Sealing or plastic patches can be used.
A: We provide a full range of bumper repairs of any severity of damage, regardless of whether all elements of the product are present or not after damage. The technique of sealing and restoration is used, and in special cases, the transplantation of parts from the "donor" bumper. The cost depends on the nature of the damage and its quantity and requires an individual assessment.
A: Yes, this work is possible. We will help you restore it.
A: Car optics with armored coating will be protected from flying particles from the road surface, tar and other mechanical damage.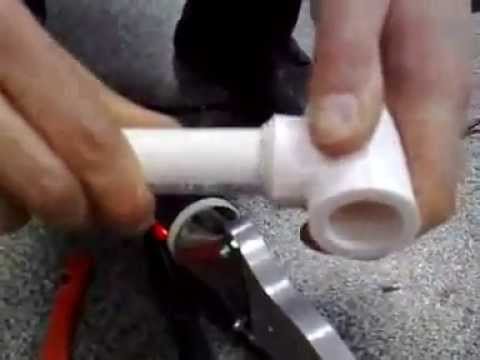
We are trusted by such brands
Contents
Plastic ATV gas tanks are in great demand in the world of motorcycles and car enthusiasts. A plastic gas tank can weigh less than half a comparable metal one. Seamless plastic gas tanks rarely leak and are immune to the rust and corrosion that affects metal tanks. If there are small holes or rips in the plastic fuel tank, there are some fairly easy ways to repair it.
Method one - patch the gas tank with epoxy
Drain the gas tank and let it dry. Sand the area around the hole or crack and wipe it with a cloth soaked in alcohol.
Mix 2 parts epoxy and apply around the hole.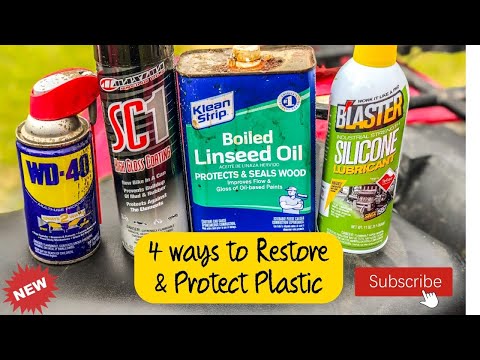 Cut a fiberglass patch wide enough to cover the hole and seal it off.
Place a fiberglass patch around the entire diameter of the hole and press the epoxy to cover the fiberglass. Apply more epoxy to the area and apply your patch, press it down with something and let it dry.
After drying can be carefully sanded and painted in the color of the tank.
Buy or rent plastic welding.
Remove the plastic gas tank from the vehicle and place it in a safe place for welding. Drain the gasoline from the tank and let it dry both inside and out. Wear safety goggles, welding helmet and welding gloves.
Use a plastic welding rod made especially for this purpose and fill the crack or hole with the liquefied plastic. Start at the edge and go all the way down the length of the crack or hole. Fill with plastic a little with a margin of excess, then sand it.
Let the weld cool, sand it and, if desired, paint it with paint on plastic.