Periodically inspecting and replacing the chain on your motorcycle or ATV is part of regular maintenance. Here, we go over steps and key tips for replacing your worn out chain with a new one.
The necessity to periodically replace the chain on off-road machines comes as a byproduct of operating in harsh environments containing dirt, mud, sand, etc. On road machines aren’t exempt from this maintenance task either, however, their replacement intervals are longer. Replacing your machine’s chain isn’t a tough job if you’re well equipped and prepared to take on the task.
Replacing your machine's chain is part of normal maintenance and should not be neglected.To start, it is essential to have a copy of your machine’s factory service manual. Within the service manual, you’ll find specific instructions and torque specifications that may be required to complete the job. For example, if either of the sprockets requires replacement, it is imperative the nuts and bolts that secure them are torqued to the outlined specifications.
Before purchasing a new chain, you’ll want to confirm that the sprockets are in good condition. Pairing a new chain to worn sprockets will accelerate the rate of chain wear and be counterproductive. You’ll also want to inspect components that come in contact with the chain such as chain slides and rollers. Replacing these components at the same time as the chain is advantageous.
Inspect your sprockets before beginning the new chain install process. Notice how the grooves in the worn sprocket are asymmetrical in comparison to the new sprocket.Inspections
Sprocket condition can be checked visually by looking at the sprocket teeth. Sprocket teeth take on a hook shape when they become worn, and in severe cases, shorten and round off when service has been severely neglected.
If funds allow, it’s always best practice to replace both sprockets when replacing your chain. This will allow for the most life possible out of your drive system.
The condition of the chain can be assessed by putting the bike on a center stand. Rotate the rear wheel and visually inspect the chain’s condition. As you rotate, feel the chain for tight spots or links that are stuck together. Attempt to pull the chain away from the rearmost part of the rear sprocket. If the chain can be pulled off the rear sprocket by a half sprocket tooth or more, it is time for a replacement. Similarly, if the chain moves significantly side to side when pushed and pulled on the sprocket, wear has occurred.
Check your chain's wear level by attempting to pull it away from the back of the rear sprocket.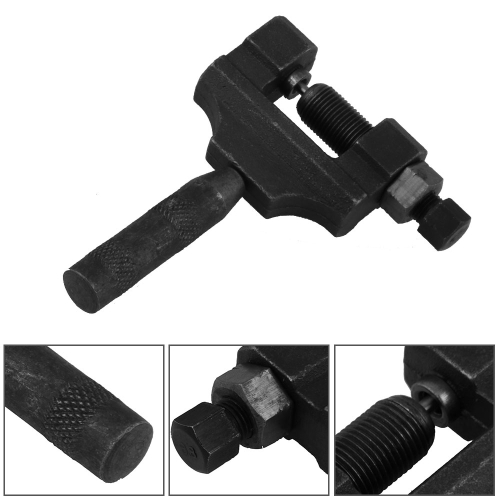 If it's half a tooth or more, it's time for a replacement.
Check any chain slides to ensure they have ample life left. Rotate chain rollers to ensure they spin freely.
Check your chain rollers and sliders as well. These are normal wear items, and they should be replaced when they show signs of excessive wear.ProX also offer OEM replacement chain rollers in addition to chains and sprockets.
Chain Sizing and Options
Off and on-road chains used for powersports applications come in various sizes based on chain pitch and length. Before purchasing a new chain, you’ll need to confirm the appropriate pitch and size for your machine.
Chain pitch defines the distance between the chain pins. Common pitch options are shown in the table below along with their corresponding dimensions.
| Chain | Pitch | Width | Roller Diameter |
| 420 | 12. | 6.35mm | 7.75mm |
| 428 | 12.70mm | 7.75mm | 8.51mm |
| 520 | 15.88mm | 6.35mm | 10.16mm |
| 525 | 15.88mm | 7.85mm | 10.16mm |
| 530 | 15.88mm | 9.53mm | 10.16mm |
There are a couple of ways to determine the type of chain your machine utilizes. First, your factory service manual should contain this information. This is usually found in the rear wheel specification table. Second, most chain manufacturers denote the chain’s pitch on the side of the chain. You can obtain the chain’s length simply by counting the number of chain links it has.
Once you’ve determined the chain pitch and length you need, you’re ready to order. When it comes to ordering, you’ll need to decide on the type of master link connection you want and whether the chain is a standard chain or a sealed chain.
The most common chains in dirt bike and ATV applications are 420 (for minis) and 520. ProX offers both sizes of chains. ProX 520MX chains are available in both standard and X-ring, in standard and gold finishes. The gold finish is the result of a rust-resistant coating. ProX chains are made in Japan from high-quality Japanese steel. These chains come with master link style connections, which is the most common in modern off-road applications.
520 is the most common size for modern off-road motorcycles, and 420 is a common size for minis.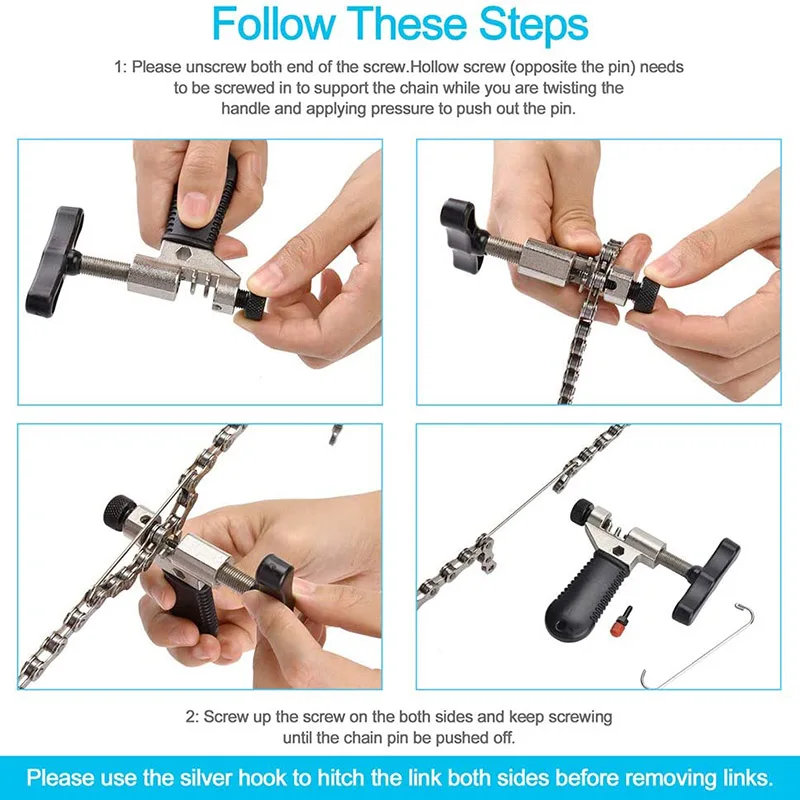
Master Link Connection
Clip Type - Clip type connections are widespread nowadays and are notable for their ease of installation. Clip type master links are not quite as strong as rivet type. However, they can be installed with no special tools.
A clip type master link.Rivet Type - Rivet type master links require a special rivet tool to install but offer a more permanent connection.
Replacement chains will either come with both of the connection types or one or the other so ensure you know what you’re ordering.
Chain Seals
The difference between a standard chain and a sealed chain is that the former does not use any type of seal to retain chain lubricant. Sealed chains, often referred to as O-ring chains, utilize O-rings or similar variants to retain lubricant which helps reduce wear and prolong chain life.
There are different styles of O-ring chains available, such as ProX’s X-ring chains. ProX’s X-ring chains are a sealed O-ring chain but have less O-ring surface area touching the link surfaces to reduce the drag in comparison to a normal O-ring chain. The advantage is in the design of the O-rings themselves.
Tools
To replace a chain that utilizes a clip type master link, you’ll need the following:
To replace a chain that utilizes a rivet type master link, you’ll need the following:

Chain Removal
On chains utilizing a clip type master link, chain removal is as simple as prying off the master link clip and removing the master link. Through use, the master link plate usually wears enough so that it can easily be slid off the link. If the master link plate is tight, the master link should be driven out by using a punch and hammer or chain break tool.
For clip style chains, one easy way to remove the master link clip is to use a pair of pliers to push the clip off by using the chain pin for leverage.Chains utilizing rivet master links will require pin grinding so that one of the links can be removed. Grind the rivets that retain one of the links flat, then use a punch and hammer or chain break tool to push the chain link out.
Chain Installation
If necessary, resize the chain to your machine by removing the appropriate number of chain links. Remember to count the chain links of the old chain to establish the length of the new chain. Don’t lay them side by side and try to set the length because the chain stretch that occurred in the old chain will lead to an incorrect chain length of the new chain.
Chain links can be removed by carefully grinding the rivet flat to the chain side plate, then driving the pin out with a punch and hammer. Alternatively, a chain break tool can be used.
Sizing the chain can be done by grinding and punching, but the easiest way to remove links is to use a tool made specifically for the job.Loosen the rear axle nut and slacken the chain adjusters. The new chain will necessitate this since it has not worn or stretched.
Position the two chain ends on the rear sprocket. Next, install the master link whether clip or rivet type. Be sure to include the o-rings when installing sealed chains.
Clip Type Master Link Install
Once the master link has been installed, install another pair of o-rings (on sealed chains) followed by the master link plate. The master link plate will need to be pressed onto the master link. Use a pair of pliers to squeeze the plate onto the master link. Press the plate on far enough so that the grooves that retain the master link clip become exposed. A pair of small c-clamps can sometimes be helpful when installing the plate, or a master link plate installation tool can be utilized.
Next, install the master link clip. The master link clip is directional and should be oriented so that the closed end of the clip leads the direction of rotation. By orienting the clip this way, should the clip hit an object during operation, it will not become dislodged from the master link. To install the master link clip, position it in its mating grooves on the master link. Use pliers to seat the clip fully in its grooves.
Rivet Type Master Link Install
To install a rivet type master link, you will need a master link rivet tool. It’s recommend to follow the instructions provided with the tool to perform the rivet operation. The chain manufacturer will also provide specifications which govern the appropriate amount of flare to add when deforming the rivets.
Setting Chain Slack
Once the master link has been installed the chain tension should be adjusted so that the machine has the appropriate amount of chain slack.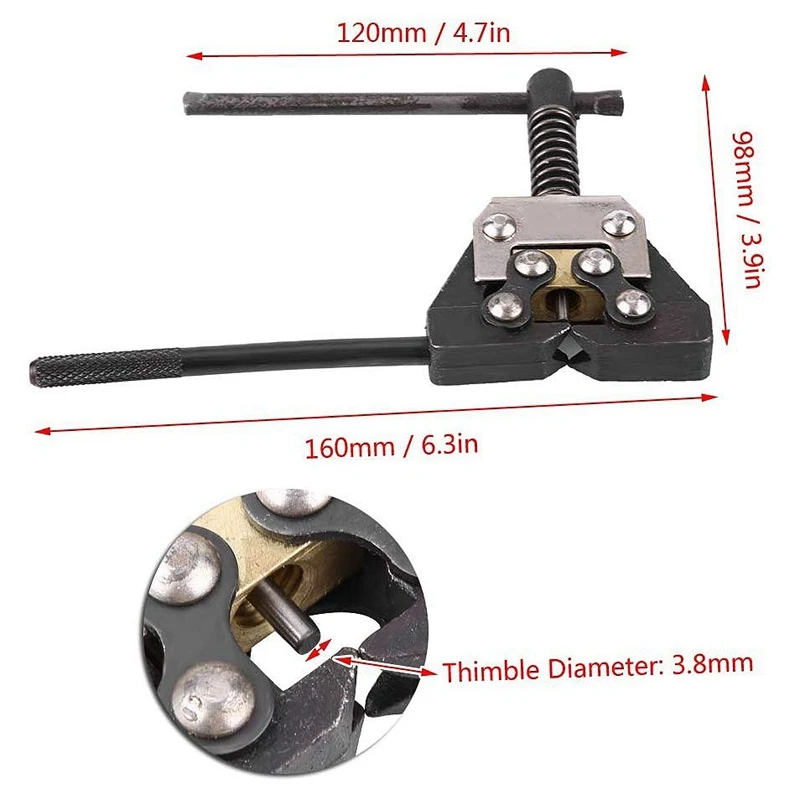 Your machine’s service manual will outline how to measure the chain slack and define the slack range. Most manufacturers recommend measuring chain slack with the bike on a center stand. Slack is then measured by pulling up on the chain near the center of the swingarm and measuring its displacement. Most dirt bikes require 30 - 60mm (1.18 - 2.36 inches) of chain slack. Carefully manipulate the chain adjusters so that they tension the chain evenly and align with the same reference points from side to side. Once chain slack is correctly set, torque the rear axle nut to the specification outlined in your service manual.
Post Installation Tips
Most chains are pre-stretched to reduce the amount of initial chain stretch that occurs once the chain is put in use, however, it is never a bad idea to keep an eye on the chain slack after the first few rides.
New chains come pre-lubricated from the factory. However, you should always ensure your chain stays lubricated throughout its life. Lubing your chain before or after every ride, especially muddy or rainy ones, should become habitual.
Find ProX chain and other components for your bike HERE!
| A 2007 Ninja 650R with its pants down (chain and front sprocket cover removed) |
If you've never done chains and sprockets on a motorcycle before, they are complicated. Being an open part of the drive system, they offer a relatively easy way to modify your bike's performance. With smaller (faster) sprockets you can produce a revvier, shorter geared engine. With a shorter chain you can close up your wheel-base creating a bike more willing to change direction. Chains and sprockets are a bike fettler's delight.
On top of sprockets, you also have a pile of chain choices. O-ring chains are the cheaper, lower efficiency alternative, while X-ring chains offer more efficiency and less maintenance at a higher cost. They also come in a rainbow of colours and a variety of sizes from little dirt bikes all the way up to thousand plus cc super-bikes.
| Chain sizes and dimensions |
| From little dirt bikes to bike motors. |
Chain sizing is based on the width of the chain and the length between the pins in the chain. You've got match all these up with the right sprockets or it won't all fit together. With so many factors in play, it pays to get a handle on chain mechanics before you take a run at changing the chain on your motorbike.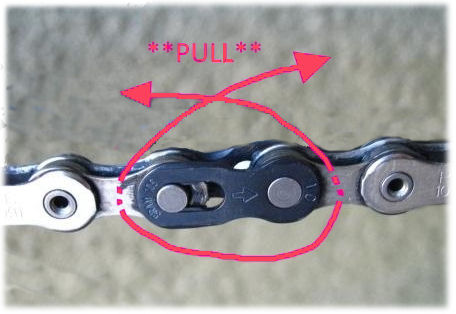
Here's a primer on how to break a chain. Some people say cutting a chain but you aren't cutting it, you're breaking it by popping the rivet out and dismantling the chain links.
How to Break a Chain:
To reduce chain size on a motorcycle:
 If you grind down the rivet you can also use a bicycle weight chain breaker (see a pic at the bottom) to push out the worn down rivet.
Installing a New Master Link:
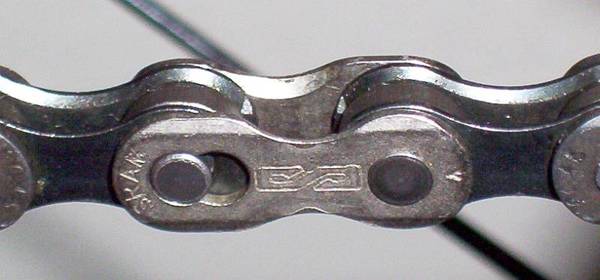
Don't freak out if you've got the rivet type master link, just make sure you have the right tool handy. The rivet type link is very strong and performs pretty much like all the other links if installed properly, which is why you'll find it exclusively on high performance chains. Check out the youtube video at the bottom for a good primer on how to do this.
If you take your time and work through it slowly, you'll have a new chain on in no time. If you want to get into sprockets the rears are remarkably easy to do. When you remove the rear wheel bolt the wheel drops down and the floating rear caliper on the Ninja 650r simply disengaged and I hung it on the frame. You can then remove the wheel. The rear sprocket is held on with your typical nuts and was easy to swap out.
| This front sprocket is a f&#*er. |
The front sprocket was in good shape, so I gave up on it. Others online have said that they are pretty straightforward if you have an air gun, but even with a breaker bar I couldn't budge the damn thing and I can pick up a car by the fender. You remove the front sprocket by bending back the holding washer, putting the bike in gear, stepping on the rear break to hold everything still and removing the nut (it's a good fit on a big 27mm bit). If there's a trick to this (other than getting a compressor, air tank and air tools), I'd love to hear it.
Follow up with Chain And No Agony for how easily the new chain went on with the right tools.
SOME CHAIN & SPROCKET LINKS THAT MIGHT BE HANDY:
| If you've only got a bicycle chain breaker, file or grind down the rivets first before you push them out.  |
If you've broken bicycle chains before you know the basics. Motorcycle chains are much heavier duty so the process requires stronger tools capable of dealing with stronger rivets. If you have a bicycle chain breaker you just have to take your time and file down the rivet you're going to push through first. It took me a couple of minutes of filing to do this. Lazy people on the internet say buy a Dremel. If you're lazy, that's what you should do.
VIDEOS
A video on how to break a motorcycle chain (skip to 35sec when the mechanic comes in) in order to re-size it using a motorbike specific tool
A good primer on how to install a master link (and how the pressed, rivet type master links work)
How to measure a motorcycle chain
Hillbilly mechanics: how to do a master link without special tools.
LINKS
Gearing Commander - a handy webpage that lets you compare different sprocket and chain combinations
http://www. gearingcommander.com/
DID company chain guide:
http://www.didchain.com/chainSpecs.html
Motorcycle Chain primer on about.com
http://motorcycles.about.com/od/motorcyclemaintenanc1/ss/Chain_Maint.htm
Wikipedia's history and technically detailed chain description
http://en.wikipedia.org/wiki/Roller_chain
| Layout of a roller chain: 1. Outer plate, 2. Inner plate, 3. Pin, 4. Bushing, 5. Roller |
An exhaustive history of chains!
ttp://chain-guide.com/applications/1-5-2-motorcycle-chain.html
How Motorcycles Work's awesome chain diagram:
Chain care (lubrication and tension) is one of the key elements of ATV maintenance. If the rider ignores this procedure, the component will begin to wear and sag, and the sprocket teeth will fail. This will all lead to serious problems and break the element. Therefore, the motorist needs to figure out how to pull the chain on the ATV.
Inspection of the unit is recommended every 2-4 weeks, depending on the operation of the equipment. It may seem like this is quite common, but ignoring the procedure can lead to serious problems. For example, if the chain breaks far from the garage, the rider will have to push the quad home. But this is a trifle, in comparison with the fact that if a component breaks, the crankcase may suffer or the axle may jam.
A critical problem for the chain is:
But how do you know when a chain needs to be tightened or replaced on an ATV? Everything is simple.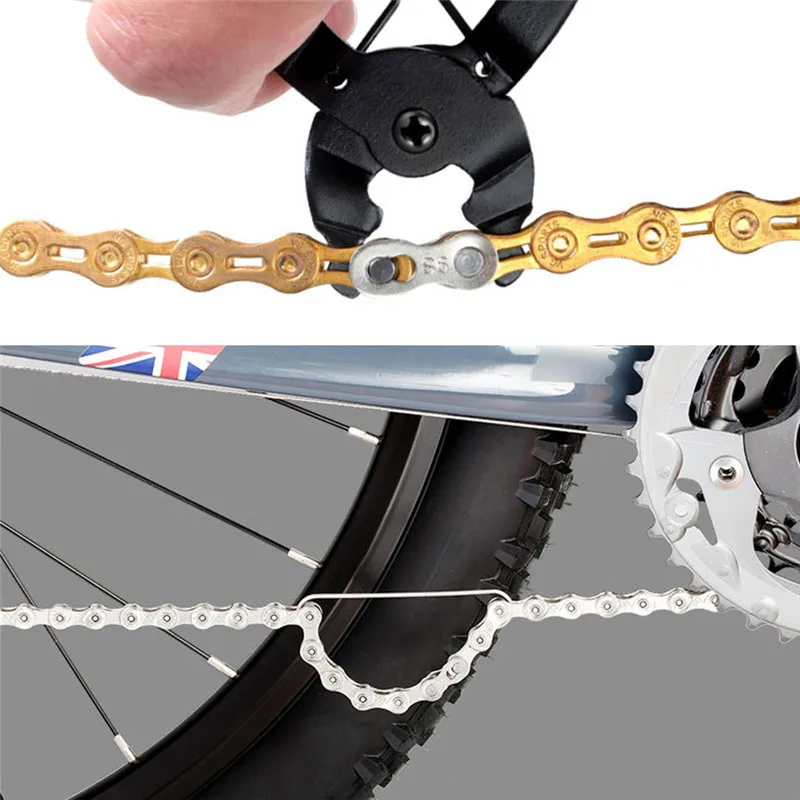 The rider needs to grab one link of the chain in the region of the rear sprocket and pull it towards him. If it turned out to pull off more than 4-5 links, then the node needs service.
Even if you have bought a reliable ATV, it is recommended to service the component every 300-400 km. This will not only increase the life of the circuit, but also detect the problem in a timely manner.
Since the quad is used for off-road driving, dust, dirt and moisture are constantly deposited on its nodes. All this leads to increased wear of the elements. By the way, experienced riders advise cleaning and lubricating the chain after each race.
First you need to find the right oil. In principle, even inexpensive lubricants can be used, but they will have to be applied more often. The oil marked "off-road" is best suited for an ATV. Such compounds are designed for off-road driving, and perfectly protect the assembly components from dirt and moisture.
Before putting the chain on the ATV, it must be completely free of dirt. However, for this it is highly recommended not to use aggressive chemicals, hard brushes, solvents or high pressure washing. All this can lead to damage to the rubber seals.
Cleaning can be done:
After the dirt has been removed, the chain must be thoroughly wiped with a soft cloth and dried. Only then can you start lubricating.
It is worth noting that it is recommended to apply oil on a warm chain. But the removal of excess lubricant is carried out with the same soft brush.
ATV chain is recommended to be changed every 500 km. But what to do with an old part that is slightly worn or torn? You can make a spare wheel out of it, after shortening it by 1-2 links. Of course, this "modification" will increase the likelihood of its rupture, but in an emergency, such a spare tire will allow you to get home.
To shorten the chain:
Important: Remember that an old shorter chain will increase the wear on the sprockets.
To tension the chain, the vehicle must be parked on a level surface in neutral. The rider should then:
 They need to be combined and fixed.
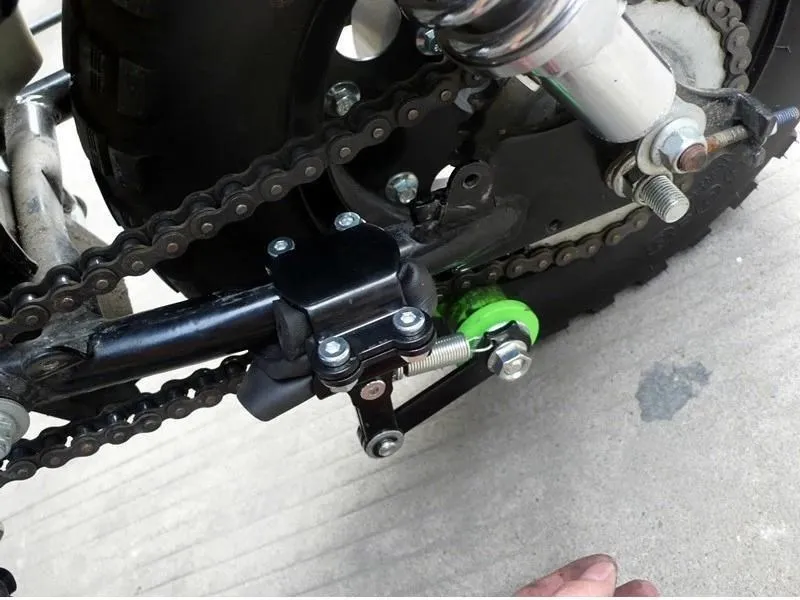
 Some machines, most of them for children or low power, are equipped with special tensioning bolts. By twisting them, you can both weaken and tighten the chain. Therefore, study the documentation for the ATV in advance.
06/16/2020 6417
Chainsaw owners are often faced with the question of how to shorten the chainsaw chain with their own hands. The need to change the length of the consumable element may arise if you need to install a smaller chain on the bar, the old chain set has worn out, stretched. If you put a tire of a different size on the chainsaw, then you need to install the appropriate chain. In general, experts do not recommend shortening consumables, especially at home. This process is considered technologically incorrect. Despite this, both professionals and amateurs regularly resort to it, because it can be used to increase the working life of cutting elements.
Why does the chain set stretch? The saw chain is made of metal alloys. And the metal is stretched due to exposure to elevated temperatures and tensile forces. This process is slow if you bought quality consumables. Various factors can speed it up.
 Use the oil recommended by the tool manufacturer. When buying, consider such nuances: the content of additives, the type of material. Never fill in used oil drained from a car engine.
 Consumables from well-known brands wear out more slowly than a cheap chain set, so when buying, give preference to certified products that meet all requirements and quality standards.
If the chains are operated on an industrial scale, it makes sense to purchase professional tools for shortening them. To work, you need only two devices: a punch for removing connecting elements and a machine for installing them.
The punch works on the principle of pressing equipment. The tool is completed with an anvil with grooves for chains with different pitches. Extrusion of rivets is carried out by replaceable tips. How to do the work, you can see on the video.
After disconnecting the chain, you need to remove the unnecessary link or several.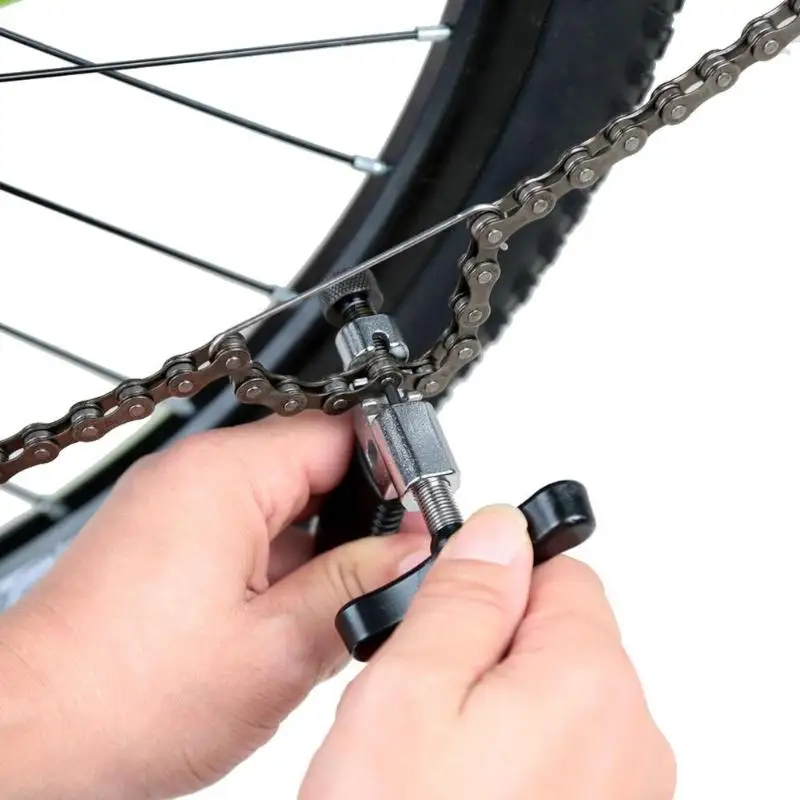 And now, to restore the integrity of the chain set, you need to install a rivet. This can be done with rivet-running equipment.
Professional, high-performance tools allow you to shorten the chain quickly and without problems. Only now the cost of electric machines is quite high, it is unprofitable to buy them for home use. In addition, they are overall, suitable for use in a garage or workshop. You can shorten the headset without the use of machines.
To shorten the saw set at home or even in the forest when sawing wood, you need to prepare:
If there is no grinder, you can use a more compact and convenient tool - a cordless angle grinder. With this device, you can quickly connect the links.
The work on shortening the chain set must be done very carefully and carefully. Be aware that the chain teeth are sharp and there is a risk of cuts or injury. Put on thick thick gloves, then proceed to riveting the headset. Joints can be riveted in one of three ways.
After you knocked out or ground off the rivet, it should stretch out, then proceed to disconnect the links. Use a beard for this purpose. Place the tool between the plates, with a jerky motion, hit it with a hammer. The plates should fall out of the rivet. Now you need to remove the required number of links in order to achieve the appropriate length of the chain set.
The most critical step in shortening the chain is its riveting. The performance and safety of operation of the chain set depends on the quality of this task. To connect the links, a special tool is used - a connector. You can buy it in a specialized store. When choosing a fixture, consider the type, pitch and profile of the chain.
The elements are connected according to the following scheme:
Riveting must be done carefully so as not to damage the chain. To check the quality of the work, inspect the product visually so that there are no thickenings and other defects. If everything is done correctly, you can put the chain on the tire and check it in operation. Before starting the engine, do not forget to adjust the tension of the chain set, check whether the lubricant is supplied in the right amount.
If you have not encountered such operations before, you have no idea how a gasoline saw works, how to rivet a saw chain, it is better not to start shortening yourself. Riveting chains for chainsaws - only at first glance it seems that it is as easy as shelling pears. In fact, the task is quite difficult. The consequences of unprofessional repairs with errors can be very deplorable: the chain on the chainsaw or electric saw broke, the broken element injured the operator, etc. What should I do? If the saw chain is stretched out, buy a new consumable or contact a workshop where a specialist will shorten and re-rivet the product.
Not only beginners, but also experienced workers who start shortening the chain with their own hands are not immune from mistakes. Let's consider the most common.

Do not attempt to repair the saw chain with a welding machine. The welding method is used, but only to restore the integrity of the gear chains, and not the headset, which is used to equip chainsaws. Gear consumables are equipped with conveyors, heavy machines that are operated in agriculture. The elements are designed to transfer torque from one sprocket to another.