The wheel hub bearings on your ATV or UTV will no doubt need to be changed out at some point. It’s not that hard of a job to do yourself with basic hand tools you probably already have. They do make specialty tools to make the job easier, but I’ve done this with ordinary tools everyone already has in their garage.
The steps I’m going to go over are universal steps for all pre 2010 ATV and UTV wheel hub bearing replacements. For ATVs or UTVs made after 2010 the steps will be similar and you may to also read the alternate wheel bearing replacement section at the bottom of this article.
There may be slight differences from machine to machine. But you’ll get the idea of what to do, and should be able to handle any slight differences your quad has. Having your service manual handy will help. And with all maintenance projects, it’s best to wear eye protection and gloves.
Here are the steps to replace your wheel hub bearings (I explain each step in more detail below)
Before I go into more detail about each of these steps, lets make sure you really do need to replace your wheel hub bearings. It’s not an extremely difficult job, but can take a bit of time and requires you remove a lot of parts from your quad. So lets make sure it’s necessary.
You’ll be able to tell if your wheel hub bearings are bad by the way your ATV or UTV is handling. One of the most common symptoms is a grinding sound and feeling when riding. You may also hear some clanking or banging type sounds coming from the wheel hub.
If they get bad enough, you could even feel vibrations and wobbling when riding. A wobbling feeling could also mean other things like you need to Balance Your ATV Or UTV Tires. If you notice the machine pulls left or right when braking, that could be a sign of bad wheel hub bearings as well.
If it’s been a while since you’ve last replaced them, or you have an older machine, it’s a good idea to do the replacement if your sure the problem isn’t your brakes or tires.
To do a manual check, jack up the wheel in question and try to move it back and forth. If the wheel is bolted on tightly but still wobbles back and forth, you probably need to replace the wheel hub bearings.
Most bearings come sealed, but over time, water and dirt will still find its way in there. There are ways to make the bearings last longer, which I’ll talk about later on. But eventually, they need to be replaced. Now on to the steps.
This goes without saying I suppose, but the ATV needs to be jacked up and remain so during this entire process. It’s a good idea to put in on jack stands as this can take a while and you don’t want your jack to fail.
Another safety measure you can take, after you take the tire off, put it under the quad near the jack stand. This is good to do just in case the machine falls off the jack or jack stands somehow. If you have a leg under there, it could save you a lot of pain.
I always start by loosening the lugs before I jack it up. That way it’s easier to remove when the ATV is lifted. You don’t have to worry about rocking the machine while its raised up if you get a stubborn lug nut.
The caliper will typically be bolted on with two bolts, either an allen head bolt or a 12mm bolt.
Remove both bolts and the caliper should come off easily.
This may be a good time to Change The Brake Pads On Your ATV if they need to be done.
The caliper may have a line going into it, that’s ok you don’t need to remove that or do anything else with the caliper. Just move it and let it sit somewhere out of the way the best you can.
Remove Axle NutAfter you’ve got the caliper off, it’s time to remove the castle nut holding the hub in place. Usually there will be a cotter pin holding the castle nut in place.
This is to prevent the nut from loosening while you ride. The cotter pin is easy to remove with a pair of pliers. Some machines will have a stake nut here instead of a castle nut.
I found it easiest to remove the castle nut with an impact wrench. Sometimes they can stuck on there pretty good, and if you don’t have a breaker bar, doing it by hand can be tough.
Once the castle nut is off, you can remove the hub, which will usually have the brake rotor attached to it. Some machines will have a guard mounted on the knuckle behind the brake rotor. Remove the guard, this is easy to remove and is usually only held in place by a few bolts.
The upper and lower ball joints will be held on to the knuckle by nuts usually with cotter pins in them.
Remove the cotter pins and take the nuts off, you should be able to slip the ball joint out of the knuckle after that.
They sometimes take a little persuading, but usually come out pretty easily with a little hit from a hammer.
Do this for both the top and bottom ball joint connections to the knuckle.
Remove Tie Rod Ends From KnuckleTo remove the tie rid ends, you will typically need two wrenches. Most of the time they are about one size apart, that’s helpful if you only have one of each size wrench.
The bolts for the tie rod ends will most likely be held in with cotter pins too. Remove the cotter pins and bolts holding the tie rod end into place.
Once the bolts are off the tie rod end should easily lift up. Just pull it up out of the knuckle and move it out of the way. There is no need to take the tie rod end apart any further than this, you can just rotate it out of your way.
Remove Shock Absorber BoltYou only need to remove the bottom shock absorber nut and bolt. You will need two wrenches for this part as well.
The shock absorber is held in by a bolt and nut set up connecting to the swing arm.
I found it easier to hold the bolt in place with a wrench and use an impact wrench to remove the nut.
Once the bolt and nut are removed, you should be able to move the shock absorber up and out of your way.
On some models of ATV or UTV, it will help make this whole job easier to do this step right after you’ve removed the wheel. You will notice a better range of motion in the whole shock and swing arm assembly after you remove the shock absorber.
It can give you easier access to the other parts you need to remove in the previous steps. I’ve just always done it this way and never had any issues, it depends on your machine and how you want to go about it.
Remove Knuckle From SuspensionAfter you’ve removed the shock absorber bolts and got it out of the way, you should be able to just pull the steering knuckle assembly off the axle. Sometimes it can be a bit stubborn and you’ll have wiggle it to get it started.
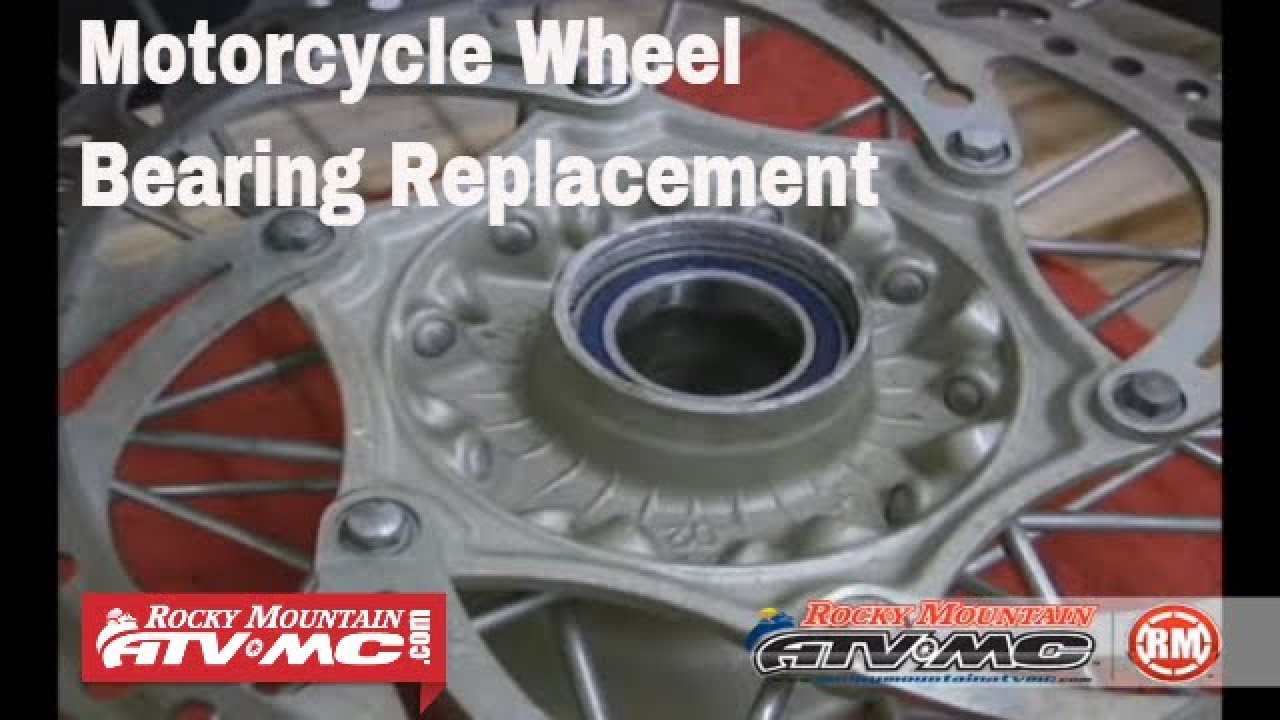
Remove Outer Seal And BearingsNow you’ll need to remove the seal and bearings from the steering knuckle. The seal will need to come out first.
They do make a special tool to make this easier like this Jecr Bearing and Seal Puller Tool from Amazon.
But I’ve got it done with just a screw driver before. Don’t get me wrong the seal puller tool makes the job a whole lot easier, and is useful for other projects as well.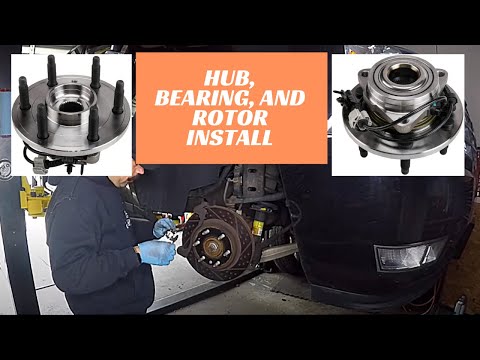 But you can get the seal out with a screw driver if your persistent enough.
To get the bearing out you’ll need a long center punch. Keep tapping around the bearing to keep it centered as you knock it out. You will most likely not be able to push the bearing clear through from one side of the knuckle to the other, so the bearings will need to removed from both sides separately from the inside out.
Clean Knuckle And Install New BearingsOnce you’ve got the seal and bearing out of the knuckle, it’s a good idea to clean the knuckle of any dirt and debris that might make installing the new bearing more difficult.
As for the bearings you use, it’s up to you. There are plenty of options out there, just make sure you get the right ones to fit your machine. I like using the All Balls bearings and seals, I’ve had good luck with them in the past.
Here’s a link to an All Balls 25-1404 Wheel Bearing Kit on Amazon, the kit comes with the bearing and seals.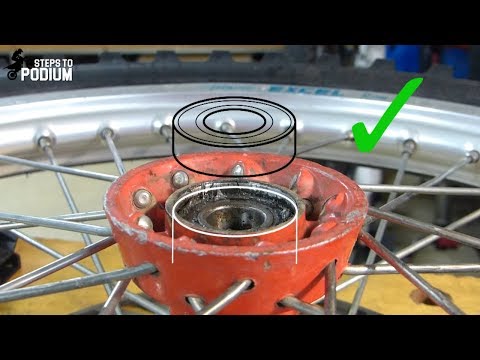 That’s a good place to start looking for the bearings and seals to fit your quad.
Once you have the bearings you need to install them in the knuckle assembly just as they were when you took them out. There is a sprecial bearing press you can use to press the bearings back in.
But I’ve always just used a large socket that is about the same size as the bearings and hammered them back in. Be careful not to hit the inner part of the bearings assembly because that will damage them. Use the right size socket that lines up with the outer edge of the bearings assembly. You could also try using the old bearings if they’re still intact, they should be the same size after all.
The bearing seal will go back on the outside of the bearings after you’ve got them installed. They should seat nicely on the outer edge of the knuckle like they were when you removed the old ones.
Make sure you don’t forget the spacer between the bearings if your model has that.
That’s it, you’re done replacing the wheel hub bearings on your ATV or UTV, now it’s time to put it all back together.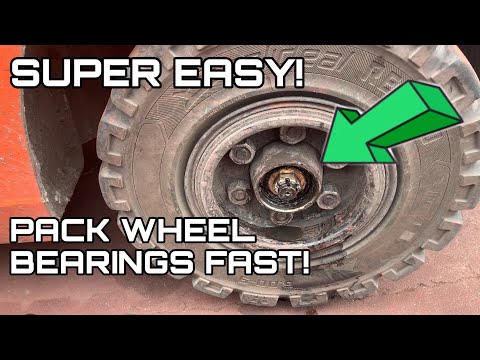 Everything will go back together the same way took it apart just follow the steps above in reverse.
I do recommend you use all new cotter pins. People will say you can re-use them, and I’ve seen people re-use them successfully. But they’re just so cheap, and it’s recommended you use new cotter pins every time so that’s what I do.
Here’s a link to a 555 Assorted Piece Set Of Cotter Pins for around 12 bucks on Amazon. I also recommend using a new stake nut instead of re-using the old one. This only applies if you have a stake nut instead of a castle nut from the remove axle nut step.
The wheel bearings on your ATV or UTV will just go bad over time. The best thing to do is make sure you’re installing the bearing seal the right way. Riding through mud and water is one the best parts about off-roading, so eventually water and dirt will get in there. But a good seal can help them last longer.
Also, avoid pressure washing the hub assembly.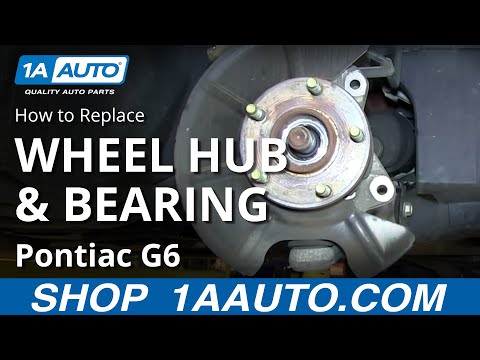 It’s ok to pressure wash your machine to clean it after a muddy ride. Just be careful around the bearing seal and hub assembly area. The pressure washer can push water into the bearing making them wear out faster.
Most of these steps will be the same, except you will be dealing with the hub assembly to replace the bearings. Also, you will want to freeze the new bearings before replacing them in the hub.
To remove the old ones the process will be the same also. Use a long punch or other tool to remove the old wheel bearings.
Some models will have a snap ring clip holding the bearing in place. You can easily remove this though with a pair of snap ring pliers.
Use a heat gun to warm up the hub assembly where the new bearings need to go.
Take the new bearings out of the freezer and press them into the hub. You can use the old bearings or a large socket and hammer to help push the bearings in.
Put everything back together the same way you took them apart and you’re good to go. Remember to use all new cotter pins to keep things tightened down the way they’re supposed to be.
Sharing is caring!
Sep 24th 2018
Unless you keep your ATV, UTV, or side-by-side stashed away in a garage 24/7 and never ever ride, wheel hub bearing service is unavoidable. This is especially true if you already have or have recently come into ownership of an older model that requires a bit of TLC before hitting the trail.
Signs and symptoms of a bad wheel bearing are similar to those in a car or truck; groaning or grinding while the vehicle is in motion, knocking or clunking sounds, wheel wobble and vibration, pulling to left or right under braking. Keep in mind that any of these can also be side-effects of damaged or worn suspension, steering, or braking components. More often than not, the wheel hub bearings are the culprit. Replacing wheel hub bearings is a fact of life for off-road riders, but don’t let it scare you. It’s totally possible for you to do this job yourself. We’ll show you how in this quick write-up.
Polaris RZR Rear Wheel Hub and Bearing
The procedure is mostly universal for ATVs and UTVs regardless of make and model, but if you’re unsure of torque specs and other exact parameters, it would be a good idea to get yourself a good service repair manual.
This part should be obvious. Not only is it beneficial for your safety, it will help you better access the wheel hub assembly.
Again, for your safety, place the wheel underneath the ATV lift/stand in case the vehicle should accidentally fall. Better for it to land on the wheel and tire than onto your leg or another vulnerable body part.
In some models, this is either a large castle nut with a cotter pin sticking out of it or a stake nut. You can reuse these, but it won’t hurt to replace them with new ones.
Brake calipers will have either 12-14mm bolts or an Allen bolt. Remove the two bolts that secure the brake caliper and the caliper should easily slip off of the brake rotor.
You might find another castle nut and cotter pin on this as well.
The ball joints should slip out of the knuckle, which will expose the outer seals bearings.
If these are still intact, first remove the knuckle bearing seals and then remove the bearing seals themselves. This may require a bit of patience and assistance from a center punch. Move the punch from side to side and tap a little at a time. This will keep the bearing square in the hole and allow it to come out easier.
Find a good socket that fits the outer race size of the bearing that will be used for reinstalling.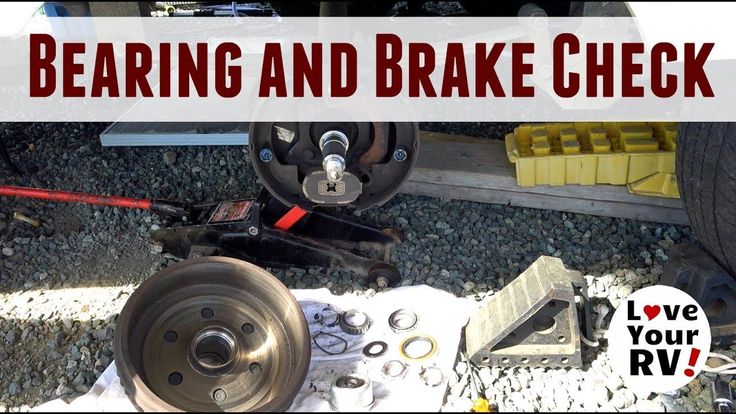 Don’t hit the inner race of the bearing or risk potentially damaging the new part. The seals will insert the same way and seat on the outer edge of the knuckle. Don’t forget to install the spacer that goes between the bearings.
HQ Powersports sells brand new, OEM-spec replacement wheel bearing kits and All Balls Racingwheel bearing seal kits for ATVs and UTVs. We carry aftermarket ATV parts for popular domestic and foreign makes and models, as well as quality replacement parts for motorcycles, scooters, snowmobiles, and personal watercraft.
ATV bearings are heavily loaded. The ATV rides on difficult routes, so mechanical loads, temperature changes, and moisture can act on the nodes. If there are signs of improper operation, the bearing on the ATV needs to be replaced. Usually, a ball or roller wheel bearing is installed on four-wheelers. This work can be done independently, following the step-by-step instructions. To buy an ATV at the best price, look at the offers of our MotoGO online store. We sell popular models of four-wheelers from well-known manufacturers.
Wheels often get into pits, drive, brake, steering movements can be sharp, jerky. One component that is subject to wear is the wheel bearing. ATV wheel bearing replacement is required for a number of reasons:
In addition, the ATV wheel bearing is replaced after a certain mileage. The part, like other components, has a certain service life.
When a wheel bearing is worn, certain signs of failure appear. Common manifestations include the following:
Visual diagnosis required. See how the wheel spins, if there are any gaps, skew. The bearing is also inspected. Its wear and tear is indicated by the presence of deformations, traces of impacts, chips, deep scratches. If there is no lubrication inside, this also indicates a breakdown of the part. You need to install a new component.
Replacing a wheel bearing on an ATV can be done by yourself. It is necessary to perform a series of sequential actions:
 If signs of wear are found, they are also changed.
 Next, the brakes are adjusted. You need to drive a quad bike for a bit without accelerating. If the brakes are working properly, the wheel is spinning normally, there are no backlashes, you can continue to operate your four-wheeler. It is quite possible to replace the ATV hub bearing yourself.
Our MotoGO online store sells high-quality, reliable ATVs, motorcycles, scooters. These are well-known manufacturers, which are covered by a 1-year warranty. You can visit our motorcycle showroom in Kyiv or choose a model in the online store. We will send the order by one of the well-known carriers in Ukraine. In Kyiv and the region, orders are delivered by our courier service.
Share on social networks!
Yevhen
Editor, working on the project since 2010. Specialization: Internet marketing, reviews of specialized events, industry news. Languages: English, Russian, Ukrainian.
The owner of domestic cars often encounter wheel bearing malfunctions. This happens for several reasons - poor road quality, careless or aggressive driving style and the general condition of the bearing after a run of over 50,00 km. How do you know it's time to change the wheel bearing? While driving, the front chassis of the car is buzzing, and when cornering, vibration and rattle appear. The appearance of these signs clearly indicates the need for diagnosis and repair.
Jack up the vehicle and try to move the wheel axially by hand. If the play is more than 3 mm, the bearing is clearly defective. Also, with a defective bearing, the wheel rotates much harder and the process may be accompanied by a characteristic rattle. But for an accurate and professional assessment of the condition of the hub bearing, it is necessary to measure the axial play.
Bearing replacement is best done using a viewing hole, or by placing the car on a flat surface. The vehicle must be in first gear and secured with wheel chocks, and the parking brake must not be used. During the replacement process, the following set of tools will be required:
For replacement, the front of the machine is raised completely. The hub nut must be released from the decorative cap, if any, then unlock and loosen the hub lock nut. Using a socket wrench, unscrew the hub bearing locknut. If it gives in with difficulty, you need to use the lever to increase the moment and WD-40 so as not to rip off the edges and threads on the CV joint. Now the wheel can be removed and the brake disc and brake caliper can be unscrewed. The latter must be fixed with wire to the rack. After that, you need to unscrew the bolts securing the swivel mechanism to the telescopic rack and remove the swivel flywheel. The next step is to remove the CV joint from the hub. To do this, loosen the bolts that secure the ball joint to the fist and disconnect the ball joint from it. After that, the hub with the swivel mechanism can be removed by hand. The extracted structure must be installed on the vise jaws and, using a mandrel of a suitable diameter and a hammer, gently compress the hub, while the blows must be applied to the end face of the hub, and not to the bearing.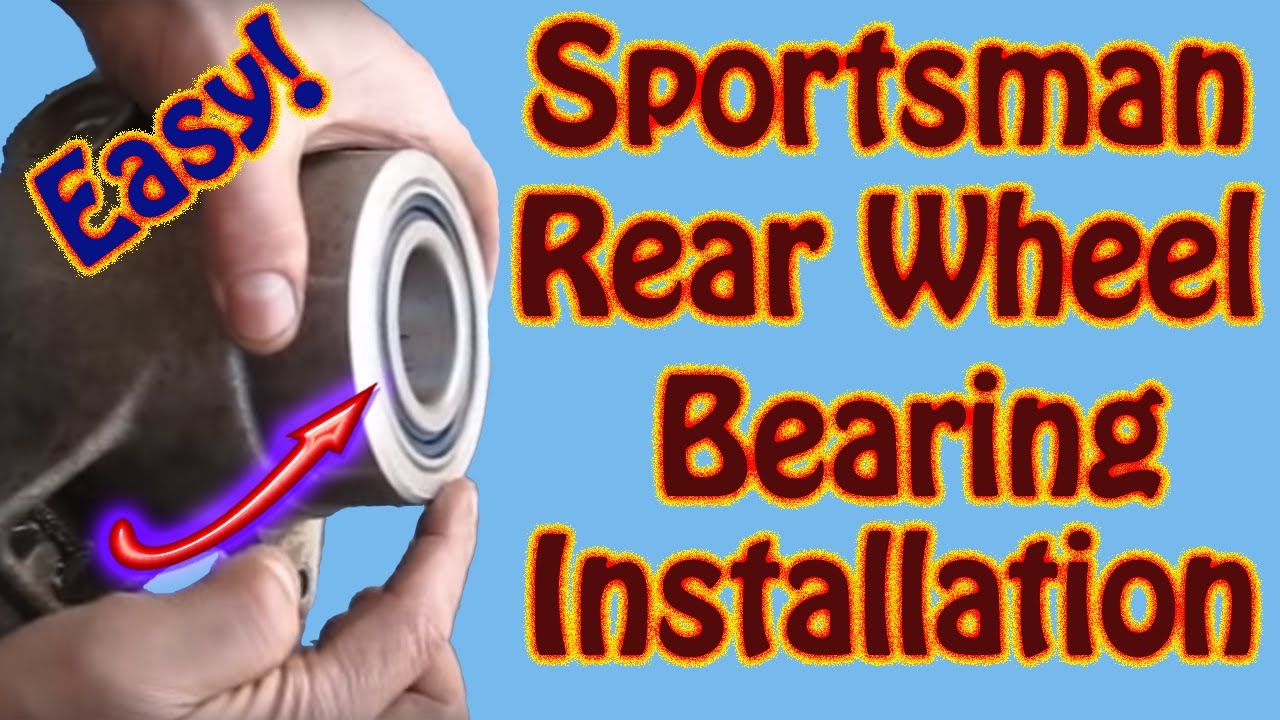 As a result, the hub should fall out along with the inner part of the part, and the outer part will remain in the fist body. Using round-nose pliers, you need to pull the retaining rings out of the fist housing, then you can easily press the outer part of the wheel bearing out of the housing with a puller. This procedure can also be done with a hammer and mandrel, clamping the body in a vise.
After pressing out, you can remove the puller. It must be cleaned of dirt and wiped its inside - the landing surface. After that, a retaining ring is installed on one side, and on the other, using a puller or a press, a new wheel bearing is pressed in and secured with a retaining ring. In the absence of special tools, pressing can be done using a vice. To do this, the bearing and fist are placed between the vise jaws. It is important that the efforts of the vise are directed only to the end face of the outer part. To do this, the puller washer is placed under the outer race of the bearing. Next, the protective ring is removed from the hub. Having clamped the part in a vise, you need to move the bearing cage 1 cm from the hub with a sharp chisel. The clip is engaged with a puller and pulled off the hub. The hub is pressed into the holder of a new part. In this case, you need to ensure that pairing occurs without distortions. To facilitate pressing, you can heat the parts, but not the bearing, or lubricate the surfaces of the products with lithol. After that, you can assemble the node. Assembly is carried out in reverse order. After replacing the bearing, you need to put on a new studio locknut.
You can buy bearings and maintenance tools at an affordable price in the online store Industrial Automation. Specialists of the sales department will help you choose the equipment, consult on any questions and control the delivery.
You can leave a request or get feedback by writing to us at [email protected] or by calling the toll-free number 8 800 550-72-52.