Whether you had one rough pull or a hundred easy ones, wear and tear on your winch cable is natural. Everybody has to replace theirs with something new eventually.
It’s a simple job right?
Not so fast!
There are a few major pitfalls you need to avoid when changing your line. We’re going to walk you through how to replace an ATV winch cable or rope to make sure you get it right and don’t damage your gear.
Table of ContentsYou’ll need a few basic tools to replace your winch cable. There’s nothing special here—you should already have everything.
These steps will take you through the process of removing your existing synthetic rope or steel cable and replacing it with a new one. The process is nearly identical whether you’re replacing cable or rope, but we’ll note the differences when they come up.
Before you do anything else, you need to figure out if you have room to remove your ATV’s winch cable while the winch is still installed.
If your winch is mounted on top of a bumper, you’ll have no problem keeping it installed.
However, if you can’t reach your winch drum with both hands, you may need to remove it. In some cases, removing the fairlead alone will give you enough space to work with. If you do have to remove your winch, the process is simple enough:
Removing your cable or rope is a piece of cake.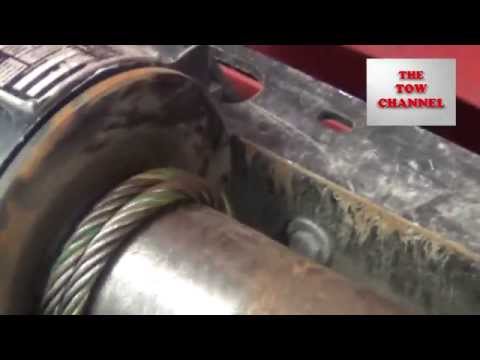 If you’re working with cable, be sure to don your heavy-duty gloves to protect your hands.
Then, follow these steps:
The line will run through a hole in the drum. With synthetic rope, the line will have a simple knot (tip: take a picture of the knot now so you can replicate it later). Steel cable will be secured with a set screw or locking bead.
If you’re removing synthetic rope, lighten the tension by pushing the long end of the line through the hole. Then, undo the knot and pull the rope through the drum. You may have to cut the end off if it’s covered in glue or tape that won’t allow it to run through the hole.
With a steel cable, you’ll need to use an allen key to loosen the set screw so you can pull the line out. On some winches, the cable will loop around a locking bead set into a slot in the drum. Just feed the cable through to lighten the tension on the bead so you can unloop the line.
It’s important to take this opportunity to inspect the condition of your winch, especially if you’re replacing a steel cable with a synthetic winch rope.
Look for grooves and ridges—anything that’s not smooth.
If it’s roughed up, you’ll need to file it smooth or replace the winch before using a synthetic rope. Those grooves can easily slice fibers when under the intense pressure of a loaded winch.
Installing your new line is a little bit more complicated than removing it. Make sure you pay careful attention to these steps. This is the part of the process where mistakes are likely to happen.
For synthetic rope, that means looping it around the drum and tying a knot. We recommend using electric tape to attach the loose end to the drum.
For steel cable, tighten your set screw or loop it around the locking bead.
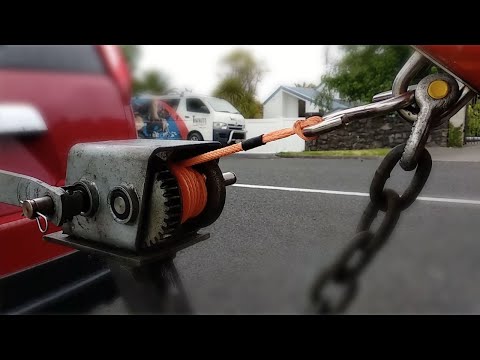
To secure a synthetic rope to your drum, feed it through the hole and tie a knot. It’s helpful if you take a picture of the knot on the original rope so you can replicate it.To properly spool the line, you need a heavy load to tighten the line around the drum as you reel it in. Attach the end of your line to a tree and slowly winch the line in as you guide it onto the drum. Your goal is to achieve neat, tight rows with no crossover.
The tension ensures that the rows are packed tightly and won’t get damaged the first time you use it in a real winching situation.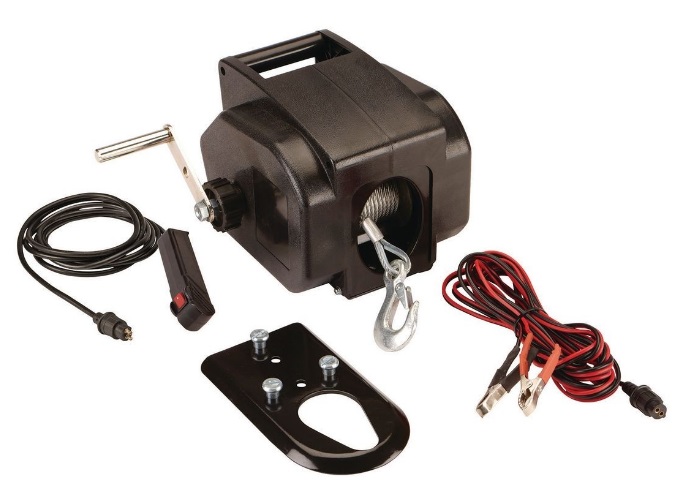
Don’t be tempted to put your fingers through the hook or loop as you guide the last few feet in. It’s easy to crush your fingers in the fairlead if you get distracted for a moment.
The even loops around the drum ensure that the rope will feed out easily when you need it and won’t get damaged when you winch in under tension.Now you know how to replace an ATV winch cable or synthetic rope. The process is simple enough, but paying attention to the details will ensure that your new line lasts longer than your busted one.
If you need a new line, check out our replacement synthetic winch ropes. We have bright colors to make them easier to spot if you’re in mud, or you can roll with classic black if that’s more your style.
But if your winch has fully bit the dust, check out our Black Ops Winches. We have 2,500 lb. winches that are perfect for ATVs, but you can also get 3,500 lb.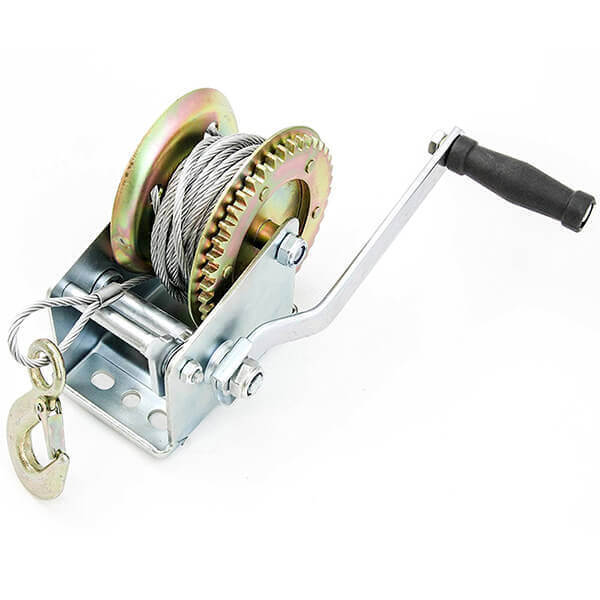 , 4,500 lb., 6,000 lb, and 12,000 lb. winches if you need a little more oomf.
Now get back out on the trail and have enough fun to get stuck. With your ATV’s winch cable replaced, those ditches and mud holes will look a lot more inviting.
Check out how to change a UTV winch rope on a Black Ops Winch:
Most winch owners will find their winch cable stuck or jammed up at some point. You set the winch to free spool, but the cable won’t pull out no matter how hard you try.
In most cases, you will be able to free up cable quite easily by knowing the tricks we will cover in this post. Other times you get a bird’s nest of cable that you won’t be able to untangle without disassembling the winch or cutting the cable.
The tips in this post will work just as well on ATVs, UTVs, as with offroad-trucks.
Page Contents
Which method works best to untangle your jammed up winch-cable depends on the jam’s type and severity.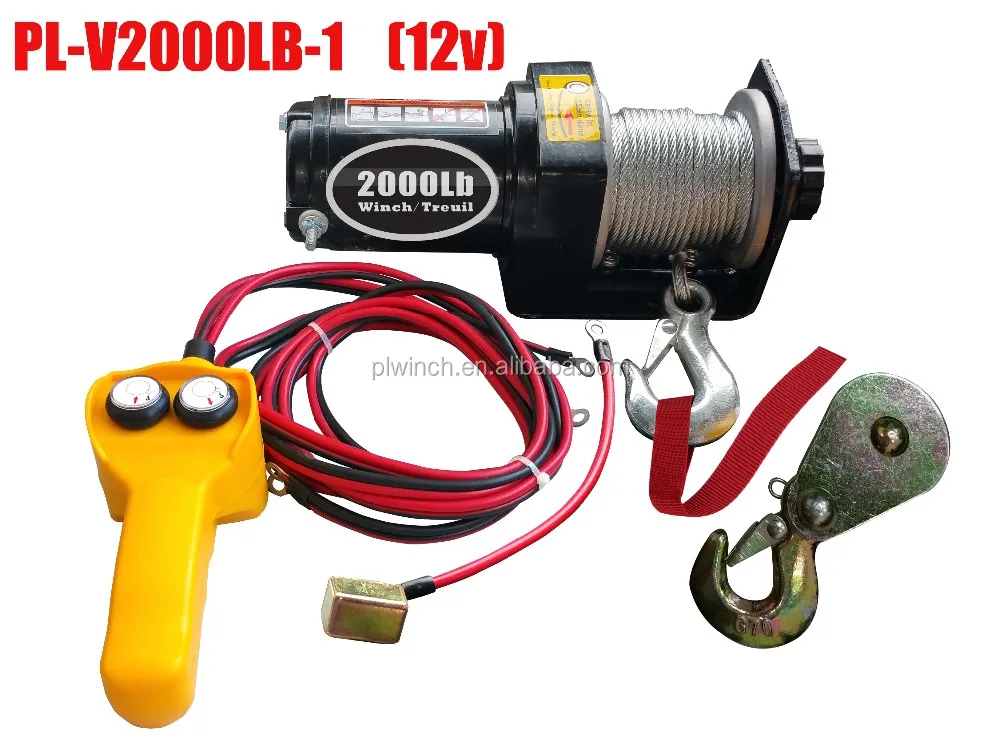
Winch cables get stuck for a wide range of reasons. Here are the most common ones, with guidelines on which method to use.
Begin with the first recommended method as it will be the fastest and less likely to cause damage. Then move your way through the other methods until you succeed.
It’s a widespread scenario that many winch owners run into: You put the winch to free spool, but the cable is stuck and won’t come out.
Most of the time that a cable is stuck, it’s because it is pinched between the cable windings. This happens when you put a lot of force on a cable that previously was only loosely spooled back onto the drum.
These cable jams are usually not that bad and can be fixed quite fast with minimal risk of damaging the cable or the winch itself.
Work your way through methods one to three.
The cable or rope has to be distributed evenly over the winch drum width for all of it to fit. Sometimes, however, the situation requires that you winch at an angle. If you are not careful, you end up overfilling the winch drum on one side.
Begin with method six before working your way through methods one to five.
The winch cable needs to be under constant tension, whether you are winching in or unspooling.
For some reason, if you get a little slack in the cable, the tightly spun windings may come undone.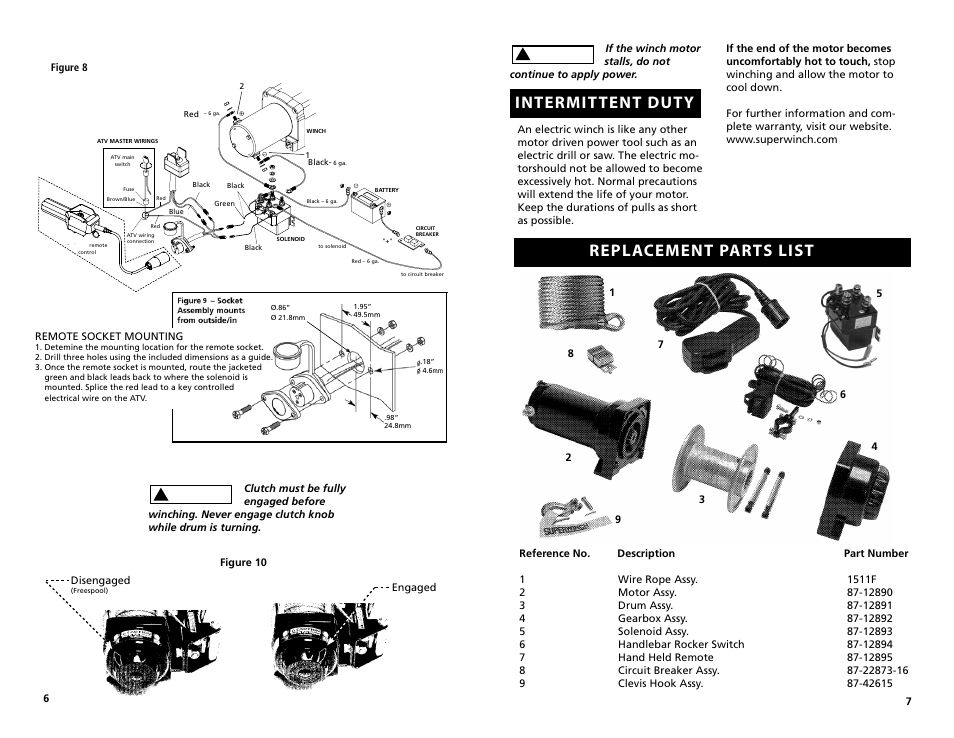 One coil ends up over the top of another, and you have a bird’s nest of a mess before you know it.
The only way to fix this is by unspooling until you get past the bad spot and then spool back in neatly.
Gently try methods one to three. If this does not help, move over to method four or five.
Steel winch cables are lightly oiled when they are new to prevent rusting. This light coat of oil wears off after only a couple of times of use.
If you leave a wet steel cable sitting for a more extended period, it will rust, leaving it hard or impossible to unspool.
Winch cable rusted after sitting outside.Generously spray the drum of rusted cable with PB-blaster or a similar product, and let it sit a little to allow the product to begin loosening up the rust. Then move your way through methods one to three until the cable frees up.
 You will know when to stop by noticing when the cable does not unspool any further. Because of the bind, it will instead reverse and begin pulling the cable back in either way you turn the drum.
This method is as far as you should go without having to disassemble the winch. As with method 2, you need to attach the cable to a stationary object.
But instead of having the winch set to free spool, you will be spooling out the winch while gently backing up the vehicle to apply tension to the cable.
Do not use speed or yank hard on the cable, as this may ruin the gears inside your winch. Winches are designed to pull, but not to be pulled on!
Bad jams or messy bird’s nests are not always salvageable without disassembling the winch. Getting a winch apart is not hard, but you need to pay close attention to how things go together. You do not want to find yourself with a table full of gears that you don’t know how to put together.
Tip: Take photos as you disassemble to help you if you forget what goes where.
If none of the above methods helped to free up the winch cable, you might need to cut it to get it off the drum.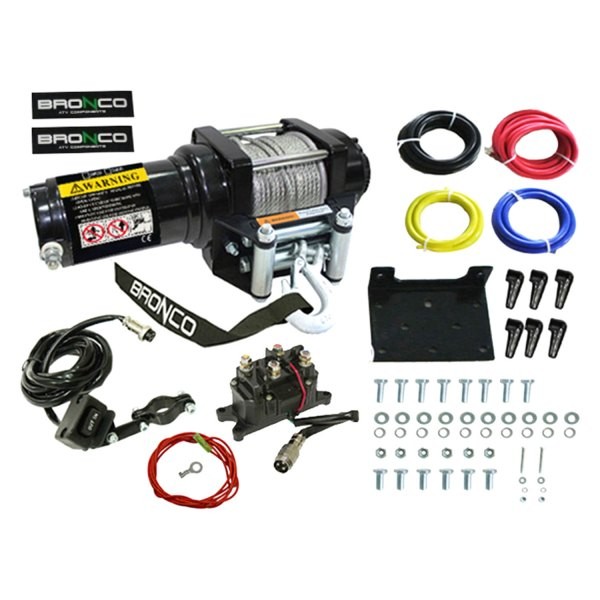
If the tangle has left a bunch of bends and kinks in the cable, it should be replaced anyway. A steel cable that gets kink weakens where the bend was. It also gets curly, making it harder to spool back to the drum nicely.
 Make sure to wear protective glasses as these discs tend to break and shoot splinters out in any direction.
A winch that is overfilled with cable on one side from winching at an angle is easier to free up if you lubricate it with some oil before trying the above methods.
Use a good lubricating oil free from acids and corrosive substances. Make sure to wipe off any excess oil as oil retains dirt, which will wear the winch and cable prematurely.
When it comes to preventing suck winch cables and winch ropes, the key is in the preparation. Here are a few essential tips to avoid cable chaos in the future:
Both steel cables and synthetic ropes have to be wrapped to the winch drum under load in a neat and even pattern.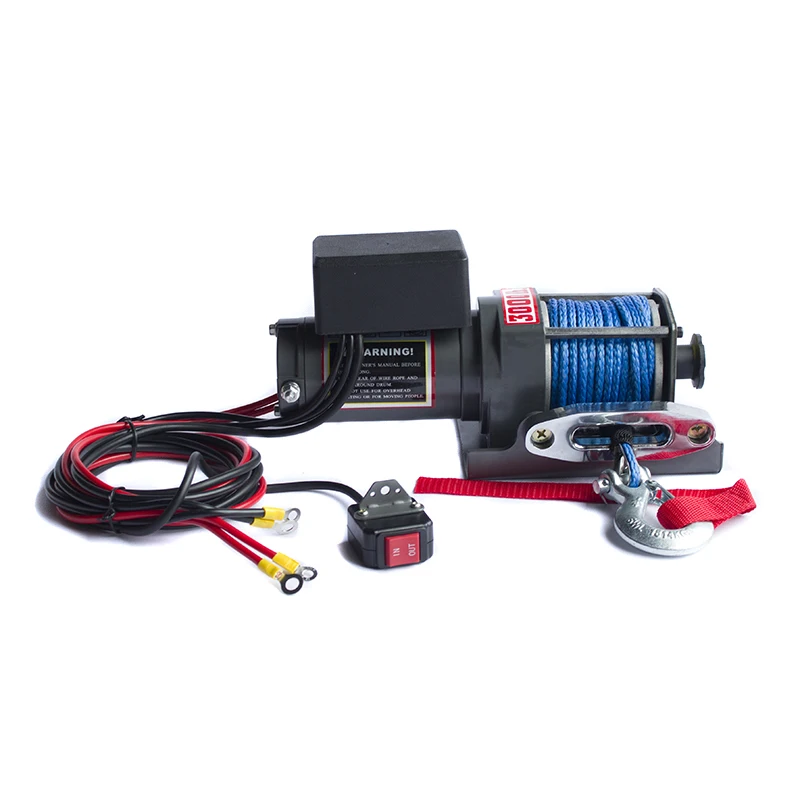 Winding the cable on too loose will allow the cable to move around and cross over on itself.
This will cause it to bind up when you add tension. The goal is to make sure the lower cable windings are wrapped tight so that the free end of the cable does not slip down between them when you add tension.
A tight and smooth wrap is essential with synthetic ropes. A synthetic is less likely to jam as long as it was spooled correctly. If not wrapped properly, a synthetic rope is, in fact, more likely to get stuck than a steel cable.
Head over to this step-by-step guide if you want to learn how to install a winch cable or rope to your winch properly.
The winch cable will often spool back up quite randomly and messy as you do the winching.
To prevent binding next time you use the winch, you should unspool and re-spool the cable neatly while under tension after each use.
In the heat of the moment, it is easy to forget this vital aspect of winching.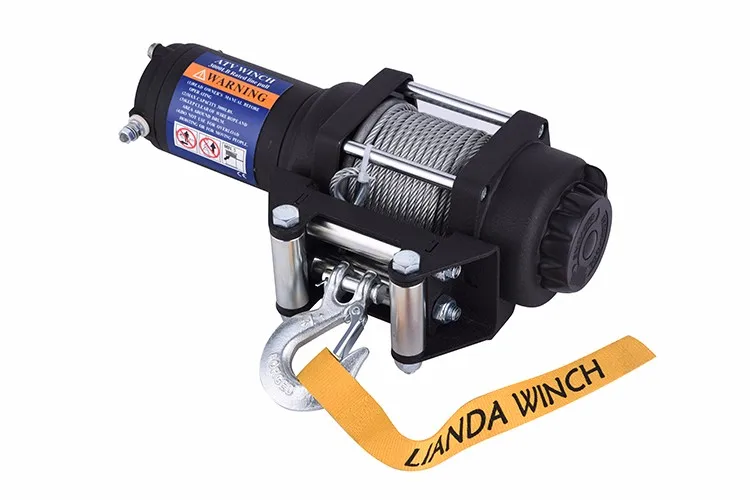 But it is the most useful tip to prevent problems down the line.
People that use their winches professionally don’t have time to mess around with stuck winch cables.
Consider installing a fairlead with a spring-loaded roller. This type of fairlead makes sure that there is always tension on the cable when you spool it back in, allowing it to spool back onto the drum, tight and neatly.
A steel cable that is full of bends and kinks is tough to spool back in neatly. If you find yourself getting a stuck cable regularly, you may save yourself some agony by getting a new, smooth cable.
Many winches use an anchoring hole through the hub of the drum to hold the cable in place. The cable is locked into the hole or slot with a set screw or held in place with a wedge.


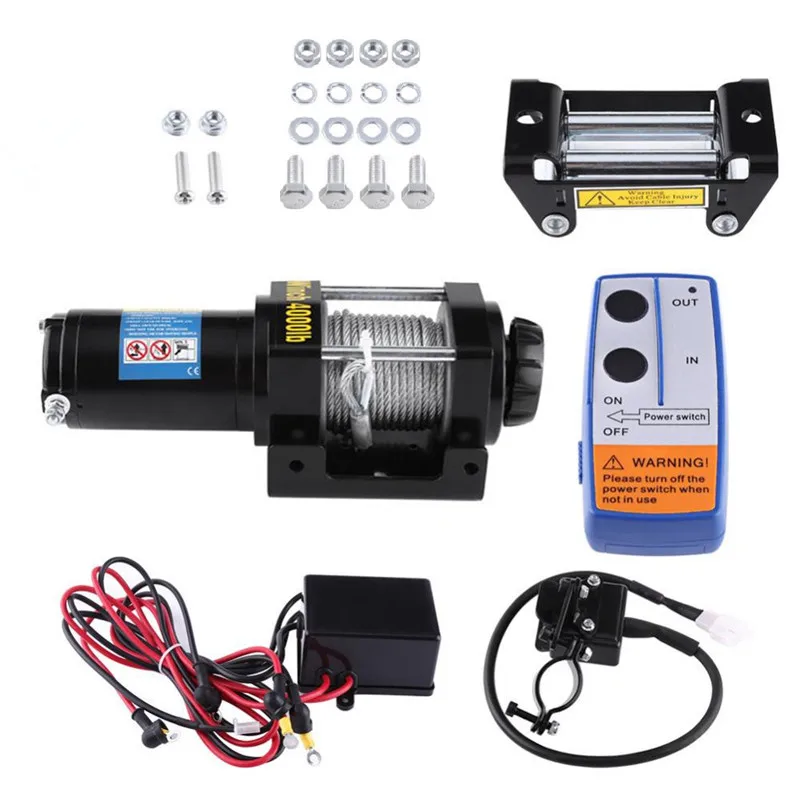
This is a typical winch arrangement:
How to operate the winch.
Most advanced winches powered by electricity can provide utility and recreational operation even when the engine is off - naturally the winch must be connected to the battery and it must be charged. The winch runs on high current and, for safety, you must use appropriate materials. It is also important to understand that the longer you use the winch, the more it heats up, including the cable heats up. For the safety of working with this device, you must provide sufficient cooling for this device. If you do not pay attention to this, winch problems can damage the engine, the electrical wiring system, and the battery itself.
Control and fire control
The winch is controlled by a switching mechanism that can be fixed on the steering wheel and \ or have a remote unit:
9000
How the winch responds to load
The winches are prepared to carry the maximum load.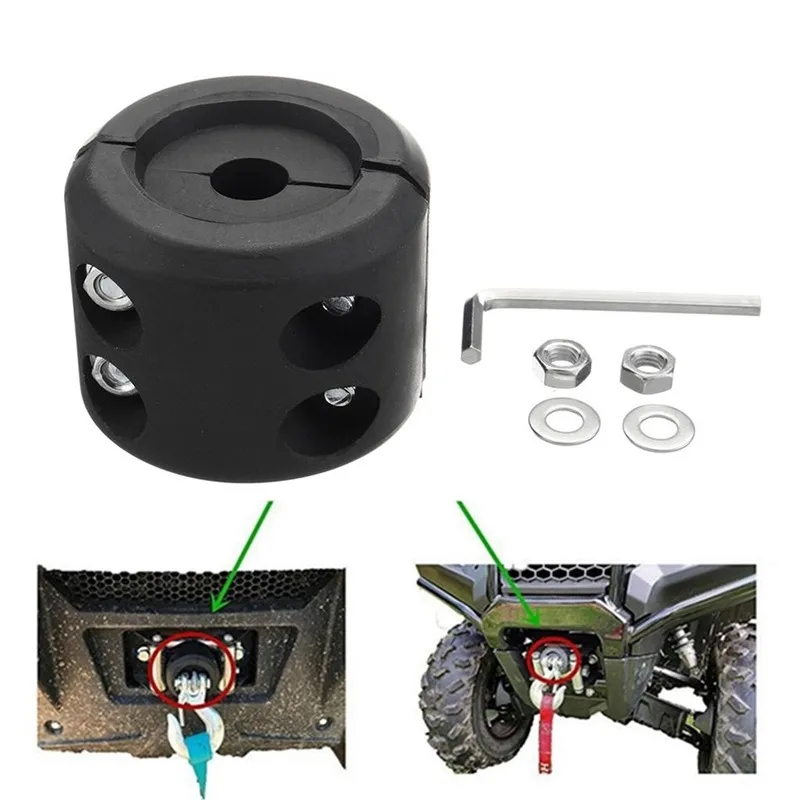 The maximum pulling force occurs on the first rope layer on the drum. That is, as the cable is wound on the drum, the traction gain will fall. Therefore, if you are sitting very tightly and do not want to tear the winch, then it is better not to be lazy and unwind the cable to the end, even if there is something to catch on nearby. Wise use of the winch now will save you a headache later. Finally, you must also make sure that the winch you choose and your equipment are ready to interact and, more importantly, are ready for the conditions in which you intend to operate them.
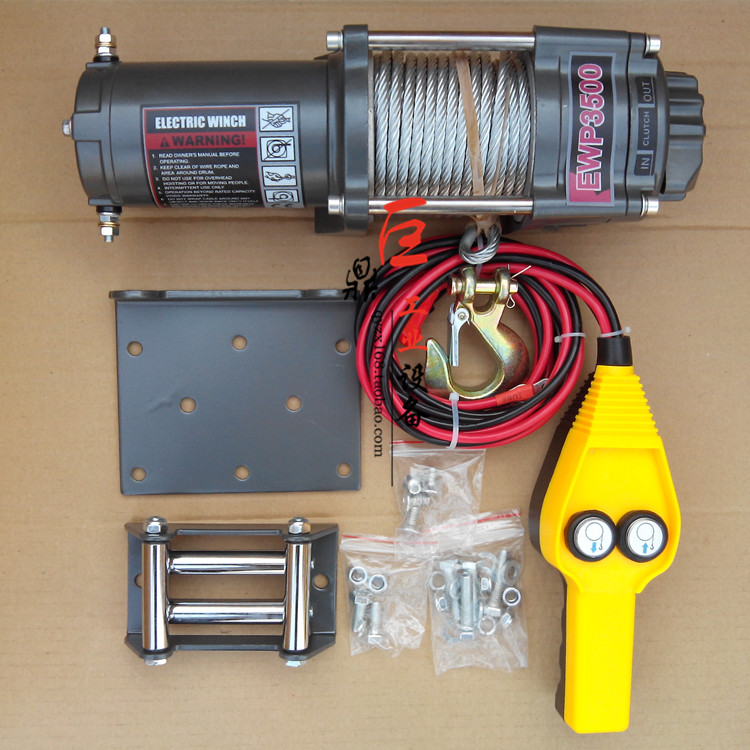
Winch accessories and equipment
Alone, the winch is not such a panacea and is not something special. But, if you use it along with special devices, the winch becomes a powerful tool both in saving equipment and for ordinary, utilitarian purposes. So, here is a list of some of the necessary items:
Leggings . Protect the skin from burns, cuts and abrasion of the skin while working with the winch.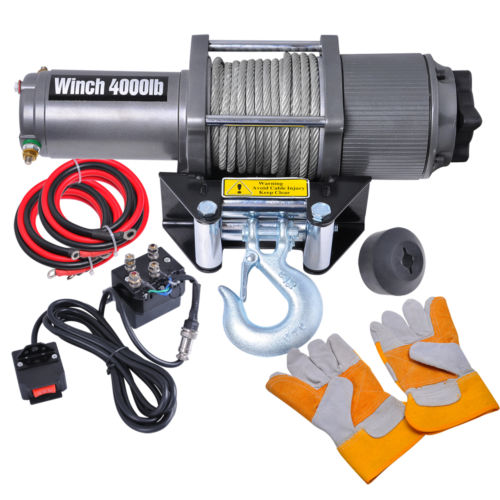 Very important, and at the same time, affordable thing. Sold in almost all clothing stores.
Hook tape . A piece of strong rag tape that makes it easier and safer to grab and hook.
Polyspast . One (or more) block-rollers that allow:
A) Strengthen the action of the winch as many times as the block rollers are installed;
B) Change the pull direction without damaging the rope.
Connecting bracket . Serves to securely connect two cables, the stud connection system allows for quick shooting.
Hook chain . Serves as a good extension. Just remember that the chain needs a special block roller. And also remember that the chain can injure trees.
Tree protection . Usually made of abrasion resistant nylon, this backing makes it possible to attach a fulcrum to, for example, a tree without damaging the tree.
Dynamic webbing . A dynamic sling that is designed to pull the ATV out of the trap, through the possibility of stretching. Use only on stuck ATVs.
Hand tools . While using the winch and evacuating your ATV from where it is stuck, you may need tools such as a shovel, ax and/or a chainsaw.
Spare parts . It is very important to carry spare parts with you, both for the winch itself and for the more complex tools that you can use in the work of saving your ATV.
Tool kit. Should include a variety of tools. It can be used both for repairing the winch and for repairing the ATV itself.
Wiring and battery recommendations .
Before every ride, you should check the battery charge and the condition of all (ideally) wires and contacts. Failure to do so may result in serious damage to the ATV, winch, or injury or even death.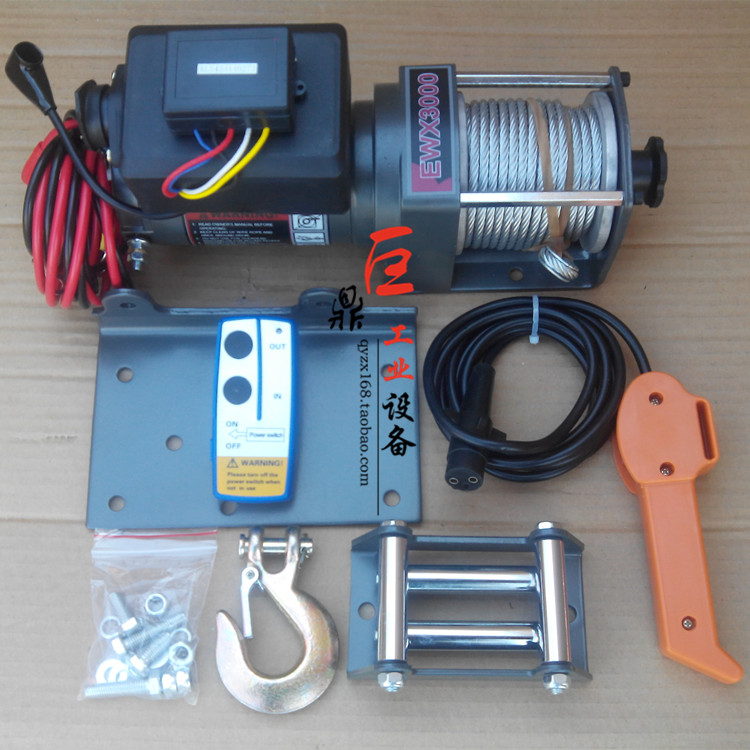
Primary education.
It's best to practice winching before you get stuck in real conditions. In the real world, you won't have the time or opportunity to learn.
Make sure your new rope is stretched before the first run. Unwind the rope so that 5 turns remain on the drum. Apply a load of 500 pounds (≈226 kilograms). You can achieve this load by securing the end of the rope to the full length of the rope and using the winch, let the ATV roll. This must be done on a flat surface.
Remember that proper use of the winch will keep you and others around you safe. And perhaps the most important thing about winching technique is what you do before launch. In this chapter, we will tell you about the basic technique of using a winch. Be that as it may, the analysis of the situation and the choice are yours, we do not claim that the management system we propose is the absolute correctness. You must decide for yourself which strategy to choose in a given situation.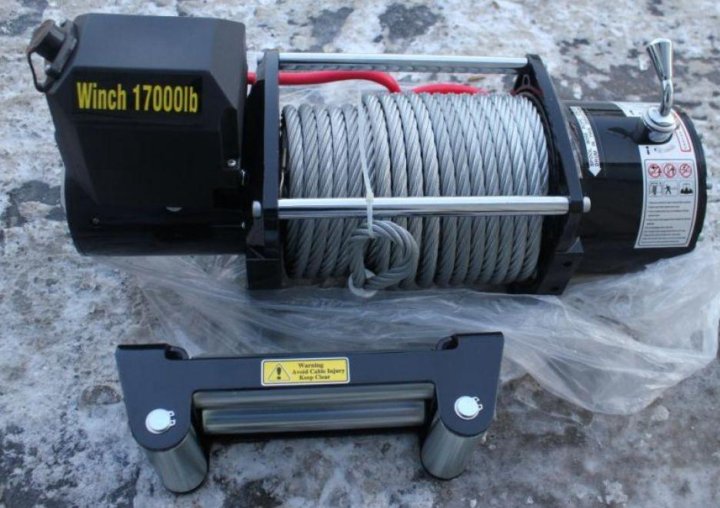 Apply your knowledge to the basic theory, develop it.
A few things to remember when using winches:
Using the winch to pull the ATV in a straight line.
In this part, we would like to tell you about getting your ATV out of a trap in a straight line.
Although pulling out in a non-straight path corresponds to the basic steps, it still requires the use of additional support points and / or chain hoists (ideally).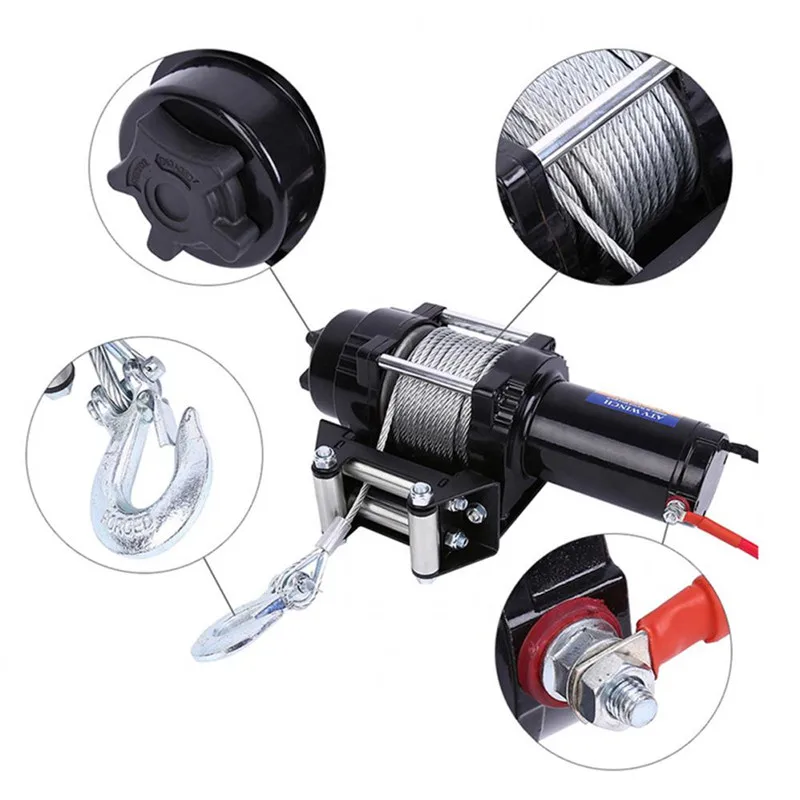
Step one : wear gloves and protective equipment.
Second step : Release the lock lever.
Disabling this lever will allow you to unwind the cable or rope by hand, saving battery power.
Step three : release the hook and attach the hook tape to it.
Fourth step : unwind the rope to the anchor point. Make sure you have a firm grip on the cable. Otherwise, it may fall out, twist, which will damage the cable. Hold the hook line while you are working with the winch.
Step five : Install the wood guard at the anchor point.
How to Choose the Right Mounting Point - The mounting point should be as far away as possible, because the most traction force is achieved with the largest leverage, in our case, the greater distance from the point to the ATV. The stability and reliability of the fulcrum is a critical point in the success of your work with the winch and, as a result, successful rescue operations.
If there are no decent footholds nearby, but you are working with a group of quads, yours, or your friend's quad, may be a sufficient foothold. The use of chain hoists will facilitate the work of evacuating the ATV. In very extreme cases, you can use the “anchor” technique, that is, drive a piece of iron reinforcement or another similar object into the ground to a sufficient depth.
Step six : finally connect the fulcrum and the winch. This can be done in different ways, in this case (shown in the picture) you need to use a connecting bracket in order to connect the hook of your cable and the protective tape.
Step seven : move the lock lever to the locked position.
Step eight : connect the control panel and the winch itself directly.
Nine step : Tighten the rope. Using the control panel, slowly tighten the cable.
Step ten: Check your fulcrum. Make sure all connections are functioning properly and are not twisted or twisted.
As you may have noticed, there are many things to pay attention to. Think about what you will do, how you will act if the situation gets out of your control. Controlling a winch is so important that you should definitely practice handling it BEFORE you get into a difficult situation in order to avoid the stress and headaches caused by a broken winch. Now back to our steps.
Step eleven: Check that the rope is correctly routed in the winch.
Step Twelve : Check the trajectory to remove unwanted obstacles on the trajectory.
! What to look for before starting - make sure that the rope lies flat on the drum, as indicated on the warning sign on the winch. Make sure your ATV is in neutral, not on the brakes, and definitely not in park gear (if any).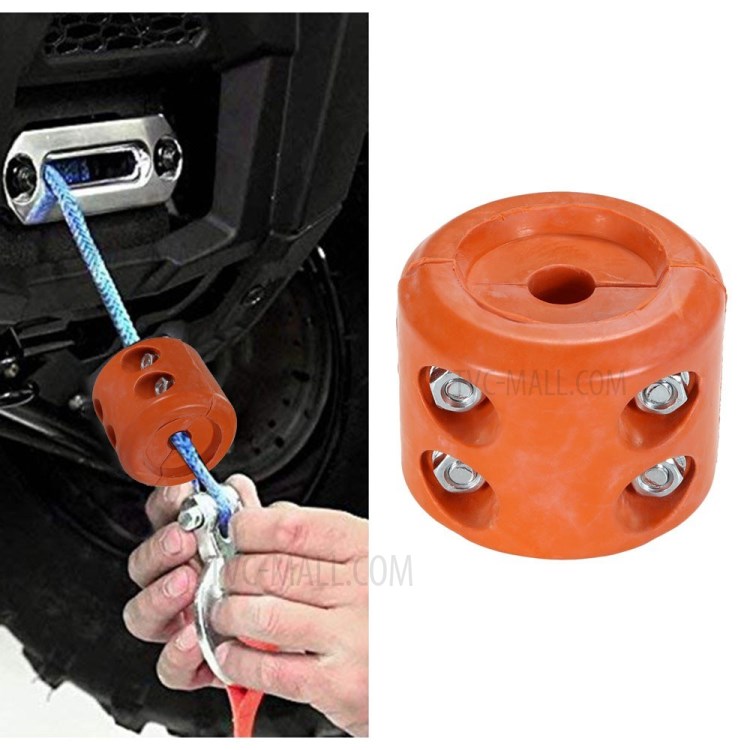 Be patient, take your time and let the winch do its job. This will prevent shock loading on the winch, which could result in damage to the cable and winch.
Step thirteen: Make sure there are no people in the suspected risk area. Because when the situation gets out of control, they can suffer.
Fourteenth step: Start winching. Along with the winch tension, you must supply light gas. Make sure that the rope or cable is laid flat on the drum. When using a winch, it is she who indicates the main direction of movement, you can only slightly correct the movement of equipment, which is why it is important to initially set the correct course.
Fifteenth step: To restore equipment. When you get the opportunity to calmly control the ATV, it will mean that your work as a winch is over. Now check the performance of your ATV and disassemble all the connecting link, assemble the winch and additional equipment.
! How to remove the winch without too much pressure. Keep the rope under light pressure, keep the rope on the drum properly, to do this, move your guiding hand from side to side, leaving some distance to secure the hook somewhere. If you don't have a hook tape, use or make one yourself. NEVER put your fingers in the winch drum, even to fix the cable, better unwind and do it all over again. And now a little dzhiperovsky reception. As I said above, for maximum efficiency (coefficient of performance) you need to unwind the cable as much as possible, and so, jeepers often unwind the cable and fix it on a bumper or other similar place so that when you need it, you can just take one end, and run the entire length of the cable. True, it is necessary that the co-pilot monitor the unwinding of the cable, and, if anything, would help to remove it. Note. ed.)
Additional tricks.
Power increase. To increase the power, you can use the simplest block roller system, or chain hoists.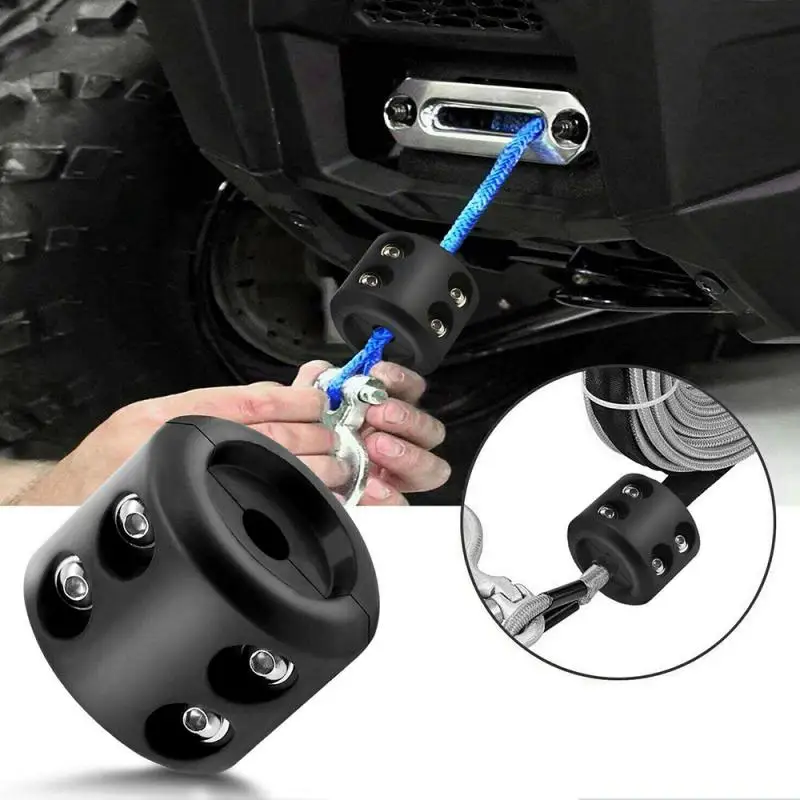 One pulley doubles the power of your winch, and the pulley allows you to change the direction the quad is pulling. The technique for using pulleys was given by Tramp above, so I won't go into the details of using roller systems.
Workmate signals when winching.
Tips.
 It is also important to check all electrical wiring.
 Translated by: Gandi , edited and made legible by: kvadromanual.com
A winch is a must-have when riding off-road. It allows you to pull a stuck ATV out of mud, water or deep ruts.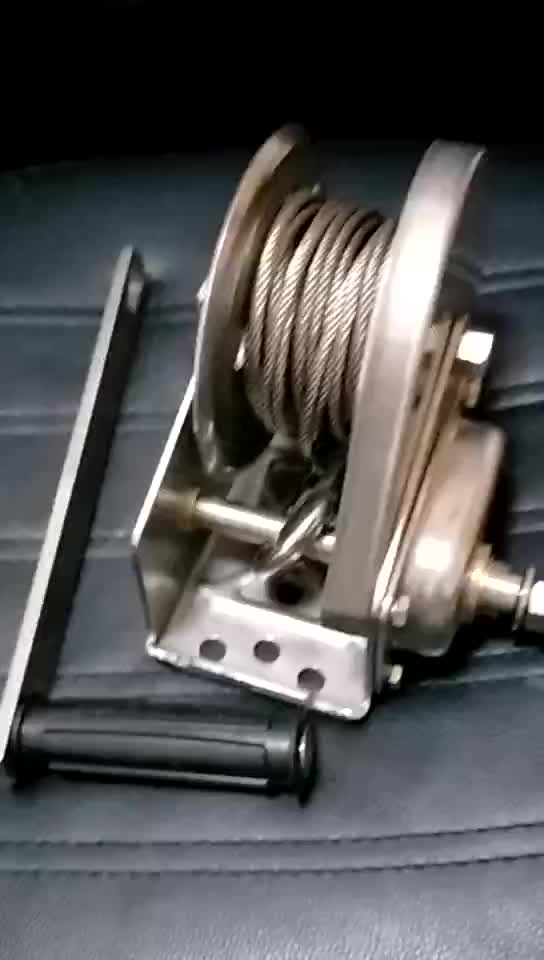 Many models of CFMOTO ATVs and ATVs have a winch from the factory, for others it needs to be purchased separately. In this article, we will tell you how the winch works, what to look for when choosing, and also give useful tips on how to use it.
The ATV winch is a drum with a cable. An electric motor is located on one side of the drum, and a gearbox on the other. Rotation from the electric motor to the gearbox transmits a shaft that passes inside the drum. The gears of the planetary mechanism are located in the gearbox.
Reducer reduces speed and increases traction. The rotation from the gearbox is transmitted to the drum, which winds the cable, creating traction and gradually pulling out the stuck equipment.
One of the key parameters to consider when choosing a winch is traction. It determines the maximum weight of the load that can be torn off the surface. With each skein of the drum, the winch force decreases.
Thrust is measured in pounds (labeled on winches as lbs), 1 lb = 0.45 kg. The force depends on a number of features: the diameter of the drum, the number of wound turns, the power of the electric motor, as well as the gear ratio of the gearbox.
It is not always necessary to choose the most powerful and fastest winch: the more powerful the mechanism, the more difficult it is to handle. Beginners can harm equipment and even their health - it is not uncommon for a broken cable or a broken hook to cause injury.
Suitable for ATV cubic capacity:
Steel - cheap and easy. Requires work with gloves, not repairable. May cause injury if mishandled.
Synthetic - requires maintenance but is easy to use. It does not "shoot", and if the cable is damaged or torn, it can be braided on the spot.
Most experts believe that material selection should be based on personal preference, with some riders leaning towards steel over time, others towards synthetics.
The winch is installed on a special platform on the ATV frame. If there is no platform, you need to buy it and install it according to the instructions. The site has standard anchor points that fit classic winches up to 3,500 feet of pull.
When choosing a winch, pay attention to the width of the drum:
With certain skills, you can modify the fasteners and install almost any winch - the main thing is not to make the fasteners "break" and not to strengthen weak points. If the ATV is under warranty, it is advisable not to touch the frame and buy a standard winch.
Installing the winch is easy, but the connection will have to be tricky. To lay the wiring, it is advisable to remove the plastic from the ATV. The winch must be connected to the control unit and battery. It is recommended to keep the power cable as short as possible to avoid current loss. All wires must be hidden in the corrugation so that they do not come into contact with the frame and are protected from moisture.