Last Updated on 3 months by Susan Mayrich
How to remove stains from clothes
Please enable JavaScript
How to remove stains from clothes
The question is how to remove rubber stains from clothes? There are different ways to deal with rubber stains on clothes depending on your clothes’ material. Most of the standard methods usually involve soaking the affected area of the clothing in either eucalyptus oil or tea tree oil.
Rubber can leave ugly stains on clothes that are difficult to remove. This can happen in many ways, but one common way is when a person changes car tires and their clothes rub against them.
Other rubber stains on clothes are rubber bands, hair ties, gloves, and gaskets used to seal doors and windows. The problem is that rubber is an oil-based substance, and oil-based products usually stick to cloth fibers. If you want to learn more, keep on reading. Let’s have fun!
What Gets Rubber Stains Out Of Clothes?
Tea tree oil, distilled white vinegar, and eucalyptus (Eucalyptus globulus) oil are a few of the many essential oils that can be used to remove fresh rubber marks from hard surfaces. Rubbing alcohol is another cleaning agent that can help lift rubber marks from nonporous surfaces.
Tea tree oil is a natural fungicide and antiseptic with a fresh aroma. It is a member of the myrtle family of plants and is native to Australia. Eucalyptus oil is used in various products such as rubs, inhalants, and chest balms. Eucalyptus trees are native to Australia, but the trees are now cultivated worldwide. The botanical name for the blue-gum eucalyptus plant is Eucalyptus globulus.
Things You’ll Need
Steps To Remove Rubber Stains From Clothes
Before you do anything, check the tag on your clothing for washing instructions.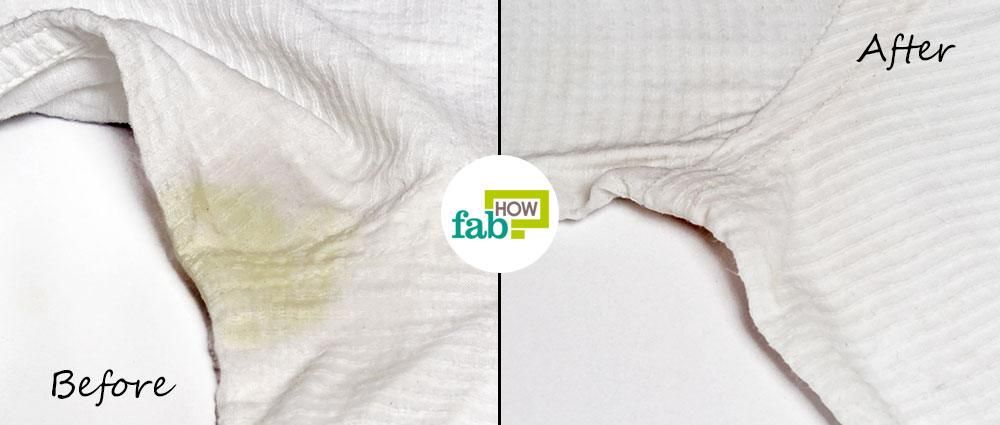 Some clothes are dry clean only, and if this is the case, you will need to take them to a dry cleaner. How do remove rubber stains from clothes? Check out these easy steps on how to remove rubber stains from clothes:
Step #1. Apply stain remover
Apply tea oil or oxiclean to the affected area of the garment.
Dab the rubber stain with the washcloth.
The oil will help break the sticky rubber in the fibers and help lift it away from the fabric.
Continue dabbing until the stains are no longer seen.
Step #2. Spray cold water
Spray the oil with water from a spray bottle and continue dabbing until the rubber is completely removed from your clothing and transferred onto the washcloth or towel.Â
Step #3. Launder the garment as usual
Once you’ve removed as much of the stain as you can, throw your garment into the washing machine with your usual detergent to eradicate any residues.
Step #4. Airdry the garment
You can either use a dryer or air dry the garment, but the best option is to hand the affected clothing out to dry.
How To Get Bike Tire Marks Off Clothes?
Here are some ways to remove r tire marks from clothes:
#1. The first thing to do is remove the excess dirt by scraping it off carefully with a blunt knife.
#2. Next, sprinkle baby powder or cornstarch, or talc on the stain and let it sit for 5 minutes.
#3. After that, rub liquid dish soap, liquid laundry detergent, or shampoo into the tire mark and let it soak in for 10 minutes.
#4. Then, rinse the spot with water and apply stain remover such as OxiClean and dab the area until all traces of the stain have been removed.
#5. Finally, launder as usual.
How To Remove Rubber Latex From Clothes?
Removing rubber latex from clothes can be a challenge. Because latex is a type of rubber, it bonds to the fibers in your clothing with heat and pressure. But that doesn’t mean removing the stain is impossible. Here are some ways to remove rubber latex from clothing:
#1. Use a dull knife to remove any excess dried paint from the fabric. Scrape with the grain of the fabric to avoid damage.
#2. Rinse out as much of the stain as possible under cold water.
#3. Combine 1 teaspoon of dishwashing liquid with 2 cups of warm water and mix well. Apply to stain and let stand for 5 minutes.
#4. Soak the stain with a commercial carpet- or clothing-stain remover designed for removing latex paint or rubber stains.
#5. When the stain is gone, rinse with cool water, then wash as usual in warm or cool water with detergent or your washing machine’s normal cycle (if your garment can be machine-washed).
Frequently Asked Questions (FAQs)
Here you will find out the answer to a few questions:
Does tea tree oil remove rubber stains?
Tea tree oil can be used to remove rubber stains.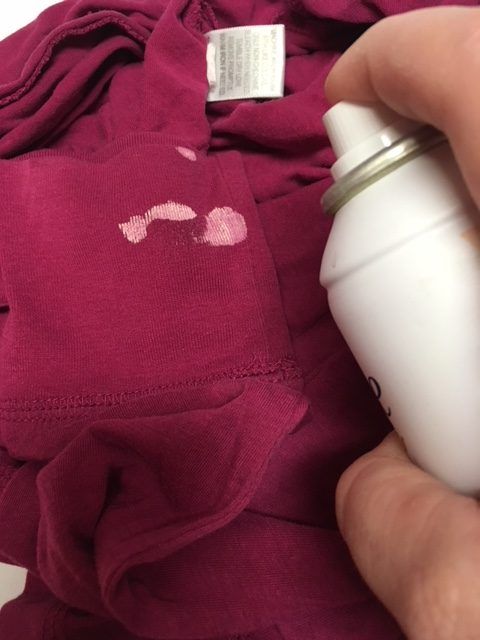 The oil is an effective solvent for natural rubber, and it will break up the rubber stain in the fibers 0f the garment to release them.
Can tire marks be removed?
Yes, it is possible to remove tire marks. But removing tire marks is very hard because they are made from petroleum and are water-resistant. You will need to use Harsh cleaners, such as ones that contain bleach or other strong ingredients.
Are tire marks permanent?
Tire marks result from rubber being pressed against a surface, which melts it and leaves behind a permanent mark. Tire marks are not permanent as long as they are removed quickly. If tire marks sit on any surface for an extended time, they will permanently damage the area.
Does eucalyptus oil remove rubber stains?
Yes, eucalyptus oil does remove rubber stains. Eucalyptus oil is a natural emulsifier that eliminates nearly all types of stains. To remove the stain, rub the stained area with a clean cloth soaked in eucalyptus oil, wipe it with a dampened cloth, and wash it with soap.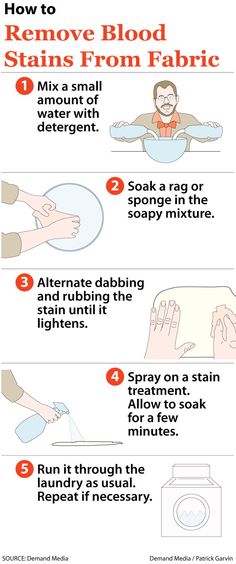
How do you remove black rubber stains from clothes?
Wet the clothing with lukewarm water and blot it with a sponge or soft cloth to remove excess water. Apply a few drops of liquid dishwashing detergent to the stain and rub it in gently with your fingers. Rinse the clothing under warm running water. You may also be interested to know about the best way to remove a rubber stain.
Removing Rubber Marks Off A Vinyl Floor
It’s A Wrap!
In summation, there are various ways how to remove rubber stains from clothes. Some of these methods are more effective than others, and some will be better at removing different types of rubber. Ultimately all of these methods can achieve good results, and it is simply a matter of finding which ones work for your specific situation.
Thank you, friends, for being with us at the end! You may also want to read about does silly string stains clothes and what causes brown stains on clothes after washing.
Are you wondering what is a bobbin on a sewing machine? A bobbin is a spool or thread cylinder used in sewing machines. The thread wraps around the center post and gets stretched out by the needle. As you sew, it feeds off the top of the bobbin and through your fabric to make stitches. … Read more
Crochet Cluster Stitch - Crochet Gu...
Please enable JavaScript
Crochet Cluster Stitch - Crochet Guru Stitch Guide
Are you wondering baby blanket size guide: how to choose the right size? The baby blanket size can be hard to determine, and it may even make you wonder what the right size is. Do you have an infant? Or maybe a toddler or young child who needs to be kept warm during winter? Blankets … Read more
Are you wondering how to put bobbin in Janome sewing machine? Are you new to the world of sewing? If so, you might not know how to put a bobbin in your sewing machine. You don’t need to worry! This article is here to help guide you through the process and answer any questions that … Read more
Are you wondering how to adjust bobbin tension on Janome sewing machine? In six easy steps, you can; and these things you will know as you delve into this article further. The bobbin is a crucial component in the sewing process. You should adjust the bobbin tension to ensure that the fabric doesn’t loosen as … Read more
Are you wondering how to thread an older singer sewing machine? We’ve got a step-by-step guide for how to thread your old Singer sewing machine. You can even watch a video of the process if you prefer. Plus, we’ll tell you what tools and supplies are needed, so it’s easy for you to get started. … Read more
Are you wondering how to thread a sewing machine for beginners? Learning how to thread your sewing machine is one of your most essential skills as a sewer. This guide will teach you everything you need to know about learning how to do it yourself! It’s easy, fun, and exciting. You’ll be able to make … Read more
Are you wondering what is the difference between a quilt and a duvet? A duvet is a type of bedding used as an insert for your comforter and a stand-alone blanket. While it may seem like there’s not much of a difference, there are several differences between these two pieces of bedding. Here’s what you … Read more
Are you wondering how to thread a sewing machine? Sewing machines are great, but threading the needle can be painless. Anyone who has tried to use a sewing machine knows it’s not easy to figure out how to thread it properly. It takes forever, and you risk breaking your expensive needles if you’re not careful. … Read more
Are you wondering how can I learn to sew at home for beginners? Stop wondering and start reading this article. First, you must have a sewing machine, an essential toolkit, and a user manual to start sewing at home. Sewing is a skill that can be learned at home with a bit of patience and … Read more
Do you want to know how to install the zipper foot on a Brother sewing machine? This article will assist you in learning the procedure. This zipper foot is used to stitch right up against the teeth of a zipper without catching them in your seams or stitching over them because it has an adjustable … Read more
So, how to choose the right sewing machine needle? You should start with finding out which type of fabric you want to sew. Some fabrics are more likely to fray than others or require stronger needles for any seams that will go through multiple layers like denim or laminated materials (think leather). A lot of … Read more
Different brands manufacture sewing machines and come in different models, types, colors, accessories, add-ons, features, and capabilities. Not all of these will be relevant to you, and also, the more the capabilities and features, the higher the cost of a sewing machine. But this sewing machine detailed reviews will give you an overall understanding of … Read more
Here are the sewing blogs you should follow right now. Sewing blogs are related to sewing. They can be general sewing blogs or sewing blogs like quilting, dressmaking, and crafts. There is a multitude of great sewing designers, DIY bloggers, and sewing magazines out there. All contribute their style and tips here. Here is the … Read more
Are you here to find the best commercial embroidery machines review for your business? And if you’re thinking of starting or already running an embroidery business, one of the most common questions today is which embroidery machine is best for commercial use? These commercial embroidery machines are more capable of handling big projects than regular … Read more
Leather might not be the first material you think of when dressing for a hot and humid day, but it shouldn’t be discounted entirely. Leather is also extremely durable, making it perfect for a variety of activities including hiking, biking, and traveling. Whether you want to wear your leather jacket while exploring a new city … Read more
When the weather is warm and sunshine is in the air, you can’t go wrong with leather shorts. They are stylish, comfortable, and versatile. Leather shorts are a great way to spice up your wardrobe. They can be worn with almost anything and can make you look super cool. However, wearing leather shorts does not … Read more
Leather shorts are a great way to add some edge to your summer wardrobe. They’re easy to wear, flattering, and versatile, so whether you’re heading out for the night or just want to look hot at the beach, leather shorts can be just what you need. Shoes are an important part of a complete outfit. … Read more
Rayon is a man-made fabric that is made from cellulose, which is a natural fiber. It is made by regenerating cellulose fibers that have been broken down into a liquid, then spinning them into yarn. Rayon can be found in a variety of fabrics and clothing, including lingerie and swimsuits. The process of making rayon … Read more
Rayon is a special fabric that wears as well and feels just as soft as silk. It was often referred to, in the past, as “artificial silk.” Rayon is similar to cellulose, but it has been processed from wood pulp or cotton linter (fine fibers). Rayon is made into clothing fabrics and home furnishings. Rayon … Read more
Nothing more complicated than sewing leather. As you might expect, the same machine that sews fabric can also sew leather. However, there are some differences between the two materials and the way they are sewn together. For instance, sewing leather requires a special needle because the needle must be strong enough to pierce through the … Read more
Body wash is a staple in most bathrooms. When you spill body wash on your carpet, it can easily leave a stain. However, with some simple cleaning tips, you can get rid of the stain and the scent of your favorite body wash. The best way to clean body wash out of your carpet is … Read more
OxiClean is a popular stain remover that is used in both commercial and residential settings. It works well on most stains, but it can leave a residue on your carpet if you don’t rinse it properly. The residue from OxiClean can make your carpet feel sticky and uncomfortable, so it’s important to remove it. The … Read more
Mold can be a nuisance in a home, but it can also be dangerous and unhealthy. Mold grows on everything from drywall to carpets, causing discoloration and damage. Fortunately, there are many ways to remove mold from carpeting naturally. Molds are organisms that can live on any wet surface. They grow best in warm, moist … Read more
Food dye can add a colorful twist to your holiday recipes. Unfortunately, if you spill food coloring on your carpet it may be tricky to clean up. The good news is that food dye stains are usually easy enough to remove. If food dye is spilled on your carpet, blot up as much as possible … Read more
Theme Made Fast By Ezoic
One of the most common floor coverings is linoleum. Its affordable price and diverse design will appeal to any consumer. In order not to often think about changing the floor covering, you need to know how to remove stains from linoleum, which, unfortunately, are inevitable in the kitchen, nursery, hallway, office, etc.
In principle, there are no difficulties in caring for linoleum. To get rid of dust, it is enough to wash the floor with warm water. If the dirt remains, you will be helped by an ordinary soap solution or any detergent familiar from advertising. The solution is washed off the surface with water, then the floor must be wiped dry - this will extend the life of your coating. A dirty spot that has become outdated can be rubbed with a brush, but remember that its fibers must be soft. Hard bristles can damage the top layer of linoleum, so it will soon need to be replaced.
Linoleum is easy to care forDo not despair if there are stains after Saturday cleaning. Try to remember the reason for the formation of marks and read on how to remove stains from linoleum.
If the floor is sketched with a ballpoint pen, marker, felt-tip pen and even ink, then nail polish remover or alcohol will help get rid of it.
Dried paint can be removed with hydrogen peroxide. This solution will also help remove stains from brilliant green - it can be easily wiped off with a piece of cloth or a cotton swab.
Grease that has just got on the surface of linoleum is best wiped off with a paper towel, previously dipped in soapy water. After that, the traces must be washed off with water as soon as possible, since the drying soap will damage the top layer of floor covering paint. But you are probably more concerned about the question of how to remove stains on linoleum if they have had time to dry. In this case, it is necessary to do the same, only use turpentine instead of a soapy solution. We recommend that you first try it on the surface, which is the least noticeable.
With the help of turpentine, you can get rid of dried fat Stains formed on linoleum as a result of careless handling of a bottle of iodine or food coloring are washed off with any solution with bleach (for example, "Whiteness"). A chlorine-containing solution will also rid the surface of traces of coffee, tea, and even grass.
A scrap of fleecy fabric (cashmere works well) is useful if you need to remove paraffin or wax from linoleum. Fold a piece of cloth in half and cover the contaminated surface, then apply a heated iron to it. As a result of the thermal effect, the wax will melt and remain on the fabric.
Rubber, shoe polish and other oily residues can be gently removed with petrol. In the absence of fleecy fabric in the household, it can also be useful for removing stains from candles.
Use gasoline to get rid of shoe polishA solution of citric acid (can be replaced with lemon juice) will help remove mold and rust. If you use a bleaching agent for this purpose, then you need to dilute it in water in a ratio of 1 to 15. If blood has dried on the linoleum, you will need an ammonia solution to eliminate it.
Sticky tape and patch marks can be easily removed with any vegetable oil, and if the stains are very old, with essential oil. Also suitable for this purpose is a window cleaner.
If the above methods do not help in the fight against pollution, you can try an extreme but effective option - use a pumice stone or sandpaper to rub out the stain. True, along with the pollution, the top layer of linoleum will also be removed.
Video on how to clean linoleum:
So, you know all the methods on how to clean stains from linoleum at home. Do not forget that after getting rid of dirt, you need to thoroughly rinse off the aids with water and wipe the floor dry.
Rate the article:(4 votes, average: 4 out of 5)
Share with your friends! Relief engraving is a form of engraving in which the print image is raised above the surface.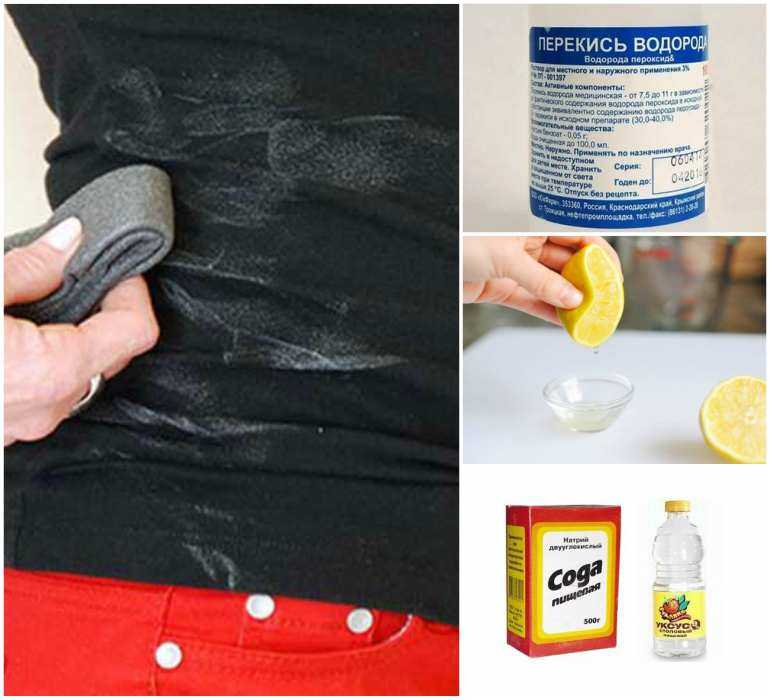 Pieces of material are removed from the surface using sharp tools called grooves. This creates a stamp-like surface, sometimes referred to as "block printing".
Water-based block ink is applied to raised surfaces using a roller called a breaker. The paper is laid on a surface and then either passed through a printing press or polished with a wooden spoon or knife. The result is a "mirror image" of the texture of the block.
Embossed prints can be made from a variety of materials. The most commonly used linoleum, wood, rubber blocks. Linoleum is much easier to cut than wood. For this reason, linoleum is preferred among beginner engravers - although many professionals also prefer linoleum. Linoleum allows the print master to easily cut curved lines and is able to accept prints from sharp objects.
Wood can also be used to create relief prints. Although harder to cut, wood is much stronger than linoleum.
New products on the market are made of rubber and are very easy to cut. However, these foods often crumble easily, which can be frustrating.
Relief printing requires several tools. Most often, these tools consist of many blades called chisels. Each notch is designed to remove different widths of linoleum. Smaller notches remove less material but work more accurately. Larger notches remove more material but are much less accurate.
Manufacturers pack the recesses in kits that are fairly inexpensive. Some kits include replacement blades (notches) that can be clipped into the handle.
Everything you need...
(Some of the following links are affiliate links, which means we earn a small commission if you make a purchase at no additional cost to you.)
process One of the benefits of creating a series prints is that more than one "original" is created. Each print is its own unique "original". Inevitably, there will be slight differences between each print, giving each one a bit of "character".
The process of preparing linoleum, although slow and often tedious, is enjoyable and rewarding. Many engravers enjoy this part of the process even more than the printing process itself.
Although line drawings can be created directly on the surface of the linoleum, many artists prefer to draw on a separate piece of paper that matches the size of the linoleum block.
The design is easily transferred to the linoleum surface with graphite transfer. First, soft graphite is applied to the reverse side of the pattern. Then the drawing is glued to the block with masking tape. A pointed tool, such as a pen or pencil, is used to trace the lines of the design by pressing the soft graphite on the back of the design against the linoleum surface.
Once the line art has been transferred, the linoleum removal process begins. Various recesses are used to cut linoleum in areas not intended for paint application.
Cuts should be made away from the body and hands should always be behind the blade. Often the blade slips, which can lead to injury.
Relief engraving sometimes requires the artist to think in reverse.
Most of us are accustomed to making dark marks on light surfaces. When creating a relief engraving, the artist must "work out" the areas that should be light, assuming that the print will be made on a white surface.
Parts of the image that should be "white" must be removed from the surface of the material (linoleum, wood or rubber), leaving the remaining raised areas for the ink to soak up.
Before printing, all necessary forms are cut out and removed from the linoleum block. As details are removed, the artist can rub in soft graphite or charcoal to get an idea of what the finished print will look like.
To begin the printing process, a small drop of ink is applied to the top of the glass plate. The ink is drawn in small amounts by the brier and rolled on the glass plane until the brier has an even amount of ink.
With the help of a brier, the ink is evenly applied to the block of linoleum. It may take several "passes" with ink to completely cover the block.
A slightly larger sheet of paper is then placed on top of the block. When creating a hand-pulled print, pressure is applied to the back of the paper with a wooden spoon or baren. Successive circular motions are used to evenly apply pressure to the back of the paper. This process is called "polishing".
When pulling the paper around the corner, the first print comes off the block.
The first print is usually not perfect. Often the first print has either too much ink, not enough ink, or uneven pressure was applied during the polishing process.
The following is an example of printing with excess ink. The lines are less clear and the paint is blotchy.
The following is an example of a print with insufficient ink. The lines are defined, but the ink application is inconsistent.
It may take several prints to find the right combination of ink and pressure to produce a series of successful prints.
More lessons you'll love...
.Disclosure: This post may contain affiliate links. I can earn commission for free for you when you make a purchase through my link. As an Amazon affiliate, I earn on qualifying purchases. Click here to read my full disclosure policy.
If you are renovating an old house, you know what an old linoleum floor is like. It's glued to the subfloor and is very difficult to remove. They say you can just lay the new floor over the linoleum, but my experience is that it's always best to start with a clean slate. If you're going to spend time on this, then do it right!
The trick to remove old linoleum is a heat gun! So simple, right? And I partnered with HomeRight to share how easy it is to remove linoleum with the HomeRight Dual Temperature Heat Gun. This little pistol is inexpensive but can be used for many occasions, especially when you're renovating your home.
I must be crazy because the paint on the two-tone "Blue and White Two-tone Kitchen" is barely dry and I'm already tearing out another room. The bathroom in the hallway on the first floor is the guest bath and the only room in the house that has not been touched. After going through a crazy 6 week kitchen renovation, we figured we could survive in this tiny room too. So, last week I grabbed a hammer and fired up the demo!
When we lifted the vanity, we found that there was a second layer of subfloor on top of the original floor. But since the new floor was only where the vanity wasn't, that meant that layer had to go. And guess what we found under it...
Vintage, isn't it? I'm sure you've seen the same (or very similar) old linoleum in your parents or grandparents' house. As much as I loved the old stuff, this too had to go. Since the old linoleum was only laid on the floor where there was no washbasin, we needed to remove the linoleum to make a smooth surface for our new floor.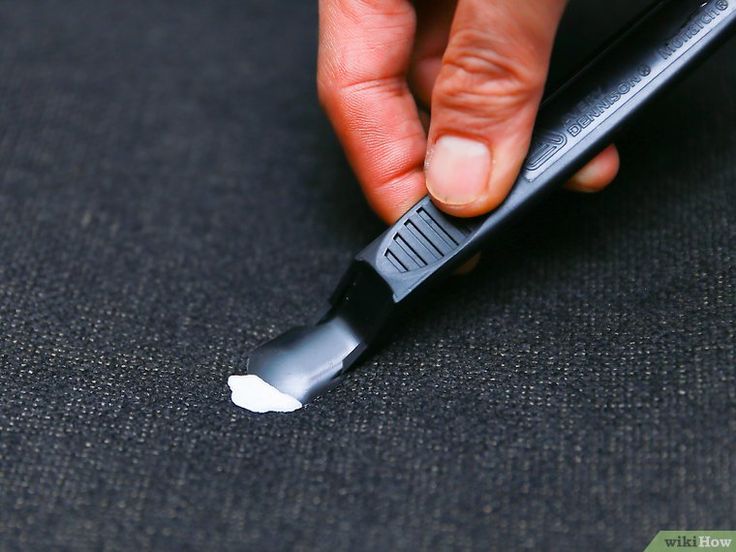 It can be frustrating... but after learning a lot from removing the linoleum from our kitchen, I knew there was an easy way to redo the linoleum and I'm so excited to share it with you!
Supplies:
Select the location where you want to start removing the linoleum. There is no right or wrong place. I like to start in a corner so I can work in stripes across the room.
Using a utility knife, cut the linoleum into strips approximately 12-15 inches in size. This will make the next steps more manageable.
I don't like cutting strips all over the floor at once. Just cut one strip and work on it, then cut and repeat. This rests your back from bending and cutting, and also rests your knees or buttocks from sitting and scratching if you do.
After you cut the floor in the cut, you will need to remove the top layer of linoleum. Just grab a corner and pull.
Mostly only the top layer will rise, but there may be areas where the adhesive has worn out and can also be removed with a little tug. Hooray!
Now it's time to take out the heat gun. The HomeRight dual temperature heat gun has 2 settings. Beautiful and simple! For the flooring, I used the high setting.
Turn on the hair dryer and point it at the old linoleum left after the top was removed. You will need to work in small sections, approximately 3" x 6" at a time. Slowly move the heat gun back and forth over a small section to heat it up.
Then turn off the gun and scrape the heated linoleum off the floor with a trowel.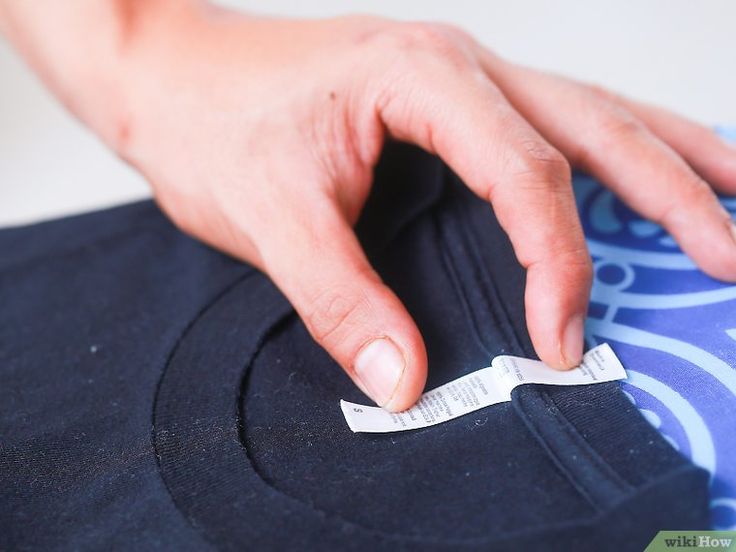 It just rolls straight off the floor into very nice little strips.
After this piece disappears, heat up a new small piece and repeat. How simple it is. But remember, I didn't say it was fast, but it's worth having a nice, smooth floor on which to lay a beautiful new floor.
To keep things going, I held a dual temperature heat gun in my left hand and a putty scraper in my right hand. It kept me from putting a hot gun on the floor and made it easy to heat, scratch, heat and scratch.
Please note that the heat gun has a safety feature to prevent it from overheating. When I started stripping the linoleum, I didn't turn it off while scraping. Instead, I let it run continuously for about 15 minutes. Then it didn't turn on anymore because it was too hot. After cooling down (about 60 minutes), it turned on again and worked perfectly. So be sure to turn it off while cleaning to prevent overheating!
Unfortunately, our vintage linoleum was hiding a dark secret…
The subfloor under the toilet and next to the bathroom was water damaged and destroyed. Didn't find it until the linoleum was put on. So, after scraping the first half of the room, we realized that we needed to completely remove the subfloor and replace it so that the bathroom floor would be a solid and solid surface for the new floor.
After using the HomeRight Dual Temperature Heat Gun to easily remove linoleum, you'll love everything you can do with it. Two heating modes make it very useful in the home.
And now it's time to install a new subfloor so we can get a little bit ahead with this bathroom renovation!
. Removing old linoleum from a floor is not as easy as putting in a new one. One way to solve this problem is to lay the new floor directly on top of the old one. However, this will raise the height of the floor by at least ¼ inch (6.35 millimeters) [source: Natural Handyman]. If that's not an option, be prepared to crawl a lot.
First, a word of caution: the floor and its substrate or adhesive may contain asbestos, especially if it is an old floor where fibers have been added to the floor for durability and strength. the health of anyone who inhales fiber [source: Minnesota].
Listing
Although a flooring sample can be taken to a lab for asbestos testing, it is safe to assume that any home built before 1980 years old, asbestos is present in the floor adhesive (and possibly elsewhere). If the adhesive does contain asbestos, do not remove the adhesive yourself! Most areas have regulations prohibiting homeowners from removing this adhesive and requiring the services of a licensed contractor [source: Natural Handyman].
Here's how to remove the linoleum:
 Make strips 6 to 12 inches (15.2 to 30.5 cm) wide.
 Find out about COVID 19 measures that will help you protect yourself and your loved ones
Shoes with snow-white soles are not going to leave the top fashion trends.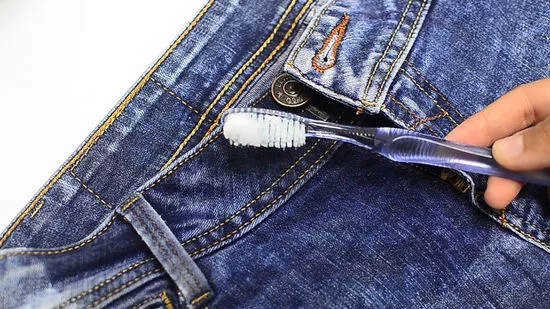 These can be practical sneakers, casual sneakers, sandals on a tractor platform. But even with careful wearing, they quickly lose their appearance. Yellowness, grayness, black stripes appear. Cleanipedia experts show you how easy it is to whiten a white sole.
Updated by Cleanipedia Team
Laundry
For the production of light-soled shoes, synthetic compounds are used, which are particularly resistant. But on contact with the environment, yellow spots may appear. It is simply impossible to wipe them off with a damp cloth. Of course, dry cleaning can handle this task, but you can clean the white soles of sneakers from yellowness at home. To restore the light shade of the darkened sole will help Domestos Cleaner for the toilet "Expert strength 7. Ultra white", 1 l. Prepare the solution: 1 capful of the product per 2.5 liters of water. With a moistened sponge, gently rub the sole. Dirty laces can also be lightened in liquid.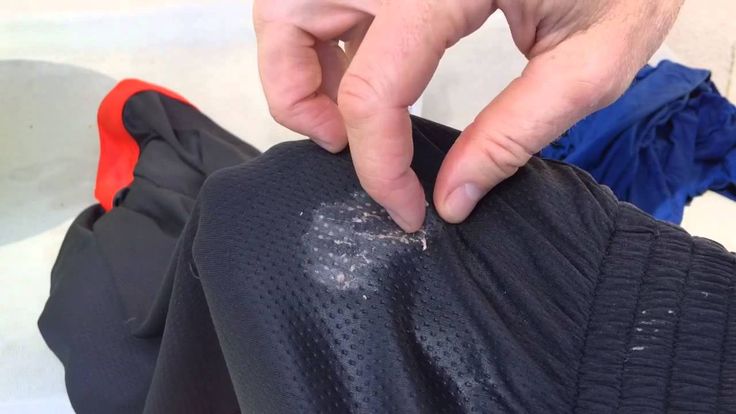 If the upper of the shoe is made of colored materials, try not to touch it, otherwise these areas will also bleach. It is recommended to leave the applied solution for 5-7 minutes, and then rinse.
Is it possible to wash sneakers in the washing machine to avoid manual labor? Unfortunately, after washing, shoes can lose their former shape or even tear and stick out. If you still choose this method, remove all removable elements: insoles, laces, decor. Small stones and sand should be removed from the soleplate: they damage the drum and filter. Some washing machines have a "Shoes" program. If it is not available, a program for delicate fabrics is suitable. Sneakers place in a special bag. It is better to cancel the spin phase to avoid deformation. It is necessary to dry at room temperature, stuffing shoes with crumpled paper: it will absorb excess moisture. Do not speed up drying with a hair dryer or heating appliances.
A radical way to make the sole white is to paint it. For this, non-water-based acrylic materials are used. Painting is done on clean shoes, drying with a hair dryer to fix.
Black streaks are marks left by dark rubber. For example, the soles of shoes, the wheels of a stroller. They can be removed by folk methods:
Almost always it is possible to wash off the pollution with acids. Table vinegar will help you. It is diluted with warm water 1: 3. For cleaning, it is better to use a white cloth so that it does not give off its color. It is convenient to treat hard-to-reach places with cotton swabs. The black stripes disappear right before our eyes. If you want to use citric acid, then making a solution is optional. Just sprinkle it on a wet brush and go over the sole. Both vinegar and citric acid are easily washed off with water after cleaning. To fix the result, a white or transparent cream is applied to dry shoes.
It is always better to clean the soles of sneakers from black marks, rather than leave this matter for later. Outside the home, it is convenient to wash shoes with Cif universal cleaning wipes. They are made from a durable non-woven base that does not leave lint or streaks. Just rub the mark on the shoe and the sole will turn white again.
In order for shoes with white soles to please you with an ideal appearance for as long as possible, follow these simple rules:0003
Use water-repellent products and colorless creams not only on the upper but also on the bottom;
If there are scratches on the surface, carefully cover them with white varnish. Then dirt and dust will not clog there;
Do not dry sneakers in direct sun;
Clean stains immediately before they have set into the material;
Machine wash only as a last resort to avoid warping and wear.
This cleaning is a painstaking process, but an effective one. It is better to take a regular light stationery eraser. Of course, it must be clean so as not to smear dirt on the surface.
Dilute half a glass of powder in a liter of water (preferably for whites). Take a container so that when the sneakers are immersed, only the sole is in the water. After 20 minutes, rub the dirt with a brush.
Best for rubber.
Mini-survey
During the self-isolation regime, have any new types of dirt/stains appeared on your clothes?
Yes, new stain types encountered
0%
There were few new stain types
0%
No, there were no new stain types
0%
0 Vote(s) Clear 9002 from a white sole and remove black stripes is quite real. For this, it is not necessary to go to a dry cleaner. Professionals recommend paying attention to regular shoe care: wash it and use caring creams and varnishes. This will help extend the life of your sneakers and save you money.