If you’ve got an older bike that’s a pain to start, or won’t tick over evenly, or stutters when you give it some gas (or indeed all of the above) then you might have a carburettor problem – they’re almost as common as electrical faults. But the good news is carbs are relatively easy to clean so the task should be near the top of your ‘jobs to do’ list if your bike is playing up.
Problems generally arise because carbs rely on fuel going through very small holes, which can be easily blocked by gunk. This is particularly common after a bike has been left standing – it only takes a bit of rust from the tank, or a tiny fragment of seal that’s been eaten away to clog part of the carb, which then restricts fuel getting into the combustion chamber, which makes the engine splutter like a politician on Newsnight. So here’s how to clean your carbs…
If you have a Guzzi or BMW twin, carb cleaning is a doddle because they hang out in the breeze.
Getting carbs off a bike is usually far more of a hassle than actually cleaning them because the intake rubbers are sometimes a pig to get off and re-fit, and you have to remove the throttle cable which can be fiddly too. So, stage one is to try and get rid of the gunk with the carbs in place, though the feasibility of this depends on how much space you’ve got below them. Small single or twin cylinder bikes are usually a far easier proposition than across the frame fours. BMW twins and Guzzis are easiest of all because their carbs hang in the breeze. With the carbs in place, you can’t do a thorough clean, but it’s definitely worth a go.
A simple carb on a single cylinder bike (this is from an SR125) is a good place to practice your carb cleaning. You can see how the float bowl on the bottom is attached by a screw at each corner.
 As the float comes out, look out for a little valve that the float pushes on to stop the fuel flow when it’s at the right level. This will come out with the float. Give it a clean.
To remove the carb you need to take off the throttle cable. In the close confines of an across the frame four-cylinder bike, this can be a royal pain in the arse.
If a quick and dirty clean hasn’t worked, it’s time for phase two:
 We’ll talk about cleaning below, but if you’re going to the bother of removing the carbs, you might as well replace all the jets, gaskets, seals etc while you’ve got it apart. They’re not too pricey and save you fiddling about trying to clean the jets.
  If that doesn’t clear the blockage, pluck out the bristle of a wire brush and poke it through. Be gentle though – the jets are brass, so are easily scratched. If that doesn’t work, leave the jets to soak in carb cleaner and repeat until you’ve cleared it.
If you’re taking the carbs off, buying a carb service kit is a good idea.
Now you’ve cleaned your carbs, here’s how you can balance - or sync motorcycle carburettors.
Carburetor from a Yamaha YFM200 Moto 4.
Carburetors were the standard for fuel delivery in gasoline-powered passenger cars and trucks up until the late 1980s, when fuel injection saw greater widespread use and eventually overtook the carburetor as the preferred method. Then-new government regulations of emissions and fuel economy dictated the changeover and the very last production passenger vehicle for the North American market to use a carbureted engine was the 1994 Isuzu TF Series Pickup (the last-ever production passenger vehicle to use a carburetor was the 2015 Lada Riva).
The Yamaha YFM200 Moto 4 is a popular vintage ATV model that uses a carburetor.
Unlike passenger vehicles, small engines do not fall under the same set of restrictions for pollution and fuel economy and it is still quite common to find late model motorcycles, ATVs, snowmobiles, powerboats, and other recreational powersports vehicles that use carburetors as opposed to fuel injection systems.
Weber carburetors under the hood of a Shelby Cobra.
Compared to modern fuel injection, carburetors are relatively low-tech. Perhaps, even archaic by today’s standards. There is, however, beauty in simplicity. Carburetors less expensive to produce and far less complicated to build, maintain, and/or repair. Unlike an electronic fuel injection system, carburetor maintenance is easy enough for anyone to perform with the most basic mechanical skills. Our quick how-to instructional piece will show you how to clean and maintain the carburetor on your motorcycle or ATV for maximum performance and efficiency.
Yuck!
All that nasty black soot that you see caked around the exhaust pipe exits, that’s all carbon deposits. Carbon is a byproduct of combustion and all gasoline-burning engines produce it. Engines that experience regular daily use are less-prone to carbon buildup as proper heat cycles and fuel flow help to clean and break up carbon deposits before they can accumulate. When engines sit unused for long extended periods of time, carbon deposits can harden and varnish can form in the carburetor, intake, and combustion chambers. Also, in many parts of the country, gasoline is mixed with ethanol and a nasty side-effect of ethanol is that draws moisture directly from the atmosphere. We all know that water and gasoline is a problem. This excess moisture can also promote rust on sensitive carburetor parts such as in the float, the jets, along the throttle plate, and also on the exterior linkages and connections. That’s why it’s a good idea to use a water displacer or fuel stabilizer if storing your powersports vehicle for a season or for any extended timeframe. The tell-tale signs that your carburetor may be due for a good deep-cleaning include rough and choppy idle, poor throttle response, difficulty starting, and the possibility of random stalling. At first, these symptoms can seem quite scary but more often than not, the solution is a simple but thorough cleaning of the carburetor.
 Especially, if you haven’t started your engine in over a month.
So, now that you know the reasons why you should keep your carburetor clean, let’s go over the steps on how to do it.
YOU WILL NEED:
 Only use this for the throttle plate.)
Turn off the fuel valve on your fuel tank and then track the fuel line down to the carburetor. Remove the hose. This would be a good time to inspect the condition of the fuel hose and check for any cracks or dry rot (replace if necessary, do not reuse damaged fuel line). Remove the overflow hose that runs out of the carburetor and then loosen the clamps at the front and rear of the carburetor. The carburetor will now be loose, but held in place by the throttle cable. Don’t let it hang under its own weight as this can cause premature wear and stretching of the throttle cable. Twist the top cap to remove the throttle cable and remove the carburetor. Once the carburetor has been unmounted, remove the throttle slide from the cable.
When cleaning a carburetor, this is the first thing to be taken apart. Common problems include engine flooding, running too rich (too much fuel) or too lean (too much air), and stalling under engine load. Remove the float bowl by loosening the four screws on the bottom of the carburetor. Be mindful not to use excessive force as these screws can strip easily. Gently pull the float bowl off the carburetor.TIP: You might want to replace the gasket.
With your needle nose pliers, gently pull out the float pin. Once the pin has been removed, the float itself can be removed. Note that on some carburetors, the needle will be hanging on the float and come out with it.
WARNING: Some carburetors have splash jets that need to be removed before the jets themselves can be extracted.
The jets are where the fuel flows and mixes with the atmospheric air. These are screws with a small hole through them, much like a brake bleed screw. The main jet is short and fat and will have either a hex head or a flat screw head. The pilot jet is long and thin and have a flat screw head. Be careful not to use too much force when removing the jets; the biggest risk is accidentally stripping the screw threads and getting tiny metal shavings inside the hard-to-reach spots and crevices within the carburetor interior.
This is the idle screw, air screw, and the choke (if external). With a flathead screwdriver, remove the idle and air screws. Again, be mindful not to use heavy force. If the carburetor has an external choke, turn the top with a wrench. The choke should easily slide out.
WARNING: Remove all gaskets and o-rings prior to cleaning the carburetor. Carburetor cleaner chemicals will eat through rubber o-rings. Also, be sure to wear nitrile gloves and safety glasses when using the spray cleaners. It’s nasty stuff and you don’t want it soaking into your skin and/or getting in your eyes.
Spray a little bit of carburetor cleaner on the exterior and use your wire brush/tooth brush to break up and agitate the debris. Give it another good shot of the spray cleaner and begin to work the holes where the jets, air and idle screws, float needle, and choke reside. Spray the holes directly with the cleaner. For stuck, caked-on debris, try to blow it out with compressed air (a thin needle or steel guitar string can also help fish out the gunk). For the throttle inlet, spray the throttle cleaner while breaking up the deposits with your brush. Spray again to wash away the residue. When finished, blow off the carburetor with compressed air. Don’t let the loosened dirt/carbon debris/cleaner sludge dry back onto the carburetor and its components.
Race Driven sells complete carburetor rebuild kits, such as this one for a Yamaha Moto 4.
This would be a perfect opportunity to replace your old gaskets and o-rings with brand new ones. These pieces are meant to form tight impenetrable seals and by dislodging and disassembling the carburetor, you risk damaging these protective layers. At Race Driven, we specialize in small engine parts for motocross, street and competition motorcycles, and off-road and performance ATVs. We have full carb kits that include all the vital components such as replacement jets, springs, gaskets and o-rings for popular models by Yamaha, Kawasaki, Honda, Polaris, Suzuki, and more.
In order for the ATV to work like a clock, the rider needs to regularly carry out a complete maintenance of the equipment. And a key element of maintenance is ATV carburetor adjustment. Over time, the system starts to work incorrectly, which increases fuel consumption, worsens dynamics and other problems appear. So how do you adjust an ATV carburetor?
The operation and life of the engine directly depends on the quality of the fuel mixture. The carburetor is responsible for the preparation of the composition, but after prolonged use of the equipment, the settings “go astray”. This results in:
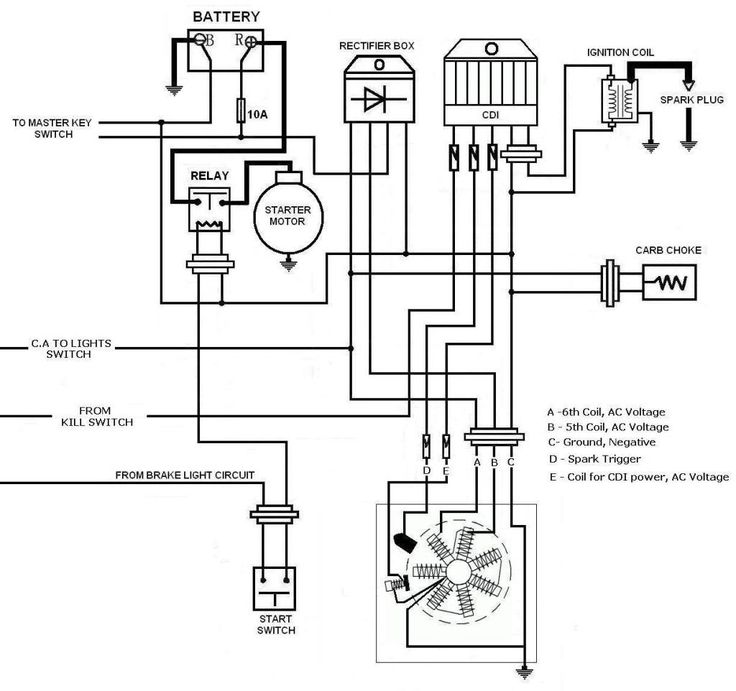
Many riders who decide to buy an inexpensive ATV simply do not spare the technique and ignore this procedure. But even if you plan to change your device in 1.5-2 years, adjustment is needed. The reason for this is increased fuel consumption. A quad with an untuned carburetor "eats" 30-40% more gasoline, and these are tangible costs.
So how do you adjust the carburetor on a Chinese ATV? For this you need:
However, it is important to remember that all adjustments are made only with a "clean" carburettor. This means that the rider needs to remove all the dirt from the node and flush the system to remove condensation and sediment from it.
Note: Just before adjusting, the engine must be warmed up to operating temperature.
To set the carburetor idle speed, the float chamber must first be cleared of fuel. To do this, start the ATV, close the fuel cock and wait until the machine stalls (5-10 minutes). To speed up the process, you can take a little ride on the quadric. Of course, gasoline can be drained, but in any case you will have to warm up the device, so the first method of "removing" gasoline is more effective.
Then:

Read the manual before adjusting the carburetor on a 125cc ATV to be sure. Remember that the location of the bolts is different in different devices, so read the documentation in advance.
To evaluate the quality of the fuel composition, make a test run. After that, unscrew the candle, and evaluate its condition. If it is:

Also look out for these “symptoms”: damaged tip (electrode failure), oil deposits (damage to rings and caps), chips and inclusions (sign of motor failure).
To adjust the mixture you need to twist the needle cover and pull it out. To get the needle, pull out the cable. After that, move the ring in the required direction (lower - more air, but less fuel and vice versa). Then start the engine and make sure it doesn't stall.
The last step in adjusting the 125cc ATV carburetor is adjusting the petrol level. To do this, you need:

Note: Adjust as carefully as possible as system components are very fragile. Ideally, carburetor tuning should be done by a specialist.
06/16/2020 23364
It often seems like an insurmountable task for beginners to tune and adjust the carburetor of an ATV, but in fact, it is far from being the case. Using our instructions, you can easily set up a carburetor with your own hands.
Due to improper carburetor settings, problems such as: failures during acceleration, jerks while driving, uncertain start of the engine, poor acceleration dynamics, overheating, loss of power, increased fuel consumption, formation of deposits in the combustion chamber.
So what exactly are we going to tune?

Attention! The adjustment is carried out under the condition of a warm engine and a clean carburetor.
First, make sure there is no condensation in the carburetor. First, you need to drain the gasoline from the float chamber, for this you need to close the fuel cock and partially unscrew the screw No. 1, after the gasoline has drained from the float chamber, tighten the screw No. 1.
Let's look at photos of candles with various deposits and defects.
A 100% indicator of a correctly adjusted combustible mixture is carbon deposits on a candle.

Consider the location of the screws for adjusting the quality of the mixture and idle speed of carburetors of different models.
#1 Float chamber plug; No. 2 Mixture quality screw;
#3 Idle adjustment screw.
1 - quality adjustment screw at idle; 2 - fuel inlet fitting; 3 - fitting through which you can sleep fuel from the float chamber; 4 - screw-plug of the float chamber.
1 - ventilation tube; 2 - idle speed adjustment screw; 3 - screw for adjusting the composition of the air-fuel mixture.
ATV carburetor speed and mixture adjustment.
1. Start and warm up the engine until it reaches operating temperature.
2. Adjust the idle screw to set the idle speed to normal. Completely, until it stops, tighten the fuel mixture screw, the engine should stall. If this does not happen, check the tightness of the air supply system from the air filter.
3. Loosen the fuel mixture screw 1 turn. (Turning the screw clockwise, we enrich the mixture, unscrewing it counterclockwise, we lean).
4. Start the engine and, by adjusting the idle screw, set the speed slightly higher than usual
5. Slowly unscrew the fuel mixture screw until the engine reaches maximum speed (we unscrew the screw no more than 2 turns, but depending range may fluctuate due to engine wear and other faults).
6. Re-adjust the idle screw to set the idle speed to normal.
7. Press the throttle trigger several times, check if the idle speed is stable.
Mixture quality adjustment with a needle.
Probably you have heard more than once about adjusting the quality of the mixture on the carburetor by manipulating the needle. I note that these are extreme measures, for the initial adjustment, use the mixture quality screw, and only if you do not get the desired result, unscrew the mount and remove the needle. What does she represent? This is the main element that regulates the amount of gasoline supplied to the combustion chamber. Connected directly to the throttle handle through a cable. When you turn the knob, the needle rises higher, opening up a channel for fuel, thereby delivering more mixture, which increases power, which translates into speed.
You will see 5 grooves on the needle at the attachment point. Initially, the retaining ring fixes it in the central position, this is the best option. But sometimes it is not possible to achieve the required quality of the mixture. Then we will need the remaining grooves, 2 on top and 2 on the bottom, this suggests that we can adjust the dose gradually.
Lifting the retaining ring up and locking it in this position lowers the needle, which, in turn, blocks the channel more than usual. Gasoline enters less than air, and the mixture becomes leaner. Lowering the ring down, we raise the needle, and everything happens exactly the opposite.