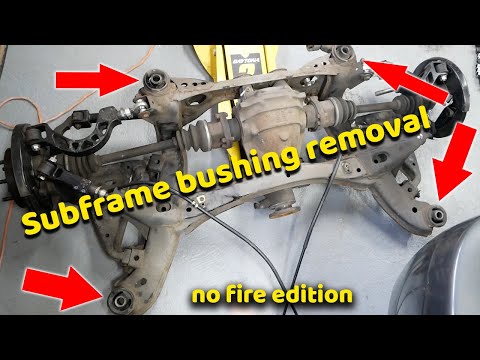
If you don’t have access to a hydraulic press, as very few of us do, there is a simple and inexpensive alternative to installing a suspension bushing. Using tools we had laying around, and a trip to the hardware store, we built a homemade bushing installer that did the job quickly and efficiently. More importantly, the hardware cost was under $10. In this article, we’ll show you how to make your own bushing installer and give you some dos and don’ts to make your install go as smoothly as possible.
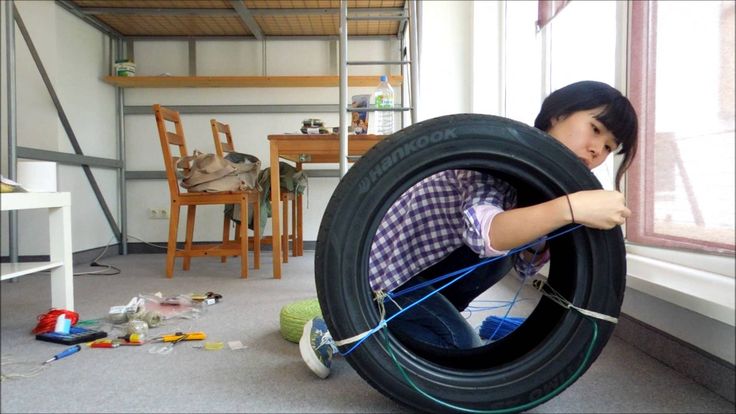
For those of you visual learners.
Before you can install your new bushing, you have to remove the old one. If you need help removing your OE bushing, check out our How-To Burn Out Bushings: The Right Way article.
**Be sure to consult your installation instructions before you remove the outer shell, as a lot of aftermarket bushings require the use of the OE shell.** But for those of you with bushings that have a new outer shell, please read below to see how we installed a bushing without a hydraulic press.
Once you have removed the OE bushing and shell, you should be left with an empty housing. Its a good idea to sand and polish the inner diameter of the housing before you install anything in order to clean up any corrosion, contaminants or rust that may have accumulated. The last thing you want is a sharp edge in there that damages your new bushing when you install it. Additionally, a clean and polished housing will reduce friction, allowing the new bushing to be installed more easily.
Once your housing is prepped, you are ready to build your bushing installer. Full disclosure: The first bushing installer we built failed, hard.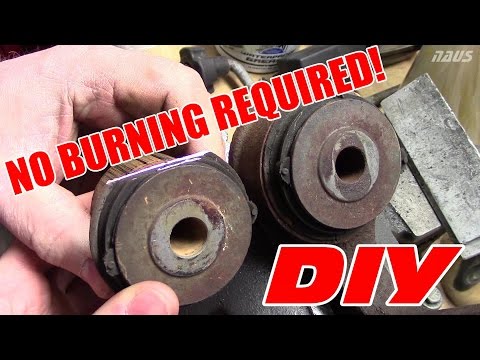 It just wasn’t strong enough to provide the force necessary to install the bushing. So throughout the description of this installer, when we say “you don’t want to use” something, it’s because we tried it and it failed.
We used a set of sockets because we had a set available, so if you have a socket set you can use that. But if you don’t have one, and you don’t want to go spend a hundred dollars on a nice set of sockets, don’t worry. You can do the same thing with two pieces of 3 dollar metal pipe. You will need a piece of pipe with the same diameter as the bushings, and the second piece of pipe with a larger diameter that will brace itself against the housing you’re installing the bushings into.
Now that you have your sockets or pipes, you need a threaded bolt to go through the entire contraption. A few important things about the nuts and bolts:
A Grade 8 bolt can be identified very easily.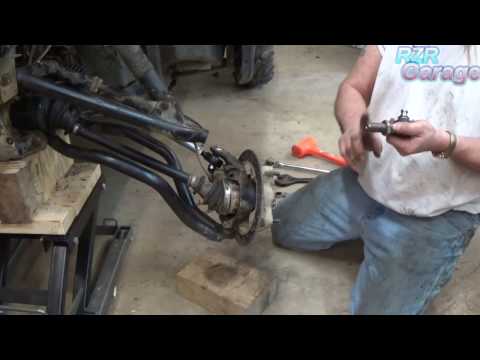 On the head of the bolt, you’ll see a number of lines. If there are 6 lines on the head, that’s a Grade 8, if there are 3 lines, that’s a Grade 5.
The first bushing installer we built used a Grade 5 All Thread rod. The threads on the Grade 5 were too soft and failed under pressure when we were installing the bushing into the housing. When we switched to a Grade 8 bolt, we wondered why we ever tried anything else.
With our brilliant minds (sarcasm) we thought surely to use a fine threaded rod. The more threads there are the less force needed to complete a turn on a thread. Thus reducing the amount of strength required to push the bushing in. That was the thought anyway. But in practice, the fine threads were weaker and failed under the stress. A coarse thread is stronger and more durable for a task that requires as much force as installing a bushing.
This bolt will have a lot of stress on it to install the bushing, so you’ll need a beefy bolt. But this bolt will have to fit through the inner sleeve of your bushing. Be sure to get the largest diameter bolt as allowed by your inner sleeve size.
Now this is where we had to stop and put our thinking caps on. The whole point of the bushing installer was to tighten two nuts, causing the sockets to push against the bushing on one side, and the housing on the other, pushing the bushing into the housing. So we needed a threaded bolt that would allow us to torque the bushing all the way in. This is why we originally used the all thread rod, lots of threads. But once that failed, we tried to find a Grade 8 bolt that would work. Unfortunately, the Grade 8 bolts at our local hardware store had a short thread length. Once we threaded the nut down to where it touched the socket, we had maybe one or two turns of thread left. After we pouted for a minute a light-bulb came on. Washers! Using a stack of washers as shims we were able to use the entire thread and then some. Once we torqued the nut to the end of the thread, we took the nut off and added more washers to reset the bolt to the end of the thread.
The taller the nut, the more threads the nut has. Our first nut was short. When we switched to Grade 8, we had to switch nuts as well. The taller nut had way more threads, allowing the force to spread on a larger portion of the bolt, putting less stress on each individual thread. Now all you need is two wrenches (or one wrench and pair of vice grips) and you have your home-made bushing installer.
Before you start torquing there are a few other tips and tricks you can use to make your install smoother.
This was a critical step in our success. The first go around we didn’t lubricate the bolt. The nut got really hot (to the touch) because of all the friction. That heat softened the metal, making the rod not only too weak to install the bushing, but we actually destroyed the thread.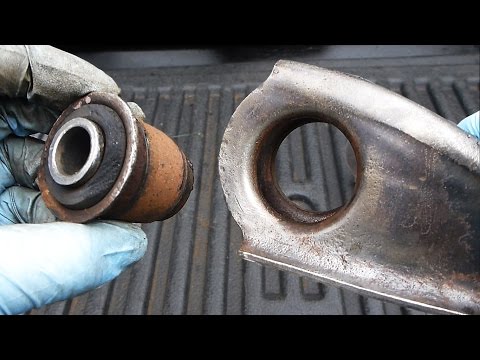 On the grade 8 bolt, we lubricated the thread. It reduced friction, which reduced the heat, allowing the metal to stay strong.
We also lubricated the housing with oil. The oil helped the bushing slide in by reducing friction. Additionally, a coat of oil will protect your freshly polished metal from corrosion.
Huh? Yeah, you read that right. Science backs it up. Metal contracts in the cold. We put the bushing in the freezer for 24 hours before the install to help contract the bushing. Now it didn’t make the bushing just drop in, but even the slightest decrease in the bushing diameter can make all the difference.
Now you are ready to install. Use a wrench or vice grips to hold one of the nuts tight. Then torque the other nut with a wrench. As the socket pushes the bushing, the opposite socket acts as a brace, pressing up against the housing essentially pressing the bushing into the housing. After a few minutes, the bushing was entirely in the housing, all without a press.
Once we had the right tools, the process was very simple. We even used the same tool to remove the bushing and then put it BACK in. It’s really all about having the right tools. So if you are having trouble installing your bushing with your homemade bushing installer, remember:
Making sure you have the proper tools for the job is key to your success. But don’t forget these helpful tips and tricks:
If you have any other questions comment below or contact our DST customer service team. Share you successes and failures (if you dare) in the comments below? Was anybody surprised about the freezing the bushing tip?
Like Loading. ..
..
JavaScript is disabled. For a better experience, please enable JavaScript in your browser before proceeding.
1 - 20 of 30 Posts
1 - 20 of 30 Posts
 Please consider creating a new thread.
Top
We can say that this is the last reincarnation of the part, through which one part of the suspension has freedom of movement relative to the other :-) What happened at the beginning, I won’t dare to say, but in the middle there were also threaded metal bushings:
and just rubber bushings.
Low resource, high backlash, driving noise.
Classic silent block - two bushings welded together with rubber. It is this solution that provides both mobility, and flexibility, and elasticity, and all this with quiet operation. And does not require maintenance :-)
As I already noted, the outer and inner bushings of the silent block are welded together with rubber. Accordingly, the separation of rubber from any of the bushings is already a sign of a malfunction. There are no criteria that would determine the allowable gaps in percentages or centimeters. Maybe the suspension still does not knock, but the partially broken silent block no longer works as programmed, which means that the suspension itself does not work correctly, and the load on neighboring nodes increases.
Therefore, do not wait until the sounds of the suspension become louder than the sounds of the radio in the cabin, but use every opportunity to control its condition:
Speaking directly about cars , then the rear silent blocks of the front levers can be considered a consumable:
This is already a reason to replace
The procedure is not very complicated, to replace the rear silent blocks, the levers themselves must be removed.
To do this, you only need to unscrew two bolts on each side and three nuts. But if you love yourself and hate traffic jams, then your car is equipped with an automatic transmission, and this is already an aggravating circumstance :-) The fact is that the front bolt of the left lever is located exactly opposite the automatic transmission case:
This is not such a big obstacle , you have to slightly lower the beam. You don’t even have to remove it entirely, and you don’t even have to disconnect the steering mechanism from it, but the number of bolts that need to be unscrewed increases slightly:
Not scared? Then we begin:
- unscrew the nuts of the ball -support fastening to the lever:
- disconnect the ball from the lever:
- ensure the emphasis:
- unscrew the traction bolts connecting the gearbox with the submarine :
- unscrew all bolts securing the subframe to the body, do not forget about the front ones. Access to them is organized through holes in the levers:
- Remove a subframe of a few centimeters:
and this is enough to make the front bolt of the left lever:
Well, the right was originally taken out without obstacles:
If the front bolts are screwed up into the beam, then the rear, vertical, are tightened with nuts:
- unscrew the rear bolts for fastening the levers:
- remove the levers by pulling them towards the wheel:
Arms removed:
This part will require mandrels, one slightly smaller than the diameter of the silent block for removal, and a little more for pressing. But first, pay attention to how the old silent blocks are located in the lever. Although they are round, they are not symmetrical, and there is only one correct position:
The arrow on the silent block must match the mark on the lever
But, see, the arrow is not one, but two? The second landmark is a protrusion on the inside of the silent block, it should look towards the wheel:
In our case, the VW Polo and Skoda Rapid cars are regularly installed by the silent blocks 1J0407181
However, there is an alternative - the so -called whole -line silent blocks 8N0407181B :
They were regularly installed in sporty vertices of the suspension. The main difference is the absence of slots in the casting, in which peeling and breaks usually begin:
Remember? You can proceed:
- extinguish the old silent block:
from below, you need to install a sleeve with a hole in a diameter more than the silent block:
- install the new silent block according to the previously voiced landmarks and schete into the lever:
Everything seems to be simple here:
- install the levers in the beam, insert the bolts:
Make money but don't delay!
Insert all beam-to-body bolts:
Tighten to 70Nm+90°. According to the manufacturer's manual - all bolts must be replaced after each removal
But the bolts of the levers can only be tightened in the loaded position! That is, in the way they accept when the car is on wheels. Most often - almost horizontal:
But it is best to calculate it by transferring the weight of the body to the lever:
Raise the rack until the paw of the lift
is now you can tighten the bolts:
and the last bar:
Yes Yes, a mandatory check of the camber and toe parameters. Well, adjustment if necessary:
When choosing high-quality silent blocks and properly installed, they should be enough for about another 100,000 km
SIGN UP FOR THE REPLACEMENT OF SILENTBLOCKS
Yakov Finogenov
EuroAuto Technician
Find out the cost of the described work for your car, pick up spare parts and sign up in a car service
Japanese cars are famous for their reliability and quality.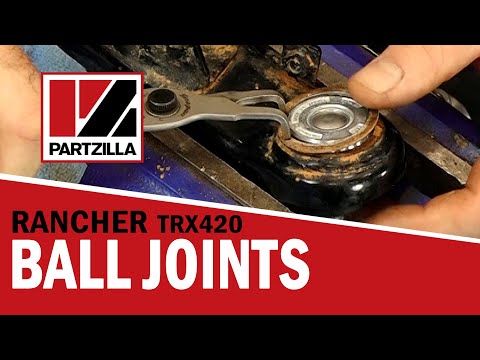 This does not apply to consumable parts such as bushings. Their working life is not long. Sooner or later, the driver of the Toyota Corolla e150 will have to deal with the replacement of the front arm silent blocks.
Content:
Metal hinges covered with rubber are subject to tremendous stress. They dampen vibrations transmitted from one node to another and provide a comfortable ride.
The condition of these parts is definitely not to be neglected. After all, they are responsible for the stability of the car on the road. An important signal of worn silent blocks is a knock in the suspension.
In addition, the driver may notice the following signs:
Toyota Corolla 150 arm bushings may also need to be replaced during visual inspection. Cracks and abrasions in the rubber coating are a sure sign that silent blocks will have to be updated in the next 30 thousand km. It is definitely impossible to neglect the state of these details. The stability of the car on the road and, accordingly, the safety of the driver depend on them.
The stability of the suspension and the smooth running of the car depend on the quality of the parts used. There is a large selection of silent blocks on the market today: both originals and their analogues.
Original silent blocks for Toyota Corolla in the catalogs appear under the article 4347452030. Given the high cost of original spare parts, it makes sense to look at analogues. They are not inferior in quality, but cost much less. We recommend to look at the following models:
Avantech art. ASB0190
FEBEST art.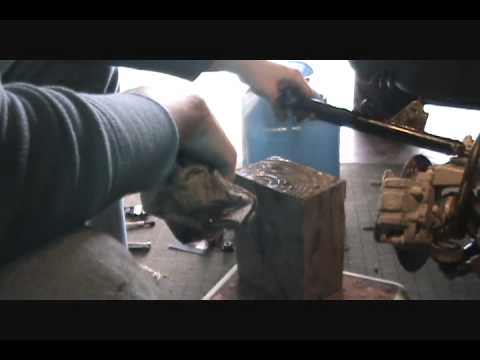 TAB202
Perfect art. TO05ZE121WS
The cost of the silent blocks themselves is low, the price tag for the work of replacing them is more impressive. Therefore, many drivers prefer to act independently.
Silent blocks are an integral part of the front arm. Therefore, you will have to start by dismantling it. Drive the car into the hole. And sequentially unscrew the ball joint first, then the bracket.
Next, remove the front arm bolt. If it does not give in, a grinder and a hammer will come in handy to cut down and then knock out the bolt. In most cases, it does not withstand and breaks. It is good that when replacing silent blocks you have a spare.
Finding an original spare part is quite difficult. But fortunately for the owners of the Corolla, the rear link bolt for any AvtoVAZ model is ideal for this model. The length and thread of these bolts are fully consistent with the dimensions of the original part. To avoid such problems in the future, when replacing the front silent blocks on the Toyota Corolla 150, lubricate the fastening parts (a special front lever bolt) with graphite grease.
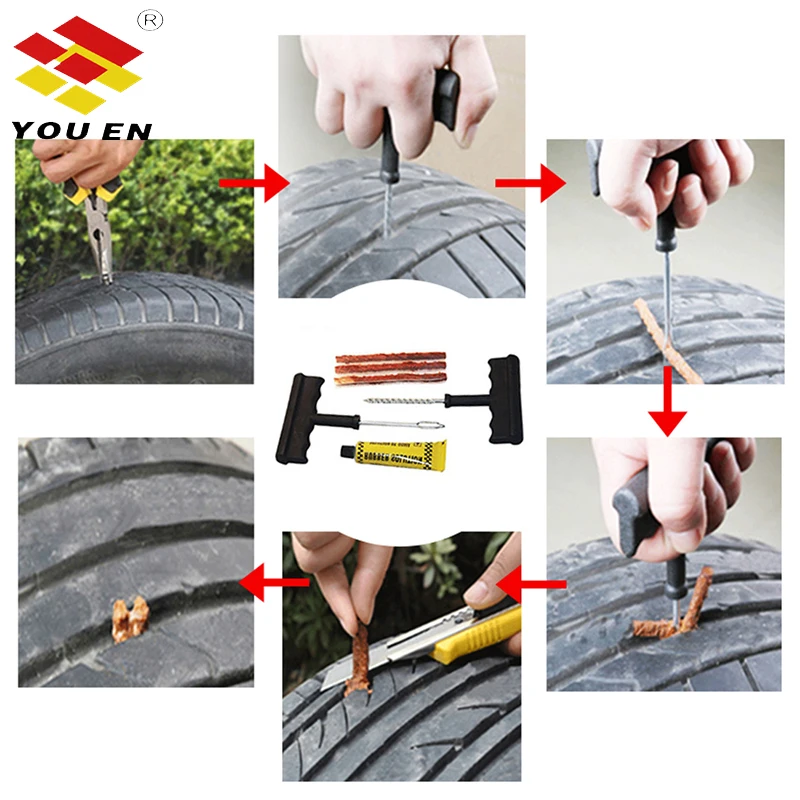
Now you can start replacing the silent blocks. Tap the lever, so it will be easier to remove the old part. Using a press, pull out the old silent block.
Install the new part in the same way. Instead of a hydraulic press, you can try a vise.
After replacing the silent block, return the front arm to its place. Reassemble in reverse order.
Replacing the silent blocks of the front levers on Toyota Corolla 150 and other cars is carried out exclusively as a kit. In other words, you need to change the silent blocks on both sides, regardless of the state.
Replacing silent blocks on a Toyota Corolla is a simple job, but it takes time. However, this is one of the few procedures that the driver can handle on his own, regardless of experience and skills.