Toyota Tacoma Owners Manual / When trouble arises / Steps to take in an emergency / If you have a flat tire
Remove the flat tire and replace it with the spare provided.
■ Before jacking up the vehicle
● Stop the vehicle on a hard, flat surface.
● Set the parking brake.
● Shift the shift lever to P (automatic transmission) or R (manual transmission).
● Stop the engine.
● Turn on the emergency flashers.
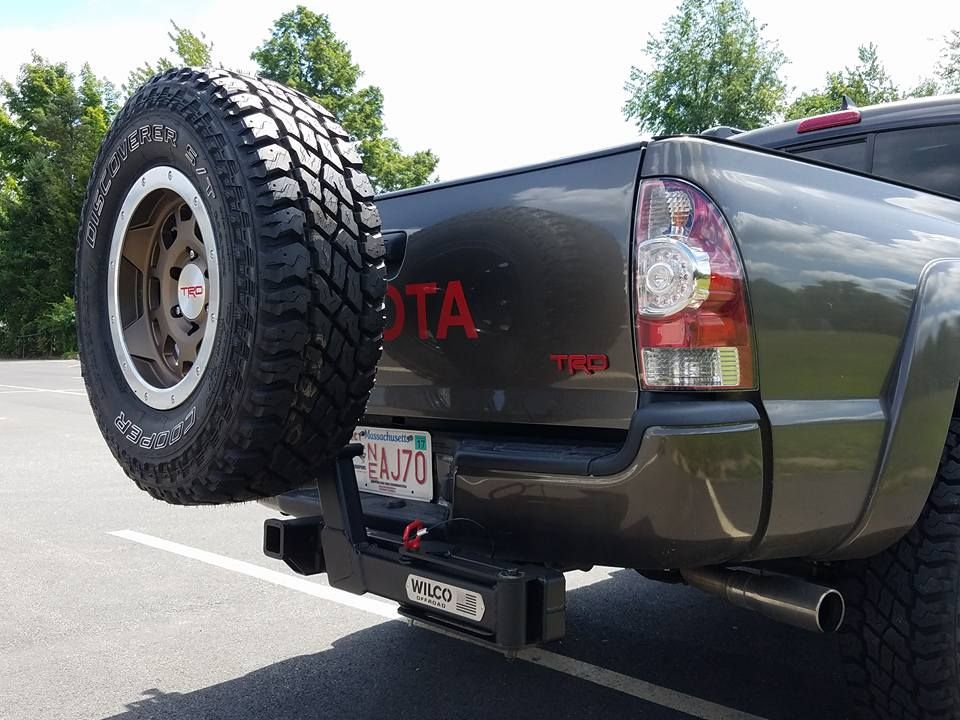
■ Location of the spare tire
■ Location of the jack and tools
Regular Cab models
Access Cab models
Double Cab models
Taking out the jack and tool bag
Regular Cab models with bench type seat
Pull the lever and fold down the seatback.
Regular Cab models with separated type seat
Pull the lever and fold down the seatback.
Unhook the strap and remove the tool bag.
Loosen and remove the jack.
1. Loosen
2. Tighten
Access Cab models
1.Pull up the lever.
2.Raise the bottom cushion up.
Turn the knob counterclockwise.
1.Open the lid.
2. Press the lid against the bottom of the lower cushion until it is supported by the hookand- loop fastener.
Make sure that the lid is supported to prevent it from closing unexpectedly.
Unhook the strap and remove the tool bag.
Loosen and remove the jack.
1. Loosen
2. Tighten
Double Cab models
Swing the bottom cushion up by pulling the lock release strap.
1. Turn the knob counterclockwise.
2. Open the lid.
Unhook the strap and remove the tool bag.
Loosen and remove the jack.
1. Loosen
2. Tighten
Assemble the jack handle (in the tool bag)
Assemble the jack handle extension as shown.
Taking out the spare tire
Insert the end of the jack handle extension into the lowering screw and turn
it counterclockwise.
After the tire is lowered completely to the ground, remove the holding bracket.
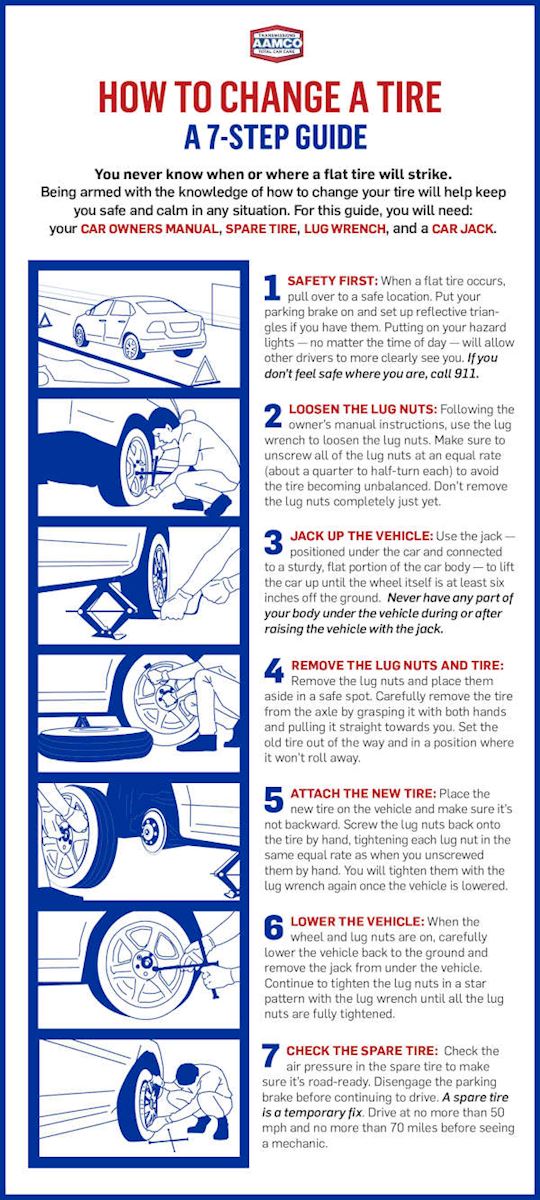
Replacing a flat tire
Chock the tires.
Slightly loosen the wheel nuts (one turn).
Assemble the jack handle extension as shown.
Position the jack at the correct jack point as shown.
1. Front
2. Rear
Make sure the jack is positioned on a level and solid place.
Raise the vehicle until the tire is slightly raised off the ground.
When positioning the jack under the rear axle housing, make sure the groove on the top of the jack fits with the rear axle housing.
Remove all the wheel nuts and the tire.
When resting the tire on the ground, place the tire so that the wheel design faces up to avoid scratching the wheel surface.
Installing the tire
Remove any dirt or foreign matter from the wheel contact surface.
If foreign matter is on the wheel contact surface, the wheel nuts may loosen
while the vehicle is in motion, and the tire may come off the vehicle.
Install the tire and loosely tighten each wheel nut by hand by approximately the same amount.
Replacing a steel wheel with a steel wheel
Tighten the nuts until the tapered portion comes into loose contact with the disc wheel sheet.
Replacing an aluminum wheel with a steel wheel
Tighten the nuts until the tapered portion comes into loose contact with the disc wheel sheet.
Replacing an aluminum wheel with an aluminum wheel
Tighten the nuts until the washer of the nut comes into loose contact with the disc wheel.
Lower the vehicle.
Firmly tighten each nut two or three times in the order shown in the illustration.
Tightening torque: 83 ft·lbf (113 N·m, 11.5 kgf·m)
2WD models except PreRunner
4WD models and PreRunner
Stowing the flat tire, jack and all tool
Lay down the tire with the outer side facing up, and install the holding bracket.
4WD models only: Fasten the claws of the holding bracket into the wheel holes as shown in the illustration.
1. Holding bracket
2. Claw
Then secure the tire, taking care that the tire goes straight up without catching on any other part, to prevent it from flying forward during a collision or sudden braking.
Stow the tools and jack securely.
■After completing the tire change
The tire pressure warning system must be reset.
■When using the temporary spare tire
As the temporary spare tire is not equipped with the tire pressure warning valve and transmitter, low inflation pressure of the spare tire will not be warned. Also, if you replace the temporary spare tire after the tire pressure warning light comes on, the light remains on.
CAUTION
■Using the jack
Improper use of the jack may lead to death or serious injuries due to the vehicle
suddenly falling off the jack.
●Do not use the jack for any purpose other than replacing tires or installing and removing tire chains.
●Only use the jack that comes with this vehicle for replacing a flat tire.
Do not use it on other vehicles, and do not use other jacks for replacing tires on this vehicle.
●Always check that the jack is securely set to the jack point.
●Do not put any part of your body under the vehicle supported by a jack.
●Do not start or run the engine while your vehicle is supported by the jack.
●Do not raise the vehicle while someone is in it.
●When raising the vehicle, do not put an object on or under the jack.
●Do not raise the vehicle to a height greater than that required to replace the tire.
●Use a jack stand if it is necessary to get under the vehicle.
Take particular care when lowering the vehicle to ensure that no one working on or near the vehicle will be injured.
■Using the jack handle
Tighten all the screws securely to prevent the extension parts from coming apart
unexpectedly.
■Replacing a flat tire
●Observe the following precautions.
Failure to do so may result in serious injury: • Lower the spare tire completely to the ground before removing it from under the vehicle.
• Do not try to remove the wheel ornament by hand. Take due care in handling the ornament to avoid unexpected personal injury.
CAUTION
■Replacing a flat tire
• Do not touch the disc wheels or the area around the brakes immediately after the vehicle has been driven.
After the vehicle has been driven the disc wheels and the area around the brakes will be extremely hot. Touching these areas with hands, feet or other body parts while changing a tire, etc. may result in burns.
●Failure to follow these precautions could cause the wheel nuts to loosen and the tire to fall off, resulting in death or serious injury.
• Have the wheel nuts tightened with a torque wrench to 83 ft·lbf (113 N·m, 11.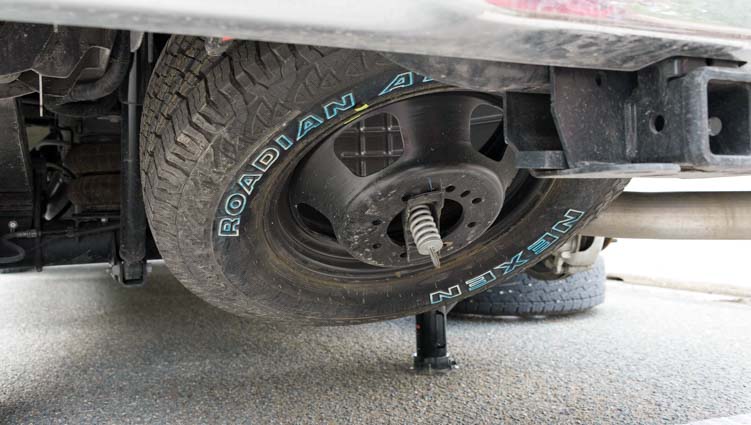 5
kgf·m) as soon as possible after changing wheels.
5
kgf·m) as soon as possible after changing wheels.
• When installing a tire, only use wheel nuts that have been specifically designed for that wheel.
• If there are any cracks or deformations in the bolt screws, nut threads or bolt holes of the wheel, have the vehicle inspected by your Toyota dealer.
• Do not attach a heavily damaged wheel ornament, as it may fly off the wheel while the vehicle is moving.
• When installing the wheel nuts, be sure to install them with the tapered ends facing inward.
■When using the temporary spare tire
●Remember that your temporary spare tire is specifically designed for use with your vehicle. Do not use your temporary spare tire on another vehicle.
●Do not use two temporary spare tires simultaneously.
●Replace the temporary spare tire with a standard tire as soon as possible.
●Avoid sudden acceleration, deceleration and braking, as well as sharp cornering.
CAUTION
■Speed limit when using the temporary spare tire
Do not drive at speeds in excess of 50 mph (80 km/h) when a temporary spare tire
is installed on the vehicle.
The temporary spare tire is not designed for driving at high speeds. Failing to observe this precaution may lead to an accident causing death or serious injury.
■Driving with tire chains and the temporary spare tire
Do not fit tire chains to the temporary spare tire.
Tire chains may damage the vehicle body and adversely affect driving performance.
■When the spare tire is attached
The vehicle speed may not be correctly detected, and the following systems may not operate correctly: ●ABS & Brake assist
●VSC
●TRAC
●Active traction control system (if equipped)
●Hill-start assist control system (if equipped)
●Downhill assist control system (if equipped)
●AUTO LSD system
●Cruise control (if equipped)
Also, not only can the following system not be utilized fully, it may actually negatively effect the drive-train components: ●4WD system
NOTICE
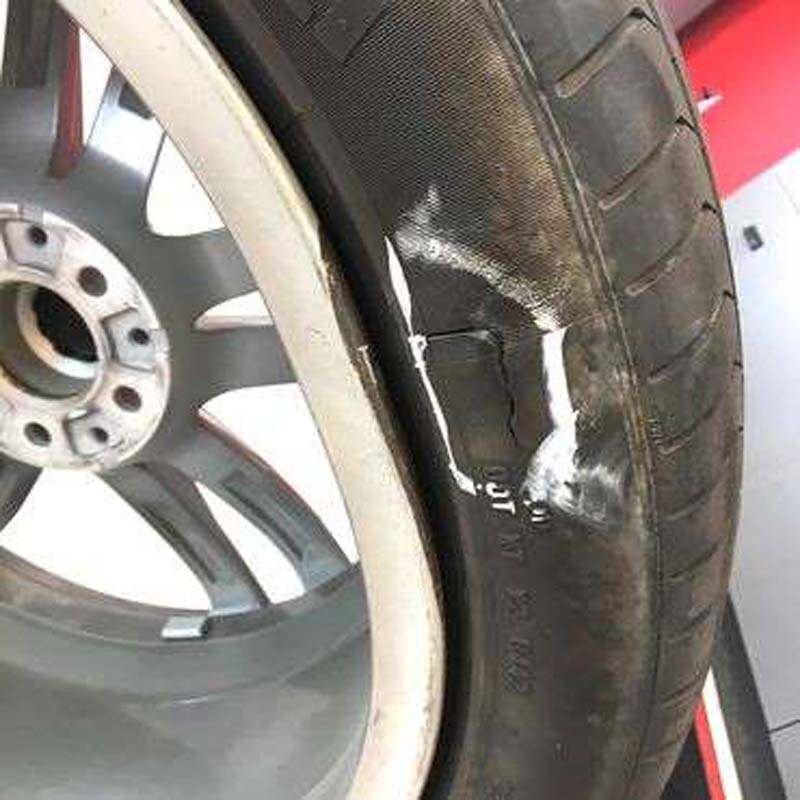
■Do not drive the vehicle with a flat tire
Do not continue driving with a flat tire.
Driving even a short distance with a flat tire can damage the tire and the wheel beyond repair.
■When stowing the flat tire
Ensure that there is no object caught between the tire and the vehicle underbody.
■When replacing the tires
●When removing or fitting the wheels, tires or the tire pressure warning valve and transmitter, contact your Toyota dealer as the tire pressure warning valve and transmitter may be damaged if not handled correctly.
●Replace the grommets for the tire pressure warning valves and transmitters as well.
■To avoid damage to the tire pressure warning valves and transmitters
When a tire is repaired with liquid sealants, the tire pressure warning valve
and transmitter may not operate properly. If a liquid sealant is used, contact your
Toyota dealer or other qualified service shop as soon as possible. Make sure to
replace the tire pressure warning valve and transmitter when replacing the tire.
Calmly perform the following actions if any of the warning lights turn on or flash. If a light turns on or flashes, but then turns off, this does not necessarily indicate a malfunction in the syst ...
If the engine still does not start after following the correct starting procedure (→P. 141) or releasing the steering lock (→P. 142), confirm the following points. ■ The engine wi ...
Lost Communication with Cruise Control Front Distance Range Sensor (U0235)
DESCRIPTION
The millimeter wave radar sensor assembly is connected to the skid control ECU
(master cylinder solenoid)*1 or skid control ECU (brake actuator assembly)*2 via
CAN communication. If communication with the skid control ECU (master cylinder solenoid)*1
or skid control ECU (brake act . ..
..
Automatic Disconnecting Differential Motor Control Circuit Open (P17A0)
DESCRIPTION
This DTC is output when an open circuit in the A.D.D. shift motor drive circuit
is detected.
DTC No.
Detection Item
DTC Detection Condition
Trouble Area
P17A0
Automatic Disconnecting Differential Motor Control Ci ...
Installation
INSTALLATION
PROCEDURE
1. INSTALL HYDRAULIC BRAKE BOOSTER
(a) Install a new brake booster gasket onto the hydraulic brake booster.
(b) Install the hydraulic brake booster with the 4 nuts.
Torque:
14 N·m {145 kgf·cm, 10 ft·lbf}
(c) Using a union nut wrench, connect the 4 brake l ...
TRD Wheels Alert!Upgrade your ride with the NEW Geniune TRD Bronze Wheel./imgs/2020/11/03/12/4321576/1cbc27d6894a26e1ae336acf0394cbd74af1d7e9.jpg)
Shop Now
Select a Year:
"},"vehicleDescription":null},"interpret":{"exampleSearch":"09150ad020","searchSummary":"","refineSearch":"","searchWordList":"","ukeyMake":5775,"ukeyModel":89501,"ukeyCategory":0,"modelYear":"ALL","nModelYear":0,"ukeyTrimLevel":0,"ukeyDriveLine":0,"searchTerm":"","introduction":"Found an exact match for stock code \"09150ad020\". for your Toyota tacoma ","relatedSearchLink":"Show all Toyota Tacoma parts like \"Spare Tire Hoist Wrench\"","ukeyModelRange":0},"cart":false,"performance":false,"accessory":false,"isRelated":true,"id":"RelatedProductsComponent","title":"RelatedProductsComponent","style":"","dataAttributes":null,"ariaAttributes":null,"shouldRenderVueComponent":true,"message":null,"localizedResources":{}} };
MSRP $ 35.28
Add to Cart
Select product options
"},"vehicleDescription":null},"interpret":{"exampleSearch":"09150ad020","searchSummary":"","refineSearch":"","searchWordList":"","ukeyMake":5775,"ukeyModel":89501,"ukeyCategory":0,"modelYear":"ALL","nModelYear":0,"ukeyTrimLevel":0,"ukeyDriveLine":0,"searchTerm":"","introduction":"Found an exact match for stock code \"09150ad020\".for your Toyota tacoma ","relatedSearchLink":"Show all Toyota Tacoma parts like \"Spare Tire Hoist Wrench\"","ukeyModelRange":0},"cart":false,"performance":true,"accessory":false,"isRelated":false,"id":"AlsoBoughtComponent","title":"AlsoBoughtComponent","style":"","dataAttributes":null,"ariaAttributes":null,"shouldRenderVueComponent":true,"message":null,"localizedResources":{}} };
Since the spare wheel is located under the floor of the car in a Land Cruiser, the owners of this car find it difficult when it is necessary to remove the spare wheel on a Land Cruiser 200 or 100. On most cars, it is located in the luggage hole , but in this Japanese it is located differently. Manufacturers have installed a separate design for lowering the spares of their brainchildren, the development of which causes problems.
Contents of the article:
To remove the spare wheel on a Toyota Land Cruiser 100, you need to do the following:
To install the removed spare wheel in the storage place, you need to do the described manipulations in reverse order.
For clarity, you can watch a video of the process of how to remove the spare tire on the Land Cruiser 200. It is not necessary to look for a video with a specific SUV model, since the device for lowering the spare tire is identical on TLK vehicles from 80 to 200.
The spare wheel lock is designed to prevent theft of the spare wheel. But it happens that the owner of the car cannot remove the spare tire on the Land Cruiser and needs to remove the protection. The reasons for this are:
The lock can be removed with a flat screwdriver. To do this, pry the pin with a screwdriver at such an angle that pressure is applied to it. Then use the tool as a lever and, with an effort, break out and remove the mechanism blocker.
As a preventive measure, the spare wheel mounting must be tested for serviceability. To do this, you need to make sure that the mechanism for raising the spare wheel is working. Frequency - 1-2 times a year.
To prevent rust and protect against moisture, the winch is painted, disassembled and lubricated with special equipment. This allows you to remove the spare wheel on the Kruzak 200 at any time without hassle.
Oxidation of the spare wheel mounting mechanism is the cause of its failure. The emergence of a problem reveals the importance of prevention. But if a breakdown does occur, you need to know what means and measures to take to restore performance.
On car forums, Kruzak owners give several ways to get out of this situation:
 The method is inefficient, since when using these products and getting dirt, a compound is formed that prevents the mechanism from working.
 The solution to the nitrous problem is only a cleaning agent containing molybdenum.
In addition to removing rust, it forms a molybdenum film when applied, which protects the metal from moisture and re-corrosion.
Motorists explain the unusual location of the spare wheel in the TLC:
But with the advent of skill, removing the spare tire on the Land Cruiser 100 is not difficult. Toyota is an expensive and prestigious SUV that, like any car, needs care. Therefore, you should not save on consumables - cleaning and lubricants, as well as preventive maintenance. So the car will last a long time and will 100% justify its high price and reputation as a reliable vehicle.
Deniska
I also have just got this car and find it fantastic except i cannot get the key fob to close or open the windows. maybe its my age at 83...?
Abelian Trent
what is the mileage of the car and where did you buy the armrest? special thanks for the vids, inquisitive but
FULL REVIEW TOYOTA Land Cruiser 80 on Volvo c303 axles and 42' wheels.?Toyo Open Country M QUICK REVIEW! 2020 CIVIC HARD OFF-ROADMichael
Do you think you might ever do a video on replacing the hydraulics that operate the trunk lid on the SL500? I've seen it on the small Mercedes but not the SL. I would appreciate it.
Connolly
Good job, Ross! :-)
FOUR WHEELS OF FURY COMMERCIAL WoW | FOUR WHEELS OF FURYLEDGlow | How To Install An LED Wheel Ring Lighting Kit On A CarDmitro Meteltsev
Wo chota sa computer OBD-II scanner hota hy wo har gari per lag jata hy jo 96 k baad manufacture ... ho
Milina
How much sir for that set up?
Genuine Toyota-Nissan Genuine Steering Wheel Heated Control ButtonReplacing Toyota Land Cruiser PRADO 120 GX 470 airbag coverElmo
Great Video Mark.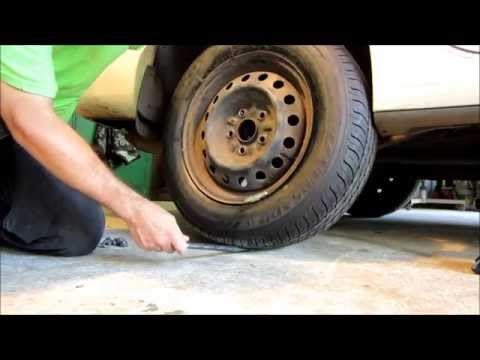 I did both hub assemblies without having to watch any other videos but yours. The whole job took about 5 hours as I'm old and slow. While waiting for parts I lubed the nuts and bolts several times a day for a week and that made a big difference. Knowing the ft. lbs. helped. And yes, I too use carb cleaner on a multitude of parts...
Katerina
I imagine the tires on that car would be toast too correct? Anything made of rubber will crack and fall apart over time. So bye bye tires, bye bye hoses, bye bye fan belt, etc... You would have a lot of things to replace on a car that hasn't been driven! :(
Toyota Tacoma TRD Pro 2017Sticking Brakes. How i fix parking brake stuckAldan
Percis macem roda gila dinamo stater
Cuba
Hi how's it gokng? It's astonishkng exercise chubby % 11
Steering wheel wrap TOYOTA CAMRY V40 CARDREAM - Car interior leather upholstery!Alvar
brother Replace caliper
Celeste
Is bandy ny new le is leye bs tarefy ker rha.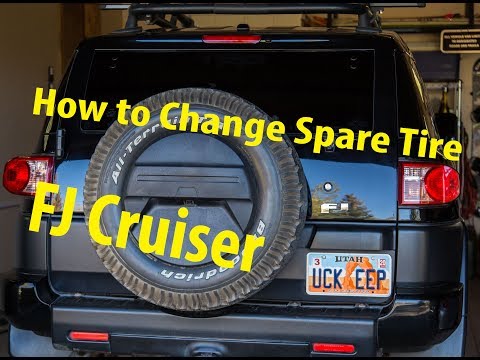 Purani cultus bhot bether hai ac b acha local 15 16 av deti r ac k sath 13.5 long py 19 tk deti hai ac k sath 16.5. Pick ki bat kerta cultus pick k mamly mai bhot bether hai koi v 1000cc us k mukably mai ni hai. Na e garam hoti hai cultus na e nexhy lagti hai kis jahil ko review k leye bulaya jisy kuch b nai pata.
Paula
Worked at KRAZ like that, burst, almost blew ... me. Didn't crush anyone.
Hagen Wavin
The torque spec is 45 ft-lbs according to the Haynes manual.
Mohammed
the concentrate will thicken and there is a table on it, depending on what temperature threshold is needed.
Javid
Here's a fucking asshole in pink pants. How ... to remember her for life
Myasnik Minushkin
About a week ago I was driving my car home from work and sat in traffic I noticed that the ABS light came on. The following day it didn't come on until I had been driving it for 10 minutes or so or sat in traffic. I didn't think too much to it as it was still driving fine and thought well if it comes on permanently I might get it looked at. A couple of days later I was driving home from a supermarket and looked down at my speedo and noticed that it wasn’t working. The rev counter was working fine and the car was still driving fine but I was starting to get concerned. That evening I did some research and it came to my attention that this is quite a known common fault. So I booked the car in to have the brake sensors checked at I am quite friendly with the guy who runs the garage so know ill get a professional job at a reasonable price. I got a phone call the following day asking me to come down the garage, its not good news. He said ive checked and replaced the front sensors which has brought the speedo back to life but now the speedo jumps up and down, almost flickering all round the dial which confusions the gearbox as it has no idea which gear to select.
 Sometimes over revving which isn't very good for the engine. He said I didn't change the rear sensors as the diagnostics weren't able to receive a signal from the rear sensors, which highlights a problem somewhere?? He did say it would be extremely unlikely for them both to have gone at the same time. The ABS light is now flashing and staying on quite a lot. So, the garage has turned round and said he uses a delph diagnostic system which can only go so far and that perhaps a Vauxhall one might be able to locate the problem more specifically. Also he thinks a problem with the ABS pump might be causing it (not cheap) or the pump ECU. But he really isn’t sure and doesn’t want to just start swapping parts over and make this very expensive and not necessarily fix the problem. The car was only MOT'd 2 months ago and I was told a lot of mud was underneath the car that needed removing, they also had a close look at the breaks due to them going slightly rusty as I wasn't driving it often enough .