Jim’s Tech Talk
By Jim Langley
As the designated mechanic for our couples group who bike together some weekends, I run into interesting issues. Like last week, when Marc disappeared off the back and I went looking for him. He was a half mile behind standing on the shoulder trying to pump up the tubeless rear tire on his Santa Cruz.
He told me it wasn’t flat, only soft enough that he wanted to add a little air. The problem holding him up was that he couldn’t get any air into the tire with his pump.
We both checked his mini-pump by holding our hand over the head and making sure pumping created pressure. No problem there. We next made sure the tip of the Presta valve was unscrewed and the seal was open. The pressure inside the tire keeps the valve sealed until you break the seal by unscrewed and depressing the tip.
The valve seemed to be in working order, because pressing down on the tip as described produced the rush of escaping air. Since I had a pump, too, we gave it a try thinking maybe something was awry with Marc’s. No dice. My pump was useless, too.
Why couldn’t we get any air into the tire with the pumps? It was a bit of a mystery so I’m explaining what we figured out in case you ever have the same problem. And to help ensure you’re prepared to deal with related tire troubles, I’ll give some examples of other tire valve issues. They’re all relatively easy to fix as long as you carry the few small parts and tools mentioned.
When Marc’s valve allowed air out but not in, I asked Marc if he happened to have a spare valve core. Tubeless valves usually have replaceable cores. The core is the working mechanism inside the valve that keeps the air in and allows inflating and deflating.
Not all valves have replaceable cores. Especially in the case of valves on tubes. You can tell by looking closely at the sides of the top of the valve just below the knurled tip you screw to open/close the valve. On valves with replaceable cores, there will be two wrench flats on the sides.
There are little valve-core removal tools you can buy, such as Park Tool’s VC-1. You can also use pliers or a tiny adjustable wrench to remove them. The cores are tightened enough that you can’t get them out by hand.
I recommend always carrying a spare tube to fit your bike – even if you have tubeless tires. And, I would also always make sure that tube has a replaceable valve core. All Presta valves with replaceable cores use a universal fitting Presta valve core. So, as long as you have a core with you on the spare tube, you will have a backup if you need it. You can also purchase Presta valve cores separately.
With Marc’s bike, he was actually carrying 2 spare valve cores in his seat bag, one for his bike and one for Sue, his wife’s Santa Cruz (attaboy, Marc!). So, we simply removed the valve core from his valve and screwed in a new one with Marc’s tool. After that, it was a cinch to pump up the tire and get rolling again.
We couldn’t tell looking at Marc’s old valve core what had made it refuse to accept air. And, I don’t know if we could have fixed it if we had time to soak it in solvent or blow it out back in my shop with compressed air.
But, it’s possible that some sealant from his tubeless tire made its way to the valve, got into the end of the core and gummed it up in a way it would let air out but not in.
Tip: To prevent sealant gumming up valves, it’s best to be sure to rotate valves to near 12 o’clock before deflating or inflating sealant filled tires. That helps keep the sealant pooled in the bottom of the tire and with luck it’ll stay down there.
Something that happens with sealant over time is it drying and forming a skin or plug. Since the tubeless valve is protruding inside the tire, it’s a natural place for the sealant to collect, dry and create a plug or a clog.
In that event, if you try to let air out, only a small bit will escape before the air flow stops. And your pump will be useless just like ours were with Marc’s tubeless tire.
The replaceable-core valve comes in super handy when you run into this problem. What’s needed to get the valve working again is pushing out or breaking through the sealant skin, plug or clog.
To do this, rotate the valve towards 12 o’clock and remove the valve core with whatever tool you’re carrying (careful; it’s small – don’t drop and lose it!). Once the core is removed, all that’s needed to clear the plug is to poke something inside the valve far enough to push out or poke through the sealant.
You don’t want to risk puncturing the tire, so don’t use anything too sharp. I like to use a 2.5mm allen wrench. It only needs to be long enough to reach through and into the tire. You could make a tool out of almost anything that fits through the valve.
Tip: It’s possible to poke something too small or too pointed into the valve plug and then still have trouble getting air in. That’s because it made too small a hole in the plug and the air sealed it again. If that happens, poke something larger into the valve to enlarge the hole.
In most cases, if you’re careful and work as described, you should be able to inflate the tire again and finish a ride after replacing a bad valve core or poking open a sealant plug. But, with all tubeless tires with sealant, you want to try to avoid breaking loose the beads of the tire from the rim.
When properly installed, tires are what’s called “seated” on the rim. This means that the edges of the tire on both sides and all around the rim are in the perfect position to seal any air from escaping. Since you are only working on the valve and not the tire, it will stay seated like this unless you make the mistake of trying to remove the tire.
And, as long as the tire remains seated, you should be able to inflate it and have it hold air – even if the sealant inside has dried up inside and there isn’t much left in a liquid state to help seal the tire.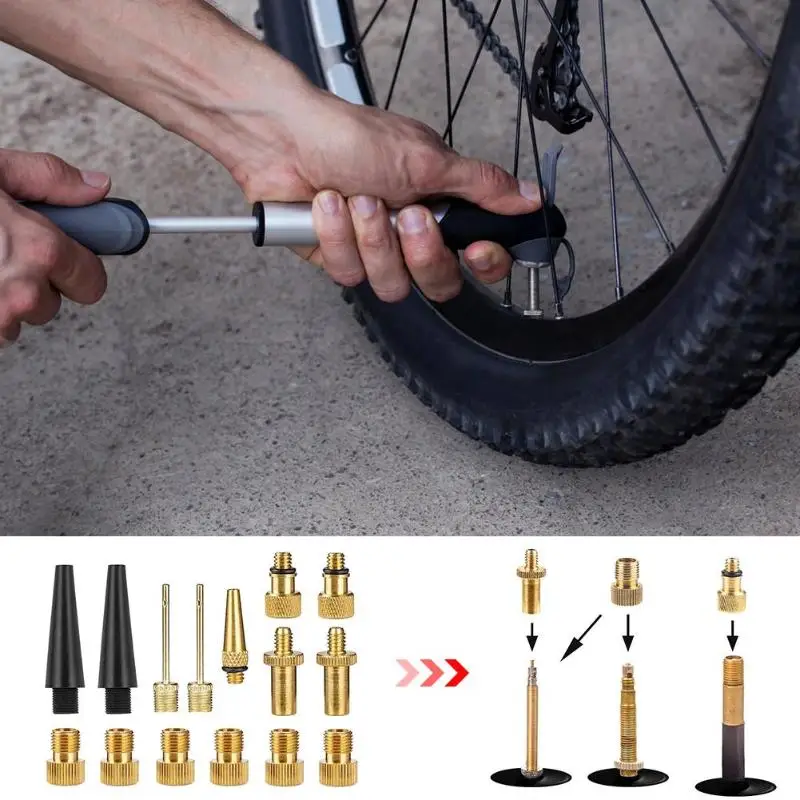
If you mistakenly unseat the tire bead(s) on tubeless tires you may have trouble getting it to hold air again if there isn’t sufficient wet sealant inside remaining to help seal the tire. If you run into this situation, you need to add sealant if possible.
Ride total: 9,247
Asked
Modified 2 years, 3 months ago
Viewed 23k times
I have the all too familiar problem of being unable to pump up my tyre :(
It's not a problem with the pump (because it works on the other wheel) so I guess there must be something wrong with the schrader valve. I've done all wiggly woggly poking efforts to get it to release air, tightening, untightening the pump head etc. to no avail (I just keep pressurising the pump instead of the tyre). However the valve doesn't "look" damaged (the pin is in place, straight, not obviously damaged).
Is there any other possible fix to this that I haven't tried? Some clever tip or trick? Or should I just give it up and buy a new inner tyre?
2
Sounds like the valve has stuck shut, this can happen if the rubber seal at the base of the valve swells up. If the valve core is replaceable just get the appropriate valve tool and a replacement core, both are really cheap.
Otherwise its likely to require a replacement tube.
I had a Slime bike tube that leaked into the Schrader valve and really gummed up everything to where no air would release. After removing the valve, no air was escaping so a solid clog for sure in the valve or tube. I replaced the valve with a cheap kit from Wal-Mart ($2.96) and still no success until I attacked the problem by inflating and blowing the "clog" in the other direction and that worked allowing me to deflate the tube.
It is very hard to remove an inflated tube, so you need to let the air out. Since the valve isn't working you need to do it another way
Puncture the inner tube with something sharp. Go through the tread not the sidewall. You might be surprised how hard this is to do. Use something small so to minimise the hole in your tyre.
Bolt cutters - snip the entire valve stem off close to the rim. This will deform the valve stem to squash it back to round before pulling through the rim. Also mind out for a loud PSSSHHT of air.
If the tube is flat already just lever the tyre off the rim like normal.
If the tyre is End Of Life, just cut the whole thing off with a sharp knife. Take care to not cut your rim or rimtape, and then lever the bead wires off like normal.
I have the same problem with Schrader valves. I have replaced the core. The valve still will not let air out, and has a lot of resistance letting air in. The pin in the new Schrader valve is mobile when screwed into the valve stem. The actual air seal in the valve STEM must be stuck somehow. A bit of air did go in, but what an effort it was. Very very stiff. Now the tire is round, sausage shaped, not flat anymore. I've sprayed lubricant into the valve, put the core back three times, pumped the pin up and down, up and down... whatever is inside will not come loose. I know I can just get a new inner tube, but I'm still frustrated. The bicycle stood for 18 months till I found time to fix it.
4
Sign up using Google
Sign up using Facebook
Sign up using Email and Password
Required, but never shown
Required, but never shown
By clicking “Post Your Answer”, you agree to our terms of service, privacy policy and cookie policy
There are several ways to fix a leaking bicycle tire. The most common way is to use a patch kit. The patch kit includes all the necessary tools and materials to repair a punctured or broken tire. You can also try using sealant or glue to fix the leak. small, you can use a needle and syringe to fill the hole with air and seal it with glue. If the leak is larger, you need to replace the tire.
There are several different ways to fix a slow leak in a bicycle tire. One way is to use a patch kit. The patch kit includes various patches and glue so you can fix the leak quickly and easily. Another way is to use a tube. small, you can use a tube to close the hole and prevent the tire from leaking. If the leak is larger, you need to replace the tire.
There are several things you can do to fix a leaking bicycle tire. The most common solution is to inflate the tire with air and pump it up until the leak stops. You can also try using sealant or repair material to fix the hole in the tire.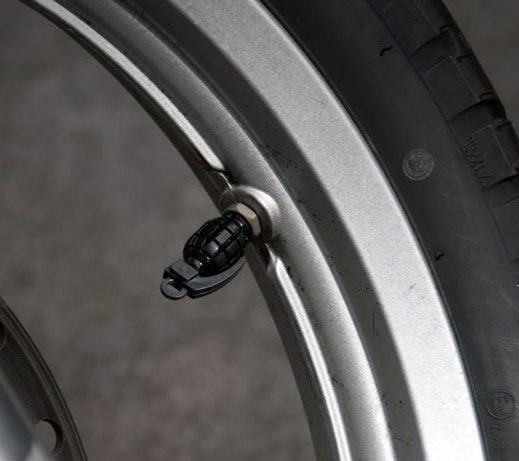 If these solutions do not work, you may need to replace the tire.
There are several reasons why your bicycle tire may be leaking air. The most common cause is a loose tube from the rim or a damaged valve. If you can't fix the leak yourself, you may need to take your bike to a mechanic for repair.
To fix a leaking bicycle tire, first make sure it's not due to a bad tube or valve failure. tube wall. In this case, you need to replace the entire tire.
Here are some tips on how to fix a leaking bicycle tire:
- Check if the tube has moved by gently rocking it between your fingers. If it moves freely, then it is correctly installed on the rim.
- If there is no problem fitting the tube, try tightening any loose bolts on both sides of the wheel with a wrench (a 32mm wrench will do). Be careful not to overtighten as this could cause damage and further leaks.
- If that doesn't work, check for tears or holes in the shroud around where the valve stem attaches to the tire sidewall (usually where you can see dirt or debris stuck inside). A puncture also often results in a leak in this area.
If your bicycle tire is leaking air, it needs to be repaired. There are several ways to tell if your tire needs repair:
-Your bicycle will not withstand air pressure
- The tire feels too soft or springy when you touch it.
- You see bubbles coming out of the tire.
- The tread of the tire is badly worn.
There are several things you can do to fix a leaking bicycle tire. The most common cause of a flat tire is a hole in the tube itself. tube, remove the wheel from the bike and unscrew the stem cap. Remove the old tube and screw in the new one. Replace the stem cap and wheel and you are ready to ride again! Another common problem with bikes is air bubbles inside the tires. When this happens, the pressure builds up to until it gets too big and the tire bursts. To solve this problem, inflate the tires until they fill with air, then let them go again.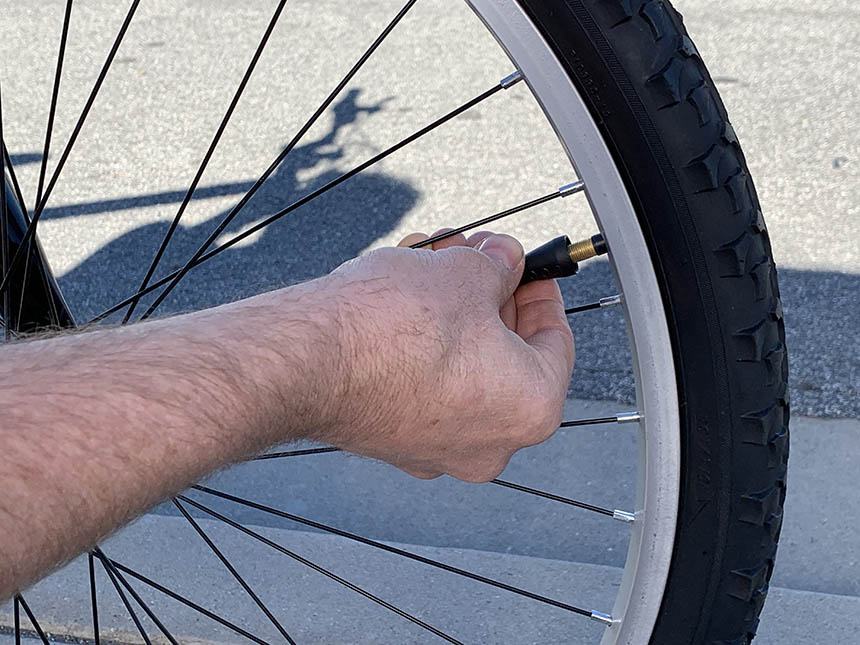 This should burst any air bubbles that were causing the problem.
There are several things you can do to try and fix a leaking bicycle tire. One option is to use duct tape to seal the puncture in the tire. This will help prevent air leakage, but it may not last long. Another option is to replace the tire. If the leak is small, you can fix it by re-inflating the tire and using a bandage or band-aid to hold it in place. If the leak is larger, then the tire needs to be replaced.
There are several ways to fix a leaking bicycle tire. One option is to use patches or plugs. The patches are easy to apply and can be removed if the tire needs to be replaced. Plugs, on the other hand, are more durable and require special tools to remove them.
The best way to fix a flat bicycle tire depends on the cause of the problem.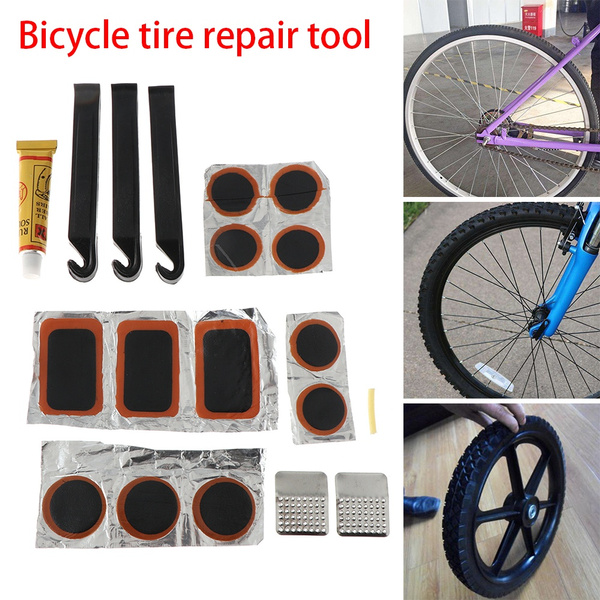 If the hole is small, only the tube may need to be replaced. the bike is properly inflated so that it does not get out of balance while you are working on it.
Contents
which can disable the very process of comfortable movement on a bicycle. It's annoying, because, in extreme cases, you can continue to move "on the rims" if there is absolutely nothing to fix the breakdown. In addition, if you have sufficiently high-quality and expensive wheels, then every meter that you had to drive over potholes gives pain to the biker's heart. He sees how the tire and rims fall into disrepair ...
First of all I need to give some advice to those cyclists who find this article on the Internet, but they do not have anything with them: no repair kit, no bike first aid kit.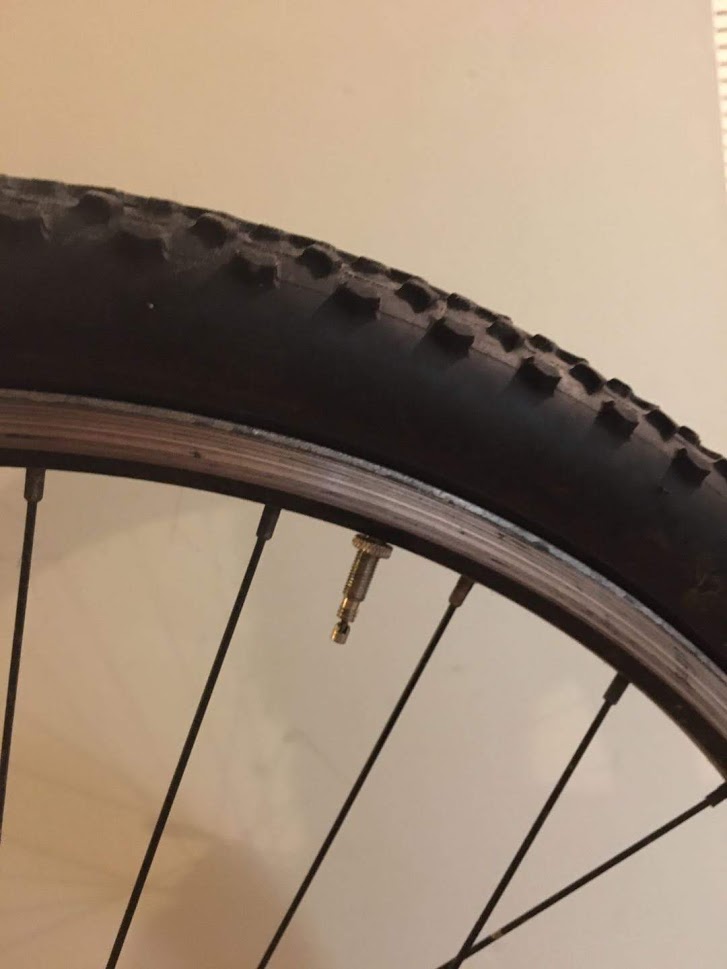 If there is absolutely nothing to glue the wheel with, then you can continue the journey, however, with some precautions.
Tips if there is nothing to repair the camera:
 But in order not to burn with shame, looking friends in the eye, it is better not to do this.
 So, every self-respecting biker should have a repair kit in order to seal the wheel properly. Moreover, its weight and volume is very small. Recently, very small and convenient bicycle first-aid kits have appeared that do not require rubber glue, and therefore time. Plugged it in and went. It used to be, in Soviet times, that you first had to coat the chamber with rubber, wait for it to dry, then apply it again ... Currently, you can glue a bicycle wheel very quickly.
What you need to take with you to seal the wheel on the bike:
Fitting kit. Ideally, you need to have three pieces, with skill you can get by with two. As a child, I had to make do with a spoon, which is very convenient in order to "hook" the camera.
Pump. If there is no pump, then everything else is in vain. You don't have to spend money on a pump. Years of experience show that the best, compact, lightweight and reliable folding telescopic pumps are made in Taiwan, the Philippines and Europe.
Russian pump manufacturers, even under the conditions of the “import substitution” policy, produce a miserable semblance. Our pumps are disposable products that allow air to pass through, which must be held with both hands, etching from a cable that does not screw on the valve, and if screwed on, then only once due to poor quality steel.
Bicycle patches. Usually they are included in the set and are both round (for punctures) and oval (for tears). In extreme cases, you can cut them yourself. In this case, you will need rubber glue. Modern kits include self-adhesive patches.
Tip: use the same old tube as a source of patch rubber. In this case, the curve of the rubber will ideally fit the curve of the chamber. In the event that you find flat patches, you need to glue them well around the edges, and when installing, make sure that they do not come off.

Metal mesh, sandpaper. With this tool, you will need to clean the chamber to give the rubber a velvety finish for more precise grip, as well as for degreasing. A 2x2 cm piece is enough.
Rubber adhesive. With its help, the rubber of the chamber is first primed, and then gluing occurs, that is, it is used twice. Glue, as well as self-adhesive patches, must be checked before the start of the season. Otherwise, you may find yourself in a situation where sealing the camera is simply impossible, since everything has dried up.
What kind of glue can be used to glue the camera, except for rubber? The masses have tried everything: from cyanoacrylate and Moment glue to epoxy resin, which is capable of pouring everything tightly. It is best to use rubber glue because of its affinity for the camera material. Cyanoacrylate and epoxy make the material brittle and unreliable joints.
In addition, rubber glue is inexpensive, sold in miniature tubes, which are enough for the whole season.
These are all the basic tools and accessories to be able to comfortably seal the bicycle tube.
Tip: you can bring a small bicycle handle and a small bottle of water if you are not bringing liquid to drink. This is useful to make it easier to find the puncture site. In addition, a LED headlamp will not hurt, which the cyclist should always have in case they have to do something on the route at night.
It's time to practice. We present the complete algorithm of action. Let's try to be brief, because sometimes there is so much written on the Internet...
 The second method seems to be preferable, since at the beginning of the tire removal process, lateral loads are possible and the valve can simply be torn off, especially if it is at an oblique angle to the rim plane.
 If there is no water source, you can bring the camera to your face. The most sensitive place is the lips. If you bring the camera to your lips, and even pre-wet them, you will feel the lightest breath.
If you have rubber adhesive, you need to follow the instructions: first lubricate the cleaned area, wait a few minutes and press the patch.