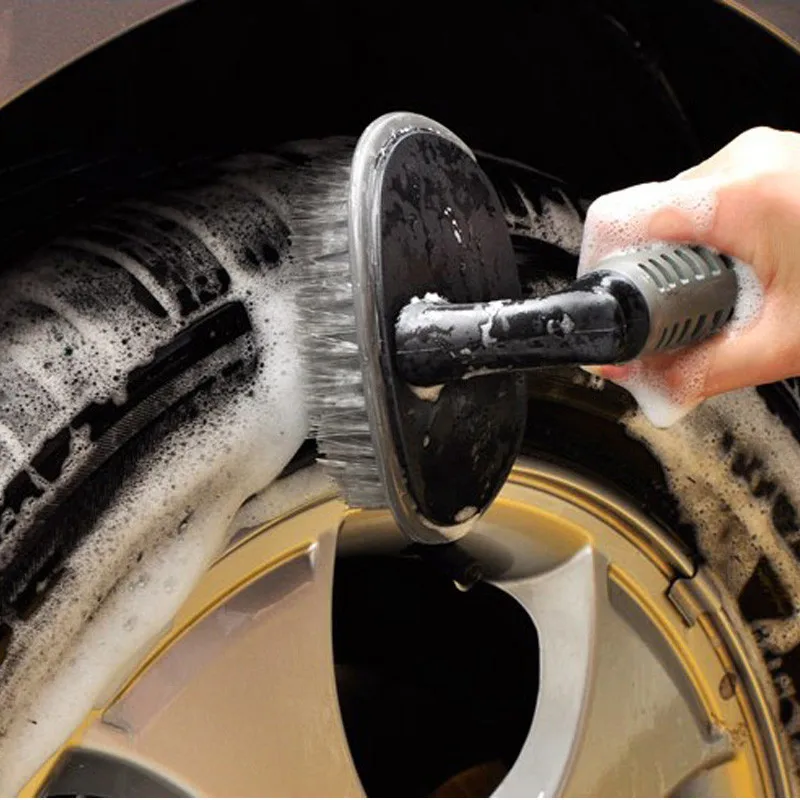
You recently installed new tires on your vehicle but don't like the way the white lettering stands out. So now you want to remove the white text. But how exactly do you go about doing that? We researched some ways to remove white lettering on tires, and here's what we found.
The steps to remove white lettering on tires often depend if you're removing paint or custom stickers. Here’s a quick look at the process for removing this text from your tires:
Custom tire sticker removal:
Before you continue reading, let us say we hope you find the links here useful. If you purchase something through a link on this page, we may get a commission, so thank you!
Painted letter removal:
At first, these procedures may look relatively straightforward. However, one mistake may damage the tire. Continue reading as we talk about these processes in greater detail. We’ll also tackle another solution to hide the tire’s lettering.
In this section, you’ll learn how to remove white tire lettering based on the graphic’s material.
Perhaps you bought a second-hand tire but it has a custom sticker on it. If so, you can remove that custom graphic by following these steps:
 Start Peeling
Use the rounded tip of the trim tool to start peeling the adhesive off each sticker. It’s a good idea to start on the edges of each letter, as it’s often easier than going for the broader areas.
Also, avoid using the sharp edge of the trim tool. Doing so may scratch or poke your tire, causing it to deflate.
Sometimes the stickers won’t come off completely with the trim tool. If so, remove the leftovers from the tires with the pliers.
You may also use the pliers instead of the trim tool. But the trim tool often provides better control than the pliers.
Use the flat side of the plastic scraper to remove the adhesive left behind by each sticker. You can apply more pressure with the scraper than with the pliers or trim tool. But take note that it can be quite tedious to remove the adhesive from the rubber surface.
You can use a 60- or 80-grit sandpaper to remove leftover adhesive that you found challenging to remove with the plastic scraper.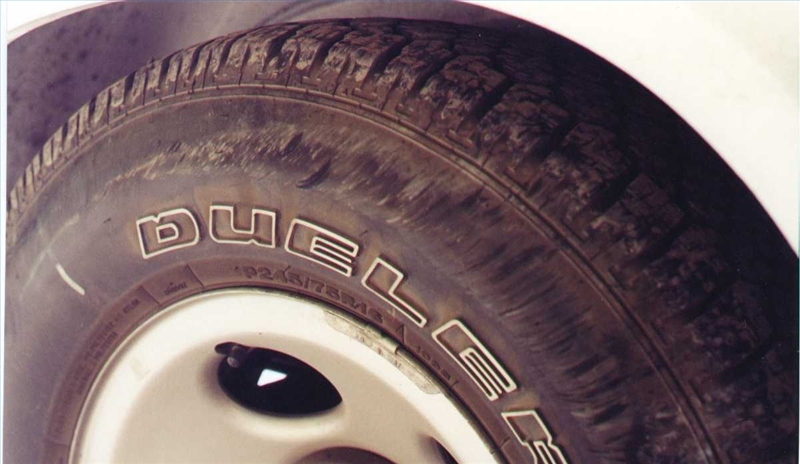
However, it’s important to pay attention to your sandpaper usage. Otherwise, the rough material may remove the traction in your tires, which puts you and your passengers at risk of on-road accidents and injuries.
Check out this plastic scraper tool on Amazon.
You can also watch the video below to see a visual guide on the steps mentioned above:
Take note that the work needed to remove stickers from tires often depends on the material's dimensions. Check out our post on how wide tires are on average to help you gauge the effort required to remove tire stickers.
Before continuing this procedure, it’s important to note that you’re about to use fairly harsh chemicals. So make sure that you’re wearing safety equipment, such as nitrile gloves and safety glasses, to prevent these products from coming into contact with your skin directly.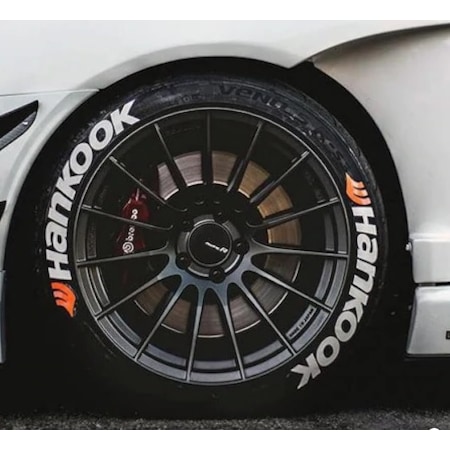
Also, ensure that you’re working in a well-ventilated area. Aside from wearing a respirator or face mask, open the windows and turn on the fans in the area. Otherwise, work outside to avoid inhaling noxious fumes for extended periods.
After finishing the preparations, here are the steps to remove painted lettering from your tires:
Apply the citrus stripping gel over the lettering. Use a paintbrush if needed to spread the product to the desired areas. Then, let the solution sit for at least 5 minutes.
With the brass brush, use a reasonable amount of pressure to get rid of the strip-covered lettering. It should only take a little effort with this tool to remove the paint. If it doesn't, you either need to let the product sit longer or you may have to apply more of the solution.
Don't worry if the paint-stripping solution isn't removing all of the lettering. Use the brush to remove as much of the paint as you can. Also, don't apply more force than necessary or you'll risk puncturing the tire.
Brushing the citrus stripper with the brass brush should leave behind residue. Clean this leftover with one of your microfiber towels. Doing so should also remove more of the paint from the tire’s surface.
At this point, some paint might still be in the corners on the outlines of each letter. Scrape that leftover paint with the nylon brush. Again, only apply the necessary pressure with this tool to avoid scratching or piercing the tire’s material.
Once you feel satisfied with the removal, clean the stripped location with the all-purpose cleaner. Use the nylon brush to remove any leftover paint and stripping solution from the surface. Then, wipe this solution off with another clean microfiber towel.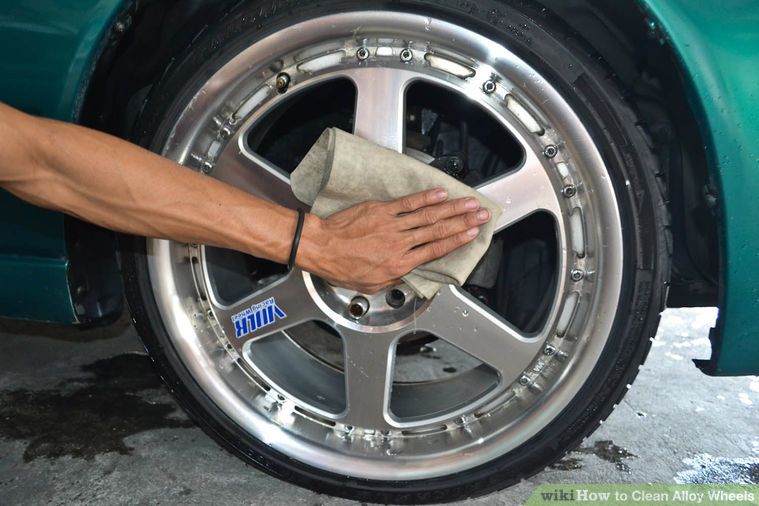
Check out this product on Amazon.
You may also check out this video to see a visual representation of the steps mentioned above:
You might also be thinking about replacing your old tires with white lettering with a set that’s devoid of graphics, particularly for your Mazda 3. If so, check out some of the best tires for that car for some excellent candidates.
Aside from the direct removal of tire lettering, you may also choose to hide the design by painting the material. If you wish to proceed with this job, here are the steps to complete it:
 Then, use that to clean the tires.
Check out this tire dressing on Amazon.
The video below will help you see this procedure in action:
Tire lettering, particularly stickers, may last up to 1,000 miles under standard daily driving conditions. However, you might expect the lettering on tires to only last about 150 miles if used on a race track frequently.
However, some tire letter stickers can last up to 40,000 miles. This high-quality lettering may not even fade over time. But expect to pay more than what you’d spend to purchase standard tire stickers if you want to buy quality lettering.
Professional labor costs to install tire lettering may range from $159 to $199 per set. Although car owners may choose to apply the lettering themselves, taking advantage of expert help might provide peace of mind and minimize the risks of errors.
You may spray paint tires, although it’s not advisable to do so because spray painting isn’t typically ideal for coating rubber material, especially car tires. If you spray paint tires, it might result in unsightly cracking.
Check out the video below if you find it interesting to see the results of spray painting tires:
It boils down to preference. Some car owners don’t mind the white lettering on their tires.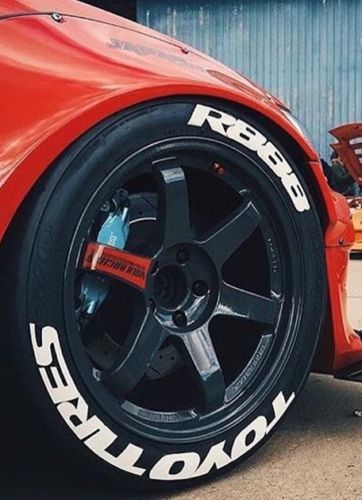 On the other hand, certain members of the automotive community aren’t keen on seeing white letters on tires.
Remove white lettering stickers from your vehicle's tires by peeling them off their surfaces. On the other hand, use a reasonably safe-to-use paint stripper, like a citrus stripping solution, to remove white tire lettering paint. Otherwise, you may also choose to cover white tire graphics with tire dressing.
Are you looking to remove white lettering on your tires? If so, you’re in luck! In this blog post, we will discuss a few different methods that you can use to get the job done. We will also provide some tips and tricks that will make the process a little bit easier.
So, whether you want to restore your tires to their original condition or just want to change the color of the lettering, read on for information on how to remove white lettering from tires!
When it comes to removing white lettering from tires, the most common kind of lettering to remove is the stick-on tire lettering.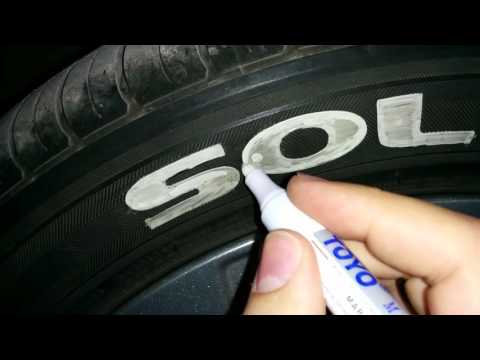
Removing stuck on white lettering can be done with a few different methods, and we will discuss a few of them here.
To remove stick on white lettering from your tires you will need to use a few rounded tools. These rounded tools will ensure that when you are removing the lettering that it does not scratch or damage your tire.
You will need to use these tools to help pry and pull the lettering off your tire. If you accidentally you slip and hit your wheel, a rounded tool will also ensure that you do minimal damage to your wheel.
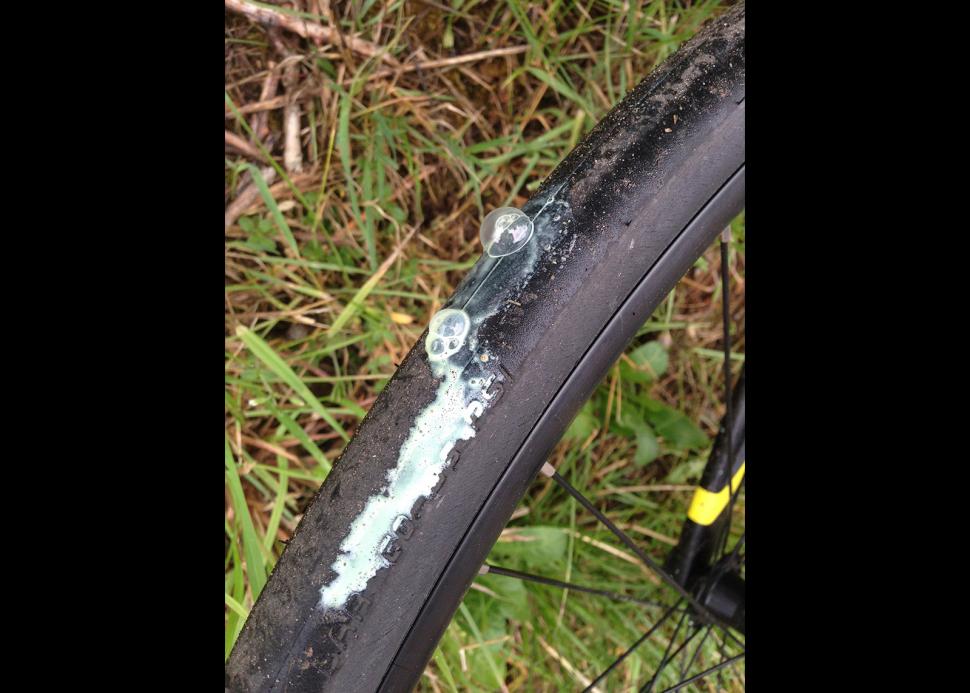
Stick on tire letters uses a strong adhesive keep the lettering in place, which means that it can be difficult to remove. However, there are a few ways that you can make the process a little bit easier.
One way is to use a heat gun or a hairdryer to heat up the adhesive. This will help to loosen the adhesive and then make it easier to remove the lettering using your tools. Be careful not to overheat the area as it could cause the tire to break down and begin to melt.
Another way to make removing stick on white lettering from your tires is by using a solution of soapy water. This will help to break down the adhesive and make it easier to remove the lettering. This should not affect the tire itself, but it is always best to test in a small area first before applying it to the entire tire.
We would avoid using strong cleaning agents such as bleach or acetone as these can result in damage to your tires by causing them to dry out or to expire prematurely.
Once you have removed the white lettering from your tires, you may notice that there is some residual adhesive left behind. This can be removed with a little bit of elbow grease and a tire cleaner. Apply the tire cleaner to a rag and then scrub at the residual adhesive until it comes off.
If you are struggling to remove the adhesive, you can also try using a little bit of WD-40. Just be sure to wash the area well with soap and water afterwards as you don’t want to leave any oil on your tire.
The other kind of white lettering on tires may be as a result of them being painted . There are a few different ways that you can remove white lettering from your tires.
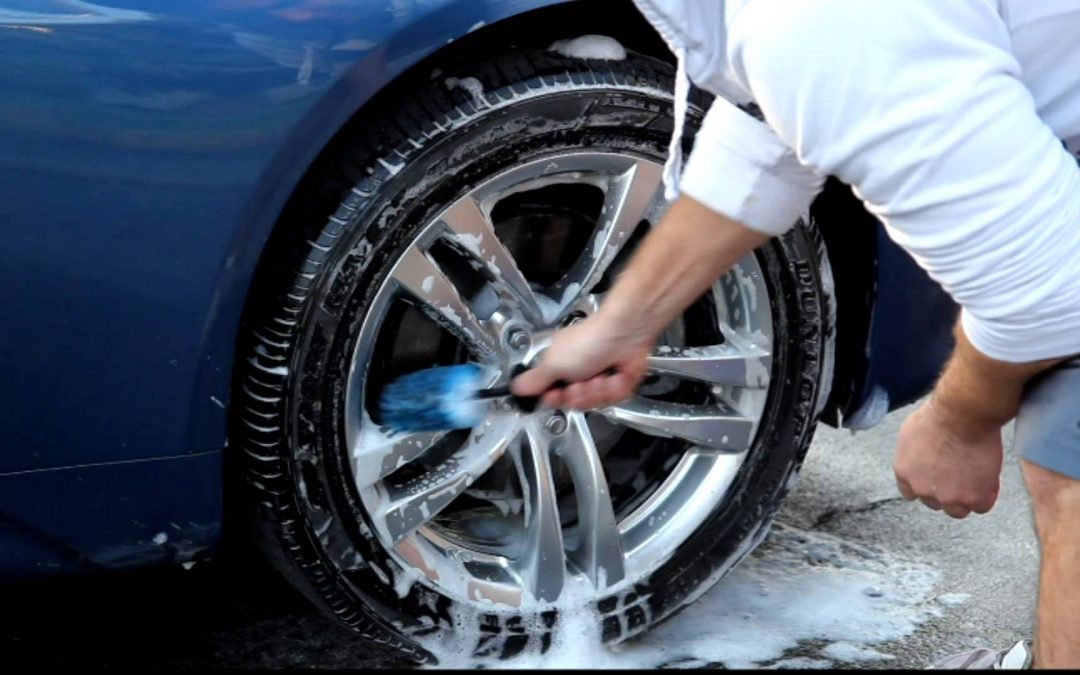
One popular method is to use a tire cleaner or degreaser. You can find these products at most auto parts stores. Simply apply the cleaner to the lettering and let it sit for a few minutes. Then, use a firm bristled brush or rag to scrub the lettering off. You may need to repeat this process a few times to get all of the lettering off.
Another method that you can use to remove white lettering from your tires is by using isopropyl alcohol or rubbing alcohol. Simply apply the alcohol to a rag and then rub it onto the lettering.
The alcohol will help to break down the paint and make it easier to remove. You may need to repeat this process a few times to get all of the lettering off. Just be sure that you don’t use too much alcohol as it can result in damage to your tires.
If all else fails or the white lettering is built into the tires, other than buying or replacing the tires, your only choice may be to paint over the lettering. You can use a tire paint or even just regular spray paint to cover the lettering. Just be sure to let the paint dry completely before driving on the tires.
Looking around and reading other guides on removing white lettering from tires has led us to consider a number of other techniques. However some of these should be avoided!
As we mentioned before, using harsh chemicals such as bleach or acetone can result in damage to your tires. These chemicals can cause the tire to dry out, which will lead to cracking and eventually failure.
Never try to remove white lettering from your tires using a knife or other sharp object. This can result in damage to the tire, which could cause a blowout while you are driving.
Sanding down your tire is another technique that should be avoided. This can result in damage to the tire, which could cause a blowout while driving. Some white lettering is built into a tire as well meaning that you would need to remove a large amount of rubber to get deep enough to remove all the lettering.
Turning your tires around so that the white lettering is hidden on the inside is not a good idea. The majority of tires are directional, meaning that the tire and the tread has been designed to rotate in a particular direction.
By turning your tires around and have the white letters facing inwards, you are changing the direction that the tread is meant to rotate in and this can cause your tires to not work properly and will be far less efficient.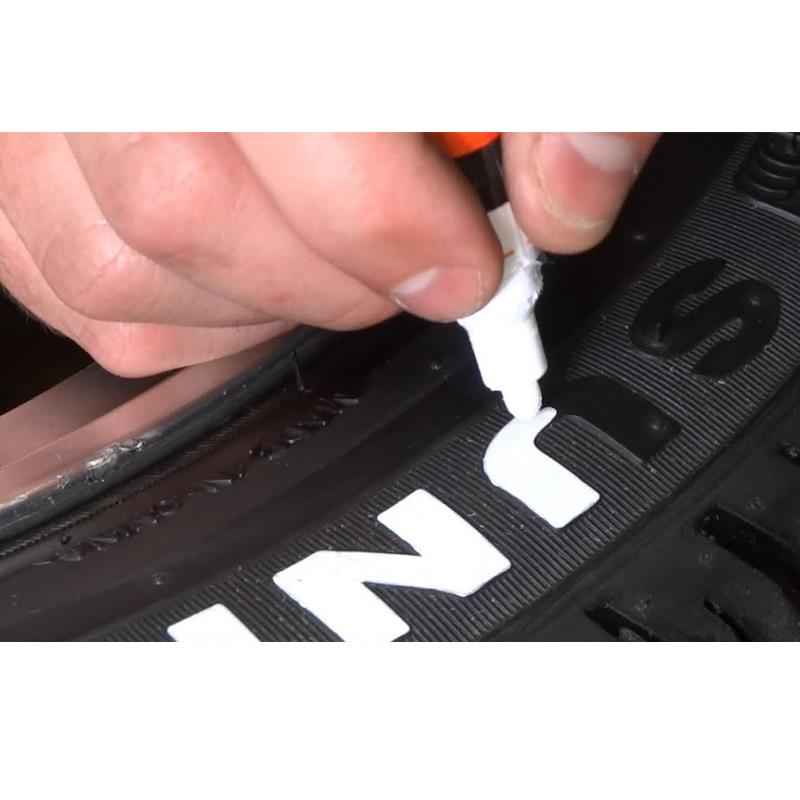
Now that you know how to remove white lettering from tires, you can restore your tires to their original condition or change the color of the lettering to something that better matches your style. Just be sure to avoid using harsh chemicals or other techniques that could damage your tires.
We hope that these tips and tricks have helped you learn how to remove the white lettering on tires. If you have any questions then please leave a comment below or get in touch via email or through social media and we will read and respond to every comment, email or question. Thanks for reading!
Permanent marker was originally designed to be difficult to remove.
However, there are often situations when the inscription from a permanent marker is completely unnecessary. And then the question arises, how to remove traces of markers.
It's very easy to remove a marker if you know the substrate it's made of:
If the marker is water-based, it can be removed from hard surfaces with a sponge dampened with water.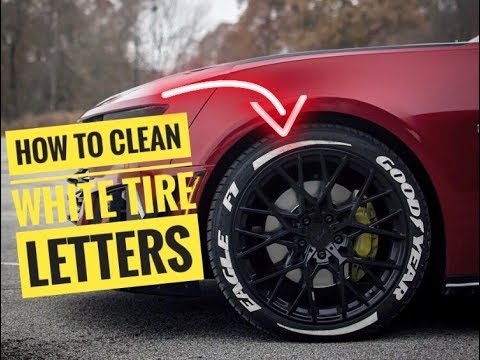
Alcohol-based markers are easy to remove with a cloth soaked in alcohol or vodka, or any ether that evaporates quickly.
Oil based marker ink is oil soluble. You can remove inscriptions from such markers using vegetable or other fatty oil. Simply apply a little oil to a short-haired tissue paper and rub the lettering with it. Then wipe off any remaining marker with a dry cloth.
If you do not know on what basis the marker is made, then do not worry. Toothpaste is a great way to remove marker stains. Try rubbing toothpaste into the marker stain, leave for 1-2 minutes, then wipe off with a damp cloth. This method perfectly removes inscriptions from wood panels, painted walls and from porcelain. To remove traces of the marker, you need to take a regular toothpaste that does not contain abrasive materials. Do not use dentifrice gel or tooth powder, especially to remove stains from varnished surfaces.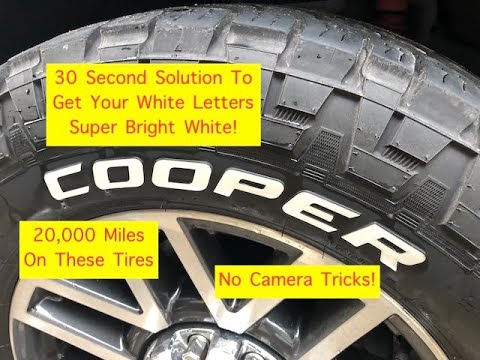
There are several other ways to remove permanent marker marks.
Permanent marker marks can be easily removed from a smooth surface, such as plastic, with a microfiber sponge (Clean Magic), simply by rubbing the inscription.
Try erasing the marker with a regular graphite pencil eraser. This method is good to use if you need to remove the trace of the marker from wooden surfaces. Use an eraser to remove most of the marker, and then use a tissue soaked in rubbing alcohol to remove any remaining writing.
Great for removing marker marks with nail polish remover (especially with acetone) or any solvent. However, this method is not suitable for all surfaces, for example, it can damage a surface coated with varnish or paint.
Any alcohol-based aftershave removes marker well. Apply lotion to the stain and leave for a few minutes. Then rinse with water. Repeat if necessary.
Try removing the marker stain with any aerosol (hairspray, deodorant). Spray it on the inscription from the marker, and then rinse with water.
Tea tree oil works well on some surfaces.
Try spraying sunscreen on the marker stain, but don't leave it on the wood for too long as you could damage it.
We recommend following these tips:
always start removing marker marks with the least aggressive solvent;
be aware that some of the solvents/chemicals will attack certain surfaces or even cause the ink from the marker to penetrate even deeper into the surface;
the use of dry powders or powders containing abrasives may scratch the surface to be cleaned;
Some solvents may "melt" the plastic.
And remember the important rule for dealing with various stains: be sure to use any method to remove marks from the marker, first try it on an inconspicuous part of the surface.
Friends, we are very interested in how our advice on removing traces of markers helped you. We will be grateful if you express your opinion or share your experience by writing to us by e-mail: [email protected].
In addition, there is a professional marking removal tool - Nissen EZ marking removal wipe .
At the end of August, a series of acts of vandalism took place in the capital. So far, unknown individuals have found cars with symbols on the streets of the city, punctured tires and left inscriptions (chaotic or insulting) on the bodies. “Paint on the paintwork is certainly unpleasant, but not at all critical, ,” experts from the TrueGarage training project say. - Today we'll show you how to easily remove it." At the same time, we asked experts to take a look at the consequences of the other side of the actions - traces of rubber bullets.
Not so long ago we published pictures of a car that came under fire from firearms, in which so-called non-lethal projectiles were used. Even these photographs give an idea of the severity of the traumatic consequences of the use of rubber bullets. Such a projectile poses a threat to life when fired at short distances.
We met with Anton, the owner of the same car shown in the pictures. It turned out to be a Hyundai Galloper. The man told how he came under fire:
- On August 11, he was driving along the street. Surganov in the "Riga" area, turned onto the street. Trouble. When I was driving past a bus stop, from above, from the parking lot of the supermarket, aimed fire was opened at the car. I did not hear warning shots in the air. All cars in the stream accelerated.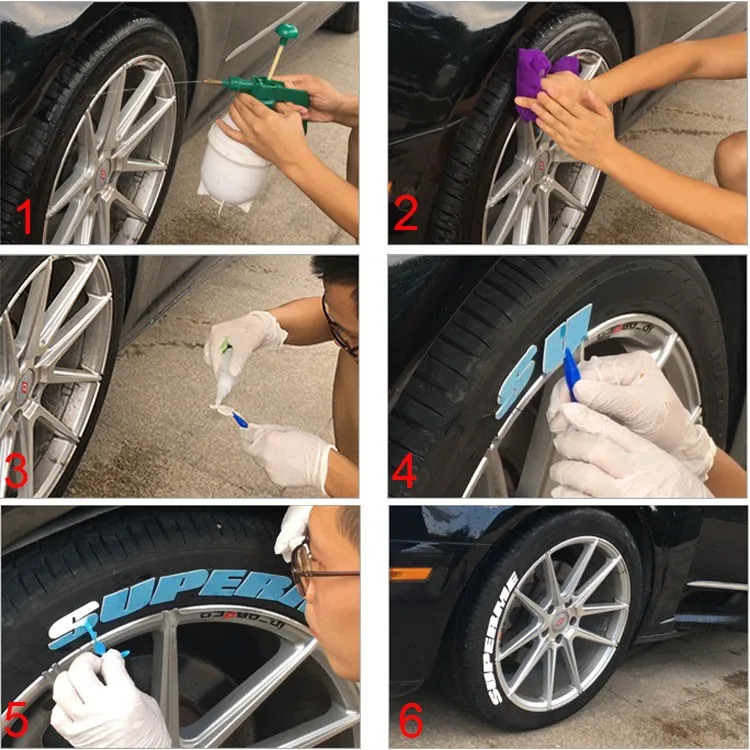 Why my Hyundai attracted attention, I don’t know. I assume they fired randomly. For example, if aimed fire was fired at the bodies of cars with minimal consequences for the people inside, then how to explain the trace of a bullet on the front pillar? A couple of centimeters - and they would have hit the window, they could have hit the passenger. I managed to leave. Of course it was scary.
In total, we counted four traces of rubber bullets on the car: one each on the pillar and fender, and two on the passenger door. Two bullets hit the plastic lining and remained inside. This made it possible to take a closer look at them. See for yourself what the so-called non-lethal projectile looks like, which is about 4 cm long.
The footprint on the A-pillar deserves special attention. This section is reinforced, all body rigidity is “tied” on it, in different models there are three or four layers of metal. It is difficult to imagine what are the consequences of a 4-centimeter bullet hitting a human body.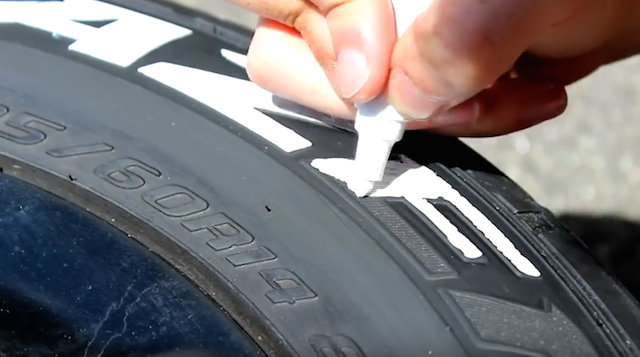
The car is insured under motor insurance. Therefore, it is necessary to establish the person whose civil liability has arisen. "It's useless. I see no reason to apply to the authorities for compensation, , Anton believes. - I will restore it myself. How much money will be needed to repair such atypical peacetime damage? We addressed this question to a representative of the Audatex company, which deals with harm assessment with all variables: from the cost of materials to standard hours. We asked to take averages. As a result, the specialist made a calculation with a total amount of 3872 rubles.
The car owner says that he intends to completely change the fender and plastic lining on the door, but he will restore the pillar with the help of a reverse hammer and repainting.
We know for sure about four cases of applying spray paint to cars in different districts of Minsk. It is easy to assume that this is not all cases.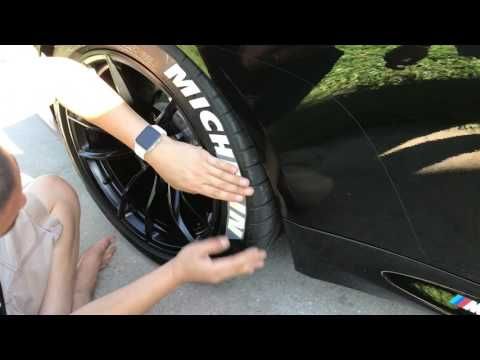 The greatest resonance was caused by the incidents with the Volkswagen Tiguan of Natalya from Minsk and the Audi of the ex-host of Belarus 1 Yevgeny Perlin. Natalya told Onliner that she had contacted the police and filed the necessary paperwork for the insurance. Her car is insured under the Casco system. According to the girl, the insurance undertook to repaint half of the body. Experts of the TrueGarage training project assure that it was not so necessary.
We bought two ordinary cans of pretty good quality paint from a regular hardware store. We read the instructions: "Aerosol paint for surfaces made of metal, wood, plastic ..." Obviously, vandals do not bother themselves much with the selection of paints and compositions.
We chose white and red colors not only to repeat the case with Evgeny Perlin's Audi. "White paint has a strong hiding power, it is - compared to others - harder to remove, - experts explain. - Red is low-opaque, but contains a fine pigment. It turns out that it constantly pollutes itself, it is hard to get rid of it. Red was applied in several layers, white imitated the inscription of some word.
In the same construction market, we purchased three types of solvents: solvent, white spirit and B-646. Experts recommend using only the first two. B-646 is the most popular, cheap, but too aggressive for an automotive paintwork. You will also need rubber gloves and paper towels. Lots of paper napkins. It is advised to use them, as the fabric can become abrasive and leave small scratches.
First we try to apply solvents on the training material - the trunk lid. The paint on it was applied a few hours ago and has already dried. At first, the master simply applies the solvent to the surface, then changes the napkin, moistens it with the solvent and begins to scrub. You have to change napkins often. The last step is wiping with a dry cloth. A greasy stain remains on the surface, but it is not terrible, because it disappears after drying.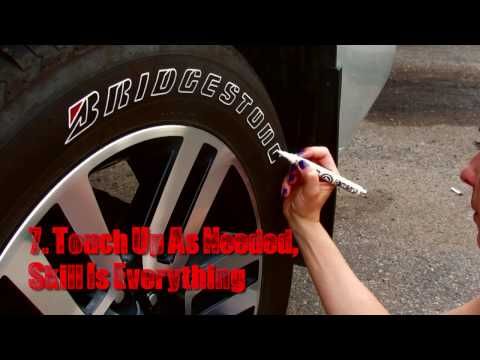
We carry out the same manipulations with white spirit. Due to the specificity of the red color, it is necessary to change wipes moistened with solvent more often. You also need to wipe it dry several times - until there are no traces left on the napkin.
The painted letter "Z" goes to B-646 - experts want to show why it is not good. The technology is the same, but after processing the area on the paintwork, a trace remains. It is not visible on the horizontal surface of the trunk lid, but a matte spot is quite clearly visible on the side. It can only be removed by polishing.
At the end of the procedure, it is recommended to send the car to a car wash with active foam.
Now we simulate the capture of a vandal red-handed - the paint has just been applied, it barely had time to grab. Jaguar acts as a sample, the paintwork is treated with wax. The owner of the car is confident in the ease of removing paint with a solvent, so he is not very worried.