414-54008
RRP £25.00
VIEW TRADE PRICES
414-54029
RRP £13.50
VIEW TRADE PRICES
414-54033
RRP £30.76
VIEW TRADE PRICES
414-52007
RRP £120.76
VIEW TRADE PRICES
151-54000
RRP £11.00
VIEW TRADE PRICES
414-54002
RRP £8. 75
VIEW TRADE PRICES
151-52006
RRP £15.60
VIEW TRADE PRICES
414-54006
RRP £20.26
VIEW TRADE PRICES
133-54001-10
RRP £10.50
VIEW TRADE PRICES
414-54015
RRP £11.75
VIEW TRADE PRICES
414-54020
RRP £17.00
VIEW TRADE PRICES
414-54037
RRP £39. 76
76
VIEW TRADE PRICES
SMU7502
RRP £11.99
VIEW TRADE PRICES
414-54004
RRP £23.50
VIEW TRADE PRICES
414-54066
RRP £79.25
VIEW TRADE PRICES
414-54005
RRP £25.00
VIEW TRADE PRICES
414-52000
RRP £15.76
VIEW TRADE PRICES
414-54011
RRP £26.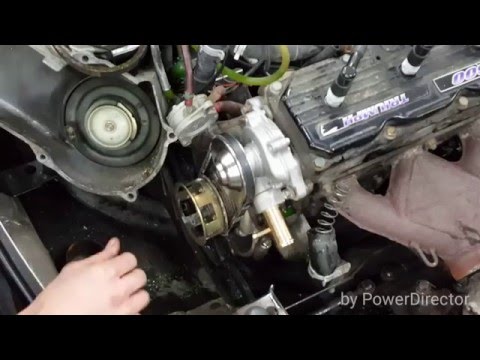 00
00
VIEW TRADE PRICES
414-54017
RRP £28.50
VIEW TRADE PRICES
414-54032
RRP £40.50
VIEW TRADE PRICES
Compare
Compare
Compare
Compare
Compare
Compare
Compare
Compare
Compare
Compare
Compare
Compare
Compare
Compare
Compare
Compare
Compare
Compare
Compare
Compare
Compare
Compare
Compare
Compare
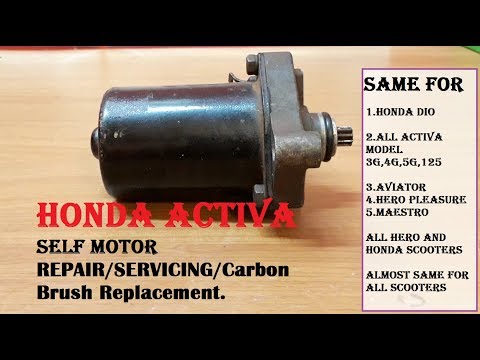
Your vehicle's starter motor contains two or four starter brushes made of a copper and carbon alloy. Over time, these brushes wear down, and you may notice problems with starting your car. O'Reilly Auto Parts offers a variety of individual starter brushes and packaged brush sets to help get your starter working again. Browse our stock to find the right parts for your vehicle.
Brushes and brush holders, called the brush assembly, are designed to transfer voltage to the armature collector plates. Let's consider how the replacement of the starter brushes is carried out, the assembly and disassembly of the launcher with your own hands.
The car starter device, as well as the principle of operation of the retractor relay, we considered in a separate article, so this material will be devoted exclusively to repair work.
Symptoms, one of the causes of which are worn brushes:
 To check, it is enough to directly close the output of the solenoid relay, on which there is a constant + from the battery, and a contact that goes directly to the starter housing. If the launcher reacted and began to rotate vigorously, then the problem of the lack of reaction to turning the key is not in the brushes;
 For accurate diagnostics, at the time of testing, the battery must be fully charged, and there must be no parasitic resistance on the contacts of the starting device circuit (oxides on the battery terminals, rust, oxides at the place where power is supplied to the starter, loosely clamped terminals, etc.).
In many respects, the subtleties of the process of dismantling the starter will be due to the peculiarities of the location of attachments on the engine. You can find out where the starter is located and how to remove it in the repair and operation manual for your car.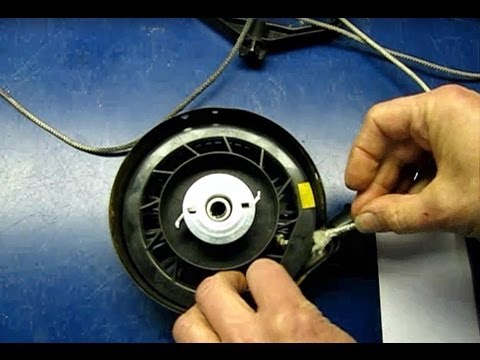
Regardless of the location and model of the car, the dismantling of the starter begins with the removal of the negative battery terminal. So you guarantee you will protect yourself from a short circuit when unscrewing the terminals and removing the starter protection.
Since the design of gear starting devices with permanent magnets on different vehicles is very similar, the VAZ starter disassembly process described below and shown in the video can be called universal.
 The screws on the back cover do not need to be touched! They attach the brush assembly to the back cover.
 During operation, the brushes wear out, as they are tightly pressed against the rotating collector by springs, which also leads to wear and contamination of the conductive plates. The wear product of the starter brushes is graphite dust, which, along with other wear products and dust, settles on the insides of the starter. Before reassembly, clean the magnets inside the starter motor with a rag. Clean the collector plates as well as the anchor with fine sandpaper.
We didn't mention checking the end play for nothing. Worn bushings lead to radial armature play. Whatever brushes you install, the presence of play will significantly accelerate their wear.
In some cases, it is not necessary to change the brush assembly because only the brushes can be replaced. There are 2 options for mounting the brushes:
While the first case is pretty straightforward, soldering the new brushes will require resistance welding and some copper fluoride. It will not be possible to reliably solder the brushes with an ordinary soldering iron (in extreme cases, a soldering iron can still be used, but its power must be at least 100 W). If desired, and with sufficient theoretical knowledge in electrics, spot welding can be assembled with your own hands from improvised means (video of one of the assembly options at the end of the article). Old brushes can be pulled out of the seats with pliers. Contacts at the soldering points must be cleaned of dirt and oxides. There should be a piece of copper fluoride plate between the metal of the brush holder and the flexible contact of the brush.
Observe all safety precautions when soldering! Be sure to wear safety goggles, as sparks can fly from the connection.
So that you do not have a question: how to assemble the starter correctly, we recommend that you decompose the parts at the disassembly stage in the order in which you dismantle them. When installing the old brush assembly, we recommend slightly stretching the springs pressing the brushes to the collector.
How to change the brushes on the starter
Starting the engine of a modern car is completely connected with the starter. It is this electromechanical device that, after receiving an impulse, engages with the flywheel gear, thereby affecting the engine. Like any other mechanism, the part tends to deteriorate, and then you need to know how to change the brushes on the starter with your own hands.
Contents
The construction of the starter is simple. Brush wear is one of the most common problems. As a result, the starter loses the ability to fully function, and eventually fully work.
How to change the brushes on the starter
It will be useful to begin with to consider how the starter functions and what is the role of the brushes in it. Being, in fact, an electric motor, the starting device consumes energy from the battery. For example, domestic VAZ starters are equipped with a 4-pole brush holder.
Now let's see how everything works:
The starter drive shaft drives the flywheel through a specially designed bendix. Bendix after the engine starts, automatically disconnects from the flywheel using a return spring.
The brush assembly in the starter has the following design:
4-pole starters for VAZ.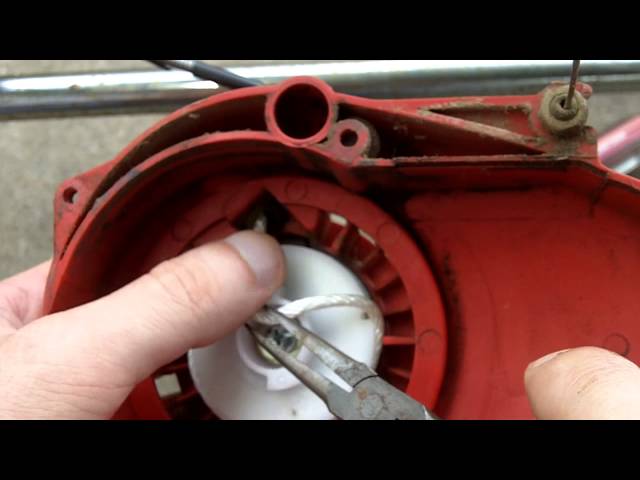 This means that four brushes are needed to ensure their operation. One pair will be connected to ground, the other to the control cable coming from the battery.
How to change the starter brushes
It is noteworthy that each of the brushes is fixed in a separate cell of the brush holder block. The brush sits securely in the cell. In addition, due to the dielectric properties of the block material, a sliding contact is provided between the brushes and the starter armature.
The most common sign of brush failure is wear. The brush simply wears out over time, due to which it ceases to be in contact with the collector spoilers. The operation of the brushes at first does not affect the functionality of the starting device in any way - the engine starts up, as before. However, over time, this gradually begins to make itself felt.
It also happens that the brushes deteriorate due to mechanical damage. This refers to the original marriage, bearing failure, problems with the collector, etc.
Standard wear is normal. You can easily eliminate it with your own hands, it is not at all necessary to go to the service to specialists.
So, first you need to determine whether this is really wear. As a rule, worn out brushes manifest themselves with symptoms of the following properties:
Do not continue to try to start the engine in these three cases. Thus, the problem is further exacerbated.
How to replace the brushes yourself
In addition to finding signs, an experienced motorist will also carry out additional diagnostics in order to pinpoint the problem. The starter does not need to be removed.
Actions are usually as follows:

If the problem was in the wires, the starter will easily start the engine. It is also recommended to listen to the device, respond to all unnecessary sounds and cods, indicating internal malfunctions.
Attention. Before carrying out diagnostics, it is necessary to put the gearbox in neutral position, and turn the ignition key half a turn.
Obviously, if the starter does not start the engine, it will have to be dismantled. It is advisable to put the car in a pit, remove the engine protection to make it easier to dismantle the starter from below.
Removal steps are as follows:
Again, before disassembling the starter, it is recommended to check the device again. It is possible that the starter is working, and the diagnostics carried out before removal simply did not give accurate results for some reason.
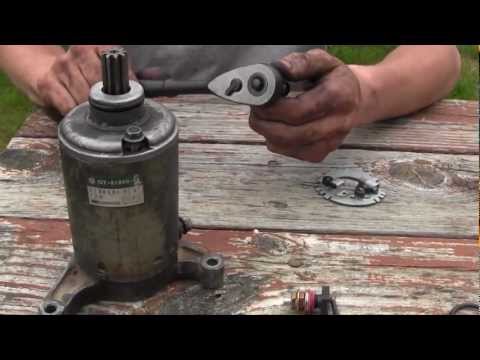
Starter disassembly: replace brushes
So, the dismantled starter is connected directly to the battery. That is, one end to the negative terminal, the other to the positive. If the starting device does not respond in any way to a pulse from the battery, it is turned over and they try to start again.
The fact is that when the starter brushes wear out, they sink, thereby losing the point of contact with the collector. If the device is rotated, this will help put everything in its place, and the electric motor should work without problems.
Starter disassembly is carried out as follows: