Delivery options and delivery speeds may vary for different locations
Sign In
or enter a zip code
Email * Password *
REPAIR & HOW TO
MAINTENANCE
TROUBLESHOOTING
GUIDES
TIPS & TRICKS
ALL ARTICLES WATCH VIDEOS ABOUT US SHOP PARTS CONTACT US
If you hear clicking or grinding coming from the front wheels of your Honda ATV, it may be the CV joints, which are protected by CV boots.
Cracked or torn CV boots can let in dirt and moisture that can destroy the joints. Here’s how to replace the CV boots on a Honda Rancher TRX420.
NOTE: You need to order two CV boot sets for your Honda Rancher if you’re replacing the boots on both the right and left side. Check out the Honda Rancher 420 front knuckle and drive shaft diagram to see how the CV boots fit.
The steps for changing the CV Boots on a Honda Rancher 420 start with removing the wheel, the caliper and the tie rod end, and releasing the ball joints. These steps are covered here and in the video above.
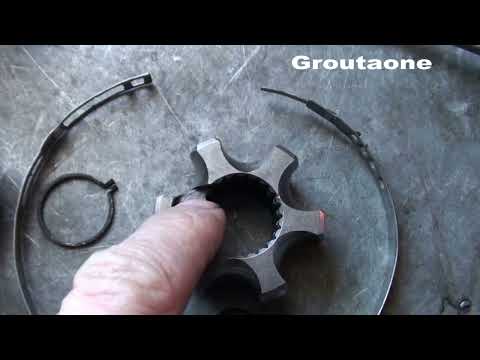
Honda Rancher 420 CV Boot ReplacementStep 1. Get the drive shaft into a vise to remove both the inner and outer boots.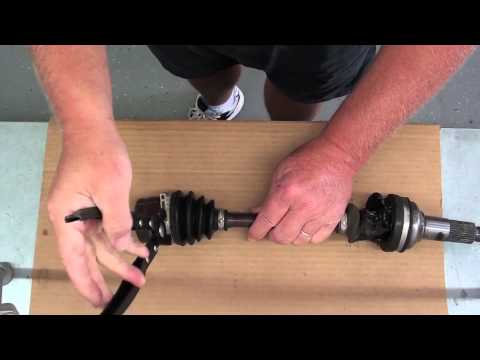 Even if you’re only replacing the outer boot, you’ll need to remove the inner boot and joint. The outer joint is fixed, so everything must slide on and off the inner side of the drive shaft. Remove the inner boot by using a chisel and a soft-blow hammer to bend the clamps open on both the inner and outer sides of the inner boot.
NOTE: The direction the clamps are wrapped around the shaft are oriented so that the end of the clamp is facing away from the direction of rotation, that way the clamp end can’t catch on anything as the shaft turns.
Step 2. Pull the inner boot from the joint, then get paper towels to wipe away as much of the old grease as possible.
Step 3. Remove the stopper ring up under the outer casing by prying it loose with a screwdriver or pick.
Step 4. Pull the outer race.
Step 5. Wipe the rest of the grease off the joint to get it as clean as possible.
Step 6. Remove the circlip that holds the joint in place.
Step 7. Remove the joint by gently tapping on it with a rubber mallet to move it up the splines.
NOTE: The concave side of the joint faces away from the shaft and the flat side of the joint faces toward it.
Step 8. Remove the inner boot by sliding it off the drive shaft.
Step 9. Remove the clamps that hold the outer boot in place. Same procedure as the inner boot clamps: bend back the tabs, pull the clamp away.
Step 10. Slide the outer boot off the drive shaft.
Step 11. Wipe off as much grease from the outer joint as possible.
NOTE: If your CV boot had a tear, make sure you have all of the debris removed and the joint still feels fluid when you manipulate it by hand.
Step 12.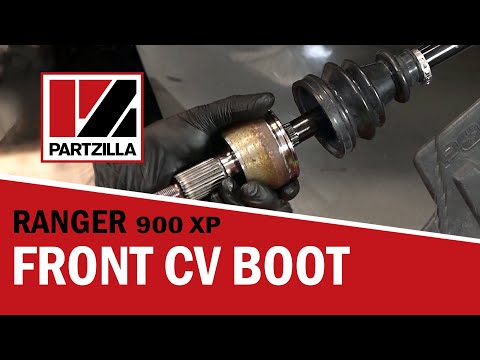 Squirt grease (included in the CV boot kit) into the outer joint, making sure not to get any on the outer casing where the CV boot will seat.
Step 13. Slide the outer boot into place and over the outer casing.
NOTE: The inner and outer boots are different diameters. The one with the larger diameter is the outer boot, nearest to the wheel.
Step 14. Slide the small inner clamps for both the inner and outer boots onto the shaft.
NOTE: Once the inner boot is on, you won’t be able to get the clamps past the boot. Remember to have the tabs on the clamps facing away from the direction of rotation.
Step 15. Slide the inner boot into place.
Step 16. Slide the inner joint onto the splines on the drive shaft.
NOTE: The flatter side of the joint faces toward the drive shaft, the concave side faces away.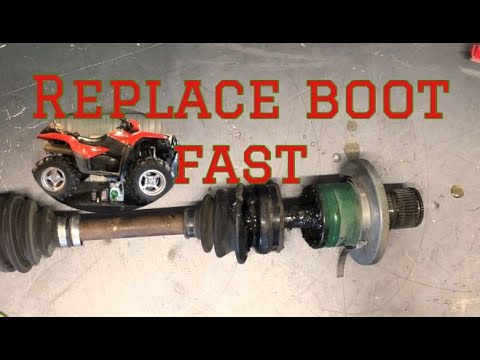
Step 17. Replace the circlip (included in the CV boot kit) that holds the inner joint in place.
Step 18. Wipe the last of the old grease out of the casing and fill it up with new grease.
Step 19. Push the casing on over the top of the joint.
Step 20. Replace the stopper ring. You’ll feel it snap into place.
Step 21. Wipe down the indentation where the boot will seat on the casing, then seat the boot into place.
NOTE: You’ll find an indentation where it seats both on the casing and on the drive shaft itself.
Step 22. Lock the four clamps on the two boots into place. First, bend the tab over, then use a soft-blow hammer to bend the small locking tabs into place.
Step 23. Insert the small retaining ring (included in the CV boot kit) at the end of the drive shaft into the case.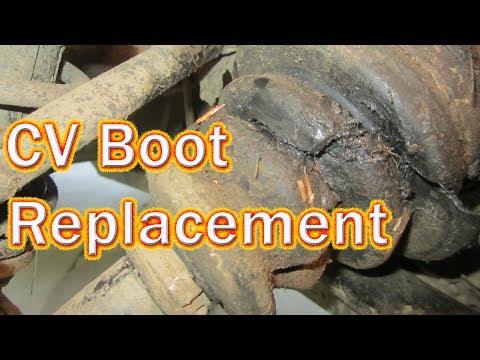 Just pry the old one off and walk the new one into place.
The rest of the process to change the CV boots involves reinstalling the steering knuckle, replacing the hub and the brake caliper and the wheel (those steps are covered here).
Watch the clip below to complete the process of replacing the CV boots on a Honda TRX420.
body
JavaScript is disabled. For a better experience, please enable JavaScript in your browser before proceeding.
1 - 20 of 33 Posts
1 - 20 of 33 Posts
 Please consider creating a new thread.
Top
A constant velocity joint, that is, a CV joint or a grenade, is one of the components of the chassis of the car. Through the CV joint, torque is transmitted to the wheels. Accordingly, the failure of this part will lead to the fact that the car will not be able to continue moving.
It goes without saying that a CV joint does not break in one second. First, there are signs indicating that the grenade's "life" time has begun to count down. They can go unnoticed only if the driver is extremely inattentive and always drives with loud music turned on. In all other cases, the attention of the car owner is certainly attracted by a characteristic crunch, which intensifies when accelerating, passing obstacles and cornering.
Another thing is that not all drivers rush to a car service, as soon as they diagnose a CV joint breakdown by ear.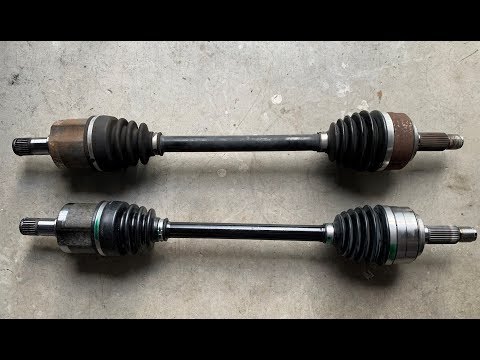 Someone pretends not to notice an unpleasant sound and postpones the replacement of the part (namely, the replacement, since the CV joint repair is impossible) until better times, someone looks at the tachometer and waits for it to show 100 thousand kilometers. Why? Because theoretically, the grenade replacement schedule falls exactly at this mark, but in fact the replacement time may come up even after six months of operation of the car and even the next day after its purchase, because a manufacturing defect of a part or an error made during assembly of the unit is always possible.
In addition to warranty failures, the service life of the CV joint is affected by driving habits. Aggressive driving with constant acceleration and emergency braking, sharp cornering and frequent off-road driving (as, in fact, on Russian roads) literally kill a grenade before our eyes. Many drivers are forced to change the CV joint two or three times a year.
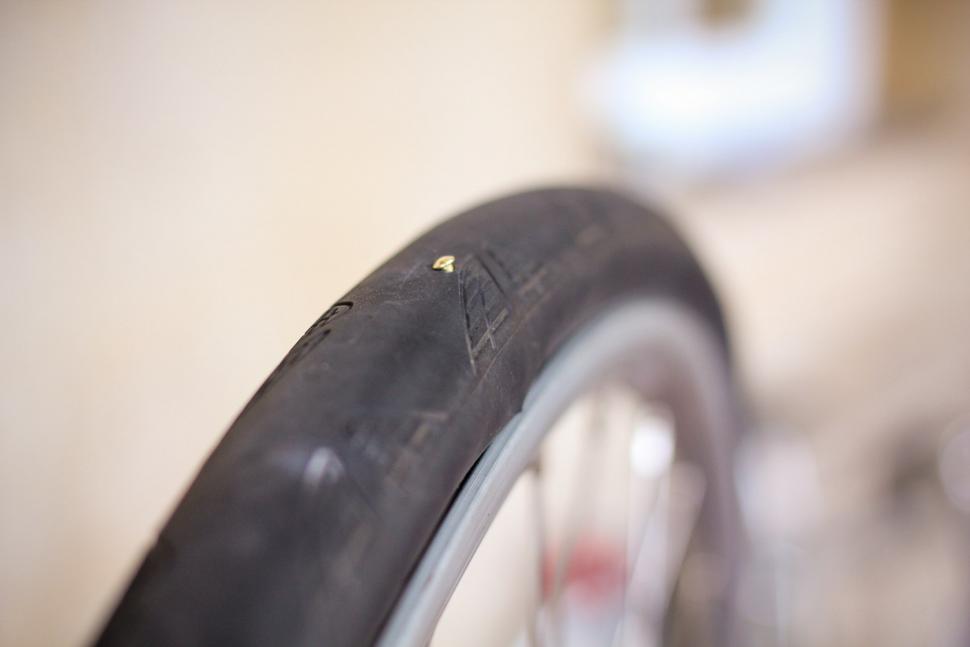
Another factor that determines the life span of a constant velocity joint is the integrity of its anthers. Many car owners do not consider the boot to be too important a spare part, and in vain. Anthers are a kind of hoods that cover especially vulnerable mechanisms, in particular, CV joints, from dust, dirt, reagents and debris flying from the road. If the anther is rubbed or torn - and this happens quite often - the mechanism is defenseless. Small particles that get into it become abrasive, and moisture exacerbates the failure process. Therefore, replacing the anther is the most correct thing to do if you notice its damage - it will cost much less to replace the CV joint.
What will happen if, at your own peril and risk, you continue to drive with a crispy grenade? Roller bearing needles may fall off. This is dangerous because they will fall into the box body, and from there, together with oil, under pressure, they will rise to the gears and disable the unit. Then you will have to change not only the CV joint, but also the box, which is much more expensive, longer and more difficult.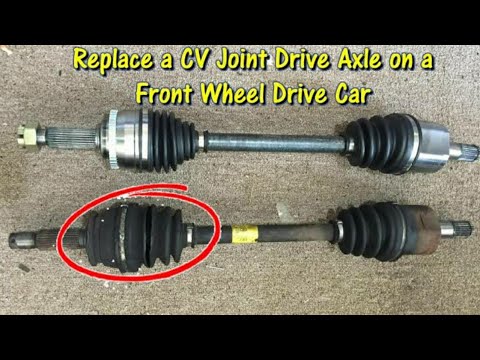
An even worse scenario when driving with a crunchy CV joint: sudden jamming. This is a very common consequence of driver frivolity, which can occur at any speed and in any place. Imagine for yourself what will happen to cars, the driver, passengers and other road users if the wheel of the car jams at a speed of 80, 100, 150 km / h?
There can be only one conclusion: monitor the condition of the grenade - check and change the anthers in a timely manner, listen to the sounds coming from the wheels and do not delay replacing the CV joint if such a need declares itself.
boot out of production !! we offer to consider a similar Universal boot made of Polyurethane
External polyurethane CV joint boot, suitable for replacing most foreign and Russian cars: , Peugeot, Mercedes, Citroen, Daewoo, Ford, Fiat, Honda, Skoda, Hyundai, Toyota, Alfa- Romeo, Volkswagen, Volvo, Mitsubishi, Nissan, Opel, Renault, Suzuki, and many others
A complete list of applicability and installation instructions can be downloaded from our website.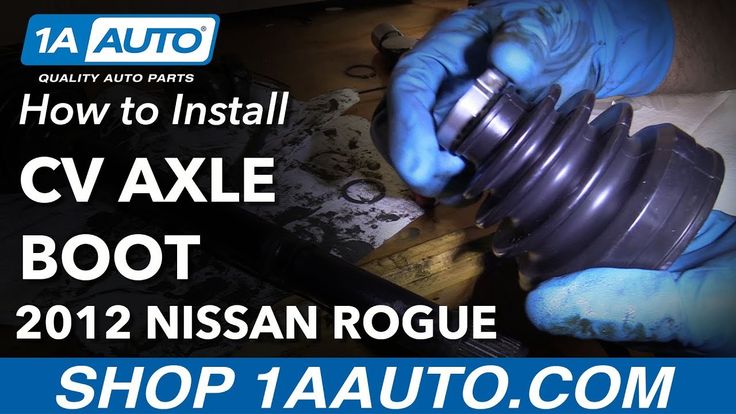
Honda H-RV test setup link
Specs:
External universal joint boot suitable for use on any cars, foreign cars and Russian cars.
Retains its original properties throughout the entire service life and provides reliable protection against dust, dirt and water.
Installation Boot and mounting dimensions:
Test illva.ru
In confirmation of the versatility of the polyurethane CV joint boot SS20, we tried and installed it on the Honda HRV in the Honda Foreva service.
The size approached both the inner part and the outer part of the CV joint, despite the different sizes of native outer and inner anthers. They compared it with the dimensions of the CV joint, the mounting dimensions of the body and with the native anthers. Only the inner torn boot was replaced, while the outer one was changed earlier and did not require replacement. I didn’t have to cut the anther at all, so it stood up perfectly on both sides. The polyurethane of the anther allows it to be strongly stretched, but this was not required, as it stood sweaty on the seats. Boot clips/clamps are included and have been praised by Honda service engineers for their excellent construction and reliable clamp clamps.
Photo of the installation we attach:
SPRASUS PLASUAL
Thermoplastic polyurethane (TPU)
9000 36 months VAZ 2101 - Zhiguli, VAZ 2102 - Zhiguli, VAZ 2103 - Zhiguli - Zhiguli - Zhiguli - Zhiguli - Zhiguli - Zhiguli - Zhiguli - Zhiguli - Zhiguli - Zhiguli, Zhiguli, Zhiguli, Zhiguli, Zhiguli, Zhiguli, Zhiguli, Zhiguli, Zhiguli, Zhiguli, Zhiguli, Zhiguli, Zhiguli, Zhiguli, Zhiguli - Zhiguli VAZ 2104 - Zhiguli - Lada/ Sputnik/ Samara1, VAZ 2109- Lada/ Sputnik/ Samara1, VAZ 21099 - Lada/ Samara1, VAZ 2113 - Lada Samara II 3dv.