2/15/2016
Comments
In today’s post I’m going to get into the details related to tire studding with the help of an industry expert. To help bring you the best information I can on studding ice tires, I’ve enlisted Jarrett King of Two Wheel Endeavors to help with this article. For those of you that don’t know, Two Wheel Endeavours is heavily involved in supporting Canadian ice racing efforts and offers studded tires, ice racing accessories, and custom ice solutions. Jarrett was involved in the development of the Mitas Ice King tires, knows his craft, and brings a lot of knowledge to the table.
Many people are under the impression that there isn’t much to studding a pair of tires, just screw some screws in and you’re done right? There is actually a hefty amount of skill involved with studding tires. These skills come down to knowledge of screw angle, head position, and screw length.
Of course there are many parameters which all affect how well the tire will perform, but today we are going to talk mostly about studding. This attention to detail is a huge reason that guys who have perfected the art of tire studding can make a living at it. I’m not saying this to scare you off from trying to stud your own tires, just that if you’re going to go for it, it will take some practice and advice from an expert.
Now I’m going to turn it over to Jarrett who will go into detail on the aspects of tire studding.
Key Factors Affecting Tire Performance by Jarrett King
Tire Choice: Selecting the right tires to stud is critical in terms of traction and tire life. Lug height, tread pattern, carcass thickness, and rubber composition all have a huge influence on how well a tire will work. Unfortunately, there is not a lot of data supplied by tire manufacturers available to help guide a person in the right direction, but there is plenty of empirical data floating around amongst the ranks of ice riding enthusiasts.-Step-2.jpg/aid1501689-v4-728px-Ride-a-Dirt-Bike-(the-Basics)-Step-2.jpg) To help get you started I put together a list of the most common ice tire choices.
To help get you started I put together a list of the most common ice tire choices.
Front Tires
Mitas Ice King - (Top Left)
Bridgestone ED11 - (Bottom Right)
Rear Tires
Mitas Ice King - (Top Right)
Kenda K335 - (Bottom Left)
Motoz X-Circuit - (Not Shown)
Tire Liners: Depending on the tire chosen, a liner can be used that will provide protection for the tube and allows for the use of longer screws. The liner is usually a cut up street tire which fits inside the chosen tire.
Pattern: The pattern in which the screws are laid out on the tire has a huge influence on the traction and grip characteristics of the tire. Specific patterns may be tailored to provide more grip or slip depending on the rider and how the tire is used.
Consistency: Care must be taken to ensure the screw pattern is consistent from one lug to the next. Any deviation in screw location and angle can cause the tire to wander as it moves over the ice.
Rim Trueness: The trueness of the rim can have a big effect on how the tire performs. A wonky rim can cause inconsistency in screw alignment. This can lead to similar handling problems because the screw pattern is not aligned accurately.
Screw Type: AMA or Canadian style screws are the primary options for competitive ice racing. The two screw types are defined below:
AMA screws - 3/16” head height, sizes #8 or #10, and range in length from ⅜” to 1 ½”
Canadian screws - ¼” head height, size #12, and range in length from 1” to 1 ½”
Along with the screw requirements for the different racing classes, keep in mind purpose made ice screws go through a different hardening process than normal hardware store screws, allowing them to stay sharp longer. If you’re going to stud a pair of tires and want longevity, be sure to use a good quality screw.
Screw Threads: Fine thread screws are preferred because they do less damage to the rubber during installation. They are also easier to set to the correct height when fine tuning the screws.
Screw Angle: The angle the screw is driven into the tire dictates how the screw contacts the ice. The screw angle can be broken down into two parts, the fore/aft angle, and the side angle.
Head Alignment: The alignment of the slot in the screw head can be tuned to provide better grip in a given direction. For screws used for braking (front) and drive (rear) the screw slot is aligned perpendicular to the direction of travel. For cornering grip the slots of screws on the side of the tire are aligned parallel to the direction of travel.
Paul: Now that Jarrett has provided a great framework of what goes into studding a tire, we’re going to get into the specifics. It was mentioned previously that ice screws have three primary functions: braking, accelerating, and cornering. Next, Jarrett will get into the details of what makes each of these three types of screws functional for their specific purpose.
Braking Screws
Braking screws are at the rear of the lug on top, but when they are on the ground they are on the leading edge (biting edge) when under braking, thus the name “braking screw”. Sweep is used to prevent the screws from chattering on the ice under braking because of the fact that the crown would strike the ice at two points if installed flat. The magic sweep angle is the shallowest possible angle without the “rear” part of the screw crown biting in. With Canadian screws, this angle is much more straight up and down but still usually has 10 degrees or so. If you leaned them too far forward it will damage the knobs because the screw isn’t sunk into the liner enough, if you went straight in they will function but it makes the tire feel a bit strange under heavy braking.
Acceleration Screws
Again, there are differences between AMA and Canadian screws. The Canadian screws can go virtually straight in, AMAs need that biting edge so they don’t deflect or lose traction because of two different contact points. Picture a skate blade. The more sharp and precise the edge, the more ground pressure is focused on that area. Same with screw tips, if two parts of it hit the ice it will start to “float”. Optimal angle is shallowest possible (as close to straight up and down as possible) before the back edge of the screw starts touching the ice surface.
Side Grip Screws:
Cornering screws are typically run in at one angle, there is no sweep to them. Some builders have tried adding some sweep, however, never with too much angle. If you run an ice tire over a piece of cardboard under lean you will see that the top edge of the screw is contacting the ice at an angle that prevents the front tire from low-siding. In essence these screws do the exact reverse thing that the rear tire does under acceleration.
Paul: The last thing Jarrett is going to talk about is the screw pattern and some of the compromises that are made when studding.
Jarrett: When it comes to general screw pattern and arrangement, there are a couple things to consider. First, is that on the rear tire the inverse “V” pattern is there for a reason… what it does is each screw passes the load onto the next screw while under lean (picture them passing sandbags to each other). To prove this, reverse a V-pattern tire, it will be all kinds of squirrely under acceleration and then the rear will try to jump out from under the bike when you hit the brakes, it’s truly scary.
My second point, ideal screw pattern is a balance between a few different factors. Knob spacing, contact pressure and knob count/pattern. On a tire like a Kenda, so many screws are striking the ice at once that the tire is floating on the surface of the ice. Traction is being gained by getting the maximum number of screw heads to hit the ice at the same time. This is great until the moment that there is a hint of snow on the lake and the tire begins to act like a crazy carpet under the bike. It floats because it can’t maintain ground pressure.
The old Pirelli Lagunacross tire became amazing the moment that Marcel Fournier came out with the modern Canadian Ice screw. The knob pattern was ideal (V shaped paddle) for the application and the knob spacing was super wide, which meant great ground pressure on each screw. Unfortunately that also meant a much larger radial load on the screws and knobs which often lead to premature knob or screw failure. The Mitas Ice King does not generate the same ground pressure as the Pirelli because the knobs are quite a bit closer but the tire’s compound and knob pattern allow for a much better balance of ground pressure (traction) to durability ratio.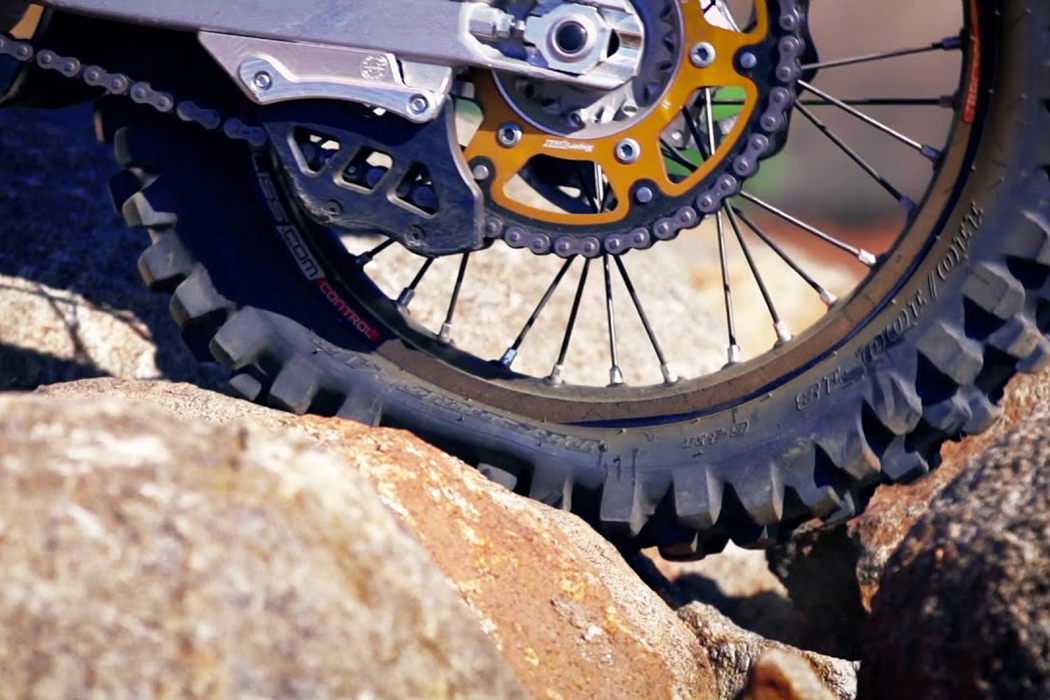 Using AMA screws, a Mitas Ice King does not benefit from additional screw rows the way that a Kenda will because it will float much quicker, but without as many screws contacting the ice.
Ice tire building is a compromise. The perfect ice tire doesn’t exist in the same way that there is no perfect Intermediate MX tire… but there are some that are MUCH more effective than others.
My third and final point, ice tires have been built in north America since the early 30s. The angle of screws is something that has been tried in multiple arrangements hundreds of times over. For someone getting into the sport their enthusiasm may make them believe that changing things will create a magic setup, but the reality is that a true set of wheels (no dings dents, warps), with consistent screw angles and heights, proper air pressures, and properly balanced is the most effective way to kick ass out on the ice racing track. Oh and don’t forget to duct-tape that face (frostbite sucks!).
Paul: I hope you all found Jarrett’s info on ice tires beneficial. In Part Two, we’ll get into the details of mounting ice tires. If you have any comments or want to share some info please leave a comment below.
Comments
3/7/2016
Comments
In my previous post with the help of Two Wheel Endeavor’s, Jarrett King, I successfully mounted my Mitas Ice Kings to my dirt bike rims. This week I’m going to stud my tires, with Jarrett’s help. We’ll be covering how to determine the number of screws you need, sharing Jarrett’s recommended process for studding, and providing tips and tricks to help ensure you have the best performing and longest lasting tires once they have been studded.
| I know many of you won’t bother building a fixture like mine, and to be honest, it is probably overkill for those of you less OCD than myself. Determining the Number of Screws Required For example: |
Prior to Screwing
Jarrett: Ideally the tire should be mounted on a perfectly straight and true rim or on the rim it will be used on. The consistency of the screws is paramount, so even if the tire or wheel is not true, smooth straight lines make for better performing ice tires.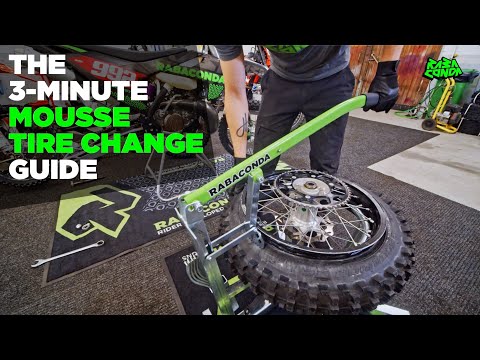
Paul: If you need a refresher on how to true a rim check out my post on the subject by clicking here.
| Jarrett: The following are some tips to consider before studding:
|
| Studding Jarrett: Our technique is to add enough screws for one row to a magnetic bowl, spray with lubricant and sit in a position where your arm pushes a direct line into the head of the screw on the angle it will go into the tire (directly parallel) in this way, your arm will only move in one plane, preventing angle changes. |
Now run one full row of screws. We like to start at the center row since consistency is not nearly as important in these driving screws.
Paul: While side to side positioning of the screws was less of an issue for me since I had my jig, locating the screw in the correct location from front to back on the lug was still a challenge. To help with this I used a silver Sharpie and marked each lug where I wanted the screw to go. This certainly added some time to the process but improved my accuracy a lot.
Jarrett: For AMA screws they should be slightly rocked back on plane so that only one edge is catching the ice. For Canadian style open screws (chisel tips) you can run them straight in (watch sides rows if running 1.5" in rear, they can poke through at the wrong angle).
Paul: On my tire I rocked my acceleration screws back 10 degrees.
Jarrett:-To check the row, spin the tire slowly and watch to see they are all in line in all three planes. Adjust the ones that are way out. Tune after finishing all rows.
Paul: Here you can see I’m off to a decent start and my first row is nice and straight.
Jarrett: Ideally the screws will be perfectly angled in all three planes to each other, not to the tire or rim. Adjust heights before the lube dries to get maximum tire life and check after the first couple rides.
Paul: Once I got into a rhythm I was able to align the flat in the screw heads consistently with one another and wasn’t terribly far off on head height between the screws in each row. I found it easiest to position the slot simply by rotating the drill without engaging it. Once the entire row was complete I went back through and looked for screws that were inconsistent in height. To tweak these screws I just used a screwdriver to set their final height and slot position.
Jarrett: Work your way out and complete the outer edge last, it's your best chance and getting practice before you get to the critical outer rows.
Paul: This point is particularly important in my opinion. As I got acquainted with the process I made a couple mistakes early on which I’m glad happened in the middle of the tire instead of at on the edge.
Jarrett: Lay a template down at the centerline of the axle and record the angle of all the screws.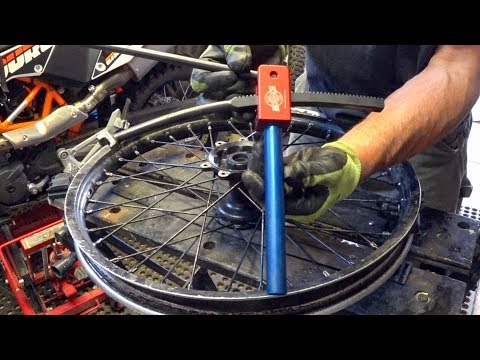 If you didn't get it quite right then the next time you have a point of reference for what to change.
Paul: Jarrett was kind enough to supply me with the templates he uses to stud the Mitas tires. In the image below you can see how the template can be used to record screw angles as well as help ensure accuracy when studding without a fixture. For your convenience, the templates for the Ice Kings can be downloaded in our Ice Tires Guide we put together (click the button at the end of this post).
Jarrett: As usual, the tips and recommendations provided are only GUIDELINES. We've built hundreds of tires over the years and have dozens of other small tricks and so do the tire builders. That being said, we encourage you to ask questions and provide feedback so that more people can enjoy getting out onto the ice with their motorcycle during the winter! Cheers.
Paul: Overall, I’m very pleased with the way my tire studding project turned out and am eternally grateful for Jarrett’s help, advice, and willingness to share knowledge with others.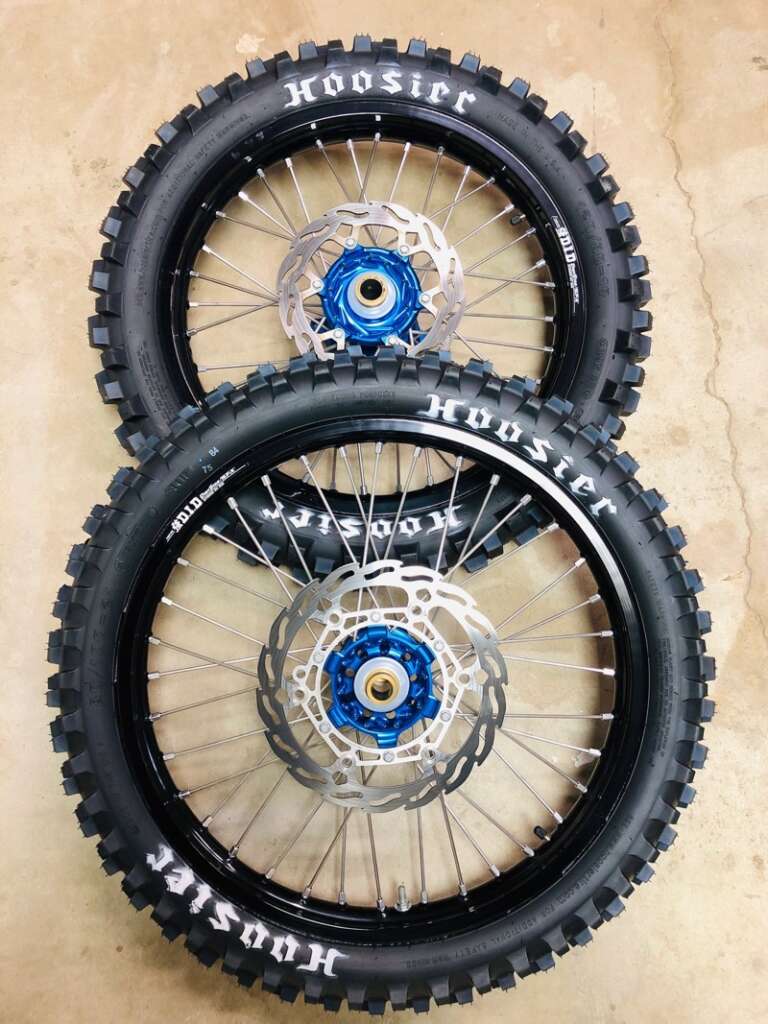 Without him I would’ve definitely made some big mistakes. Having studded my first set of tires I can say that it is a time consuming job and requires patience, however, I don’t think it is outside the realm of what a DIYer can do. As you can see from some of the pics, patience is the name of the game, having a decent stool to sit in, and a warm place to work is key!
I hope you’ve enjoyed this three part series on ice tire studding. I know I had a great time learning from Jarrett and soaking up the finer details of tire studding. Hopefully with the information provided in this post you’ll decide to stud your own tires and take up ice riding! If you have any questions or comments please leave them below.
For those of you interested in the Mitas Ice Kings here is some additional information Jarrett provided on them.
Mitas Ice King Tips and Settings
So far these tires perform very well... just don't forget that they kick out sideways like a DT bike so keep that throttle percolating if you wanna keep the traction!
Grab the Free ICE TIRES GuideAfter compiling all the great information in these three posts, I figured it would be easiest on you to put it into a free guide. If you want all this info organized and in one place, click the link below to grab it for free! |
Thanks for reading and here's to many seasons of ice riding on high quality studded tires!
Comments
Hello.
There is a saying: "To make rabbit roast, you need at least a cat. " Today we will stud tires for winter enduro riding with our own hands using dowels for a construction gun. That is, to cook a rabbit from a cat.
I have already written about do-it-yourself studding of sports bike rubber using screws. For enduro, this method is not suitable, since the density of the spikes will be less, because we can put only one spike on one checker. Accordingly, the spikes themselves should be stronger and thicker. Therefore, we do not look at the screws, we immediately focus on the dowels.
I will also say right away that ready-made studded tires are obviously better. Some teleborg wears out much less, and you don’t need to bother, because the process of studding motorcycle rubber is simply wildly tedious!
You can also just buy screw-in studs and screw them into the rubber blocks of the motorcycle. The downside is that, firstly, such spikes are not cheap. And secondly, the checkers themselves must be in good condition.
Studding with building dowels has two minuses and many fat pluses. Cons:
Cons:
1. This process is for the real hardcore! Impossibly tedious and boring, you feel like an assembly line worker at a candy factory!
2. We need a semi-automatic welding machine, that is, the whole studding process cannot be carried out in the kitchen. Forget about welding with an electrode, this is not an option.
Pros:
1. It's mega-cheap.
2. Dowels can be used to stud almost any rubber. That is why I chose this option: I have almost nothing left of the side checkers of the front wheel on my motorcycle. Screw-in spikes there is simply nowhere to screw.
3. Old tires are not thrown away, but simply become winter tires. Convenient and economical.
In order to stud, we need:
1. Drill and drill bit 5 mm.
2. Dowel for 35 mm mortar gun. (they have a diameter of 4.5) - by the number of checkers on wheels.
3. M5 nuts according to the number of dowels.
4. Semiautomatic welding machine.
5. Punch (long head 9 will do).
6. Some kind of stop in order to abut the dowels from the inside of the wheel (a suspension arm from a Zhiguli will do).
7. Reinforced tape.
8. Lots of time and patience.
1. It all started with the fact that we took apart my old summer tires, I washed it a little and drilled through holes in it according to the number of checkers.
Got 250 holes on the front wheel and 280 holes on the rear. Initially, I drilled holes with a 4.5 mm drill, since the thickness of the dowel for a construction gun is exactly that - 4.5 mm. But then I realized my mistake when I started to “thread” the dowels into the holes and re-walked along both wheels with a 5 mm drill, expanding the holes.
Here the point is to drill these holes more or less evenly, otherwise our "spikes" will stick out in different directions as they like, since these very holes are like guides for dowels.
2. I went to the construction market and bought dowels according to the number of holes - 280 pieces 45 mm long for the rear wheel and 250 pieces 35 mm long for the front wheel. As it turned out later, for the rear wheel of the 19th radius (cross) 45 mm is a lot. For the 18th radius (enduro) it may be suitable. But you can always cut with a grinder 🙂
Dowels come with washers, these washers need to be knocked down first. This is done easily and effortlessly.
3. Insert the dowels on the back side of the tires.
See how they stick out in one direction? This is just because of the fact that he drilled, anyhow. But then, however, after stuffing the nuts, the spikes almost completely aligned.
4. We stuff the washers knocked off the dowels on top. For punching, the usual long head was used for 9 on a small ratchet.
5. We fill the M5 nuts and fix them pointwise with a semi-automatic welding machine. One cool master helped me a lot with studding, who, I still don’t understand why, decided to take on this terrible process 🙂 I will advertise Oleg to you later, but in articles that are more interesting from a technical point of view. For now, just thank you!
At first there were attempts to weld the dowels directly to the washers, and not to pierce with nuts. But when trying to weld the rubber started to burn. I still had to punch nuts and boil to the nuts.
6. With a good reinforced adhesive tape, glue the entire surface inside the studded tire. This should be done in several layers, and it is better to stick the first layer in transverse pieces, and only then make a longitudinal layer.
I glued the rear wheel as it should, I was too lazy with the front wheel, I didn’t glue it with transverse pieces of adhesive tape. As a result, after the first race at the Extreme Factory, I got punctures. Then they boarded again, glued with one more layer, glued the camera in five places.
Before the beading, we inserted a tube into the tire and pumped it up so that the adhesive tape lay down as it should. Otherwise, when beading rubber on the rim, the adhesive tape will collapse.
The photo shows pieces of transverse layers of reinforced tape.
7. Then we tried to put the wheels in place and realized that we would have to cut all these spikes :) So the 45mm rear spikes had to be trimmed nicely.
The spikes on the front wheel were not sheared, but then they still had to be shortened and blunted. That is, even the 35-millimeter ones had to be walked by a grinder.
1. Studded for a week and a half, trying to be in time for the race. A friend told me that with four hands they studded tires on two motorcycles for a full 3 days. But this endurance is necessary to have! 🙂
2. Both wheels are 2 kg heavier. Those. the weight increased a lot, but it gave a funny effect. Everyone knows that cool motocross riders regulate the position of the motorcycle in a jump not only with weight and body, but also with gas-brake. I'm not at all such a tough racer to feel the effect of jump gas much, but with spike-weighted wheels, the effect is very noticeable! That is, in addition to the hook, we got two sickly gyroscopes 🙂
3. If the studs are not blunted, riding on them is very dangerous for others. In other words, if you plan to spike the wheels for simple rides around the dacha, you can not blunt them, because. Motik perfectly climbs trees on such spikes. But if the race ... It is clear that they should not be allowed to a normal race with such nails in the wheels, but we have everything in a slipshod manner. If this is an enduro, with a rally start every minute, then it’s still ok. But, if this is a motocross with a bunch of starts, you definitely need to cut and blunt these spikes. They cling to ice well with nuts, but safety should be above all.
Just in case, let me remind you that motocross allows spikes no larger than 7 mm. long and having a flat cylindrical top, with a diameter of at least 2.5 mm.
4. Completed one race and several motocross training sessions. The result of the race is five holes in the front wheel 🙂 After the wheel was properly sealed with adhesive tape, there were no problems. Even after landing on the front wheel from the springboard, there were no punctures. That is, the design is reliable, if not lazy.
The wear of the studs on the ground is low. Asphalt removes a noticeable chamfer.
5. Do it right away. At least because beading studded tires is a separate torment, painfully prickly 🙂
That's it.
This entry was posted in Tuning and tagged yamaha, yz250f, motocross, motorcycle, orc tech, tuning, enduro. Bookmark the permalink.
Podolsk,
15 km Simferopol highway To contacts
#thorns
6 years ago
Experience with studded wheels with frequent self-tapping screws without additional fixation revealed some shortcomings. On uncleared ice, the front wheel gets clogged with snow and stops working, the rear wheel clears itself of snow. You can ride on frequent spikes only on clean ice. If the studs on the front wheel protrude even slightly beyond the dimensions of the tire, they can touch the fork or fender.
There were no problems with the spikes themselves, they all remained in place and were not damaged. On snow-covered ice, rubber with rare spikes works better. Such spikes must be securely fixed, because. there is a large load on a single spike. Professional speedway studs are the ideal solution, but they are hard to come by and expensive. An alternative would be thick self-tapping screws that are fixed to the wheel with two washers and nuts.
Roofing screws with a drill end are excellent. These self-tapping screws do not require pre-drilling holes. The nut should be slightly smaller in diameter than the self-tapping screw so that it cuts into it with force. This method has already been tested by many, the nuts do not unwind.

 You can still do yourself a favor though when getting started by securing the tire in a truing stand, in the swingarm, or another device which will make the tire easier to work on.