For most Onewheel riders, a Onewheel Tire Change will give their board a new and preferred handling feel. And, with many different tire sizes and profiles to choose from, there is a Onewheel Tire Upgrade to suit almost every rider.
Changing out your Onewheel’s tire is quite a simple Onewheel DIY Mod easily accomplished by anyone who is mechanically inclined. Full Warning Though, changing your Onewheel Tire will void the warranty and, if you make a mistake, it could possibly leave your Onewheel inoperable.
The first and most common reason why you might want to change your Onewheel tire is it is worn out. In ideal situations, Vega tires are known to pass upwards of 2000 miles. However, abrasive terrains and inconsistent tire pressures often cause premature wear.
Another reason why you might want to change out your Onewheel tire is for increased traction on your favorite Onewheel terrain. There are many great options for both treaded and slick Onewheel tires. If you find yourself riding mostly trails then a treaded tire would give you the best traction over various terrain. Whereas, a slick will give the best traction on the pavement without sacrificing range.
A third reason why you might want to change out your Onewheel tire is for increased handling. The rounder profile of some tire options allows for a smaller contact patch and less friction meaning less energy is required for turns and movement. You get a more agile board with more range! (extra range applies to slick tires only)
There are many great tire options available to fit on your Onewheel. But, a problem some people might face is choosing the right Onewheel tire to suit their riding preferences. Read my Onewheel Tire Upgrade post for the best information to help you in Choosing The Right Tire For Your Onewheel.
My go-to trail on my onewheel plus is an almost perfect full battery loop with a bit to spare for random detours. I had ordered and was ready to install the Burris 9606TX33, 11 X 6.0-6 Treaded Onewheel Tire and then FlightFins released the Hoosier Slick Street Whisper 6. This new tire comes with claims of an ultra-smooth ride and added range. So I quickly pulled the trigger on this new Onewheel specific tire.
Now for the fun part. This post is not quite a How-To change a Onewheel Tire but more a How-I did it. Even though, Keep reading for some great and helpful tips to help you with your Onewheel Tire Change. And, to see how I install a new FlightFins Hoosier Slick Street Onewheel Tire On My Onewheel Plus.
As far as DIY projects go, this one doesn’t require many specialized tools.
Removing the Onewheel Hub Motor Assembly was done in a few simple steps.
Using a Klein Multi Screwdriver with the correct size Allen bit, we removed our front Float Plate, then removed the controller plug area cover. I love this tool, it is very convenient, better than fiddling with the small Allen Wrench that comes with some Onewheel accessories.
Next, we unplugged the Footpad and motor plugs. The footpad sensor had a twist lock. And the Motor Connector has a little slider and push tab that locks the plug in place.
There are three small Phillips Head screws holding the Cable Stays in place, I had to drill a hole in my sidekicks before removing them with a #01 Philips Head Screwdriver. Also, these screws are easily lost, I dropped one and spent 10 minutes looking for it!
The Motor is held in place by four Allen bolts. Once they are removed the rails will just lift off, leaving the motor behind.
Getting the Vega tire off was quick and easy.
We removed the valve core using a Valve Core Tool. This allowed the tire to completely deflate.
We used a set of Irwin Quick Clamps to squeeze the tire off the bead.
Next, we used a set of Bike Tire Levers to pry the tire off the rim.
Most Onewheel Tire Change guides say to use Windex or soapy water to help the tire bead set to the rim. I am going to recommend using Bead Lube as it is designed for just this purpose and works way better than the other two previously mentioned options!
I smeared a little Bead Lube onto the rim and tire Bead and it pushed on so easy!
Before adding pressure we pasted more Bead Lube on the tire and rim. Then we set the pump to 30psi and hit go. Both beads set before the pump stopped, (about 28psi.)
Once the bead was set I removed the pressure and added Slime brand tubeless tire sealant to the wheel. This will seal the tire bead as well as seal minor punctures throughout the life of the tire.
The Milwaukee M12 lineup has a cordless compact inflator. This tool is perfect for easily inflating your Onewheel Tire to your preferred pressure. Just dial in your pressure and push go!
Reassembly after my Onewheel Plus tire change was as simple as….
Using the common star tightening pattern to torque the Hub Bolts.
Remembering to lock them in with the locking mechanisms.
Being very cautious not to cross-thread or overtighten, I reinstalled the remaining parts.
Without a doubt, the new Hoosier Street Whisper 6 from FlightFins is an amazing tire! Direction changes are snappy and transitions through carves are smooth like butter. This tire gives confidence to really push your favorite maneuvers!
Once I put on some decent miles on this wheel you should expect a detailed review to follow.
As always, thank you for reading and don’t forget to check out our latest Onewheel related content.
Now go out and ride!
The Sideways Movement – Onewheel Blog – thesidewaysmovement.com
⚠️ WARNING: REPLACING YOUR TIRE WILL VOID YOUR WARRANTY.
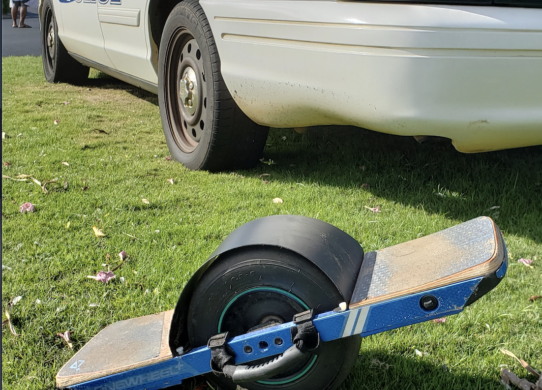 1.1 Full video from start to finish:
Tires for Onewheel are available now at Craft&Ride here.
Tires compatible with the Onewheel+ XR, Onewheel+, and original Onewheel include:
Tires compatible with the Onewheel Pint include:
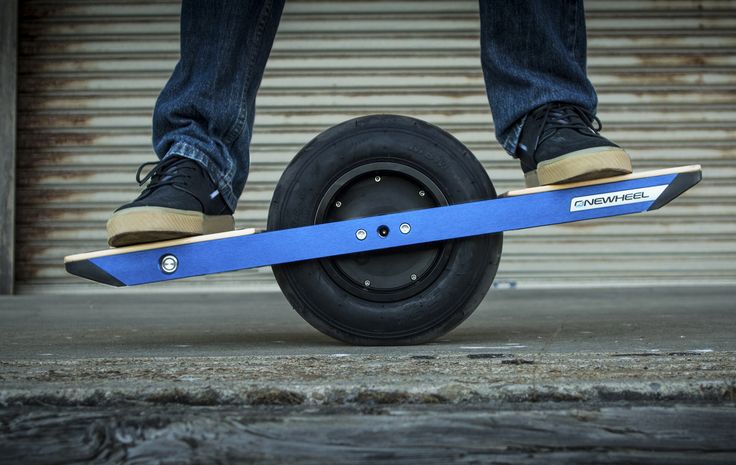 5-5.0-6 Treaded Tire is available now here.
Burris Ceramic Hybrid Bearings for the Onewheel+ XR, Onewheel Pint, and Onewheel+ are available now at Craft&Ride here.
| Brand | Style | Size | Compounds | Recommended Skill Level | Profile Summary |
|---|---|---|---|---|---|
| Vega | Slick | 11.5x6.5-6 | Beginner | Stock Tire: Flat and wide with sharp edges. Easy to balance, rough ride, less grip off-road | |
| Hoosier | Slick | 11x6.0-6 | D10A/D20A/D30A/A40/FK | Advanced | Rounder than Vega.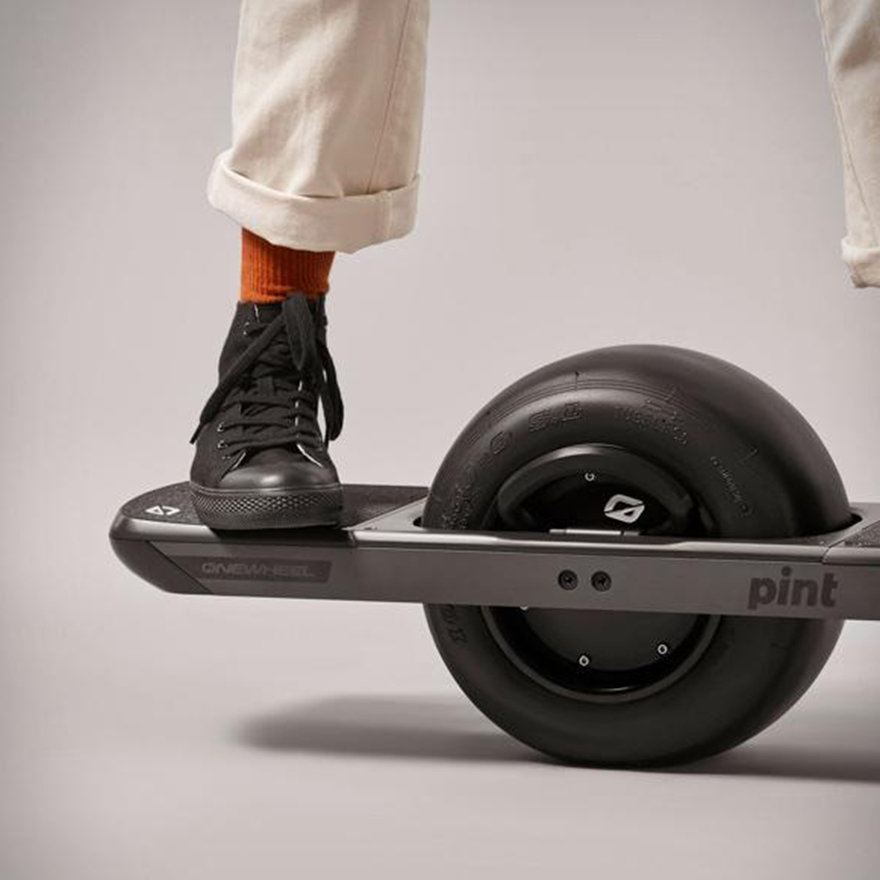 Easier/Smoother carving. Slightly smaller diameter than Vega. Easier/Smoother carving. Slightly smaller diameter than Vega. |
| Hoosier | Treaded | 11x6.5-6 (>17PSI requires trimming) | D10A/D20A/D30A | Advanced | Rounder than Vega. Harder to balance at stop. Easier/Smoother carving. |
| Hoosier | Treaded | 11x5.5-6 | D10A/D20A/D30A | Advanced | Rounder than Vega. Hardest to balance at stop. High maneuverability. Enough clearance to install ice studs. |
| Burris | Treaded | 11x5.5-6 | QRC33 | Advanced | Rounder than Vega and narrower. Harder to balance at stop. Easier/Smoother carving. Stability is about the same as the Hoosier Slick 11x6-6. |
Start by removing this door on the bottom.. 2 Allen head screws..
Next you will have to turn the plastic nut with red paint on it counter clockwise, then you will pull the plug out
Next you will have to push the white clips down to unlock them, and then press in the black button and pull the harness out. .
.
Next remove the 3 small Philips head screws on the bottom and the 3 retaining clips ..
Now put your OW on its side with power button up.. remove the 2 Allen bolts.. flip the board and remove them on the other side..
Now your wheel should wiggle out..
Now you will need a valve removal tool. Tire slime comes with one and I do suggest it. I will talk about that later on..
Time to remove the old tire.. it can be tricky by hand.. a set of tire spoons will help. Do not use screw drivers.. tire spoons are cheap .. or a local bike shop can do it.. but that's money were all trying to save.. if you get spoons try not to scratch up the inside of the rim because you don't want to leak air later on..
Also make sure when removing the tire the side with the air valve is up.. the tire ONLY comes off in one direction and installs the same way. .
.
Done...
I forgot to mention...buy a small 4oz bottle of tire slime for 6$... the factory used it and I also recommend it. tire was also bought from tsracing.com they are alot of help if you call.. they sell the Onewheel too so they know what tire you need..
First hand experience with the Hoosier treaded D30A 11.0x6.5-6 nearly 400 miles on my v1. I don't have any problems with small or large rocks getting caught up and I ride gravel often enough to think it would have happened by now. In fact with the Vega tire I would occasionally have to stop to remove a stuck rock before it gouges the tire and I've never had to with the treaded. There are however clearance issues with the Hoosier above 15psi and I'm looking for a solution to that.
Tire
The plus is slightly different since it doesn't have a bolt through the axle.
| Name | Required Tools | Instructional |
|---|---|---|
| Option 1 | ||
| Option 2 | https://cometkartsales.com/RLV-Tire-Beadbreaker.html | |
| Option 3 |
Every car needs a tire change from time to time. A fairly simple procedure, but not all car owners know how to properly produce it.
Most often, tire replacement is required for two reasons:
1. Wear of one, two or all tires at once.
2. Severe damage to one or more tires beyond repair.
To ensure that incorrectly installed tires do not cause a serious accident, certain rules should be followed when replacing them.
Rule one: The tires to be installed must have the dimensions provided by the car manufacturer, or differ from them by no more than 2%.
You can find out the tire sizes that can be fitted to your car from the vehicle manual, from the tire description, or call your dealer.
Rule two: Tires must also have an appropriate load index and speed index, not less than those provided by the manufacturer for this vehicle.
It is possible to replace tires with higher index values, but not with smaller ones.
You can also find out which load and speed indexes correspond to your car from the instructions, tire descriptions or from a car dealer.
Rule three: Tire pressure must match the pressure specified by the vehicle manufacturer (the pressure in the front and rear tires may be different).
Under-inflated or over-inflated tires can have a very negative effect on vehicle stability and handling.
For exact tire pressures, see your vehicle manual or call your dealer.
Fourth rule: (relevant for those owners who buy ready-made tire sets in stores along with rims)
When buying, you need to make sure that the wheels have offset and landing parameters provided by the car manufacturer.
Mismatch between the offset of the disks and their landing parameters has a very negative effect on the handling of the car, and also quickly wear out the suspension of the car, rendering it unusable.
Refer to the vehicle manual or call your dealer for exact offset and landing parameters.
On all cars, without exception, tire wear occurs unevenly - as a rule, the front tires wear out noticeably faster than the rear ones.
Many owners are tempted to change only the front tires and leave the rear tires for another season or two.
However, in this case, the owner needs to know that maximum driving safety will be ensured only if all four wheels of the car have the same tread. In all other cases, the car will have a much greater chance of losing control.
Therefore, the safest option for changing tires is to install a complete set of 4 pieces.
Of course, car tires are a very expensive commodity, and not all drivers have enough money to replace all 4 tires at once.
In this case, the driver can divide the complete tire change into two stages - first change the front pair of tires, and after some time the rear (tires are changed ONLY IN PAIRS).
Moreover, it is better not to delay the replacement of rear tires, since while the car is running on old tires, there is an increased risk of skidding the rear axle.
In the event of a tire replacement due to serious damage (such as a cut), the basic rule applies - the tread thickness on all tires must remain the same.
If there is no way to restore the tire, you will have to change at least a pair of tires.
It is only possible to replace just one damaged tire without compromising the handling of the car in one case - if the damaged tire was just bought and managed to drive only a few hundred kilometers.
In this case, the owner of the car can buy one exactly the same new tire and replace the damaged one without fear of losing control of the car.
If, on the other hand, the owner managed to drive quite a lot on new tires - more than a thousand kilometers - then its tread has managed to wear off and replacing one tire is no longer enough.
We must not allow a situation where the thickness of the tread pattern on the wheels of one axle will be different - in this case, the probability of losing control is very high.
By the way, the remaining good tire does not have to be thrown away - you can leave it on the spare wheel if there is a bad tire, or in extreme cases, sell it to someone else as a spare tire.
Every experienced car owner knows that it is recommended to change tires installed on the front axle of the car first.
Despite the great danger of skidding the rear axle of a car with worn tires, there is an even greater risk of front tire rupture also due to wear, after which an accident with very serious consequences simply cannot be avoided (see video).
The reasons for the rapid wear of the front tires of a car are simple - they experience increased stress due to constant steering.
Due to the very serious consequences of blown front tires (see above), increased requirements are placed on them in terms of strength and safety.
To reduce the risk of this tear, when changing tires in pairs, the front tires are changed first.
To prevent the possibility of an accident due to a broken wheel, the owner should regularly check their tires for wear and cracks, and not bring them to a state where they can burst from a sharp stone or a good hole.
Almost every car owner, when replacing tires on his car, faces some difficulties: to change the entire set or just a pair of tires, what type of tires to choose and whether it is possible to mix tires from different manufacturers. Continental experts tried to bring clarity to the resolution of these issues.
Of course, the situation when all tires wear out equally and at the same time confirms that the conditions and type of driving, together with the timely maintenance of the car, perfectly matched its technical characteristics. And the answer to the question posed here is obvious - change all four tires to a new set of tires recommended by the automaker. But such a picture, alas, is rare, especially in Russian realities, due to the influence of numerous factors.
Even in the case when the tires are worn unevenly, and there is a need to replace only part of the tires, the best solution would still be to buy a whole set of new tires. This guarantees the necessary safety on the road. The only downside to this approach for most drivers is the cost. And if, in order to save money, you still decide to replace only half of the wheels, then pay attention to the recommendations below:
 The fact is that worn tires naturally provide less traction, and when mounted on the rear axle, they reduce the resistance to skid, and this leads to uncontrollability of the car on wet or slippery surfaces. Installed on the front axle, worn tires do not have such a noticeable effect on the stability and controllability of the vehicle.
  So, for example, for the northern territories of Russia, studded tires will be the most suitable option in winter conditions, and for cities with a milder winter climate, Scandinavian-type friction tires with improved grip on dry and wet roads are suitable.