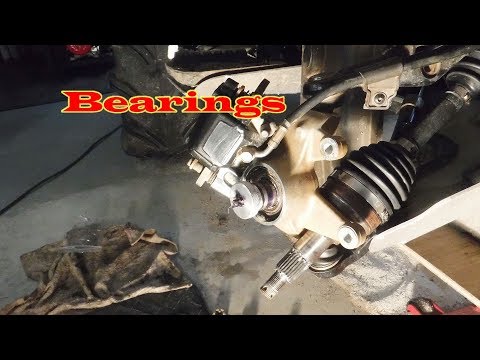
The wheel hub bearings on your ATV or UTV will no doubt need to be changed out at some point. It’s not that hard of a job to do yourself with basic hand tools you probably already have. They do make specialty tools to make the job easier, but I’ve done this with ordinary tools everyone already has in their garage.
The steps I’m going to go over are universal steps for all pre 2010 ATV and UTV wheel hub bearing replacements. For ATVs or UTVs made after 2010 the steps will be similar and you may to also read the alternate wheel bearing replacement section at the bottom of this article.
There may be slight differences from machine to machine. But you’ll get the idea of what to do, and should be able to handle any slight differences your quad has. Having your service manual handy will help. And with all maintenance projects, it’s best to wear eye protection and gloves.
Here are the steps to replace your wheel hub bearings (I explain each step in more detail below)
Before I go into more detail about each of these steps, lets make sure you really do need to replace your wheel hub bearings. It’s not an extremely difficult job, but can take a bit of time and requires you remove a lot of parts from your quad. So lets make sure it’s necessary.
You’ll be able to tell if your wheel hub bearings are bad by the way your ATV or UTV is handling. One of the most common symptoms is a grinding sound and feeling when riding. You may also hear some clanking or banging type sounds coming from the wheel hub.
If they get bad enough, you could even feel vibrations and wobbling when riding. A wobbling feeling could also mean other things like you need to Balance Your ATV Or UTV Tires. If you notice the machine pulls left or right when braking, that could be a sign of bad wheel hub bearings as well.
If it’s been a while since you’ve last replaced them, or you have an older machine, it’s a good idea to do the replacement if your sure the problem isn’t your brakes or tires.
To do a manual check, jack up the wheel in question and try to move it back and forth. If the wheel is bolted on tightly but still wobbles back and forth, you probably need to replace the wheel hub bearings.
Most bearings come sealed, but over time, water and dirt will still find its way in there. There are ways to make the bearings last longer, which I’ll talk about later on. But eventually, they need to be replaced. Now on to the steps.
This goes without saying I suppose, but the ATV needs to be jacked up and remain so during this entire process. It’s a good idea to put in on jack stands as this can take a while and you don’t want your jack to fail.
Another safety measure you can take, after you take the tire off, put it under the quad near the jack stand. This is good to do just in case the machine falls off the jack or jack stands somehow. If you have a leg under there, it could save you a lot of pain.
I always start by loosening the lugs before I jack it up. That way it’s easier to remove when the ATV is lifted.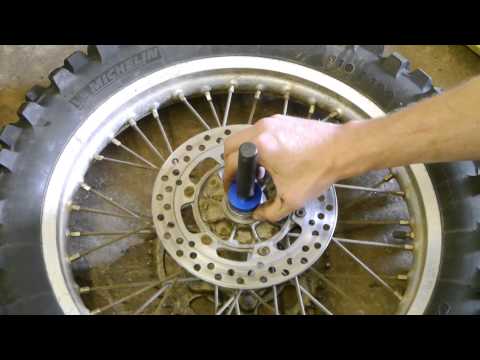 You don’t have to worry about rocking the machine while its raised up if you get a stubborn lug nut.
The caliper will typically be bolted on with two bolts, either an allen head bolt or a 12mm bolt.
Remove both bolts and the caliper should come off easily.
This may be a good time to Change The Brake Pads On Your ATV if they need to be done.
The caliper may have a line going into it, that’s ok you don’t need to remove that or do anything else with the caliper. Just move it and let it sit somewhere out of the way the best you can.
Remove Axle NutAfter you’ve got the caliper off, it’s time to remove the castle nut holding the hub in place. Usually there will be a cotter pin holding the castle nut in place.
This is to prevent the nut from loosening while you ride. The cotter pin is easy to remove with a pair of pliers. Some machines will have a stake nut here instead of a castle nut.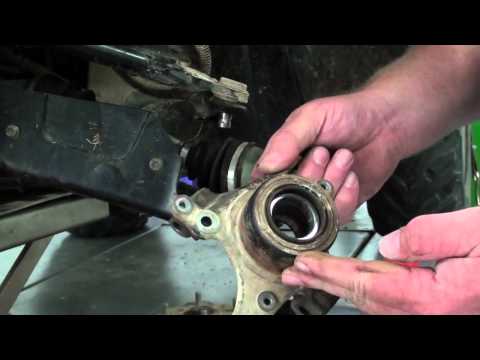
I found it easiest to remove the castle nut with an impact wrench. Sometimes they can stuck on there pretty good, and if you don’t have a breaker bar, doing it by hand can be tough.
Once the castle nut is off, you can remove the hub, which will usually have the brake rotor attached to it. Some machines will have a guard mounted on the knuckle behind the brake rotor. Remove the guard, this is easy to remove and is usually only held in place by a few bolts.
The upper and lower ball joints will be held on to the knuckle by nuts usually with cotter pins in them.
Remove the cotter pins and take the nuts off, you should be able to slip the ball joint out of the knuckle after that.
They sometimes take a little persuading, but usually come out pretty easily with a little hit from a hammer.
Do this for both the top and bottom ball joint connections to the knuckle.
Remove Tie Rod Ends From KnuckleTo remove the tie rid ends, you will typically need two wrenches. Most of the time they are about one size apart, that’s helpful if you only have one of each size wrench.
The bolts for the tie rod ends will most likely be held in with cotter pins too. Remove the cotter pins and bolts holding the tie rod end into place.
Once the bolts are off the tie rod end should easily lift up. Just pull it up out of the knuckle and move it out of the way. There is no need to take the tie rod end apart any further than this, you can just rotate it out of your way.
Remove Shock Absorber BoltYou only need to remove the bottom shock absorber nut and bolt. You will need two wrenches for this part as well.
The shock absorber is held in by a bolt and nut set up connecting to the swing arm.
I found it easier to hold the bolt in place with a wrench and use an impact wrench to remove the nut.
Once the bolt and nut are removed, you should be able to move the shock absorber up and out of your way.
On some models of ATV or UTV, it will help make this whole job easier to do this step right after you’ve removed the wheel. You will notice a better range of motion in the whole shock and swing arm assembly after you remove the shock absorber.
It can give you easier access to the other parts you need to remove in the previous steps. I’ve just always done it this way and never had any issues, it depends on your machine and how you want to go about it.
Remove Knuckle From SuspensionAfter you’ve removed the shock absorber bolts and got it out of the way, you should be able to just pull the steering knuckle assembly off the axle. Sometimes it can be a bit stubborn and you’ll have wiggle it to get it started.
Remove Outer Seal And BearingsNow you’ll need to remove the seal and bearings from the steering knuckle. The seal will need to come out first.
They do make a special tool to make this easier like this Jecr Bearing and Seal Puller Tool from Amazon.
But I’ve got it done with just a screw driver before. Don’t get me wrong the seal puller tool makes the job a whole lot easier, and is useful for other projects as well. But you can get the seal out with a screw driver if your persistent enough.
To get the bearing out you’ll need a long center punch. Keep tapping around the bearing to keep it centered as you knock it out. You will most likely not be able to push the bearing clear through from one side of the knuckle to the other, so the bearings will need to removed from both sides separately from the inside out.
Clean Knuckle And Install New BearingsOnce you’ve got the seal and bearing out of the knuckle, it’s a good idea to clean the knuckle of any dirt and debris that might make installing the new bearing more difficult.
As for the bearings you use, it’s up to you. There are plenty of options out there, just make sure you get the right ones to fit your machine. I like using the All Balls bearings and seals, I’ve had good luck with them in the past.
Here’s a link to an All Balls 25-1404 Wheel Bearing Kit on Amazon, the kit comes with the bearing and seals.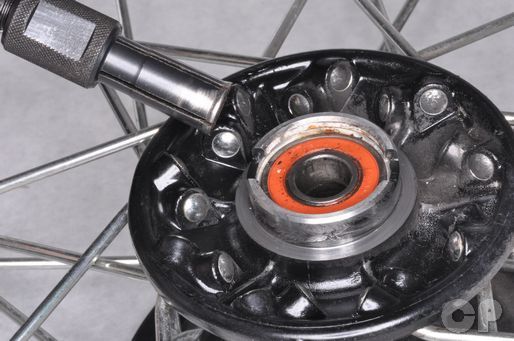 That’s a good place to start looking for the bearings and seals to fit your quad.
Once you have the bearings you need to install them in the knuckle assembly just as they were when you took them out. There is a sprecial bearing press you can use to press the bearings back in.
But I’ve always just used a large socket that is about the same size as the bearings and hammered them back in. Be careful not to hit the inner part of the bearings assembly because that will damage them. Use the right size socket that lines up with the outer edge of the bearings assembly. You could also try using the old bearings if they’re still intact, they should be the same size after all.
The bearing seal will go back on the outside of the bearings after you’ve got them installed. They should seat nicely on the outer edge of the knuckle like they were when you removed the old ones.
Make sure you don’t forget the spacer between the bearings if your model has that.
That’s it, you’re done replacing the wheel hub bearings on your ATV or UTV, now it’s time to put it all back together. Everything will go back together the same way took it apart just follow the steps above in reverse.
I do recommend you use all new cotter pins. People will say you can re-use them, and I’ve seen people re-use them successfully. But they’re just so cheap, and it’s recommended you use new cotter pins every time so that’s what I do.
Here’s a link to a 555 Assorted Piece Set Of Cotter Pins for around 12 bucks on Amazon. I also recommend using a new stake nut instead of re-using the old one. This only applies if you have a stake nut instead of a castle nut from the remove axle nut step.
The wheel bearings on your ATV or UTV will just go bad over time. The best thing to do is make sure you’re installing the bearing seal the right way. Riding through mud and water is one the best parts about off-roading, so eventually water and dirt will get in there. But a good seal can help them last longer.
Also, avoid pressure washing the hub assembly.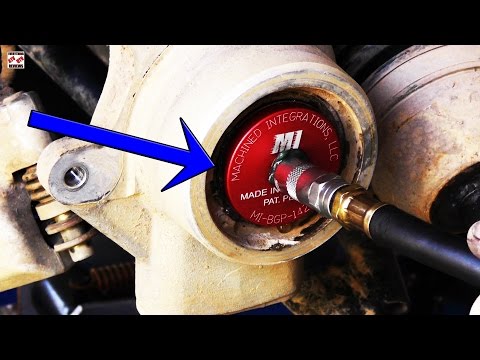 It’s ok to pressure wash your machine to clean it after a muddy ride. Just be careful around the bearing seal and hub assembly area. The pressure washer can push water into the bearing making them wear out faster.
Most of these steps will be the same, except you will be dealing with the hub assembly to replace the bearings. Also, you will want to freeze the new bearings before replacing them in the hub.
To remove the old ones the process will be the same also. Use a long punch or other tool to remove the old wheel bearings.
Some models will have a snap ring clip holding the bearing in place. You can easily remove this though with a pair of snap ring pliers.
Use a heat gun to warm up the hub assembly where the new bearings need to go.
Take the new bearings out of the freezer and press them into the hub. You can use the old bearings or a large socket and hammer to help push the bearings in.
Put everything back together the same way you took them apart and you’re good to go. Remember to use all new cotter pins to keep things tightened down the way they’re supposed to be.
Sharing is caring!
If you own an older model ATV or Side-by-Side, at some you will have to service your wheel hub bearings and it is not always pretty.
Many things can cause the bearings to go bad and there are a few ways to prolong the life and prevent the damage, providing you catch on soon enough. Most wheel bearings are sealed bearings, but that does not always prevent water from getting in as the bearing ages. There are also seals that go in on top of the bearing itself to keep debris and trail muck from getting in close to a bearing. These can sometimes fail or be prematurely damaged, allowing mud and water to build up on the bearing itself.
If you ride in a lot of water or mud and do not clean your machine on a regular basis, then chances are that your wheel bearings will fail faster. Pressure washing your machine after a good ride is not always a bad thing, but if you put really high-pressurized water in the close proximity of the wheels or axles you could be forcing water and silt into the bearings. Our advice would be to gently spray off any mud or debris with a garden hose. This takes longer, but it could prolong the life of your wheel bearings and any other pivot bearing for that matter.
Bearings and seals are available from various manufacturers but we finds that All Balls products seem to hold out the longest.
We have laid out a basic process for bearing access and replacement using a Suzuki Eiger 4×4. Most utility ATVs and also the vast majority of UTVs 2010 and older will use the same basic process, but a good OEM service manual is always nice to have for reference when working on your particular model.
Obviously you will need to jack the machine up and place it securely on a stand of some kind. This is primarily for your safety, but it also allows a better access point to the wheel hub assembly. After removing the wheel I like to place it under the machine just in case the jack or stand fail or become dislodged as this will give me a little room between the machine and the floor to escape should I have a foot or leg under there.
Be sure to add a jack stand when getting the front end jacked up to keep the machine where you want it.
Removing the lower shock bolt and freeing the shock will allow better range of motion in the suspension for even better access to the parts you need to remove. Loosen the top shock bolt and raise the shock up out of the way.
Unbolt the shock and move it up out of the way in order to get more free range movement in the suspension while you work on it.
After the wheel comes off you will be staring at a wheel hub. There should be a large castle nut on the end of the axle and potentially/hopefully a cotter pin sticking through the castle nut. In some cases you will have what’s called a stake nut on the end of the axle instead of a castle nut. The outer face of the stake nut is thin and flexible metal and should be staked into a keyway on the end of the axle. This insures the nut does not back off. Most will say these can be reused, but this is something that is cheap and it would be in your best interest to simply replace it with a new nut.
The axle nut varies from one ATV to the next. The castle nut is common, but a stake nut may be found on others.
After removing the axle nut you will need to focus on the brake caliper. The caliper will have 12-14mm bolts or an Allen-head type bolt. Our Suzuki Eiger had the Allen-head bolt. There should be two bolts holding the caliper in place. Once removed, the caliper can be slipped off of the brake rotor. This should allow the wheel hub to slide off of the axle.
The brake caliper bolt’s can be either Allen head or metric flange head bolts.
This is when you will want to remove the steering tie rod from the knuckle as it is much easier than when the knuckle is loose from the suspension arms.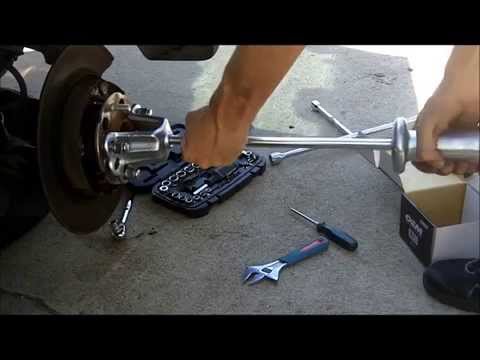 There should be a castle nut and cotter pin on this part as well.
Removing the steering tie rod before loosening the ball joints simply gives you more leverage on the small castle nut.
Your next focus will be on removing the wheel bearing knuckle from the suspension arms. This Suzuki has a pinch bolt type connection holding the upper and lower ball joints to the bearing knuckle. By removing the bolt, the end of the ball joint should slip out of the knuckle. You may need to encourage the arms to drop off with a little help from a good hammer. Once free from the control arms you can now start on removing the outer seals and bearings.
These upper and lower ball joints are held in place by a simply pinch bolt system.
The seals in the bearing knuckle will need to be removed first if they are still intact. This then gives you access to the bearings. Our Suzuki Eiger has a small spacer between the bearings. When pushed aside, this allows enough space to gently tap the bearings out with a long center punch.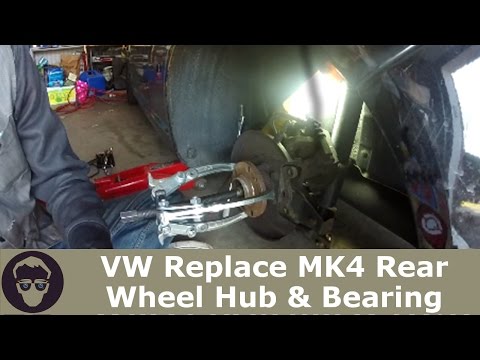 This can be a tough task, but be patient and be sure to move the punch from side to side, tapping a little at a time to keep the bearing square in the hole so it will come out easier.
Getting the outer seals off of the knuckle is easy with a seal removing tool or a flat head screw driver.
The bearing spacer can be moved from side to side to allow access to the bearing race below. The bearings have to come out each side and will not push all the way through the knuckle on most machines.
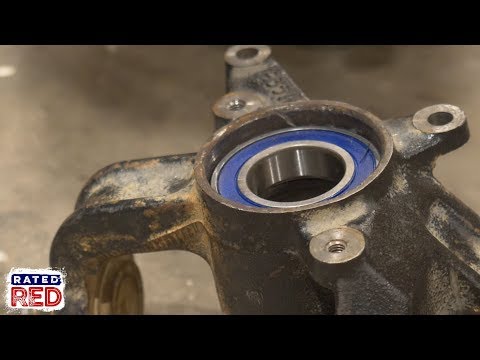
Once the old bearings are removed, the knuckle needs to be cleaned and it is ready for new bearings. Simply look for a good socket that fits the outer race size of the bearing to be used for reinstalling the bearing into the knuckle. Be sure you do not hit the inner race of the bearing or use it to install the bearing as this could weaken or potentially break the new part. The seals will go in the same way and should seat on the outer edge of the knuckle. Be sure you do not forget to install the spacer between the bearings.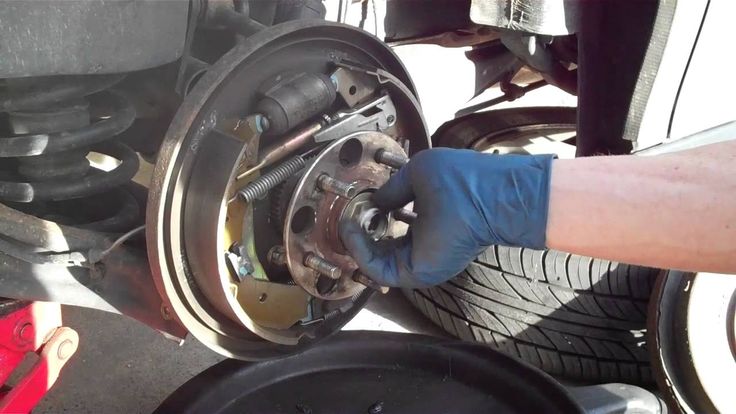
I used this large socket in lieu of a traditional bearing press as it was the perfect size to get the bearing seated in the knuckle.
Most seals will seat just under the surface of the bearing knuckle. If the seal goes in too far the lip may not seal correctly.
Though not all bearing knuckles are the same, for the most part you will be able to read between the lines once you dig into the repair. This is also a great time to look for worn tie rod ends or even ball joints and a great time to replace them while the machine is already torn apart.
Podolsk,
15 km Simferopol highway To contacts
#service #enduro #motocross
4 years ago
Wheel bearings are replaced in pairs when at least one fails.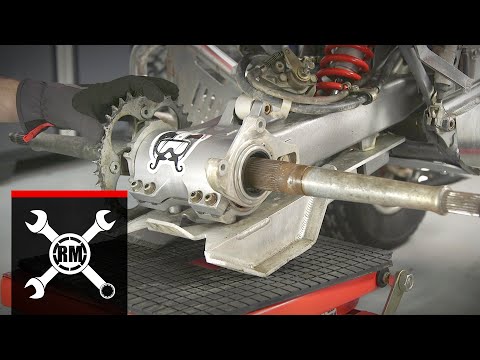 Wear is determined by wheel play under axial or radial loads. The service life of a bearing depends not only on the quality of workmanship and the presence of anthers, but also on timely maintenance. The replacement procedure is simple, and with a special tool it is very simple. Below are some points and subtleties of the process, as well as a detailed video of replacing the front wheel bearings on the Yamaha WR450F.
It is advisable to periodically, when removing the wheel, check the condition of the bearings and apply additional grease. If there is rust, it is better to clean and lubricate the bearing. After passing the fords and driving through deep puddles, the bearing will surely rust.
When removing the bearings, it is enough to move the spacer and knock the bearing out with an impact screwdriver from the inside. If the bushing is firmly fixed, it can be loosened by hitting the inner race of one of the bearings.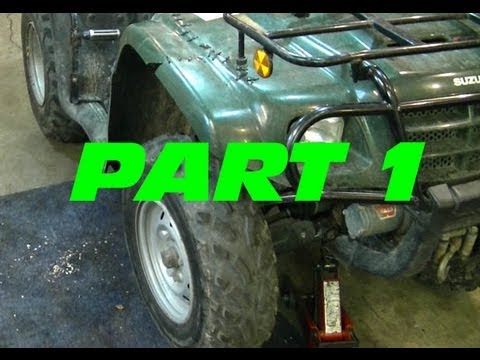
The bearing can be knocked out very easily with a reverse hammer. An anchor bolt can be used instead of a hammer.
There are waterproof bearing sets with gaskets. In the future, we will definitely test a similar one, the video and the article will be on the site! You can buy consumables and tools in our motorcycle shop.
Enduro Wheel Bearing Replacement
95 242
2 194
0
Recommended
Best Moments of PSC 2015 Magazine F4i ZX6R R6 CBR GSXR stunt bike review Magazine Training Motocross Enduro - Video School French Stunt Romain Jeandrot
More interesting news on our pages in social networks
The wheel bearing is responsible for the smooth and uniform rotation of the wheel without braking and deviations in the vertical plane.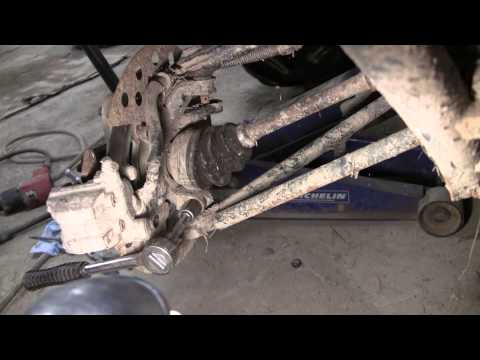 During movement, this part experiences very high loads, therefore, to ensure maximum reliability, it is made of high-strength materials.
Usually problems with them begin somewhere after 100-120 thousand kilometers. Although for high-quality wheel bearings with careful driving, 150 thousand is far from the limit. On the other hand, it happens that newly installed parts begin to fall apart after a run of two to three thousand kilometers. And it's not always about the quality of the bearing itself.
Several factors can contribute to a hub bearing problem.
 In this case, the wear process will go at an accelerated pace.
 Finally, wheel bearing failure can be accelerated by overtightening during installation. For proper operation, the bearing must have a certain axial clearance.
Nuts that are too tight will result in increased internal friction and overheating. When installing, use a torque wrench and make sure that the nuts are tightened with the right torque.
Initially, there is a hum in the area of the wheels. Often it disappears or intensifies when turning. The tone of the sound may change depending on the speed. It is possible to pull the car to the side due to the constant wedging of one of the wheels.
In some speed ranges, the rumble may be absent at first, but will gradually become constant, and then be replaced by a characteristic crunch and vibration, which can give a noticeable return to the steering wheel and car body.
This symptom indicates that the wheel bearing is almost destroyed and it is simply dangerous to continue driving. We urgently need to go to the service station at low speed.
A broken bearing can jam at some point, and the wheel will jam along with it. In this case, damage to the ball joint of the suspension arm and deformation of the axle shaft is possible. If this happens at high speed, the car may end up on the side of the road and even roll over. And in the event of a departure into the oncoming lane during busy traffic, a serious accident is guaranteed.
Unlike many other automotive problems, identifying a bad wheel bearing is relatively easy.
You can find out which side the problem part is on by turning while driving. When turning right, the load is redistributed to the left side, and the right wheel bearing is unloaded. If at the same time the hum disappears or noticeably decreases, then the problem is on the right. If the sound is amplified, then the left hub bearing must be replaced.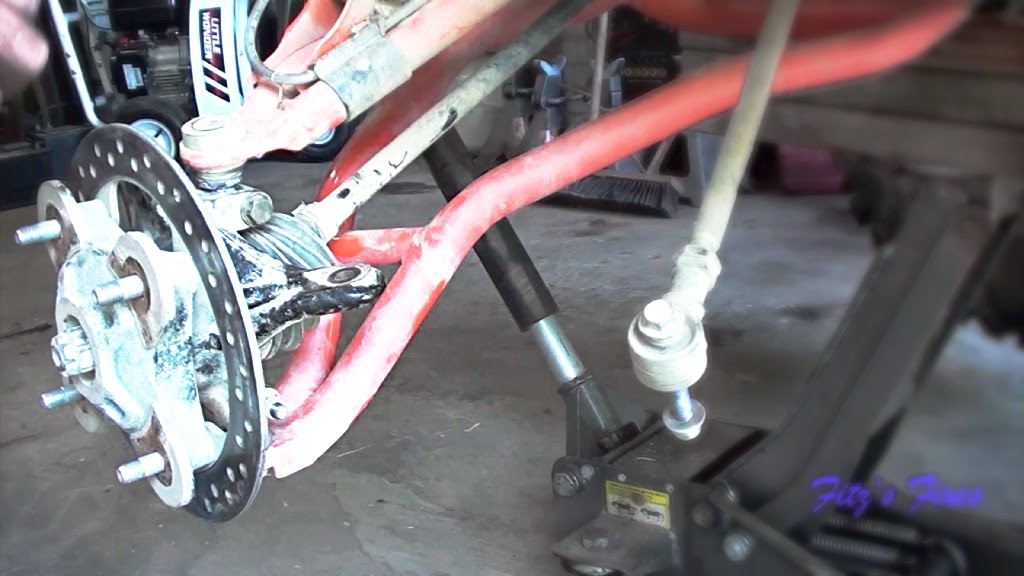 When turning left, the opposite is true.
Sometimes a similar noise comes from unevenly worn tires. To more accurately diagnose the problem, you need to install the car on a flat area and use a jack to hang out the problem wheel (or two wheels at once). To eliminate the possible noise of the CV joint, it is better to place the jack not under the body, but under the suspension arm.
Use both hands to move the wheel vertically and horizontally. There should not be any backlash! The presence of even a small play indicates that the bearing is broken and needs to be changed.
It happens that wheel play is caused by wear of other parts. To eliminate this option, ask an assistant to depress the brake pedal and shake the wheel. If the play has disappeared, then the hub bearing is definitely defective. Otherwise, the problem should be sought in the suspension or steering.
Next, turn the wheel by hand and listen to the sound. You certainly will not confuse the specific crackling noise of a defective part with a quiet rustle when a working wheel rotates.