Whether you ride your bike every day or twice a year, you’re going to get a flat tire eventually. Here’s how to change your tube with minimal headaches.
We’ve all been there. You’re biking along when suddenly something feels…wrong. You ran through glass or over a stray thorn, and now you have a flat tire. But your ride isn’t over yet. With a couple of simple tools and a bit of know-how, you’ll find it’s simple enough to replace your tube and get back on your bike.
Here, we cover what tools you’ll need and outline seven easy steps for how to change a bike tire.
Whenever you go for a bike ride, you should carry these tools with you. Without them, you risk being stranded halfway through your ride.
Flip your bike upside down to make the process easier if you’re out and about. If you have a stand, or there’s a bike repair station nearby (common on many city bike trails), place your bike on it. If your wheel has a quick release, open the lever and unscrew the skewer (and make sure to catch whatever random springs or washers fall off).
Or, if your bike has bolt-on or theft-proof skewers, make sure you have the appropriate tools to remove them.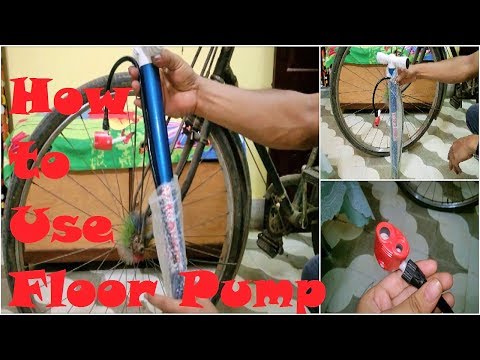 Set the skewer aside and pull your wheel free.
If you have rim brakes (the ones that stop you by clamping onto your rims), you may have to unhook those to get the wheel off. If you’re taking off your back wheel and you have gears, it helps to shift to your highest gear so that your chain is on the smallest cog of your rear cassette, giving you a bit more room to maneuver as you lift your tire clear of the chain and rear derailleur.
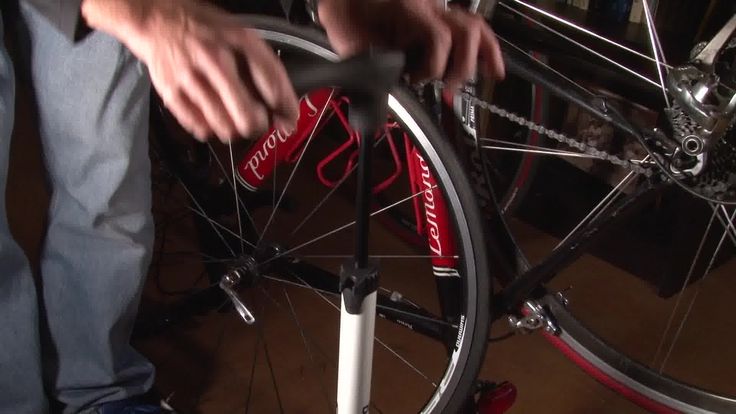
First, let out the rest of the air from your tube to make this step easier. Then, use your tire lever if you have it (and you really should have it, especially if your hands aren’t super strong) to remove one side of the tire from the rim. Hook the lever under the bead of the tire (the hard part of the tire that sits inside the wheel) and pull it over the rim, all the way around.
If you’re just changing the tube, leave one side of the tire on the rim. This way, you can pull out the tube without totally removing the tire, which saves time.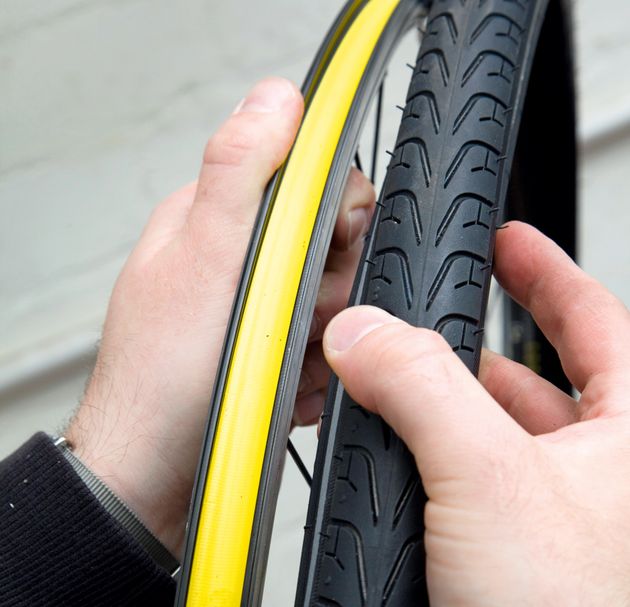 If the tire was also damaged or you just want new tires and you’re planning to swap the tire out too, take both sides off the rim.
First, try to find where the hole is in the tube. (You can look for punctures on the exterior or listen or feel for air.) This will help you determine the cause of the flat so it doesn’t happen again. If the hole is on the inside of the tube, it’s likely because the rim tape — a strip of tape that goes along the inside of your rim — has shifted, exposing the spoke holes which can wear out your tube. If that happens, try to push the tape back in place.
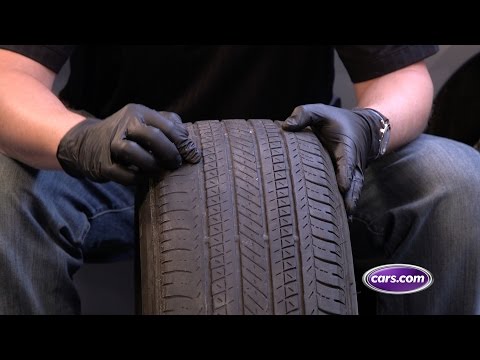
Then, run your fingers carefully along the inside of the tire to check if there’s anything sharp stuck there. You don’t want to have to change your tube again a mile down the road because there’s still a staple in your tire. Just be careful not to slice your hand open in the process.
Photo credit: Peter Woodman via FlickrIf you’re using a patch kit, apply the patch according to the instructions. You’ll rough up the area around the hole with sandpaper to help the patch stick better. Then, spread glue on the area, if it requires glue, and place the patch. Alternatively, you can pull out your brand-new spare tube.
Next, put a little air in the new tube to make it easier to handle and put it in the tire, starting by putting the valve stem in place. Make sure it’s in straight; if it’s at an angle, there will be too much pressure on its base and it could tear the tube. If there’s a lock ring for the valve stem, screw it on now to keep the valve in place.
Once your new (or newly patched) tube is in place, you need to replace the bead of the tire. You can usually do this just with your hands, or you can use the tire lever to help.
The wall of your tire should have a recommended psi that you will want to inflate your tube to match. It’s nice to line that info up with the valve stem so it’s easy to find when you’re airing up your tires in the future.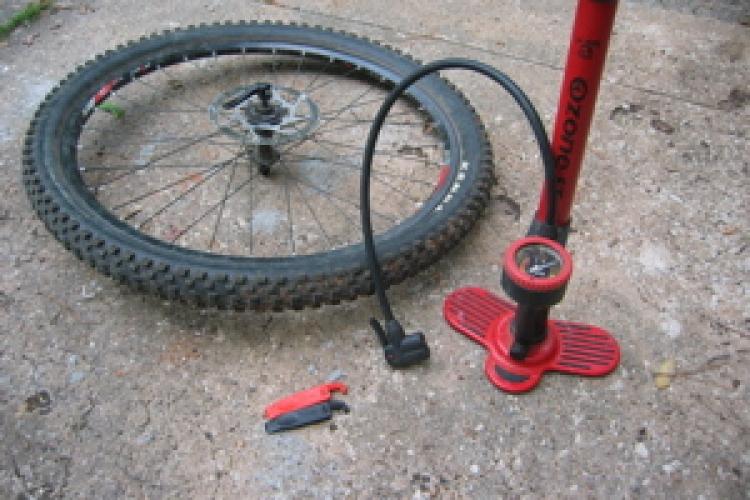
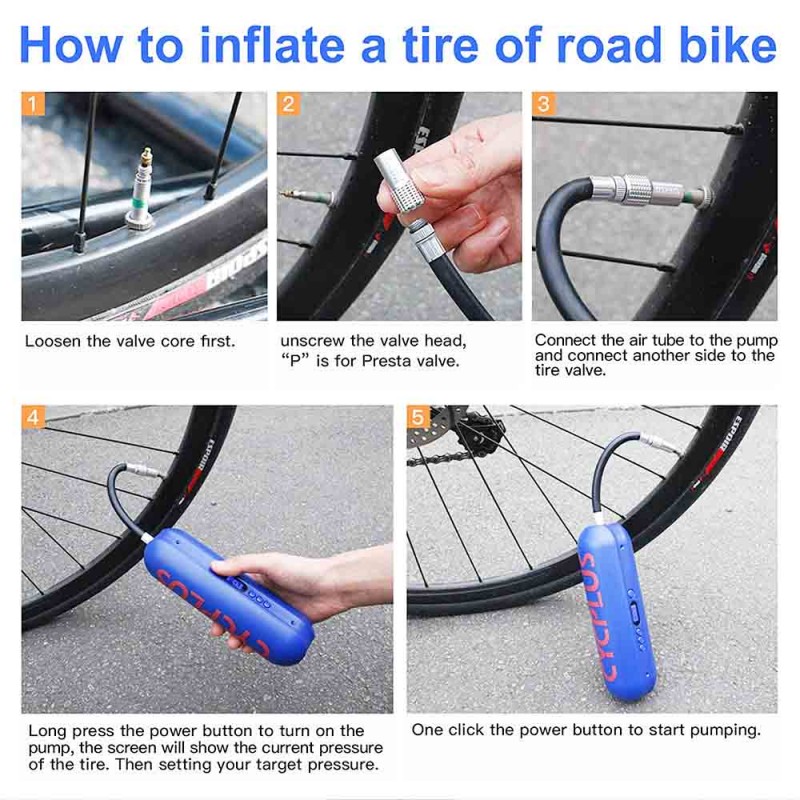
If you have a Presta valve, open it by unscrewing the top nut. Place the inflation device on the valve according to the instructions and air up the tire. When the tube is partially inflated, check that the tire is seated correctly and the tube isn’t bunched up anywhere. Then finish inflating to the recommended psi.
If you’re using CO2 cartridges, follow the instructions with the inflator.
Put the wheel back on your bike, slide the skewer in place, and tighten it. If you have a quick release, it should be a little difficult to close, but you don’t want to have to wrestle with it. If you have rim brakes, reattach them.
Give the wheel a spin and make sure it spins smoothly. If not or if the brake is rubbing, your wheel may be on crooked.
If you’ve had lots of flats or your tread is worn down, it may be time to replace your tire as well. But for starters, these seven steps should get you from the side of the road to the end of your ride.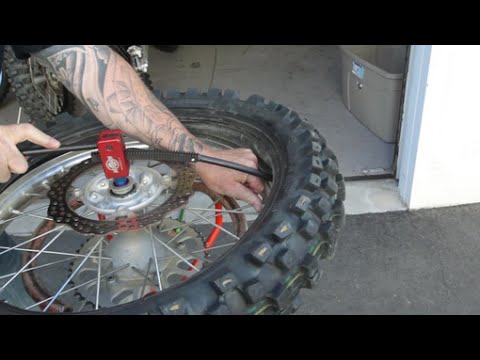
Updated: Jun. 09, 2022
Next Project›
Family Handyman
Follow these simple steps for replacing a punctured bicycle tube. You can even fix the flat on the go if you have a spare tube, tire levers and a pump.
By the DIY experts of The Family Handyman Magazine
Step 1: Remove the tire and old tubePry under the bead of the tire with one of the tire levers and hook it to a spoke. Move over about 4 to 6 in. and insert the other tire lever. Pry it down and then slide it along the rim to release the tire.
The first step of how to change a bike tire is to release the brake and loosen the axle nut so you can remove the wheel from the bike. Most bikes have a quick-release mechanism on the brake and a quick-release lever on the axle. If you’re not sure how to remove the wheels on your bike, check the manual or visit your local bike store and ask someone on staff to show you how. Do this before you have a flat so you’ll be prepared. For a guaranteed trouble-free fix, buy a new tube rather than patching the old one (see “Valve Types” below).
After removing the wheel from the bike, the next step is to take one edge, or bead, of the tire off the rim so you can remove the damaged tube (Photo 1). Pull out the tube. Then remove the tire completely from the rim, put it around your neck like a necklace and turn it inside out while running your fingers along the inside to feel for sharp objects. Be careful, though—there could be bits of glass lodged in the tire.
If you don’t want to walk home after having a flat, here’s a tip: Assemble a tire repair kit like this. A repair kit is one of the most valued bicycle accessories you’ll want. You can put it in a resealable plastic bag and tuck it in a knapsack or buy a small pack that straps under your bicycle seat. Not including the seat pack, the kit cost us about $38.
Partially inflate the new or patched tube and insert the valve stem into the hole in the rim. Then work the tube into the tire.
Press the bike tire back over the rim, being careful not to pinch the tube. If it’s too tight to push the last section by hand, use the tire levers to pry the bike tire onto the bike rim.
After checking the tire, put one bead back on the rim, leaving the other side loose so you can install the new (or patched) tube (Photo 2).
Photo 3 shows how to push the second tire bead back onto the rim after the tube is in place. When the tire is completely installed, check all around on both sides to make sure the tube isn’t pinched between the tire and rim. To do this, push against the bead and look into the space between the tire and rim to be sure it’s clear.
Now you’re ready to fully inflate the tire. But there’s one last thing to watch for. Occasionally the bead may not seat properly on the rim, so stop before the tire is inflated to full pressure and rotate the wheel while you inspect the area where the tire and rim meet. If you see a spot where the bead isn’t seated in the rim, let a little air out and work the bead into the rim with your fingers. Then inflate the tire to the pressure listed on the side. Reinstall the wheel and spin it to make sure it’s centered between the brakes and rotates freely. If you’ve done an emergency repair using the CO2 cartridge, you may not have enough pressure. When you get home or to a bike store or gas station, fill the tire.
When you go to buy a new tube, take the old tube with you and match the valve. Presta valves have a nut on a threaded shaft that seals the air in and must be loosened to inflate the tube. You need a pump that’s compatible with a Presta valve to inflate these tubes. If you have Presta valves on your bike, keep a Presta-to-Schrader adapter with you so you can use a gas-station air pump to inflate your tire.
Next, check out how to change a car tire.
Originally Published: August 28, 2019
ⓘ
If you are a cyclist, you need to be able to deal with a number of common problems that can happen on the road. A punctured wheel is one of the main ones. Unfortunately, you can run into a nail, a piece of metal or a broken bottle almost anywhere, and sooner or later it happens to everyone. Already happened? Read our review, which we prepared together with Onliner, on how to change or seal the tube, tire on a bicycle.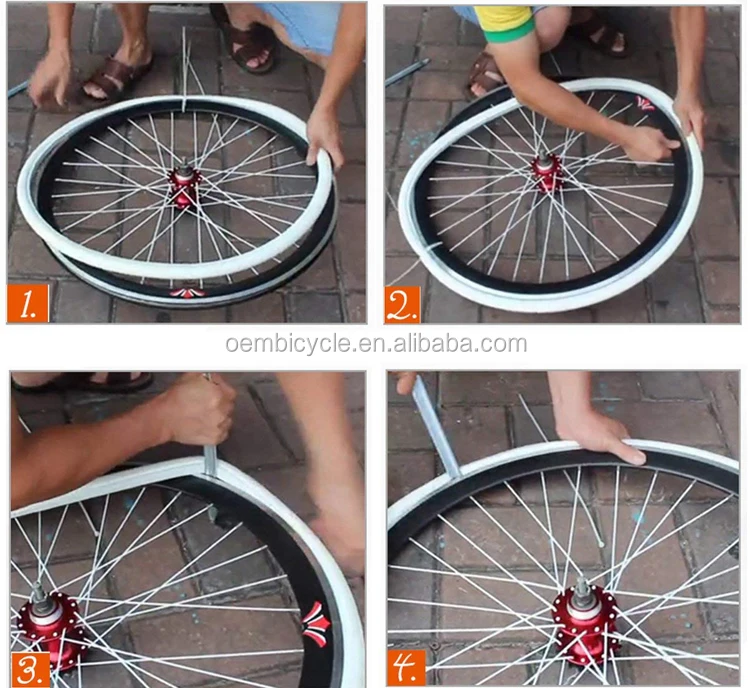
To remove the damaged tube from the wheel, you need to remove it from the bike - this is much more convenient to work with. Then follow the step by step instructions:
1. Unscrew the protective cap from the nipple. If necessary, completely deflate the wheel. This will make the job easier, as there will be no unnecessary resistance.
2. Using a pry bar, hook the edge of the tire and pull it out of the rim. Special tools allow you to carry out this procedure quickly and as painlessly as possible. If there is no pry bar, you can try using any thin and durable object, such as a spoon. Her handle has repeatedly rescued cyclists who did not have repair tools at hand. Just make sure she doesn't bend over.
Important: The tool should not have sharp ends, so a screwdriver is not the best solution, although it fits the given shape.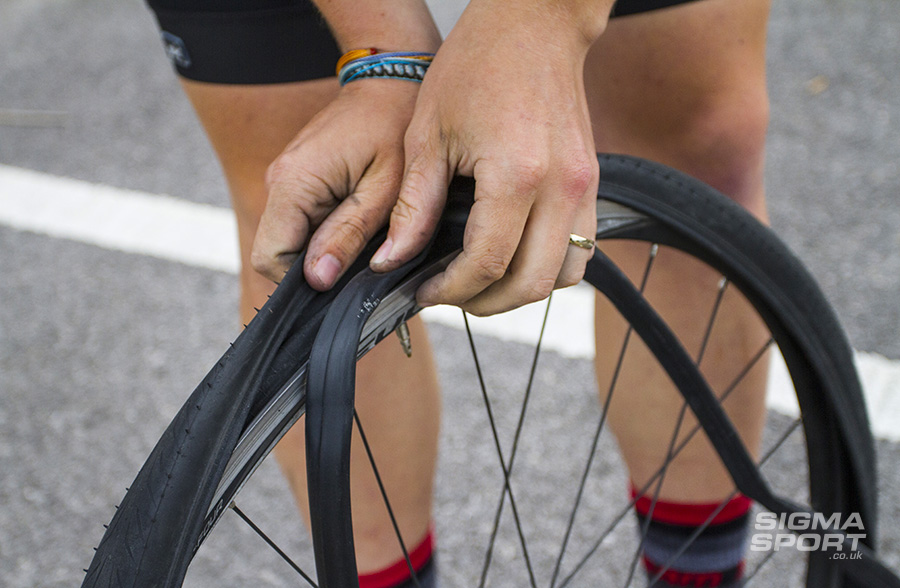 With it, you can only damage the wheel more. If you want to keep the tire, don't.
3. It is optimal to use two mounts. First, pick up the edge of one, then, when you fix the position, in 2-3 centimeters, pick up the tire with the second mount. This will be followed by a release of pressure, and the work will go easier. While continuing to support the first mount with your hand, continue prying the tire in a circle with the second until it is completely released from the rim.
4. Now that one end of the tire is completely out, release the nipple and remove the damaged tube.
We will consider the installation process with the installation of both a new camera and a tire. If you are keeping the old camera, skip the first step.
1. We put a new tire on one “rib” of the wheel, so that we have a free pocket for inserting the camera.
2. We take a new chamber (deflated) and, starting from the nipple, lay it along the rim.
3. While the camera is not yet closed, pump it up a little to make sure that it is laid flat and not twisted anywhere. If the tube is installed with a kink or twisted during installation, it will most likely burst as soon as you get on the bike. Agree, you don’t need such unnecessary frustrations, because these are not only ruined plans, but also additional financial costs.
4. Now you need to "fill" the tire into the rim. In the first steps, this is done manually, but at the end, installation will again be required. You can do it with one, but it's better to use two. Use it to pull the tire towards you a little so that it easily enters the rim. You can push the tire a little inward with a mount so that it is better fixed. The main thing is that the attachment depth is the same throughout the circle.
5. After the wheel is closed, pump up the chamber to the desired state. Usually the right pressure is indicated on the tire, check it to properly set your pump.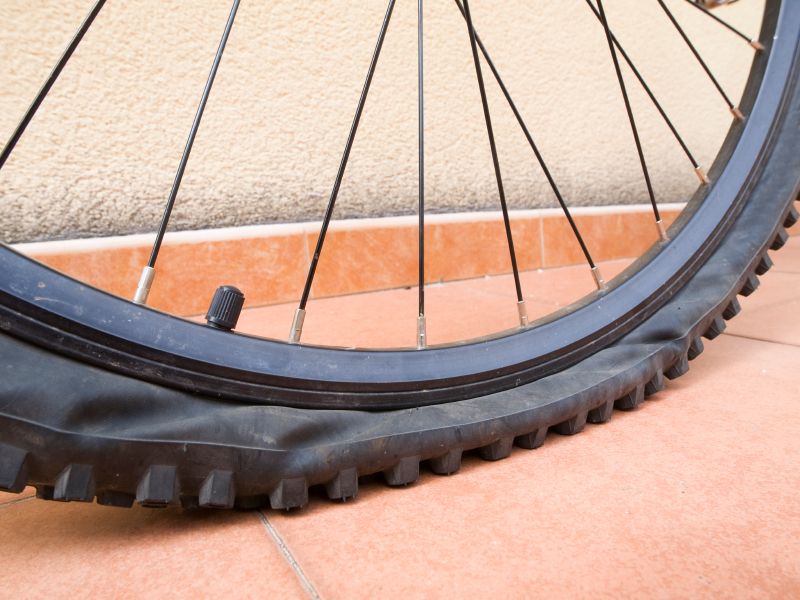
6. Now screw the cap on the nipple to fix the condition of the wheel.
7. It remains to install the wheel in place and that's it. Now your bike is back on track! Make a small circle on it at low speed to make sure everything is secured properly and you feel comfortable. If necessary, pump up the chamber of the second wheel so that they are equally elastic. After replacing one tube, many cyclists experience minor discomfort while riding. If everything is fine, you can go to the road. What if something happens, you already know how to change a tire and you can do it even in field conditions.
Try not to rush during the procedure and be careful at every step. Any carelessness can then turn into problems on the road. If you are saving an old tire, be sure to check the inside of it for any piercing or cutting elements. It often happens that part of the object that pierced the camera breaks off and remains in the tire. Doing so may damage the camera again. So, if you managed to find the "culprit" of the tragedy, make sure you extract it completely.
When working with the pry bar, be sure to hold it with your hand, even if it seems to you that it is holding itself. The resistance of the tire can easily push it out. In the best case, it will simply fall and you will have to start work again. At worst, it will fly out with force and can hit you in the face. The sensations are unpleasant, not to mention the fact that it can be traumatic.
Bicycle tires and inner tubes
 ru -Recommendations for repair, maintenance and tuning of a bicycle for beginner cyclists|Cycling club
 A flat tire on a bicycle is a fairly common occurrence, especially when riding on rough terrain or using poor quality or worn tires. Such an unpleasant incident happens to a cyclist at least once a season, and some are "lucky" to change the camera two or three times in a short trip.
And if it takes five minutes for an experienced cyclist to change the tube on a bicycle, then for some reason beginners are very afraid to remove the tire on their own and most often drag their bike to a service or to friends. In fact, changing the camera is very simple:
 To do this, you can use special mounts that are sold in almost every bike shop. Of course, it is more convenient to remove the tire with them and there is no risk of damage to the rim. However, there are situations when such a tool is not at hand. In this case, you can use any sufficiently thin and durable objects: various wrenches, a beer opener, or even a camping spoon. The only restriction: your tool should not have sharp ends, otherwise you will pierce the camera in a couple more places. Because of this, it is strongly not recommended to use screwdrivers, knives and other sharp objects to remove tires. It is also worth remembering that if you press too hard on the rim, you can damage it. As an example, in this manual we will use ordinary wrenches as montages, which were the first to come to hand - not the best, hiking option.
 In order to pull the tire out of the rim, you need to pick up its edge with the first "wire" and pull it out of the rim. At the same time, the mount must be held so that the tire does not end up inside the rim again, and the mount itself does not fly into your forehead.
After that, with the second mount, similarly pull out the edge of the tire next to the first mount. Don't forget to hold the first montage while doing this!
If the tire tension is still high after using two mounts, use the third one in the same way.
You should end up with one end of the tire completely out of the rim.

Done. Now you can start sealing the damaged camera or just install a new one.