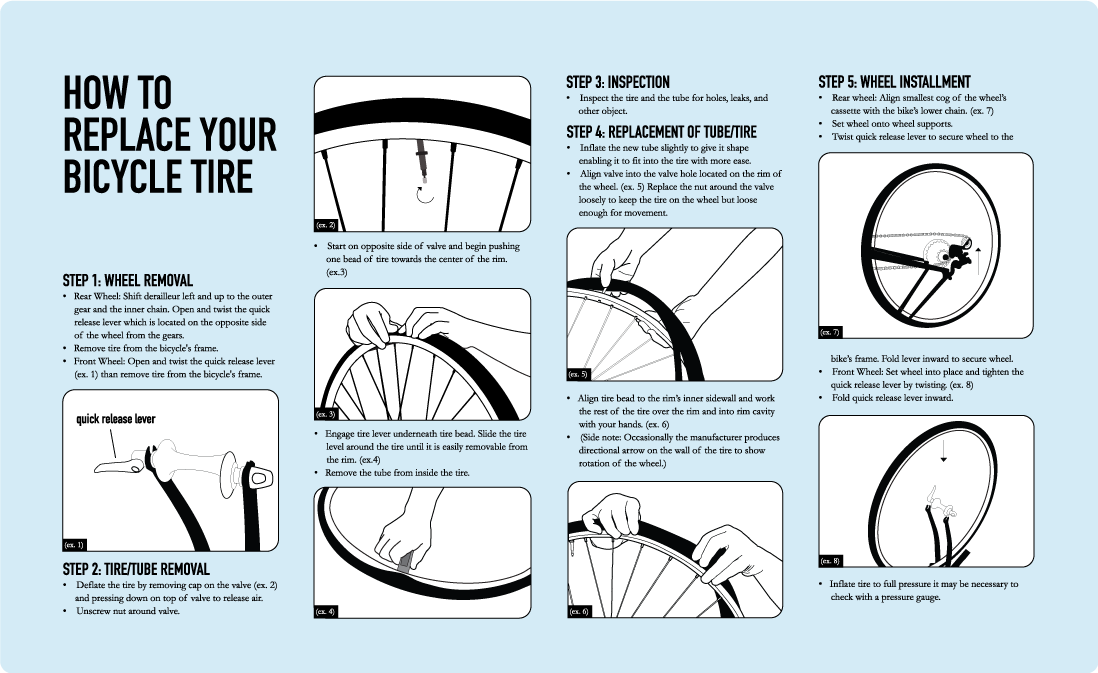
1
What do I need to know how to do?
What Tools do I need?
First, verify that your components are tubeless compatible. See Tubeless Tire Compatibility for more information on tubeless tire standards.
3
There are two main methods for adding sealant to the tire:
This method requires a measuring cup. An air compressor is highly recommended.
This method requires a valve with a removable valve core, a syringe, and an air compressor.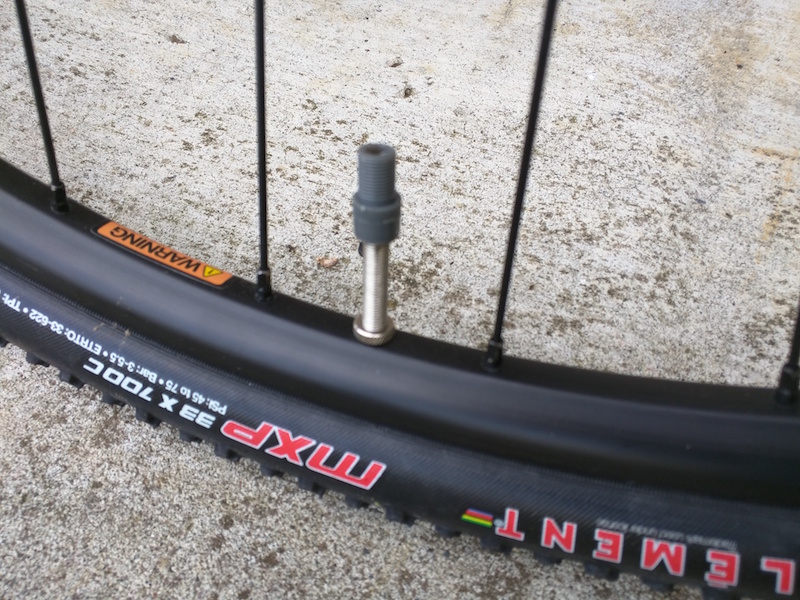
Sealant seeping through the tire bead
The rim strip on this wheel was not adequately sealed. Sealant may, in time, create a seal
4
In general, punctures in tubeless tires cannot be repaired. Punctures in UST tubeless tires, and other tubeless tires with a butyl inner lining, can potentially be repaired using a vulcanizing patch kit such as the VP-1. It is not recommended that you attempt to use other types of patches, or attempt to repair other types of tubeless tires.
See Inner Tube Repair for instructions on using a vulcanizing patch kit.
Outside's long reads email newsletter features our strongest writing, most ambitious reporting, and award-winning storytelling about the outdoors. Sign up today.
You’re railing that descent, nailing every line and feeling like a world champ, when suddenly you smash a wheel into a big square-edge rock. Quite literally, you can feel the air go out of the ride. Not much kills the stoke from a great spin quicker than a flat tire. This is why tubeless tires are increasingly popular for all kinds of cycling. These setups use a liquid sealant instead of an inner tube to hold air. As a result, they offer better protection against all kinds of flats and enable you to run lower pressures than tube-type systems, increasing traction and creating a more comfortable ride.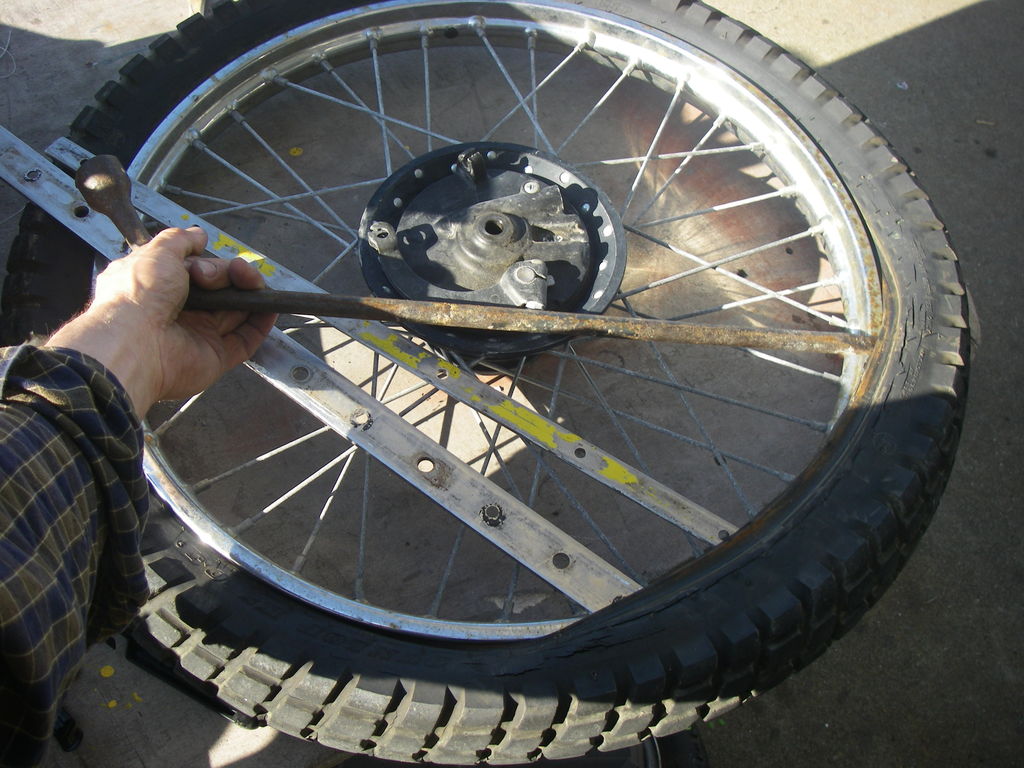 In the event you do get a puncture, tubeless tires are also more likely to stay attached to the rim, which is safer.
But ask most riders about going tubeless and you’ll encounter a litany of horror stories about setup. Why are some tubeless installs easy and others a multi-hour thrash session punctuated by merchant-marine levels of cursing? In short: manufacturing standards and tolerances. Wheels and tires from different brands vary ever so slightly in actual size, so a tire that fits great on one wheel is an overly tight nightmare on another. The good news is that this is slowly improving. Because manufacturing standards are getting better, with stricter tolerances, it’s now much more likely than even five years ago that you’ll be able to install and seat tubeless tires on the first try with a standard floor pump. Here’s a step-by-step guide.
 You’ll see people using all manner of cheap DIY approaches (Gorilla Tape is popular), but we recommend using actual tubeless rim tape. It’s not that expensive, and it’s far better suited to the task.
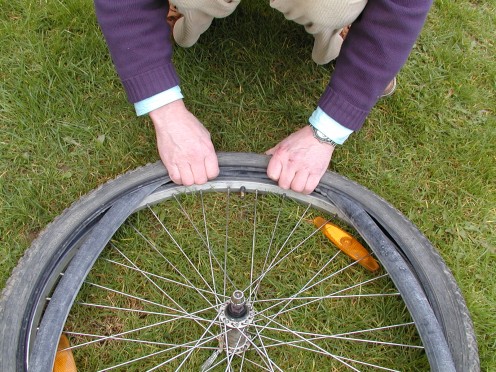
You’ll need tubeless-compatible or tubeless-ready wheels to start. This is governed by the rim profile itself (see the glossary, above).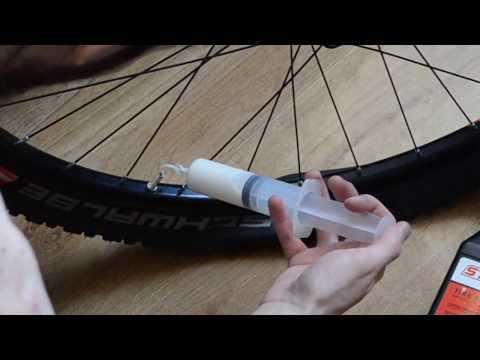 Most gravel and mountain-bike wheels these days are compatible; road bikes are not always so. But in any case, check manufacturer specs.
A warning: Do not under any circumstances try to make a wheel that is not listed as tubeless compatible into a tubeless system. If you’re lucky, all that will happen is the tire will blow off the rim in your garage and spray sealant everywhere. If you’re not lucky, the tire will hold just long enough for you to go on a ride, and then it will blow off, likely causing a crash. The same goes for tires: the bead on non-tubeless-ready tires will not hold securely in the bead lock and can blow off without warning.
Many higher-end wheelsets are tubeless ready right out of the box. For others listed as tubeless compatible, you’ll need to seal the rim bed (namely the spoke holes) with airtight tape. Good brands are Silca, Stan’s NoTubes, and WTB. You’ll need to match the tape width to your rim width.
This special elixir typically features very small solid particles of rubber or latex in a liquid suspension. When you’re riding, the particles slosh around the inside of the tire, where they find and plug small leaks. Good bets are Muc-Off, Orange Seal, and Stan’s. Buy an 8-to-16-ounce bottle. Sealant doesn’t dry out in the bottle over time like it does in tires, and you may want some extra in case the initial installation doesn’t go smoothly. Some bottles of sealant come with a measuring cup; if yours doesn’t, you’ll need a cup that has measurement markings in ounces.
Tubeless tires use special valve stems that create an airtight seal on the inside of the rim bed to prevent air loss. The rubber grommet that forms the seal sometimes has to be matched to the profile of your wheel’s rim bed (so-called universal valves claim to work with almost any system). The best valves have removable cores. Industry Nine, Muc-Off, and Stan’s make good universal valves with removable cores.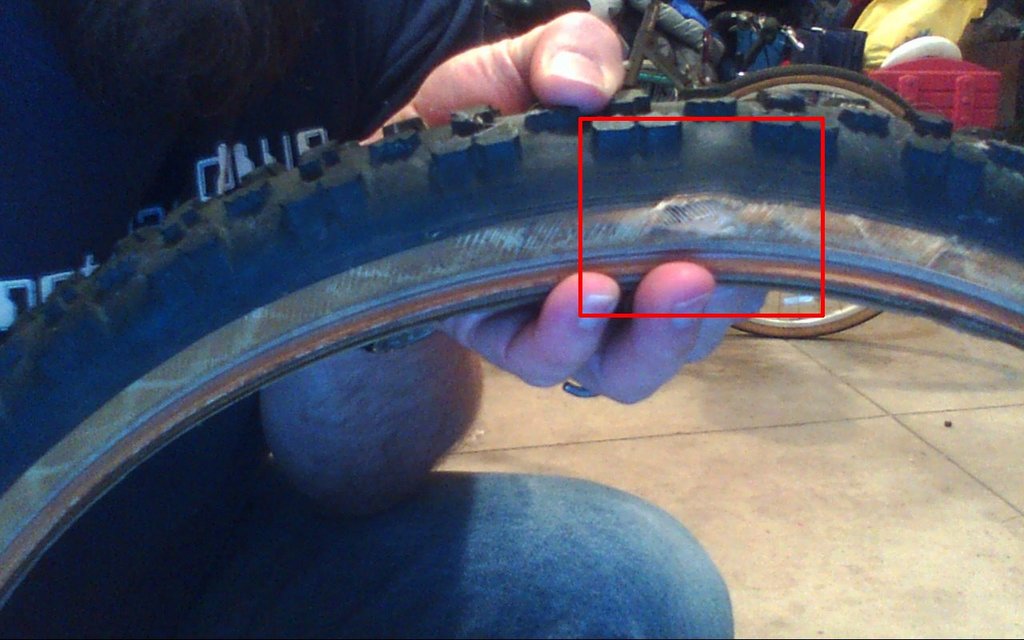
The sealant’s job is to plug holes, but it won’t seal a non-tubeless tire. More important: non-tubeless tires don’t have the specially shaped bead to lock to the rim. We’ll steer clear of recommendations here. Tires are personal and, for gravel and mountain-bike riding especially, the best choices are highly geography- and conditions-specific. Ask around for what others in your area use and trust.
You’ll need a floor pump, sturdy plastic tire levers, a valve-core remover (a very small and inexpensive wrench), a clean rag, a small paintbrush, some rubbing alcohol, and an old cup for soapy water.
These are big syringe-like devices that install the sealant directly through the valve stem. They’re fairly affordable ($10 to $30) and long-lasting. They’re also easy to use and much less likely to spill than the simple plastic measuring cup that comes with most bottles of sealant. Some have a needlelike attachment that can also be used to pull sealant back out of tires—useful if you’re swapping tires or want to store a bike for winter without letting the sealant congeal.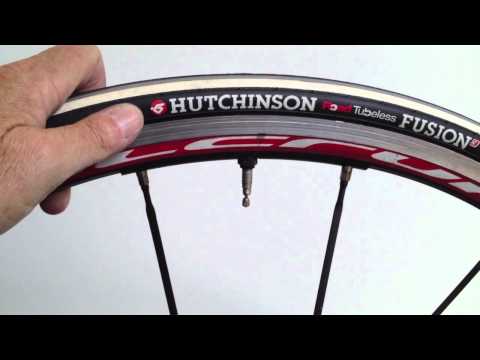 Stan’s makes a basic system, but I prefer the KOM or Mil-Kit versions (note: Mil-Kit’s system is more expensive but comes with universal valve stems).
These are basically reusable air chambers that you pressurize with a floor pump, then place over the valve stem and use to inflate the tire quickly. They’re helpful because seating tubeless tire beads to the rim often requires a high volume of air delivered fast, and floor pumps can struggle to do that. Brands include Airshot, Mil-Kit, and Specialized. But these items are designed for one task only, which may not justify the price ($50 to $100) if you use them rarely. If you’re only installing tubeless tires on rare occasions, you can also use a conventional CO2 inflator system to seat beads. Many people use standard air compressors of the sort you need for home-improvement projects.
 (Joe Lindsey)
Tools: Rag, rubbing alcohol
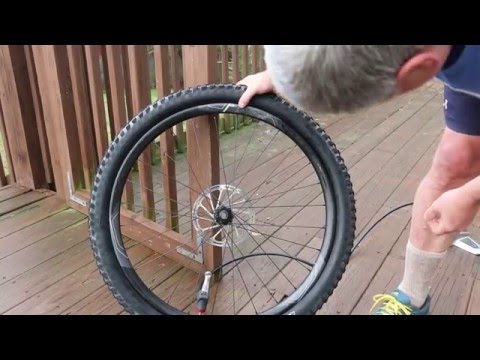
Whether you’re working with new wheels or ones you’re converting, make sure they’re clean. Dip a rag in rubbing alcohol, and thoroughly wipe down the rim bed, rim tape, and internal sidewalls. Pay special attention to removing any debris from the bead hook, where the tire will seat. Check to ensure that the tape is even and tight, with no wrinkles or gaps that could leak air. Wipe dry.
Tools: Tire lever, floor pump, tube
That’s right: use a tube first. Why? It’s an easy way to get at least one of the tire beads firmly seated to the bead lock and to work out the kinks in a tire bead after it’s sat folded in storage.
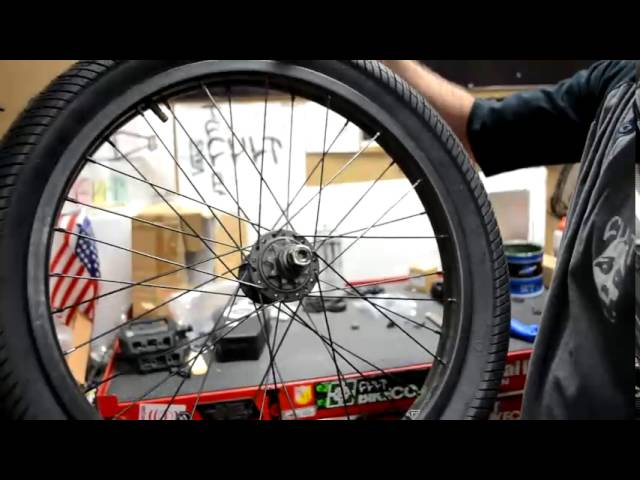
Unfold the new tire, and seat one side in the rim bed. Many tires, especially mountain-bike tires, are directional or even front- or rear-specific; check to make sure it’s in the proper orientation before installing. Tip: line up the center of the tire logo over the valve stem, as this can make it easier to find and fix leaks on rides.
Inflate an inner tube just enough that it holds shape. Insert the valve in the rim’s valve hole, and tuck the tube into the tire. Finally, deflate the tube a bit, and install the other side of the tire. The bead will likely be tight in the last quarter or so. Use a tire lever, and carefully lift the bead into the rim well, taking care not to pinch the tube between the tire and rim. Once seated, push the tire bead toward the center of the rim bed, and visually check to make sure the tube isn’t pinched.
Inflate the tire, stopping at about 20 psi to make sure that the tire bead isn’t bulging out over the rim in any location. Resume pumping to a few psi short of the maximum inflation listed on the tire sidewall. You’ll hear some snaps and pops. This is normal; it’s the tire bead seating in the rim lock. Finally, set the wheel in a warm, sunny location for 15 to 20 minutes. The heat softens the kinks in the tire bead, and—if you’re setting up wheels for tubeless for the first time—helps ensure that the rim tape’s adhesive is fully bonded to the rim and won’t leak.
Tools: Tire lever
Take the wheel out of the sun, and let it cool back to room temperature. Deflate the tire. Carefully push only one side of the tire into the rim bed, then use the tire lever to lift that bead off the rim. Remove the tube, leaving the other tire bead seated in the rim.
Install the tubeless valve by threading the knurled nut as tightly as it’ll go with your fingers. Don’t use a wrench or pliers; overtightening could crack the rubber gasket on the valve stem and cause a leak. Make sure the valve you’re using fits the rim-bed profile (see “What to Buy,” above). A poor fit could leak.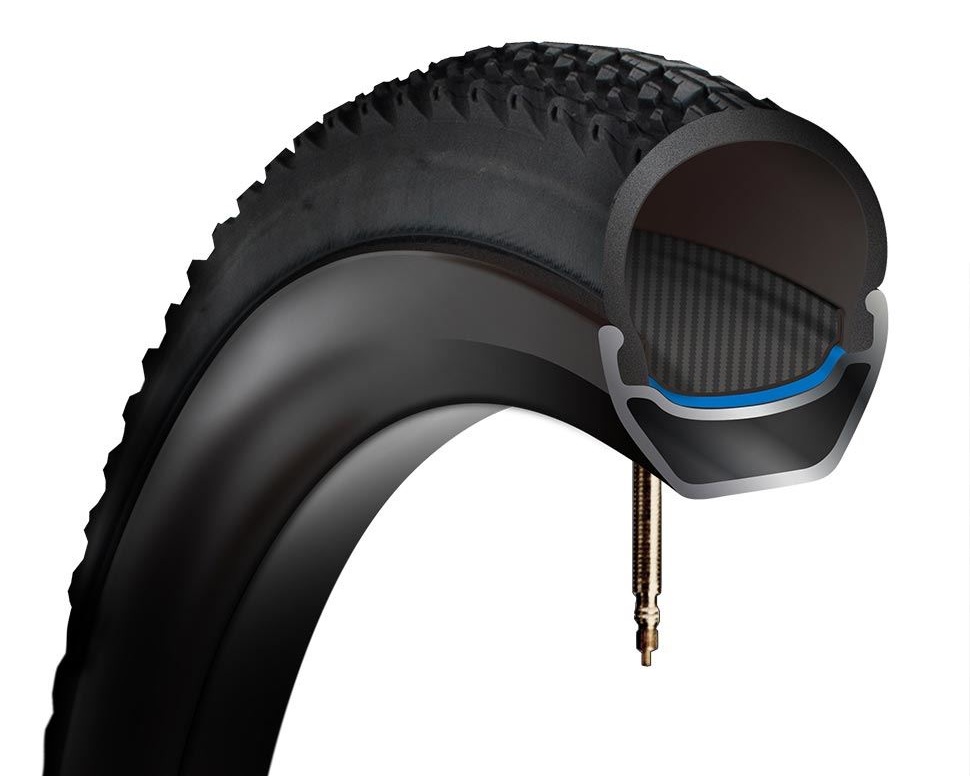
Tools: Tire lever, tire sealant, measuring cup or injector, valve-core remover
If you’re using a sealant-injector system: Reinstall the loose tire bead, taking care not to dislodge the bead on the other side of the tire. Use the valve-core remover to unthread the core counterclockwise, then remove it and set it aside. Shake the sealant bottle for 10 to 20 seconds to thoroughly mix its contents, then measure out the appropriate amount for your tire size into the injector chamber:
Two ounces for road tires (up to about 28 millimeters)
Three ounces for 700c gravel or 27.5 mountain tires
Three to four ounces for most 29er mountain tires
Five to six ounces for plus-size mountain-bike tires
Seat the injector securely on the valve stem (or push the needle fitting through the valve stem), and then carefully inject the sealant into the tire.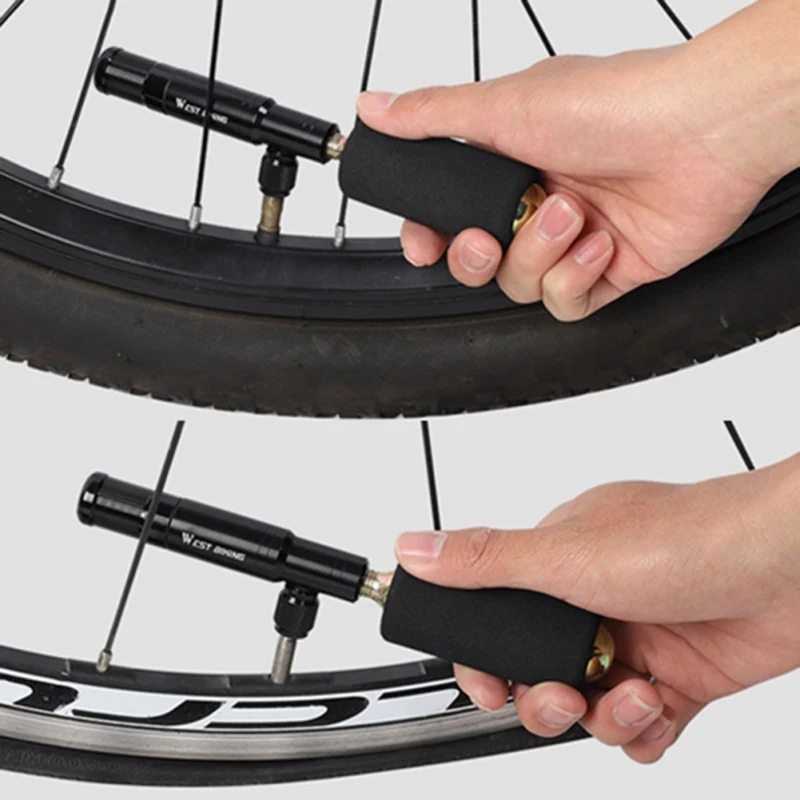 Reinstall the valve core.
If you’re just using a sealant cup: Don’t worry about removing the valve core, since you’re not using it to add sealant. Reinstall the loose tire bead, but leave a final section unmounted. Prop up the wheel with this section closest to the ground but the opening tilted upward to prevent spillage. Shake the sealant bottle for 10 to 20 seconds to thoroughly mix its contents, then pour the appropriate amount into the cup, and carefully pour that directly into the tire at the unmounted section. Grab the wheel and gently rotate the unmounted section up to 12 o’clock, so that the sealant flows into a fully mounted section of the tire where it’s less likely to leak out, and wrestle the final section of tire bead onto the rim (you may need the tire lever).
Tools: Floor pump, soapy water, small paintbrush
Seating tubeless tires takes a lot of air rushing into the tire very fast to seat the tire bead into the rim lock.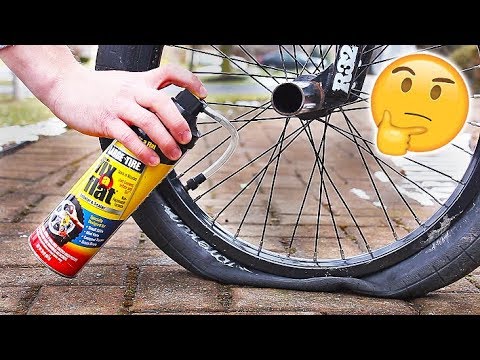 You might be able to do this with a floor pump, but you may need a higher-volume air source.
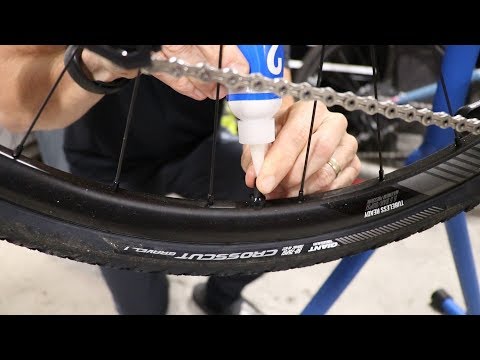
Take the paintbrush and dip it in the soapy water, then run it along the tire sidewall where the loose tire bead and rim bead lock meet. The soapy water helps the tire bead slip into place more easily.
If you’re using a floor pump: Because you’ve already seated one side of the bead, you may be able to inflate the tire with a floor pump. It takes some effort and maybe a little luck. First, thread the wheel skewer or axle through the hub—that provides something to grab as you spin the wheel to disperse sealant. Then firmly seat the pump chuck on the valve stem (making sure the stem core is fully open), and pump full strokes as fast as you can to get the installed but unseated tire bead into the rim’s bead lock. Again, you’ll hear those telltale snaps and pops. If you hear that, keep pumping! Pump to a few psi short of the maximum inflation listed on the tire sidewall.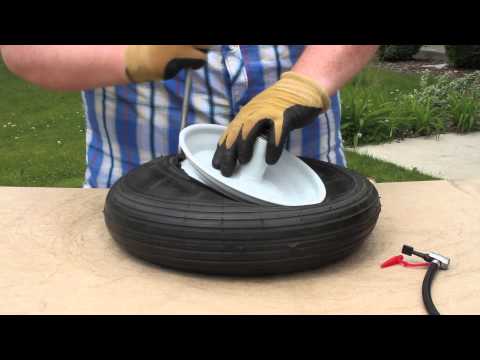 Quickly remove the pump chuck, grab the quick-release lever on the wheel skewer or axle, and spin the wheel for a minute or so, rotating the axis back and forth. This helps distribute the sealant evenly inside the tire. If you see sealant spraying out anywhere for more than a few seconds, stop; the tire’s not fully seated. Also: if you are pumping quickly for at least 30 seconds but the tire won’t hold any air, stop; the tire likely won’t seat with just a floor pump.
Secondary protocol: If you can’t get the tire bead to fully lock in the rim, you’ll need a higher volume of air delivered faster. This is where the CO2 cartridge inflator you normally use for trailside-flat repairs comes in or the special tubeless-inflation systems we mentioned above. Another option is a pump with integrated booster chambers, like the Bontrager TLR Flash Charger or the Topeak JoeBlow Booster, although these get mixed reviews.
In any case, the process is basically the same with a booster or combo pump: charge the booster chamber, securely fasten the inflator chuck around the valve stem, then release the air into the tire.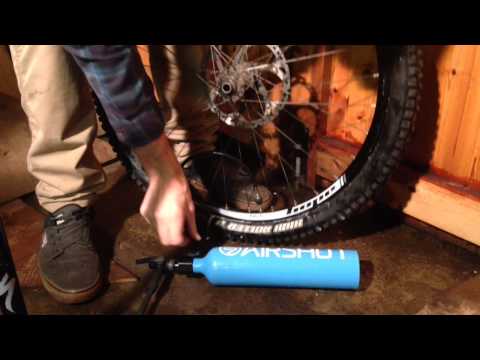 If you’re using a CO2 inflator, use the largest cartridge you can find for mountain tires (up to 20 grams). If the CO2 cartridge successfully seats the bead, it may still not be at the full pressure needed to ensure a complete seal to the system. Remove the inflator, and switch to the floor pump, topping off the pressure to a little less than the listed maximum sidewall pressure.
Something to consider: stand-alone tubeless boosters cost $50 or more. Booster and pump combos cost $120. Pancake-style air compressors start at $99, plus $30 or so for a Presta attachment.
Whichever method you use, once the tire seats, grab the wheel by the quick-release or through-axle lever, and spin it to disperse the sealant inside. Success? Awesome. Check for obvious sealant leaks at the sidewall and valve stem. If you don’t see any, install the wheel on the bike, and ride slowly around the neighborhood—this helps the sealant foam and plug any microscopic hole in the system. Leave the tire inflated at the higher pressure, which helps ensure that the tire stays sealed.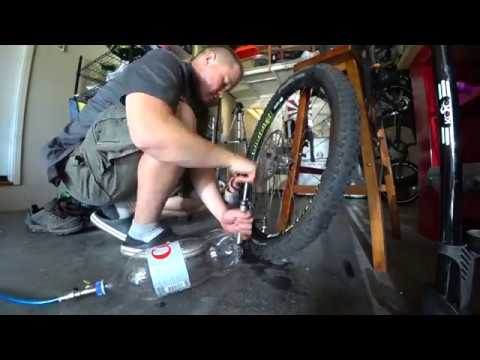
If this process didn’t work, the problem may not be something you can fix at home. In that case, we recommend going to a shop.
Tubeless tires can hardly be called the know-how of the bicycle industry, however, they still raise questions for many. The topic itself, as a rule, is surrounded by a lot of skepticism and distrust, which are more often explained by a lack of understanding of basic things and a lack of experience in riding such wheels. To dispel all these doubts, we answer the main questions related to tubeless technologies.
These are bicycle tires that do not have a tube. At the same time, tubeless technology is not only about tires. We are talking about a whole wheel system, which also includes a special rim and a sealant that gives the wheel anti-puncture properties. The tubeless concept makes the bike more comfortable to use and improves its riding performance, which will be discussed in order.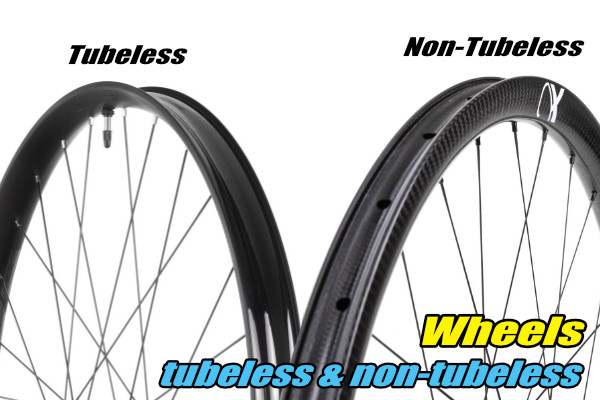
How long ago did this technology appear and can it be trusted?
Those who hear about bicycle tubeless for the first time usually tend to be suspicious of them. You can dislike this technology for subjective reasons, but you definitely shouldn’t distrust it. Tubeless tubes have been massively used for cars and motorcycles for several decades, and during this time they have not given reason to doubt their reliability.
The first tubeless systems for bicycles appeared in 1999, when the French rim brand MAVIC, in collaboration with tire manufacturer Hutchinson, presented their concept of a simple and effective tubeless wheel. In the 2000s, this technology remained the prerogative of mainly professional athletes, who quickly appreciated its main advantages: lighter weight, more air in the wheel, good "traction" and durability.
In recent years, tubeless has finally ceased to be perceived as something exotic. For example, today a significant part of the MTB and almost all touring cars come with such wheels as standard.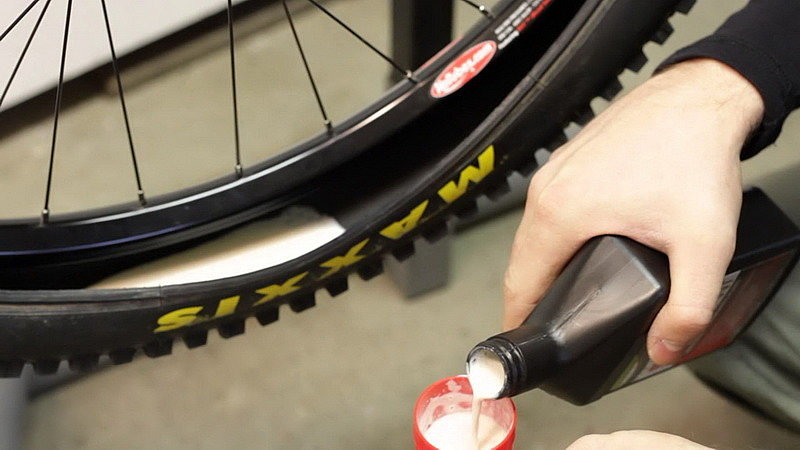 A wide variety of sealants are also available on the market, and the number of those who are discovering the benefits of tubeless technology is steadily increasing.
The tubeless system provides a special rim and tires that are labeled tubeless ready or TR. However, the rims themselves are easy to distinguish visually - they have a low side and characteristic walls with recesses, forming a kind of lock in which the tire cord is wedged when air is injected. Due to this, in the inflated state, the rubber reliably and hermetically “sits” on the rim, without breaking off the wheel even at low pressure. The rim itself is additionally glued with a sealing tape, after which the nipples are installed separately.
The benefits of tubeless wheels are revealed no matter how often and what kind of bike you ride: whether it's weekend trips, extreme downhill or long-distance touring. Nevertheless, for certain categories of cyclists tubeless still open up more opportunities: first of all, we are talking about those who are seriously passionate about off-road.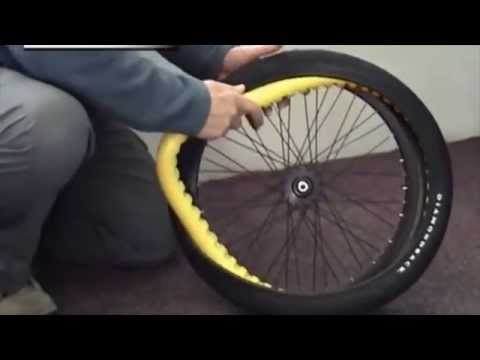
When actively driving off-road with tubeless tubes, you can ride on lowered wheels and at the same time not be afraid of such an unpleasant type of puncture as a snake bite. Low tire pressure, in turn, gives better handling, dampens vibrations more effectively and generally provides more comfort on difficult tracks. If we are talking about cyclists, then they appreciate tubeless for their anti-puncture qualities.
Road bikes also use tubeless wheels. Moreover, they are the pioneers of this technology. But road tubeless tubes are a different story: they are designed for different operating pressures and have tangible design differences. Therefore, further we will talk mainly about those tires that are put on mountain, touring and city bikes.
These are the two rim formats that define the features of a tubeless wheel assembly. BST is a standard that involves the installation of a special sealing tape that prevents air from leaking through the holes in the spokes. This is the most common version of tubeless systems.
UST is a blind rim in which an additional bridge isolates the spoke holes. Thus, there is no need for laying a sealing tape. In practice, this greatly simplifies life, because when installing a tire (especially without proper experience), the tape tends to crush, which is why you have to reassemble the wheel. It is easy to guess that such rims also have a drawback - their price.
The tubeless system in the form in which we wrote it above is already a full-fledged wheel, it can be installed on a bicycle and hit the road. But there is an important nuance. First of all, tubeless tubes are valued for their anti-puncture qualities: for this, a small amount of a special liquid, a sealant, is poured inside the tire.
Yes, you can. But you should not do this. Firstly, this is illogical: for no reason you are depriving yourself of the main advantage of tubeless - the anti-puncture effect. But more importantly, it is very difficult (or even impossible) to inflate such a tire in a completely flat state with a portable pump: to do this, you need either a strong floor pump or a booster. Naturally, no one will take such bulky things with them on the road. Filled with sealant 95% of punctures "seal" without a critical loss of pressure, and in most cases there is no need for even light pumping. Thus, the probability of being with a flat tire is very low.
So, if you put tubeless, sealant is still needed. Such fluids are easy to find in any bike shop, they are inexpensive and require replacement on average once every three to four months, so there is no need to talk about any inconvenience. Yes, in order to cope with the fill, you need to acquire a certain skill, but this is much easier than constantly changing broken cameras. In addition, sealant can be replaced once a season in a specialized service.
Bicycle sealants are based on fine particles (rubber or polymer fibers) suspended in a liquid carrier.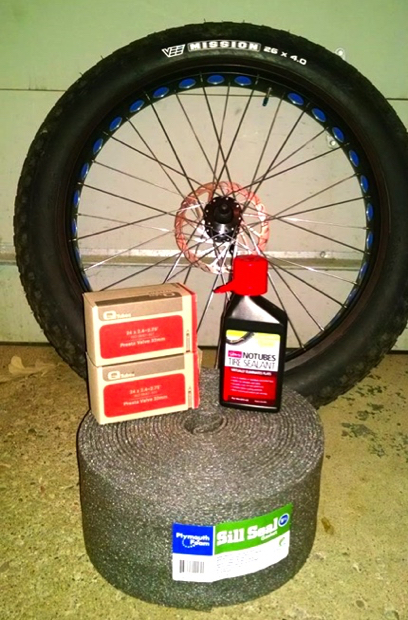 Inside the wheel, the sealant does not polymerize: it is in a liquid state and is distributed along the inside of the tire during movement. When a puncture occurs, the air flow begins to push the solution out. A fine suspension clogs the hole, and the sealant dries quickly. Thus, there is a reliable "sealing" of the puncture.
If we talk about typical punctures - collisions with thorns, wires, small glasses - such damage is self-healing without a noticeable loss of pressure. Usually, a puncture can only be guessed from a small spot on the surface of the tire. Naturally, the sealant works with more complex damage. You can count on it even if you pierce the wheel with a thick nail, 4-5 mm in diameter. If you don't understand how a liquid can seal such holes, you can watch numerous crash tests on YouTube that demonstrate the miraculous properties of sealants.
The consumption per tire is from 50 to 100 ml. If we are talking about standard MTV tires, the golden mean is about 60 ml per wheel.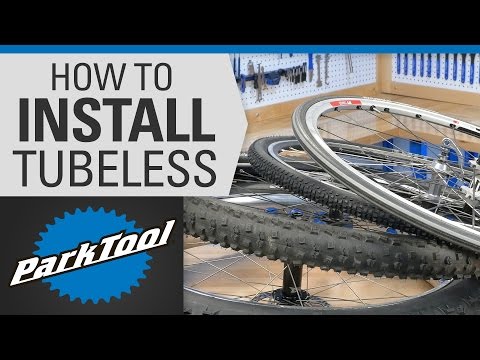 The exact dosage will always be written on the bottle. It is difficult to get confused even for those who do not like to read instructions: most sealants have measuring containers or a dosage scale on the bottle itself.
Here, too, everything is conditional and depends on the characteristics of the specific composition and intensity of punctures. In the absence of serious damage that entails the leakage of a large volume of sealant, you can easily skate a whole season on one fill. Some cyclists prefer to do an incomplete start-up gas station and gradually add 20-30 ml of fluid every two to three months. You can also navigate by how effectively the sealant works: if you see that small punctures are sealed with a strong deflation of the wheel, it may be that the composition is no longer enough and it needs to be added. Be that as it may, sealant is a very economical thing that lasts for a long time.
The sealant inside the tubeless tends to dry out, forming a characteristic film. Whether or not to clean the tire cavity is up to you. This is a purely aesthetic moment, which does not affect the operation of the anti-puncture fluid. The sealant can simply be added as it dries and not bother with unnecessary worries. It is more likely that the tire will completely wear out than it will have time to completely clog with dried filler.
Serious damage - large diameter punctures, small cuts, run over nails with subsequent tire rupture - are repaired using special repair worms. These are rubber or fibrous bands that are inserted into the hole to reduce its area and allow the sealant to seal the puncture.
With long longitudinal cuts it is more difficult. Here you need to either sew up the dissection with nylon threads, or stick a patch on the inside of the tire. You don’t have to worry about the tightness of the repair site - the sealant will do this work, of course, if it does not have time to leak out. But being able to inflate a completely flat tire with only a portable pump will require skill.
In fairness, we note that such complex injuries are rare for most cyclists. But for those who are seriously passionate about off-road, it is better to play it safe with a spare camera. In this case, having caught a cut, you can always drain the sealant, unscrew the nipple from the rim and install a regular camera. And in order not to drive with a “hernia” protruding outward, we recommend placing, for example, a bill folded in half under the cut on the tire.
Tubeless allows you to forget about such an unpleasant form of damage as a "snake bite" forever. It usually happens when at full speed you catch a pothole in the pavement, unsuccessfully jump onto a curb or run into a stone on a downhill. Hitting the edge of a hard object, the tire is crushed, and the rim walls work like incisors, damaging the chamber in two places. In tubeless wheels, this scenario is excluded, because. there is nothing to break through here. Of course, it can be assumed that the rim will cut the tire itself, but this should be a blow of enormous force, which is almost never encountered in practice.
Rejection of the chamber increases the volume of air in the wheel. This changes the contact patch (it becomes flatter) and allows the wheels to better absorb off-road bumps. Add here the ability to ride at low pressure, without being afraid of a snake bite, and it becomes completely clear why tubeless lovers of hard off-road riding so idolize. Soft tires with a large contact patch "fit" all the bumps in the road, giving excellent traction on rocks, forest primers and other off-road.
In addition to traction, tubeless tires improve shock absorption, dampen vibrations better, and generally provide more off-road comfort. At the same time, to get the most out of this rubber, you need to experiment a lot with tire pressure, trying to find the indicators that will best suit your individual riding style.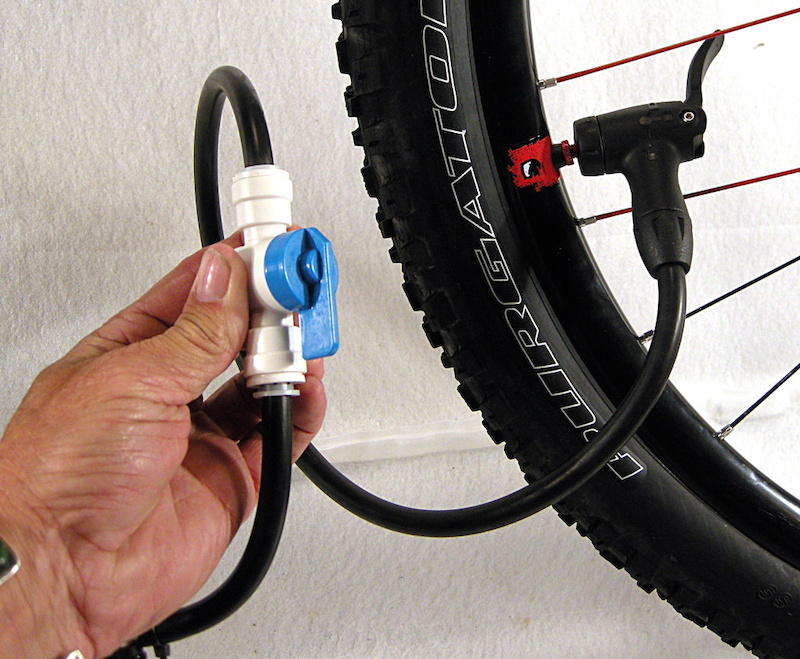
Finally, the camera is extra grams. By refusing them, you can save an average of 70-100 g of weight on each wheel. For some, this may seem like a formality, but it is worth considering the fact that extra grams on the periphery of the wheel have a stronger effect on driving performance. This difference is especially felt on road bikes: road bikes, gravel, touring.
They also exist. Moreover, it is far from formal. First, it's the price. The difference becomes especially noticeable when you buy tubeless systems separately: rims, tires + small things (tape, removable nipples, sealant). For tubeless you will have to pay an average of one and a half times more than for ordinary wheels, plus or minus the same class. And if we are talking about more advanced UST rims, then this means another + 30-40% to the cost.
With tubeless by default, everything is more difficult in terms of installation (here we are talking about conventional BST systems).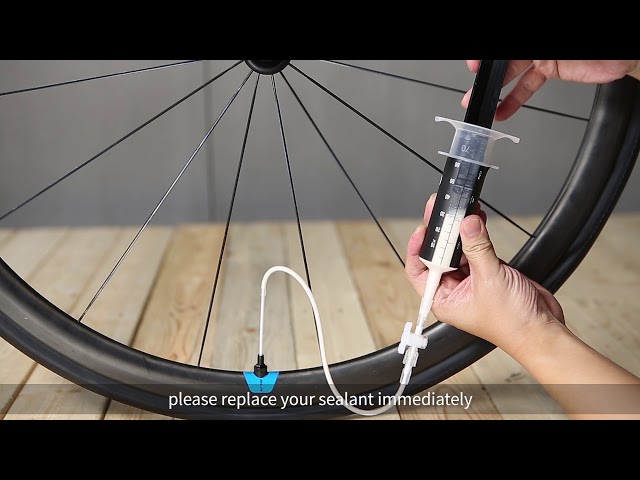 You need to learn how to properly glue the tape, accurately insert the nipples, carefully install tight rubber, making sure not to displace the tape and not fill everything with sealant. On the other hand, all this comes with experience, but what you will always have to put up with is the difficulty with pumping a completely flat tire.
A tubeless tube cannot be inflated until its landing board snaps into place on the rim. To do this, you need to sharply introduce air into the tire. The tire should straighten up and fall into the grooves with a characteristic click - then it can be safely pumped further. This all sounds simple if there is a compressor in the garage. Putting a tubeless tube into the grooves by pumping air with an ordinary floor pump is quite difficult, and almost impossible with a portable bicycle pump.
All this makes life much more difficult. But there are solutions. In the field, a compact can of compressed air can help out. At home, installing tubeless tubes greatly simplifies the booster. This is a cylinder into which a high pressure is pumped with a pump, then it is connected to a nipple, the valve is lowered - and the air from the reservoir pumps up the wheel sharply.
As you can see, tubeless cameras also have enough disadvantages, but it is wrong to consider them in isolation from the advantages. For example, the probability of being with a completely flat tire away from home is very low, due to the anti-puncture qualities. Complicated installation is offset by the lack of punctures and roadside repairs. And by overpaying in price, you save on interchangeable cameras, and, of course, win as a roll on off-road.
A valve is the simplest device that connects the wheel chamber to the pump tube for pumping air. As soon as the pump is disconnected, the nipple does not allow the pressure created in the chamber or tire to decrease.
Its design is quite simple, and this is the main advantage over other elements:
 Its opening comes from exposure to air, with the end of the pressure, the valve closes, not allowing it to go outside;
 When a tubeless valve fails, the tire will lose pressure. The problem is quite insidious, because of it, a wheel can break at high speed. What to do if the nipple device in a tubeless tire is broken?
In most cases, the pressure in the tire drops slightly, and it is possible to get to the tire shop, where they will replace the defective element, and you can continue the trip.
But sometimes there are situations when the air-permeable valve is jammed, or it froze in the cold in a pressed position due to moisture that got on it. The wheel in this case descends immediately, and further movement is impossible.
What is done in such situations? It is recommended to move from simple actions to complex ones:
 Remember that a heavily deflated wheel has more contact with the road surface, additional friction is created, the tire heats up and deforms, and the likelihood of damage to the wheel rim increases. Therefore, it is not advised to operate transport in such a state for a long time;
 So, if the tire is flat from time to time, the problem may not be in the puncture, but directly in the valve. From prolonged use, through cracks appear in the nipple through which air escapes. To perform a replacement, there is no need to use the services of specialists or bead the wheel yourself.
Knowing the nipple structure, tubeless tires are easy to repair with your own hands, but for this you will need to prepare certain tools.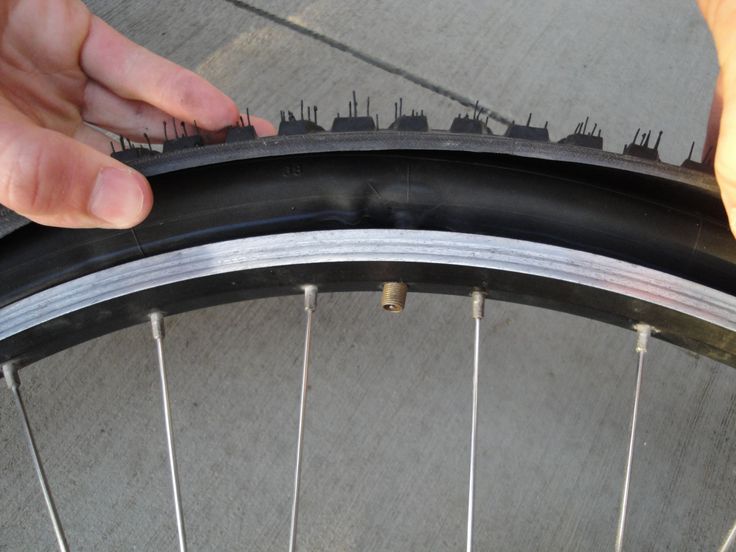
This option is suitable for both stamped metal wheels and cast aluminum alloy wheels. To work, you will need a hook, a cone-shaped tube, a pusher. For the first part, a wire with a cross section of 2 - 3 mm is needed, so that it is more convenient to work with a hook, it is recommended to attach a handle to it. The size of the hook should allow it to easily enter the nipple.
The pusher is made from a steel bar and a nipple cap soldered to it. It is advisable to provide a handle for this tool.
The cone-shaped tube is made from sheet metal. The edges are welded because the solder seam cannot withstand the pressure created. The diameter of the holes of such a tube should correspond to the size of the nipple: the edge with a large section should slightly exceed the seat of the nipple, and the smaller one should correspond to the hole in the rim.
Once everything is ready, we get to work. The algorithm of actions is as follows:
 As soon as the nipple is in the rim, there will be a click, suggesting that the gum has straightened;
 If you don't have the time or inclination to make tools, you can purchase tubeless valve replacement kits. But they are quite expensive.
If the replacement is carried out at a low temperature, it is recommended to warm up the nipple beforehand in order to soften the rubber and make it easier to work.
Manufacturers of bicycles and accessories for them use several varieties of such a device. The design of one of them was developed in America, such a nipple is installed on a bicycle or car, on a bicycle fork and a shock absorber. Structurally, it consists of a cylindrical body, where a valve is screwed in, blocking the air outlet under the influence of a spring. This option is even used in refrigerators to relieve pressure if necessary.
The second variant of the nipple is the body, on which the external thread is cut. Inside there is a fitting with inlet and outlet holes, air is pumped into the bicycle chamber through such a valve. A special nut is put on top of the valve.
Sport models, road bikes and race bikes with tubeless tires are fitted with Presto valves. They have certain features:
Air is retained by the pressure created inside the wheel. To lower it, you must press the protruding valve. This design ensures that the wheel chamber is quickly inflated, even if you operate with a low-power hand pump.
This version of the nipple is installed on bicycles and cars, in balls, life jackets, inflatable rafts and mattresses.
Recently, nipples have been actively used in the agricultural sector for breeding birds and rabbits.