by Rachel Jones
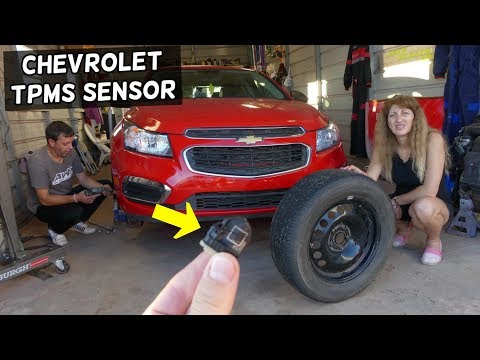
Have you recently rotated, replaced, or inflated one of the tires on your Chevy Traverse? You may see a warning sign on your dashboard indicating that your tire pressure isn’t balanced. You will need to reset your TPMS system to get rid of this signal and ensure the safety of your vehicle.
The reset process requires a TPMS diagnostic relearn tool you can purchase from your auto dealer or Amazon.
Contents
SUBJECT VEHICLES: Chevrolet Traverse and GMC Acadia, model years 2007 – 2013.
RELEARN PROCEDURE? Yes.
SPECIAL TOOLS NEEDED? TPMS special tools EL-46079 or EL-50448 may be used.
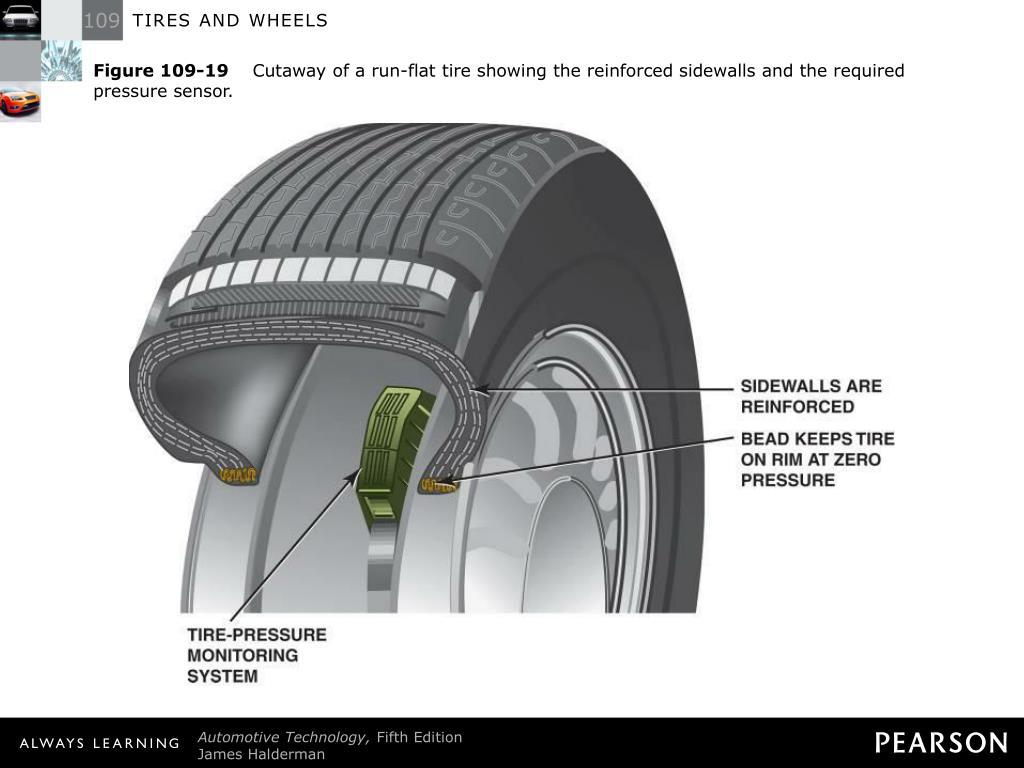
The tire pressure monitor system (TPMS) of the Chevrolet Traverse and GMC Acadia, model years 2007 – 2013, alerts the driver when a large change in the pressure of one tire exists while the vehicle is being driven.
The system will also display individual tire pressures and their locations on the driver information center (DIC). The TPMS uses the engine control module (ECM), body control module (BCM), instrument panel cluster (IPC), DIC, remote control door lock receiver (RCDLR), a radio frequency (RF) transmitting pressure sensor in each wheel/tire assembly, and the serial data circuit to perform the system functions.
When the vehicle is stationary, the sensors go into stationary mode. In this mode, the sensors transmit once every 60 minutes to minimize sensor battery consumption. As vehicle speed increases, the sensors go into drive mode, in which they transmit once every 60 seconds.
NOTE: The sensor’s pressure accuracy is about 2 psi (14 kPa) at temperatures from 14 degrees Fahrenheit to 158 degrees F (-10 degrees Celsius to 70 degrees C). The RCDLR receives and translates the data contained in each sensor transmission, then sends the tire pressure and tire location data to the DIC. When the TPMS detects a significant loss or gain of tire pressure, a “CHECK TIRE PRESSURE” message will appear on the DIC, and the low tire pressure warning indicator is displayed on the IPC.
The RCDLR has the ability to detect malfunctions within the TPMS. Any malfunctions detected will cause the DIC to display a “SERVICE TIRE MONITOR” warning message.
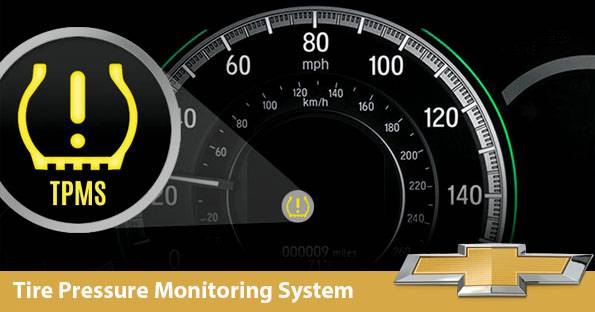
Tire pressure monitor warning indicators
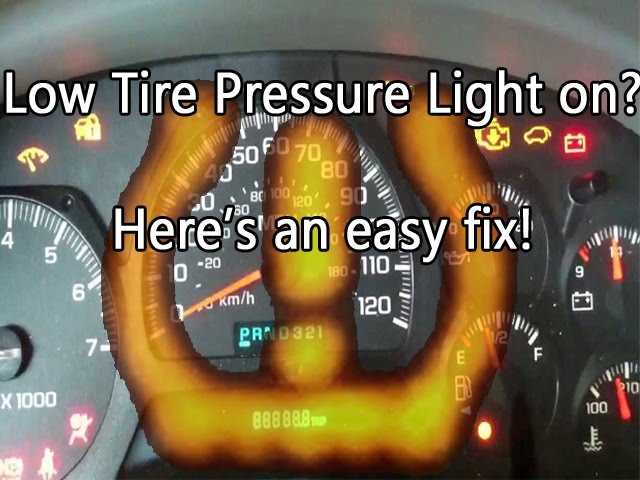
When the TPMS detects a significant loss of tire pressure, the “CHECK TIRE PRESSURE” message is displayed on the DIC and the low tire pressure indicator is displayed on the instrument panel. Both the message and indicator can be cleared by adjusting the tires to their recommended pressures and driving the vehicle above 25 mph (40 km/h) for at least two minutes. If the warning indicators are still on or the display shows dashes instead of a value, there is a problem in the TPMS. The RCDLR has the ability to detect malfunctions within the TPMS.
Any malfunctions detected will cause the DIC to display a “SERVICE TIRE MONITOR” warning message. See appropriate manufacturer service information.
Reset procedures
NOTE: If a tire pressure sensor or the RCDLR is replaced, or if the wheels have been rotated, the tire pressure sensor must be retrained. When the tire pressure warning light illuminates and a warning message appears, immediately check air pressure of all tires and adjust to the specified pressure. Drive the vehicle above 25 mph (40 km/h) for a few minutes and ensure the warning indicators go out.
Tire pressure sensor relearn
NOTE: Once the learn mode has been enabled, each of the sensor’s unique identification (ID) codes can be learned into the RCDLR’s memory.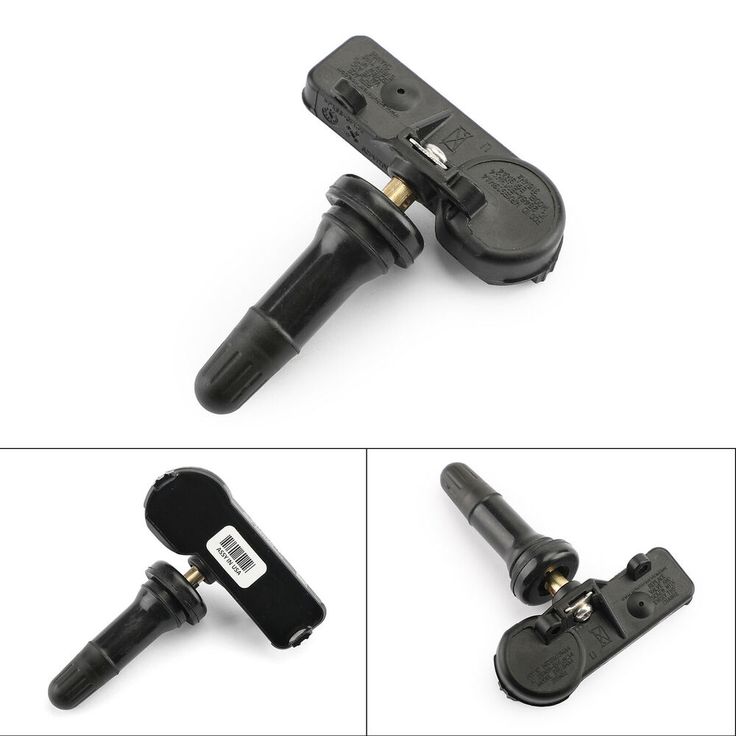 When a sensor’s ID has been learned, the RCDLR sends a serial data message to the BCM to sound a horn chirp. This verifies the sensor has transmitted its ID and the RCDLR has received and learned it. The RCDLR must learn the sensor IDs in the proper order to determine the correct sensor location. The first learned ID is assigned to left front, the second to right front, third to right rear and fourth to left rear.
NOTE: Each turn signal will illuminate one at a time indicating which location is to be learned next.
NOTE: Each sensor takes a pressure measurement sample once every 30 seconds while in stationary mode. If the tire pressure increases or decreases by more than 1.2 psi (8.3 kPa) from the last pressure measurement, another measurement will occur immediately to verify the change in pressure. If a pressure change has indeed occurred, the sensor transmits a learn mode. When the RCDLR receives a learn mode transmission while in sensor learn mode, it will assign that sensor’s ID to the location on the vehicle relative to the order in which it was learned.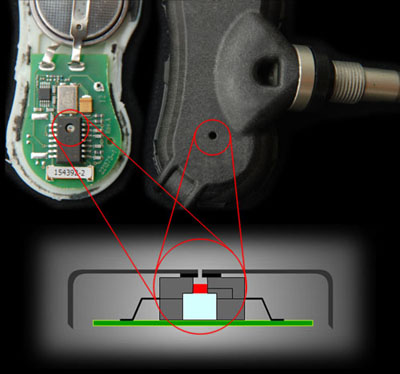
NOTE: The TPMS will cancel the learn mode if more than two minutes have passed and no sensors have been learned, or if the ignition switch is turned to the OFF position. If the learn mode is canceled before the first ID is learned, the RCDLR will remember all previously stored IDs and their locations. As soon as the first sensor ID is learned, all other IDs are erased from the RCDLR’s memory. If the learn mode is canceled after the first ID is learned, the RCDLR will store the IDs as invalid and the DIC will display dashes instead of tire pressures.
NOTE: In the following procedures, a TPMS special tool (EL-46079 or EL-50448) may be used in place of increasing/decreasing pressures to enable the sensor. To use, place the activator antenna against the tire sidewall close to the wheel rim at the valve stem location, then press and release the ACTIVATE button.
NOTE: If TPMS special tool EL-46079 or EL-50448 is used, and the vehicle is having trouble entering relearn mode, check the batteries in the activation tool. Low batteries may allow some functions to work, but not allow the vehicle to perform the learn function. When the internal battery is fresh (fully charged), the indicator is “full” or all dark. When the battery is depleted, the indicator shows “empty” or all light.
The learn mode can be enabled using any one of the following three methods:
NOTE: Before proceeding with any of the steps below, ensure that no other sensor learn procedure is being performed simultaneously and that no tire pressures are being adjusted on another TPMS-equipped vehicle within close proximity.
Using the keyless entry system
1) Turn the ignition switch to the ACCY position. Apply the parking brake.
NOTE: The left front turn signal will also illuminate to indicate the learn mode has been enabled.
2) Simultaneously press the keyless entry transmitter’s lock and unlock buttons until a double horn chirp sounds, indicating the learn mode has been enabled.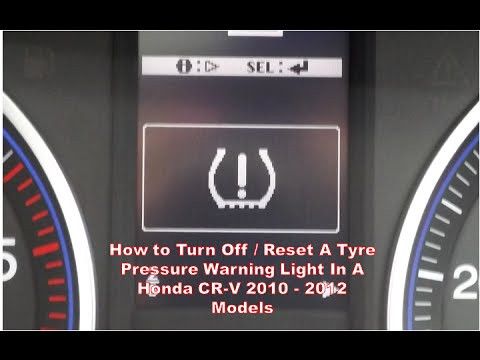
3) Activate the sensors by one of the following methods:
4) After the horn chirp has sounded and the right turn signal has illuminated, repeat the procedure for the next three sensors in the following order: right front, right rear, left rear.
5) After the left rear sensor has been learned, a double horn chirp will sound, indicating all four sensor IDs have been learned. Turn the ignition switch to the OFF position. Adjust all tire pressures to specification.
Using a scan tool
1) Connect the scan tool. Turn the ignition switch to the RUN position. Apply the parking brake.
2) Using a scan tool, select “SPECIAL FUNCTIONS.”
3) Select “SENSOR LEARN MODE ENABLE,” and press the ENTER key.
NOTE: The left front turn signal also will illuminate to indicate the learn mode has been enabled.
4) Press the ON soft key. A double horn chirp will sound, indicating the learn mode has been enabled.
5) Activate the sensors by one of the following methods:
6) After the horn chirp has sounded, repeat the procedure for the next three sensors in the following order: right front, right rear, left rear.
7) After the left rear sensor has been learned, a double horn chirp will sound, indicating all four sensor IDs have been learned. Turn the ignition switch to the OFF position. Adjust all tire pressures to specification.
Using the DIC
1) Turn ignition switch to RUN position. Apply parking brake.
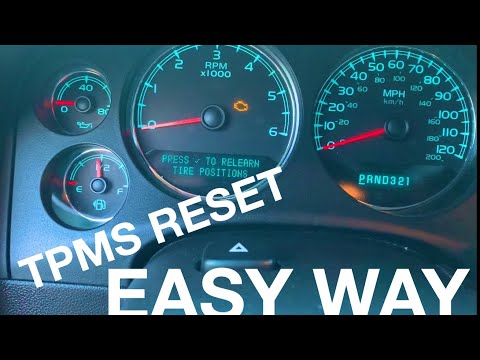
2) Press the “INFO” button on the DIC, until the “RELEARN TIRE POSITIONS” message display on the DIC. Then press the “SET/RESET” button on the DIC, until a double horn chirp will sound, and the DIC displays “TIRE LEARNING ACTIVE”.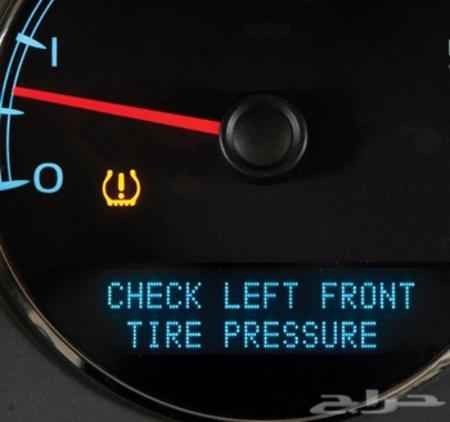 This will indicate the learn mode has been enabled.
3) Activate the sensors by one of the following methods:
4) After a horn chirp has sounded and the right turn signal has illuminated, repeat the procedure for the next three sensors in the following order: right front, right rear, left rear.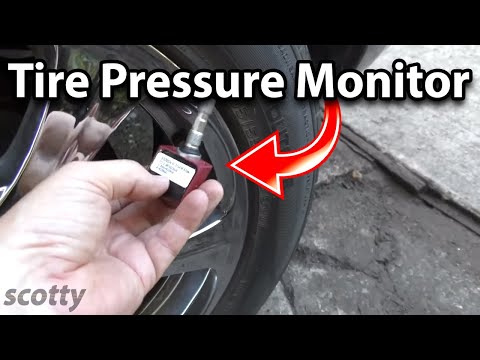
5) After the left rear sensor has been learned, a double horn chirp will sound, indicating all four sensor IDs have been learned. Turn the ignition switch to the OFF position. Adjust all tire pressures to specification.
Demounting/mounting procedures
CAUTION: The tire should be demounted from the wheel using the tire changer manufacturer’s instructions. Use the following information to avoid damage during the demounting/mounting procedures.
NOTE: If vehicle’s tires are replaced with those not having a TPC spec number, the TPMS may give an inaccurate low pressure warning. Non-TPC spec tires may give a low pressure warning that is higher or lower than the proper warning level achieved by TPC spec numbered tires.
NOTE: If a tire pressure sensor or the RCDLR is replaced, or if the wheels have been rotated, the tire pressure sensor must be retrained. See reset procedures.
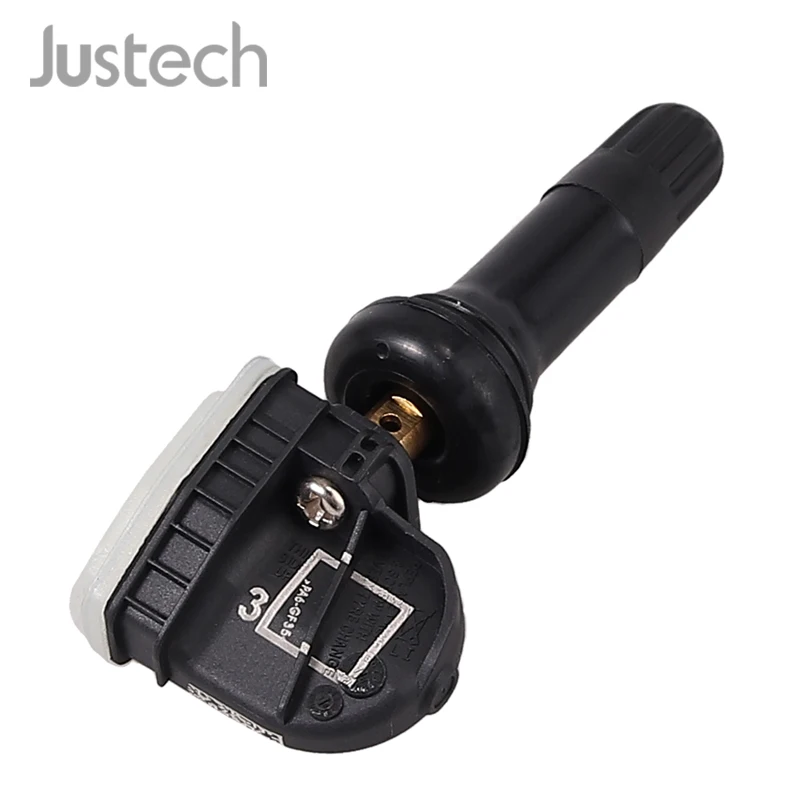
Tire pressure sensor
CAUTION: Do not inject any tire liquid or aerosol tire sealant into tires, as this may cause a malfunction of the tire pressure sensors.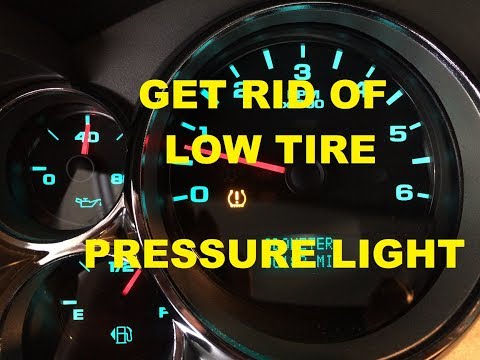
If any tire sealant is noted upon tire demounting, replace the sensor. Also remove all residual liquid sealant from inside the tire and wheel surfaces.
There are currently two different kinds of TPMS sensors in use on the vehicles covered in this article. Identification of which sensor is in use can easily be made after the tire has been removed from the wheel by referring to Figures 1 and 2.
Removal and installation
1) Raise the vehicle on a suitable support. Remove the tire/wheel assembly from the vehicle.
2) Demount the tire from the wheel following the tire changer manufacturer’s instructions while paying special attention to the following to avoid damaging tire pressure sensor:

3) If the TPMS sensor is the clamp-in style (Figure 1), follow clamp-in style removal as follows. If it is a snap-in style (Figure 2), follow the snap-in style removal.
Clamp-in style sensor removal
1) Remove the tire pressure sensor nut (see Figure 1).
2) Remove the sensor from the wheel hole.
3) Remove the sensor grommet from the valve stem.
4) Follow the clamp-in sensor installation steps below, to replace the sensor.
Snap-in style sensor removal
1) Remove the TORX screw (3) from the tire pressure sensor (2) and pull it straight off the tire pressure valve stem (1) (see Figure 2).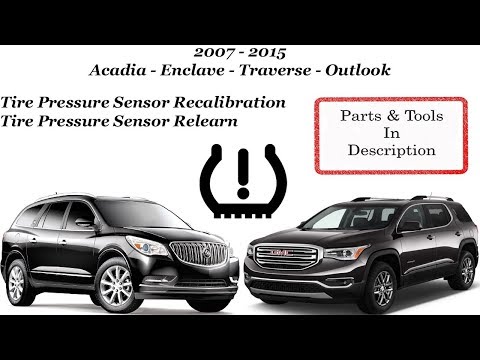
2) Remove the tire pressure valve stem by pulling it through the rim.
3) Follow the snap-in style sensor installation steps below, to replace the sensor.
Clamp-in sensor installation
1) Clean any dirt or debris from the grommet sealing areas. Install the grommet on the sensor valve stem.
2) Insert the sensor in the wheel hole with the air passage facing away from the wheel.
3) Install the sensor nut, and position the sensor body parallel to the inside wheel surface while tightening nut to 62 in.-lbs. (7 N.m).
4) Before installing the tire on the wheel, note the following items to avoid tire pressure sensor damage upon tire mounting:
5) Install the tire on the wheel. Install the tire/wheel assembly on the vehicle. Retrain the tire pressure sensor. See reset procedures.
NOTE: A service replacement tire pressure sensor is shipped in OFF mode. In this mode, the sensor’s unique identification code cannot be learned into the RCDLR’s memory. The sensor must be taken out of OFF mode by spinning the tire/wheel assembly above 25 mph (40 km/h) for at least 10 seconds in order to close the sensor’s internal roll switch.
Snap-in style sensor installation
1) Assemble the tire pressure sensor (2) to the valve stem and install the new Torx screw (3) (see Figure 2).
2) Apply tire soap to the rubber portion of the valve stem.
3) Using a tire valve stem mounting tool, pull the valve stem through in a direction parallel to the valve hole on the rim (see Figure 3).
4) Before installing the tire on the wheel, note the following items to avoid tire pressure sensor damage upon tire mounting:
5) Install the tire on the wheel. Install the tire/wheel assembly on the vehicle. Retrain the tire pressure sensor. See reset procedures.
NOTE: Snap fit TPMS sensors are still shipped in the OFF mode. However, the TPMS no longer needs to be spun to remove it from the OFF mode.
The TPMS sensor will exit its OFF state when the tire is inflated. The technician can then program the vehicle as normal. ?
Torque specifications
Component Ft.-lbs. (N.m)
Wheel Nut 100 (140)
In.-lbs. (N.m)
Clamp-in sensor nut 62 (7)
Snap-in sensor Torx screw 11.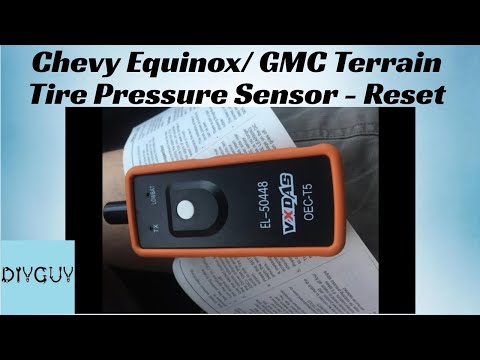 5 (1.3)
Information for this column comes from Mitchell 1’s “Tire Pressure Monitoring Systems Guide” for domestic and import vehicles. Headquartered in Poway, Calif., Mitchell 1 has provided quality repair information solutions to the automotive industry for more than 80 years.
For more information, visit www.mitchell1.com.
To read more TPMS articles, see:
2011-13 Chrysler 200
2008-2010 Hyundai Sonata
2007-13 GMC Sierra and Yukon Series
You are an enthusiastic owner of a recent car, the joy of tactile devices, the integrated technologies should bring you the convenience of using your Chevrolet Traverse, however, which says that the technology speaks of electricity, and as we all unfortunately know, Quite often there are problems to solve. Today we will focus on the tire pressure sensor and specifically the tire pressure sensor. nine0003 how to reset the tire pressure sensor on a Chevrolet Traverse so that this indicator never appears on the dashboard again.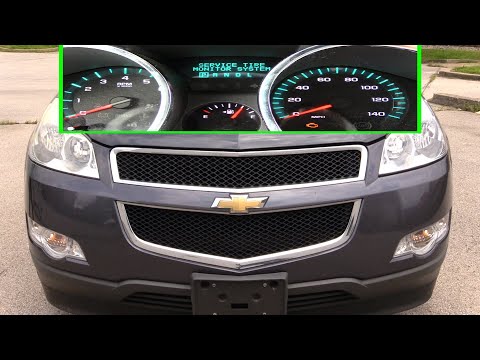 To do this, we will divide our article into two parts: first we will explain the classic case of the tire pressure indicator light and the further operation, and then the case when the tire pressure indicator remains on despite the tires being inflated. so how to reset this tire sensor on Chevrolet Traverse.
First, we will look at the typical methodology for resetting a tire sensor on a Chevrolet Traverse, which if it lights up, here are the basic steps:
Now that you have followed the classic operation of removing the tire pressure sensor on the Chevrolet Traverse, and it didn't work, we'll move on to the second solution, which is, the tires on my Chevrolet Traverse are well inflated, and I still want that light to go out.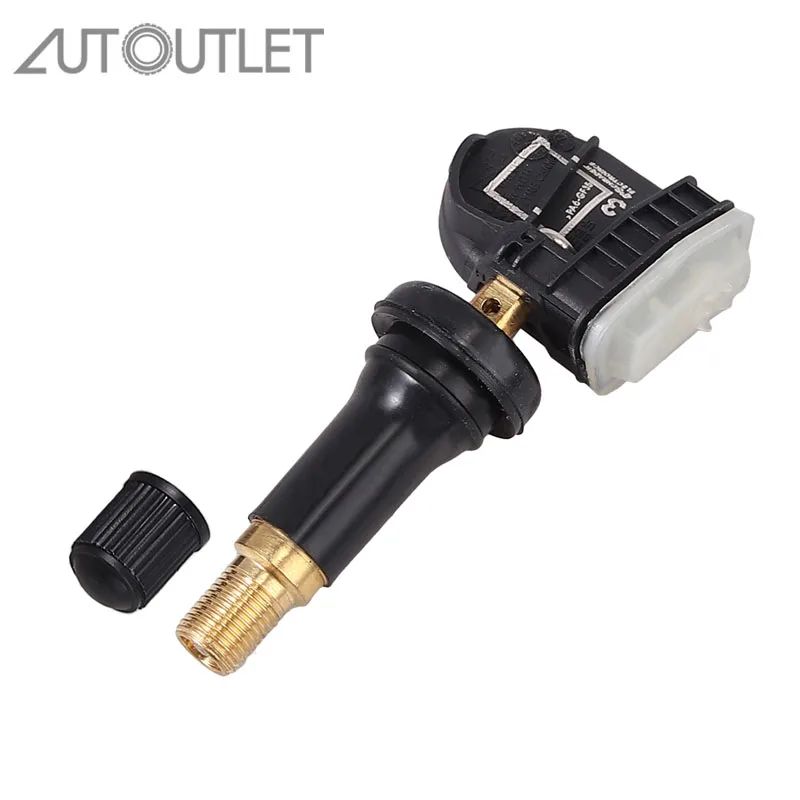 Most likely, this means that you have Faulty tire pressure sensor. This will require to reset the value on your car's dashboard. However, be careful not to do this while driving, as pressure fluctuations will affect your pressure sensors. In most cases you have to go through the vehicle configurations, then you have to find an option to detect inflation or "detect deflation" when in this tab you have to hold the select button or the reset button depending on the year of your Chevrolet Traverse until a message from the car console appears , confirming that the reset is taken into account (usually it takes a few seconds). You can now turn off the ignition and restart your Chevrolet Traverse to see if the tire pressure light has gone out. nine0005
 Keep in mind that in general the unit price is around 120 euros. Another solution that some prefer to use as the problem may recur in some series is to disable the sensors with your carrier and diagnose your vehicle. However, this method is not recommended as it may result in mishandling and malfunction of your Chevrolet Traverse. You now have all the keys to know how to reset the Chevrolet Traverse tire pressure sensor. nine0005
 If you have any further questions about the Chevrolet Traverse, do not hesitate to contact us. Chevrolet Traverse category.
Features:
TPMS Relearn Reset Activation Tool works on most GM series vehicles (Chevy/Buick/GMC/Opel/Cadillac, etc.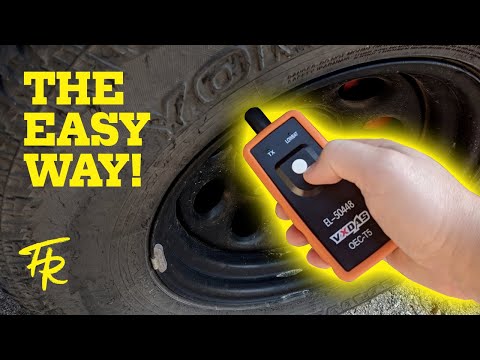 , cars, SUVs, pickup trucks) equipped with Tire Pressure Monitoring (TPM) .
EL-50448 TPMS reset tool can help you reprogram all tires much easier in just 3 steps. Tire reset is easily activated within 1-2 minutes.
It can quickly reset tire sensors after swapping tires or replacing a new tire. nine0106 Hold the tool against the tire sidewall next to the valve stem. Press the learn button while holding the tool against the sidewall of the tire.
Tire Pressure Monitoring Sensor Activation Tool is simple, fast and convenient to use, activates a separate TPM sensor with the push of a button.
This TPMS reset tire pressure monitoring sensor tool is suitable for GM series vehicles after 2010.
Specifications:
Model Name: EL-50448
Material Type: high plastic reinforcement; Metal
Power: 9W
Voltage: 12V
Tips: No Battery
Function: Auto Tire Pressure Sensor Reset Tool
Item Size: 9*6*3cm/3.54*2.36*1.18in
Product weight: 150g/5.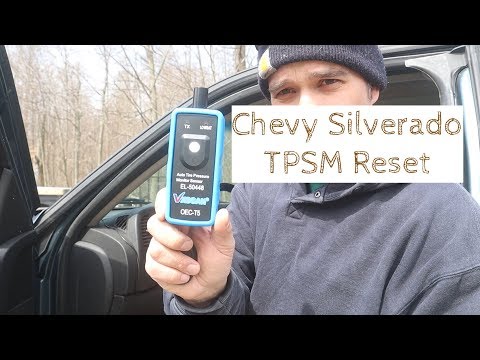 29oz
29oz
Step 1 Enter the learning mode
Set the shift lever to "P"
Turn the ignition switch to "ON"
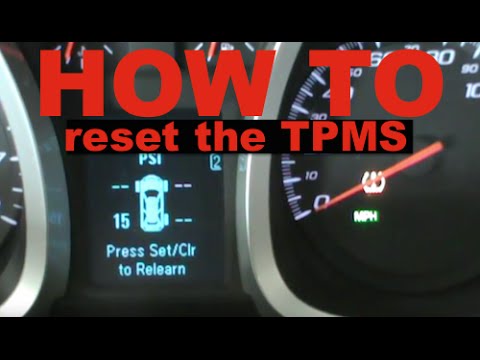
Enter the tire pressure display interface with DIC
DIC shows "Press Set / Ctrl to relearn"
Press "Set/Ctrl"
The turn signal lights up for 3 seconds and beeps twice to enter the learning mode
Step 2. Read the tire pressure sensor information
Start from the front left wheel,
Install the antenna J -46079 or diagnostic tool EL-50448 against the position of the valve core and booster. close to tire sidewall rim
Tire pressure gauge EL-50448 triggered by start switch
Successful reading of tire pressure sensor information when beep sounds once
Step 3. Same method for reading other tire pressure information
Follow the instructions above to read the front right, rear right, and rear left tire pressures.
The turn signals come on for 3 seconds and a double beep sounds when the learning is completed.
Applicable models:
2010 9-5
2010 Acadia, Enclave, OUTLOOK, Traverse (VIN R/V)
2010 Allure, LaCrosse (VIN G)
2010 Antara, Captiva, Terrain, Winstorm
2010 Avalanche, Escalade, Suburban, Tahoe, Yukon (VIN C/K)
2010 Aveo, G3, Barina (VIN S/T)
Buick Excel 2010
2010 Buick Regal (China) )
2010 Camaro (VIN F)
2010 Canyon, Colorado (VIN S/T)
2010 Cobalt, G5 (VIN A)
2010 Corvette (VIN Y)
2010 Cruze (China)
2010 Cruze
CTS (VIN D)
2010 Daewoo Lacetti
2010 DTS (VIN K)
2010 Equinox, Terrain (VIN L)
2010 Express, Savana (VIN G/H)
2010 G6 (VIN Z)
2010 h4/h4T (VIN N)
2010 HHR (VIN A)
2010 Impala (VIN W)
Insignia 2010
2010 Lacrosse (China)
2010 Lucerne (VIN0 H6) 2010 Malibu (VIN Z)
2010 Opel/Vauxhall Astra
2010 Sierra, Silverado (VIN C/K)
2010 SKY Solstice (VIN M)
2010 SRX (VIN N)
2010 STS (VIN D)
2010 VE WM - sedan, Sportwagon, Ute, Lumina, Caprice, HSV
2010 VUE (VIN Z), Captiva Sport
2011 Acadia, Enclave, Traverse (VIN R/V)
2011 Alfeon
2011 Antara, Captiva
Astra 2011
2011 Avalanche, Escalade, Suburban, Tahoe, Yukon (VIN C/K)
2011 Aveo, Barina (VIN S/T)
Buick Excel 2011 Buick China 20106 )
Camaro 2011 (VIN F)
2011 Canyon, Colorado (VIN S/T)
2011 Caprice PPV
2011 Captiva Sport
2011 Corvette (VIN Y)
2011 Cruz
2011 CTS (VIN1 K6)
)
2011 Equinox, Terrain (VIN L)
2011 Express, Savana (VIN G/H)
2011 HHR (VIN A)
2011 Impala (VIN W)
Insignia 2011
2011 Lacrosse (China)
2011 Lucerne (VIN H)
2011 Malibu (VIN Z)
2011 Orlando
2011 Regal (VIN Cierra 20106)
/K)
2011 SRX (VIN N)
2011 STS (VIN D)
2011 VE/WM - Sedan, Ute, Sportwagon, Caprice, Lumina, Omega, VXR8
2011 Volt
2012 Acadia, Enclave, Traverse (VIN R/ V)
2012 Alfeon (2706)
2012 Amp, Volt (VIN R) (Europe)
2012 Antara, Captiva
2012 Astra-J (2857)
2012 Avalanche, Escalade, Suburban, Tahoe, Yukon (VIN C/K)
2012 Aveo Classic, Barina Classic (VIN T)
2012 Aveo, Sonic (2777)
2012 Barina (2774)
2012 Buick Excel (2861) )
2012 Camaro (VIN F)
2012 Canyon, Colorado (VIN S/T)
2012 Caprice PPV
2012 Captiva Sport
2012 Chevrolet Cobalt (2809)
2012 Colorado (Other IO), S10 (South America) 2016 Corvette (VIN Y)
2012 Cruz (2863)
2012 CTS (VIN D)
2012 Equinox, Terrain (VIN L)
2012 Express, Savana (VIN G/H)
2012 Impala (VIN W)
2012 Insignia (2707)
2012 Lacrosse (China) (2710)
2012 LaCrosse (VIN G) (2709)
(VIN) Malibu Z)
2012 Opel Combo-D
2012 Optra, Viva (VIN J)
2012 Orlando (2859)
2012 Regal (China) (2711)
2012 Regal (VIN G) (2708)
2012 Sierra (VIN C) /K)
2012 Sonic (US/Canada) (2775)
2012 SRX (VIN N)
2012 VE/WM - Sedan, Ute, Sportwagon, Caprice, Lumina, VXR8
2012 Verano (US/Canada) (2816)
2012 Volt (VIN R)
2012 Zafira-C (2860)
2013 Acadia, Enclave, Traverse (VIN R/V) (3206)
2013 Alpheon (3094)
2013 Amp, Volt (VIN R) (Europe) (3211)
2013 Antara, Captiva (5376555)
2013 Astra-J Cabriolet / Coupe (5376567)
2013 Astra-J (537657)
ATS (VIN13) ATS (VIN13) 20106 2013 3086)
2013 Avalanche, Escalade, Suburban, Tahoe, Yukon (VIN C/K) (3088)
2013 Aveo, Sonic (Africa, Middle East, AP, South America, CKD, Mexico) (5376711)
2013 AVEO, Sonic (Europe) (5376704)
2013 Barina (5376837)
Kamaro 2013 (VIN F) (3106)
2013 PPV (3105)
2013 Captivate Sports (3101)
Cobalt (3107)
2013 2013 Colorado, Colorado 7, S10, Trailblazer (5392270)
2013 Combo-D
2013 Corvette (VIN Y) (3104)
2013 Cruze (Global) (5377099)
2013 CTS (VIN D) (3085)
Encore (China) ) (5377162)
2013 Encore, Trax (North America) (5377181)
2013 Equinox, Terrain (VIN L) (3100)
2013 Excel (5377155)
2013 Express, Savana (VIN G/H) (3103)
2013 Impala (VIN W) (3102)
2013 Insignia (3098)
2013 Lacrosse (China) (3010 Lase) (VIN G) (North America) (3090)
2013 Malibu (China) (3096)
2013 Malibu (Europe, other IO countries and South America) (2713)
2013 Malibu (North America) (3093)
2013 Mokka, Trax, Tracker (Europe) (5377179)
2013 Onyx (3166)
2013 Orlando (Worldwide) (5377530)
2013 Regal (China) (3099)
2013 Regal (VIN G) (North America) (3089)
2013 Sierra, Silverado (VIN C/K) (3087)
2013 Sonic (US/Canada) (5377994)
2013 Spark (US/Canada), Barina Spark (Automatic) (5421555)
2013 Spin
2013 SRX (VIN N) (3201)
2013 Trax, Tracker (Africa, Australia, Middle East, South America) (5377156)
2013 VE/WM Utah, Caprice, Lumina
2013 Verano (USA/Canada) (5377996)
2013 Volt (VIN R) (North America, Holden) (3210)
2013 XTS (China) (3092)
2013 XTS (North America) (3091)
2013 Zafira-tourer
Packaging sheet:
1 * EL-50448 Dressure Monitor
Customer Reviews
Reviews reviews not yet.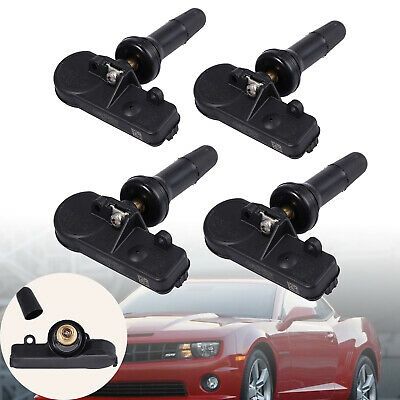
Share your thoughts with other customers and get Cafago points, the first 5 reviews get x2 Cafago points!
Write a review
Be the first to review this product
Best Products More
Learn more