Here’s a quick little trick for you. (If you don’t want to read the whole story, skip to the step by step below)
I found this 2 wheel cart in the garbage at one point. The only thing that seemed to be wrong with it was that it was missing a wheel. I figured it was about a $70 or $80 cart that probably needed a $5 or 10 wheel and tire, so I brought it home. It sat for years. I brought it with when I moved. It sat for another year until I was about to move again and I thought, “This would come in handy when we move.” So I went to Home Depot to buy a wheel & tire. I didn’t think they would have it, but they did! What they did NOT have was the compression nut that holds the wheel on. The guy I asked about it (who inconsequentially was me 20 years ago, except he had a bit more swagger) actually KNEW something! I HATE going to Home Depot, but for a year it was about a mile from my house and the only ‘hardware’ store in NE Minneapolis.
I go to hardware stores a LOT, so I ended up at Home Depot quite a bit. Anyway, unlike most of the employees whose method of helping is to blindly search with you, this guy actually knew where the item was SUPPOSED to be, but informed me that they’d removed a whole drawer from the hardware section. Yet another reason to hate Home Despot. They carry the wheel to fix a cart, but not the nut to the hold the wheel on! Awesome! Later in the week I went to Menards and found the wheel/tire assembly AND the nut.
I got home and it took longer to remove the packaging than to actually install the wheel. The only thing left to do was pump up the other tire, which I decided to do this morning when I got out the pump for my bicycle. I started to pump and realized there was no tube and the tire was completely unseated from the rim. I’ve had this happen before with wheelbarrow and other tires, and it can be nearly impossible to get the tire to reseat. When I was trying to reseat the wheelbarrow tire, I tried something I’d seen on a video. You spray starter fluid inside the tire and then light it. When it lights it quickly expands seating the tire. I could never get that to work, and I’ve tried it on a few different tire/rim combos.
When I was a kid my dad taught me how to seat my own car tires. I had a 77 Dodge van that was perpetually getting flats for a while. We thought someone in our townhouse complex didn’t like my eyesore of a van and kept letting the air out. After spending $10 a half a dozen times or so to have a shop reseat the tire, my dad told me that I could reseat it myself with dish soap and an air compressor. You just squirt dish soap along the bead of the tire and then with a good quick compressor, inflate the tire. If the compressor is strong enough (like a gas station compressor), the tire will balloon out against the rim and seal. Later I ended up having to bring my wheel in again and the new guy who worked on it told me, “Your rim was so rusty I’m surprised it held air at all! I cleaned it up for you and it should be fine now. ” Yeah, so thanks to the guy who fixed my flat tire half a dozen times or more but never fixed the actual problem!
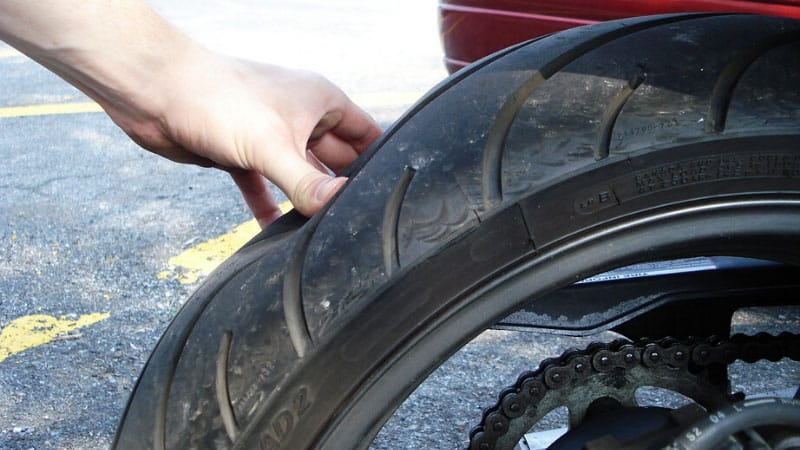
This might work with a wheelbarrow or cart wheel, but they also usually unseat on both sides of the wheel rather than just one like my van tires. Today I took the advice from my dad and combined it with something I saw my ex-father-in-law do once. He was trying it on a motorcycle tire and I’m not sure if it worked for him, but it worked for me.
Okay, I’m done with story-time, here’s the
 At that point, both of the beads should be in contact with rim. If not, tighten it a bit more.
It seems really simple, but it worked and it saved me from having to buy anything else. And I didn’t need to go find a compressor either.
Like Loading...
This entry was posted on Wednesday, March 11th, 2015 at 4:02 pm and tagged with cart tire, seating a tire, tire, wheelbarrow tire and posted in DIY. You can follow any responses to this entry through the RSS 2.0 feed.
Have you ever been on the road and suddenly had problems with your tires or wheels? If you have, you know it is never a good experience.
One of the many problems you could face is your wheel jumping off the tire bead. It could be dangerous.
However, the solution is to reseat the tire bead on the wheel and change the tires or re-inflate to keep moving.
The aim of this article is to discuss how to seat tire beads, the causes, and other important things to know.
Page Contents
For your vehicle tire bead to de-seat, there are two factors responsible:
If your car tire experiences low air pressure, it is only because it has been in contact with a stronger force on the road or encountered road hazards such as deep potholes, curbs, and bumps.
And as the pressure decreases, it may cause bead failure – the tire bead pops off.
Another reason why your tire bead popped off is if you use defective tires. It is important that you consider the choice of the manufacturer before buying tires for your vehicle.
A problem during the manufacturing or production process could eventually cause your tires to be faulty – explosion or reduced pressure, ultimately leading to bead loss.
Bead de-seating is a common problem in off-road vehicles. It could come out on the inner or outer side or both sides. But whatever the situation is, there is nothing a simple reseating work cannot fix.
Here is how to go about it:
The first step to fixing the problem is to raise the affected tire so that there is enough space to work on it.
You can raise the tire to a decent height with the help of a jack or rig.
Now, you can choose to work on the bead while the tire is still attached to the wheel or not.
Even though it is easier to work with the attachment in place, it is more effective when you separate them and re-attach them.
By the time you have the tire bead area exposed, there is a good chance that you will find debris seating around it.
You should consider cleaning the debris off because it is important in sealing and re-seating.
As a matter of fact, you can wash the bead set with soapy water – as long as it is rid of dirt and can ensure smooth reseating.
And when the whole area is clean with the tire bead re-seated, you can fix up your tire. You can work on the old one or get a new tire.
The inflating of your tire shouldn’t be difficult – especially if the rear bead is still attached to the wheel.
Simply add air via the valve stem on the tire sidewall using a blow gun.
If you hear a hissing sound while pumping, that means some parts are not holding air and need to be sealed by focusing on those areas.
When air eventually reaches every part, you should have the tire popped back to the bead seat.
Ideally, it takes a good shot of air to push a tire back into place. As a matter of fact, you may have to use a large pump.
And once the tire is seated back into its regular position, you can restore the tire back to the ground.
Alternatively, the starting fluid method can help reseat a tire bead effectively.
This method involves adding a little amount of starter fluid into the blown tire and igniting it with a match.
Now you have to be quick about this. Immediately the tire starts expanding into the wheels due to the heated gas developed inside the tire, you should add air into the tire via the valve stem for inflation.
As a matter of fact, you can even remove the valve core to get air inside the tire better.
The only thing is: you have to be careful with this method because the hot gasses are quite dangerous.
The Ratchet Strap method is another way to set the bead of a tire. It is quite simple to use but may not be so effective.
It involves cinching it down-throw into the tire to create tension in the tire for bead arrangement.
After following the step-by-step guide above, you still need to confirm if your tire bead is fully seated or not. Here are the things that would tell you if it is or not.
The first sign of a seated bead is an even rim line.
You should trace the bead around the rim – check both sides (internal and external) for gaps.
The inner tube shouldn’t be visible and the convex bead indicator should maintain an even spacing from the rim around the wheel.
Another way to tell if the tire bead is well seated is no air leak.
Flat tires are commonly associated with tire bead de-seating.
And even after you’ve fixed the issue, you should confirm and make sure that there are no holes around the rubber tire that could cause other damage.
A simple way to confirm air leaks is to spray or add soapy water to the tire and look out for bubbles.
The Mounting Hump is a feature in the wheel holding the tire beads in place.
The mounting hump is a small ridge around a barrel, keeping tires from slipping away from the edges’ wheels.
Let’s say your tire beads need a proper re-seat after showing signs that your wheels could come off, here are things you should do:
You should start by raising your tire and slowing air out from the tube valve. You might even need tools like an Allen wrench to press air out of the valve until it becomes deflated.
Likewise, you need to clean the tire bead, making sure it is rid of debris or dirt. As a matter of fact, you can use a lubricant on the tire bead while resetting it.
The next step is to fully seat the bead by pressing it in place.
However, you have to be careful while doing this because you don’t want the inner tube in between the rim and the tire.
A simple way to ensure it is done properly is by making sure the tire bead track follows the rim’s edge. Check both sides of the rim – make sure they are even.
Finally, inflate the tires with a blow gun to the recommended pressure on the tire sidewall.
And while you do that, make sure to check if the tire bead is fully seated and is ready for use.
If you’ve always wanted to know how to seat a tire bead, this article has successfully provided you with a comprehensive guide.
You could watch YouTube videos for a more visual approach on how to use starting fluid, ratchet strap, or the conventional method.
Overall, investing in vehicle maintenance is a great responsibility.
A punctured or broken tire, as well as other defects, may lead to the need to take apart a wheel on the road. Also, disassembly is required if do-it-yourself tire fitting is performed, tires are repaired and / or replaced in a conventional garage, etc.
At the same time, not every car owner knows how to disassemble the wheel on their own without a special machine or tool. In general, wheel beading involves working with two types of tires:
The first type is much less common today, but can also be found on some vehicles. In any case, it is necessary to take into account individual subtleties and nuances, as well as to have a minimum set of tools. Read more in our article.
Contents of the article
It is a mistake to believe that you can limit yourself to only a hammer and pry bar when removing a tire. Such a minimum set can only lead to hidden or obvious damage to the rubber, and the nuances will appear later (after installing the previously removed tire on the rim).
Let's start with wheels that have a tire and a tube.
A tubeless tyre, unlike tires with a tube, does not have a separation into a tube and a tire. This means that the inner cavity of the wheel is filled with air. To maintain tightness, the tire fits tightly on the disc. At the same time, this design assumes that there are additionally special convex areas along the edges (hampas). nine0003
When the wheel is inflated with air, the tire joint seals as the pressure increases. Taking into account such features, disassembly of tubeless tires is more labor-intensive. To disassemble a tubeless wheel, you need to literally tear the tire off the seat.
Please note, if this type of tire punctured on the road, it is better to use a tubeless tire repair kit or try to insert a tube inside and get to the tire shop on your own.
It is also important to consider that even if the tubeless tire can be removed, the air must be supplied quickly and at high pressure during subsequent inflation. This is necessary in order for the board to be able to jump over the hump. In artisanal conditions without a powerful compressor (compact automobiles will not work), this is almost impossible.
The only way out is to put the tire on the rim with a small explosion (popularly, this method is called pumping the wheels with gasoline). To solve the problem, you need to take about 20 grams of gasoline or ether. nine0003
We also recommend reading the article about which tires are better, studded or non-studded. In this article, you will learn about the advantages and disadvantages of different types of winter tires for a car, as well as what you need to consider before buying.
Proceed as follows:
In fact, this is the only way to board a "tubeless" in artisanal conditions without a powerful compressor. It is quite obvious that wheel beading in this way is associated with certain risks and cannot be recommended, especially for novice drivers. nine0003
 It is also important that dirt does not get inside the tire.
  nine0008
 More experienced motorists who are accustomed to driving long distances usually have both a full-size spare tire and a compact stowaway in the car.
11 May 2017, 13:44
| During the year, each driver must change the tires on his car at least 2 times - from winter to summer and from summer to winter. | |
Removing the old tire from the rim | |
| The first step is to remove the old rubber from the rim. To carry out this operation, you need to raise the car with a jack, unscrew the fixing screws with a wheelbarrow wrench and dismantle the wheel from the car. Next, the wheel should be put on the ground so that the valve is on top. Remove the nipple from the valve and let the air out of the tubeless tire or tube. There are situations when the rubber is too tight on the rim, so it is not easy to wring it out. After that, the mounting blade should be placed in the gap between the sidewall and the rim. With the help of the blades, you need to smoothly pull the sidewall out of the rim, and drag the camera into the gap. In the same way, it is necessary to bring the next sidewall through the same rim and dismantle it from the disk. During operation, you must be extremely careful not to damage the disk. | |
Installing a new tire on a rim | |
| Before you do your own tire fitting, you should carefully check the condition of the rubber. Check for any defects, punctures or other damage. It is also important that the tire and rim are the same size. When installing new passenger tires, it is worth remembering the color marking that is applied to their surface. More specifically, we are talking about the direction of rotation, which is indicated by an arrow on the sidewall of the tire by the manufacturer. To facilitate the process of mounting tires, you should apply a mile solution or a special lubricant to its side. But here it is important not to overdo it with lubrication, because otherwise, the tire will slide on the rim. Winter and summer passenger tires are installed on the rim in the reverse order of removal. More specifically, one sidewall is put on the rim first. But if a tire with a tube is used, then first you need to place the tube so that the valve enters the hole in the rim. Then you should do the same with the second sidewall. | |
How to fit the tire tightly on the rim | |
| In the case of tube tyres, it is enough to inflate them with air. The pressure should be slightly higher than normal. This will ensure a tight fit for the tire. Then it is recommended to reduce the pressure in the tire to the established norm. It is worth noting that it is necessary to measure the pressure when the rubber is already installed on the disc, so that the weight of the machine is also taken into account. nine0003 Tubeless summer and winter tires require a more complex approach. An ordinary hand pump and a car compressor will not help here. The tire beads must fit snugly against the rim so that air does not escape into the gap between the rim and the rubber. Therefore, any car wheel should be pumped up to about 3.5 - 4 atmospheres. Then you need to remove the hose from the pump and put one end of the hose on the valve.  | |
 But in the event of a puncture or other damage, premature replacement of tires is performed. Many motorists turn to service stations for tire fitting. However, this procedure can be performed at home. This does not require special skills and knowledge. All you need is a jack, wheel wrench, a few mounting paddles, a car pump. But still, in order to independently replace tires, you need to know some "secrets". Consider below how to install tires yourself .
  Then you need to stand on the wheel with your feet so that the sidewalls of the tire lag behind the rim, and the valve must be pressed into the tire. nine0003
  Disks also need to be checked. They should be free of dirt, corrosion, mechanical damage. If a tubeless tire is used, then the old valve and balancing weights must be removed from it. nine0003
  nine0003