Tubeless tyre technology for bikes is exactly what you’d imagine from the name – it does away with inner tubes, working in much the same way as the tyre and rim of a modern car.
Tubeless is now the default option for mid-range to high-end mountain bikes and gravel bikes, and it’s becoming increasingly popular for road bikes too.
This guide covers the basic principles of tubeless and we’ve got separate advice on tubeless setup for road bikes and tubeless setup for mountain bikes.
Don’t miss our guides to the best tubeless road tyres, the best mountain bike tyres, and the best gravel tyres.
Also, if you want to optimise your tyre setup for speed, comfort, grip and puncture protection, we’ve got in-depth guides to road bike tyre pressure and mountain bike tyre pressure.
If there are any technical terms or jargon that aren’t familiar, scroll to the end of the article for a full glossary.
Tubeless does away with inner tubes. Enve
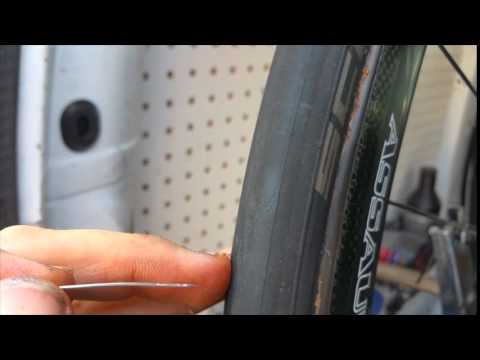
A tubeless tyre looks like a standard tube-type clincher tyre but requires no inner tube and, once ‘seated’ (seating is the process of snapping the beads into position), it forms an airtight seal with the rim.
A valve just like the one you’d find on an inner tube is fitted directly to the rim.
For the system to work, neither the rim nor tyre can leak air, so the tyre needs to fit tightly to the rim.
Sealant, which sloshes around inside the tyres, is an essential part of any tubeless setup.Russell Burton / Immediate Media
Sealant poured into the tyre or injected through the valve helps plug any tiny leaks. This sealant stays liquid inside the tyre and will heal small punctures suffered while riding.
Tubeless tyres are not to be confused with tubular tyres. Tubulars (also known as ‘tubs’ or ‘sew-ups’) are a traditional type of tyre that’s glued or taped to a tubular-specific rim. They are still widely used in road racing and cyclocross but have otherwise largely been replaced by high-performance clinchers.
Tubeless setups suffer fewer punctures, but it’s the potential performance benefits of lower pressures that are the main advantage of the tech.BikeRadar
The number one advantage of tubeless tyres compared to standard clinchers with inner tubes is they can be run at lower pressures without the risk of pinch flats.
A pinch flat occurs when your tyre hits an obstacle (such as a rock or the edge of a pothole) and deforms to such an extent that it squashes the inner tube against the rim. This leads to a characteristic ‘snake bite’ style double puncture.
With no inner tube to trap, and sealant in the tyre to heal small punctures, a tubeless setup is much less prone to flatting overall, and so allows you to reap the benefits of lower tyre pressures.
These include greater comfort, and potentially more grip and speed too, although the relationship between tyre pressure and performance is complex so it’s hard to generalise.
Tubeless tyres may also have lower rolling resistance and therefore be faster than an equivalent tubed setup, but again it’s hard to generalise because there are many variables and it depends exactly what you consider to be an apples-to-apples comparison.
There is a general consensus that tubeless tyres roll faster than tubulars, though, and this is driving a gradual adoption of tubeless by pro road racers.
The advantages of tubeless are pretty clear cut for mountain bikes and gravel, but the picture is more nuanced for road use – many riders feel the added complexity is not worth the benefits.
When things don’t go to plan, tubeless can be messy and inconvenient.Jonny Ashelford / Immediate Media
Tubeless setup and maintenance is inherently more onerous than using inner tubes, tubeless tyres cost more than non-tubeless tyres, and you’ll need to keep buying sealant.
Some tubeless tyres mount easily and will seat on the rim using a normal pump.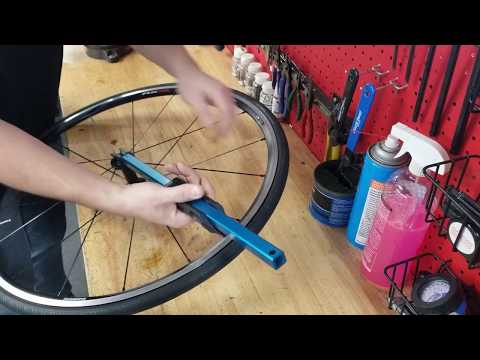 However, this often isn’t the case and some tyres are tricky to mount and/or need a dedicated tubeless inflator or air compressor to seat.
Sealant can be messy and needs to be renewed periodically – typically every few months – because it gradually dries out.
Tubeless tyres also need to be pumped up more frequently than tubed tyres – it’s advisable to check your pressures before every ride.
It’s important to make sure you’re matching compatible parts when you go tubeless.Matthew Loveridge / Immediate Media
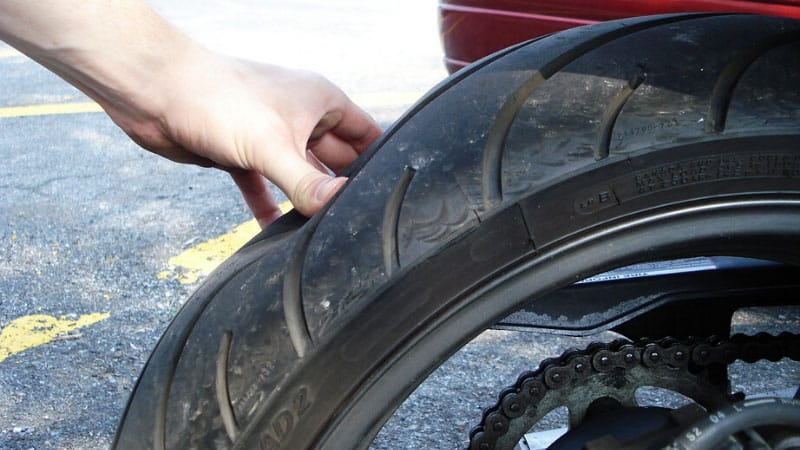
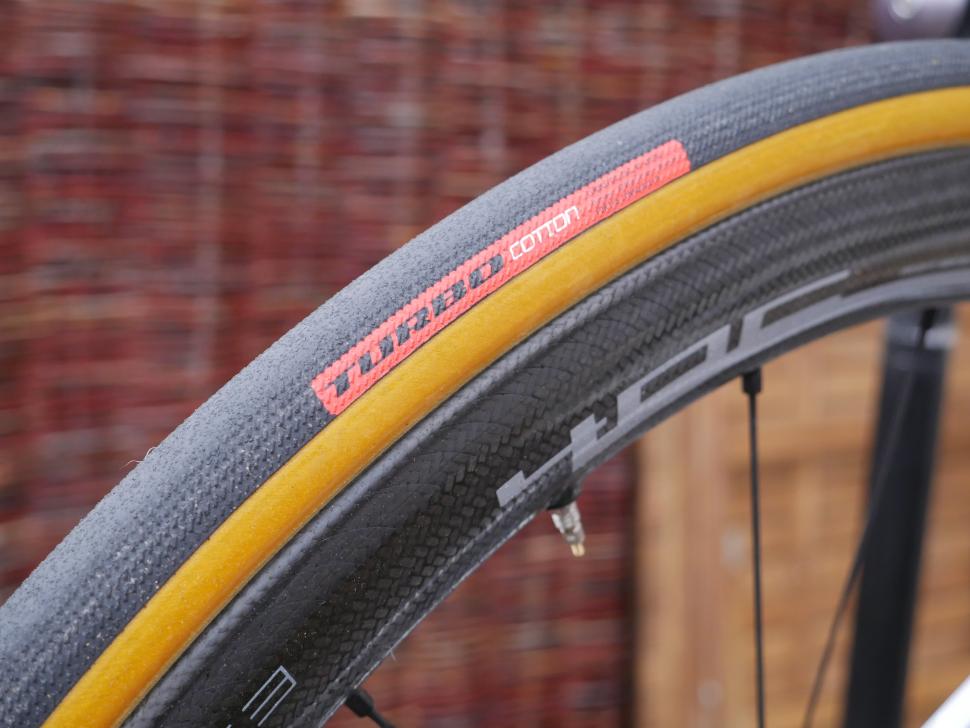
For the best and safest results, tubeless requires both tyres and rims designed specifically for the job. Tubeless tyres have stretch-resistant beads to prevent blow-off under pressure and casings that are sealed to prevent air loss.
Rims vary in design but usually have a central channel to make tyre fitting easier, and humps that keep the tyre beads locked in position. The majority also have bead hooks to aid tyre retention, but hookless rim designs are also common and some brands claim these offer an advantage.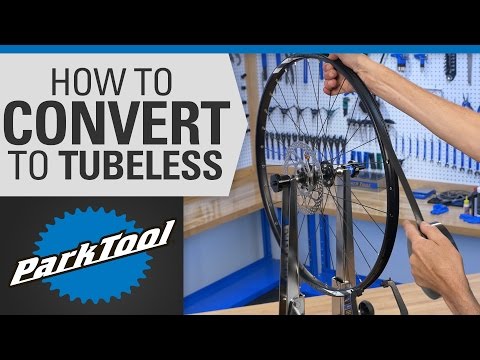
It used to be common in the mountain bike world – and cyclocross/gravel to some extent too – to run standard tube-type clincher tyres and/or standard clincher rims tubeless.
However, with the choice of proper tubeless tyres and rims now on the market, there’s not much incentive to do this. Results with homebrew setups vary greatly, and it’s definitely not the easiest or safest option.
With a road bike, you should never run a non-tubeless tyre tubeless or attempt to convert a standard tube-type rim. The higher pressures used on the road make this dangerous and the consequences of failure can be serious.
Brands use various terms to designate their tubeless tyres. Maxxis, for example, uses “TR” for Tubeless Ready.
These terms are sometimes used interchangeably and don’t have standardised definitions.
For some brands, a tubeless-ready rim is exactly that, and all you need to do is insert a valve (which may or may not be included with the wheels), fit an appropriate tyre and add sealant.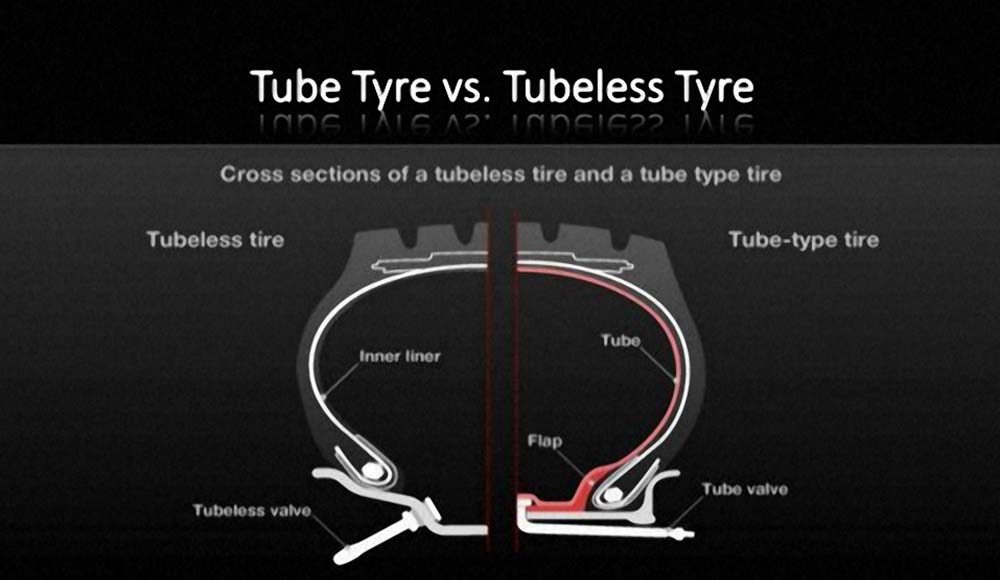
If a wheel is described as tubeless-compatible, it’s likely you’ll also need to fit tubeless tape to seal the rim.
In the road world, it’s not uncommon for bikes to ship with tubeless-compatible wheels, but non-tubeless tyres.
That means you’ll need to fork out for a set of new tyres in addition to the other bits if you want to ditch your inner tubes – a significant extra outlay.
Hookless rims are only suitable for tubeless-specific tyres. You can usually fit an inner tube if you need to (for example, as a get-you-home measure – you’ll need to remove the tubeless valve first, of course), but you can’t fit a standard tube-type tyre because there’s a risk it will blow off the rim.
For mountain bikes, tubeless compatibility is mostly straightforward but tyre designs vary and some will be more porous (and hence require more sealant to hold air) than others.
In the late nineties, Mavic created the UST standard (Universal System Tubeless), and this is only designed to work with UST-conforming tyres and rims.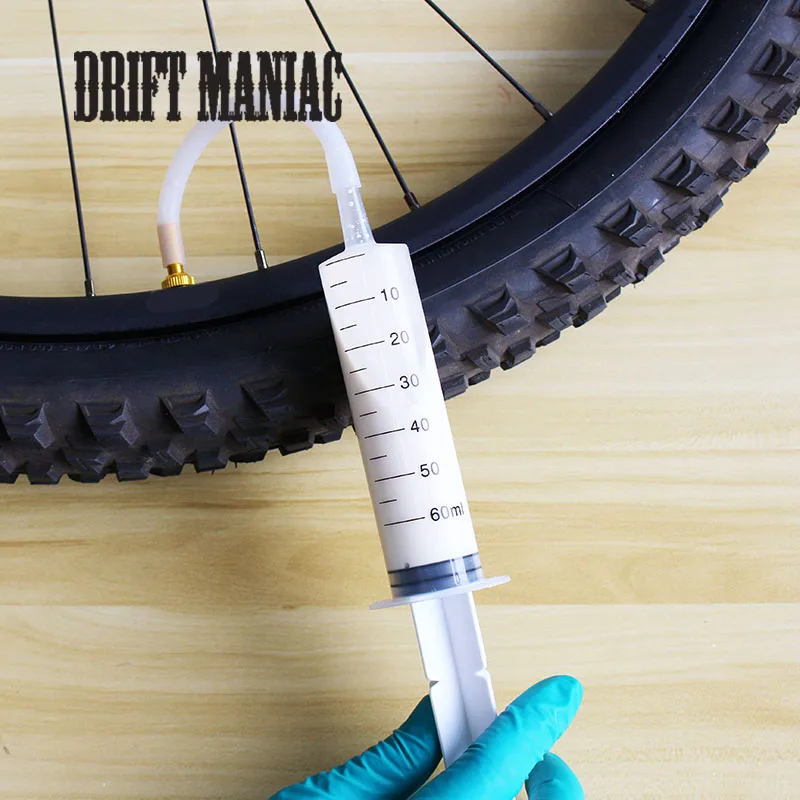
These tyres are made to an exacting specification and are heavier and more airtight than many ‘tubeless-ready’-designated tyres.
Otherwise, you should expect any tubeless-ready mountain bike tyre to work with any tubeless-ready mountain bike rim, unless the respective manufacturer explicitly forbids it.
When it comes to tyres, it’s critical you follow manufacturer guidelines to stay safe.Simon Bromley / Immediate Media
For road and gravel bikes, things are a bit messier. Tubeless standards haven’t yet fully settled down and you should pay close attention to rim and tyre manufacturer guidelines when considering a particular combination.
We’ve got separate guides on tubeless setup for road bikes and mountain bikes, but here are the basics for setting up your wheels tubeless:
There are all manner of tubeless tyre repair solutions on the market.Steve Behr
Overall, you should experience fewer punctures with tubeless. The beauty of the technology is that small punctures are healed by sealant as you ride, sometimes without you even noticing.
Larger punctures or slashes require more intervention. Your options are:
We’ve got a separate guide on how to repair a tubeless tyre.
Tubeless isn’t a panacea, but it offers meaningful advantages for many riders.Felix Smith / Immediate Media
It depends. For mountain bikes it’s an unequivocal yes. For gravel bikes it’s a yes, assuming you want to get the best out of your bike and you do actually take it off tarmac.
For road bikes, it’s a yes if you want the performance benefits or you suffer a lot of punctures, but the differences are less stark.
At BikeRadar we’re broadly pro-tubeless, but we recognise it’s not for everyone and we certainly wouldn’t recommend it for a bike that’s used infrequently because the sealant will simply dry up.
 Tube-type and tubeless tyres are both types of clincher
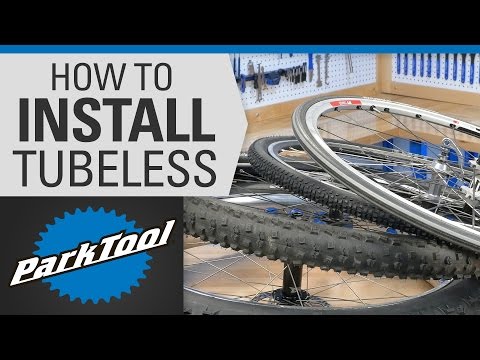 A number of tyre makers produce UST tyres, but only Mavic and Mavic’s licensees produce UST rims
Matthew Loveridge (formerly Allen) is BikeRadar's former senior writer, an experienced mechanic, and an expert on bike tech who appreciates practical, beautifully-engineered things. Originally a roadie, he likes bikes and kit of every type, including gravel bikes and mountain bikes, and he's tested a huge variety of all three over the years for BikeRadar, Cycling Plus, Cyclist.co.uk and others. At 174cm tall and 53kg, he looks like he should be better at cycling than he actually is, and he's ok with that.
If it ain’t broke, don’t fix it, right? Well, that seemed to ring true for the pneumatic bicycle tire. Since John Boyd Dunlop invented it back in 1887, bike tires remained fairly unchanged for decades: an inner, inflatable tube that offers flotation for a smooth ride and efficiency for a fast one encased in an outer layer of grippy rubber that provides traction and protection against flats.
That was until 1999, when Mavic created the first tubeless tire system for bikes. Tubeless was first heavily adopted amongst mountain bikers, but this innovation has since expanded to cyclocross, gravel, and even traditional road bike segments.
Along the way, tubeless tires have gotten lighter, more reliable, and now offer an improved ride experience compared to earlier versions. “Honestly, I don’t see any drawbacks to [tubeless],” says Tom Hopper, a longtime pro mechanic for cyclocross and the alternative race program director for the EF Education-EasyPost WorldTour team (which, full disclosure, still raced with traditional tubular tires at the time this story was originally reported).
If you haven’t yet made the transition to tubeless tires yourself, here’s what you need to know about this life-changing technology.
In order to understand how tubeless bike tires work, here’s a quick refresher on the three main types of bike tires: conventional clincher, tubular, and tubeless clincher.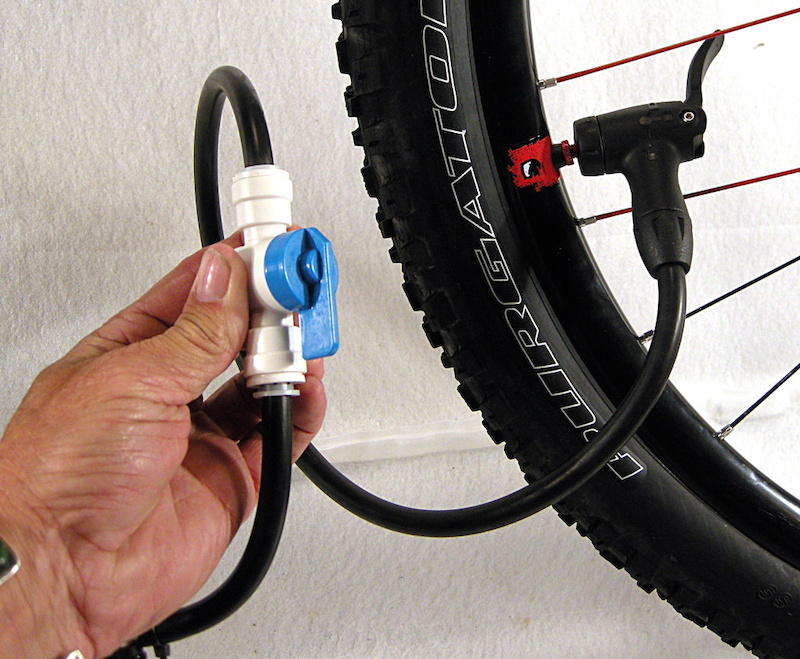
Charlie Layton
Conventional clinchers are the most common type of tire sold on bikes. As the inner tube inflates, it presses the rim and tire beads together, which secures the tire to the rim. A clincher tire is held on primarily with air pressure, and while they are easy to install and fix when you get a flat, they’re a little heavier, and tubes are susceptible to pinch flats.
Charlie Layton
Tubulars have an inner tube that is completely enclosed by the tire casing, which is stitched together at the base. The tire is glued to the rim. The benefit to tubulars is a highly-refined ride quality and, broadly speaking, the lowest weight and rolling resistance. The downsides are flats (with no easy fix) and tricky installation.
Charlie Layton
Tubeless tires feature the same general cross-section as a conventional clincher, but without an inner tube.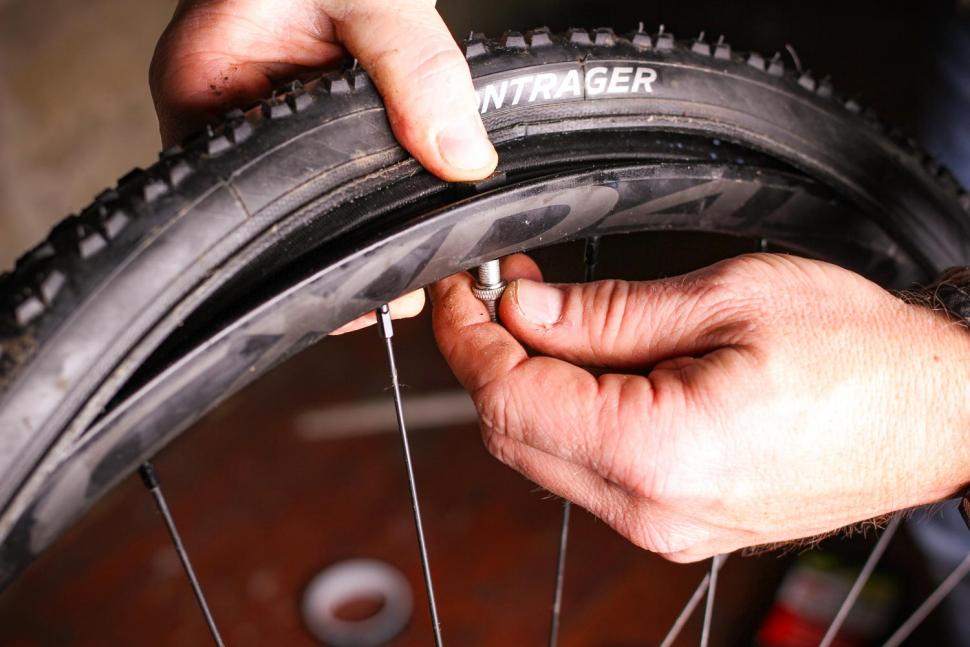 Instead, a layer in the tire casing or liquid sealant is used to make the tire impermeable to air. The rim and tire beads have a different shape than conventional clinchers, with interlocking profiles that form a seal under pressure—much like how a sandwich bag closure works.
The rim bead isn’t the only difference in the wheels themselves. Because tubeless tires hold air, the rim bed needs to be sealed completely. Tubeless tires also offer the ability to run lower air pressure for a better grip and more comfortable ride, are much more resistant to flats, and the tire is less likely to separate from the rim if you do flat. But that all comes at a cost: Tubeless systems can be the heaviest of the three (especially for mountain biking). They can also be somewhat difficult to set up initially, and while flats are far less likely, if you do get one, field repairs tend to be messy and take longer than conventional clinchers.
Today, tubeless is the dominant style of wheel and tire for mountain biking.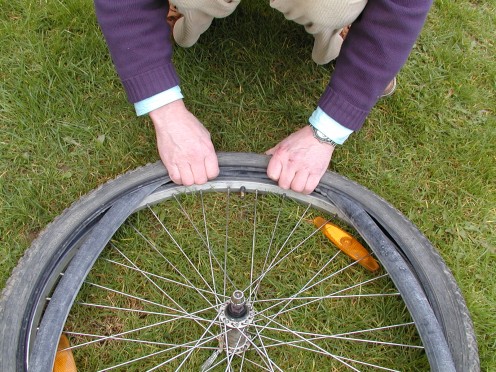 But the attributes that make it desirable also hold for gravel and cyclocross riding, and tubeless has even made inroads in performance road systems. When considering running tubeless yourself, you’ll hear three common terms used: tubeless ready, tubeless compatible, and UST.
Tubeless Ready: The dominant technology in the bike industry today, tubeless-ready rims and tires have bead locks, but the actual profiles of the rim cross-sections and tire bead locks vary from brand to brand. To be “tubeless ready,” rims on complete wheelsets have spoke beds sealed with tape. Tubeless ready tires don’t have the sealed casing that UST tires (see below) do. That makes them lighter, and also means they require sealant to hold air.
Tubeless Compatible: A tubeless-compatible wheel or rim is one in which the rim has a bead lock, but the rim bed itself is not sealed. Some companies use “tubeless ready” and “tubeless compatible” as synonyms. In either case, the components needed to run the wheel and tire combo as a tubeless setup are the same: a sealed rim bed, tire with a tubeless bead lock, and sealant.
UST: An acronym that stands for Universal System Tubeless, a patented Mavic standard developed in 1999 in partnership with Hutchinson and Michelin. UST is an engineering standard, with a matching square-shaped bead lock for the rim and tire, and a tire with an impermeable butyl rubber layer so that it can be inflated and hold air without sealant. Several companies make UST-compatible tires, but Mavic is the only company making UST rims and wheels. UST tires are heavy, and the UST standard has not been updated for modern wide mountain bike rims, so it’s a small part of the overall market today.
It’s important to note that, other than UST, these are generic terms, not engineering standards. With tubeless-ready and tubeless-compatible systems, actual compatibility between tires and rims varies across brands. Check manufacturer specifications for recommendations, and never attempt to set up a non-tubeless tire or rim as tubeless. Without the bead lock, you risk unpredictable blowouts from beads separating from the rim even at normal tire pressures.
$34 at Competitive Cyclist
Credit: Stan's No Tubes$10 at Competitive Cyclist
Now 24% Off
$30 at Amazon
Credit: Muc-Off$30 at Amazon
We won’t sugarcoat it: Setting up tubeless tires for the first time can be a frustrating experience. Mike Curiak, a longtime adventure rider and photographer who’s built thousands of tubeless wheelsets through his Lace Mine 29 wheelbuilding shop, has a tried-and-true approach: He uses a tube at first, inflates to normal pressure, and then sets the wheel out in the warm sun for an hour or so.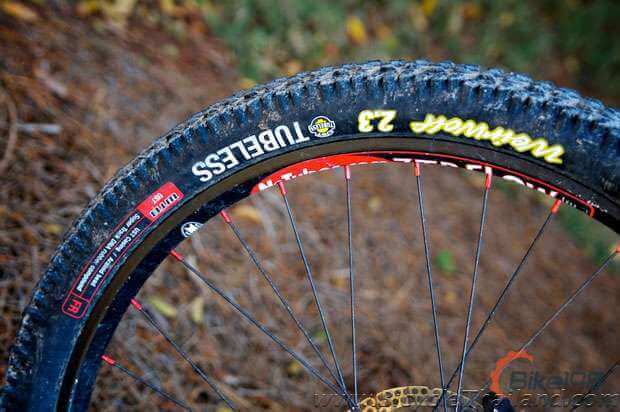
“This does three things at once,” he explains. “It gets the tape stuck down uniformly to the rim, it pushes all the air bubbles out of the tape, and it seats at least one bead of the tire.” Also, if you’re using new tires, it also helps the tire bead soften the kink that results from the tire being stored folded for long periods, which can prevent it from seating.
$150 at REI
Bring the wheel in and let cool to room temperature (so the rim tape adhesive isn’t gooey). Then, pop one bead off, remove the tube, install the valve stem, and replace the bead. Add the recommended amount of sealant through the stem, replace the valve core, and inflate. Curiak says he uses a simple floor pump, while Hopper says he’s found some tire/rim combos simply do need the blast from an air compressor or a comparable floor pump like the Bontrager TLR Flash Charger Floor Pump.
Other tricks to seat the bead include using a long, tie-down strap (or even a spare deflated tube) cinched down around the circumference of the tire to help push the bead out toward the rim, and bouncing the wheel gently when inflating. A light application of soapy water to the tire/rim bead seat with a clean rag or sponge can also help the tire bead slip on more smoothly.
Sealant automatically repairs most small punctures; your only clue may be a small bit of blueish-white sealant on the tread. If you get a particularly big gash, you have three likely fixes: plugs, a patch, or a tube. It’s best to carry all three. If your sealant is relatively fresh, Curiak says one or two tire plugs usually do the trick for most medium-size punctures. We like DynaPlug Racer, which keeps you rolling with a super quick repair.
For large cuts like a sidewall tear, all kinds of patch materials will do: Duct tape is Hopper’s go-to, but Curiak has used pieces of leather or neoprene from old gloves. “It doesn’t have to be sold as a repair material to do the job,” he says. Patches can be a more or less permanent fix, but inspect your sidewalls after every ride for signs that the casing is failing. If the cut is fairly smooth, smear Gear Aid AquaSeal UV on top to help keep the edges together.
If a patch won’t work, install a tube, but Curiak cautions to make sure there are no thorns or other pieces of debris that caused a flat stuck in the tire. “Miss one tiny thing, and you’ve wasted time, wasted a tube, and you’ve still got a flat,” he warns. You can always get creative. “I once helped a guy stuff his tire with pine needles and then blasted it with CO2 to get him home,” says Hopper. Another essential to carry: latex gloves–fixing tubeless flats can be messy with the sealant.
To cut down on flats, check your sealant regularly (every few months or more frequently in hot climates), pop the bead and make sure the sealant is still liquid and hasn’t evaporated or dried into “boogers.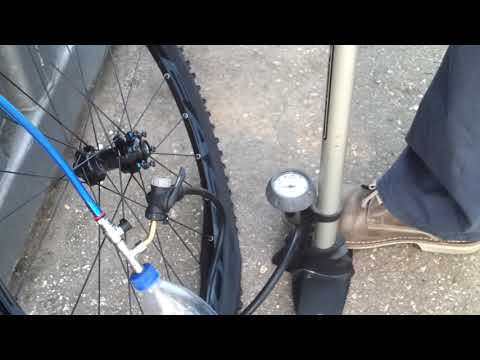 ” Or shake the tire side-to-side to see if you can hear it sloshing around. If it has dried up, pull the tire, clean out the debris, and reinstall fresh sealant.
Tubeless tires require slightly different setup techniques and have higher maintenance requirements than conventional clinchers. But, says Curiak, for mountain bike and gravel riders especially, the benefits outweigh its finicky nature. “The technology is so freaking fantastic these days,” he says, and echoed Hopper’s assessment: “In use, I don’t see any drawbacks.”
[Want to fly up hills? Climb! gives you the workouts and mental strategies to conquer your nearest peak.]
Sealant: The liquid that keeps the system from leaking air and seals punctures. There are various formulas, but generally it consists of very small, solid particles of fiber or rubber suspended in some kind of liquid matrix (latex is common). The sealant sloshes around inside the tire when the bike is rolling and coats it to prevent general air loss and seals smaller punctures.
Sealant only works for punctures up to a certain size (usually a few millimeters). Larger punctures, like from a sharp rock that slashes a sidewall, will cause a flat and require more extensive repairs. Sealant lasts years in a tightly sealed container, and from one to six months inside a tire.
Valve Stem: Tubeless valve stems feature rubber grommets and a knurled nut that seal the valve hole on both sides of the rim bed. The cores are often removable, which allows a low-mess way to add sealant without gumming up the core. The rubber grommet profiles are often specific to the rim cross-section; valve stems from one wheel company may not work with other brands.
Tubeless Rim Tape: The plastic adhesive tape that’s used to seal the rim bed from air loss.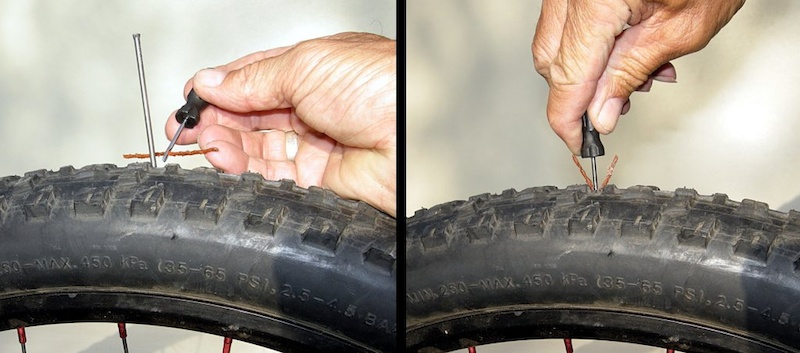 Not all rim tape is tubeless compatible; look for tape that’s specifically designed for tubeless systems. If your wheelset has a solid rim bed with no holes for spokes, it doesn’t need tape. Installing tubeless rim tape is a precise job. Prep the rim bed by wiping with alcohol or acetone and a clean rag, and let dry. Stretch the tape just tight enough not to deform around spoke holes, and keep it straight and free of wrinkles that could leak air. A double wrap of tape makes for a better, more durable seal, says Hopper. Tubeless tapes are very light; this will add only a few grams of weight.
This content is imported from OpenWeb. You may be able to find the same content in another format, or you may be able to find more information, at their web site.
Tubeless tires can hardly be called the know-how of the bicycle industry, however, they still raise questions for many. The topic itself, as a rule, is surrounded by a lot of skepticism and distrust, which are more often explained by a lack of understanding of basic things and a lack of experience in riding such wheels. To dispel all these doubts, we answer the main questions related to tubeless technologies.
These are bicycle tires that do not have a tube. At the same time, tubeless technology is not only about tires. We are talking about a whole wheel system, which also includes a special rim and a sealant that gives the wheel anti-puncture properties. The tubeless concept makes the bike more comfortable to use and improves its riding performance, which will be discussed in order. nine0003
How long ago did this technology appear and can it be trusted?
Those who hear about bicycle tubeless for the first time usually tend to be suspicious of them. You can dislike this technology for subjective reasons, but you definitely shouldn’t distrust it. Tubeless tubes have been massively used for cars and motorcycles for several decades, and during this time they have not given reason to doubt their reliability.
The first tubeless systems for bicycles appeared in 1999, when the French rim brand MAVIC, in collaboration with tire manufacturer Hutchinson, presented their concept of a simple and effective tubeless wheel. In the 2000s, this technology remained the prerogative of mainly professional athletes, who quickly appreciated its main advantages: lighter weight, more air in the wheel, good "traction" and durability.
In recent years, tubeless has finally ceased to be perceived as something exotic. For example, today a significant part of the MTB and almost all touring cars come with such wheels as standard. A wide variety of sealants are also available on the market, and the number of those who are discovering the benefits of tubeless technology is steadily increasing. nine0003
The tubeless system provides a special rim and tires that are labeled tubeless ready or TR.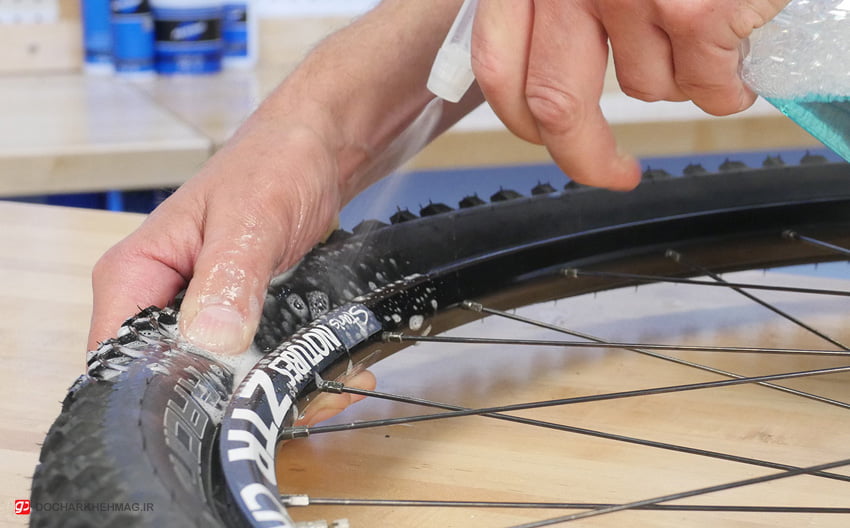 However, the rims themselves are easy to distinguish visually - they have a low side and characteristic walls with recesses, forming a kind of lock in which the tire cord is wedged when air is injected. Due to this, in the inflated state, the rubber reliably and hermetically “sits” on the rim, without breaking off the wheel even at low pressure. The rim itself is additionally glued with a sealing tape, after which the nipples are installed separately. nine0003
The benefits of tubeless wheels are revealed no matter how often and what kind of bike you ride: whether it's weekend trips, extreme downhill or long-distance touring. Nevertheless, for certain categories of cyclists tubeless still open up more opportunities: first of all, we are talking about those who are seriously passionate about off-road.
When actively driving off-road with tubeless tubes, you can ride on lowered wheels and at the same time not be afraid of such an unpleasant type of puncture as a snake bite.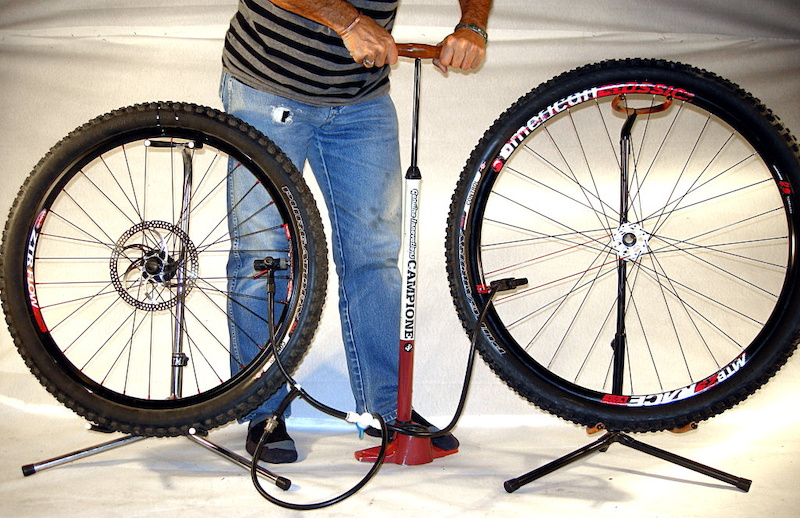 Low tire pressure, in turn, gives better handling, dampens vibrations more effectively and generally provides more comfort on difficult tracks. If we are talking about cyclists, then they appreciate tubeless for their anti-puncture qualities. nine0003
Road bikes also use tubeless wheels. Moreover, they are the pioneers of this technology. But road tubeless tubes are a different story: they are designed for different operating pressures and have tangible design differences. Therefore, further we will talk mainly about those tires that are put on mountain, touring and city bikes.
These are the two rim formats that define the features of a tubeless wheel assembly. BST is a standard that involves the installation of a special sealing tape that prevents air from leaking through the holes in the spokes. This is the most common version of tubeless systems. nine0003
UST is a blind rim in which an additional bridge isolates the spoke holes. Thus, there is no need for laying a sealing tape. In practice, this greatly simplifies life, because when installing a tire (especially without proper experience), the tape tends to crush, which is why you have to reassemble the wheel. It is easy to guess that such rims also have a drawback - their price.
The tubeless system in the form in which we wrote it above is already a full-fledged wheel, it can be installed on a bicycle and hit the road. But there is an important nuance. First of all, tubeless tubes are valued for their anti-puncture qualities: for this, a small amount of a special liquid, a sealant, is poured inside the tire. nine0003
Yes, you can. But you should not do this. Firstly, this is illogical: for no reason you are depriving yourself of the main advantage of tubeless - the anti-puncture effect. But more importantly, it is very difficult (or even impossible) to inflate such a tire in a completely flat state with a portable pump: to do this, you need either a strong floor pump or a booster.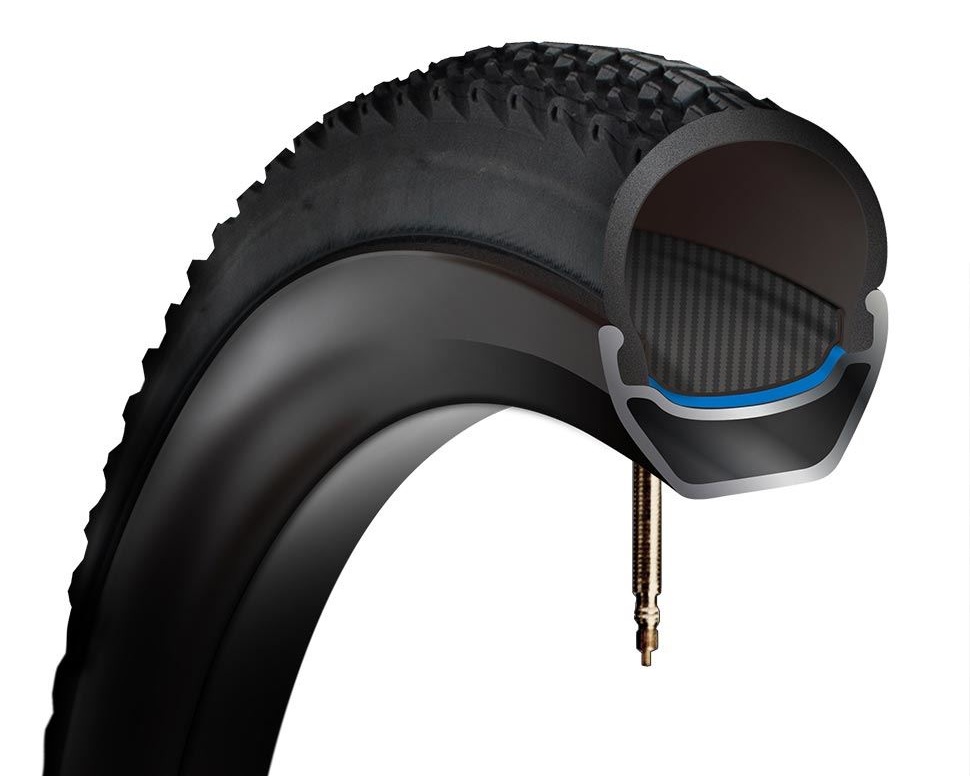 Naturally, no one will take such bulky things with them on the road. Filled with sealant 95% of punctures "seal" without a critical loss of pressure, and in most cases there is no need for even light pumping. Thus, the probability of being with a flat tire is very low.
So, if you put tubeless, sealant is still needed. Such fluids are easy to find in any bike shop, they are inexpensive and require replacement on average once every three to four months, so there is no need to talk about any inconvenience. Yes, in order to cope with the fill, you need to acquire a certain skill, but this is much easier than constantly changing broken cameras. In addition, sealant can be replaced once a season in a specialized service. nine0003
Bicycle sealants are based on fine particles (rubber or polymer fibers) suspended in a liquid carrier. Inside the wheel, the sealant does not polymerize: it is in a liquid state and is distributed along the inside of the tire during movement.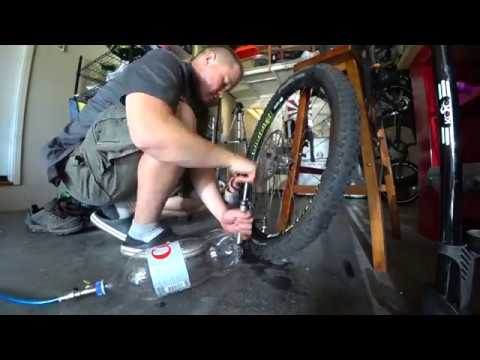 When a puncture occurs, the air flow begins to push the solution out. A fine suspension clogs the hole, and the sealant dries quickly. Thus, there is a reliable "sealing" of the puncture. nine0003
If we talk about typical punctures - collisions with thorns, wires, small glasses - such damage is self-healing without a noticeable loss of pressure. Usually, a puncture can only be guessed from a small spot on the surface of the tire. Naturally, the sealant works with more complex damage. You can count on it even if you pierce the wheel with a thick nail, 4-5 mm in diameter. If you don't understand how a liquid can seal such holes, you can watch numerous crash tests on YouTube that demonstrate the miraculous properties of sealants. nine0003
The consumption per tire is from 50 to 100 ml. If we are talking about standard MTV tires, the golden mean is about 60 ml per wheel. The exact dosage will always be written on the bottle. It is difficult to get confused even for those who do not like to read instructions: most sealants have measuring containers or a dosage scale on the bottle itself.
Here, too, everything is conditional and depends on the characteristics of the specific composition and intensity of punctures. In the absence of serious damage that entails the leakage of a large volume of sealant, you can easily skate a whole season on one fill. Some cyclists prefer to do an incomplete start-up gas station and gradually add 20-30 ml of fluid every two to three months. You can also navigate by how effectively the sealant works: if you see that small punctures are sealed with a strong deflation of the wheel, it may be that the composition is no longer enough and it needs to be added. Be that as it may, sealant is a very economical thing that lasts for a long time. nine0003
The sealant inside the tubeless tends to dry out, forming a characteristic film. Whether or not to clean the tire cavity is up to you. This is a purely aesthetic moment, which does not affect the operation of the anti-puncture fluid. The sealant can simply be added as it dries and not bother with unnecessary worries. It is more likely that the tire will completely wear out than it will have time to completely clog with dried filler.
nine0063
Serious damage - large diameter punctures, small cuts, run over nails with subsequent tire rupture - are repaired using special repair worms. These are rubber or fibrous bands that are inserted into the hole to reduce its area and allow the sealant to seal the puncture.
With long longitudinal cuts it is more difficult. Here you need to either sew up the dissection with nylon threads, or stick a patch on the inside of the tire. You don’t have to worry about the tightness of the repair site - the sealant will do this work, of course, if it does not have time to leak out. But being able to inflate a completely flat tire with only a portable pump will require skill. nine0003
In fairness, we note that such complex injuries are rare for most cyclists. But for those who are seriously passionate about off-road, it is better to play it safe with a spare camera. In this case, having caught a cut, you can always drain the sealant, unscrew the nipple from the rim and install a regular camera. And in order not to drive with a “hernia” protruding outward, we recommend placing, for example, a bill folded in half under the cut on the tire.
Tubeless allows you to forget about such an unpleasant form of damage as a "snake bite" forever. It usually happens when at full speed you catch a pothole in the pavement, unsuccessfully jump onto a curb or run into a stone on a downhill. Hitting the edge of a hard object, the tire is crushed, and the rim walls work like incisors, damaging the chamber in two places.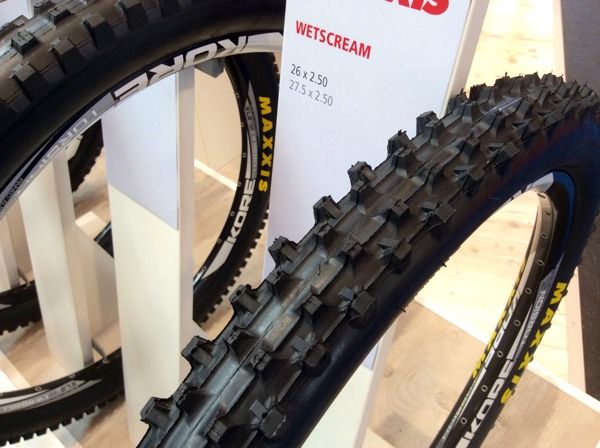 In tubeless wheels, this scenario is excluded, because. there is nothing to break through here. Of course, it can be assumed that the rim will cut the tire itself, but this should be a blow of enormous force, which is almost never encountered in practice. nine0003
Rejection of the chamber increases the volume of air in the wheel. This changes the contact patch (it becomes flatter) and allows the wheels to better absorb off-road bumps. Add here the ability to ride at low pressure, without being afraid of a snake bite, and it becomes completely clear why tubeless lovers of hard off-road riding so idolize. Soft tires with a large contact patch "fit" all the bumps in the road, giving excellent traction on rocks, forest primers and other off-road. nine0003
In addition to traction, tubeless tires improve shock absorption, dampen vibrations better, and generally provide more off-road comfort. At the same time, to get the most out of this rubber, you need to experiment a lot with tire pressure, trying to find the indicators that will best suit your individual riding style.
Finally, the camera is extra grams. By refusing them, you can save an average of 70-100 g of weight on each wheel. For some, this may seem like a formality, but it is worth considering the fact that extra grams on the periphery of the wheel have a stronger effect on driving performance. This difference is especially felt on road bikes: road bikes, gravel, touring. nine0003
They also exist. Moreover, it is far from formal. First, it's the price. The difference becomes especially noticeable when you buy tubeless systems separately: rims, tires + small things (tape, removable nipples, sealant). For tubeless you will have to pay an average of one and a half times more than for ordinary wheels, plus or minus the same class. And if we are talking about more advanced UST rims, then this means another + 30-40% to the cost.
With tubeless by default, everything is more difficult in terms of installation (here we are talking about conventional BST systems).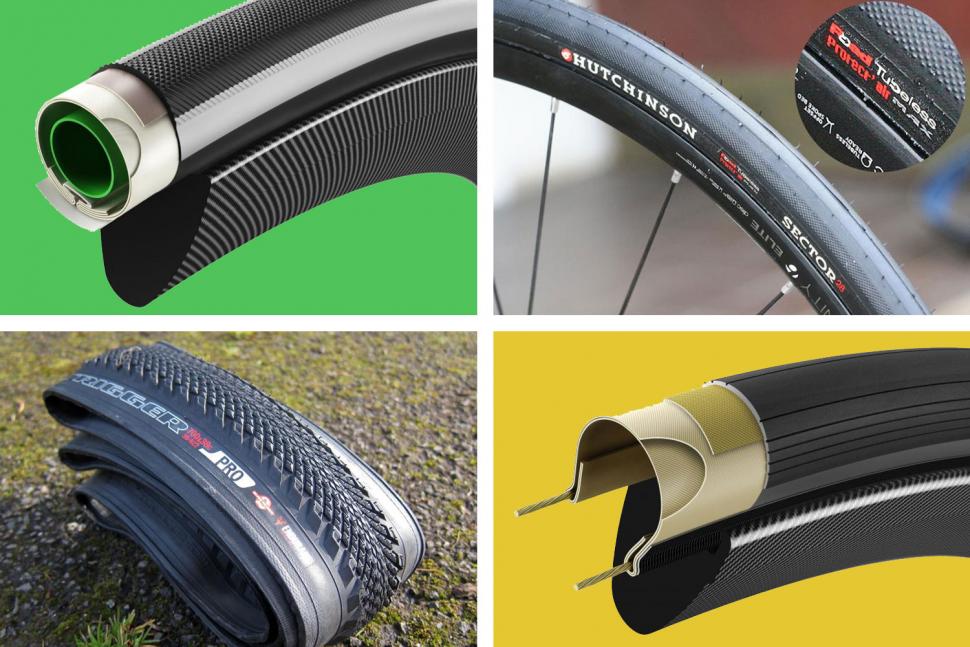 You need to learn how to properly glue the tape, accurately insert the nipples, carefully install tight rubber, making sure not to displace the tape and not fill everything with sealant. On the other hand, all this comes with experience, but what you will always have to put up with is the difficulty with pumping a completely flat tire.
A tubeless tube cannot be inflated until its landing board snaps into place on the rim. To do this, you need to sharply introduce air into the tire. The tire should straighten up and fall into the grooves with a characteristic click - then it can be safely pumped further. This all sounds simple if there is a compressor in the garage. Putting a tubeless tube into the grooves by pumping air with an ordinary floor pump is quite difficult, and almost impossible with a portable bicycle pump. nine0003
All this makes life much more difficult. But there are solutions. In the field, a compact can of compressed air can help out. At home, installing tubeless tubes greatly simplifies the booster. This is a cylinder into which a high pressure is pumped with a pump, then it is connected to a nipple, the valve is lowered - and the air from the reservoir pumps up the wheel sharply.
As you can see, tubeless cameras also have enough disadvantages, but it is wrong to consider them in isolation from the advantages. For example, the probability of being with a completely flat tire away from home is very low, due to the anti-puncture qualities. Complicated installation is offset by the lack of punctures and roadside repairs. And by overpaying in price, you save on interchangeable cameras, and, of course, win as a roll on off-road. nine0003
For some, the existence of tubeless bicycle tires will be news, and not surprisingly, they are relatively new. But tubeless bicycle wheels have grown in popularity in recent years. What kind of tires are these, and what are their features? Let's figure it out.
K design of tubeless tires for bicycles
It is thanks to her that pressure is created between the rim and the tire, which allows the cyclist to ride comfortably. The very name "tubeless tire" suggests that there should not be any chamber under the tire. And there is. Tires in such wheels are mounted in the wheel rim in a special way, and under them there is a sealant that replaces the same chamber. nine0003
Folding bikes available with delivery to your area! Big choice. Best price guarantee.
Why are these wheels becoming more popular every day? What are the advantages of ?