Today's Featured Article - Tractor Profile: John Deere Model H - by Staff. Latest Ad: Oliver 77-880 power steering unit.77-880 complete hydraulic pump.4 digit series front weights and starter blocks. [More Ads]
| |||||
It’s a fine sunny day of the spring season, and you are busy with some work in your garden. You use your trusted lawnmower that has not failed you. But suddenly, you feel that the lawnmower is not running as smoothly as it should. It feels like it’s being dragged on the ground forcefully. So, you turn off the lawnmower engine and get off your riding lawnmower. But what you see now is not pleasant at all. Your lawnmower has a flat tire, and you know you need to fix it with a new tire or tube.
As the lawnmower tire gets old, it is more likely that a nail can easily pinch into the tire and make it flat. A hard bump to the lawnmower can also cause this issue. This article shall be a step-by-step guide on removing a lawnmower tire, fitting a new tube or tire, and putting the tire back on the rim.
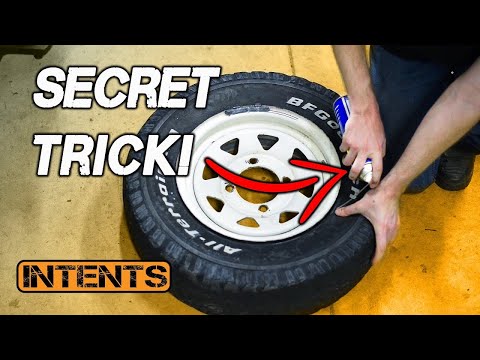
How to put a lawnmower tire back on the rim, step by step:
 Install the tire on the rim
Contents
 5.1 – Step 5.1. Place the tire back on the axil:
The detailed procedure of removing and replacing your lawnmower tire has been broken down into several small steps.
The first step to fix the flat tire or replace it with a new one is to remove the old tire and the rim from the lawnmower. You shall follow the following steps to complete this procedure:
There is a plastic boot (or a cap) at the center of the tire’s rim. Grab it using a pair of pliers and remove it from the rim. Try not to break it as it holds some grease and is a little brittle because of that.
Behind the plastic boot lies a c-clip. Grab the tab of the c-clip using a pair of pliers and pull it out of the rim.
Once you have removed the c-clip, you shall see a washer. Draw this washer out of the rim.
After you’re done with the steps mentioned above, you can now pull out the rim along with the tire from the lawnmower.
As you have removed the rim and the tire from the lawnmower, it’s time to remove the tire from the rim.
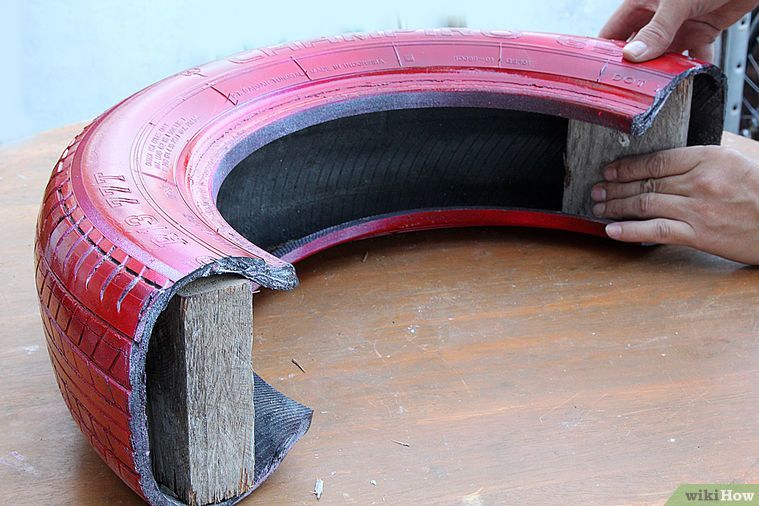
To remove the old tube’s nozzle (if your tire has a tube), you first need to peel the tire off from at least one side of the rim.
To do that, hammer a flat head screwdriver at the junction of the tire and the tube. Once the screwdriver gets inside this junction, please give it a push and try peeling the tire off the tube. Repeat the same step on the opposite side of the tire as well.
Every tire and tube has a nozzle that is fitted into the tire’s rim. It would be best if you pulled out this nozzle from the rim to proceed further.

This is where things get exciting and is the most technical step of the entire process. You may need a couple of screwdrivers for this step. Although there are special tools to take the tire off the rim, we shall use screwdrivers to save some bucks.
Insert screwdrivers at different positions: Insert a screwdriver inside the junction of the tire and the rim, and pull the screwdriver upwards so that the tire starts coming up off the rim.
Do the same step using another screwdriver, which shall be inserted at some distance from the first one. Keep working around the tire doing the same step.
Remove the tire off the rim: The tire is now completely free from the rim’s grip. Remove this tire off the rim.
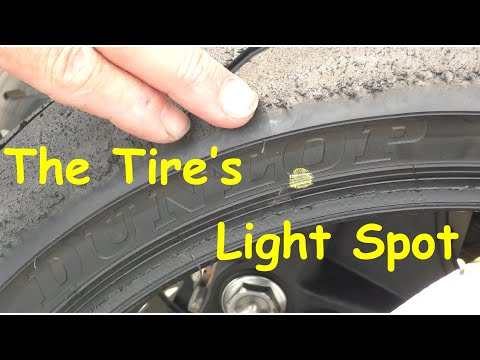
Grab a torchlight and check if there are any nails or a sharp object pinched into the tire’s inside or on the outside surface.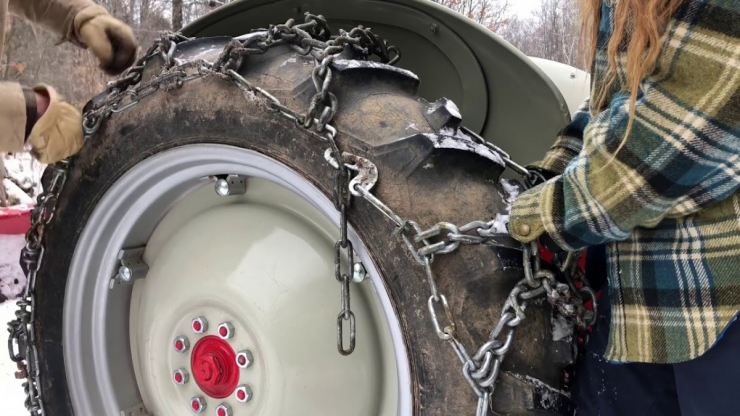 If you find any, remove it from the tire’s surface using pliers.
Phew, that must have been a tiring job. You are now halfway there, and all you need to do now is install the new tire back on the rim.
Some tires might be tubeless, while some may have a tube. You need to install a new tube if the previous one had completely weathered or has had various punctures.
Please insert the new tube inside the tire and stuff it in. The tube’s fill valve must be in line with the fill valve hole inside the rim, where it is to be fitted in. Insert the fill valve into the fill valve hole located on the rim.
If you are installing a new tire or putting the old tire back on the rim, this step is applicable for both of these cases. Screwdrivers and some hand force are all you need for this step.
 This step is done to make the edges softer so that they may easily fit onto the rim. Oil can also be used to serve this purpose in case transmission fluid is not available.
Once the tire has been put back on the rim, it shall now be installed back on the lawnmower.
Place the tire back on the lawnmower’s axil, just like the way you pulled it out earlier.
 2. Re-install the washers:
Insert the washers back into the tire’s rim.
Re-install the c clip back into the rim with the aid of pliers.
Re-install the plastic boot back on the tire’s rim.
Related Questions:1. What size of lawnmower tires should I get?Like other tires, a lawnmower tire has a series of numbers imprinted on one of its sides. These numbers indicate certain specific details about the tire. Only two parameters are enough to indicate the tire’s full size, i.e., the tire width and the rim diameter. There are two different systems for tire’s sizing:
Two-number sizing:
Most of the lawnmower tires use a two-number sizing system to indicate the tire size. For example, in two number sizing, numbers are displayed as 5-9. This number indicates that the tire width is 5 inches and the rim diameter is 9 inches. These two numbers are all that you need to get a fresh piece of a lawnmower tire.
Three-number sizing:
This sizing system indicates the tire’s size with the help of three digits. For example, if the number 15×6.00-6 is imprinted on your tire, the number before ‘x’ indicates the tire’s diameter when it is fully inflated. The tire width is indicated by the number between the ‘x’ and ‘- ‘. The last number indicates the rim’s width.
2. How much air pressure should I maintain in lawnmower tires?Like other lawnmower parts such as the engine, fuel, and filters, they must be maintained for the lawnmower’s ideal performance. Similarly, maintaining an adequate and specific amount of air pressure in the tires is equally essential.
A flat lawnmower tire can ruin a garden lover’s mood. But removing and replacing a tire is not very complicated and can be done easily by most. Do not forget to take some precautionary measures before you start. Wear safety glasses and protective gloves to protect yourself from unnecessary injuries. And when you finish fixing your tire, also think about other maintenance tasks like the carburetor, air and fuel filters, and do not let gas get too old. This will prolong your lawnmower’s life, and you can continue to maintain your lovely garden!
Tractor Wheels and Tractor Tires
The wheels transfer the weight load of the tractor body directly to the ground.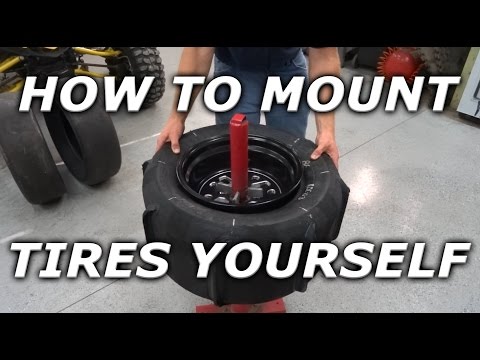 Torque is supplied to the drive wheels from the engine. When these wheels interact with the supporting surface, the rotational movement of the wheels is converted into the translational movement of the tractor. The driven wheels, under the action of the pushing force of the frame, convert the translational movement of their axles into rotational (wheel rolling). As a rule, the driven wheels are steerable, they rotate relative to the frame. nine0005
Most wheeled tractors have larger rear wheels than front wheels. This is caused by a greater load on the driving wheels (approximately 70 ... 75% of the total mass) of tractors with a 4 x 2 wheel arrangement. On 4 × 4 wheeled tractors, they strive for a more even distribution of the tractor mass over the wheels, and therefore the dimensions of the front and rear wheels many of these tractors (for example, T-150K, K-701) are the same.
The wheel consists of two main parts: an inner rigid part and an outer elastic part. nine0005
The rigid part of the wheel is the hub, disc and rim. An elastic pneumatic tire is installed on the rim, into the inner cavity of which air is pumped.
The hub (Fig. 1, a) of the driving wheel of the tractor is rigidly attached to the ends of the axle shafts protruding from the frame. Such fastening provides for the possibility of a relatively easy change of the fastening point along the length of the semi-axis. The hub (Fig. 1, b) of the steered wheel is mounted on two tapered bearings on a non-rotating pivot pin. The wheel is fixed on the trunnion with a nut. The wheel bearings are adjusted with the same nut. nine0005
Fig. 1. Tractor wheels: a - leading; b - controlled; 1 - hub; 2 - disk; 3 - rim; 4 - pneumatic tire assembly; 5 - axle shaft; 6 - steering knuckle; 7 - trunnion; b - stuffing box; 9 - bearings; 10 - nut; 11 - cap; 12 - easily removable weights
Additional easily removable weights can be attached to the disks of tractor wheels (Fig. 1, a).
Tractor wheel covers are deep. The deep rim has a high bead that securely holds the pneumatic tire. nine0005
The pneumatic tire is the elastic part of the wheel. The eye consists of a chamber, a rim tape and a tire (Fig. 2, a) or only one tire (Fig. 2, b).
The chamber is made of thin elastic rubber in the form of an o-ring. Air is pumped into the inner cavity of the chamber through a valve. When installing a pneumatic tire, the chamber is laid inside the tire, which protects the chamber from mechanical damage. To exclude mechanical effects of the steel rim on the chamber, an insulating rubber rim tape 8 is installed between the rim and the chamber. nine0005
The tire (Fig. 2, a) consists of a carcass ending with beads with metal wire rings, sidewalls, a cushion layer and a tread. The carcass is the basis of the tire, it consists of several layers of highly durable nordic fabric. Sidewalls are a relatively thin layer of rubber applied to the frame from the sides. The tire is held on the wheel rim by strong and sufficiently rigid sides. Metal wire rings in the beads increase the rigidity and strength of the tire. nine0005
The tread makes contact with the ground. The tread must be wear-resistant and ensure reliable grip of the wheel with the supporting surface. Therefore, it is a thick layer of rubber, the outer surface of which has protrusions. The sizes and configuration of these protrusions are very diverse. On off-road tractors, the protrusions are large, high, most often arranged in the form of a herringbone.
The tread wears out most intensively in tires. When repairing tires, first of all, the tread is restored by building up a new layer of rubber and molding a pattern on it. nine0005
The air pressure in the tires of the steering wheels of tractors is 0.10...0.27, the driving wheels - 0.08...0.20 MPa.
Fig. 2. Pneumatic tires: a - chamber on a flat rim; b - tubeless on a deep rim; 1 and 6 - sides; 2 - frame; 3 - sidewall; 4 - cushion layer; 6 - protector; 7 - camera; 8 - rim tape; 9 and 10 - retaining rings
Fig. 3. Main dimensions of pneumatic tire
When servicing the tractor, check the condition of the tires, the air pressure in them and the tightness of the wheel nuts. nine0005
Tires must not be damaged or blistered, tread wear is not allowed until the pattern disappears completely.
Tire pressure should only be checked with a pressure gauge; other methods of air pressure control in tires (by pressing in a mounting blade, hitting a tire, etc.) are not allowed. Both low and high air pressure in tires reduces the efficiency of the tractor and leads to intensive tire wear.
The wheel mounting must be particularly secure. nine0005
It should be remembered that not only the efficiency, but also the safety of wheeled vehicles depends on the technical condition of pneumatic tires and wheels.
When parked for a long time, the tractors must be placed on stands to relieve the tires. To avoid rapid aging of rubber, protect tires and tubes from sunlight. In the premises for storing tires and tubes, it is necessary to maintain a temperature from minus 10 ° to 20 ° C at a relative humidity of 50 ... 80%. nine0005
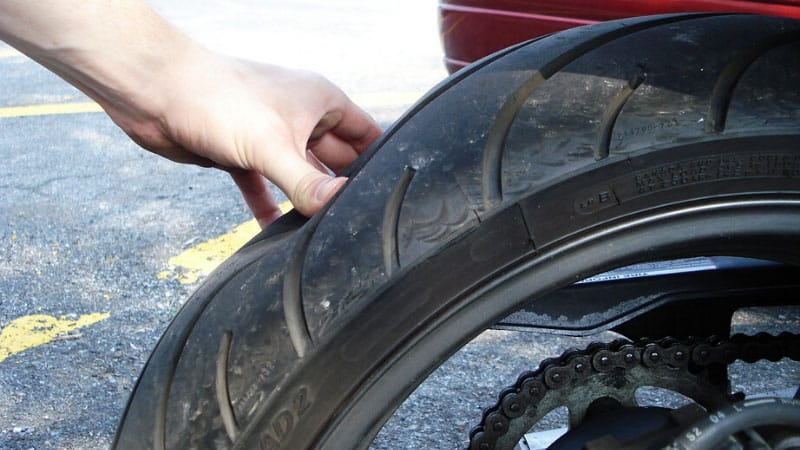
Another season of changing shoes is approaching. And you may remember that on one of the tires after the last winter/summer there is a jamb - a small bump. I don’t want to run to the store for the sake of one new tire. We understand. Or maybe it looks even better if repaired?
Yes, not every wheel that has met with a nail, rebar sticking out of the ground or a sharp stone on the road is considered damaged. Everything, of course, depends on the scale of the damage and its location on the tire itself. Some are easily repaired, while others are simply impossible to do - the tire can only be sent to the trash. nine0005
A bulge on a wheel, referred to by drivers as a bump or bulge, is the most common tire sidewall defect. It appears due to a collision with an obstacle or after falling into a pit, more often at high speed. The threads of the sidewall carcass are easily damaged by impact, and the tire at this point can no longer hold the load and air pressure - swelling appears. A small bump sooner or later turns into a big one, and driving with such a defect is dangerous - the wheel can shoot at any moment.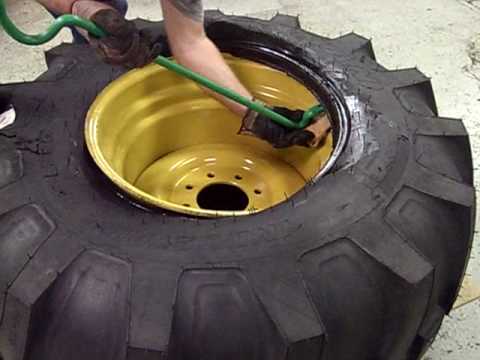 At high speed, this is fraught with loss of control, departure from the road and a rollover. nine0005
The quality of roads in Kazakhstan contributes to the appearance of bulges on tires
Some types of bulges are repairable, although this is a temporary measure. Not a single patch can restore the factory rigidity. Ideally, change the tire.
Special cord patches can extend the life of a tire with a herniation, even if the swelling has appeared on the tread. The sidewall is a different story. If the swelling appeared at a distance of more than 40 mm from the side, it can be repaired. If not, then the wheel needs to be replaced. Blisters on low profile tires are most often non-repairable. nine0005
For maximum safety when riding with a repaired bump, insert the tube. This is an inexpensive and reliable solution. On our market, you can find cameras made in China and Russia, the latter are slightly more expensive, but also of better quality.
The elimination of a side cut is a serious operation, therefore, as in the case of a bump, you will have to go to the professionals.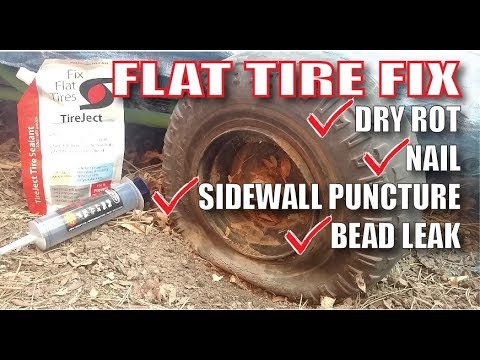 We need cord patches, fortunately in our time they are of different sizes and with a different number of layers. And if you do it wisely, then you can't do without special tools and vulcanization. nine0005
A cut, by the way, cannot be healed in all cases. If the gap is in the shoulder area of the tire, it is unlikely that anyone will undertake to repair it, since no guarantees can be given here. However, our Kulibins take on even the most difficult cases, cutting out parts of the sidewalls from the tires and even weaving the cord on their own.
Tire overhaul. We would not put such a wheel on ourselves
Low profile tires can be repaired, but more difficult. A tear in the sidewall is easier to seal on tires with a medium or high profile. nine0005
Sometimes a cut is confused with a pluck. This is when the outer layer of the sidewall caught on something sharp, a tear formed, but the frame itself remained intact. There is nothing wrong with that, although the drivers at the tire fitting company successfully repair the cut, for which they take it accordingly.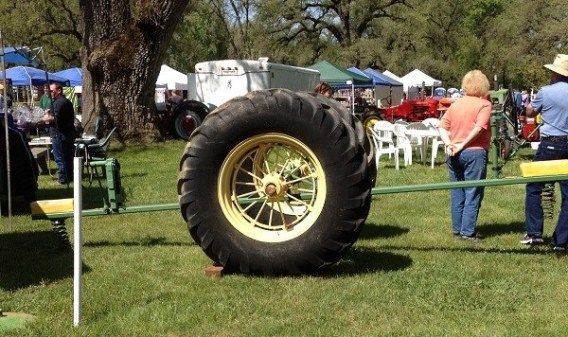
If a piece of rubber remains on the sidewall, then glue it with ordinary superglue (101st). If it came off, then it is better to cover it with raw rubber and vulcanize. Leaving the pluck bare is not recommended, because the tire carcass, often consisting of a metal cord, will quickly corrode. nine0005
In Europe, defective or used tires are perforated before being sent for scrap to prevent their resale and possible operation. But they don’t know that we have such holes on the sidewall patched once or twice
Cuts and hernias are not the only possible damage to the side of the tire. You can also spoil the side ring, in the process of changing shoes, for example. If it’s for garlic, then such a tire is already dangerous. Sooner or later, the tire pressure and the load in motion will start to squeeze the rubber off the rim - a wheel explosion can occur. nine0005
This ailment is repaired if the wire ring - the base - is intact. There are no special technologies and materials to correct this particular problem, but most often craftsmen use a two-component composition for chemical (also called cold) vulcanization. After mixing, the mass is pressed into a fat-free damage. Compound manufacturers recommend waiting 72 hours before mounting a tire. Of course, our masters do not pay attention to this condition - they put the tire right away. And it’s good if the wheel is flat because of this at night in the parking lot, and not on the road. nine0005
If the side ring tears are barely noticeable, but the wheel still deflates, then you can use a special liquid - a bead seal designed to seal a tubeless tire.
These seals have been used in motorsport for some time. In particular, in the American Formula D Drift Series, drivers used compounds to keep the tire on the rim even with minimal tire pressure. Now they are banned.
Pay attention to the left rear wheel of the Nissan Silvia S13. Due to too low pressure, it was literally taken off the disk under load
Every schoolchild faced this problem when patching the tube of his bike after hitting something sharp. Repairing a car tire puncture with your own hands will also not be difficult even on the road. But for this you will need a pump (or compressor) and a universal tire repair kit with harnesses. All this is sold at any car market or gas station.
Repairing a tire on the shoulder with harnesses
The process is simple. If we are talking about the front wheels, then in most cases the wheel can not even be removed, it is enough to turn the steering wheel in the right direction, find the puncture site and carry out repairs. First, the hole is cleaned with a helical awl from the set. The tourniquet itself is smeared with glue and tucked into the eye of the awl, after which it is inserted into the tire hole. With a sharp movement, the tool is removed, and the tourniquet remains in place and clogs the hole.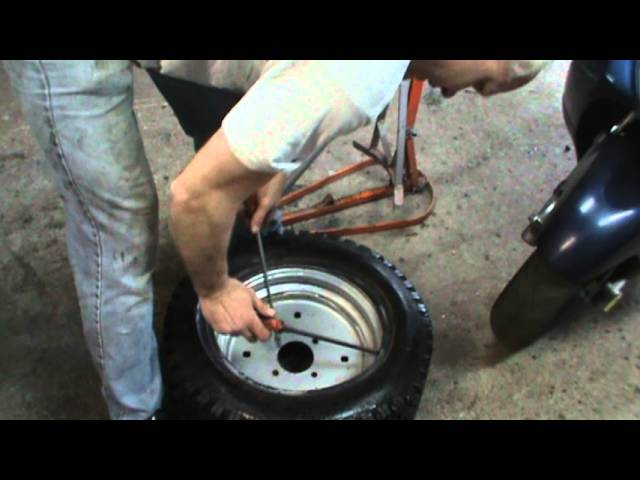 The tails are cut with a knife, but not at the root, it is recommended to leave about 20 mm. The tire is inflated and checked. nine0005
Sometimes a nail or self-tapping screw clogs the hole itself, remaining in it. If you see a hat in a tread, do not rush to pull it out. While the pressure is holding, move to vulcanize. And sometimes they drive with a screw in a tire for weeks.
Repair of a puncture at a tire shop
Punctures are also repaired with harnesses at a specialized service, although among professionals such repairs are not considered long-term. After a few months, the flagella dry out and can let air through. There are more advanced methods like cold and hot vulcanization. The latter is more reliable. In this case, the hole is sealed with an elastic patch, and the funnel from a foreign object is filled with a special compound. After that, a vulcanizer is put on the tire, it heats up the rubber and solders it. nine0005
In addition to the plaster, the puncture is also repaired with special cord fungi. Craftsmen process the puncture site: drill it and treat the surface with a tool to roughen it. Then the repair area is lubricated with glue (it is also called cement) and a fungus is introduced. This is done from the inside of the tire. The cap of the fungus is rolled, and the excess legs are simply cut off from the outside.
Puncture repair with sealant
With the advent of tubeless wheels, and later run flat tires, many automakers began to abandon spare wheels. Instead, repair kits with compressors are supplied with the machines. A repair kit is essentially a bottle of pressurized sealant. Later, such spray cans began to appear on the shelves of ordinary car dealerships. nine0005
This method has not taken root in the CIS, because the condition of the roads makes it necessary to have at least a stowaway in the kit, but it can also be considered as a method of repair on the road.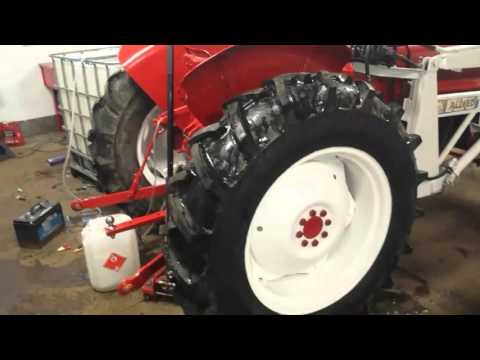
The car must be jacked up and sealant must be pumped into the damaged wheel through the nipple. Next, you should spin the wheel, then pump it up, lower the car and drive a few hundred meters. If the tire tightness has not been restored, repeat the procedure.
For commercial vehicles, cutting the tread with a special device (regrower) is a common thing. Moreover, such tire retreading is provided by the factory (marked REGROOVABLE on the sidewall) to increase the service life. But there are entrepreneurs who undertake to deepen the grooves in tires for passenger cars. But they are not intended for such an operation. Often used tires for sale are “refreshed” in this way. Be careful!
What is the danger?
The worst option is that the retreaded tire will shoot out on the road, as the master can damage the undertread layer when deepening the grooves. Such a tire will not be able to hold pressure at some point. There will be a boom! At best, the tire will indeed last a little longer, but is the game worth the candle? We think it's not worth it.
How is cutting done?
A regrower is used to cut the tread. Roughly speaking, this is a large soldering iron with interchangeable tips of various shapes. It goes through rubber like a knife through butter. nine0005
If the tire is for passenger cars, then it is worth taking on a regrower only in one case - when part of the tread pattern was welded with "new" rubber during repair. This is where threading comes in handy in order to restore the grooves and symmetry of the tread.
Vehicle operation is prohibited if:
— tires have a residual tread height of less than 1.6 mm; nine0197
- tires have punctures, cuts, ruptures that expose the cord, as well as delamination of the carcass, delamination of the tread and sidewall;
- tires in size or load capacity do not match the car model;
- tires of various sizes, designs (radial, diagonal, chamber, tubeless), models, with different tread patterns, winter and summer, studded and non-studded, new and restored, are installed on one axle of the car; nine0197
— Tires retreaded according to the second repair class are installed on the front axle.

 Use of this Web site constitutes acceptance of our User Agreement and Privacy Policy