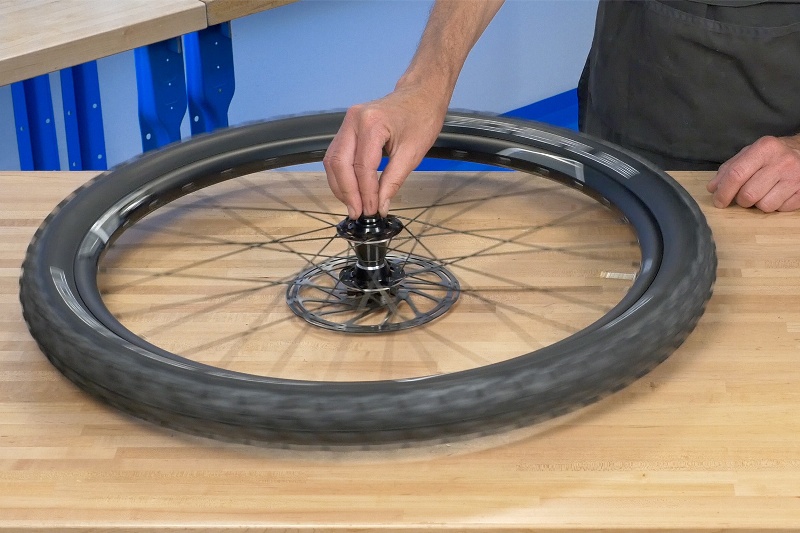
So you’re already convinced that tubeless is the way to go? Great choice! While running tubeless can have its own advantages, there are few things you need to know before making the change. One of the most important things to know is, how to maintain tubeless tires.
Similar to a normal setup, maintaining a tubeless tire requires that you monitor tire pressure and manage leaks. Tubeless tires also require that you maintain appropriate levels of sealant, knowing how it can change over time. Let’s discuss further how you can get the most out of your tubeless tires and examine what it really takes to maintain them.
Before we get into it, there are a few things you may need to maintain your tubeless tires.
• Tubeless wheel (or tubeless-converted wheel)
• Tubeless tire
• Tire sealant
• Sealant injector
• Valve core removal tool
• Track pump
• Tubeless inflator
If you’re new to biking or even just new to tubeless tires, you may be wondering what tubeless is and how it works.
Fortunately, it is actually quite simple to understand and implement. I will give you a basic rundown and also answer a few commonly asked questions about tubeless tires, and what it takes to maintain them.
Tubeless tires are different than regular pneumatic tires in the main sense that they don’t use a tube. So how do they keep air in your tire? By adding a special sealant that prevents air from escaping the tire bead.
While that can sound a little complex, it is actually really simple to implement. If you can seat a regular tubed tire, you can manage a tubeless tire.
If the initial setup and maintenance sounds intimidating, you may be wondering if tubeless is even worth the conversion.
While I can’t tell you how you’d feel going tubeless, I can give you a few pros and cons of running tubeless tires.
Fewer Flats – Virtually no more pinch flats. Plus, smaller punctures are sealed almost instantly.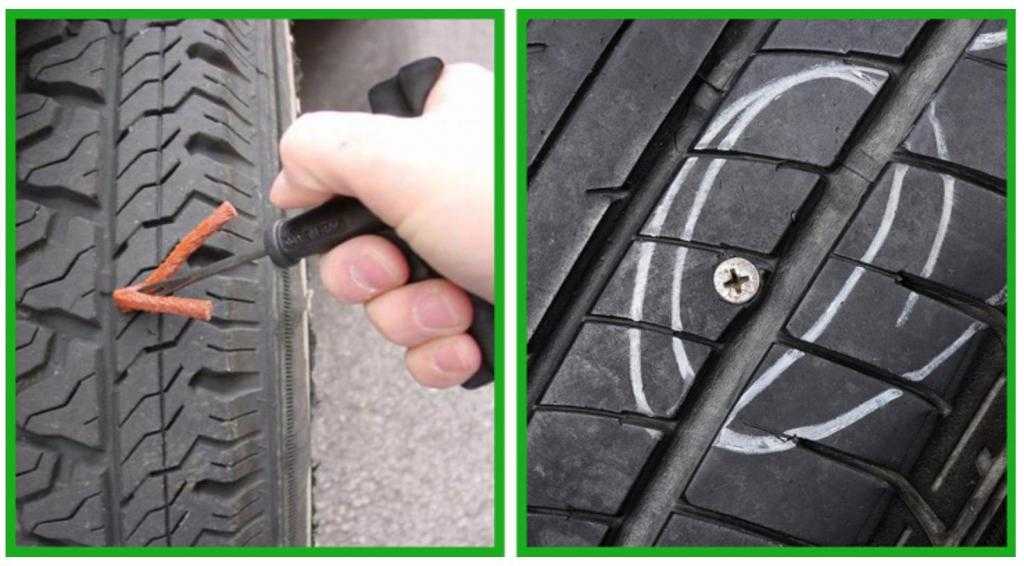
Better Ride – Although this is objective, it is pretty easy to see why the ride is better. When your riding tubeless, you’re able to run lower psi in your tires, taking full advantage of your tire’s traction. As well, the extra room that your tire has to deform, allows you to roll over bigger objects faster and easier.
Lighter weight – you actually save a bit of weight losing the tube in a tire, the weight is minimal, but worth it if you’re looking to save weight as much as possible.
Kind of Costly – Tubeless ready tires and rims can be pricey compared to a standard setup. As well, the conversion kits can run anywhere from $70-100. If you’re a dedicated rider, this may be worth the money.
Involving Mounting Process – Mounting tubeless tires can be a bit of a challenge. Once you’ve done it a few times, you will start to get the hang of it.
Sealant is Messy
– This one speaks for itself.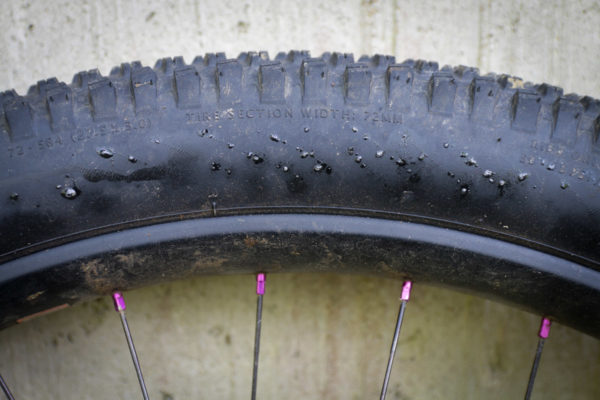 If you’re new to tubeless tires, prepare to clean up sealant quite often.
Yes. The tubeless sealant plays a vital role in keeping air in your tire and also makes it possible to inflate the tire in the first place.
Though it can be a pain to deal with, you will definitely appreciate the sealant after a long ride when you see how well it helps your tire hold up.
Tubeless tire sealant is much more than a sticky liquid that fills cracks.
There are actually two types of tubeless tire sealant, latex-based and fiber-based – and they work differently to get the same result.
In general, both sealants use the escaping air, tire rotation, and gravity to seal the tire when punctured. However, their chemical make-up gets the job done in two different ways.
With Fiber-based sealants, the internal tire pressure forces the sealant into a cavity, blocking any escaping air. The fibers and particles in the sealant then form a bond with the rubber, effectively blocking the hole. Fiber-based sealants work better with tubeless ready tires and rims.
Latex-based sealants are much simpler, as they are already made from a rubber based synthetic. This time, when the tire pressure forces the mixture into a leak, the compressed air helps the sealant solidify, forming another solid bond with the tire. Latex-based sealants make it possible for you to convert your non-tubeless tires to tubeless.
Latex sealants are much more popular since they are inexpensive to manufacturer and very effective in plugging leaks, however, there are certain reasons you will want to limit their use.
Regardless of which type you use; it will always be more effective to plug a hole with tubeless sealant than with a regular patch.
Traditional plugs, patched from the outside, can further expand the puncture and even damage the rubber. A tire plugged with sealant is a more natural repair, as it forms a self-healing skin from inside the tire.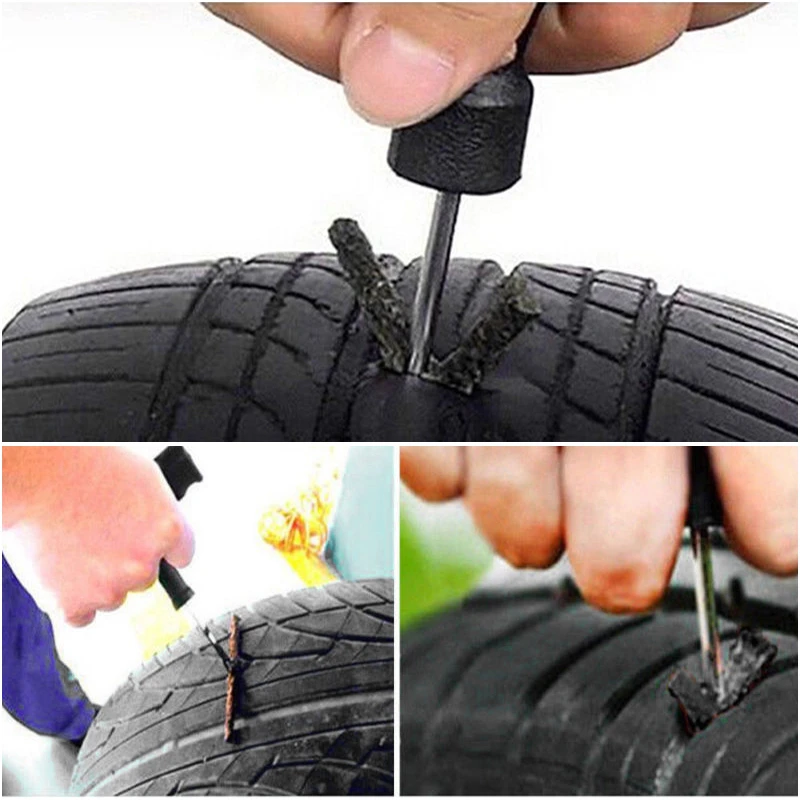
If the idea of a self-healing tire sounds too good to be true, it’s because it is. Unfortunately, there will come a time where you must change your sealant.
Depending on the type you use, your sealant may have a certain lifespan. So, how long does tubeless sealant last?
Latex-based sealants last around 9000 miles and fiber-based sealants can virtually last for the life of the tire. Plus, fiber-based sealants tend to be easier to maintain.
That is why we recommend fiber-based sealants if possible. Although latex sealants can be cheaper and more effective, they can also develop some nasty properties over time.
Latex-based sealants start to dry over time, especially as you reach closer to 9000 miles. Once dried, it can stick to the rim and tire, making it hard to remove, and even harder to clean. If you leave it long enough, it can even cause corrosion to your rim and tire, prompting an even more costly repair.
Fiber-based sealants are typically water based and retain their soluble properties for a long time. This makes cleanup a lot easier and helps keep you mind at ease as to what’s rolling around in your tire.
In general, the first thing to know when learning how to maintain tubeless tires, is when to replace your sealant. That leads to our next question.
You should aim to replace your sealant every 3 to 6 months, although, you may want to replace it more often than that.
Since your tire is healing itself, you may not even notice how many punctures you’ve accumulated over time or how much fluid you’ve lost. In addition to adding sealant regularly, you should clean and replace the old sealant in your tire.
Over time, sealant continues to dry and become less effective. As well, latex-based sealants can leave clumps of mixture that distribute weight unevenly through the tire.
Though the chances of you doing any actual damage is small, it’s still good practice to replace your sealant regularly.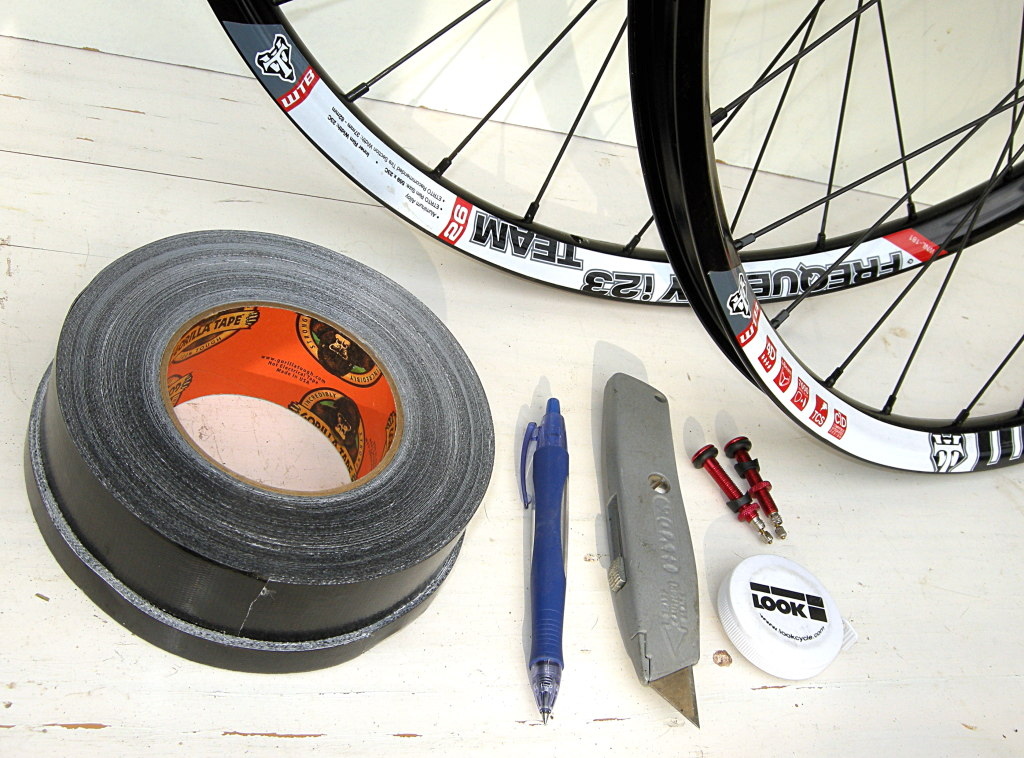
All in all, tubeless tires aren’t all that different than regular tires. You should only have to replace your tubeless tire when it’s worn down or no longer holds air.
To get a good idea of how long you can expect your tires to last, check out this article, “How long do mountain bike tires last?”.
You may find yourself needing to replace your tubeless tire a little early still. If the punctures are too severe to be patched or if the bead of the tire no longer seals in the rim.
Since tubeless tires rely heavily on that seal, any damage to those vital areas could mean a new tire is needed.
Something a lot of people struggle with initially, is adding the sealant and getting the tire aired up. Understandably so, as airing up a tubeless tire can be something of an art.
But don’t worry too much, you can still get the job done, and there are two separate ways for you to add sealant.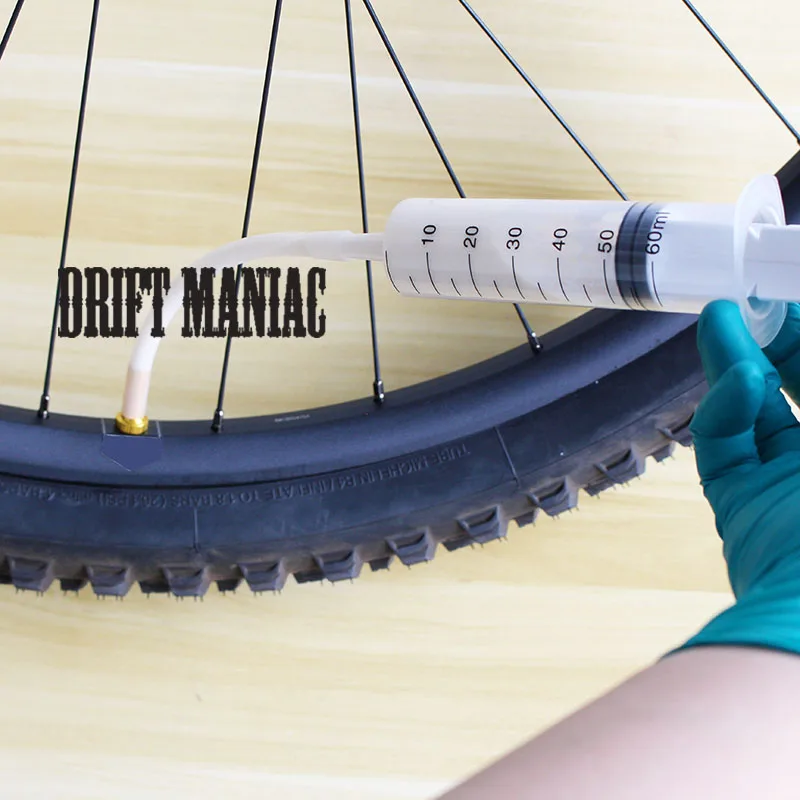 Since both methods require that you quickly inflate the tire, it is recommended that you have an air compressor. For further instruction, there is no better teacher than ParkTools.
Check out this video from ParkTools for a visual guide to adding tubeless sealant.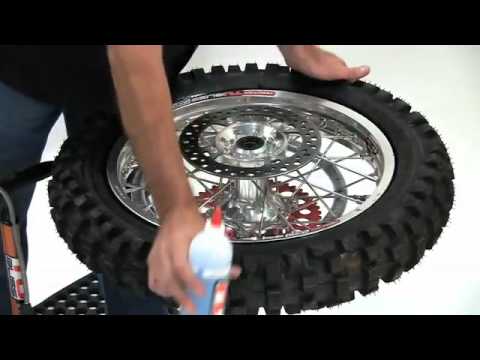
For tubeless ready rims and tires, the sealing process is fairly simple. However, if you are converting non-tubeless rims and tires, there are a few steps you must complete before adding sealant. Always remember to add enough rim tape to prevent the sealant from escaping the spoke holes.
Other than the initial setup, the air pressure and sealant will do the rest of the work for keeping the tire sealed.
Just like when you setup the tires, sealing will involve inflating the tire to the least maximum psi and making sure the bead is seated on both sides of the tire.
From there, you just want to watch out for any obstructions that could get lodged in the tire bead or sidewall, as this can make the sealant ineffective in sealing the tire.
It can be devastating getting your tubeless tires all setup, just to see it start to leak out. Or even worse, what if you spring a leak while riding on the trail?
Unfortunately, leaks are a common issue when you run tubeless tires. On the road to learning how to maintain tubeless tires, you will also learn how to manage leaks.
Since there’s not that many places for sealant to escape, you will run into 2 types of leaks. I will list them here, with a brief summary of how to stop a tubeless tire from leaking.
 If you are still getting leaks, you may need to lower the air pressure in the tire. Sometimes, high air pressure can prevent sealant from drying enough to seal any gaps.
 Tubeless tires are known for their versatility and resilience to the same pinch flats that would stop a standard tire in its tracks. So can a tubeless tire go flat?
Yes, tubeless tires can still go flat.
If you have low, old, or even bad sealant in your tire, you can find it hard to keep a seal, making your tubeless tire go flat.
If you rip a hole in your tubeless tire that’s too big to seal, even a tire full of sealant won’t stop it from going flat.
And of course, if the bead is not properly seated, you can lose air and sealant in a massive leak.
But don’t worry, learning how to maintain tubeless tires prevents these issues.
In general, punctures in tubeless tires cannot be repaired and it is often not recommended to try and do so.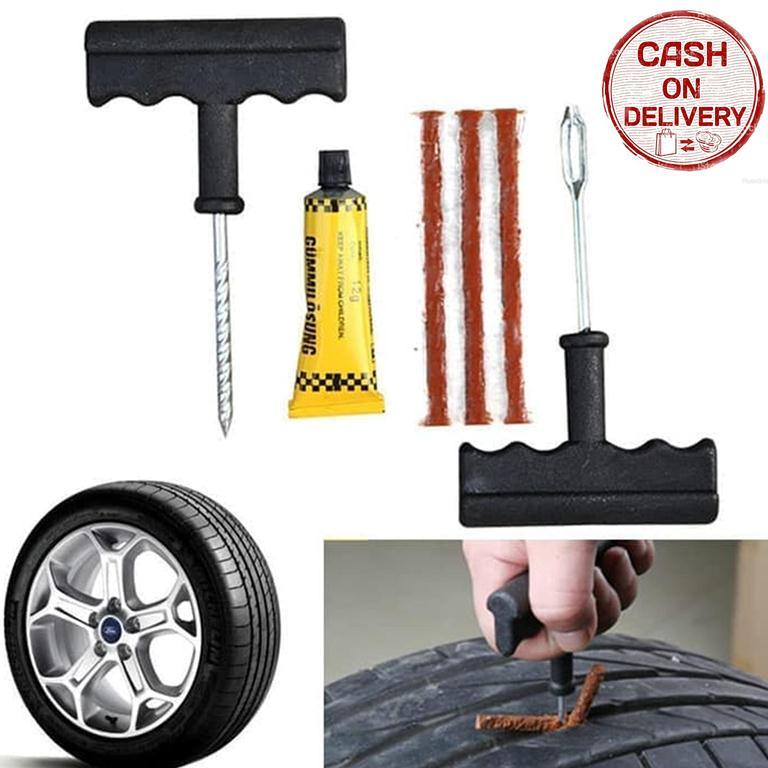 Although it can be a bit of an expense, it is always safest to buy a new tire.
The last step in learning how to maintain tubeless tires, is being able to remove the tire.
Whether you’re replacing the sealant or replacing the tire all-together, there will come a time when you have to remove the tire from the rim. This can be a bit of a challenge.
Similar to a standard tire, removing a tubeless tire consists of deflating the air and using your hands to push the bead off the rim. Only with tubeless tires, you have to be aware of the sealant that could make a mess during the whole process. Again, check out ParkTools for a visual representation of the process.
Now that you have a firm understanding how to maintain tubeless tires, you probably already realized what type of sealant you want to use. For those still looking for a little direction, you may still be wondering what is the best tubeless tire sealant?
Knowing what we know about the different types of sealant and their properties over time, we recommend a sealant that gives you the benefits of both, without most of the drawbacks.
That is why we recommend the No Puncture Hassle Tubeless Sealant from Muc-Off.
Check Amazon for Latest Pricing and Reviews
In conclusion, it is really simple to learn how to maintain tubeless tires. Just like any other maintenance on your bike, it can be a challenge at first, however, once you get the hang of it, it can be a rewarding task.
If you find the task particularly daunting, see if you can watch as your LBS does the work. The price you pay will be worth the knowledge and tips.
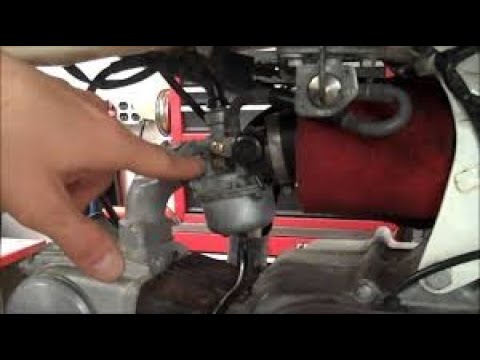
By Tom Jow — During my career as a bicycle technician, it has been my duty to prepare the two-wheeled machine so that its rider can perform at their best. That means presenting a clean bicycle that operates safely, smoothly and quietly. Therefore, my personal bikes, most people would expect, would also be “ready to race” at any moment. Nothing could be farther from the truth. In fact, it has almost become a personal challenge to see how much squeaking, grinding and knocking I was able to put up with. One of the things I put up with most of last summer was clogged tubeless tire valves. Unlike “tubed” tires, tubeless tires on road, gravel, and mountain bikes require periodic maintenance.
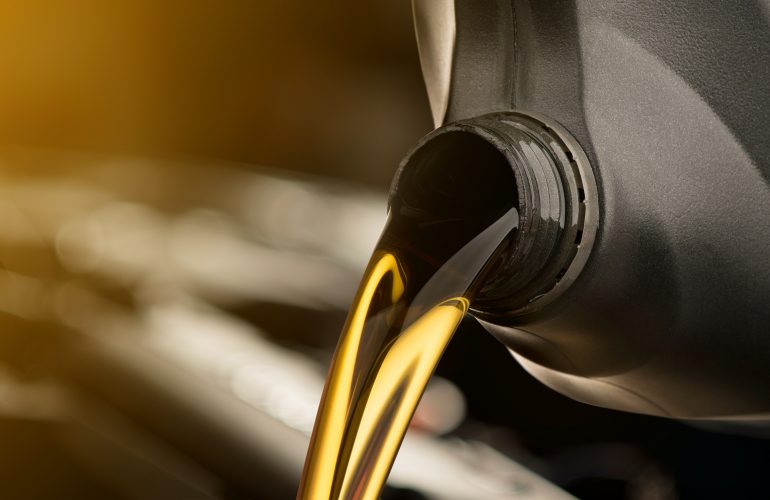
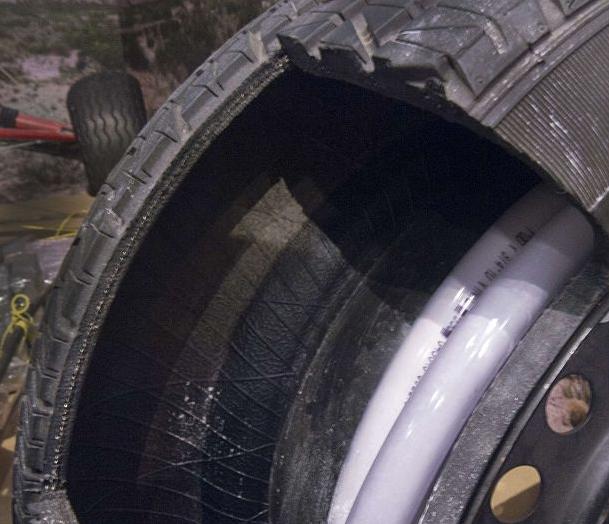
The current version of tubeless bicycle tires uses a tight-fitting seal between the tire and rim with a liquid sealant inside. It is the liquid sealant that creates the need for maintenance. Why? There are two reasons. First, because bicycle tires are not one hundred percent airtight, the liquid medium of the sealant evaporates over time. In extreme cases, evidence of this shows up as what appears to be large wet areas on the exterior of the tire casing. The second reason is the tire valves can become clogged. This occurs because the tire sealant is designed to seal punctures up to approximately 3mm in diameter. Conveniently the inner diameter of the tire valves is approximately 2.5mm.
How then shall we service the tubeless tire system? For periodic in season maintenance it can be as easy as refreshing the sealant and replacing the valve core. Do this by first removing the valve core. Follow this by installing a small amount of sealant through the valve. When installing the new sealant, place the valve stem at approximately the four or eight o’clock position. In this position, the sealant flows out of the valve stem and down to the bottom of the tire. This helps prevent clogging the valve stem. Finally, install a new valve core and inflate. Valve cores, core removal tools and sealant refresh kits can be ordered or purchased at your favorite local bike shop.
For a more extensive service, such as at the beginning of the season, tire removal is recommended. Before removing the tire, wash the exterior of the tire and wheel with soap and water. When dry, remove the tire from the wheel. Be prepared for a wet sticky mess. When I do this at work, I first carefully dismount one side of the tire over the trash can. Then, gently pour out any remaining sealant. Wipe out the inside of the tire with a rag before completing the tire removal. Once removed, wash the inside of the tire and the rim bed with soap and water. Inspect the valve stem for blockage and the rim tape for any cuts or damage. If necessary, clean the valve stem and replace the rim tape if damaged.
A valve stem blocked by sealant. Photo by Tom JowReassembly starts by installing one half of the tire. Be sure to orient the tire to the manufacturer’s recommended direction of rotation (pro tip: orient front and rear tires with the tire name at the valve stem). Installing the second tire bead and sealant can be done in one of two ways. The potentially messy way involves now pouring sealant into the tire, and then gently, without spilling, fold the second bead onto the rim. To complete the tire installation the less messy way, fold the tire bead onto the rim and before inflation, install the sealant through the valve stem. In either case, begin the second tire bead installation opposite the valve, and finish it at the valve.
Inflation of an unseated tire is best done with an air compressor (wear eye and ear protection please) or a bicycle tire pump specially designed for tubeless tires. Perform this first inflation with the valve core removed. Without the valve core a higher volume of air flows into the tire which more easily enables the seating of the tire beads. Then, as mentioned earlier, rotate the wheel to place the valve at approximately the four or eight o’clock position. After the beads are seated install the valve cores. Inflate to your desired pressure. Service complete!
One of the great things about bicycles is the fact that they will continue to operate despite neglect and lack of maintenance. This includes modern tubeless tire systems. Despite the old “tube” tire system being virtually maintenance free, tubeless tire systems, while a little messy, require only a little more care to operate flawlessly. Don’t put up with clogged tire valves. Tubeless tire service can be easy.
(Visited 1,441 times, 1 visits today)

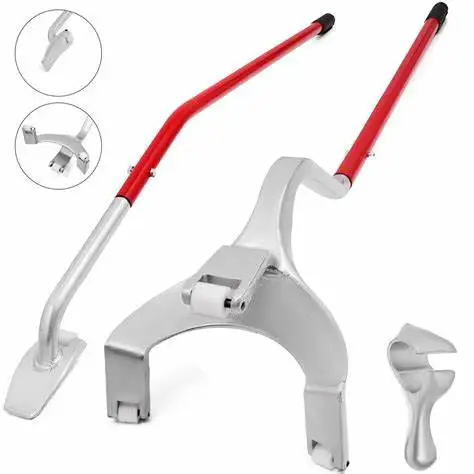
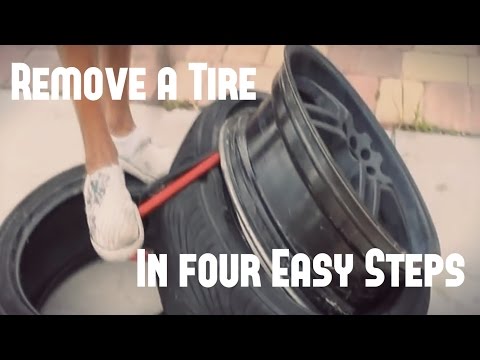
Mounting and dismounting process can be dangerous and must therefore be carried out by qualified workers using proper tools and procedures. Failure to follow these guidelines may result in the tire not being properly seated on the rim, resulting in a tire explosion that could result in serious physical injury or death.
1. Make sure the disc, tire and tube are compatible with each other.
2. Check that the tire is suitable for the machine. Use only rims recommended or approved by the tire manufacturer.
3. Use only special equipment and tools.
4. Disc must be clean and in very good condition (ie no damage, etc.). If necessary, clean the disc with a wire brush. In no case should a tire be installed on a rim with visible cracks, deformations, traces of welding repairs, etc.
5. The tire should be carefully inspected inside and out to make sure there is no damage.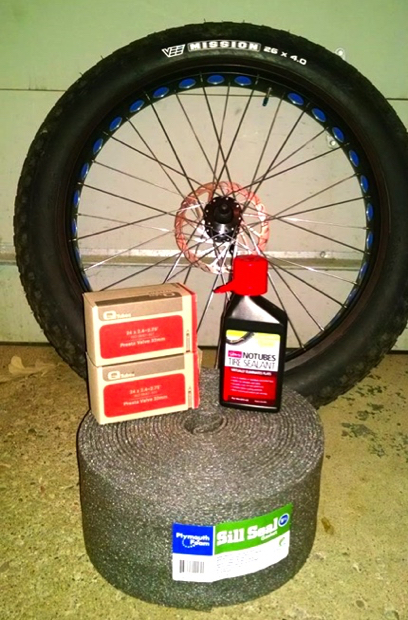 If damage is found that cannot be repaired, the tire must be replaced with another one.
6. If fitted with a tube, a new tube and valve must be used that is appropriate for the tire size. If a tubeless tire is installed on a tubeless rim, a new tubeless valve must be used.
7. Lubricate the rim and beads before assembly. Use only a suitable lubricant that does not harm the tire (do not use lubricants based on silicone or gasoline).
8. Vertical mounting recommended. In the case of horizontal installation, it is not possible to determine whether the lower bead has seated correctly.
9. Install the tire on the disc from the side diametrically opposite the valve (observe the direction of rotation, if indicated by the arrows). With the right leverage and repeated use, place the first rim over the wheel flange. Then apply a slightly inflated tube, talcum-coated (if used) inside the tire. Position the valve by loosely seating the clamping wheel. Plant the second bead, gradually raising it above the disc flange, ending at the valve.
10. Remove the valve core to seat the beads and center the tire. Inflation should be done slowly to ensure proper bead seating. Make sure the sides don't pinch the camera.
11. When inflating the chamber, keep a safe distance and use a safety guard, if possible fixed to the wall or with restraining chains. When taking a pressure reading, make sure that no part of the body is in the possible path of the valve mechanism or caps. It is recommended to use suitable pressure limiting sensors. A filter and desiccant should be used in the compressed air supply line to keep out moisture or dirt. Under no circumstances should a hammer be used to shrink the bead.
12. Continue inflation. Make sure that the pressure does not exceed 2.5 bar, if the beads do not sit down and stand up exactly in relation to the middle of the wheel.
13. If the beads are not seated correctly, bleed the air, lubricate and re-inflate. Repeat until the sides are set correctly.
14. After correctly carrying out the above steps, replace the valve core and adjust the load pressure according to the table in the technical manual.
15. Make sure the valve does not touch discs, brake discs or other fixed mechanical parts.
Modern passenger cars are equipped with tubeless tires. Tires with rubber chambers inside are extremely rare today, only on super-budget vehicle options. Car owners have long appreciated all the convenience and benefits that tubeless tires have. Unlike chambered rubber, they keep air in the wheels by being sealed to the rim. The tightness of tubeless tires is ensured by a two-millimeter layer of rubber applied to the tire from the inside. It is he who prevents the passage of air. The coating of soft rubber layer provides tightness at the junction of the tire with the rim of the rim. The tire bead sits on the so-called rim shelf, which is equipped with a special rounded ledge. Thanks to him, the tire is securely connected to the wheel rim, and complete tightness of the joint is achieved. A tubeless tire is filled with air through a valve installed on the rim, on its rim.
Why did tubeless tires become so popular that they gradually replaced tubed tires? First, tubeless tires are much lighter. This is a very important and great advantage, because heavy weight enhances the inertial movement of the wheel when driving on, to put it mildly, imperfect road surfaces, which we still have much more than smooth autobahns. As a result, this affects the condition of the chassis, accelerates its wear. In addition, tubeless tires do not heat up during driving in the same way that chamber rubber heated up, in which the inner cylinder rubbed against the tire while driving.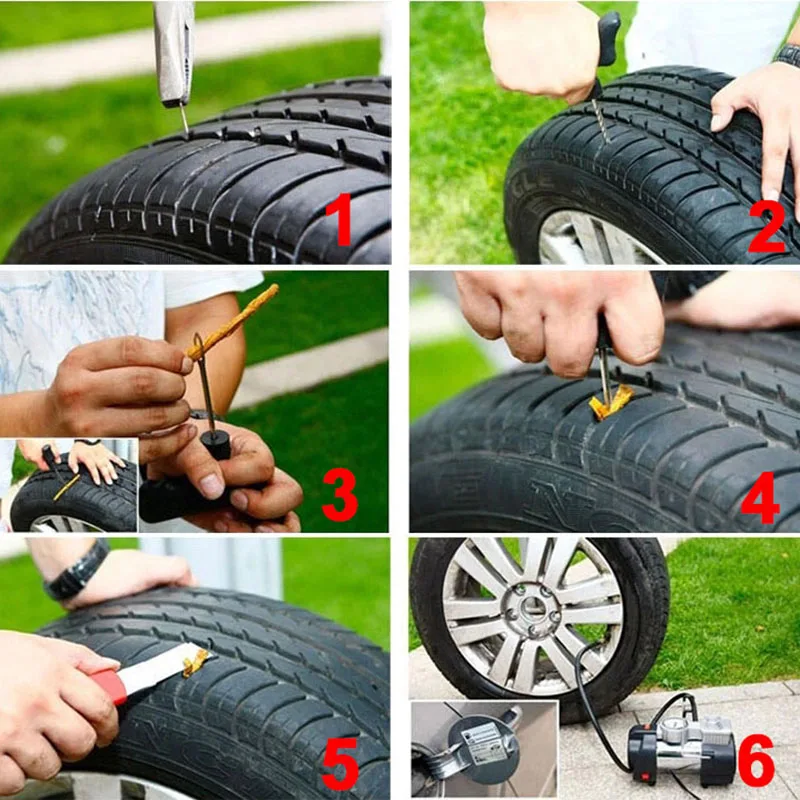 Such friction led to its rapid wear, and also increased the likelihood of tire rupture during movement. When a tube is punctured, the tube tire loses air very quickly, since it escapes not only from the puncture site, but also through leaky tire beads that do not fit snugly against the rim flange. In addition, if such a tire is punctured, you will not be able to stop the car immediately, it will travel more than a dozen meters by inertia until it comes to a complete stop. During this time, the tube and the tire can be damaged more thoroughly, the rubber of the inner cylinder will “chew”. With tubeless tires, this option is excluded. Even if a puncture occurs, thanks to the tightness of the chamber and its periodic pumping, you can get to the tire service.
Tubeless and tube tires also differ in how they are mounted / dismantled. If chambered rubber can be freely disassembled or, conversely, installed at home, then such a number will not work with a tubeless one - the risk of damaging the side flanges is too high, damage to which will lead to depressurization of the tire. Due to the peculiarities of installation and dismantling, many motorists find it impossible to repair a tubeless tire with their own hands, especially on the road, not in a comfortable garage, but on the side of the road. And in vain. Of course, it will not be possible to completely eliminate the problem at a professional level without special equipment. But to make sure that the damaged tire still travels, and sometimes not only reaches the tire fitting center, but goes more than one hundred kilometers after an impromptu repair, is quite realistic.
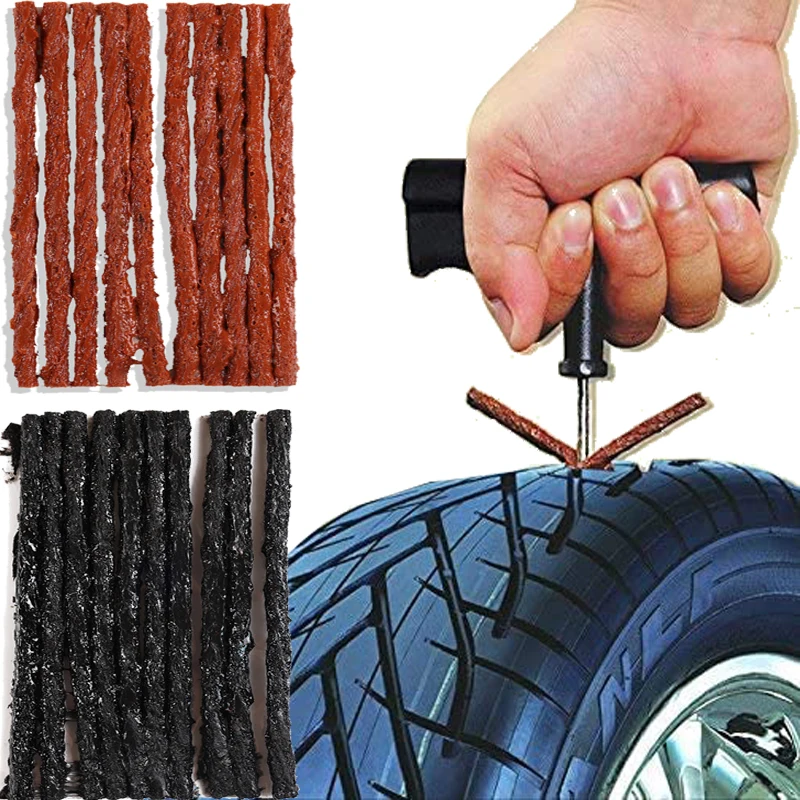
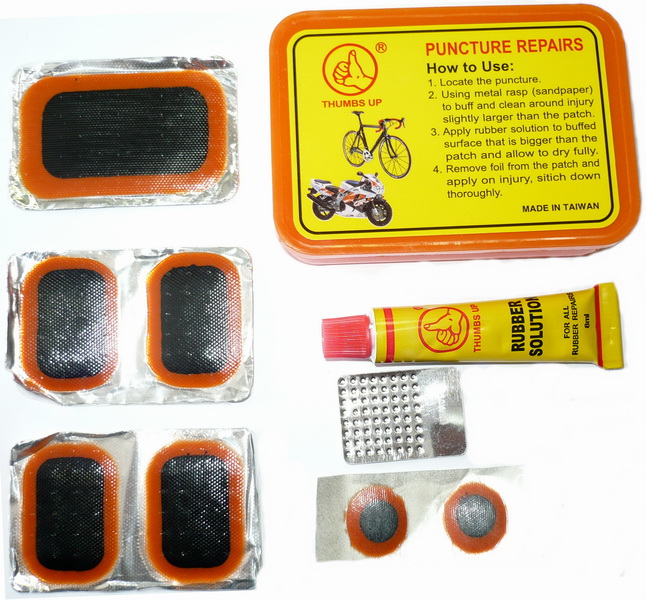
To do this, use special tire repair kits, which can be purchased everywhere today by going to any car shop. Better yet, buy everything you need to repair a tubeless wheel yourself separately and always have it ready. By doing this, you will save some money, which is always nice. The fact is that manufacturers of ready-made repair kits, in an effort to make their kits more expensive and solid in appearance, include in them both really useful tools and materials, as well as those that you can easily do without.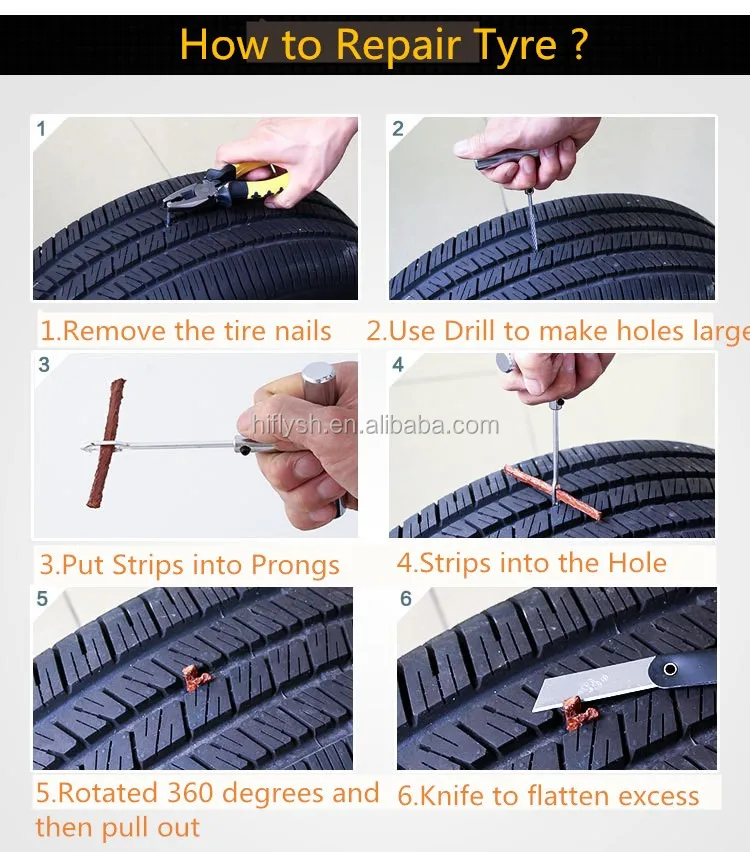 Using repair kits or separately purchased harnesses and tools, you can repair tubeless tires not only for cars, but also for trucks. This can also be regarded as one of the advantages of tubeless tires over tube tires. It is much more difficult to repair it with a puncture. It is necessary to disassemble the wheel, remove the chamber, find the puncture site, and then degrease the working area, cut out the patch, and seal the rubber balloon. After drying, the camera is installed in place, and the wheel is beaded. With a tubeless tire, everything is much easier.
RUNWAY Tubeless Tire Repair Kit, 7-Piece
If you find that your car's tubeless tire wheel is damaged, first assess the severity of the situation. If, in your opinion, you can do without repair, having reached a reliable tire service on periodic pumping of the wheel, then it’s better to do so. Tubeless tires were designed to hold air even with foreign objects sticking out of the cord.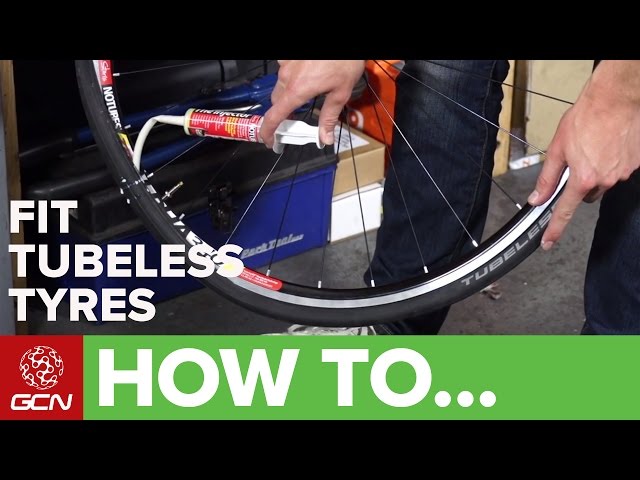 But do not forget that riding with a nail or other object in the tire causes the puncture to gradually expand and the tire around the damaged area begins to gradually collapse.
But, if it so happens that the damage to the wheel received on the road is too extensive, the chamber does not hold air and it will not be possible to complete the journey while inflating the tire, you need to choose the best method of temporary repair and start it immediately. A tubeless tire is repaired in the following ways:
When choosing a repair using a tourniquet, you need to decide what type of material will be used. The harness can be cord or rubber. Let's consider both of these options.
Wheel repair kit, 6 pieces
Cord harness has found wide distribution as a repair material for tubeless tires. With this harness, you can carry out repairs in any conditions: on a city street or on the side of a country road.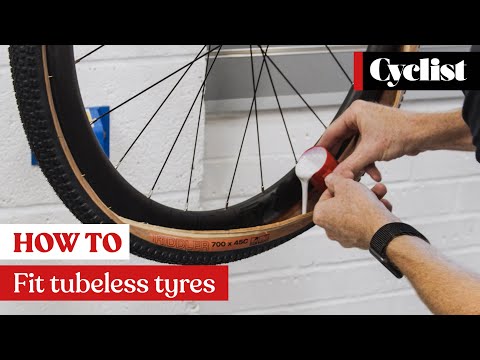 It is a strip of high-strength nylon, which is richly impregnated with high-quality rubber-based adhesive. Such harnesses are supplied to the domestic market by many manufacturers, they have certain differences in technical characteristics and cost. But all cord harnesses are installed according to the same type of scheme:
First of all, they find the place of damage and mark it with wax crayon or another marker.
Remove the item that damaged the tire if it is stuck in the cord.
Then you should check the tire pressure, it should not fall below 0.5 atmospheres.
Take a spiral awl and use it to determine at what angle the tire is damaged.
Apply vulcanizing glue to the awl.
Using the awl inserted into the puncture, coat the puncture site with glue in the most thorough way, for which you need to rotate the tool lubricated with it clockwise. Perform this action three times - lubricate the awl and insert it into the puncture, then leave the tool in the cord for the time being.
In the meantime, select the desired harness and carefully remove the protective film from it.
Insert the tourniquet into a special needle, focusing on the center.
On both sides, cover the surface of the tourniquet with vulcanizing glue.
Remove the helical awl from the tire where you left it at the puncture site.
Install a pen with a needle and a tourniquet placed inside into the puncture.
By pressing the handle, install the needle with the tourniquet into the puncture, advancing to the stop at a given angle.
Remove the pen with the needle from the puncture site without rotating it.
Carefully cut off the parts of the tourniquet sticking out on the surface.
Then you need to determine how tight the tire is repaired. This can be done with the help of a special liquid, which is used to determine the puncture site. If, after applying such a liquid, no air bubbles appear, then the tire is temporarily repaired and can be used further. If air bubbles appear, try installing an additional tourniquet in the place of damage to the tire.
This method of temporary repair is inexpensive, but it has proven its effectiveness more than once. A tire repaired in this way without repair will serve you for a long time - up to 6 months.
A rubber harness costs more than cord, but it is also more reliable. They install it in much the same way as the cord one, but there are still some differences. For example, when installing a rubber band, do not use an awl in the form of a rasp, since it can damage the rubber band during installation. In addition, the rubber band must be mounted on the adhesive specified by the manufacturer in the instructions for the repair kit.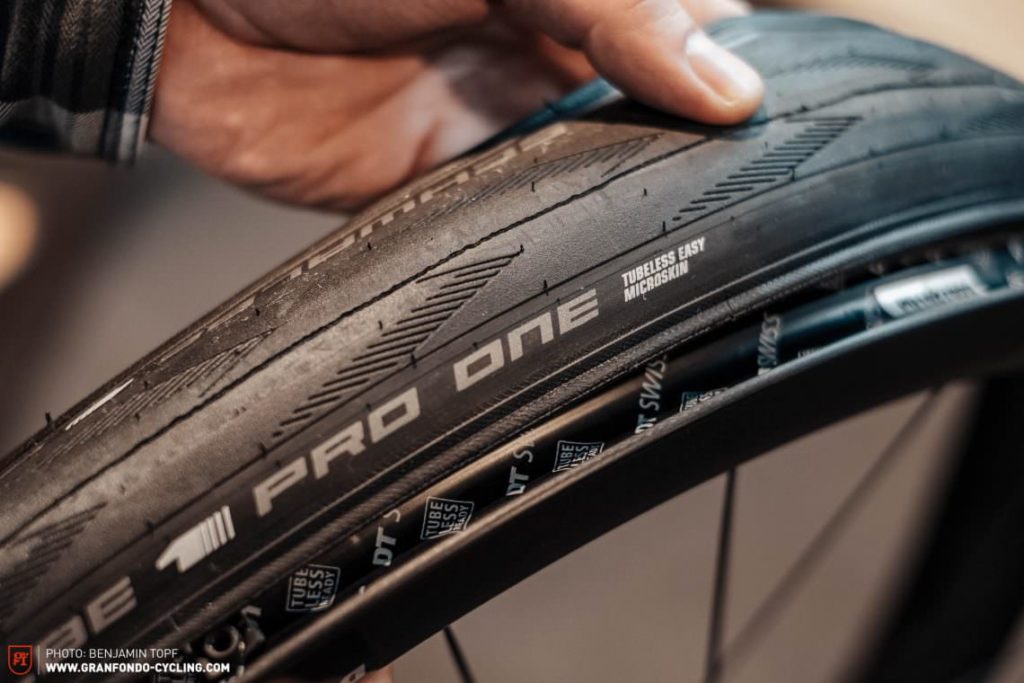
Raw rubber band for repairing RUNWAY tubeless tires, 5 pcs
In this case, an anchor is a special type of bundle, one end of which ends with a small patch. The anchor is installed in the same way as other types of harnesses, but in addition, it glues the puncture site with an internal patch. To do this, the tourniquet is pushed inward, and then pulled a little in the opposite direction. Anchor can only be installed using a special cutter with a diameter of 6 mm. It is purchased separately from the set. But your efforts will surely be crowned with success, because the anchor is considered the most reliable option for repairing a tubeless tire with a harness. But with the help of harnesses, you can not repair side punctures. And in any case, even if the repair is successful, it is necessary in the coming days to choose the time to visit the tire service. Remember that prolonged use of the harness will cause irreversible damage to the tubeless tire.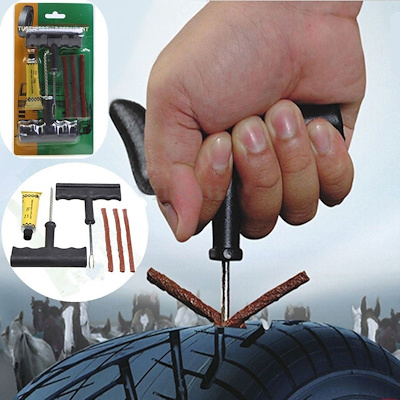 And until the problem is fixed, constantly monitor tire pressure.
The second option for repairing tubeless tires involves the use of sealant. This option cannot be called optimal, but it has become widespread, since tire repair in this way is carried out very quickly, literally in a matter of minutes. And the result of its implementation is guaranteed to allow you to get to the intended purpose of the trip, without first stopping by the tire service you met along the way.
The sealant is very easy to apply. In this case, it is not necessary to remove a nail or other object from the cord, due to which the tire was damaged. Simply attach a bottle filled with sealant to the valve on the rim of the wheel and see that the contents of the bottle are pumped into the wheel. Keep in mind that repairing a tire with sealant will significantly disrupt the balance, so choose a moderate speed. But on the other hand, repairs with the help of a sealant are easy, simple and very fast.