Clanking noises, vague steering doesn’t fill you with confidence as you give your ATV the beans on a dirt trail.
To check ATV ball joints, lift and support the chassis. Ball joints are fitted to steering and suspension components. Test procedure differs for both.
In this post, you’ll learn how to check the ball joints of your ATV, how to change them, the tools you’ll need, and some mechanics hacks.
Page Contents
Ball joints, as you know, are fitted to your suspension but also your steering components. You could argue they are the most important component of your ATV. And although they are a common repair on ATVs, total failure of a ball joint is rare.
A dangerously worn ball joint will make its presents known for quite some time before it lets go. Fitting oversized wheels and tires while adding stability shortens the life of ball joints. The added weight and stress take their toll on the ball joints.
Testing a steering ball joint is slightly different from testing a suspension, only in so far as they are loaded differently.
I like to first ride the bike and listen for any unusual squeaks or clanking noises, and I’ll feel for excessive pulling or vagueness in steering. All ball joints have a rubber boot that contains grease. It’s designed to lube and protect the metal ball and socket from water and grit. Stiff steering is a common symptom of a seized ball joint (usually the lower A-arm).
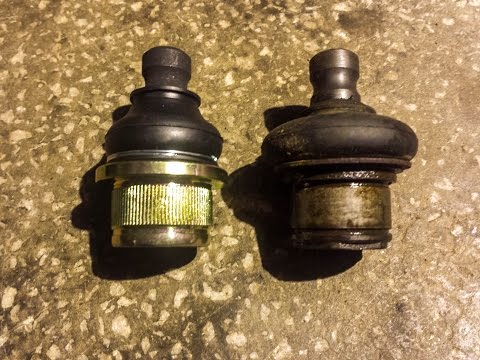
In the workshop, I’ll jack and support the front of the vehicle.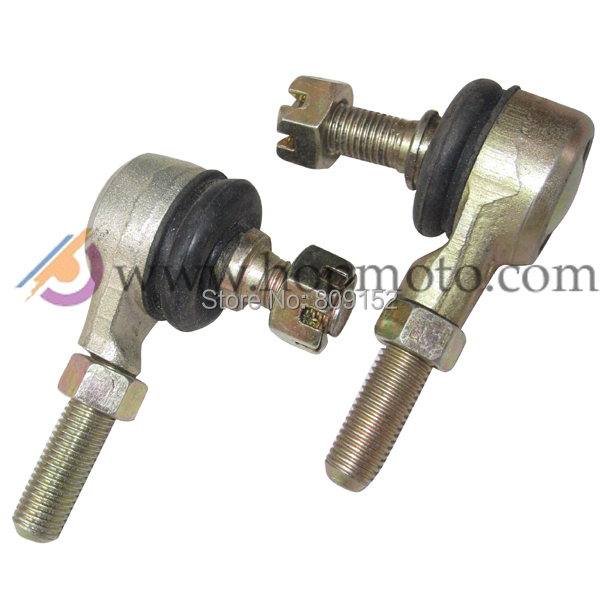 I go ahead and visually inspect the rubber boot for tears or any sign of leaking grease. A torn boot, as you can imagine, allows water and grit in, which does two things, causes corrosion and premature wear. Finding a tear or grease means this ball joint is either already worn or soon will.
To test the joint, we’ll grab the wheel at six o’clock and rock it top to bottom. If you sense free-play or feel a definite knock, you’ve found a worn ball joint.
A worn wheel bearing is possible too, so you may need to verify a ball joint and you can do that by placing your fingers on the ball joints while a helper rocks the wheel. Movement will be felt in the worn joint.
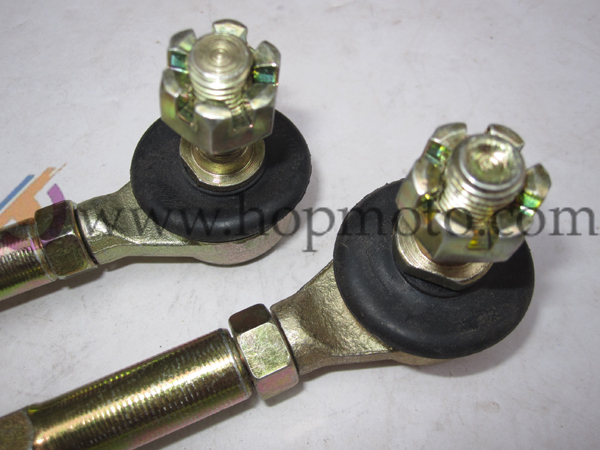
Your ATV may have several ball joints on the steering system (more on that later), but it will have a ball joint at the wheel knuckle, and it’s known as a tie rod end. The test drive will usually show some vagueness in the wheel if you have steering ball joint wear.
To test steering ball joints, grab the tire at 3. 15 and move it from side to side. If you sense free play or feel a knock, you have a worn ball joint.
You’ll need your helper again, have them move the wheel side to side while you watch and feel each joint.
ATV steering systems will employ several ball joints, and so you will likely have inboard ball joints to check too. It’s not unusual to find all the ball joints worn to some degree. It’s OK to replace the worst joints, but the mechanic in me wants to say change them all out.
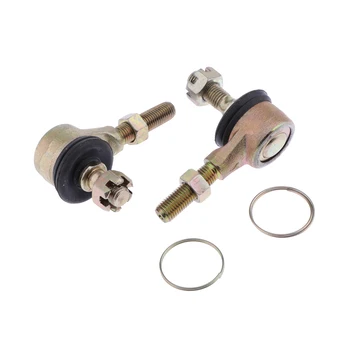
Ball joints aren’t all the same. You know that. Replacing a suspension control arm (A-arm) will differ from a steering tie rod end ball joint.
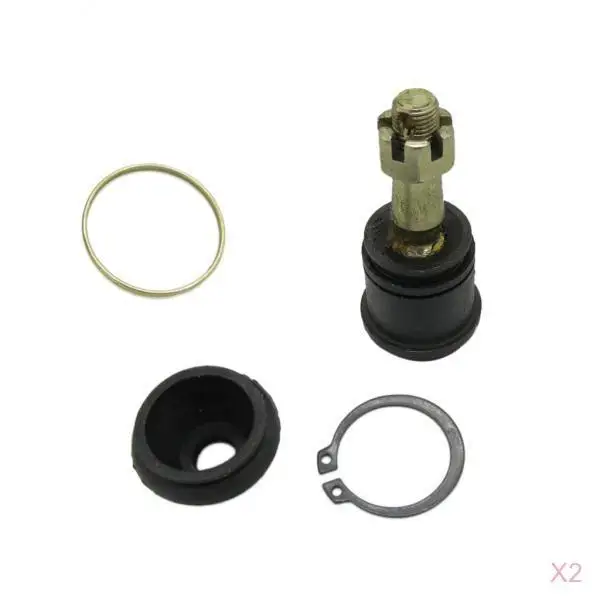
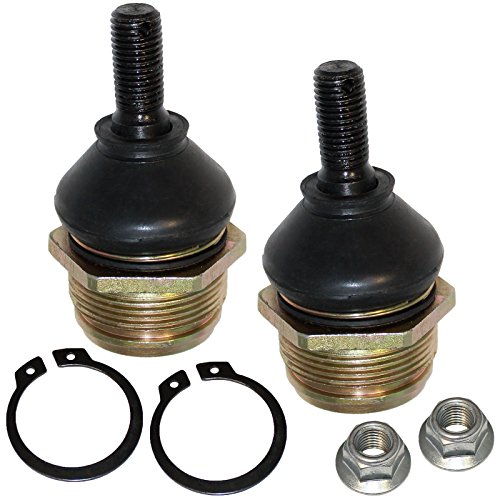
An A-arm ball joint is pressed, fitted into the arm, and secured with a C clip. Removing these guys can be done with basic household tools, but it will require removing the A-arm from the bike. The correct tool for the job is a bushing puller, it saves removing the A-arm and makes the job move like butter.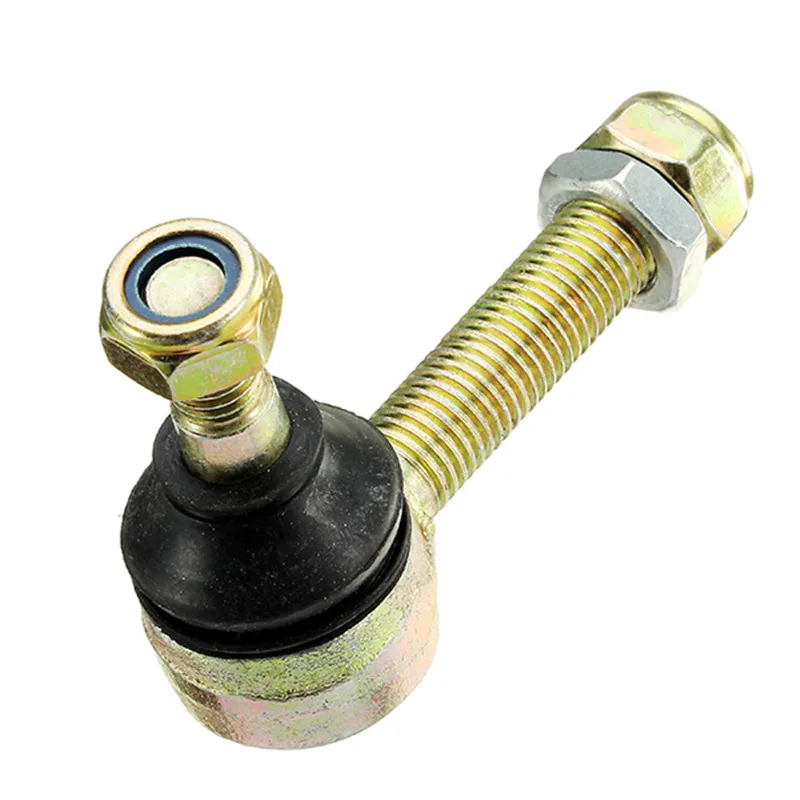 But for the purpose of this guide, we’ll go MacGyver style.
Replacing either upper or lower ball joint goes like this:
If you have access to a shop press, you can eliminate all the hammering.
Note: When refitting the A-arm chassis bolts, don’t tighten until the weight of the bike is resting on the ground.
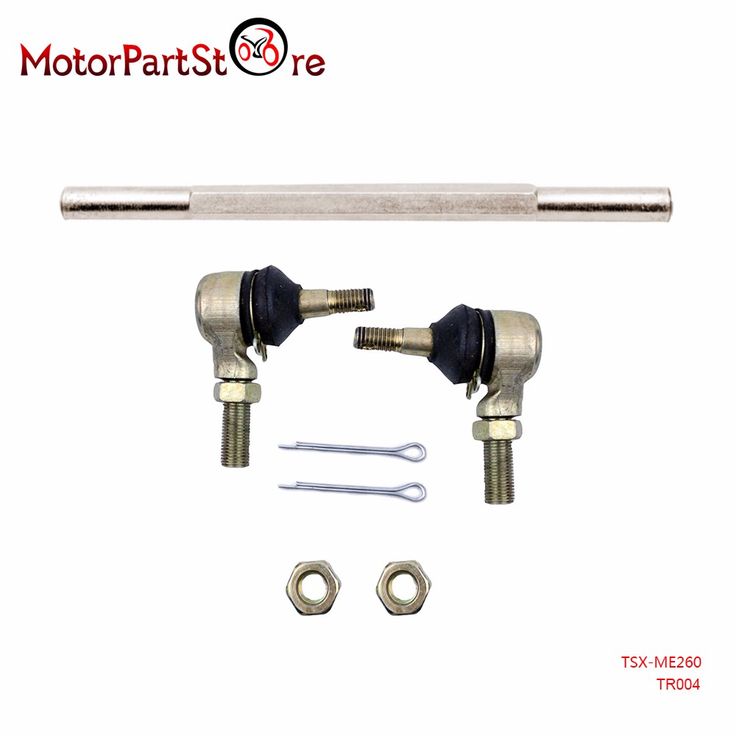
Replacing the steering a tie-rod ball joint is a lot less work than an A-arm suspension ball joint.
The procedure goes like this:
When fitting the new tie rod, use the witness mark of the old to position the new. Ideally, the bike should be aligned after fitting steering components.
You may find these posts useful also:
Does ATV tire width matter?
How often should I service an ATV?
Share
4
What Are SuperATV Ball Joints Made Of?We have four main types of ball joint that each use slightly different design and materials. Here are what each of our ball joints are made of.
 They use chromoly steel housings and 4340 or 300M studs depending on which ball joint you use. They’re tested and proven to outperform stock and go the extra mile.
SuperATV’s threaded ball joints are designed to thread into your A-arms instead of pressing in. This makes them more secure in the A-arm and makes them easier to install and remove—you don’t need a big press, just a M36 socket.
They’re made just for SuperATV’s threaded A-arms (which come with threaded ball joints installed, by the way), and can’t be used on any other A-arms.
They use a similar construction to our heavy-duty ball joints:
Between the heavy-duty materials and the threaded housing, they are about three times stronger than a stock RZR 1000 ball joint.
Threaded ball joints boost strength by threading into A-arms instead of pressing in.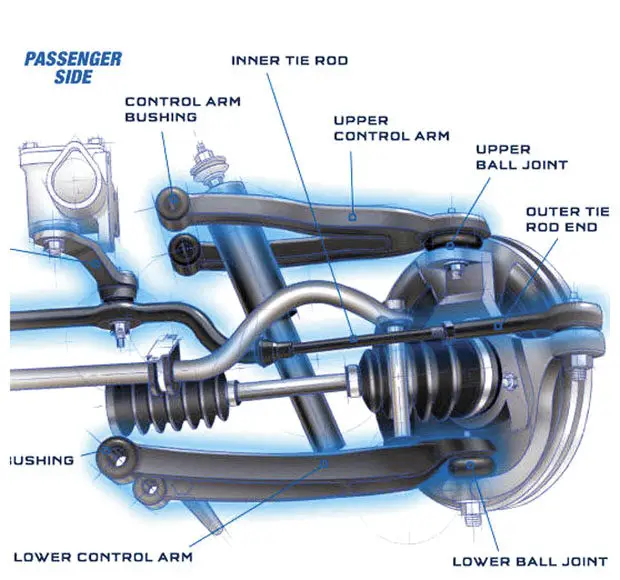 They’re still easily greasable and serviceable using the threaded cap and grease fitting at one end. And you can just remove the pin and tighten the cap to get your stud to like-new movement.
Pressing in a ball joint can be a pain if you’re not prepared.
If you don’t have any kind of press tools, you can usually get away with using a socket or section of pipe and a hammer to get ball joints in or out. However, it’s not the best idea and can cause damage because of how imprecise it can be.
Instead, you can get a ball joint service kit for less than $100. These kits include a handheld mechanical press along with various fittings and adapters designed to fit whatever ball joints you have. These are easy to use and effective. They can even be used with your A-arms still installed.
If you want to run a serious garage and you need a press for a number of different reasons, you can invest in a hydraulic shop press.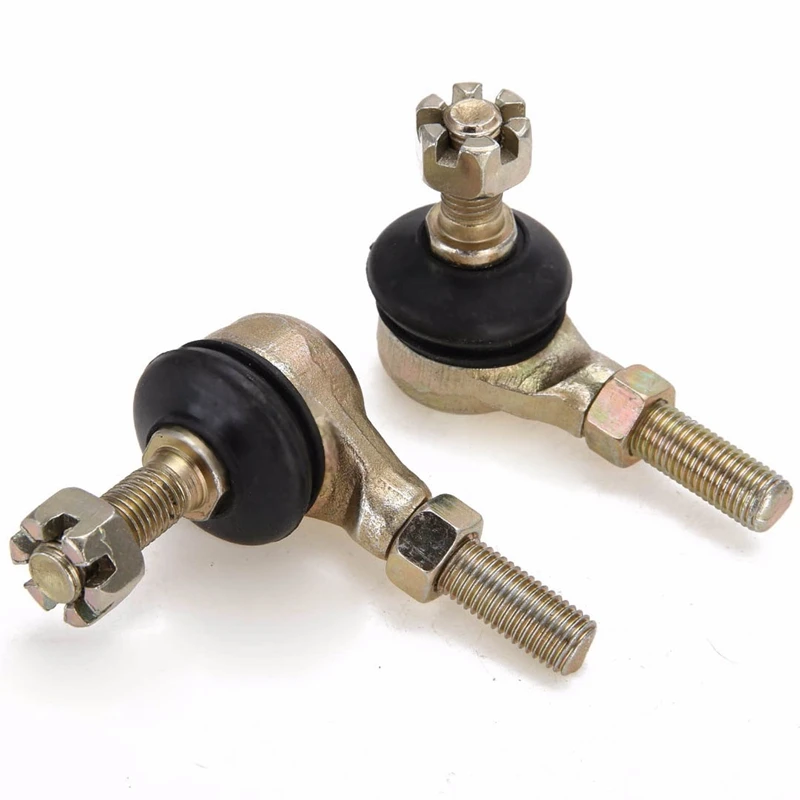 They can be had for as little as $200 but if you’re taking up the floor space, it’s worth investing in a high quality one.
With the right tool, pressing in a ball joint is as easy as lining it up, pressing it in as far as it will go, and securing it with a snap ring.
Your first clue that you have a bad ball joint on your side-by-side is that you’ll here it rattle. The rattle is caused by the stud bouncing around in the housing. This is a sure sign that the stud and housing are too worn down to continue to use.
You may also notice a catch when you turn the wheel as you have to overcome the excess suspension slop caused by the bad ball joint.
Once you know you have a bad ball joint, you just have to figure out which one it is. To do that, lift your vehicle and move your front wheels by hand. Look for any movement around the ball joint that doesn’t belong. Remember: the stud should pivot in the housing, not move side to side or up and down.
Our warranty specifically covers defects in materials and workmanship under normal use. That means if it falls apart because you hit a tree or after years of riding it in mud every day for years, it’s not covered.
If a ball joint falls apart for no obvious reason within the warranty period, then it may be covered.
The warranty duration varies depending on the ball joint:
SuperATV’s Heavy-Duty, Super-Duty, and Threaded Ball Joints are greasable and serviceable.
The bottom of each ball joint has a threaded cap that has a flat grease fitting in it.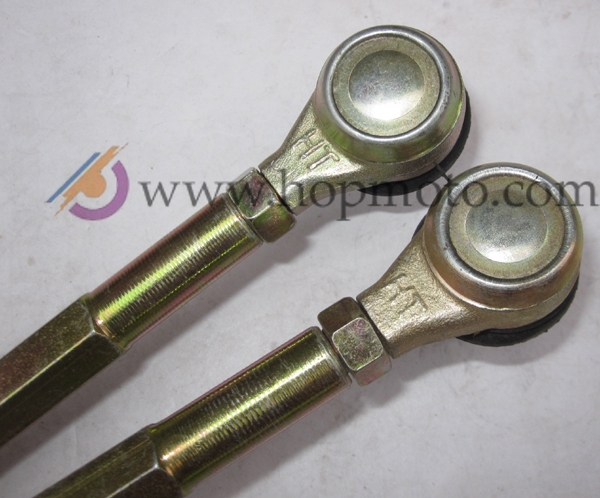 Even when they’re installed on an A-arm, they’re easily greasable with grease gun.
To dissassemble the ball joint for cleaning and servicing, the set screw on the side of the housing must first be removed. Then the entire cap can be unscrewed. This lets you clean out any dirty grease before repacking.
Only heavy-duty, super-duty, and threaded ball joints are adjustable.
The steel cap on the bottom of the housing can be threaded in or out to adjust the tension of the stud. After years of riding, the ball joint on the stud will naturally wear down, causing it to move more freely and potentially plunge in and out. All ball joints wear this way eventually.
To fix this, simply remove the set screw, then tighten the cap to return the ball joint to like-new levels of movement.
To adjust a SuperATV Ball Joint, you have to remove the pin and tighten or loosen the threaded cap. The stud should move freely, but it shouldn’t plunge in and out at all.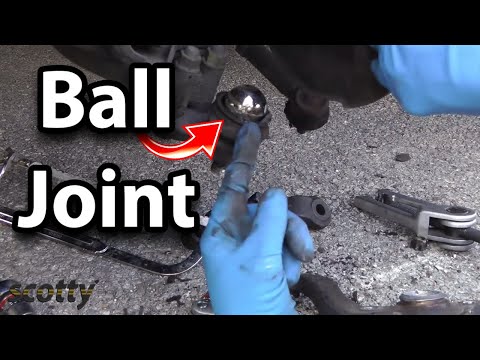
The difference between Heavy-Duty and Super-Duty ball joints is the stud material.
Heavy-duty ball joints use a 4340 chromoly steel stud while Super-Duty ball joints use a 300M stud. The Super-Duty ball joints are approximately 20% stronger than the Heavy-Duty ball joints on the same machine.
They both use the same housing including the grease fitting and adjustable cap, so you get the exact same usability and features.
The stud should be able to pivot in the housing. It should not be able to plunge in and out at all. If it does plunge, you need to tighten the housing until it doesn’t, even if that stiffens the studs movement.
We have replacement boots for Heavy-Duty and Super-Duty ball joints only.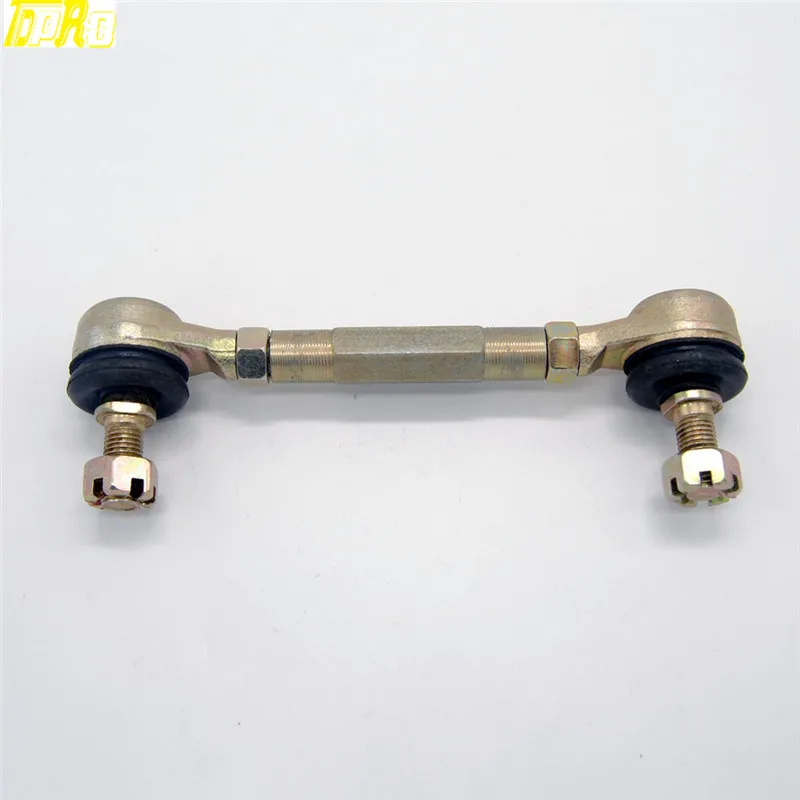
If you would like to order replacement boots, give us a call at 855-743-3427.
Buying a quad is a simple matter. However, this technique requires special attention and regular maintenance of all nodes and elements. This is especially true for the ball joint.
The ball joint of an ATV is an extremely important element of the suspension of this motorcycle, on the serviceability and stability of which even the life of a rider can directly depend. Therefore, timely maintenance and repair of this component must be given maximum attention.
Due to the extreme operating conditions of an ATV, the ball joint may fail more often than on other types of motorcycles. The impact on it of abrasive substances of the road surface also plays a role in the wear of this element.
Ball joint on ATV stealth consists of the following components:
Since the ball joint undergoes significant dynamic loads during the operation of the ATV, the presence of too much clearance between the parts, which is most often found in Chinese motorcycles, can significantly reduce its service life. Please note that the ball joint is present on both full-size and children's models of ATVs. In both cases, it is very important to monitor its condition by performing timely repairs and maintenance.
When this element of the vehicle suspension is worn out, during its movement, the driver begins to hear suspicious sounds, such as knocking or crackling. There is also a noticeable wobble in the steering wheel.
Before repairing a 150cc ATV ball, it must be disassembled. On some models of such motorcycles, the hinge has a collapsible design, making it easy to get to worn parts and replace them. Most often, motorists need to replace the anther, liner and lubricant.
ATV ball joint repair with a one-piece joint is carried out as follows:
 If necessary, it must be replaced with a new one;
 After performing this repair with a partial redesign of the ball joint, you can significantly improve the factory performance of this functional ATV component. Now, in case of wear, it will be enough to slightly tighten the liner, thereby significantly extending the life of the ball vehicle.
We recommend that you lubricate the hinge in a timely manner using high-quality oil, and do not save on buying a good silicone boot. Therefore, if you decide to purchase adult motorcycles or buy an ATV for a child, be prepared for the fact that you will have to pretty delve into its insides.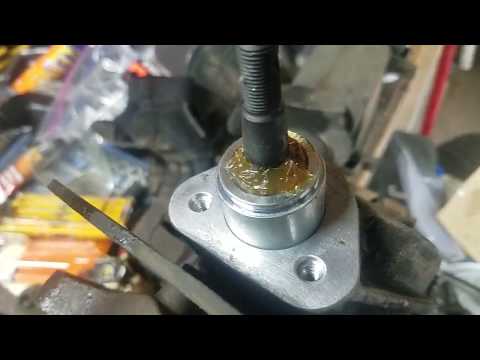
The replacement of the ball joint on the ATV is necessary when it is not possible to repair it. This component of the motorbike breaks down both due to wear and tear over a long period of operation, and as a result of liquid and dirt getting inside the boot. That is why it is required to lubricate the ball components from time to time, and change some of them as needed.
As soon as it became clear that something was wrong with the ATV ball, it is recommended to solve this problem as soon as possible, since its malfunction can cause many other more serious breakdowns of motorcycles.
Replace the ball motorbike as follows:
 After that, this part will also need to be removed;
 When assembling a motorcycle, pay special attention to the integrity of its rubber cuffs, as well as the presence of abundant lubrication on all functional units.
Both repair and replacement of ATV ball joints can be done on your own if you have certain skills. If you doubt that you can perform such manipulations with your own hands, then the best solution would be to contact a service center for help.
05/29/2021 1195
deepgreen_ wrote:
Hello to everyone who reads these lines :smile3:
There is a successful experience of converting a conventional NSGV front suspension arm into a replaceable ball joint.
In a nutshell:
the decently worn original ball joint is removed and an adapter ring is welded in its place to fit the new ball joint into tension. The new ball is pressed into the adapter and fixed with a retaining ring on the side of the steering knuckle. Such a connection makes it possible to subsequently change the ball joint to a similar one an unlimited number of times instead of buying a new lever assembly, which has a positive effect on the budget :wink3:
As a replacement ball joint, SB-3881 from the Japanese manufacturer 555 is used. The manufacturer offers it for use in the Toyota Hilux suspension, but the most important fitting dimensions are also suitable for the Grand Vitara. Since the ball was originally intended for a heavier car with large suspension travels, this also affected the ball - the bearing surface of the ball is approximately 30% larger than the Grand Vitarovskaya, the angles of the finger are also larger (how much exactly, I can’t say, since I didn’t specifically measure ).
All this can be considered a nice bonus, as it should have a positive impact on its resource.The adapter ring must be specially sharpened (see "drawing") according to the calculations, from steel with an elastic limit of at least 230 MPa .
Requirements for the welding seam between the adapter and the arm itself:
1) Weld with an electrode with a diameter of 4 mm. You can also use a 5 mm electrode, but this will not add strength to the connection.
Electrode type - UONI, since the seam made by it has good impact strength.
2) The length of each of the two welds around the ring is at least 5 cm.Fulfilling these requirements will create a joint that will withstand a shear force of about 4 tons.
In general, I drive on such levers for about six months - about 8 t.km. No negative side effects have been observed so far.
Z.Y. And yes, the rework budget is 642 rubles. for each ball 555 SB-3881 (now it costs 1200 rubles) and 500 rubles.
for the manufacture of each transition ring. Total 1142 rubles on the lever. Well, plus the time to study the design, calculations and the actual work on the alteration.
View attachment 89942 View Attachment 89943 View Attachment 89944 View Attachment 89945 View Attachment 89946 View Attachment 89947 View Attachment 89948 View Attachment 89949
Click to expand...
deepgreen_ wrote:
Hello to everyone who reads these lines :smile3:
There is a successful experience of converting a conventional NSGV front suspension arm into a replaceable ball joint.
In a nutshell:
the decently worn original ball joint is removed and an adapter ring is welded in its place to fit the new ball joint into tension. The new ball is pressed into the adapter and fixed with a retaining ring on the side of the steering knuckle.
Such a connection makes it possible to subsequently change the ball joint to a similar one an unlimited number of times instead of buying a new lever assembly, which has a positive effect on the budget :wink3:
As a replacement ball joint, SB-3881 from the Japanese manufacturer 555 is used. The manufacturer offers it for use in the Toyota Hilux suspension, but the most important fitting dimensions are also suitable for the Grand Vitara. Since the ball was originally intended for a heavier car with large suspension travels, this also affected the ball - the bearing surface of the ball is approximately 30% larger than the Grand Vitarovskaya, the angles of the finger are also larger (how much exactly, I can’t say, since I didn’t specifically measure ).
All this can be considered a nice bonus, as it should have a positive impact on its resource.The adapter ring must be specially sharpened (see "drawing") according to the calculations, from steel with an elastic limit of at least 230 MPa .
Requirements for the welding seam between the adapter and the arm itself:
1) Weld with an electrode with a diameter of 4 mm. You can also use a 5 mm electrode, but this will not add strength to the connection.
Electrode type - UONI, since the seam made by it has good impact strength.
2) The length of each of the two welds around the ring is at least 5 cm.Fulfilling these requirements will create a joint that will withstand a shear force of about 4 tons.
In general, I drive on such levers for about six months - about 8 t.km. No negative side effects have been observed so far.
Z.Y. And yes, the rework budget is 642 rubles. for each ball 555 SB-3881 (now it costs 1200 rubles) and 500 rubles. for the manufacture of each transition ring. Total 1142 rubles on the lever. Well, plus the time to study the design, calculations and the actual work on the alteration.
View attachment 89942 View Attachment 89943 View Attachment 89944 View Attachment 89945 View Attachment 89946 View Attachment 89947 View Attachment 89948 View Attachment 89949
Click to expand.