Delivery options and delivery speeds may vary for different locations
Sign In
or enter a zip code
Email * Password *
REPAIR & HOW TO
MAINTENANCE
TROUBLESHOOTING
GUIDES
TIPS & TRICKS
ALL ARTICLES WATCH VIDEOS ABOUT US SHOP PARTS CONTACT US
You've been riding all afternoon, and now it's time to shut it down. But what happens when your ATV won't turn off?
We came across that problem on our 2007 Yamaha Grizzly YFM700 and needed to get in there and do a little electrical system troubleshooting. Unless you have this particular model, the access points may differ. Watch the video above and read on below for what you need to check when your ATV won't shut off.
It all began when we had starting problems on our Yamaha ATV. We replaced the battery on our unit, and in the process of cleaning up the electrical system, we may have done something to trigger this problem. When we turned the switch off, the ATV's electrical system was still live.
Diagnosing a Bad Switch on an ATVWe heard a relay clicking on the right front of the ATV, so we ran a few tests to see what's triggering it.
First, we checked to see if there had been any water intrusion due to a seal failure. The screws here holding the power steering control unit assembly in place were tight, so we used an impact driver to remove them. The electronic control unit (ECU) is underneath the steering unit.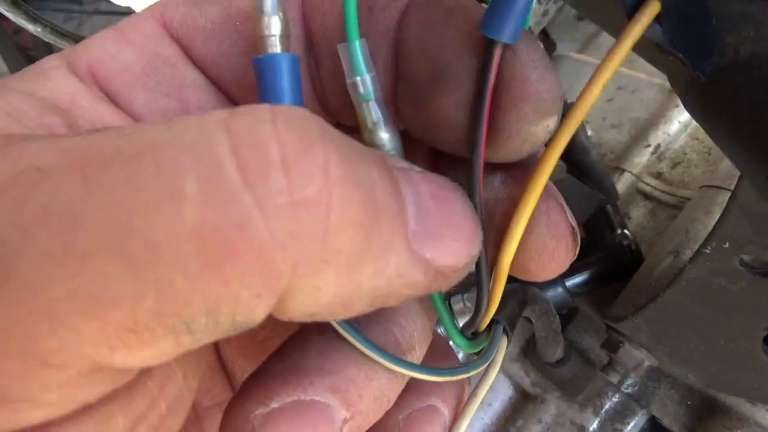
Once the power steering unit was out of the way, we accessed the ECU. You can pull it up and then unplug it to inspect it for water intrusion. Check to make sure the seal around the connections is dry and that the underlying electrical connections are also dry. While we didn't find any problems there, our display was still on, even though the switch was off.
Testing the Power Switch on a Yamaha ATVWe started off by just feeling the wiring that runs from the switch itself back to the connection circled in the image below.
The wire was warm, which may explain the problem, and might also explain why the battery kept draining out before, prompting us to replace it.
We took a closer look at that switch wiring. To do this, we disconnected the wire from the gray connector above, and then hand-loosened and removed the locking ring holding the actual switch in place. Once we did that, we pulled the wiring from under the right front fender to remove it.
Once removed, we saw the problem. Apparently the previous owner had stripped back the sheath protecting the wiring and made another connection for some electrical accessory. With the wires exposed inside this electrical tape, a connection was made when we pressure washed the unit.
The moral of this story: If you buy a used unit, ask the previous owner if they installed any accessories. The connections, if not done properly, can lead to all sorts of problems down the road.
How to Replace the Switch Assembly on a Yamaha GrizzlyStep 1. Remove the storage box to have more room to snake the wiring behind the plastic. Start by removing the two Phillips screws, then use a screwdriver to pry the snap ring assembly out of its channel and walk it off.
Step 2. Push on the rim of the storage box a little and it should drop straight down.
Step 3.
From behind the plastic, insert the key-end of the switch assembly into its opening.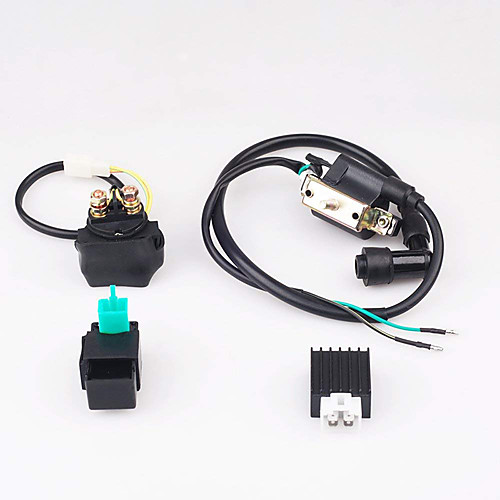 There's a notch on the switch. Make sure it aligns with the cutout for the notch in the switch opening shown below.
Step 4. Hand-tighten the lock ring, then use a set of channel locks to get it snug. Don't over-tighten it. They're plastic threads and you'll strip them easily if you do.
Step 5. Thread the plug end of the cable up from behind the plastic and into the bay with the electronics.
Step 6. Reconnect the new switch into the electrical system.
After following these steps, your Yamaha ATV should power off and on like normal again. Now that you know what to do when your ATV won't turn off, check out the video below to see what to do if your Yamaha YFM700 won't turn on.
body
The ignition switch, as the name implies, controls the ignition system of the engine.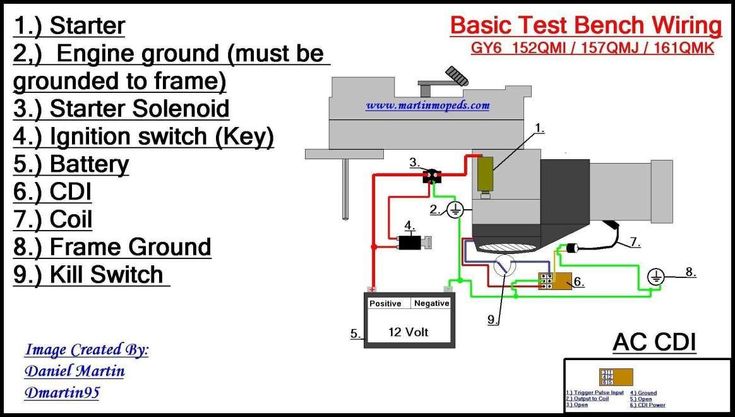 It activates once the key is turned in the ignition lock, and the correct chip key FOB is present. However, it’s not uncommon for the ignition switch to fail, especially once the mileage clock enters the six-digit range.
Multimeter tool is an essential part of any DIY mechanic’s kit. It allows you to quickly test the state of electrical connections and identify possible issues.
The ignition switch is just one part of the ignition system, so in this guide, I’ll cover how to test all of the components and identify the cause of the electrical problem. A basic multimeter will get the job done, but having a larger variety of test leads can make your job easier. I’ll leave a few options in the table below, and you can decide which one fits your needs and budget.
To test the ignition switch, first, we need to gain access to it, which involves removing the bottom steering column shroud. The exact process varies between vehicles, but there are usually a series of clamps and screws holding it in place.
With the shroud off, we can now insert the key into the lock. Double-check that the vehicle is in park gear (neutral gear for the manual gearbox) and that the parking brake is engaged.
Connect the ground alligator clip (black wire) to the multimeter and attach it to the chassis bolt that keeps the driver’s door in place. The live (red) wire can also be an alligator clip, but the basic probing lead will work better. Set the multimeter to 20 volts DC – it’s represented by a straight line and three dots beneath it, positioned left of a capital V.
On the opposite side of the ignition key, you’ll find a cylindrical housing with wires connected to it. Touch each metal connector with the testing probe while turning the ignition and watch for readings on the multimeter. Alternatively, you could use a test lamp and see whether it lights up. If the multimeter doesn’t read any voltage, you need to replace the ignition switch.
The complexity of the job depends on how the ignition system is configured in your vehicle. In some cars, it’s as simple as unscrewing the electrical side of the ignition lock and unplugging a power cable. However, most vehicles will require you to remove the cylinder lock as well, and even the entire ignition housing.

Removing the cylinder lock would require you to change your ignition key, but if your current key and tumblers aren’t worn out, there’s no need to do it. Use a thin screwdriver to press into a hole in the ignition assembly, near the cylinder lock. Put the original key into the lock, then pull the entire cylinder out with the key. Repeat the process for the new assembly, and just insert the original cylinder by pushing it in.
Testing the ignition switch is not a bad idea if you’re already suspecting it to be the cause of your problems, but there are other components in the ignition system that are worth checking out.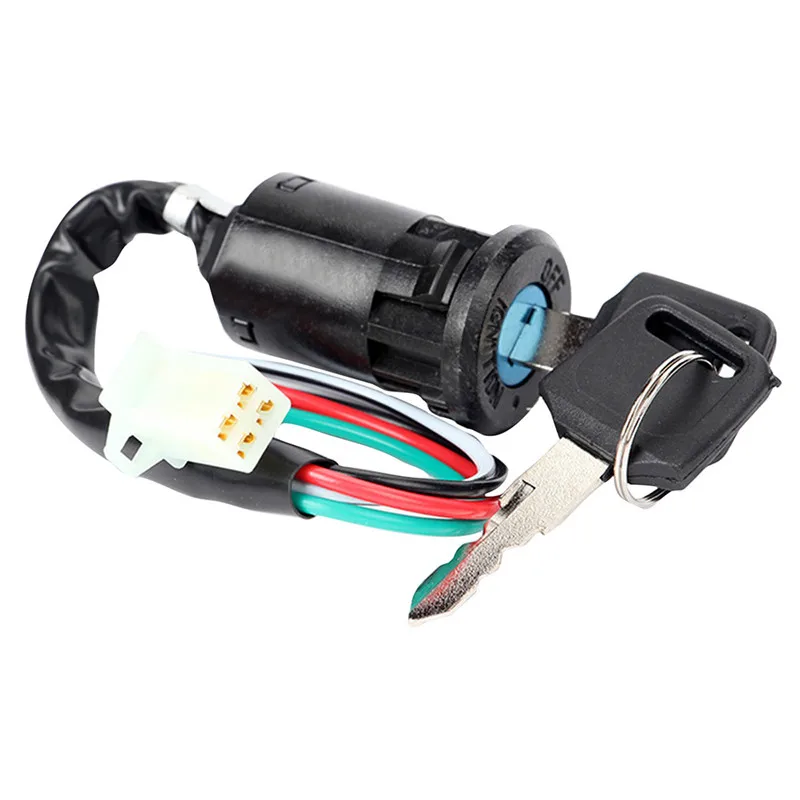 In this section, I’ll show you how to inspect other parts of the system with a multimeter and a couple of other tools.
Testing the spark plugs is the most time-consuming step, but given the likelihood of the spark plug going bad, it should be one of the first things to check. There are two ways to check spark plugs, but the common step is to unscrew them from the engine block. To do that, you’ll need a ratchet arm and a special spark plug socket.
To remove the spark plug, disconnect the spark plug wires and use the socket to unscrew it. Once it’s out, there are two ways you can check if it’s working. One is to put it back into the wire, attach a jumper cable to the ground and the thread of the spark plug, and crank the engine. If you see the sparks coming out of the tip of the spark plug, it means that it’s working.
I prefer the second method as it’s safer and easier to do. Set your multimeter to 20k ohm (Ω) or whatever the setting is in tens of thousands and touch the top of the spark plug with one probe, and the small tip underneath the hook at the bottom of the hook with the other probe.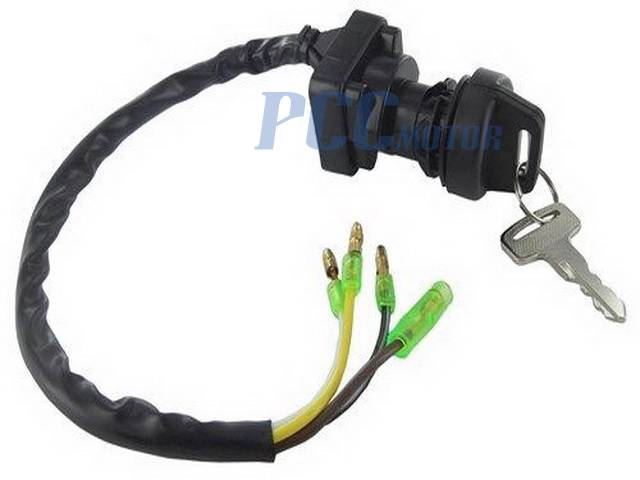 There is a rod running through the center of the spark plug, and by touching those two points, you’re closing the circuit.
The reading you get will be in thousands of ohms, but you’ll have to check the specification of the spark plug manufacturer, or the owner’s guide to see what the correct resistance range is.
If the spark plug has the correct resistance, set the multimeter to the highest ohm setting, keep one probe on the tip of the spark plug, and touch across the side of the spark plug with the other probe. You should not get any reading while doing this – otherwise, it indicates that the spark plug has gone bad.
Whether there are one or several faulty spark plugs, you should replace the entire set for consistency. The number of spark plugs you need usually correlates with the number of cylinders of the engine, but some engines use two sparks per cylinder, so keep that in mind.
To test the spark plug wires, set the multimeter to the lowest ohm setting, and connect the probes to the inside of the wires. If there’s no resistance, you’ll have to change the spark plug wires for the engine to run optimally. However, make sure you’re properly measuring the resistance and not accidentally connecting the probes in the wrong place.
Expose two towers of the ignition coil and attach the alligator clips to it. That’ll make it easier to get a reading on the multimeter, which should be set to ohms. Compare the reading to your service manual to determine whether the ignition coil is within the range and hasn’t gone bad.
To check the crankshaft sensor, you’ll need another person to help you out and check the owner’s manual to see what kind of a reading you should expect. Set the multimeter to a 200 volt AC setting, disconnect the crankshaft position sensor, and insert the probes into the power jack. Ask the other person to crank the engine while you’re reading the multimeter.
Replacing a bad crankshaft position sensor isn’t difficult, so if you’re certain that the readings aren’t correct, you can replace it yourself by simply pulling the old one out and pushing the new one in place.
Locating the power supply connector can be a bit difficult, but it’s usually located behind the ignition coil. Disconnect the cable and turn the ignition key to the On position. Set the multimeter to 20 volts DC, ground the black wire while probing the power supply with the other. If you get a voltage reading, it means that the ignition is receiving power.
Before testing the ignition switch with the multimeter, you may experience a number of problems: failure to start the car when the key is turned or problems with turning the key at all, stalling, flickering dashboard lights, and no noise coming from the engine starter.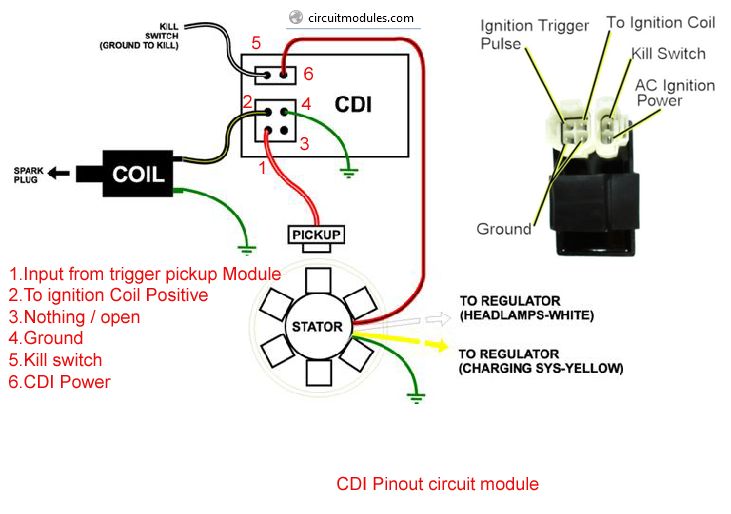
You might have to buy an ignition switch packaged with the cylinder lock or even the whole ignition assembly, but that doesn’t mean you have to switch keys. The original key and tumbler can be easily transferred into the new assembly and allow you to continue using your key.
I would advise you to at least attempt to replace the ignition switch yourself, as it’s not a very complicated job. You need to be careful not to break the steering column shroud, but other than that, the process involves unscrewing a few screws and bolts and putting the new parts in their place. I’ve explained how to replace the ignition switch in this very article, so scroll up if you’d like to learn more.
The exact cost depends on how the ignition switch is assembled. An ignition switch without the cable or cylinder lock can go for as little as $20.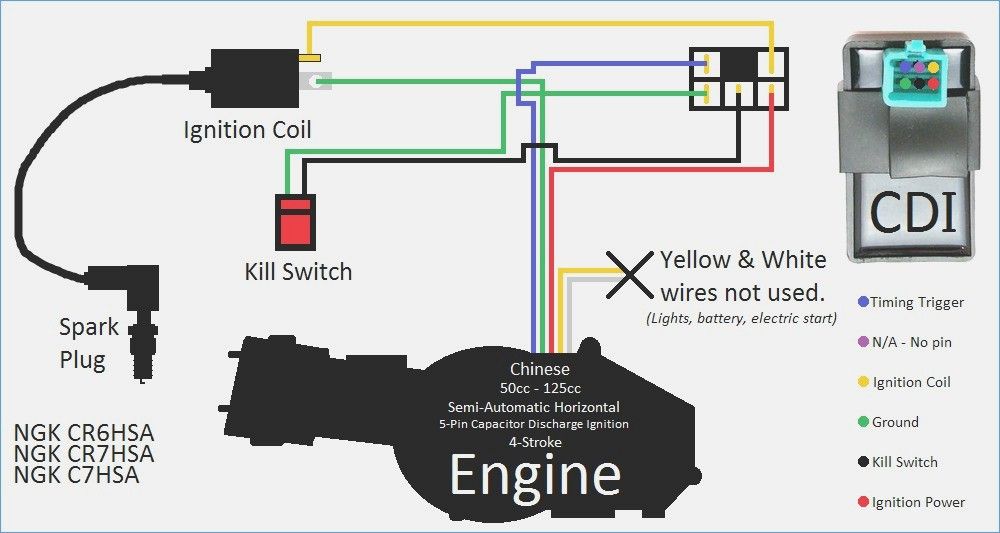 If it comes with the ignition cable, it’s going to cost roughly $40, while the assembly with the cylinder lock, new keys, and the housing can reach $100.
Yes, your vehicle has a dedicated fuse for the ignition switch. In the owner’s manual, you’ll find a diagram that explains what each of the fuses is connected to.
The average cost of labor to replace the ignition switch is around $60-100, while the parts range from $20-100, so you can expect to pay around $150 in the shop, or $50 if you do the job yourself.
The multimeter is an extremely useful tool in diagnosing power-related problems, so I would strongly recommend picking one up, even if it’s the most basic model. I hope that reading this guide has helped you test the ignition switch of your car, as well as show you how to inspect other components of the ignition system!
Check out other VehicleFreak’s related articles:
How To Remove The Ignition Lock Cylinder Without a Key
How To Test Transfer Case Shift Motor
How To Test A Fuel Pump Without A Pressure Gauge
To buy a reliable scooter that will last more than one year, you need to carefully check its components and systems. And it's worth starting with the ignition. This system converts the current, supplies it to the spark plug and ignites the fuel mixture. The action is carried out in several stages, and even the slightest failure can affect the operation of the engine and increase fuel consumption. Therefore, let's figure out how to check the ignition on a scooter.
The first thing to do is to check the lock itself. The assembly will need to be repaired if:
Figuring out how to check the ignition switch on a scooter is pretty easy. You just need to turn the key a few times and start the device.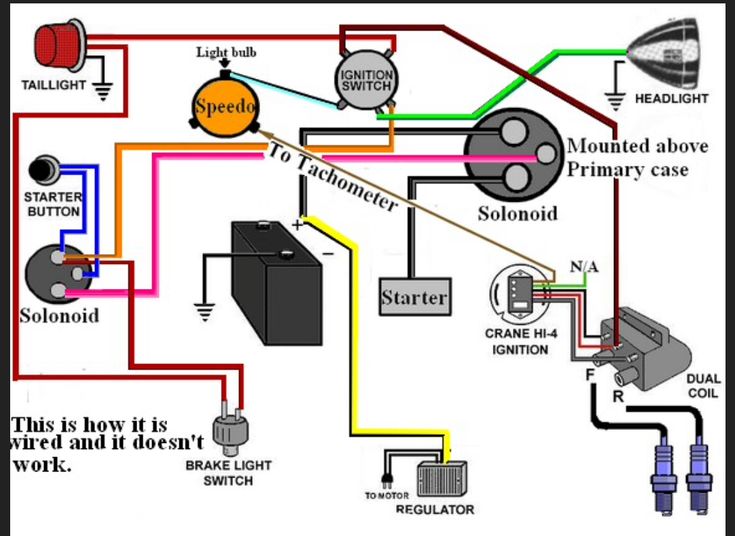 But it is worth remembering that this is the simplest breakdown, and to fix it, you just need to change the lock.
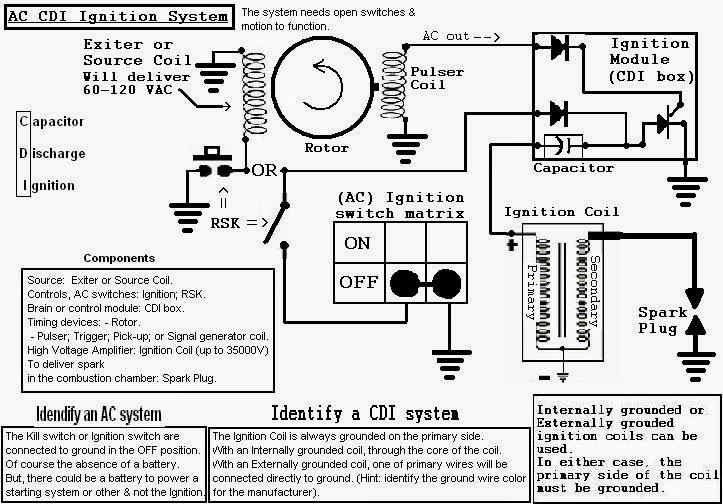
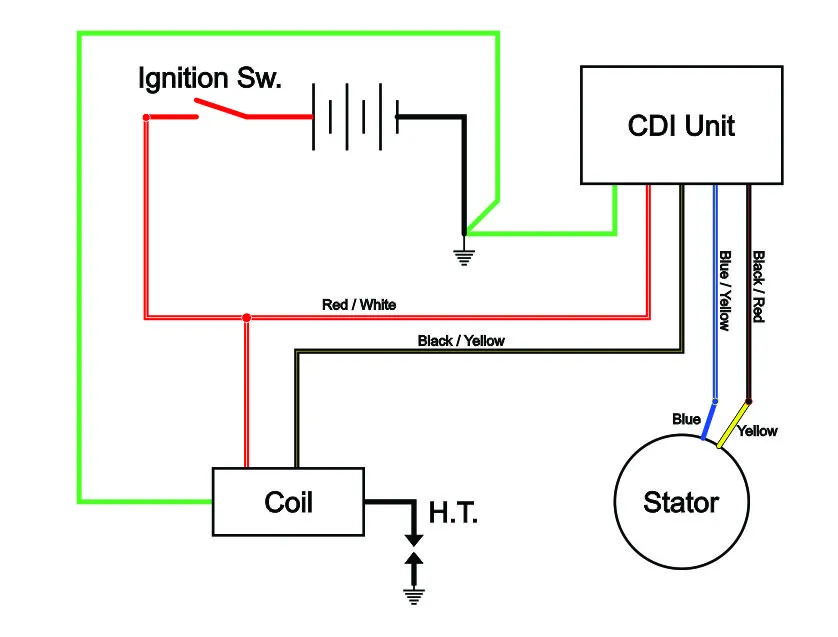
The ignition coil of a scooter is responsible for sparking, and its failure will make it impossible to start the engine. If you find that the candle does not give out a spark, first of all, diagnose this node.
To perform the test, you will need a multimeter that can measure resistance. It is best to use an electronic device, as it is more accurate.
To carry out diagnostics you need:
The coil can also be 'ringed' with an ordinary indicator screwdriver. With it, you can check the candle cap, primary and secondary winding. However, this is a "field" method that does not allow to identify all defects. If you need an accurate check of the scooter ignition coil, then a multimeter is indispensable
When checking the ignition of a 4t and 2t scooter, it is also recommended to inspect the spark plug and its cap. First of all, determine the type of candle. There are two types of element: cold and hot. The scooter documentation indicates which type of candles should be used. But if the component is chosen incorrectly, then:
If the spark plug is chosen correctly, the color of its electrode should be light brown. Any abnormality is indicative of component wear or other systems on the scooter not working properly. For example, if the fuel mixture is poor, then the electrode will be white, and if the composition is too rich, a velvet deposit will form on the candle.
But to check the candle cap, you will need additional equipment - a multimeter. Set the device to 20 kOhm, and then connect the probes to the input and contact. The resistance in the working component ranges from 2.5 to 5 kOhm. But if the indicators are higher, then the cap is faulty.
The switch is a key element of the ignition system, which is responsible for the accumulation of energy, and its timely supply to the coil. If the component is defective, then the scooter will not start, the motor will stall or run erratically. But in order to accurately determine the source of the problem, you need to check the scooter ignition coil switch for serviceability.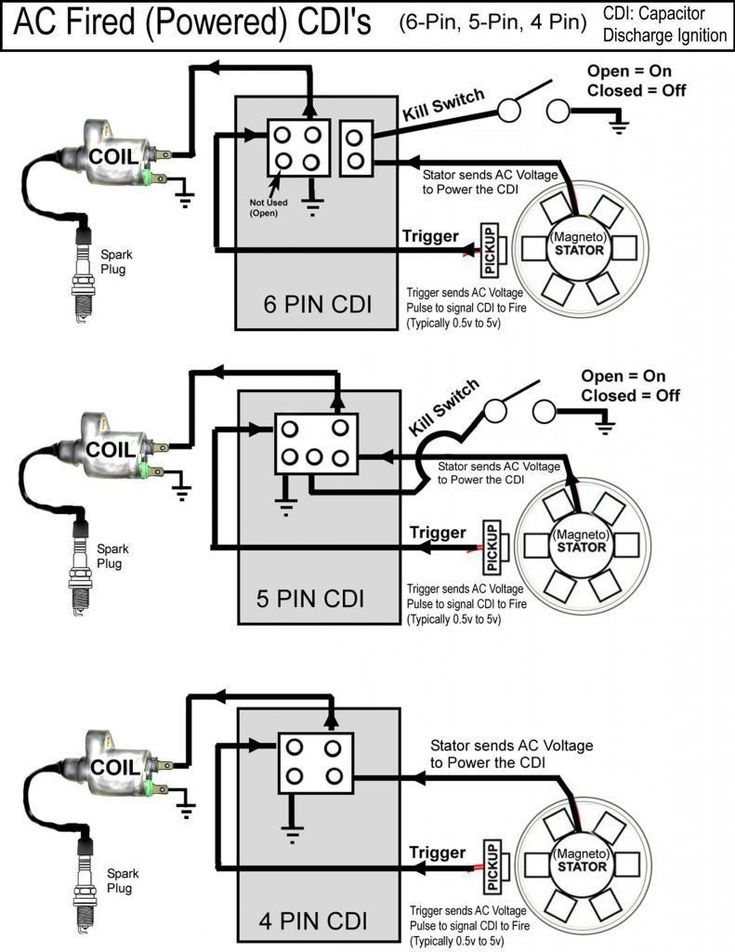
To do this:
If it is not possible to check the ignition coil and switch of the scooter with a multimeter, you should simply replace them with good parts and retest the system.
The sparking process must take seconds, so every ignition part must function correctly. This means that any defective or worn components will have to be replaced. Even a minor breakdown will disrupt the operation of the engine and prevent the engine from starting.
So, when buying a scooter, it is necessary to check the 4t scooter ignition coil with a multimeter, inspect the spark plugs and wiring, test the switch and evaluate the condition of the ignition switch.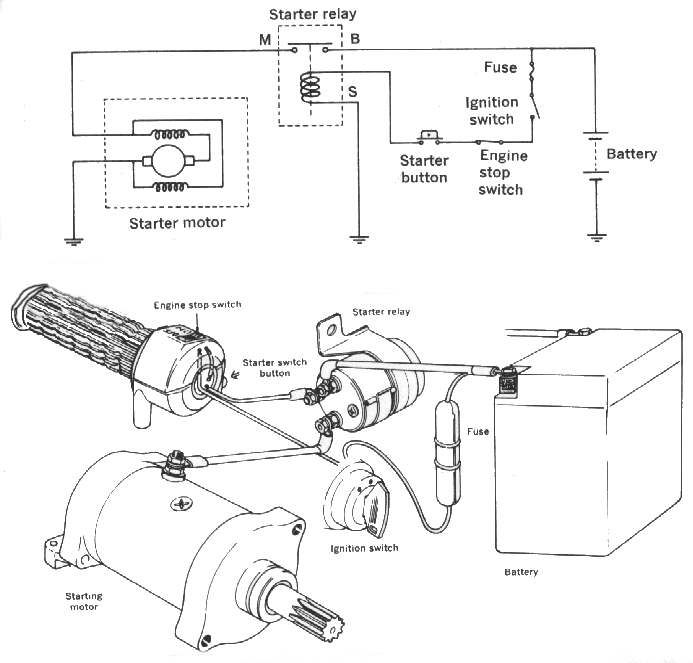 Such a small diagnosis will help to significantly save on further maintenance of the moped.
08/14/2020 12141
In this section, we decided to place a list of malfunctions ATVs that may occur on different models. And most importantly, in Our table describes the troubleshooting methods for performing DIY ATV repairs. Using this manual, you yourself can find a breakdown and eliminate it without resorting to the help of a motorcycle service. I want to note that this table is not focused on any specific ATV model, but is intended help the owner of any ATV.
| Fault | Reason | Diagnostic method | Remedy |
| Motor does not rotate | Weak battery | Check battery voltage | Charge battery |
| Faulty electric starter | Check voltage at electric starter | Replace Electric Starter | |
| Faulty starter relay | Check the voltage on the electric relay | Replace electric relay | |
| Faulty ignition switch | Check ignition switch | Replace ignition switch | |
| Engine jammed | Crank engine by hand | Contact Motoservice | |
| Engine smokes | Incorrect fuel mixture | The smoke is black, x / x is unstable, the engine does not develop speed | Clean carburetor |
| Air filter dirty | Black smoke, cold, unstable, engine does not rev | Clean air filter | |
| Worn piston group | The smoke is blue, there is an internal combustion engine oil consumption.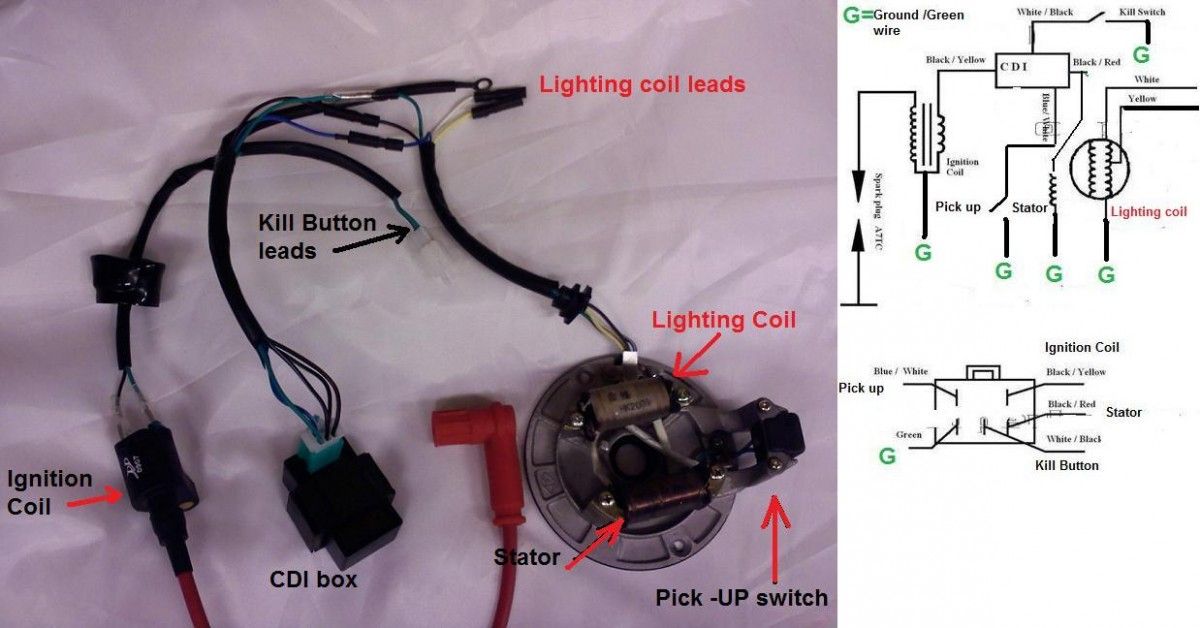 | Contact a motorcycle service | |
| Noises during engine operation | - | - | Contact Moto Service |
| Loss of engine power | Worn clutch | Visual inspection | Replace clutch |
| Incorrect fuel mixture | - | Clean the fuel system | |
| Air filter dirty | Visual inspection | Clean air filter | |
| Worn piston group | Visual inspection | Contact Moto Service | |
| There are malfunctions in the ATV transmission | see transmission section | - | |
| "Shooting" in the silencer | Low Octane Gasoline | - | Replace gasoline |
| Timing chain stretched | Visual inspection | Contact Moto Service | |
| Deposits on timing valves | Visual inspection | Contact Moto Service | |
| Late ignition | Visual inspection | Check ignition timing | |
| Engine won't start | Bad air-fuel mixture | Wet spark plug, gasoline smell from muffler, | clean the fuel and air system |
| No spark on spark plug | Put in a known-good spark plug. |