June 18, 2013 02:00 AM
Jennifer Karpus, Tire Business staff
On the Web: More of a visual learner? Check out Tire Business' Facebook page for a photo gallery.
AKRON—Since I started at Tire Business, I have had to go to my local tire/automotive aftermarket repair shop twice. The first time I walked in, I had the print edition of Tire Business in hand because I had to leave my car overnight, so I had gathered up what I needed to take home.
The man behind the counter looked at me and said, "You read Tire Business? That's not the normal reading material for a woman in her 20s."
So you could imagine the look on another employee's face the second time I visited the store and asked to keep my old tires for a project for work.
All across social media, I have seen beautiful tire planters. What a great way to help the environment by reusing tires. Trying my hand at making one also gave me an opportunity to try out my "green thumb."
I decided to start with two planters because I am really not that crafty of an individual and did not want to bite off more than I could chew.
Here are the steps for making a tire planter.
Getting the tires
After explaining my intentions, the clerk told me I could take as many old tires as I wanted to make tire planters.
I grabbed two of my old tires and headed home.
After realizing that my process was going to involve cutting the tire with a knife, and turning it inside out, I enlisted the help of my boyfriend Doug, because not only am I not the "craftiest" person, but I am also very accident prone. I am NOT saying a woman could not do this herself—but how else would I be able to take photos for my trusted readers?
Prepping the tire
There is a simpler way to make a tire planter—just paint it and plop some dirt in it and plant whatever you want. However, it you want it to be fancy, there are a few more steps to take.
You want to wash the tire so it's easier for the paint to adhere later on.
The first step is to mark up the tire so that you will know where to cut. You can make any kind of design you want. We basically drew half circles all the way around the bead of the tire. We used a paint marker and an old wonton soup container.
Cutting
My boyfriend opted to use a box-cutter knife to do the cutting. It is harder to cut toward the inside of the tire — by the bead — because the rubber is thicker. You will cut this all in one piece because the bead part of the tire can become a base for the tire planter. When the cut portion comes out, it sort of looks like something a little kid might draw — with little sun beams coming out.
Flipping
This is where things can start to get a little tricky. You need to flip the tire inside out so that the tread is on the inside, and the nice flat surface is what will be on the outside, and where you will eventually paint.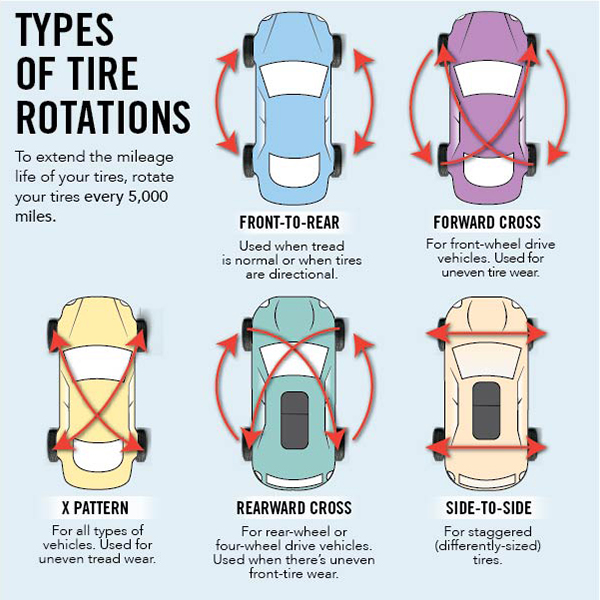
The first tire we flipped inside out was done on a nice, hot day. That made it much easier to manipulate the rubber, rather than the time we tried it for the second one on a rainy day. We waited until a nicer day, but still had trouble flipping the second one. Ultimately, we decided to cut the bead part out on the bottom, too, so that it was easily "flippable."
Painting
Once everything is flipped and ready to go, it's time to make it your own! We opted to use spray paint because our lack of artistic hands figured it would be easier that way. I have seen some awesome tire planters, though, that are intricately designed to the minute detail. Since I did the majority of the painting, I went with one that was hot pink and bright green and then made one light blue with yellow polka dots.
Things to note on paint:

Finishing touches
Once the paint dries, you can get your tire planter all settled in in its new home. I have a courtyard area at home where I have put my two tire planters. I have planted hot and bell peppers in one and parsley and basil in the other. Keep checking out Tire Business' Facebook page to see how they turn out!
Already have tire planters? Post them to Tire Business' Facebook wall and keep checking to see how my planters turn out this summer!
Questions? Call me at 330-865-6143 or email [email protected].
Published: | Last Modified: | Author: adrienne
Learn how to make inside out tire planters for your garden. These planters are made from recycled tires that you cut and flip inside out. Save tires from the landfill and create fun garden art with this tutorial.
Millions of tires are discarded every year in the United States. With so many tires headed to the landfill or recycling plants it's fun to think of creative ways to reuse them. I showed you a few months ago how to grow potatoes out of tires.
Today I am going to share a tutorial on how to make flower or vegetable planters out of old tires. But this is a project with a twist, you're going to flip your tires inside out! Whether you have a large yard or just a tiny balcony to garden on you can make these rustic tire planters with (relative) ease.
Now I realize that old tires in the garden may not be everyone's idea of stylin' outdoor decor but I like rustic, junky, old gardens. I also like using free materials. I am cheap, plus my goal is to have the tires so overflowing with lush foliage that you don't immediately know it an dirty old tire.
Short-term, tire planters are okay, although the soil in black tire planters might get hotter than most plants would prefer if they are in direct sun.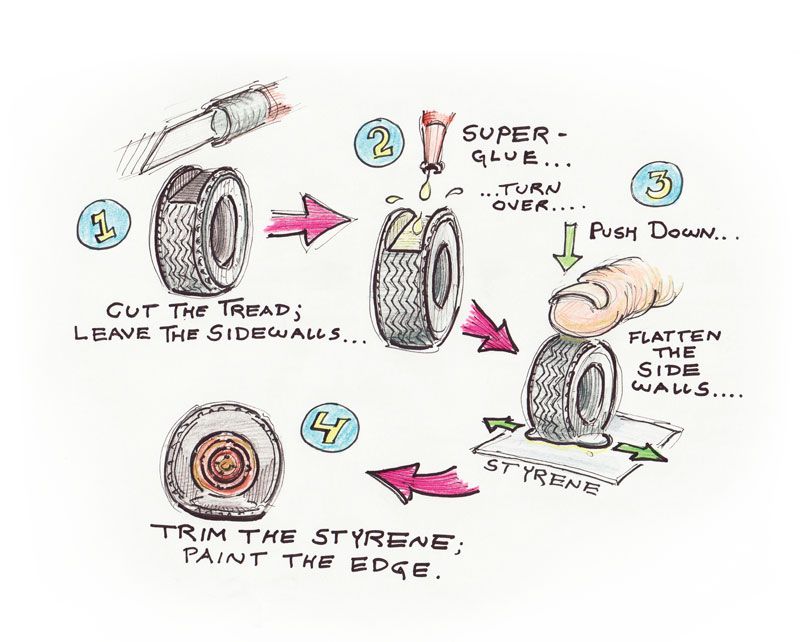 Long-term, the tire rubber will slowly biodegrade and release zinc, carcinogenic PAHs (polycyclic aromatic hydrocarbons) and other toxic compounds into your garden soil.
How much leaches from tires? Without analyzing the soil, we just don’t know. How much eventually makes it into the vegetables? Without testing we don’t know. What we do now is that plants are quite adept at absorbing substances from the soil in which they grow. To be on the safe side plant flowers in your tires instead of food that you will eat.
You may also like: House Plant Care Guide
1) Get yourself some tires. If you don’t have any old tires lying around try Craigslist. People will be begging you to take their old tires away or you could try calling around to some auto shops. They will probably have some tires they can give you too .
2) Take your tire and cut away the inner part of the rubber. Use the natural grooves in the rubber as a guide. If you ever bought one of those fancy Ginsu knives that claim to cut everything from steak to slabs of marble now is the time to dust if off and put it to good use. Please be careful. Nothing ruins a fun DIY project faster than a trip to the emergency room.
You may also like: 10 Best Herbs to Grow Year Round
3) Now you are going to flip your tire inside out. This is more difficult on tires without rims. Use your feet for support and pull the trimmed edge up. Consider calling a friend with big muscles over to help. The older the tires are the easier this will be
4) Tires with rims are slightly easier. Flip the tire upside down so the trimmed side is face down. Sit in the middle and pull the sides up with all your might.
5) Now that your tires are inside out give them a good spray down with the hose and clean off all the gunk.
6) If you want to paint your tires now is the time to do so. Make sure they are very clean and dry before painting. I like my tires pretty plain Jane which is why I left them au naturale. A google search will bring up tons of inspiration for bright fun colored tires that look like flowers and such.
7) Place your tires where they will have a permanent home. The tires without rims wont have bottoms so they will not be easily moved. Tires with rims have a bottom so the dirt won't spill completely out. They will however, be quite heavy.
8) Fill your tire planters with potting soil and add your favorite plants.
9) Water liberally and watch your plants grow! Sit back and admire your new planters and feel good knowing not only have you created free rustic planters for your garden, you also just saved unnecessary waste from the landfill.
Car tires have been used for a long time in such a matter as decorating flower beds. However, the simplest flower bed, made of raw car tires, looks rather boring and uninteresting. In addition, the most ordinary tires do not provide enough free space, so planting flowers in them is rather inconvenient, because the rim is very thick and the hole itself is unusually small.
If you spend a little time and use your imagination, then you can make an original flower bed out of a tire.
With just a little bit of effort and a little free time, you can make a pretty good pot out of an old tire.
To make flowerpots or a flower garden from car tires, you need to take materials such as:
It is better to use tires from modern cars for the flowerpot, as they are easier to turn out than tires from old cars.
To make special flowerpots, you need to take any tire from a car, it is best if they are modern, because the old ones are much more difficult to turn out. In addition, as a result, such do-it-yourself flowerpots look rather rude and untidy.
Also, it is best to take a tire with a straight tread, and not with a semicircular tread, and it is desirable that they be winter ones, because they are much easier to turn out. There is a special instruction with which you can make a flower garden, and also, adhering to which, you can create truly original and unique garden flowerpots.
Triangular or semi-circular petals are best planned, they are ideal for any garden.
Before you start cutting out patterns from a car tire with your own hands, you need to make a preliminary markup. The easiest way to cut a tire is in the form of petals, so you need to draw them first. They can have a variety of shapes and sizes. It all depends on the imagination of the one who makes the flower bed. You can make triangular or semi-circular petals, because they look more attractive and can be ideal for any garden.
To make triangular petals, you need to attach the corner of any suitable plank and carefully outline the outline with chalk or an awl. Then move it so that the edge is slightly in contact with the already marked petal, outline another petal and so on in a circle, to the end of the entire tire. If the last triangle does not fit a little, then it is worth slightly adjusting all the other triangles that are located in the middle. On a ready-made flowerpot made by oneself, the difference in size will not be very noticeable, so the petals can be safely adjusted upward or downward.
Following the instructions, you can make quite interesting and unusual flowerpots for the garden, which will surely please everyone.
If you need to make semicircular petals, then initially you need to draw a suitable outline on thick cardboard and only then circle it.
Back to index
To make a do-it-yourself fence for a flower bed or flowerpots from an old tire, after marking has been made, you can start cutting it. First you need to cut a small hole, insert a narrow and sharp knife into it and cut the rubber exactly along the markings. At the same time, the knife must be constantly dipped in water: this will greatly facilitate cutting the tire. It is best to take an ordinary shoe knife, but a simple kitchen knife may also work.
Back to index
When everything is cut out, it is necessary to pull out the cut out part and start turning the tire inside out. This is a rather laborious stage of the whole work on the manufacture of flower beds for the garden. To make this process a little easier, it is best to make large cuts right up to the tread.
A kitchen knife is also suitable for cutting tires along the markings.
If there is not enough strength, cut around the part of the future flower bed opposite the petals, so that the steel cord is removed. However, it is likely that without it the flower garden will keep its shape much worse. And, besides, almost every man can quite easily turn the tire without cutting the cord, you just need to make a little effort and time.
When turning a tire with your own hands, you must first turn one side out, then flatten the tire a little into a small and narrow oval, and then it is very easy to turn it completely out.
Back to index
With your own hands, you can make a simply excellent flower bed for the garden or a fence. In addition, their manufacture and subsequent design does not take much time and does not require a lot of effort.
When the flower bed for the garden is complete, it must be thoroughly washed and dried. In addition, a fence or flowerpot from a tire must certainly be degreased with the help of special tools and only then painted.
To decorate a planter or garden tire fence, it is best to use white paint and a few basic color dyes. Light shades must be used. Thus, when blending, you will get not too dark tones.
The resulting flower garden will look amazing on the site and much better than ordinary car wheels.
When the flower bed is ready, it is necessary to pour earth into it and plant flowers.
Home » Second life 165 ideas
Author Master Reading 3 min. Views 48.3k. Published by
In the city at the entrances there are flower beds made of car wheels. Upon closer examination, it is clear that this is a car tire turned inside out. And the leg of the flowerpot is a car disk. About three years ago I decided to make such a design with my own hands. I took a construction knife and cut the tire on the disk along the contour. I tried to turn it out - no way. I made additional cuts to the cord along the grooves of the tread. The tire began to bend but could not be turned inside out. Having carried out several approaches to eversion, I concluded that for eversion, either I do not have enough strength or I need helpers and special devices, or the tire needs to be heated, as I tried to do this in the late autumn. After the failure, he threw the wheel into the bushes and remembered him three years later in the summer of 2011. So to speak, with renewed vigor, the wheel began to torment, and, finally, after 40 minutes, we managed to find the secret of turning the tire inside out on the disk. To celebrate, I also sentenced to the last life the second wheel from the car that had left me into the unknown. The answer to the question of how to make a flower bed from a wheel is given below.
How to make a flower bed from a master's secret from a wheel with your own hands
Watch this video on YouTube
1. To cut the wheel, I used a shoe knife with abundant wetting during cutting with soapy water. Liquid soap was used as a soap solution. The knife should be sharpened sharply - this will speed up the work. I did not cut out the petals figuratively, although this can be done if desired. When working, take care of your fingers, wear gloves and try to cut away from yourself. A very good mechanization of this laborious process is outlined in another blog (cutting will take a few minutes!)
Donor wheel Start cutting Using liquid soap The distance between the longitudinal cuts is 5-10 cm. 3. The first tire was imported and we managed to turn it inside out right away.