Tech Guy Questions & Answers
If you need any assistance, we will be happy to help. Please use our Customer Service or Contact Us pages. You may also call 208-455-8433 during regular business hours.
1. Where can I download the Electronic Wiring Schematics or Owner's Manuals?
A. Please click on the PDF file links below for the wiring schematics only. The owner's manuals with wiring diagrams for each model can be found at Owner's Manuals:
800 Utility or 800UT-X Wiring Schematic
800 Aluminum Wiring Schematic
1600 Utility Wiring Schematic
1600 Aluminum Wiring Schematic
A. Installation is pretty easy. Just cut and splice four wires in the trailer's black box and you can enjoy the benefits of Wireless Dumping in a matter of minutes. If you own a model year 2009 trailer, just snap the two connectors together for an instant installation-- no tools necessary. Click below for a step-by-step 'how to' for Part 1865 from Bosski: Installation Instructions for Wireless Remote Control part 1865 |
3. How do the brakes and brake/tail lights work on the ATV Wagon trailers?
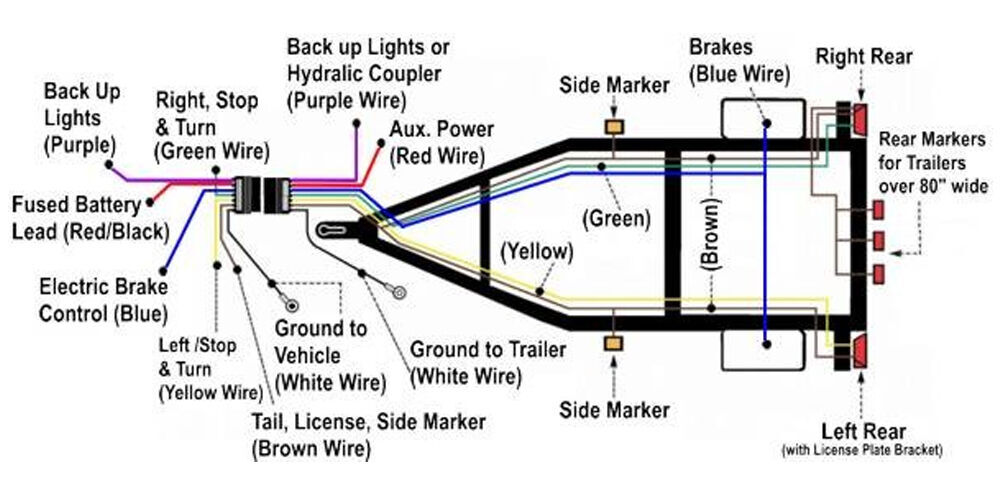
A. Nearly every ATV sold today comes with a dual-element brake/tail light. When you apply the brakes on your quad, that sends a positive electronic signal from the Brake Light Switch to your rear tail/brake light telling the light to turn on the brake light on your ATV.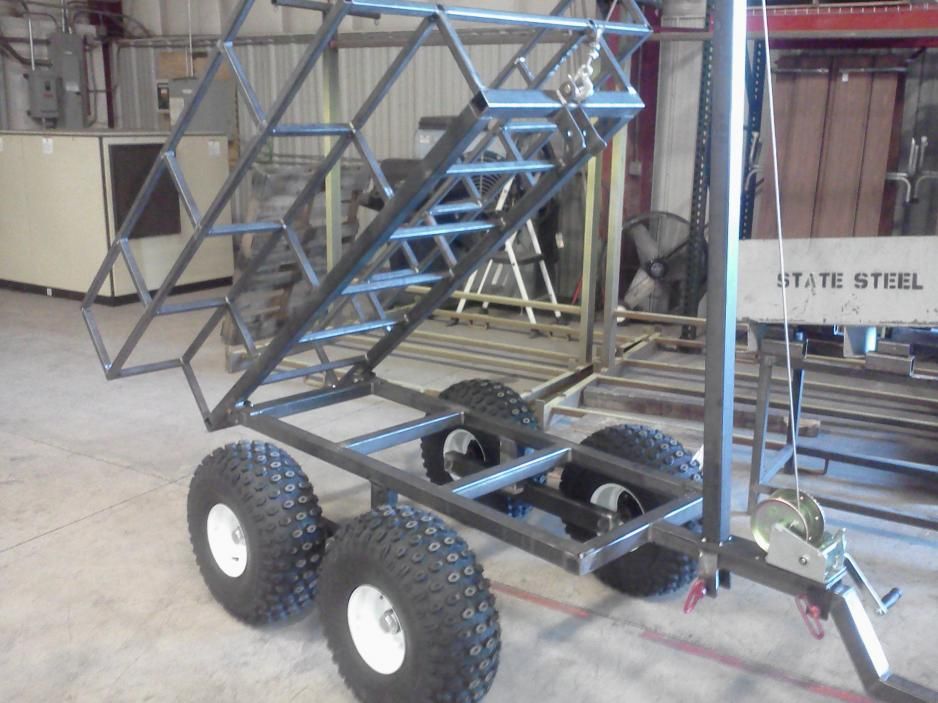 The squeezing of the brake lever or pressing the foot brake turns on the brake light. That same positive signal (hot power source) is transmitted to our Brake Controller mounted on the ATV Wagon which engages the trailer brakes. For the trailer tail light, you simply splice a separate wire into the tail/running light on the quad. It is very simple and easy to wire. For wiring installation, please refer to the owner's manuals for your specific trailer- follow the link on the left. To find the brake and tail light wires on your ATV, please refer to your ATV owner's manual or contact your authorized OEM ATV dealer.
4. I don't have Brake Lights and or a positive Brake Light Switch on my ATV so how do I activate the brakes/brake light on the ATV Wagon?
A. Some ATVs do not have a switch connected to the braking system which activates a hot wire which turns on the brake light, but your tow vehicle can be made to work with our trailer.
(*Can Am and Polaris owners, please review Q&A # 5 below) |
You will need to purchase a separate Brake/Stop Light Switch and they are available direct from Bosski or your local dealer for hydraulic or drum brakes. You may also need to purchase a T shaped fitting and plumb it into your brake line- purchase varies depending on your specific model and brake line system. Some people refer to Hydraulic Switches as 'Banjo Bolts'. These parts are commonly sold for off-road dual sport motorcycles and cost around $20-30.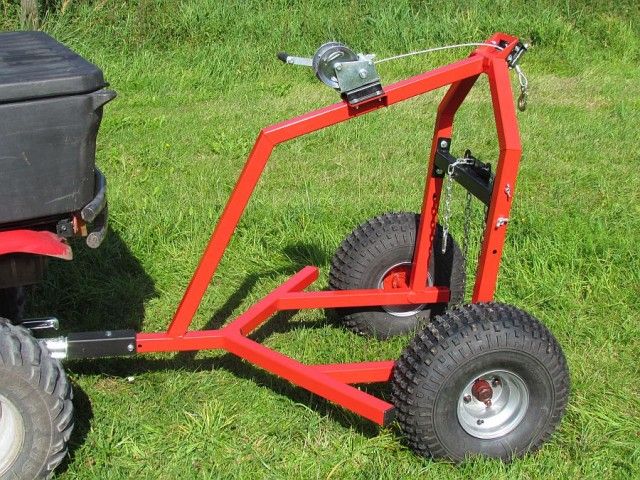
IMPORTANT: Be sure to check with your OEM dealer to be certain the correct part will work on your machine.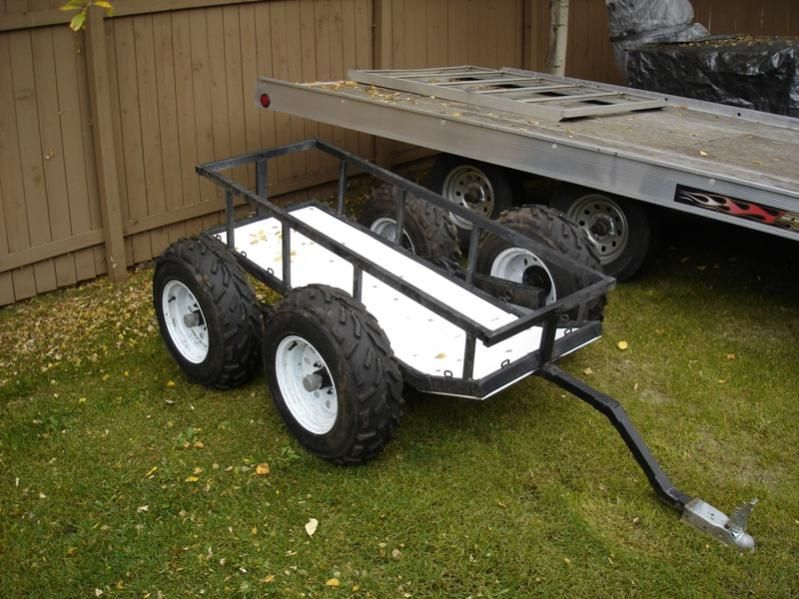 Your dealer can also assist you with the wire connections on the ATV in order to safely operate the ATV Wagon trailer.
5. I own a Polaris or Can Am machine and I am having problems wiring the brakes/brake light on the ATV Wagon?
A. We understand most newer models mfg. by Bombardier have a positive ground system where the brake light wire is always on or hot when your ignition is on. This is also true of newer models made by Polaris which use LED light systems. Because of it's unique wiring, it can not activate the ATV Wagon Brake Controller.
Polaris Rangers, including Polaris models using LED tail lights/brake lights, and late model Can Am / Bombardier quads can easily be made compatible with our trailer braking system by purchasing Part 1870 from Bosski, see photo above. The new Positive Ground Relay System sells for $39. 99. See your authorized dealer or order direct from Bosski. Part 1870 works in conjunction with the ATV Side Wiring Harness which comes with a trailer. For installation, please review the Part 1870 Wiring Schematic.
-- Please review the owners manual of your specific quad and or check with your authorized OEM dealer for assistance on finding the Taillight wire and Stop Light wire on the ATV.
--If needed, please see your ATV Wagon Owner's Manual for more information on connecting the ATV Side Wiring Harness. Owner's Manuals
6. How do you adjust the Brake Controller on the 1600 models?
A. ATV Wagon offers power brakes as a standard feature on the 1600 AL and the 1600 UT. Mounted within the black box of the ATV Wagon is a Brake Controller, pictured below, where you can adjust the time delay and intensity of the trailer brakes.
First, make sure power is being supplied to the brake controller by hooking up the 4-pole wire connection to the ATV and turning-on the ATV ignition. Squeeze the Manual Brake Activator and note the red lights appear by the Power Intensity Adjuster. The more lights that activate, the more stopping power you apply to the ATV Wagon brakes.
Move the Power Intensity Adjuster to the Left, towards the (+) positive symbol for more stopping power. Move the adjuster to the Right towards the (-) negative symbol for less stopping power.
The Time Delay Adjuster allows you to place a 1-3 second delay when applying the trailer brakes. Check that the switch is pushed to the back in the opposite direction of the Power On Light.
7. How do you 'manually' adjust the brakes on each brake hub/drum?
A. After reviewing answer 6 above, you may need to manually adjust the brake shoes located within the brake drum, if you still need more or less stopping power.
At the bottom, inside portion of each brake hub you will note an elongated plastic cap. Remove this cap as indicated in the photo below:
Inside the hole of the hub, you will note a silver adjuster. Insert a screwdriver into the hole, and spin the teeth down to expand or add more stopping power to each hub, as seen below. Spin the teeth up to contract or decrease the brake pads from contacting the brake drum. To clarify, the direction 'down' would be to spin the circular adjuster in a direction towards you. Imagine the adjuster like a coin rolling on a table towards you, that is the direction of 'down'.
After adjusting the brakes, check that the hubs spin freely or a partial drag of the shoes on the drum. Note: If Answers 6 & 7 above fail to increase your stopping power, it is possible your brake shoes are worn out. The changing of brake shoes should only be done by a certified technician.
Finally, if you need any assistance, we will be happy to help. Please use our Customer Service or Contact Us pages. You may also call 208-455-8433 during
regular business hours.
Your ATV Wagon Owner's Manual is very helpful, view them here.
All-terrain vehicles improve access to the backcountry. ATVs and side-by-sides excel at carrying people, but their restricted cargo room limits the gear we can haul in, and the meat we can pack out. To better suit my outdoor adventures and projects around my homestead, I needed more space to haul the necessary gear. It was time to build a utility trailer!
Advertisement
In the spirit of any good DIY project, salvaged materials kept my costs down. I used as much repurposed metal as possible to create my ATV trailer. When using old metal, good prep improves weld quality, so I brushed or ground off rust and old paint.
Advertisement
I rate this project as intermediate both for its required skill level and time to complete. To tackle this project, you’ll need access to a welder and a compliment of workshop tools. I chose wood planks for the decking, so a method to cut wood to length helps too. I’m not a welder by training, so there was a steep learning curve. Nevertheless, using a MIG welder and attention to detail, I achieved ‘professional’ results.
The hardest part of the project was coming up with a design. Plan considerations included trailer purpose, bed size, ground clearance, tires, hitch, load capacity and overall trailer weight. Some of decisions were easy, based on locally available materials – type of hitch, for example. Others crystalized after much deliberation. With my trailer specs and materials in hand, it was time to start cutting.
Advertisement
I cut the metal parts with a chop saw, a bandsaw and a special thin cutting blade on an angle grinder – any of the three will work well. The three-foot by five-foot frame was built using one-and-a-half-inch square tubing, which is strong and makes a superb platform on which to mount everything else. Simple butt joints to make neat square corners simplified welding for a beginner. Using two-inch square tubing for extra strength, I welded the tongue at 26 inches, allowing ample clearance between the ATV and trailer, even during tight turns. For frame strength and a place to secure the decking, I welded angle iron side to side across the trailer in strategic locations.
The wheel assembly is the most complicated part of this project. An online search returns several suitable ideas, from a simple straight axle with no suspension, to more complex walking axle designs. For me, design considerations included the type of tire. I opted for a standard 14-inch trailer tire and reduced the fabrication process by purchasing a pair of bolt-on equalizer torsion axles for a five-bolt rim. Swapping tire hubs to a four-bolt ATV style will accommodate off-road ATV-style floatation tires. I fabricated the axle supports using angle iron. Using the wheel assembly as a template, I marked and drilled holes to accommodate the bolts.
I used a wire wheel on an angle grinder to clean and rough up the metal surface of the trailer prior to painting. For paint, a rattle-can of spray paint for metal did the trick. To prevent slipping when wet, I plan to add a rubberized rocker guard paint on the tongue.
With the trailer still upside down, I bolted the axle assemblies to the frame and installed the tires. My wife and I easily lifted the trailer off the sawhorses and rotated it to sit on the ground right-side up. It wasn’t too heavy, yet!
Next was cutting the trailer decking – I used spruce 2x6s and 2x8s – securing them to the trailer using self-tapping metal screws into the angle iron supports. For longer life, I’ll paint the deck with a water seal. Treated lumber works well too, I just didn’t have any on hand at the time.
After the trailer frame and deck was built, it was time to focus on the sides. For now, I just needed a cart to haul logs and game out of the field, so I added arms that flare out from the trailer for more capacity.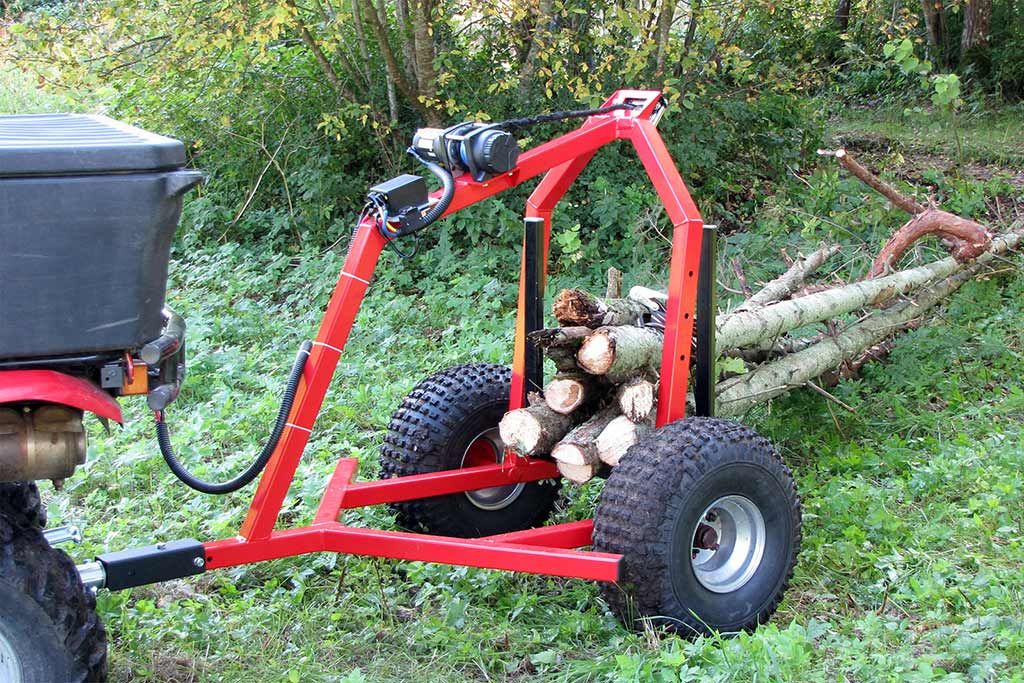 An alternative is quick-detach brackets and modular sides to slide in, to suit your adventure.
The last step was installing a trailer coupler. I used a standard part-store aluminum ball-hitch coupler, simply bolting the basic coupler through the tongue. I admit, I do admire the swivel hitch designs for safety considerations in rough terrain – if you misjudge your centre of gravity, your cart can tip without flipping the ATV on its side as well.
I had a great deal of fun researching and building this project. I learned new skills and created something that makes me proud to look at and use. Plus, I now have a custom trailer that is more solid and heavy-duty than most commercially made items of this size. If I wished to get it inspected and licenced, I could use it on the road behind my truck as well.
Have fun choosing your options and building your own utility trailer!
Step 1, plans and parts: I decided on the size, shape and parts specification for the trailer I wanted to build.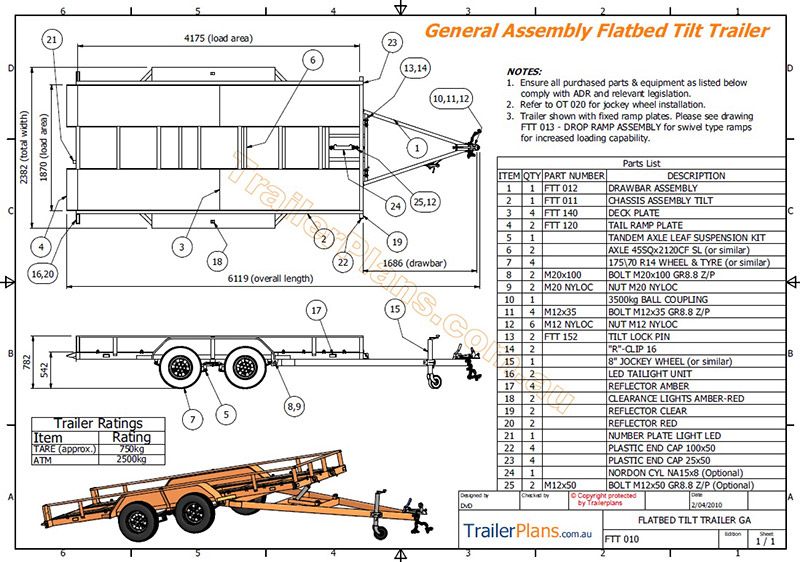 I scrounged used metal where I could and purchased the parts and materials I needed.
Step 2, layout: Metal parts measured and marked in preparation for cutting.
Step 3, cutting: I used a chop saw to cut most of the metal parts to length. A metal cutting bandsaw is another method for cutting metal parts.
Step 4, metal preparation: Good metal preparation is crucial to good welds, especially when using recycled metal. Here, a wire brush on an angle grinder removes old paint and rust.
Step 5, welding: Magnetic clamps hold the workpiece while welding, keeping everything square. For the perfect fit, the axle assemblies were used as a spacer while the supports were tack-welded into place.
Step 6, painting: After welding the frame, the steel was painted before assembling.
Step 7A, assembly: The axel assemblies were bolted onto the frame supports, followed by tire installation.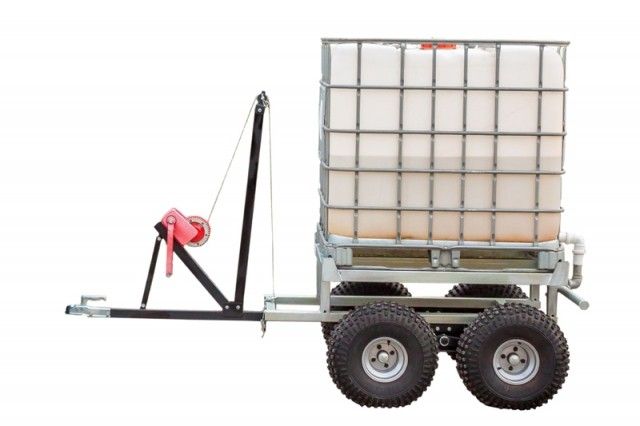
Step 7B, assembly: The hitch coupler was bolted to the tongue to facilitate future upgrades or replacement.
Step 8, final details: Install side arms and pre-cut decking.
The final product, showing clearance, axel assembly and tires.
Trailers The technical indicators of the ATV are quite unique, so the technique can be used for a variety of purposes. In particular, an ATV may need to transport cargo or the equipment itself, sometimes it becomes necessary to deliver it to the place of movement. And in this case, a suitable trailer is useful, which you can buy or make yourself. Also, in the event of a breakdown of the ATV, it will be possible to deliver it to the place of repair only with a special trailer.
Please note that ATV trailer dimensions may differ from classic equipment built for the same vehicle. In particular, this is due to the fact that the width and height will not fit a standard towbar.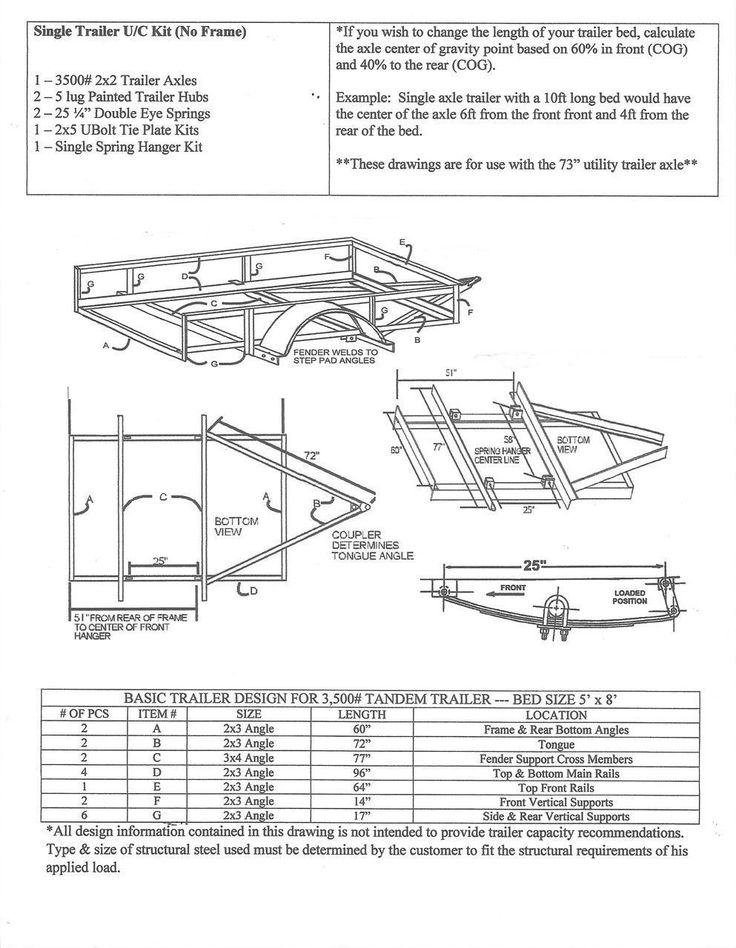 This solution will be especially relevant for transporting various things or small household tasks. Some try to limit themselves to the existing trunk or buy wardrobe trunks for things, but more massive and dimensional things are transported only in a trailer. On such equipment with a trailer, it is especially convenient to work outside the city, for example, bring land to the country house or load garbage. Trailers are of the following types:
Please note that the car trailer is selected very carefully, because in some places it will be inconvenient for operation, as it has a considerable size. It will be difficult to get between trees and other obstacles. And the equipment from the walk-behind tractor is not quite suitable for the reason that it has a weak and uncomfortable suspension.
If you need a workhorse, but there are no extra 1500-2000 for the trailer, then there is a more budget option - make it yourself. First of all, you will have to find a drawing of a trailer for an ATV, then pick up the necessary parts. The basis will be the axis, which you need to get first of all. You can buy a new assembly, or find a car in decent condition. The axle with the car will be long enough, you need a length of about 120 cm. Therefore, you will have to file a little, for which we first cut the axle in the middle. Then we cut off a part on one side so that when the two halves are joined, we get the optimal length.
Connecting the two halves of the axle is not quite a simple matter, but we have chosen a fairly convenient way. You need to take a pipe that would be slightly larger in diameter than the axis itself. That is, the pipe will be located in the middle, and two parts of the axis will be inserted into it. But it is important to choose such a diameter that the halves have almost no gap, otherwise the wrong collapse will result. We carefully weld the pipe along the edges and protect it if necessary.
Next, a rather important task is the creation of mounts on which the platform and sides will be located. The drawbar will be created from ordinary rectangular profiles, the length and thickness are selected by you individually, depending on the cargo being transported. Please note that the platform should create a center of gravity precisely on the axis, and for the best effect and reliability, additionally weld metal reinforcements.
The next step is to create a hitch. Fortunately, it is available in assembled or separate form in stores, for this you buy a tow ball and a hitch device directly. There are ATVs already with a towbar, but if one is not provided, we weld the ball to the beam of the equipment. The hitch will be welded to the drawbar.
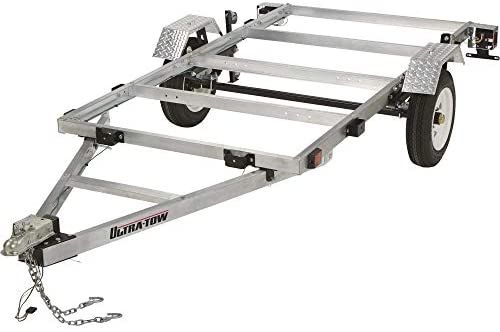
The process of creating a frame is quite simple, especially if you have worked with a grinder and steel profiles. First of all, we make the necessary measurements and weld all the parts. But it is important to consider that the surface of the profiles must be even, otherwise the sheets will be uncomfortable and crooked. The bottom itself can be created from plywood, but it must be thick enough. Fastening must be done with screws to the frame, the screws must not stick out on the surface, otherwise it will create discomfort during unloading. Some specialists will surface the bottom or install a thin sheet of metal for the best result. The wheels for the ATV trailer are selected at your discretion and based on which axle is used. Typically, car wheels are used, but should be of a small radius and not too heavy. Otherwise, the trailer will turn out to be heavy and it will be difficult for the equipment to pull it when loaded. A simple trailer should turn out with a weight of 50 kg. Also note that registration of such equipment will not work, since the ATV does not involve the use of a trailer due to the lack of a differential.
 03.2017
 For the most part, we will talk about making a towbar for 150-250 cubic meters ATVs, since the industry has bypassed this detail, and the owners have to “get smart” about something on their own. We will also touch on the topic of installing a towbar on ATVs with a larger cubic capacity.
With the big brothers it is easier to install the towbar, as a rule, they all already have a mounting platform.
And it remains only to purchase or make with your own hands just such a simple device.
Heavy-duty attachment options are also available for this hitch to pull heavy loads.
There are also sites of this type, and the owner only needs to purchase a tow ball (often it is already installed).
By the way, about the towbar balls - you can save a lot by buying a KAMAZ hydraulic cylinder ball head instead of a ball, it costs less, and the mount and ball diameter (50mm) are absolutely identical.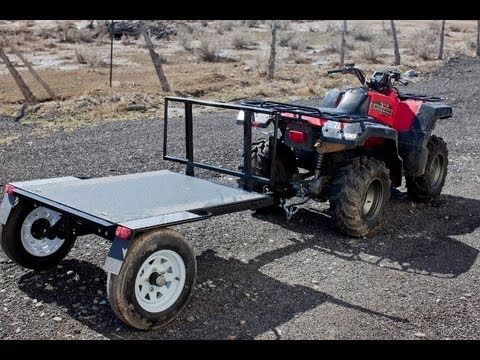
I think even a baby will understand the installation, and we will not describe it, but move on to “our smaller brothers”.
Do-it-yourself installation and manufacture of a towbar for an ATV 150-250 cubic meters.
First you need to decide where exactly to attach the towbar: to the swingarm or to the ATV frame. The opinions of ATVs on this issue differ: some argue that mounting exclusively to the pendulum will not be entirely correct, some, on the contrary, advocate this type of mounting, and we decided to present all the options, and we will give you, dear readers, freedom of choice.
Attaching the towbar to the ATV swingarm.
Everything is very simple here: it will take 2-3 hours to make, you will need metal plates 2.5 - 3 mm thick, a grinder, a welding machine and longer bolts that tighten the pendulum.
Another way to attach the towbar to the swingarm. Everything is clearly visible in the photographs, so we will not do a description.
Attaching the towbar to the ATV frame.
To attach the towbar to the frame, two ears are welded on the front,
the rear part is attached at the top to the internal thread of the trunk mount.
All provided fastening options are quick-release (max 4 bolts), are quite simple to manufacture and now it will not be difficult for you to install the towbar on the ATV. But do not forget that an ATV of 150-250 cubic centimeters is far from being a tractor, try to use light trailers and do not tow more than 150-200 kilograms in order to avoid undesirable consequences.
If you have any questions, feel free to ask them in the comments.
"Tension roller...
How to..."
