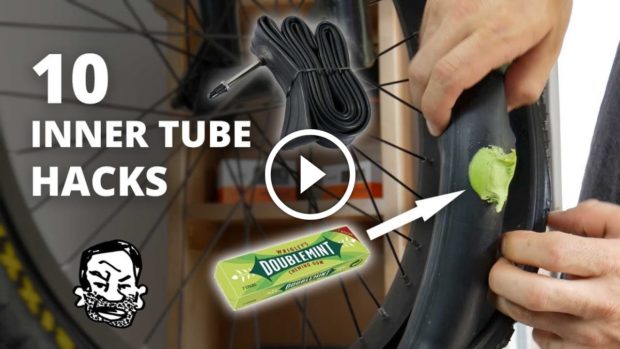
Anyone who has been riding bikes for a while can tell you that sooner or later, you’re going to get a flat. Even with tube sealant that prevents flat tires for up to two years, it’s just an unavoidable occurrence. When flats occur, the best thing you can do is be educated and prepared to patch the tube so that you can quickly get back on the road. Let's get started:
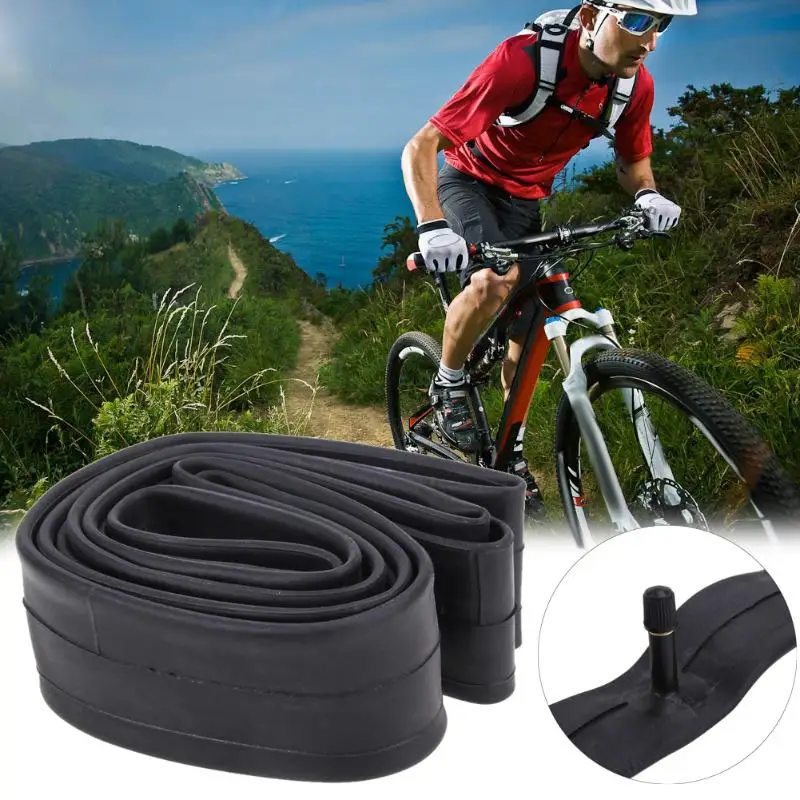
Materials NeededConsider these different flat tire scenarios: The at-home repair scenario where you're walking your bike into the garage and notice that the back wheel is sagging a little bit—you have a flat. Or, the on-the-trail repair scenario where 20 miles into a 50 mile ride, you go down hard on a rock and get a nasty pinch flat.
We’re going to walk you through some of the materials you’ll need for either situation, and then how to use them for both. Here’s a list of some things you will need to repair your tube.
Follow these 4 easy steps to patch your bicycle tube and repair your flat.
Step 1. Remove Your Tire
Take your tire lever and hook it around the outer edge of the tire (the bead) to get it off of the rim. Once you have the tire lever under the tire rubber, hook the other end of your tire lever around one of your spokes to keep the tire elevated. With a second tire lever, work your way around the rim, taking the tire out of the bead until one side has been completely removed from the rim.
Step 2. Find the Leak
If the puncture or gash in your tube is not easily apparent, you’re going to need to fill the tube back up to locate where the air is escaping from. There are a couple of different ways to find the leak. The layman’s way would just be to run your hand along the tube and try to feel it out.
The bucket of water method that we mentioned earlier, however, is a more accurate way. If you’re at home, fill your sink or a large bucket full of water and submerge each end of the tube. Watch for air bubbles escaping from your tire to locate your problem area.
Make sure you submerge each side, as there may be more than one puncture. Be sure to check the inside of the tire to make sure that the puncture-causing object has been removed. Once located, mark that spot with your tire marking chalk.
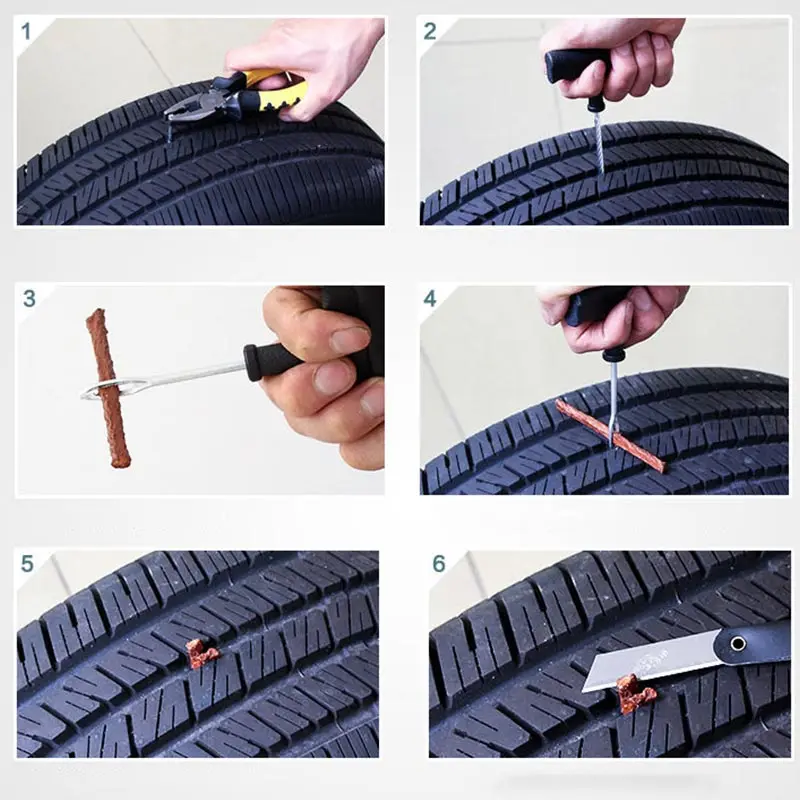
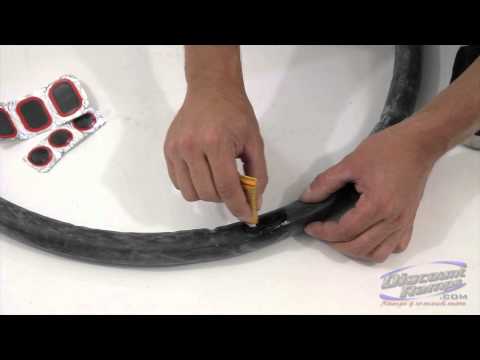
Step 3. Patch the Hole
When patching the hole in your bicycle tube, make sure that the area around the puncture is clean so that the patch will stick. Using the scuffer from your patch kit (sand paper or emery paper will also do the trick), rough up the area around the puncture so that your adhesives have something to grip.
If your patches don’t require glue, simply press them firmly over the hole. For patches that do need glue, add a layer of glue and spread it evenly around the area. Wait for the glue to get a little tacky, and then press on your patch. If you have the materials available to you at home, some cyclists will sprinkle talcum powder on top of the patch so that that patch/adhesive doesn’t stick to the inside of the tire.
Step 4. Put It All Back Together
Put a little air into your tube and then put it back in the tire, making sure, again, that there are no foreign objects remaining in the tire. Be sure to insert the tube and tire back into the rim using only your hands, as the tire levers may pinch the tube and cause another flat (we certainly don’t want that after all your hard work).
Once you’ve pushed the tire back in and the valve stem is securely inside the tire, inflate your tube back to maximum pressure, being sure to check the tire one more time to make sure that the bead is installed snugly. Ready to ride!
in: Featured, How To, Skills
Brett & Kate McKay • May 26, 2022 • Last updated: December 15, 2022
The bicycle is one of the greatest tools of self-reliance.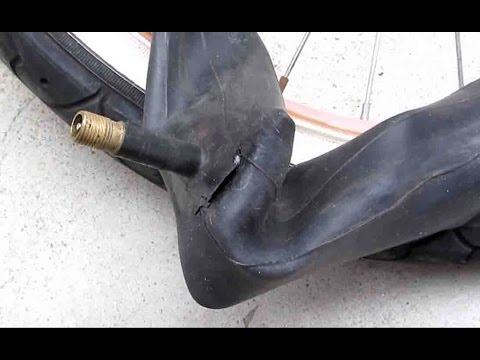
Without any need for electricity or gas, it can carry you far distances.
But bikes only work towards your self-sufficiency if you know how to maintain them. They may have fewer complications than an automobile, but they’re still machines that can break down and need to be repaired.
Several years ago Kate and I bought some bikes for ourselves (our kids already had them) so we could take family rides on Tulsa’s many pleasant bike paths. But I realized that I didn’t know beans about how to maintain our new purchases. If one of us got a flat tire, I wouldn’t know how to patch it. If my brakes were acting wonky, I’d be hosed.
So I set out to learn some basic bike maintenance and repair. It’s been fun. I thought I’d share what I’ve learned with you all in a new series: Bike Maintenance 101.
In today’s inaugural class, we’re kicking things off with how to patch a hole in your inner tube. I remember watching my dad patch a hole on one of my bike tires as a kid.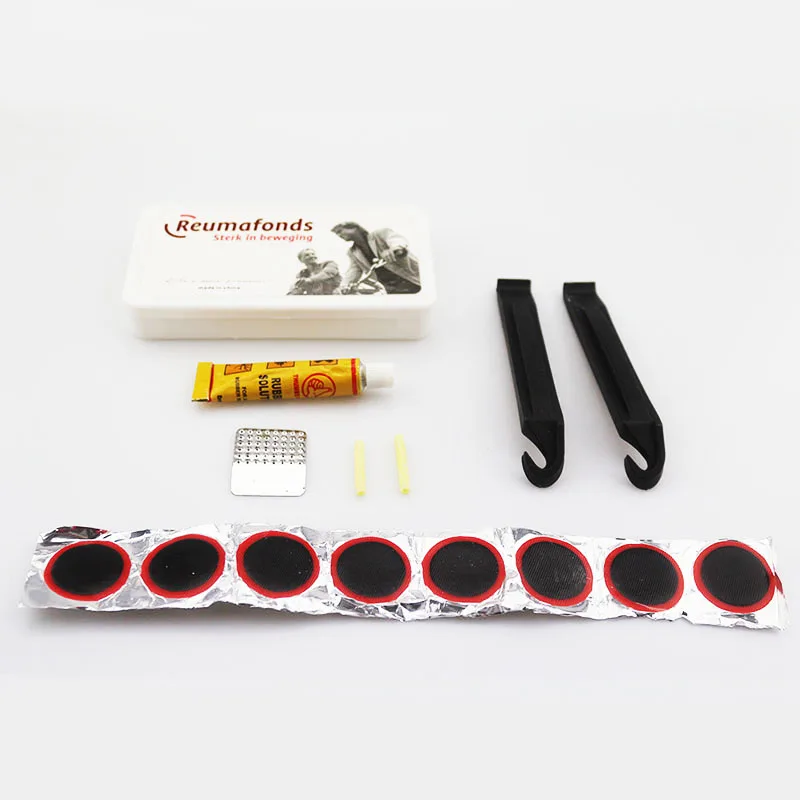 It looked like a huge pain in the butt. But I learned that it’s surprisingly easy. Here’s how to do it.
Let’s get that wheel off so we can get to our flat inner tube.
I like to flip my bike upside down. It makes it easier to work with your wheel. I don’t have one of those fancy bike holders you use to work on your bike.
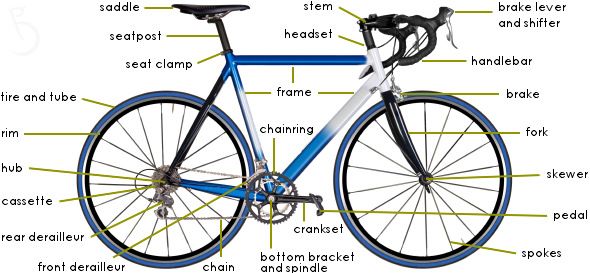
Getting wheels off a bike is a breeze with today’s quick-release systems. It’s pretty much the same for all bikes. The only difference you’ll encounter is how you’ll disconnect your brakes. That will depend on what type of brakes you have on your bike. Here’s how I removed the wheel on my bike with v-brakes.
It’s really easy to disconnect a v-brake. You squeeze the two brake arms together and unlatch the cradle from the noodle (that’s the thing with the rubber tip on it).
Flip the quick-release lever open and unscrew it until you have enough space to remove the wheel.
You don’t have to take the quick-release rod out of the hub, but if you want to, that’s fine.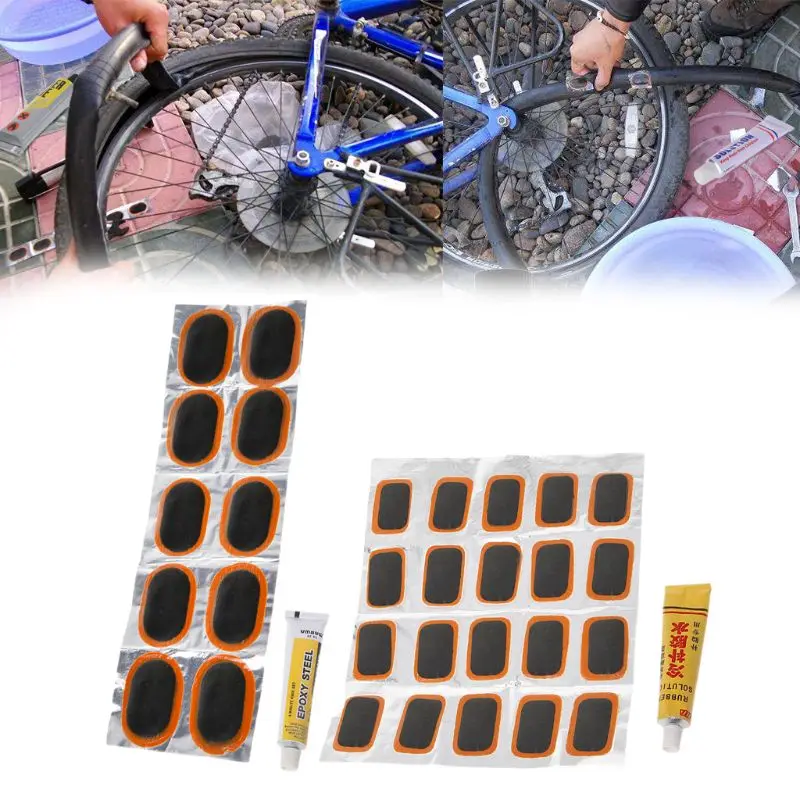 I think it’s easier to work with the tire without the quick-release rod still in the hub, so I take it out.
Wheel removed!
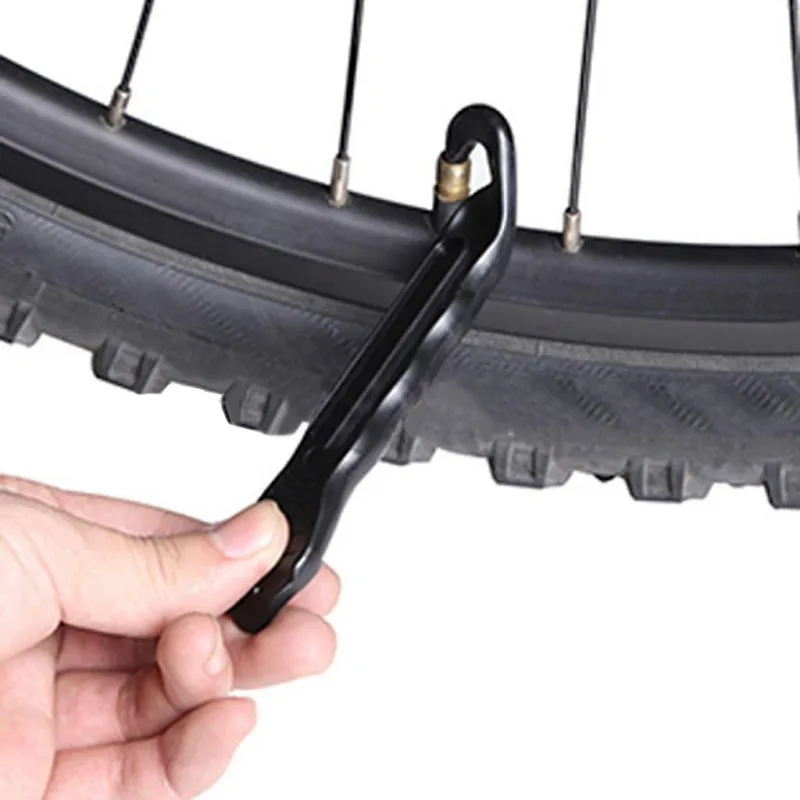
Time to get the tire off the wheel so we can get to the inner tube. Tire levers will make this job much easier. You can buy them on Amazon. They’re cheap.
Place your first tire lever between the wheel and the tire. You want to get the lever underneath the lip of the tire so you can pry it away from the wheel.
To keep the lip of the tire from going back into the wheel, hook the tire lever into one of the spokes. This will keep your tire and wheel separated, making it much easier to get the rest of the tire off of your wheel.
Place the second tire lever next to your first tire lever. Get it under the lip of the tire. You’ll slide this lever around your wheel to separate the rest of the tire from the wheel.
Here’s what your tire will start looking like as you slide that second tire lever around your wheel.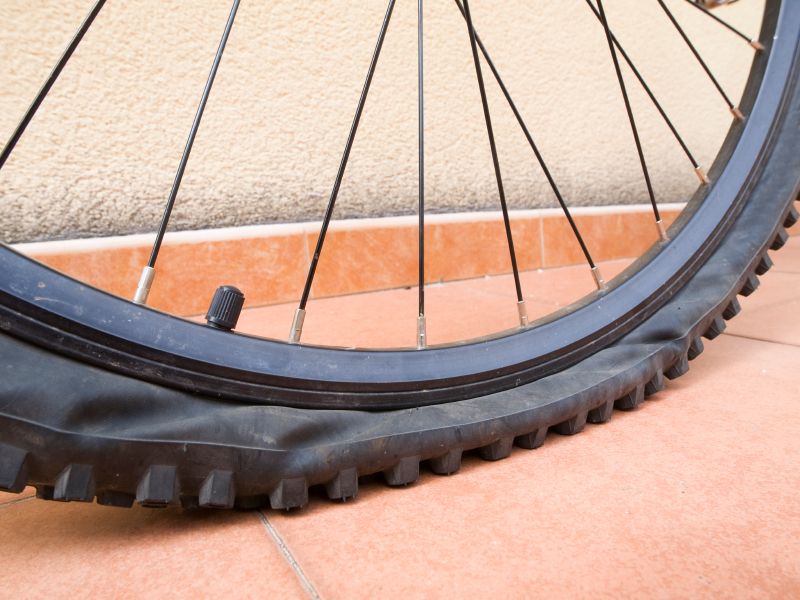 It’s hard at first, but gets easier as you progress. As you can see, more and more of the tire lip is over the rim of the wheel.
Tire successfully removed from wheel. Now it’s time to remove the inner tube from the tire.
Inner tube will be tucked inside your tire. Just pull it out.
There’s the hole.
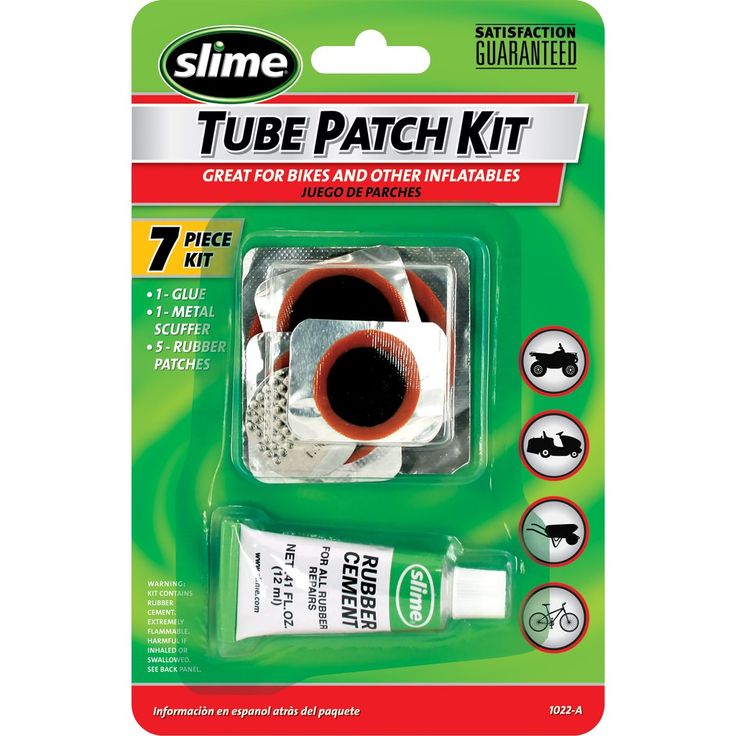
Get your patch kit.
Inside my patch kit is a metal square that has a bunch of little bumps on it. It’s almost like a cheese grater. Use it to lightly scuff up the area on and around the hole. If you don’t have a little metal cheese grater in your patch kit, you can use sandpaper to prep your patch area. The scuffing will give greater adhesion to the patch.
Use a moderate amount of rubber cement. Spread it evenly around an area 1/2″ around your hole.
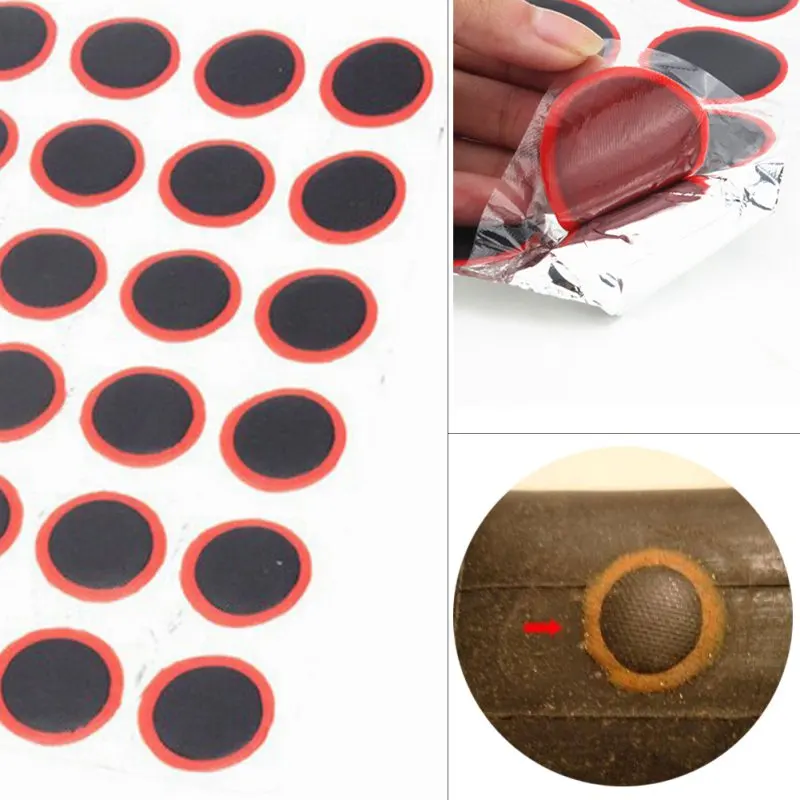
Pick an appropriate sized patch for your hole.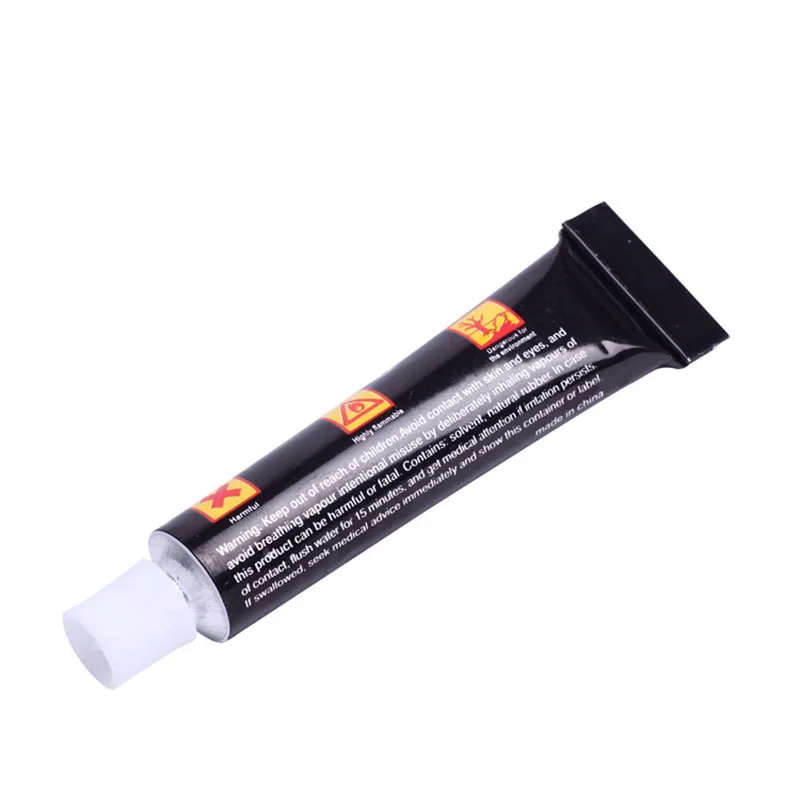 Since mine is so small, I used the smallest patch. Remove the foil backing and stick patch onto the hole.
Peel away the plastic film on top of the patch. Press edges down firmly. Bam! Hole is patched.
Inner tube back in tire.
Tire back on wheel. Getting the tire back on the wheel can be a bit tricky. You may need to use your tire levers to help you get the lip of the tire inside the wheel’s rim. Just make sure you don’t pinch your inner tube between the tire and the wheel. You’ll risk creating a puncture in your inner tube. Once you get your tire back on the wheel, inflate your inner tube and then put your wheel back on your bike.
You can patch your inner tube a few times and not have a problem. If you have more than three patches, you might start noticing that your tire goes flat overnight and you have to pump it up if you want to use it. After your third patch, chuck your old inner tube and replace it with a new one.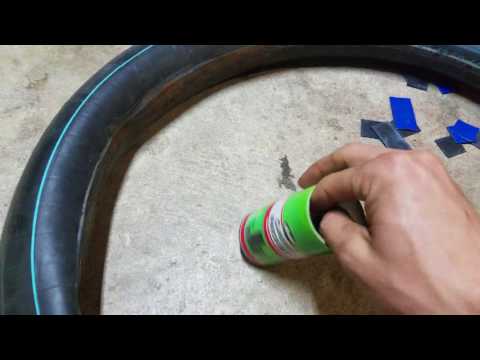
Want to start taking action on the content you read on AoM?
Join the Strenuous Life
Learn More
The frame of modern bicycles is made of durable and reliable materials, but each of them has its own tensile strength. Most Langtu frames are made from aluminum, steel, or carbon alloys, each with advantages and disadvantages. The main advantage is, of course, the long service life. Our company offers services for the repair and maintenance of any type of frames.
TO, regardless of its type, is more preventive in nature. That is, transport lends itself to detailed study to identify malfunctions, breakdowns, as well as wear and tear of working units and connections. Bicycle frame maintenance is no exception. The procedure involves identifying the problem and suggesting ways to solve it.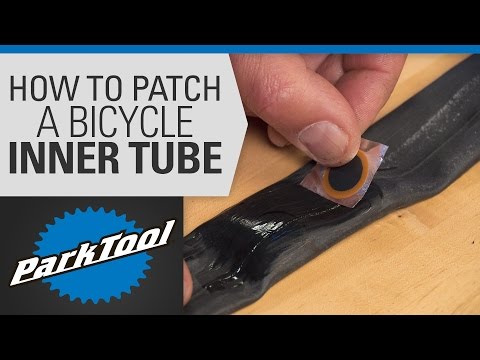 In the case of a frame, the following operations can be carried out:
If you are planning a long trip on a bike that is over 5 years old, you should pay attention to the fact that the frame metal could “get tired”. This happens from constant vibrations, and the transport can come into an emergency condition. Therefore, a test should be carried out to determine whether the frame is suitable for further use. Also, maintenance of bicycle frames involves the identification of small cracks and their further removal. Among the most common places of occurrence, it is worth noting:
It is necessary to hand over the bike for frame inspection at least every 2 years, this will help minimize the number of unexpected breakdowns, including those associated with cracks in places of maximum loads.
Even if the bike has been used correctly, there is always a chance of breakage, especially at the points of welds. In this regard, the repair of steel bicycle frames is the easiest to implement.
For example, chain stays that are welded to the seat tube have a very small area of contact with it, so with active use, especially inexpensive "Hiten" trick bikes, the structure can break. But even in places where relatively thick and large tubes of a bicycle frame are welded, there is an increased risk of fracture. The following factors influence this:
 However, the metal did not stop exerting pressure, and with aggressive skating and performing tricks, an increased load on the knot can lead to a break at one of the points along the perimeter of the seam.
 To partially eliminate the weak points of the bicycle frame, several modern technologies are used, such as butting, hydroforming, or applying additional reinforcing plates. Also, to reduce the existing pressure in the welded joints, the weld area is subjected to heat treatment.
Carbon frames, if they break, then anywhere. This is often due to a direct hit rather than the pressure of doing tricks, steep descents on rocky terrain, etc. Repairing carbon bike frames is a little different than everyone else.
Attention! Cracking in the seatpost area can be for a completely commonplace reason, such as getting sand or dirt on the bike. But at the same time, there is a possibility that a microcrack has formed on the frame, which creaks every time when weight is applied to the seat.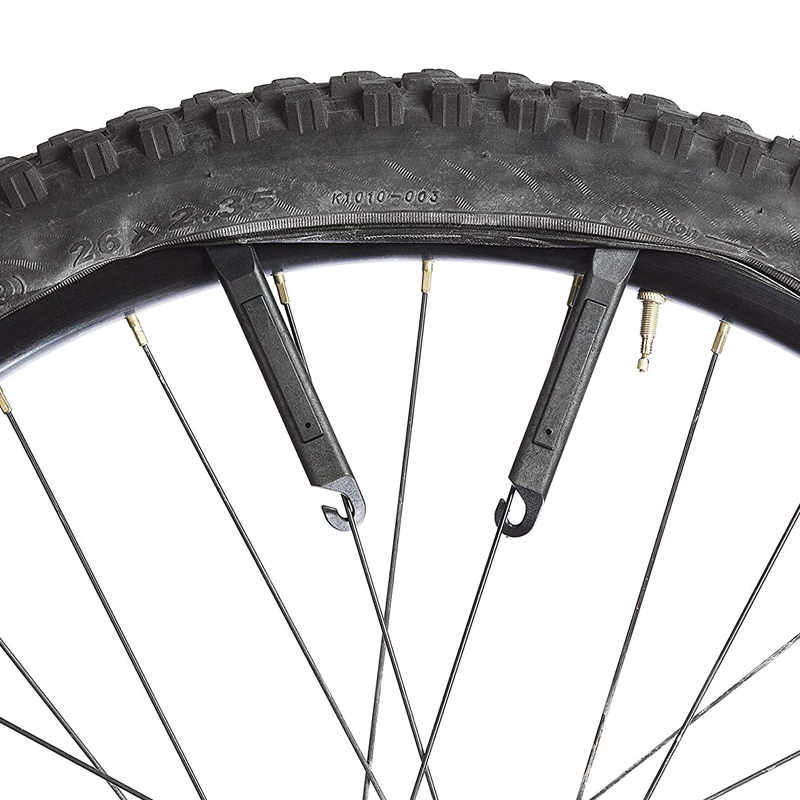 It is worth conducting a full examination in order to prevent the possibility of a sudden break, as a result of which not only the bicycle, but also its driver may suffer.
Bring your vehicle to the Langtu workshop, we will adjust the switches, brakes, adjust the operation of the fork, as well as eliminate unpleasant sounds, backlash and other problems.
Basically, our company solves even the most complex tasks in 1-4 days. It is worth remembering that it is necessary to bring the bike to the service center in a clean condition, and free repair of aluminum bicycle frames is carried out only if all warranty conditions are met.
We repair and maintain the following bicycle components:
Your name*
Message*
Protection against automatic messages
Enter the word in the picture*
X
Personal account login
Forgot your password?
A registered user can:
All informational messages are sent as an e-mail to the address you specified when registration.
Register
RealVelo's repair shop carries out bicycle repairs of any complexity. Bicycle pre-season training is underway. Repair work on wheels, setting up and pumping hydraulic brakes, setting up a bicycle gear shifting system, selecting and installing additional bike accessories (fenders, bike racks, bike computers, bike lights, etc.) We also provide service for bikes purchased in our store. Address: St. Petersburg, m. "Lenin Square", Kalininsky district, Botkinskaya street, 1
| Name | Cost | wheels | from 500= | |
| 2 | Eight correction | from 400= | ||
| 3 | Wheel reassembly with disassembly of old | from 1200= | ||
| 4 | Wheel assembly (new components) | from 1000= | ||
| 5 | Alignment (umbrella) | from 600= | ||
| 6 | Front hub bulkhead (bulk bearings) | from | = from | 0 |
| 7 | Rear hub bulkhead (bulk bearings) | from 1100= | ||
| 8 | Replacing industrial bearings of the front sleeve | from 800= | ||
| 9 | 0120 from 1200= | |||
| 10 | Replacing the cassette (ratchet) | 350= | ||
| 11 | Installing / removing the brake disc 9012 9012 1 | |||
| 12 | Brake disc alignment | 400= | ||
| 13 | Tire change (tube) | 350= |
| Designation | Cost | |||
| 1 | Head tube preparation (trimming) | === | ||
| 2 | bottom bracket tube preparation1 21=== | |||
| 3 | Preparation bottom bracket tube (threading) | === | ||
| 4 | Machining IS caliper fit (per side) | === | ||
| PM side of fit | 0121=== | |||
| 6 | Holder alignment h.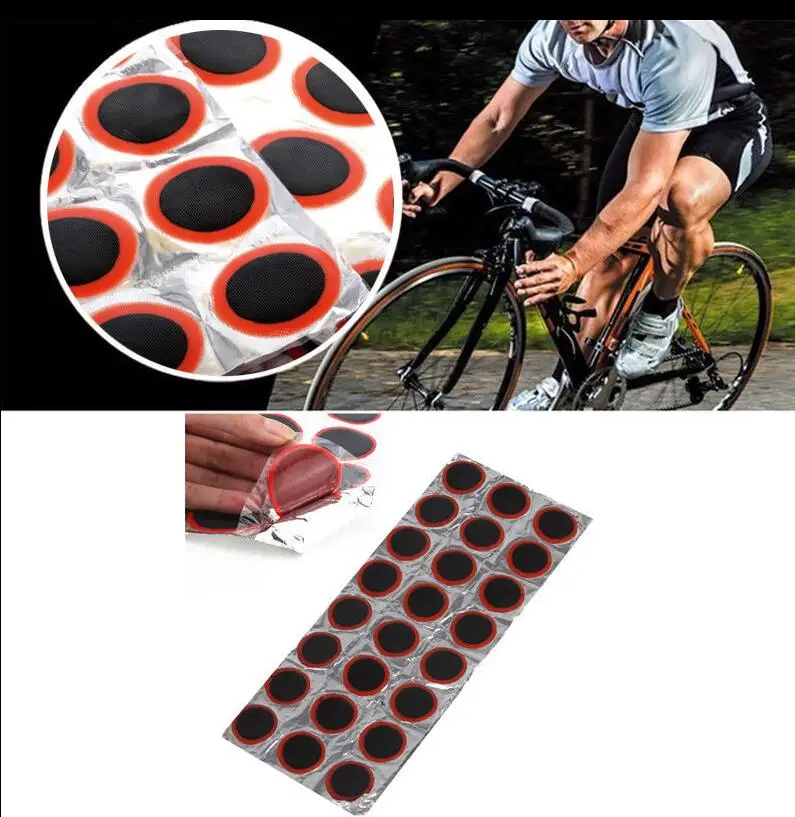 switch (rooster) switch (rooster) | 500= | ||
| 7 | switch | 350= | ||
| 8 | Rem. bushings on holder thread h. switch. | === | ||
| 9 | Frame geometry check with correction0121 | 550= | ||
| 11 | BB90 (92.86) press fit cups install/remove | === | ||
| 12 1 bearings remove gnolo UT | === | |||
| 13 | Mounting the rack/bottle cage (bonks) | === | ||
| 14 | Preparing the seat tube (drilling9 milling) | = 9012 = 9012 011915 | Lower steering cone preparation columns (trimming) | === |
| 16 | Installing/removing the lower steering column cone | 350= | ||
| 17 | 1 | 0120 450= |
| Name | Cost | ||||
| 1 | == | ||||
| 2 | Installation of the repair sleeve of the pedal thread of the connecting rod | === | |||
| 3 | 19 | 4 | Replacing cranks with reinstallation of pedals | 550= | |
| 5 | Removing/installing the chainring | 350= | |||
| 6 | Replacing bottom bracket | from 100200119 | 7 | Removing/installing pedals | from 200= |
| 8 | Shimano pedal cone adjustment (pair) | 900= | Removing/installing ind.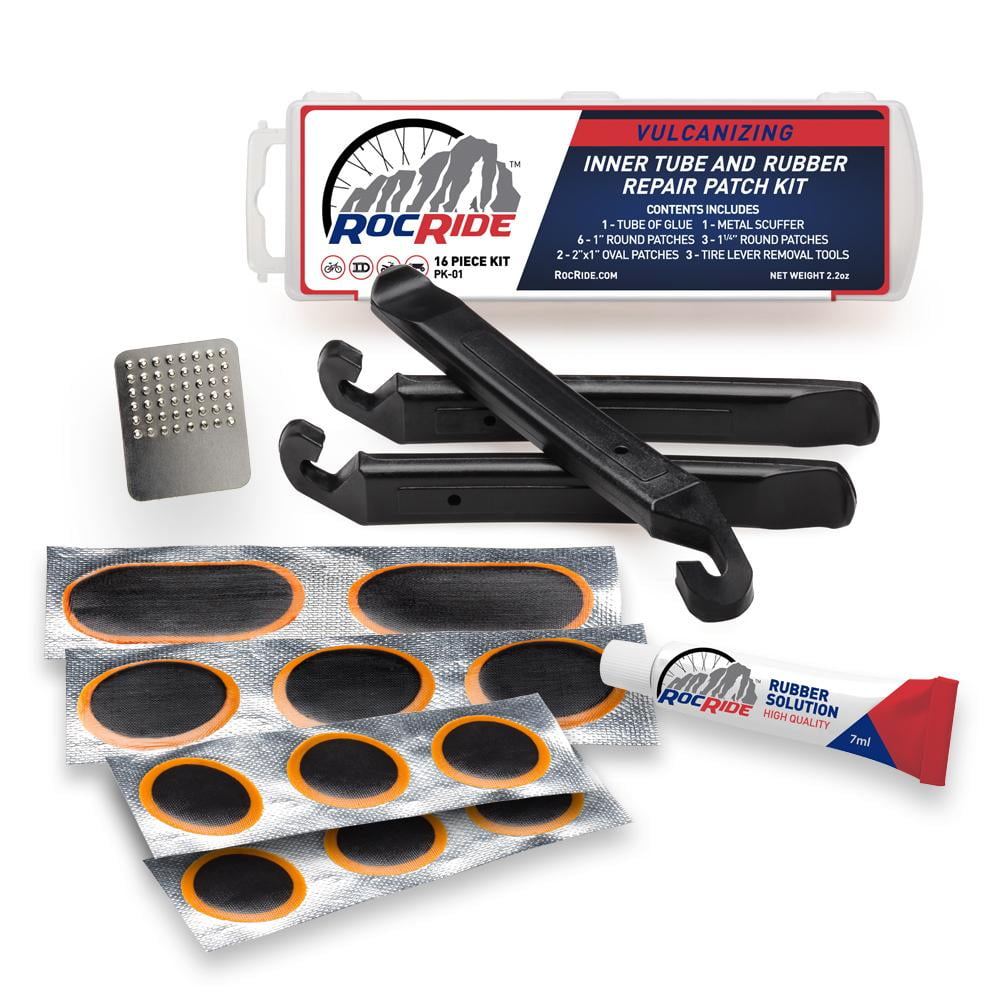 pedal bearing (pair) pedal bearing (pair) | 1100= | |
| 10 | Removal/installation of chain | 350= | |||
| 11 replacement cable side 9 | 350= | ||||
| 12 | Removing/installing the switch with adjustment (per side) | 600= | |||
| 13 | Replacing the switch lead (cable, jacket) with adjustment | 9012= 9012 0120 14 | Removing/installing the lever with adjustment (per side) | 600= | |
| 15 | Removing/installing rear derailleur rollers | 400= | |||
| 16 | 121 | 800= | |||
| 17 | Replacing HT-II bottom bracket bearings | 900= |
| Name | Cost | ||||
| 1 | Removing/installing handlebar 1 | 300= | |||
| 3 | Handlebar shortening | 450= | |||
| 4 | Removing/installing saddle | 350= | |||
| 5 | |||||
| 6 | Removing/installing grips (handlebars) | 250= | |||
| 7 | Removing/installing horns | 250= | 9013 0121 | Installation of the luggage rack in standard mountings | 400= |
| 9 | Custom rack installation | from 800= | |||
| 10 | Standard fender installation | 350= | Installing full size fenders (classic) | 800= | |
| 12 | Installing full size fenders using non-standard solutions | from 1200= | |||
| Footrest installation | 400= | ||||
| 14 | Child seat installation | 800= | |||
| 15 | Light installation (per piece) | 150= | |||
| 16 | Installation of bell/horn | 150= | |||
| 17 | Transfer of equipment to a new prepared frame | from 6000= | |||
| 18 Full bulkhead | bicycle (capital)from 13000= |
 Petersburg
 Many modern bicycle models have a complex design, thanks to which you can count on comfortable movement in any conditions. In order for the performance to remain at the level for a long time, it is necessary to systematically carry out preventive maintenance, and entrust repairs to specialists. This will avoid unpleasant situations on the road.
Residents and guests of St. Petersburg and the Leningrad Region can contact the workshop to entrust us with:
Tuning is a great opportunity to make your bike unique. Modernization can concern not only the appearance. Technicians are often called upon to make the bike more comfortable and faster. The most popular among bike tuning enthusiasts is LED lighting. They can be installed anywhere, but most often nipple caps are equipped with diodes: glow-in-the-dark wheels look very impressive. Often, additional lighting is installed on the speedometer and shifters.
Preventive maintenance allows you to monitor the condition of all bike systems and replace worn parts before a malfunction causes a breakdown. In most cases, maintenance comes down to adjusting the operation of the brakes and shifts, lubricating the chain, tightening the bolts, cleaning the bushing bearings and steering column from dirt and lubricating them. As a rule, cyclists begin pre-season training with a detailed inspection of the technical condition of the main parts of the bike. Scheduled maintenance is recommended once a year. The timing of maintenance depends on the style and driving conditions. In some cases, it should be done less frequently, in others more than once a year.