by Mike Anderson
themikeanderson
10th July 2015Benjamin Franklin reckoned that life had two inevitabilities: death and taxes. If you’re a cyclist, there’s one more thing to add to that list. Punctures.
No matter how smooth your local roads, how tough your tyres, how little you ride in the rain, eventually you will puncture. It’s just one of those things.
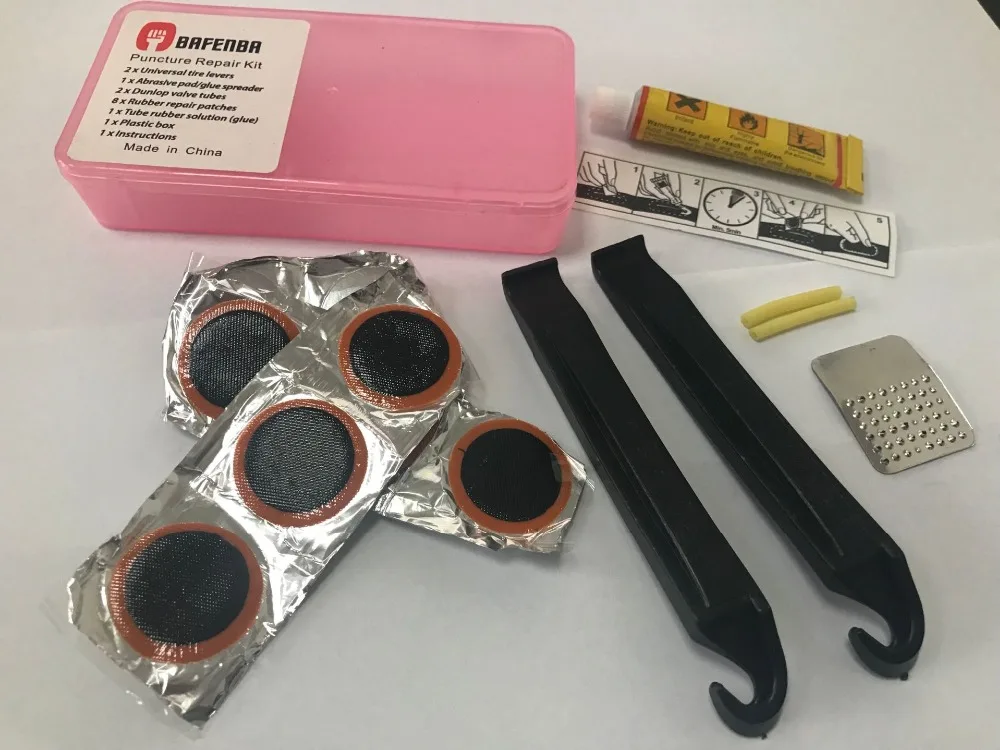
A couple of tyre levers, a small piece of sandpaper, some tube patches and rubber solution are all you need. You may want to carry a tyre boot as well just in case the tyre is badly damaged. Needless to say, you’ll need a pump or CO2 inflator, tooAnd when you do puncture, you’ll need to know how to fix the punctured inner tube.
Admittedly, you can just change the damaged tube for a new one but unless you have an endless supply of new tubes in your back pockets, you’ll eventually have to face up to repairing the tube itself, even if it’s when you get back home so you can re-use the tube at a later date.
Of course, for starters all this means having a puncture repair kit, and keeping it in your saddlebag should you need it on the road.
The first part is getting the punctured tube out of the tyre. The easiest way to do this is with tyre levers although you can occasionally get some tyres off just by using your hands if the fit is particularly good, or you happen to have the grip of a powerlifter, of course.
Levering the first bit of the tyre off the rim is the hardest part. Let all of the air out of the inner tube (if there’s any left, that is) and push the lever end of the tyre lever under the bead of the tyre. Then push down hard on the end of the lever and lift the tyre up.
Some tyre levers will have hooks on the end so you can attach them to the spokes to hold them in place at this point, but remember that the more you stretch the tyre, the harder it’ll be to get the second level under the bead.
With many tyres, this likely wont be a problem, but if it’s a particularly tight tyre, it might make it damn near impossible to get the tyre off.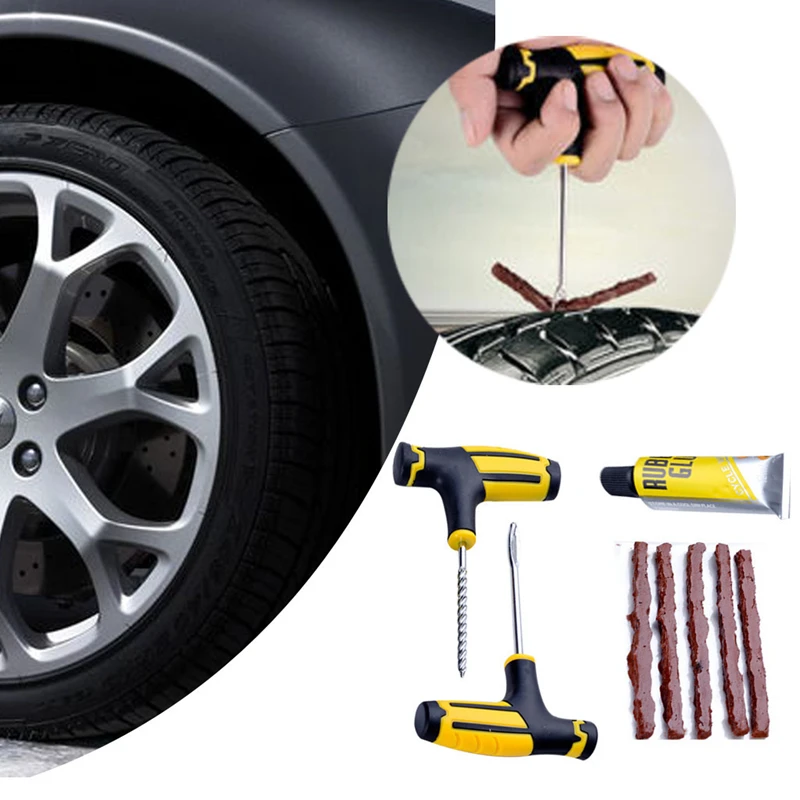
Anyway, the next step is performing the same action with the second lever while making sure the first one stays in place. Once you’ve lifted that second part of the bead, it should sit outside the rim, leaving you free to lift the rest off the tyre off the rim, or do the same thing for a third time, if it needs a bit more persuasion.
At this point it’s actually possible to slide the tyre lever around inside the bead of the tyre, pulling it all out of the rim. As we’ve alluded to, it’s often possible to do this earlier in the procedure, but again it all depends on how tight and stiff the tyre is.
Some tyres can be removed without the use of levers if they’re particularly supple, or you have a very strong grip, but tyre levers just make the process easier
Once you have half of the tyre completely out of the rim, you can remove the tube. After the tube’s out, check it over to see where the hole is.
There are various methods to do this. One if the hole is obvious enough, is to just look. Another, easier, way to do it is to pump air through the tube and listen/look/feel for air escaping.
Yet another way (and this one only generally works for fixing punctures when back at home, for obvious reasons) is to submerge sections of the tube in a tub of water while pumping air through the tube. That way you can see the air bubbling out of the hole when you reach the damaged section.
One you have one half of the tyre completely off, you can slide the tube out without removing the other side, too. This just makes the process a bit quicker as you don’t have to mess about any more with the tyreSomething that’s easy to forget in the haste of fixing a tube is to check the tyre.
If your puncture’s been caused by something piercing the tyre, the last thing you want is to fix the tube, stick it back in the tyre only to puncture again five minutes down the road because the piece of glass or offending item is still stuck in the tyre.
So check the tyre thoroughly – use where the hole is in the tube to clue you in to where the tyre may be punctured – and make sure any debris is cleared.
In the case of bad punctures, where there’s a hole in the tyre, you may need a tyre boot to cover that hole until you get home.
Sometimes finding the hole in the tube is easier than others, but if you have a mini pump, using it to push air through the tube can really help as you can hear/feel it escapingIn your puncture repair kit, there should be a small piece of sandpaper. Use it to lightly rub around the damaged tube in the area of the hole to provide a better surface for the rubber solution to grip.
Next, apply the rubber solution to the tube. The reason we call it rubber solution rather than glue is because if you treat it like conventional glue, you’ll have no joy at all trying to fix the puncture. Basically, you need to apply enough to cover an area the size of the patch and you don’t need a massive amount of solution.
Once applied – and this part is vital – leave it for around 30-60 seconds. You want the solution to go tacky, runny is no good at all, and you don’t want to apply the patch until the solution is just the right consistency.
You can just apply the solution and spread it out with a finger, no special tools necessary! But don’t use too much and remember to wait until it’s tacky before you apply the patch because otherwise you’ll have no joy trying to get it to stickWhile you’re waiting, get the patch ready by pulling the silver foil or similar off the back, but don’t touch the side you’ll be applying to the tube as you don’t want to get dirt on it.
Next, carefully apply the patch to the tube. Sure, it’s not exactly surgery, but you don’t want to mess it up and leave part not stuck down properly because that means it won’t seal the tube and you’ll have to start all over again.
I usually hold the patch against the tube for a good 30-60 seconds to make sure the whole thing is securely stuck down.
After that, either pump some air into the tube to check that the patch has been installed correctly or, once you’re confident enough in your ability to do it first time, stick the tube back in the tyre, inflate and you’re good to go.
If you need guidance on how to pump the tube back up, we’ve also got a beginner’s guide for that.
Fixing a puncture is really a very simple task. But, like everything, you’ll probably have to muddle through the first few times before you get the technique dialled and it becomes second nature.
I’ve had tubes with multiple patches on that have lasted for hundreds more kilometres after the original puncture, so learning how to do this properly will genuinely save you money, especially as repair kits are usually a few pounds and can fix multiple tubes, whereas new tubes are anything between £3-10 each, or even more if you want something very fancy.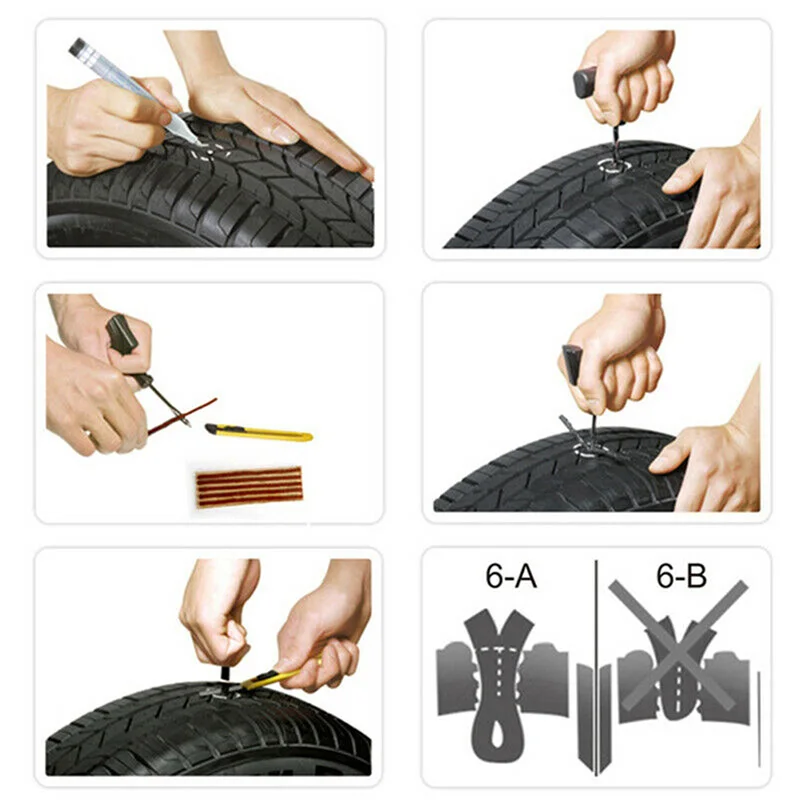
Check out the gallery below for a pictorial step-by-step guide to fixing punctures. And remember, practice makes perfect. If you’re new to cycling and need more advice, check out our other beginner’s guides.
Beginner’s guide: how to pump up a road bike tyre
Beginner’s guide: how to use clipless road cycling pedals
Please enter your email so we can keep you updated with news, features and the latest offers. If you are not interested you can unsubscribe at any time. We will never sell your data and you'll only get messages from us and our partners whose products and services we think you'll enjoy.
Read our full Privacy Policy as well as Terms & Conditions.
Cookies help us deliver our services. By using this website, you agree to our use of cookies. Learn More
Accept
production
From changing tubes to preventative measures to reduce the risk of punctures happening in the first place, here’s our survival guide for one of life’s deflating scenarios.
Reduce the risk of a puncture
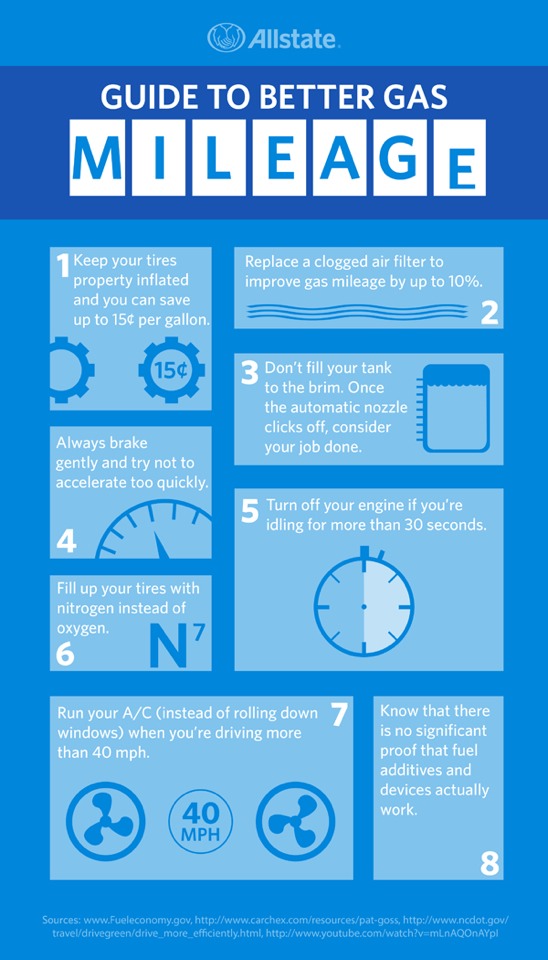
A pinch flat is caused by tyre pressure being too low, causing the tyre to compress when hitting a bump and pinching the tube against the rim. One way of avoiding such punctures is by ensuring you maintain correct tyre pressure.
The other major cause of punctures is something working its way through the tyre, pricking the tube and causing it to deflate. This can either be instantaneous, or a delayed process presenting itself some way down the track
Fixing a flat tyre
1. Removing the tube
Insert tyre leaver
Leaver tyre over the rim
Repeat process
 Repeat this process until one side of the tyre is sitting outside the rim
2. Locate the cause
Check tyre casing
3. Replacing the tube
Insert new tube
Work way around tyre
Use thumbs to replace
1. Locate the puncture
2. Repair the puncture
 Hold for a couple of minutes to be on the safe side.
3. Install tube and inflate
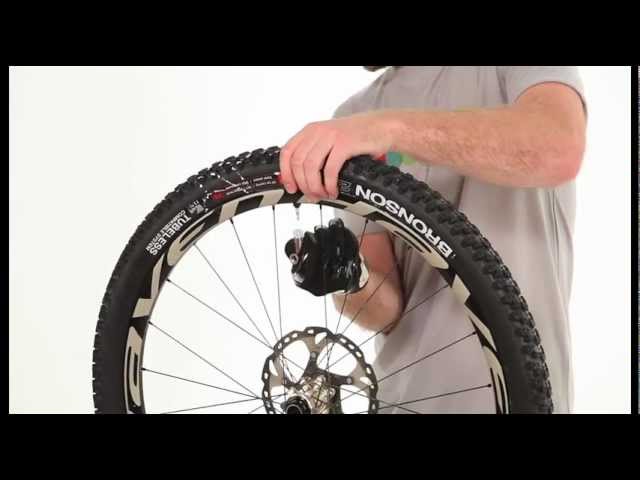
WATCH THIS VIDEO
Troy from Pedal Power Garage shows you how to change a punctured tube to get you back on your bike in no time.
Happy riding!
Related materials
This must be done at every tire change. But you definitely don't
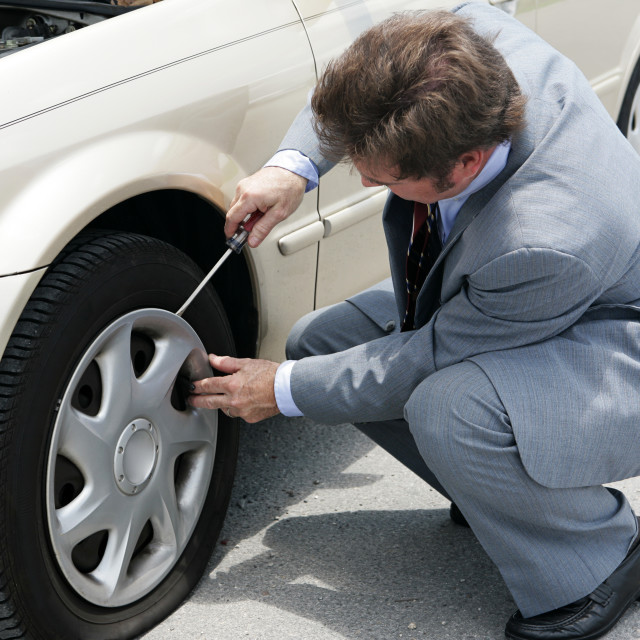
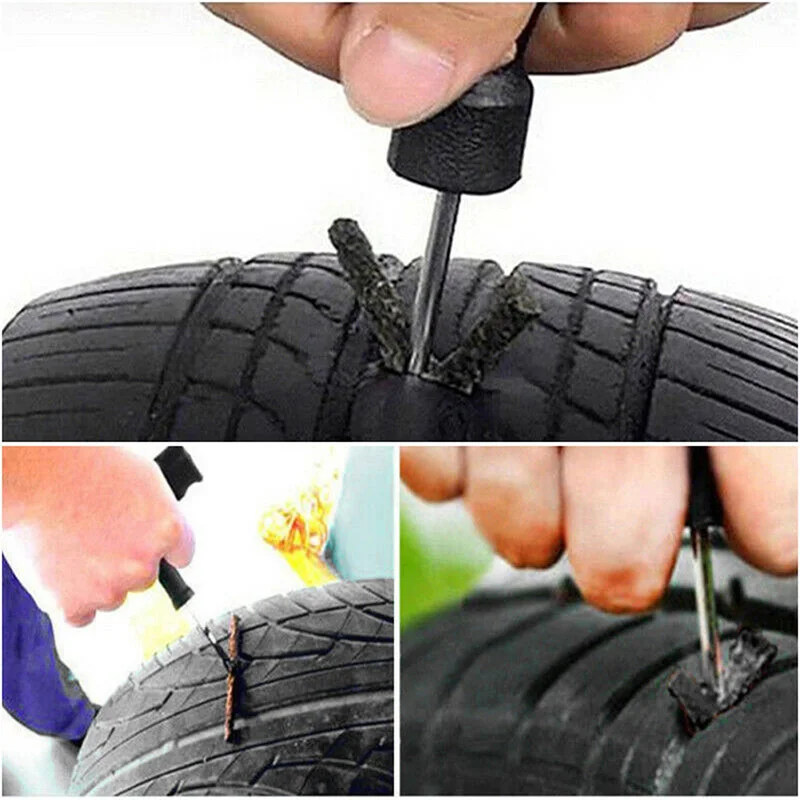
“It’s annoying to puncture a tire: the damage is small, but it’s no longer possible to drive, first you need to somehow get to the nearest tire service,” many people argue in such a situation. In fact, you can do without the help of a workshop. If the front wheel is damaged, it does not even need to be removed. The back one will still have to, but this will be the most difficult step in the repair process.
To repair the wheel, you will need a soapy solution in a spray bottle (composition of shampoo and anti-freeze liquid, which is not afraid of cold, it is better to prepare in advance and take it with you). You will also need: a file for cleaning the puncture site, a tourniquet, a mandrel for its installation and scissors.
We start with the removed wheel. We slowly roll the wheel and apply a soapy solution to it to find damage. The appearance of bubbles in the place where there is an intense release of air is a clear sign of a puncture. Having found it, we take a file and clean the hole in the tire. Gently insert it there and twist it clockwise. We slightly expand the hole to make it easier to insert the tourniquet, since its diameter is larger than the diameter of the puncture.
Related materials
We repair a punctured tire - a test of 16 repair kits and advice from ZR
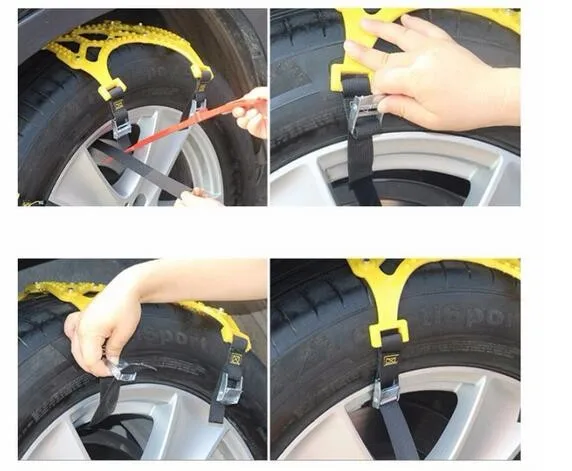
We turned the file almost to the middle, and then another two centimeters. Now we unscrew the file and remove it. We take a package with harnesses. They are usually sold in packs of 4. The length of each is about 200 mm. We need half of one tourniquet. We cut off. We remove the protective transparent film and the paper backing on which the tourniquet is held. It's not worth worrying about it breaking. A tourniquet with special impregnation, so it is not necessary to use glue.
We take a mandrel for installing the harness and thread it into the corresponding slot so that the harness is in the middle.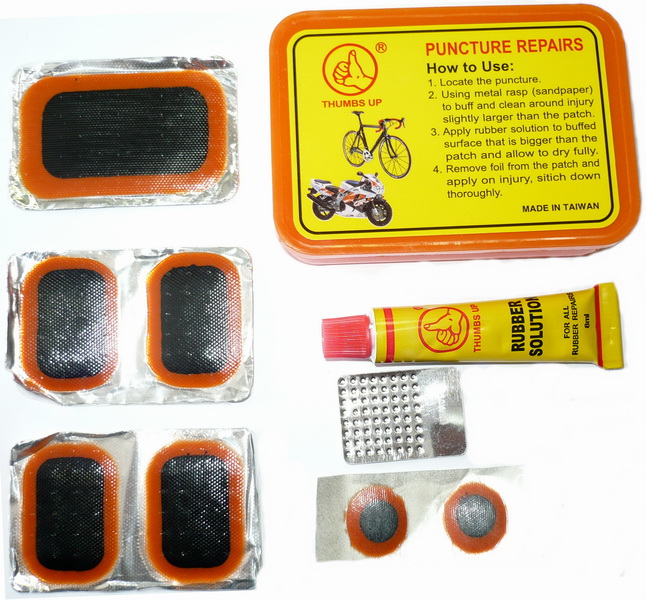 We insert the mandrel into the place of damage approximately to the middle. The ends of the bundle remain visible. Holding them, carefully pull the mandrel out of the wheel. We cut off the excess tourniquet, leaving tails 5-7 mm long. This completes the wheel repair. You need to wait 10 minutes, after which you can put the wheel back in place, pump it up and drive on.
If there is a puncture on the front wheel, then the work can be done without removing it. True, you will have to raise the car on a jack in this place, after switching the gear lever to neutral mode. Having done this, we turn the front wheels to the side until they stop.
And we do the same work: by rotating the wheel, we apply a soapy solution to it. If a puncture is found, we clean the place of damage with a file, insert a mandrel with a tourniquet of the required size there and pull it out, after which we cut the ends of the tourniquet. After 5–10 minutes, we lower the car, remove the jack and pump up the wheel. Problem solved.
It is possible to fix a puncture on your own, without resorting to the help of a special workshop. The main thing is to take into account the features of the tire and correctly assess the degree of its damage.
Please send all questions and suggestions regarding the Technical Environment series to: [email protected].
Repairing a puncture with a tourniquet - simple instructions
Repairing a puncture with a tourniquet - simple instructions
Repairing a puncture with a tourniquet - simple instructions
Repairing a puncture with a tourniquet - simple instructions
Our new video
Consumption 2-3 l/100 km! Test of the most economical UAZ
Test of the earliest VAZ-2103 from the surviving
Test of a new crossover. Again "Chinese"? Not quite
Did you like the note? Subscribe and you will always be in the know!
Driving on Yandex.Zen
News smi2.ru
September 10, 2010
Tips and instructions
Instructions for the repair of pneumatic (self -appropriate) rugs
to detect small accelerated punctures with a mouth with a mouth as a wire as much as possible. Fold the mat in half to increase internal air pressure, dip the mat in water, or apply soapy water to the surface. Small bubbles coming out of the mat will show you the puncture site: mark the puncture site.
Deflate mat and close valve. Place a drop of Seam Grip on the puncture until the puncture area darkens. Let the glue harden until the adhesive layer is no longer tacky. Cuts up to 0.5 cm can be sealed in the same way.0130
To find a puncture, use the method described above, thoroughly clean the puncture site with a damp cloth, remove excess water.
Open valve. Place a generous amount of Seam Grip on the puncture area. Make sure the puncture area is covered with adhesive 1.25 cm from the puncture site. Apply the glue evenly to the fabric using the small applicator from the kit.
Select a suitable patch from the Repair Kit. Place the patch over the puncture so that the puncture is in the middle of the patch.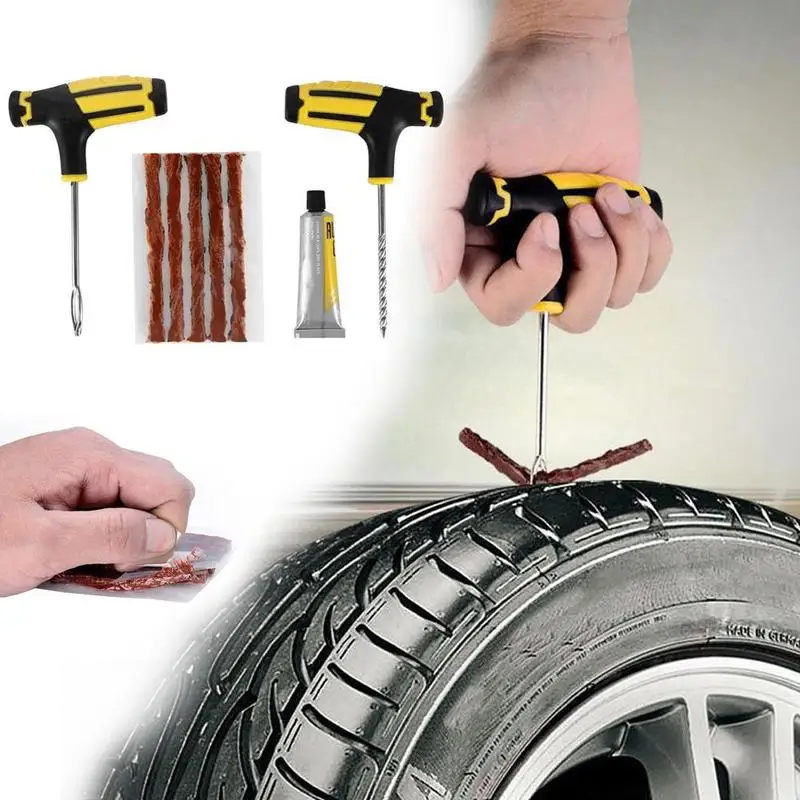 Press firmly and place a heavy object on the patch so that the patch is fully pressed. In order for the patch to adhere securely, it is necessary to keep it pressed down for about 20 hours.
Valve repair
Remove the damaged valve with pliers. Squeeze a small amount of adhesive onto the serrated tip of the valve being replaced.
Place the valve on the mat.
Service center
If you cannot repair the product yourself by following the instructions attached to the repair kit, contact the Therm-a-Rest service center directly: Smolnaya 63B, office 10, (495) 225-7343 (brand manager Elena Roshchupkina). The repair will be done FREE OF CHARGE.
Wishes from the master: To speed up the repair process, try to find and mark the puncture site yourself. Contact the service center at least two weeks before your trip.