In a previous blog, we went through each of the steps necessary to change a flat tire. But what do you do when you open the trunk and find that your spare is flat, too? Or what if in a series of unfortunate events, your spare is punctured shortly after you put it on?
No matter what situation you may find yourself in, it's never a bad idea to have another trick up your sleeve; another way to fix a flat tire when a spare isn't available. Fortunately, there are two methods that are simple, cheap, and effective. Read on as we show you what to do if you have a flat and no spare!
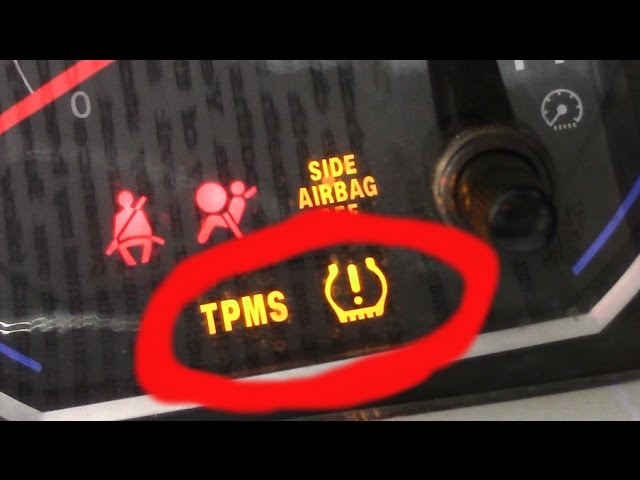
Imagine this: You're on a road trip with the family (and the dog) and you stop at the gas station for a much-needed snack. As you walk back to the car, hotdog in hand, you notice something strange on your front tire - it's the dreaded silvery glimmer of a nail. What's more, the tire looks like it's deflating and sooner rather than later, you'll have a full-blow flat.
As the children grow restless and the dog loses its patience, you think through your options. Unfortunately, the spare tire isn't one of them - it's flat, too. Now what? In most cases, roadside assistance would be the best option, but the whole family can't ride in the tow truck to the tire shop and you don't want to leave them with the dog in the parking lot.
Fortunately, you read a blog somewhere that helped you put together a roadside emergency kit. You fish it out of the vehicle and sift through it to find exactly what you need to get back on the road.
So, what was it you found in your kit that saved the day? There are two main tools you can use to temporarily fix your flat without changing the tire completely (assuming your tire isn't totally ruined): puncture sealant and a tire patch kit.
Regardless of which tool you have on hand, the first step is locating the puncture site. Of course, this won't be particularly difficult if you ran over something like a nail, but finding a hole in a punctured tire isn't always so easy. To locate the source of the leak, try the following:
Visual inspection. First, you can look over the tire to try and find any obvious punctures or foreign objects (like nails).
Listen. If you don't see anything right away, bring your ear close to the tire and listen for a faint hissing sound.
Feel. Sometimes, an otherwise invisible puncture can be found by holding your hand just above the tire to feel for the leaking air.
Soap and water. If all else fails, try the soap and water method. Fill a bucket with water and add dish soap. Then, carefully coat the outside of the tire until it is covered in suds, either by hand or a spray bottle if you have one. Wait for the leaking air to create a small frothy patch of bubbles - you've found the leak! Mark it and then wash the soapy water away.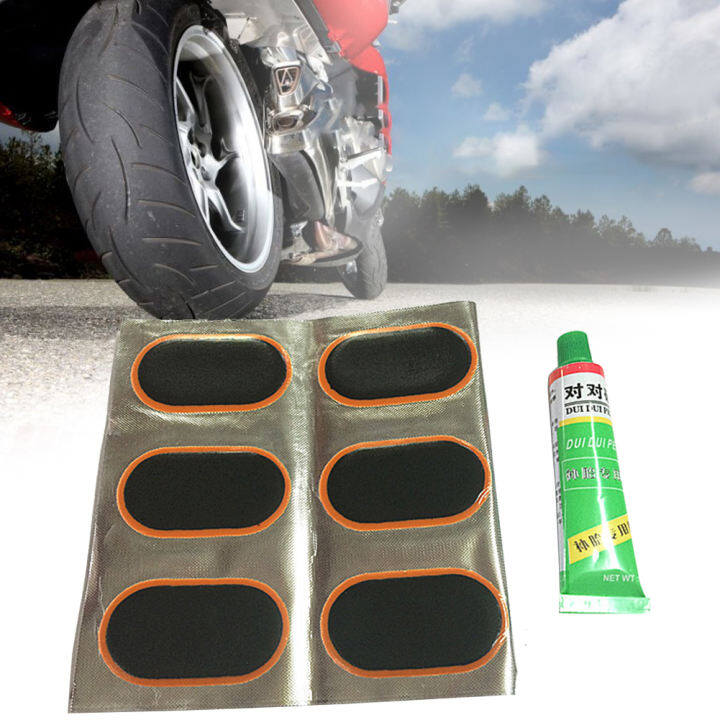
Of course, if you find yourself with a flat on the side of the road, you may not have soap, water, and a bucket on hand. However, if you're near a gas station or grocery store, you may be in luck. All you need is a water bottle (or any plastic bottle) and hand soap from a restroom. Simply add the soap to the water in the bottle, shake it up, and gently pour and spread it over your tire!
Now that you've found the leak, let's look at the two most common ways you can fix it.
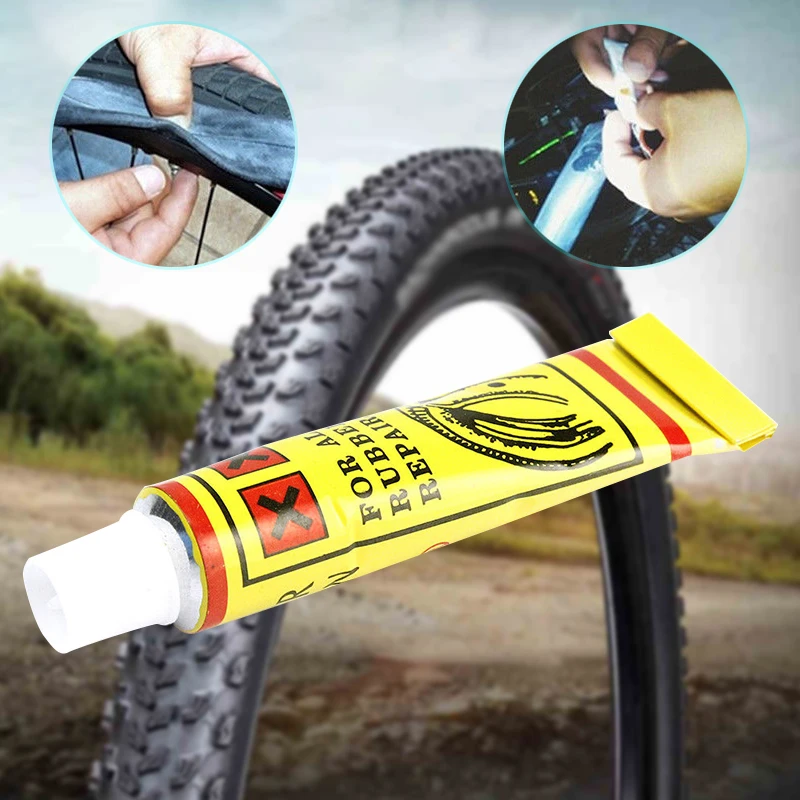
There are a number of different products on the market that can seal a puncture, and they fall into two main groups. Some brands are a gel-like substance that hardens around the puncture. These products can work well, but they usually require other tools to effectively apply and can be quite messy.
The more common puncture sealant products come in an aerosol can, and don't require anything additional. For our purposes, we'll be focusing on this variant. While the specific directions may vary from product to product, they generally work in a similar fashion.
The aerosol cans typically contain a foam or liquid sealant along with extra air. You attach the can to the tire's valve stem with the tube provided and fill it with the sealant, which presumably covers the puncture from within before hardening. Obviously, these products aren't going to fix major punctures or gashes, but they can be a great temporary solution.
Before using a puncture sealant product, make sure to read the can for product-specific instructions. They'll likely look something like this:
Step 1: You'll first need to remove any foreign objects, like a nail, with a pair of pliers.
Step 2: Position the tire with the valve stem at the top.
Step 3: Attach the nozzle on the can of sealant to the valve stem.
Step 4: Press the button and allow the fluid to enter.
Although the can comes with a little extra air, you'll likely need to add more air after the sealant becomes firm. Once you've allowed the sealant time to dry, you can use some of your soapy water to make sure it has done its job and stopped the leak.
So how long can you drive with a tire that has been fixed with tire sealant? Although it depends on the product, some manufacturers say you can drive for up to 100 miles. However, most experienced experts will tell you that that estimate isn't realistic, and it certainly isn't advised. Again, tire sealant solutions are meant to be temporary, emergency measures rather than a permanent fix. For that reason, you should make a tire shop your next stop.
That having been said, these little cans can be just the thing you need in a pinch. They're small and inexpensive, so you can potentially keep several in your emergency kit.
A tire plug kit is another tool you can use to temporarily fix a flat until you can replace the tire with a new one. You'll find that there are all sorts of different kits that range from the most basic tools to a collection of implements for every possible scenario. However, the fundamental components you'll need to plug a flat tire are as follows: a rasp tool, a threading tool, the plug itself, and cement or sealant.
Some of the larger, more extensive kits will come with pliers to remove foreign objects, a knife to trim the excess portion of the plug, and even work gloves to protect your hands while you make the repairs. While you can get by with the basic components, you'll probably want to have the other items at your disposal anyway. If you don't have them in your roadside emergency kit, it's a good idea to find a tire plug kit that comes with all of the above.
Step 1: First, you'll likely need to remove the tire. This may not be necessary in every case, but you need to be able to have direct access to the puncture point. If your tires are larger, or if the tires take up too much space within the wheel well, you may not have the clearance needed until the wheel is off. For more detailed instructions on how to remove your tire and wheel with a jack and a lug wrench, read our previous blog, "How to change a flat tire in four simple steps. "
"
Step 2: If the object that punctured your tire is still in place, use your pliers to remove it.
Step 3: Use the rasp tool to clean the puncture hole. The rasp tool is a long, pointed piece of metal with a rough, textured end. By quickly running it and out of the puncture, it helps make the hole more uniform, cleaning away stray pieces of rubber, but also providing a rough texture for the plug to grip on to.
Step 4: The insertion tool should look like a long, thin piece of metal with an eyelet at the end (like the head of a really large sewing needle). Thread the plug through the eyelet, and then firmly press the plug into the hole using the insertion tool. Some kits come with a glue, cement, or adhesive product, which you'll want to apply to the plug prior to insertion. Depending on your kit, there should be some portion (like 1/4 - 1/2 inch) of the plug protruding from the hole after insertion.
Step 5: Cut away the excess portion of the plug using your knife.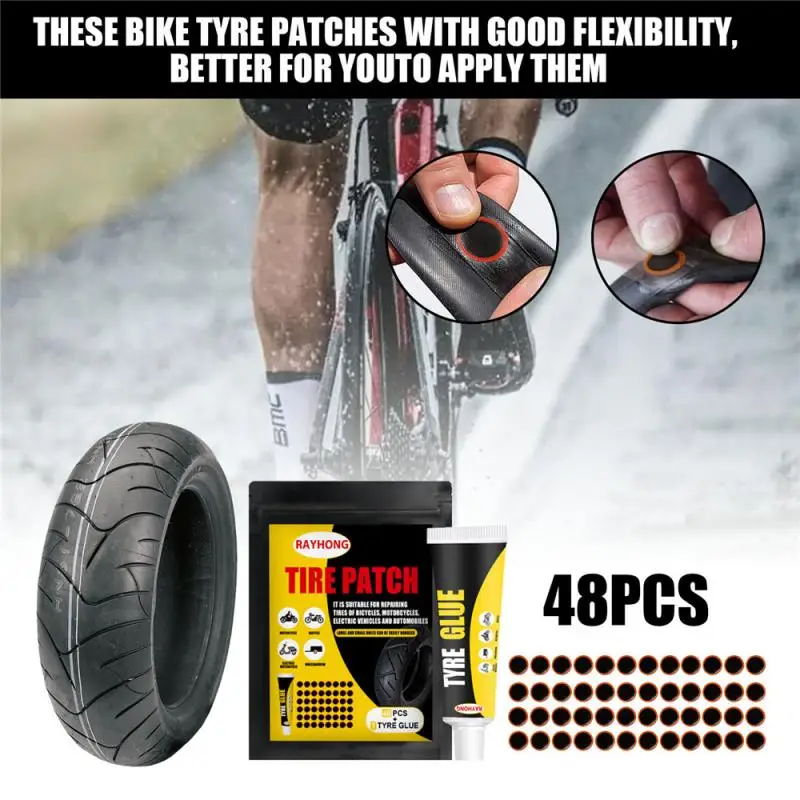 Then, apply a layer of adhesive over the top to seal it in place and cover any small cracks.
Step 6: Wait for the adhesive to dry, then apply some of your soapy water to the plug site to test for leaks and fill them in with adhesive if necessary.
Step 7: Before replacing the tire, inflate the wheel to ensure that the plug and seal holds. If it does, you can now place the tire back on the vehicle, fasten it in place with the lugnuts and finish inflating.
How long can you drive with a tire plug? Unlike tire sealant, plugs can potentially last for hundreds of miles, or even years after you apply it. Of course, this depends on the plug, the type and location of the puncture, and how well the plug was installed. Furthermore, depending on the cause of the puncture, your tire may be more prone to flats and blowouts in the future.
No matter what the cause of your flat is, or what method you choose to fix it, the safest option is to visit your local tire shop as soon as possible. It can be easy to forget about your tires when you're going through your list of auto maintenance tasks. However, taking care of your tires through routine tire maintenance is the best way to avoid flats in the future.
Fixing a flat tire isn't always simple and sometimes, you need a helping hand. When you add Germania's Roadside Assistance Service to your personal auto policy, help is never far away!
Visit our website to learn more about Germania's Auto Insurance products!
Read more: Replacing a tire can be expensive, but your auto insurance doesn't have to be! Check out our blog to learn which auto insurance discounts you should look out for!
So, you have a flat tire or one that’s leaking air. It’s not the end of the world. Luckily there are safe and cost-effective ways to properly repair most tire punctures. The purpose of this article is to show you the difference between a safe, permanent repair and a temporary string, plug or patch repair.
According to the National Highway Traffic Safety Administration (NHSTA) and the Tire Industry Association (TIA), the only method to properly repair a tire puncture is to fill the injury with a repair stem and back the stem with a repair patch. This is commonly known as a combination repair or a patch/plug repair.
Patch/plug repairs are most often performed using a one-piece repair unit that combines the repair stem and cap (or patch) into one unit. However, special circumstances may require the use of a two-piece combination repair (ex. If the angle of the puncture exceeds 35 degrees). The repair is then permanently bonded to the inside of tire and through the injury channel using a cold, chemical vulcanizing process. The repair essentially becomes part of the tire, creating an air-tight seal that keeps air in and moisture and contaminants out (more on this procedure below).
Tire Plugs and String Repairs are Temporary RepairsEmergency roadside plug repairs are NOT intended to be a permanent tire repair.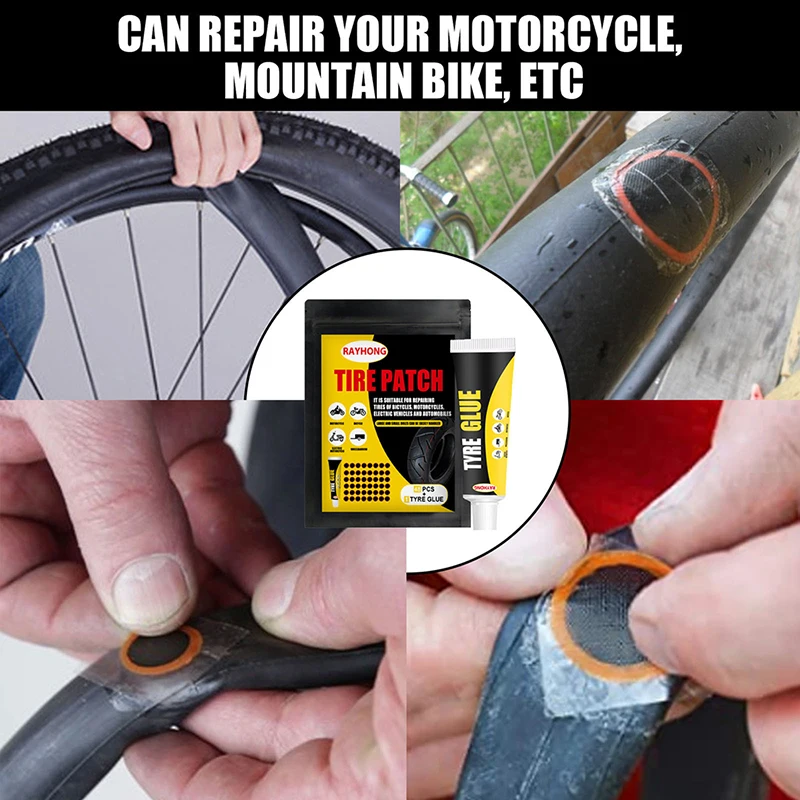 Plugs and string repairs are designed to get you back up and rolling long enough to get home or to the nearest service center to perform a proper tire repair.
The common misconception with plug and string repairs is that because they hold air, they are safe to use. While it is true that many plug repairs do a great job of keeping air in the tire, that’s only part of the equation. Because they’re not completely sealing the injury, plug repairs may allow air and moisture to penetrate the body of the tire. Over time, this could lead to a dangerous (or even deadly) blowout.
A Patch-Only Tire Repair Leaves Your Tire Susceptible to DamageA tire repair that uses only a patch is also NOT considered proper or safe. A properly installed patch will do a great job of allowing the tire to hold air. However, similarly to the plug-only repair, the patch does not fill the injury channel. Therefore, air and moisture could seep into the tire from the tread surface and eventually damage the tire.
Only a proper patch/plug repair completely seals the puncture from inside the tire and through the entire injury channel. There are a few extra steps necessary to perform a proper tire repair in accordance with industry guidelines. We’ve developed a simple acronym to help organize and remember the steps: R.E.P.A.I.R.
 First, the injury is drilled out using a carbide cutter to strip away and damaged cords or belts. Next, the inner liner is cleaned and buffed to a slightly rough texture. This also helps maximize adhesion of the patch/plug repair.
There are a number of factors that may determine whether or not your tire is safe to repair.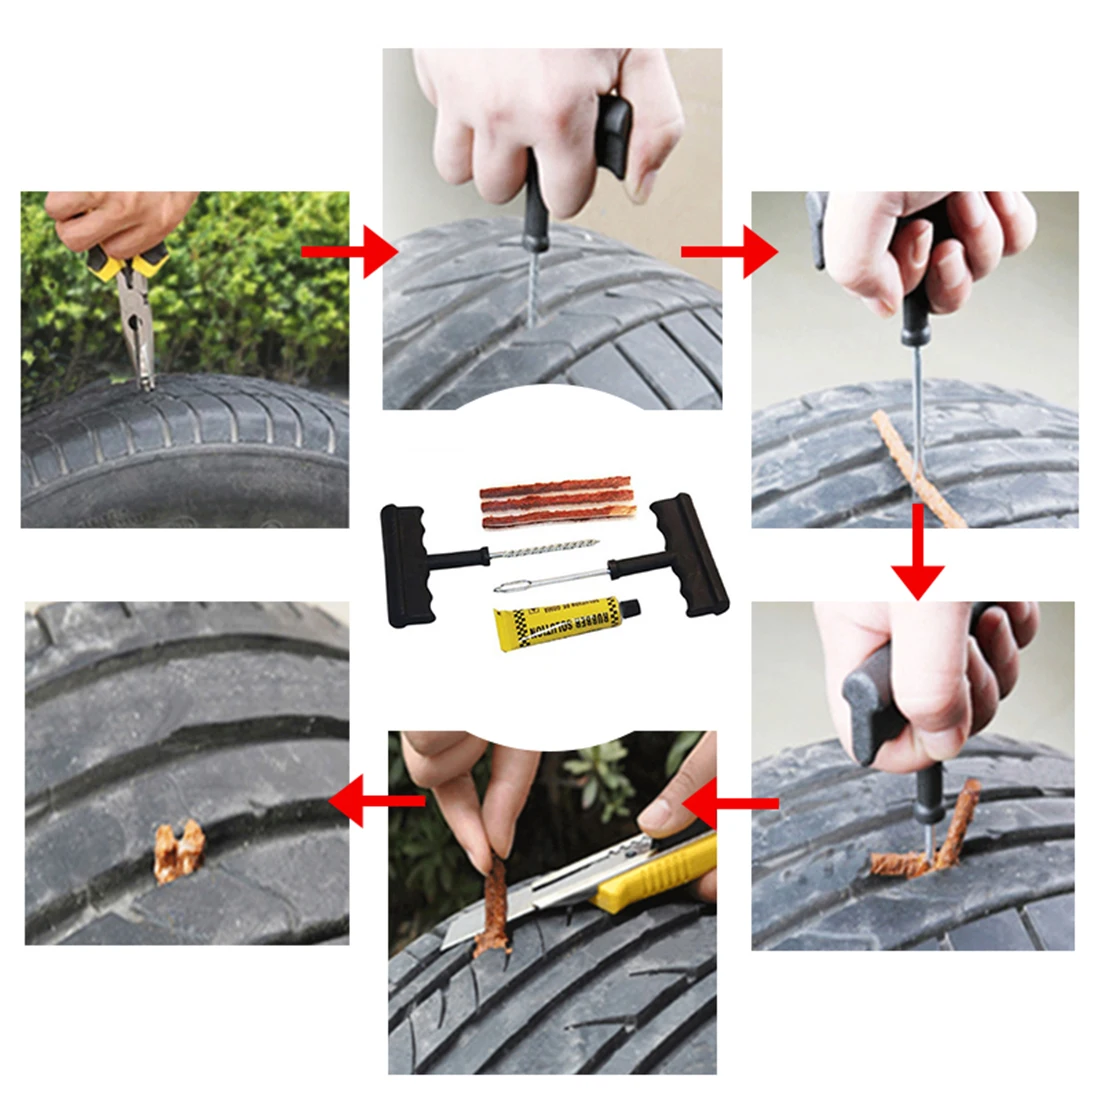 These factors fall into three main categories:
The occasional flat or leaky tire is an unavoidable part of life. But, taking shortcuts to repair it can be dangerous to you and your passengers.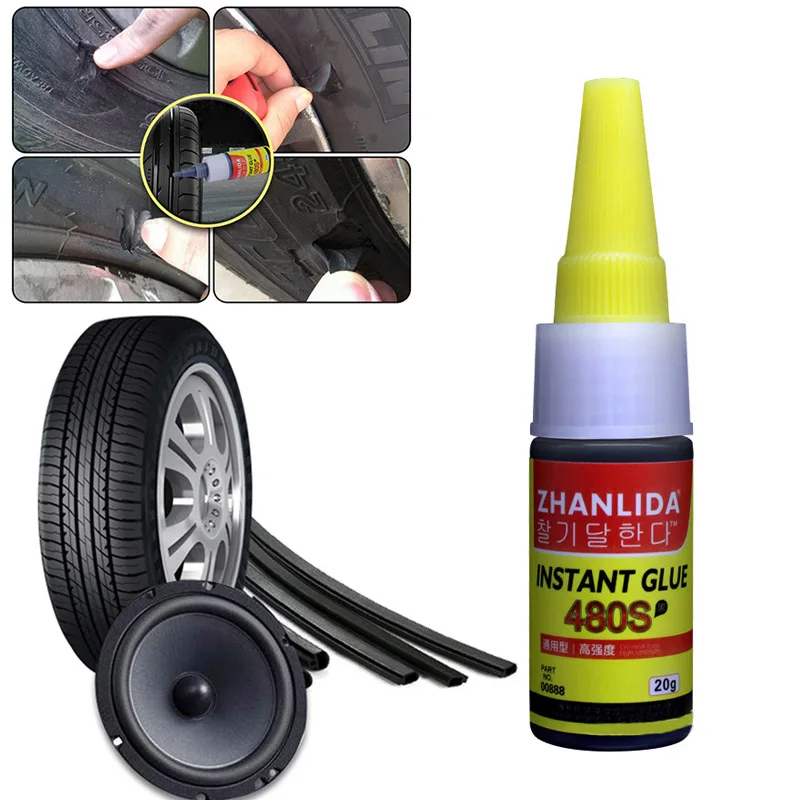 Take the time and do the research to do the job right and/or find a reputable tire repair shop trained in proper tire repair procedure.
Vladimir Gavrilov
Estimated reading time: 3 minutes
8678
Category: Service Auto
In the spring, you often have to resort to the services of tire fitting services. The wheel suddenly descends, and one swap with the compressor is enough for literally a couple of hours. This is enough to get to the workshop. Employees usually inspect the tire and offer repair options of varying cost and complexity, ranging from a simple flagellum to a complex patch on the inside of the tire. Which way do you prefer?
Repair with a small tape impregnated with sealant is the easiest and cheapest of all the methods listed.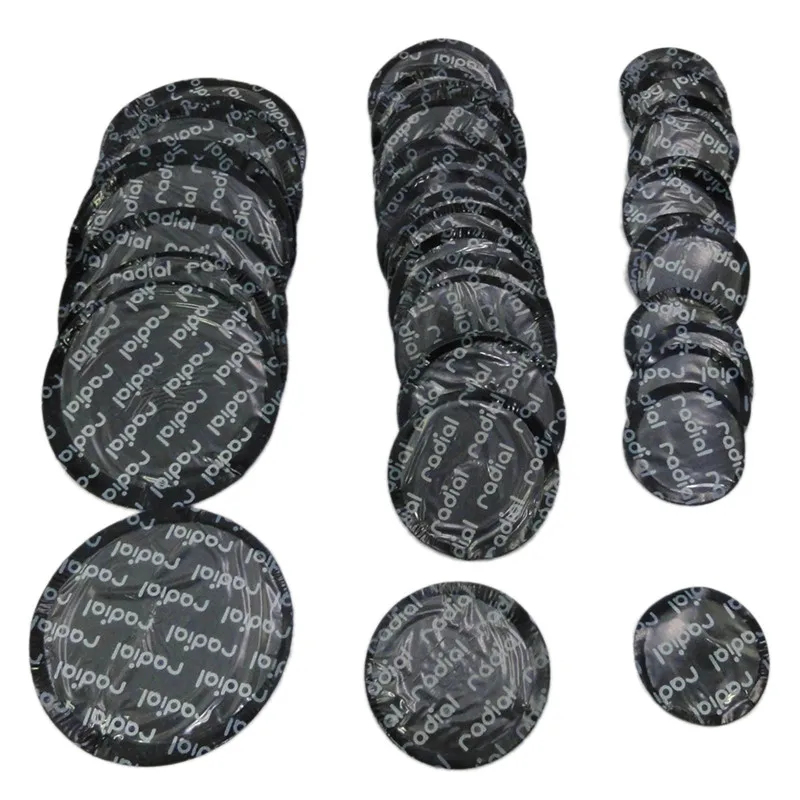 Even a motorist on the side of the road can execute it. To repair with a flagellum, it is not necessary to remove the wheel from the hub.
Flange repair kits are available from all parts stores. They include an awl, a file, flagella and sealant. The repair technology is simple. First, a puncture site is searched for in the rubber, a nail or self-tapping screw is removed with pliers, and the resulting hole is cleaned with a file.
Usually the tool is screwed into the hole like a self-tapping screw and then pulled out along with the bits of rubber embedded in it. The hole is smooth and round.
Next, you can put the flagellum. They are sold in packages and in a protective film that prevents the applied sealant from drying out. The length of each flagellum is about 200 mm.
Take an awl with an eye for installing the harness and push it into the hole in the tire to the middle. The ends of the bundle remain outside. We pull out the awl and cut off these ends. The flagellum completely closes the hole and can easily withstand pressure up to 3 atm.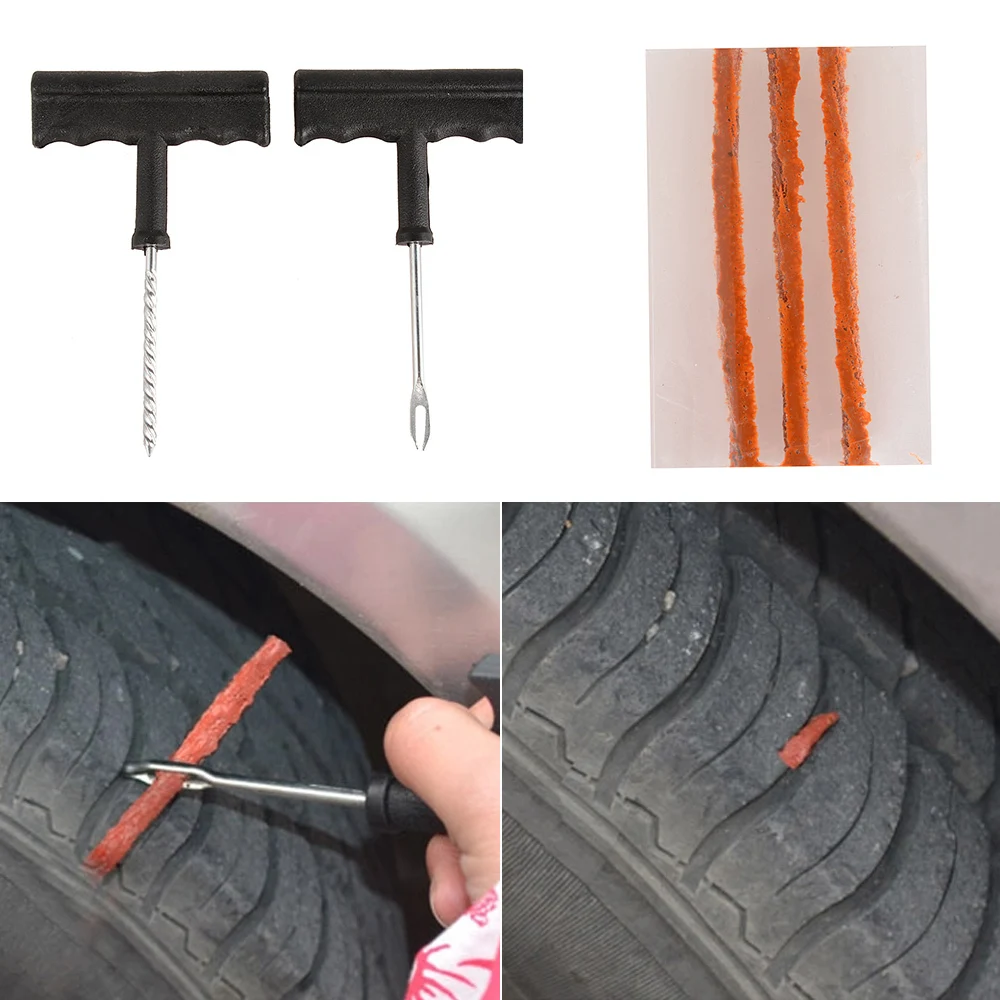
True, such repairs are short-lived. Over time, the flagellum is squeezed out of the hole, and the wheel begins to bleed air. Therefore, if possible, it is better to visit a tire shop and install a more reliable element.
This tool is used for quality and reliable tire repairs. True, the installation of the fungus is possible only in the workshop after removing the tire from the disk.
The repair tool is an adhesive patch with a foot to fill the puncture site. After cleaning the damage with a file, the fungus is inserted into the hole from the inside and pressed tightly with a press for a better fit. The leg and cap, lubricated with glue, are well fixed on the rubber and cover the puncture site. Such a patch can work for many years without losing pressure in the wheel. But this repair is five times more expensive than installing a flagellum. They resort to it if the hole turned out to be large.
This type of repair has been used for many decades. Twenty years ago, it was almost the only way to repair major damage. However, now patches are extremely rare.
Their disadvantage is that, due to the large fixation area, it is rarely possible to adhere the material evenly. Cavities appear through which air escapes.
However, a patch may be necessary for severe cord cuts with torn rubber damage that the fungus can no longer cope with. It is difficult to clean them, which is why the leg of the fungus cannot fit snugly into the puncture site. Therefore, the entire problem area is sealed with a layer of rubber.
Patches are not as reliable as fungus, but they do help to repair half-centimeter cuts. Sometimes patches are even glued to hernias from the inside in order to keep the tire working for some more time for a trip to the wheel shop.
Long driving with patches is not recommended.
tire repaircar maintenancetips for motorists
Next article
Media news2
Find out now about repairing your car's wheel. Call now or request a call!
Repair cost depends on wheel size and damage.
Still have questions?
Call now!
We are waiting for your call!
Call the branch on Dzerzhinsky Street Call the branch on Dovatortsev
A modern tire is a complex and high-tech product made from modern durable materials, but no car owner is immune from the troubles associated with tire damage. Punctures and side cuts have plagued mankind since the invention of the rubber-tired wheel. Sometimes it even seems that, contrary to all the laws of physics, car tires have magical properties to attract metal objects with sharp edges. To the great regret of drivers, the confrontation between metal and rubber most often ends in favor of metal. Let's see if a damaged tire can be repaired.
Tire repair depends on the type of damage the tire has received. All tire damage is usually divided into three broad categories: punctures, cuts and swelling. And each type of damage requires its own type of repair.
A puncture is the most common problem that occurs on the road. The cause of the puncture is nails, screws, self-tapping screws, which are scattered in sufficient quantities along our roads. The main sign of a puncture is a regular drop in tire pressure. Auto shops offer a huge amount of tools for self-repair of punctures. Some products are simply poured into the tire, others require special rubber bands to be installed at the puncture site. But almost all of these tire repair kits are based on the principle of cold vulcanization.
Some car owners believe that self-repair of a tire is enough for further trouble-free driving. But the harnesses that are being repaired deform over time, and the wheel begins to let air through. Since the tire at the site of a self-repaired puncture is damaged, the possibility of the bundles falling out at the most inopportune moment is not ruled out. Therefore, self-repair of the tire should be regarded as a temporary solution.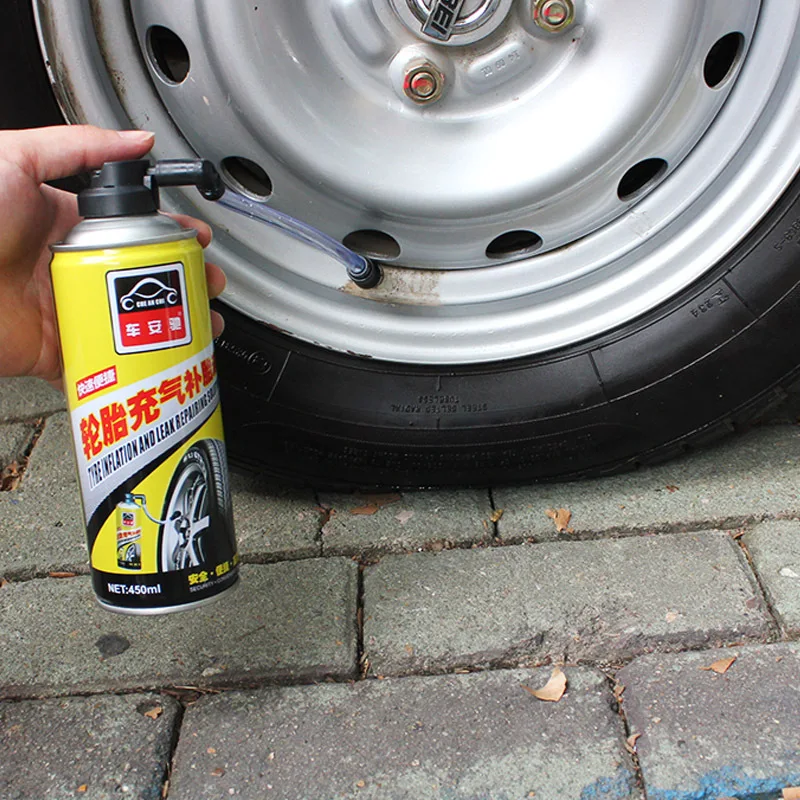 At the first opportunity, you should go to a tire shop and put a permanent patch on the puncture site. After applying the patch, it is desirable to balance the wheel.
Wheel side cuts are serious tire damage with broken cords. Such a defect significantly affects the performance of the tire. Repairing a tire with small cuts is possible, but a cut is already a serious reason to think about buying new rubber. The tire at the site of the cut becomes vulnerable to external influences and quite often a new cut occurs exactly at the site of the repaired previous one, and the matter may not be limited to one tire repair.
The repair of tire cuts requires special equipment and is carried out by hot vulcanizing the rubber followed by the application of a reinforcing patch. The edges of the cut are processed with a special tool and coated with a special compound. After that, the cut of the tire is densely filled with raw rubber and vulcanized. With this method, the tire must be heated from both sides.