|
|
Tool-Flo Manufacturing, Inc., located in Houston, Texas, USA; began operation in January 1978 and has grown into a 33,000 square foot complex operating 3 shifts. Tool-Flo serves the carbide threading and grooving market through out the United States as well as throughout the world. Tool-Flo employs manufacturer’s representatives to cover the United States and to service the U.S. distributor network. The markets Tool-Flo serves include automotive, aerospace, medical and oil industry products and basic domestic manufacturers. | ||||||||||||||
| Tool-Flo continues to be a major supplier to the oil and gas drilling and production industry and provides a major portion of the premium threading tools used in this industry. Click here to link to Tool-Flo's Web site. | |||||||||||||||
|
Shop categories for Tool-Flo’s most popular products (All available products, including those not categorized, can be found using the search box) |
|||||||||||||||
|
|||||||||||||||
ToolFlo Cutting Tools
www.tooflo.com | (800) 445-1068
Providing top quality solutions for the automotive, aerospace, medical and oil & gas industries, Tool Flo offers a winning combination of innovative technology and skilled engineering that results in high performance tools that won't let you down. The Tool Flo range includes Rigid-lock end mills, the Bantam collection (for applications where extra-small boring is required), deep grooving tools, threading chasers and much more. We have a good selection of ToolFlo products, so why not take a look at what's available?
We know that cost matters to our customers, which is why we keep prices competitive. In addition to providing a good selection of tools and accessories from top manufacturers, we also have a series of appealing promotions and special offers, enabling you to save even more on your favorite brands. Whether you need precision cutting tools, innovative tools for tricky projects or hand tools that are made to give years of faithful service, we've got what you need for less.
We've been operating for more than thirty years, providing high quality tools that are suitable for a wide range of applications. Our customers come from many different sectors, but all value precision tools that give exceptional results. If you're not sure what tool would be best for a particular job, or need further product information, just get in touch and our experienced, knowledgeable team will be happy to advise and offer suitable product recommendations.
Our stock includes carbide inserts, hand tools, tool holders, vises, storage and plenty of other related products that we've found are popular choices with our customers.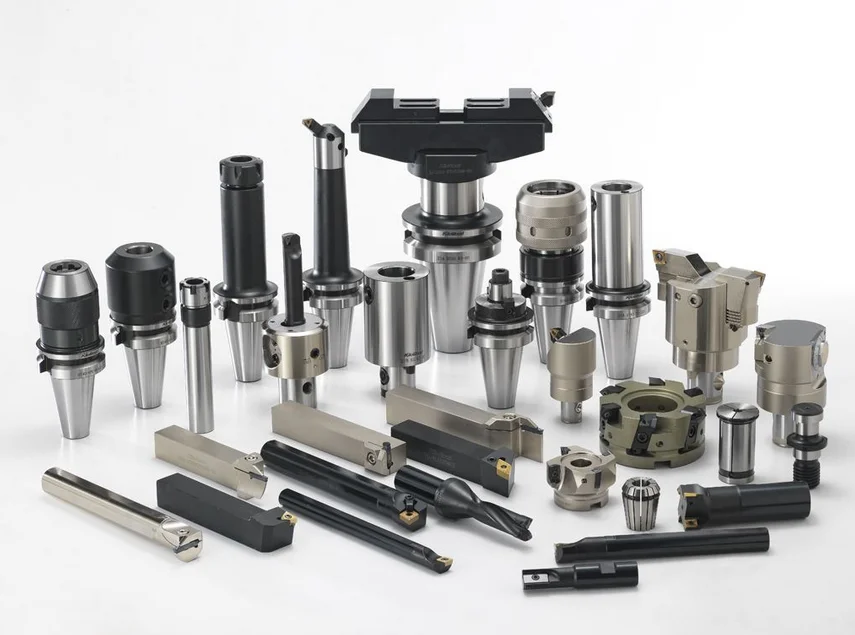 Use our “Product Finder” feature to locate the item you're looking for, or give us a call at (800) 445-1068 so that we can help you find exactly what you need.
Why Choose Hemly Tool Supply for Tool Flo Inserts?
Hemly Tool Supply has years of experience in the cutting tool industry. We offer some of the finest carbide tools in the world. We do business with top tooling manufacturers to give you the highest quality parts at affordable prices. Here are eight good reasons to choose Tool Flo inserts from Hemly Tool Supply.
1. Confidence
Tool-Flo opened its doors in 1978. Hemly has decades of experience too. You can shop with confidence when you choose an experienced manufacturer and distributor.
2. Convenience
Tool-Flo offers many selections, and Hemly provides a lot of Tool Flo cutting tools, so you are sure to find what you need. You enjoy the benefits of having one company for all your needs.
3. Cost
Cost
You save money on high-quality Tool Flo inserts because the manufacturer buys raw materials in bulk. Cheaper materials offer lower production costs which create lower customer costs.
4. Problem Solving
Tool-Flo works with their distributors and clients. If you have a problem, Hemly Tool Supply helps you solve it. If Hemly cannot assist you, we contact the manufacturer for added help.
5. Fast Service
When you need tools, you can draw from a vast inventory of Tool Flo inserts. The company stocks thousands of products.
6. Custom Service
If you have special needs, the company offers custom designed and manufactured Tool Flo cutting tools for your business.
7. Quality at Affordable Prices
Tool-Flo uses high-tech CNC machinery for fast manufacturing. Fast production rates make more products available at lower prices.
8. Tools for Many Industries
Are you in the automotive machining industry? Perhaps you manufacture medical devices or aerospace parts. Tool-Flo makes cutting tools for your business, and this includes the oil and gas sectors.
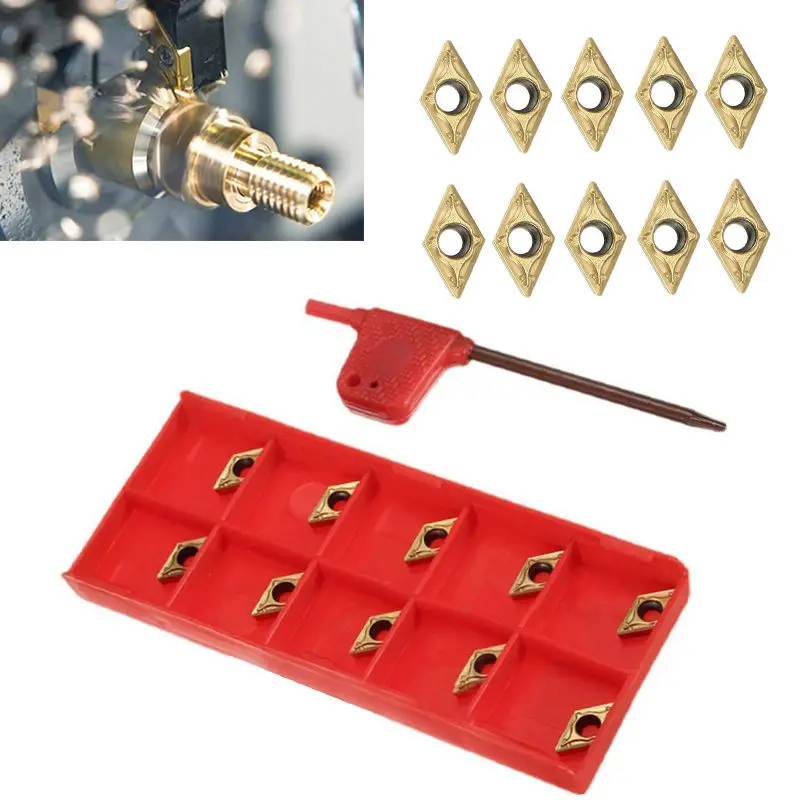
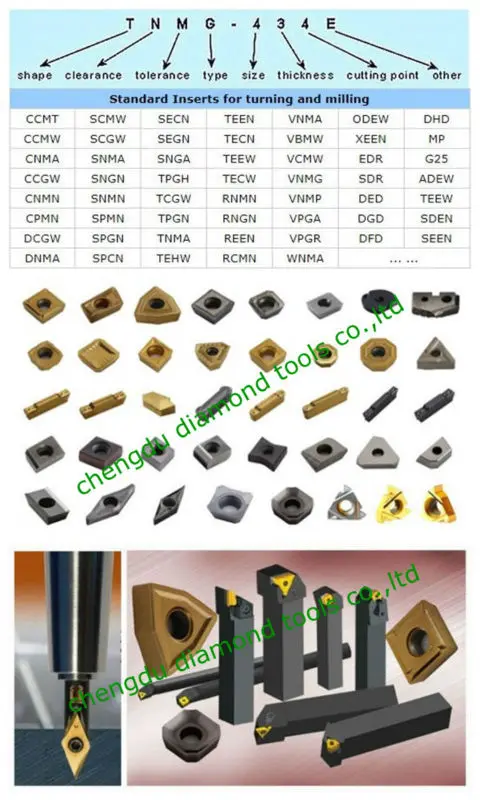
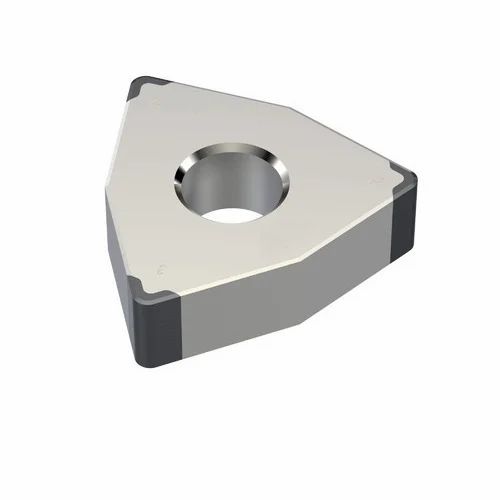
21-14NPT Carbide Thread Milling Tool Inserts for Milling Machine Cutting HR10-45
Features:
1. Types: 12NPT, 21NPT, 30NPT
2. Coating: PVD, TIAN
3. Color: Black
3. Standard: Navarta of an international organization standardization
4. Certification: ISO9001
5. Material: Tungsten carbide
6. High wear resistance with VD coating. VD coating with high wear resistance.
7. Long tool life, higher production efficiency.
8. Reliable and safe performance every time
Advantage of
1. Made by original raw material;
2. With good abrasion resistance;
3. After fine grinding and polishing, had a very good surface
4. With strict tolerance size control
5. With high grinding precision
6. With high hardness and good wear resistance.
| Model | Series 12NPT | Series 21NPT | Series 30NPT |
| Grade | CM915/CM618 | ||
| Workpiece | steel stainless steel/cast iron | ||
| Coating | PVD coating | ||
| MOQ | 10pcs | ||
| Package | 10pcs in one box | ||
| Smooth finish: | Highly polished | ||
| Maintenance | OEM/ODM | ||
questions and answers:
Q: Why do customers choose us?
: Competitive price, high quality, fast delivery, patiently pre-sales consultation and perfect after-sales service. And we manufacture, have our own factory, we can guarantee our quality.
Q: What's the MOQ?
: Usually MOQ is one carton, 10 pcs/carton, some special 5 pcs/carton or 2 pcs/carton.
Q: How long is your delivery time?
: Generally 3-7 work days if quantity 1-500 pcs, more than 500 pcs, need to negotiate.
Q: How does your factory control the quality?
: Quality priority. we will do 100% quality inspections before shipment.
Q: What's the payment method?
: Normally T/T, Western Union, PayPal, Credit Card.
Q: Do you accept trial order?
: Yes, u can order with small quantity to test.
tag:
In Microsoft Office Word 2007, there are several ways to format a table after it has been created. Applying table styles allows you to set the format for the entire table at once, as well as perform a preview to see in advance how the table will look with the selected formatting style.
You can modify tables by splitting or merging cells, adding or removing columns and rows, and drawing. When working with large tables, you can set the display of the table header on each of the pages on which it is displayed. To avoid unintended data flow breaks in a table, you can specify where page breaks should occur.
Using Table Styles to Style an Entire Table
Add or remove frames
Showing and hiding gridlines
Add a cell, row, or column
Deleting a cell, row, or column
Merging and splitting cells
Repeat table header on subsequent pages
Table split control
After you create a table, you can format it using table styles. By placing the mouse pointer over one of the predefined table styles, you can preview how the finished table will look.
Click the table for which you want to set the format.
In section Working with tables , click the tab Designer .
In the Table Styles group, hover your mouse over the table styles until you find the one that suits you.
Note: Click the arrow button More than to see other styles.
To apply a style to a table, click it.
In the Table Style Options group, select or clear the check boxes next to those table elements that you want to show or hide in the selected style.
Top of page
You can add or remove borders to give your table the look you want.
In section Working with tables open tab Layout .
In the Table group, click the Select button and select the Select Table command.
In section Working with tables , click the tab Designer .
In the group Table styles , click Border button and select one of Below 2010
In section Working with tables , click the tab Layout .
In the group Table , click the button Select and select command Select table .
In section Working with tables , click the tab Designer .
In the Styles group, click the Borders button and select the option no border .
On the Home tab , in the Paragraph group, click the Show or hide button.
Select the required cells together with the cell termination characters.
In section Working with tables open tab Designer .
In the Table Styles group, click the Borders button and select the desired border type.
On tab Home in group Paragraph click the button Show or hide .
Select the required cells together with the cell termination characters.
In section Working with tables open tab Design .
In the group Table styles , click the button Borders and select the option No borders .
Top of page
Gridlines display borders between cells in a table that has no borders. If you hide the grid in a table with defined borders, the changes will not be visible because the grid lines follow the border lines. To see the grid lines, the borders must be removed.
Unlike borders, grid lines are displayed only on the screen and are not displayed when the table is printed. If you turn off the grid, the table will be displayed as it will be printed.
Note: Grid lines are not displayed in the web browser and in preview mode.
Top of page
Click the cell to the right or above where you want to insert a cell.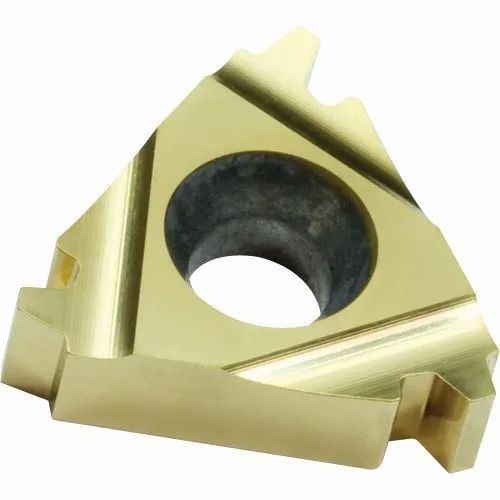
In section Working with tables open tab Layout and click the dialog box launcher Rows and columns .
Select one of the following options.
| Parameter | Action |
| right offset | Inserts a cell, moving the rest of the cells in the row to the right. Note: This action may result in more cells in a row than in other rows. |
| downshift | Inserts a cell, moving the cells in this column one row down. The last cell is placed on a new row added at the bottom of the table. |
| insert whole line | Insert a row above a selected cell |
| insert whole column | Insert a column to the right of the selected cell |
Click the cell in the row above or below which you want to add a new row.
In section Working with tables , click the tab Layout .
Do one of the following:
To add a row above the selected cell, in the Rows and Columns group, click the Insert Above button.
To add a row below the selected cell, in the Rows and Columns group, click the Insert Below button.
Click a cell in a column to the right or left of where you want to insert the column.
In section Working with tables , click the tab Layout .
Do one of the following:
To add a column to the left of the selected cell, in the Rows and Columns group, click the Insert Left button.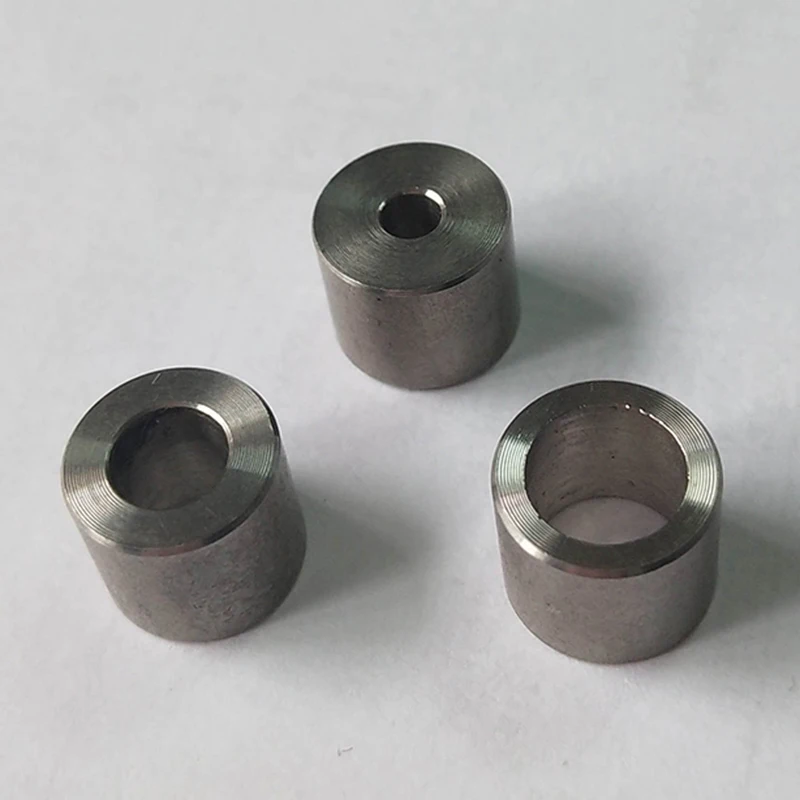
To add a column to the right of the selected cell, in the Rows and Columns group, click the Insert Right button.
Top of page
Do one of the following:
| To highlight | Do the following |
| Cell | Click the left edge of the cell. |
| Line | Click to the left of the line. |
| Column | Click the top grid line (that is, the top border) of the column. |
In section Working with tables , click the tab Layout .
In the Rows and Columns group, click the Delete button and select the command Delete Cells , Delete Rows or Delete Columns .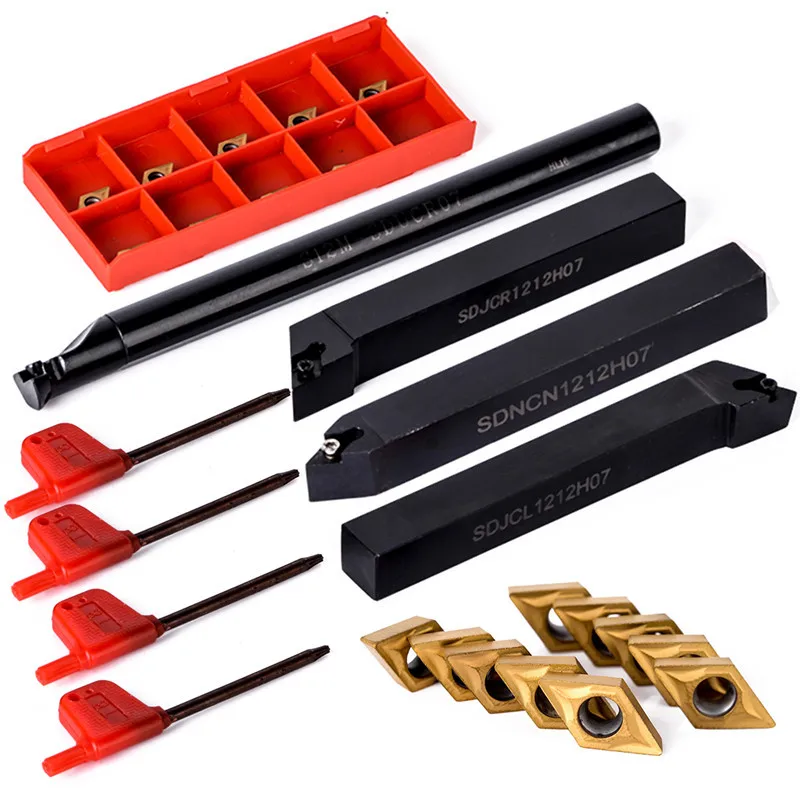
Top of page
Two or more cells in the same row or column can be merged into one. For example, you can combine multiple cells in one row to create a table header that is common to multiple columns.
To select the cells to be merged, click the left border of one of them and drag the pointer, while holding down the mouse button, over the required cells.
In the Table Tools group, on the Layout tab , in the Merge group, select Merge Cells .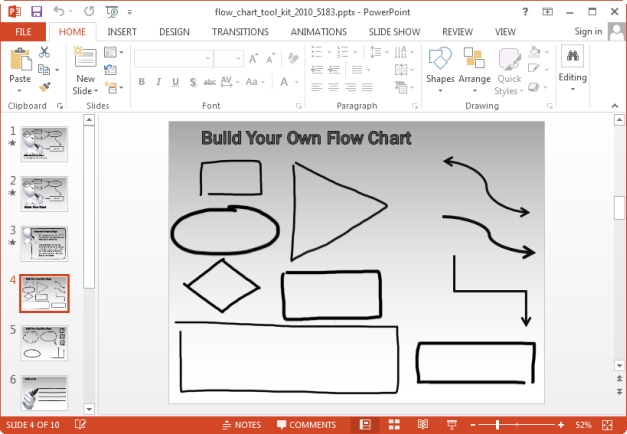
Select one or more cells to be split.
In group Work with tables on the tab Layout in the group Merge select the command Split cells .
Enter the number of columns and rows into which the selected cells should be split.
Top of page
When working with very long tables, they have to be broken into pieces at page breaks. In this case, you can set up the table so that the table header is repeated on every page.
Duplicate table headers are displayed only in Markup Mode and in the printed document.
Select the line(s) that make up the header. The selection must include the first row of the table.
Under Table Tools , on the Layout tab , in the Data group, select Repeat Header Rows .
Note: Microsoft Word repeats table headings at automatic page breaks. If a page break is manually inserted into the table, the header is not repeated.
Top of page
When working with very long tables, they have to be broken into pieces at page breaks. If a page break occurs on a long line, part of that line wraps to the next page by default.
To present the data contained in a table that spans several pages, modify the table accordingly.
Click anywhere in the table.
In section Working with tables , click the tab Layout .
In group Table click the Properties button and open the Line tab.