Delivery options and delivery speeds may vary for different locations
Sign In
or enter a zip code
Email * Password *
REPAIR & HOW TO
MAINTENANCE
TROUBLESHOOTING
GUIDES
TIPS & TRICKS
ALL ARTICLES WATCH VIDEOS ABOUT US SHOP PARTS CONTACT US
The CV boots on ATVs and UTVs can be easily damaged by an assortment of trail and track debris such as rocks and tree stumps. Unless CV boots are replaced when they’re damaged or worn, dirt will get into the CV joints and wreck them in no time.
Watch the video above and follow the steps below and to do an ATV or side-by-side CV boot replacement
NOTE: We used Polaris Ranger parts, but the process will be almost identical for CV joints on all makes and models of ATV and side-by-side.
PRO TIP: We recommend you purchase a CV boot kit rather than individual parts. The kits are cheaper and include the CV boot, clamps and grease you’ll need. Find the CV boot kits for your machine by selecting its make, year and model.
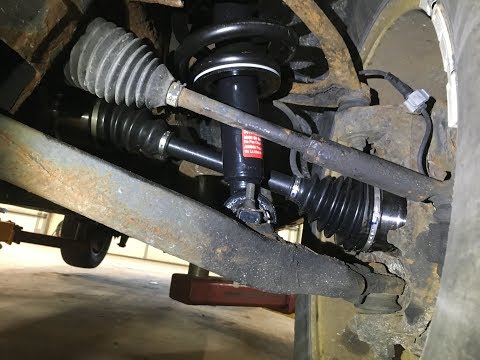
Removing ATV or Side-By-Side CV BootsStep 1. Remove the CV boot retaining clamps using a side jaw pincher tool.
Step 2. Cut off the old CV boots and discard them, then clean off as much of the old grease from the CV joints as possible.
Step 3. Position a drift punch against the innermost part of the outer CV joint, and carefully tap the CV joint off the driveshaft splines.
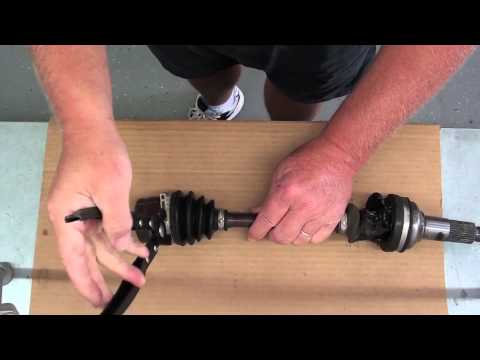
Step 4. Install the new CV boots and clamps onto the driveshaft in the following order:
1. Inner CV boot
2. Inner CV boot small clamp
3. Outer CV boot small clamp
4. Outer CV boot
Step 5. Put the outer CV joint back over the driveshaft splines, and tap it back onto the driveshaft with a soft-blow hammer.
Step 6. Pack the CV joints and the new CV boots with the grease included in the CV boot kits.
Step 7. Slide the CV boots over the CV joints so the lip of each boot slots into the channel in each CV joint.
PRO TIP: Make sure the lip of the CV boot and the channel in the CV joint are both clean and free of grease, because you want a tight seal. Any grease will prevent a seal, and can result in the boot slipping off the CV joint.
Step 8. Position each of the CV boot clamps over the CV boot, secure each clamp using a CV joint clamp tool and you’re done.
Want a more in-depth look at replacing the CV boots on a Polaris side by side? Watch the videos below to see how to replace the front and rear CV boots on a Polaris Ranger 900XP.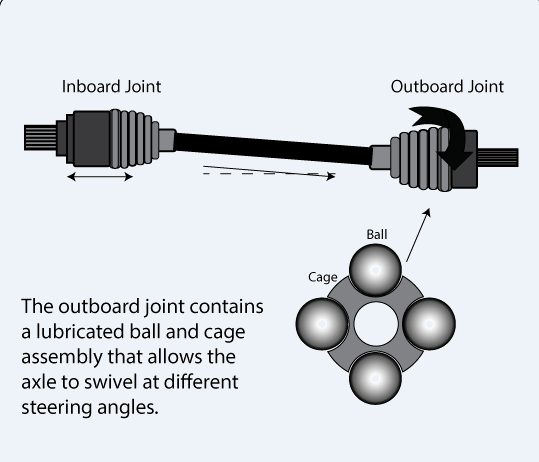
Polaris Ranger Front CV Boots Replacement
Polaris Ranger Rear CV Boots Replacement
body
Your CV boot is the most vulnerable part of your axle. The soft rubber boot seals great against water, dust, and debris without compromising the full flexibility of your CV joint. But sticks, rocks, or even improper installation can lead to tears. A torn boot leads to lost grease, and lost grease leads to a broken axle. That’s why it’s so important to know how to change the CV boot on your Polaris Ranger.
It’s a cheap fix that doesn’t take too long.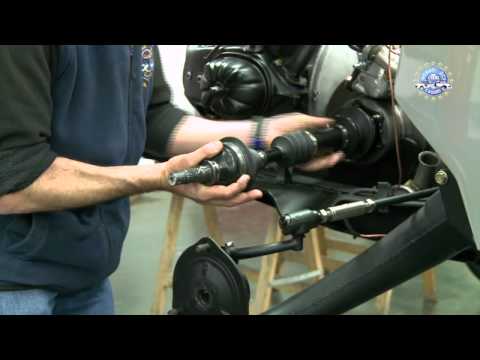 Do it right by following these 10 steps, and you’ll save a bundle of cash.
Changing a boot is relatively easy, and with a little practice, you should be able to do it in thirty minutes or so.

 Remove as much grease from the CV joint as you can and inspect it for water, debris, and damage. If you find any, your best bet is to go ahead and replace the whole joint. Even with thorough cleaning, the joint is likely to underperform and eventually break.
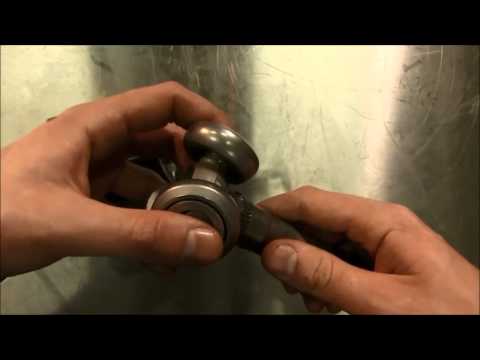 Cut off any extra length of the clamp.
And that’s how you change the CV boot on your Polaris Ranger! Just reinstall your axle and suspension and you’re ready to ride!
But WAIT, there’s more.
Yes, you’re installed and ready to ride. But it’s important to keep up with routine maintenance so you’re not having to pull some big bills out of your wallet in a couple of weeks.
Inspect Your CV Boots FrequentlyThe rule of thumb is to check your CV boots for tears before and after every ride. It’s easier to spot dust and dirt sticking to the grease that’s leaking out of your joint rather than seeing the tear itself. When you find a tear, pick up a Polaris Ranger CV boot repair kit and fix it ASAP.
There’s no reason to put off replacing a torn boot. It’s a small and cheap fix (SuperATV sells them for $25-$30) that can quickly turn into a more expensive fix if left unchecked. A torn boot can let water and dirt into the CV. If you keep riding on it, your CV will break.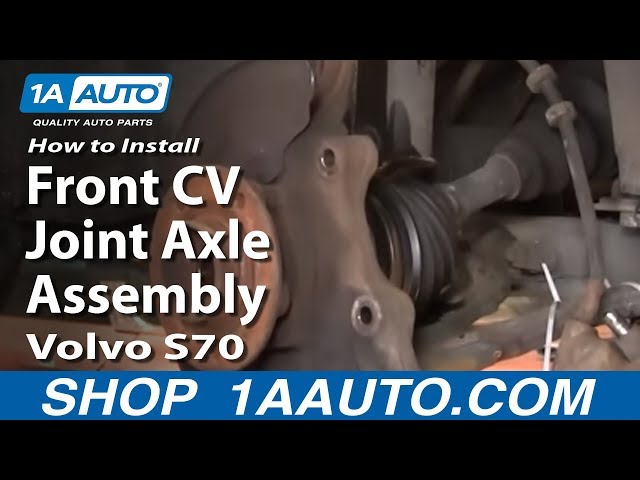 As soon as you see a tear in a boot, replace it!
Many people wonder if it is possible to ride ATVs in winter. In fact, it turns out that lovers of a sports lifestyle choose a motorcycle for the summer, and a snowmobile for the winter. But there are also those who manage to use ATVs all year round, regardless of weather conditions. A dose of adrenaline and saving space in the garage, as well as budget funds for two types of equipment, are the main reasons for this approach. Each type of transport also requires a separate technical inspection and a permit to drive.
But if you are wondering whether it is worth riding an ATV in winter, take care of its proper operation and preparatory work for it. There is nothing complicated about this, and such preparation is not much different from preparing a motorcycle. Let's consider in more detail.
The ATV is a kind of hybrid of a tractor and a motorcycle, that is, a motorcycle engine is bolted to the tractor chassis.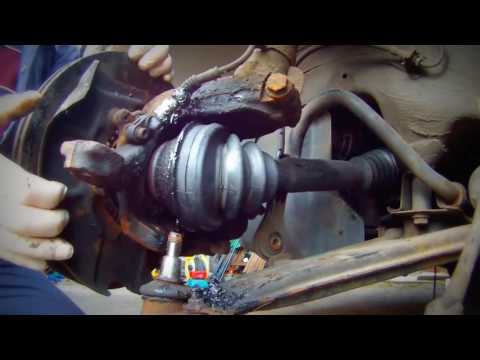 Engine preparation comes down to adjusting the carburetors (if the engine is carbureted) to a low temperature and changing the oil to "winter", that is, with improved starting characteristics in cold weather.
For the vast majority of ATVs, the instructions require the use of motorcycle oil with a viscosity of SAE 10W-40 and a JASO MA quality level. Usually it is called semi-synthetics, and it is considered efficient up to a temperature of -20 ° C, which is clearly not enough for winter operation in the middle lane, to say nothing of Siberia and the North. Therefore, before winter, even if the oil has not worked out the required resource, we ruthlessly change it to a fully synthetic one with an extended temperature range, for example: Liqui Moly ATV 4T Motoroil 5W-50. This lubricating fluid meets improved cold start temperatures and is able to resist overheating. This phenomenon may surprise many when riding an ATV in winter, but in fact it turns out that it is not so rare. Occurs when skidding in the snow, so this must be taken into account in advance.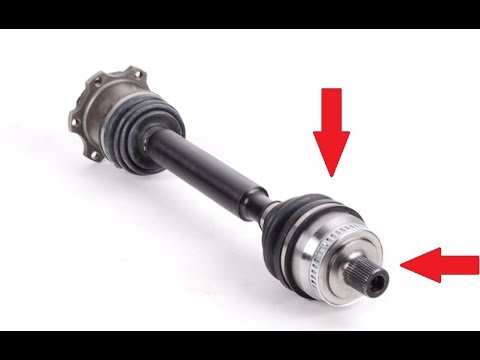
There are two more specific winter problems with the ATV engine when driving:
 The same alcohol liquid will help unlock the throttle and other controls if they are not equipped with heating. By the way, the brake mechanisms can also freeze, especially in the parking lot after a tempo ride.
 In addition, in order to ride an ATV in the winter, you should pay attention to the liquid cooling system. It may be necessary to replace the antifreeze with a more frost-resistant one. We recommend using Liqui Moly Kuhlerfrostschutz KFS 12++, a concentrate that should be diluted 2:1 with water (product and water). Such a mixture can only freeze at temperatures below -60 °C. Hence the conclusion that such a reserve will not interfere even in the Moscow region.
She does not need special arrangements. It is advisable to change the oil in the bridges to fully synthetic, if you have not already done so. Motorcycle synthetics are excellent for increased loads - Motorbike Gear Oil VS 75W-140, if such oil is allowed in the instruction manual.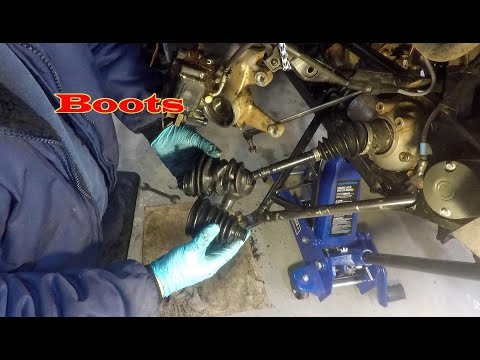 Anthers on CV joints must be regularly treated with silicone so that they do not lose elasticity in frost. The chain in winter conditions needs to be processed less often and you can use the same chain lubricants as in summer, for example: Motorbike Kettenspray Enduro.
Change old brake fluid ruthlessly in winter for ATV riding. The accumulated water insidiously freezes in the brake machines and working cylinders. It happens, as always, suddenly, and you already know what happens when the brakes fail. Brake Fluid DOT 5.1 has good low-temperature qualities. It remains fluid at temperatures even below -50 °C, and it is not for nothing that travelers in the Arctic latitudes use it.
Rarely does anyone on an ATV change tires to winter tires, considering the usual mud option suitable for winter conditions. However, on clear ice, rough off-road tires are completely helpless. The situation can be improved by studding large tread blocks with cargo studs.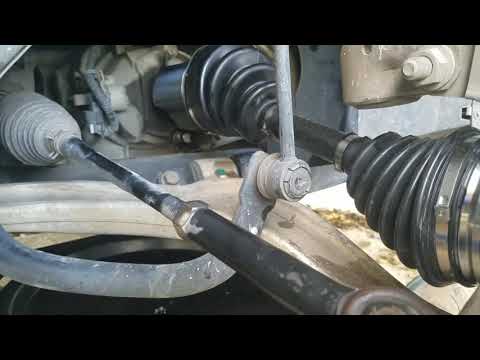 Such services are provided by both some tire shops and cargo services. You can also “cut” the rubber into small lamellas using a grinder or a special device, but this is a very laborious and literally dirty event.
In order for ATV riding in winter to be normal, attention should also be paid to the winch, as the only means capable of pulling out of the snow captivity. To do this, it is necessary to properly service the structural element even before the onset of winter time in accordance with the instructions attached to it. To do this, it is necessary to change the lubricant to a low-temperature one and remove water if it has entered the gearbox. For the latter, Liqui Moly Marine Winschfett marine waterproof synthetic lubricant with Teflon is optimal. Its temperature range allows you to use the winch down to -35 ° C, and one tube is just enough. Electronic-Spray contact lubricant is well suited for servicing electrical contacts and solenoids, it will also save you from freezing.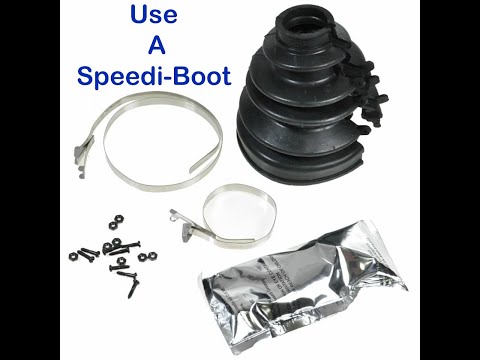
Pay attention to the fuel system as well. Both carburetor and injection systems need maintenance, for which Motorbike 4T-Bike-Additiv is well suited. It cleans the system of carbon deposits, makes it easier to start the engine, improves traction and protects against corrosion.
ATV with proper care, will give you pleasure both in summer and in winter. There is nothing terrible or frightening in winter trips, it is enough to prepare the equipment and acquire the appropriate equipment.
Regular maintenance will keep your ATV running safely and for a long time. Control, lubrication, cleaning, adjustment and replacement of parts are carried out according to the regulations or as needed. Without the appropriate knowledge and qualifications, these procedures are best carried out at official CFMOTO service centers.
First check the level and quality of the oil in the engine, gearbox, front and rear gearboxes. Then proceed to other procedures:

ATV care includes:
Store the ATV in a cool, dry place, covered with an opaque tarp or cover.
For engine - semi-synthetic oils CFMOTO G-MOTION 10W40 4T and 5W40 4T with a temperature range of application from -30 to +40.
For the gearbox, front and rear gearboxes - Gazpromneft 80W-90 GL-5 transmission oil.
G-MOTION engine oils are specially designed for maximum damping of loads on 4-stroke engines of CFMOTO ATVs, have an increased margin of protective properties to ensure uninterrupted operation of the engine in all operating modes, including extreme ones, and increase the service life of equipment.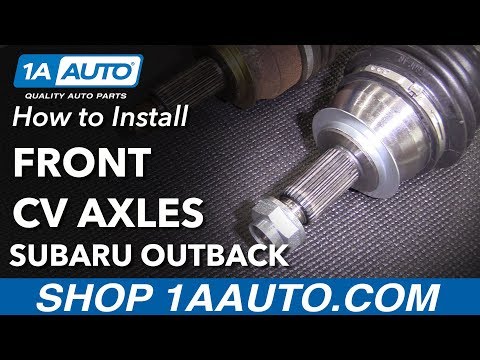 The oil consists of high-quality base components and additives with an optimal chemical composition. Their use guarantees the maximum service life of the CFMOTO ATV.
Automotive ATV oils are not suitable. The use of fuels and lubricants that do not comply with the manufacturer's recommendations can disable the equipment with serious consequences for the budget.
Be trained and instructed before using the ATV. Persons under 16 years of age are not allowed to drive. It is forbidden to operate an ATV without protective equipment - a helmet, eye protection, gloves, boots, long sleeves and trousers. You cannot operate machinery while intoxicated.
Check the ATV for proper operation before using it. Hands should always be on the handlebars and feet on the footrests. Do not drive the ATV too fast - speed should be appropriate for the terrain, visibility and riding experience.
Do not walk on the ice of a frozen body of water. Do not cross water obstacles, the depth of which is higher than the level of the footrests of the ATV - this can damage the equipment.