Jim’s Tech Talk
By Jim Langley
Three times this month I helped roadies with almost identical problems. If my mechanic’s life was on social media, the mystery I was asked to diagnose and fix would be trending. So, I figure there’s a chance you might run into this issue on your own rig or your buddy’s.
To ensure you’re ready to save the day, I’ll explain more about it and then provide some remedies. Feel free to comment at the bottom to share your best tips.
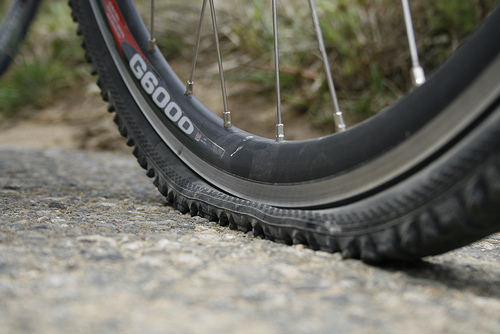
The three riders all complained about tire trouble: slow leaks and flats. Two run tubeless-ready road tires with sealant. The other is on standard tires with tubes. All were sure there was something wrong with their valve because they could hear air escaping there.
The tubeless riders realized their tires were softer than usual when they checked them before rides. They knew that tubeless tires sometimes lose air, so they just pumped them up. But, when the tires kept going soft, they started looking for leaks and that’s when they heard the air coming out by the valves.
They next tried tightening their valves to stop the leak. That’s a good idea because tubeless-ready systems require an airtight connection between the valve and the rim. The sealant in tubeless-ready tires will travel with the escaping air and can seal the gaps around a loose valve.
Yet, if the valve is very loose, the particles suspended in the liquid sealant might not be able to do the job. Plus, the valve is designed to seal on its own so long as it’s sufficiently tightened. Over enough time (usually months), sealant dries up, too, meaning it can’t travel to leaks and seal them forever.
The person with the standard tire and tube setup was frustrated because she’d suffered back-to-back flats. She thought they were both due to bad valves because when she fixed the second puncture by installing a new tube, she flatted again before even getting to put the wheel back on the bike.
She had just finished inflating the tire and hadn’t even removed the pump from the valve when there was a loud hissing as all the air rushed out of the tire. And, it felt and sounded to her like it came right out of the valve.
When it comes to tire trouble, always start with a full inspection
Flat tires and slow leaks are among the most frustrating problems for many cyclists. They can render otherwise perfect bicycles unrideable, can strand you by the side of the road and can be tricky to fix – even if you have a spare tube and pump.
The good news is that with a little Sherlock Holmesing anyone can figure out why tires aren’t holding air and what to do about it. But, it can take some careful investigation and thought.
I recommend starting by taking the tire (and tube if you have one) off the rim. That’s the only way to see what’s going on inside the rim and around tubeless-ready valves.
And, with standard tire systems, removing the tube is the best way to inspect the tube and the valve that’s built into it.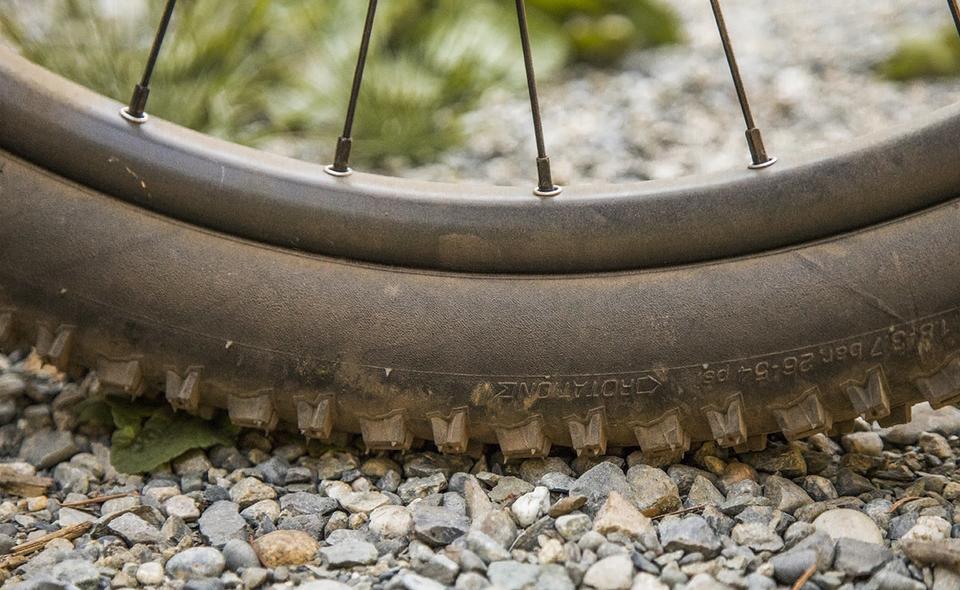 Also, when the tire is removed it’s much easier to inspect it and the rim inside and out.
Because I’ve been fixing flats and slow leaks forever, I knew that it was unlikely that the valves were to blame for the slow leaks and flats. Leaking air will follow the path of least resistance and escape at the point of the biggest hole, which – unless there’s a large puncture somewhere in the tread or sidewall – is usually the valve hole.
So, when I took the tires off I was looking for something much more common, namely faulty rim strips. The rim strip is the plastic, rubber or cloth piece that goes onto the rim to cover all of its spoke nipple holes. In a tubeless-ready system, it seals these holes so that the air and sealant can’t escape.
In a standard tire-and-tube system, the rim strip, 1) protects the tube from being cut by the sharp edges of the holes in the rim; 2) it prevents the pressure in the tube forcing the tube down into the holes where the tube might get punctured by the end of a nipple; and 3) in the event of a spoke that is long enough to stick out through a nipple and past the rim hole (more common that you’d expect), the strip protects the tube from being punctured by it.
What happened with the first tubeless-ready slow leak was that the non-adhesive plastic rim strip had been scrunched up to one side inside the rim. This partially exposed two rim holes letting the air and sealant get down inside the rim and escape at the valve hole.
What usually causes a rim strip to move like this is not enough care when installing the tire. Tubeless-ready tires need to fit tightly which means they can be tough to install. If you don’t pay enough attention when putting tires on, the beads of the tire can pull the rim strip out of position.
The tire may still go on and work fine for awhile. But, as you keep riding and topping off your tires as usual, the rim strip at that spot where it’s too close to the rim holes will eventually yield to the air pressure opening gaps and causing a slow leak (or even a fast one).
In the second tubeless-ready tire, I discovered that the rim strip was too narrow for the rim. In this case, the strip was just a little too narrow. This can happen if the rim holes are staggered left and right. A too narrow rim strip might work on a rim with all the holes down the center but that same rim strip won’t work when the holes are staggered and thus wider. So, this was a case of the wrong rim strip for that rim.
TIP: Because rim strips can move like this, and not fit correctly, it’s a good idea to get in the habit of checking them whenever installing new tires. To do this, once you’ve got the tire on the rim, yet before you pump it up, carefully go around the wheel pushing and rolling the tire to the side to see if the rim strip is laying flat and covering the rim and its holes the way you want all the way around. Be sure to check both sides of the tire/rim. If you spot a problem anywhere, fix it before finishing tire installation.
Then, with the tubed tire, it actually had a broken rim strip. But, it was a little hard to spot because it was split down the middle near the valve and I didn’t see it until I took the strip out and flexed it looking for defects.![]()
The split was opening when the tire was fully inflated letting the tube protrude into the rim hole where the sharp spoke nipple was popping the tube. That’s a worst case scenario that would have kept popping tubes.
For all three wheels, the fix was replacing the rim strips.
For tubeless-ready rims, there are options. One is going with the wheel/rim manufacturer’s recommended rim strips. Some wheel and rim makers sell strips specially made to work with their rims. Usually, they’re recommended because they are sized to exactly fit the inside width of their rim to seal it from leaking and also ensure tires go on/off without too much difficulty.
You should be able to learn if proprietary rim strips are available for your wheels by checking the maker’s website or by calling and asking to speak with tech support.
For standard tube tires, bike shops sell universal rim strips. Just make sure you get the right width strips to fit fully inside your rim.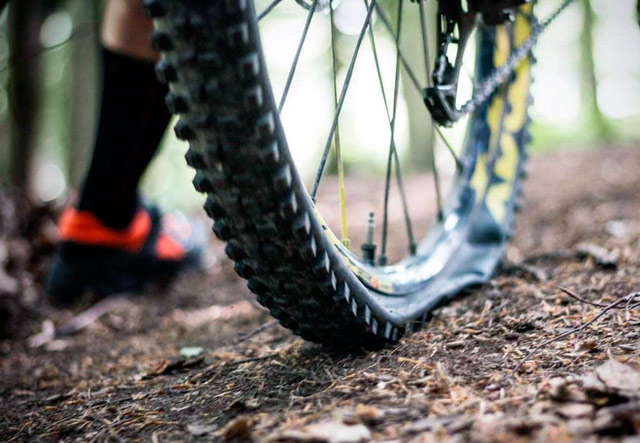 Just like with tubeless rim strips, you don’t want the tube-type strips to be able to move and expose the dangerous rim holes and nipples.
Lots of mechanics today make tubeless-ready rim strips from Gorilla Tape. It’s adhesive so it won’t move out of place even when installing/removing the tightest tubeless tires. And it seals great. Also, it comes in a width that fits some rims perfectly, or you can cut it to the exact with.
1-inch (25.4mm) wide Gorilla Tape , is the width that fits nicely inside many road tubeless-ready rims. Or, if you have super wide rims, with a wall-to-wall internal width greater than 25.4mm, you can purchase Gorilla Tape in the 1.88-inch (47.75mm) and cut it to the exact width required.
To do this, place the roll of tape on its side on a flat surface (photo). Get a utility knife (“box cutter) with a new blade to cut the tape (a used/dull blade can result in a jagged, rough cut).
Now, you just need to put a shim under the knife (or under the tape if you prefer) that puts the blade at the exact height to cut the tape to the right width. With this setup you simply hold the knife while pressing the tape into the blade and turning the tape. A few turns of the tape and you will cut deep enough to have enough tape to cover the rim.
When taping the rim, start just past the valve hole and press down on the tape to make sure it’s sticking to the rim all across and following the rim’s shape (often you need to press it down into a concave channel inside the rim). You don’t want air pockets between the rim and tape.
Take your time as you tape the rim and get the tape sticking all around and up on the edges. If you get a bubble from an air pocket, just pull the tape up off that spot again, and use a little more care pressing it down. To prevent these air bubbles, it helps if you pull the tape taut as you apply it.
When you get back to the valve hole, cut the tape to allow about three inches of tape past the valve hole so it overlaps the first part of your tape job. Stick that last section of tape down like you did the rest.
All that’s left is to make a small “X” cut with your utility knife right above the valve hole (I like to push the pointy end of a valve up through the rim from below to make a small mark on the tape showing me exactly where to make the cut). When you insert your tubeless valve and tighten it, it will spread the little “X” cut making a tight seal around the valve.
Ride total: 8,982
As far as my experience gets, this can happen because:
For tiny punctures, inflate the tube a lot more when testing and be more patient when testing, i.e. allow a little more time each time you sink the tube in water, and watch for bubbles that develop slowly and remain stuck to the tube. Don't be afraid to over inflate the tube, it won't blow up, but if it does, it was already too old or chemically damaged. You can safely inflate a tube up to three times it's normal "non stretched size".
If you ride without valve caps, dirt can get inside the valve or even the tube, later returning to the valve and getting stuck between the valve's sealing surfaces. This is hard to test without inflating the whole tire assembly and pumping it to maximum pressure. The valve can sometimes be cleaned by inflating to max pressure and deflating quickly a few times (2-4) IF this is attempted but does not solve the problem, look for a way of recycling the rubber!
Seals in bicycle tubes are usually made of very soft rubber, which looses flexibility with age, even in the shelves, so, if you ever buy a tube that leaks air by its valve, try to get it exchanged for a different brand or one that is from a different/newer batch. Schrader and Dunlop type vales cores that are easily replaceable and with luck can be cheaply available.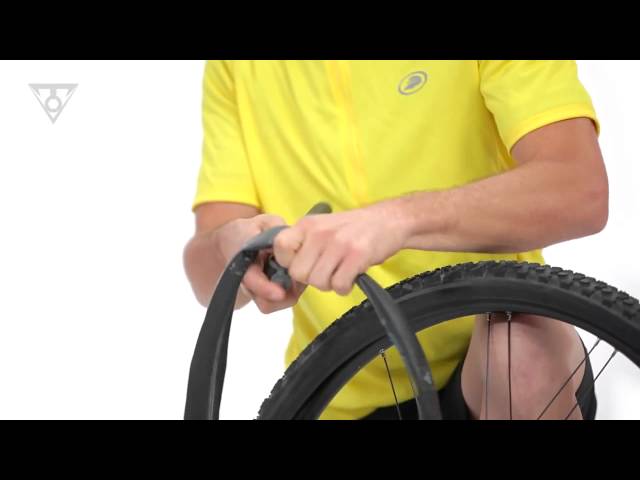 (In my country I can get 3 to 5 Dunlop cores for less than US$ 1.00) Schrader Valves are the same used in car's tires so maybe you get used ones for free at tire shops. (AS for presta valves, I do not know of replaceable cores...).
I have had ruined dunlop valve cores due to rim brake overheating. As mentioned before, rubber seals are really soft and can be easily damaged. They become dry and cracked with age and heat. To avoid heating of rim brakes, try to keep your rims and pads clean and free of oil and crystallized debris and observe a good braking technique in long steep descents. Schrader and presta valves are much less prone to this kind of problem, however, rim brake heating can also damage the valve neck (the union between the tube and the valve stem) weakening the union, producing leaks that are worthless to repair and sometimes very difficult to detect with the usual sink-in-water test.
As for old or degraded tubes, it's fairly easy to detect the problem. Inflate the tube so it becomes stretched.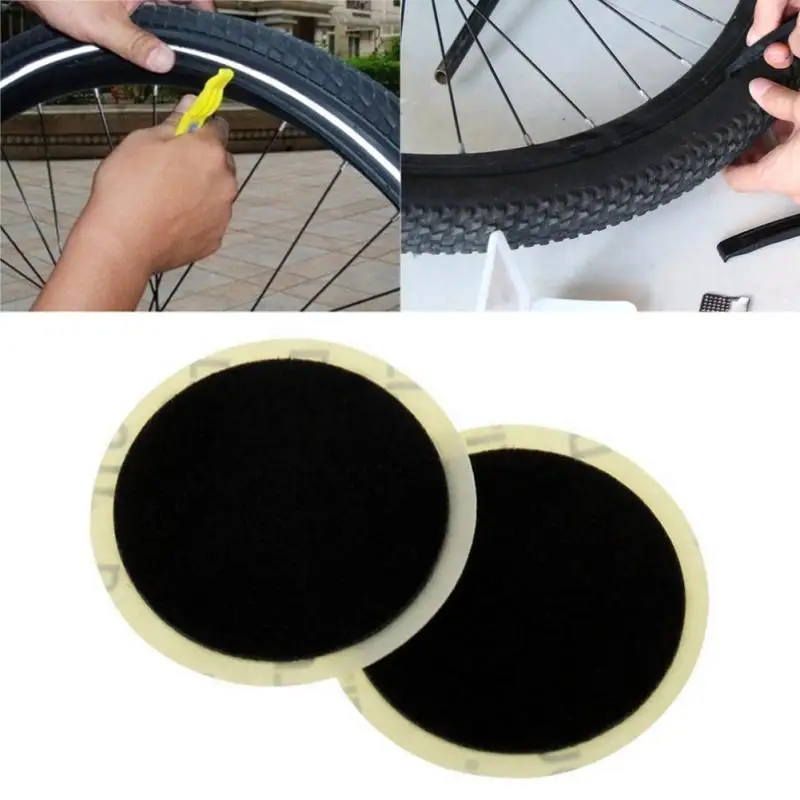 The tube should stretch in a more or less uniform fashion, and keep almost the same texture all-round. A very old tube degrades naturally, but chemicals can also damage rubber, accelerating its aging. Be careful if you store, repair, or use your bike, tires or tubes in places with existence of powerful solvents, paints with very volatile properties and the such. If you ever suspect that a tube has been chemically damaged, carefully inspect the tire as well.
A tube that has aged out will stretch more in its weak parts. These parts would present a less smooth surface, showing cracks and pores which appear not to be leaky. Those parts of the tube won't have the subtle shine of a clean rubber tube. Another sign of a weak or aged out tube will be the appearance of inexplicable punctures, such as tiny perfectly round holes in the part of the tube that faces a good clean rim tape. These fine holes appear by themselves, not by any object damaging the tire or tube.
Finally, all that I have stated, comes from my experience, and I must say, that it varies somewhat due to quality, design, raw material and manufacturing processes used by various brands.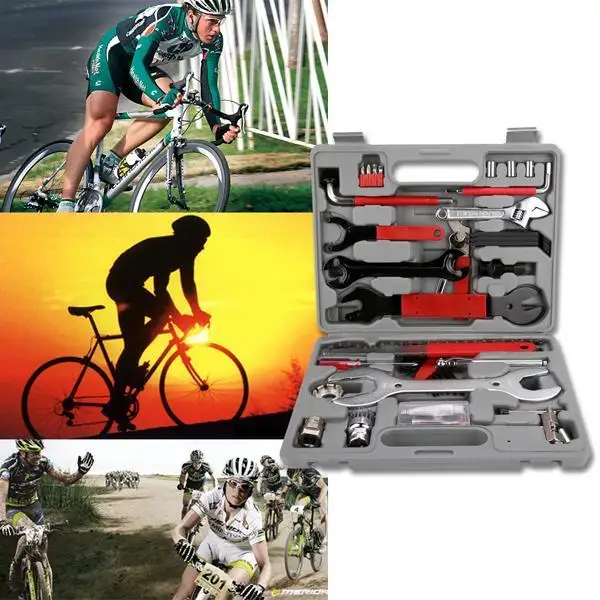
References:
http://en.wikipedia.org/wiki/Presta_valve
http://en.wikipedia.org/wiki/Schrader_valve
http://en.wikipedia.org/wiki/Dunlop_valve
4.5/5 - (2 votes)
It may be elementary, but being able to inflate bike tires is an essential skill for any cyclist.
Many of you already know how to do this, but for those who don't, the different types of valves, pumps, and more importantly, how much pressure to inflate your tire can be a little overwhelming. Let us help you through this process.
Contents
Pneumatic tires were invented to overcome the harsh "ride quality" of massive wheels.
The air inside acts like a spring, giving you suspension and allowing the tire to adapt to the terrain for better traction.
Tire inflation is a quick job that can easily improve your driving pleasure. Incorrect tire pressure will adversely affect cycling and make it more prone to punctures.
If you've never repaired a puncture before, you may not have thought about how your tires hold air in.
The vast majority of bikes will use a tube. It's a donut-shaped airtight tube that sits inside the tire with the inflation valve you see on the outside.
Inflated tire rests on the ground and provides puncture protection.
You may have heard of tubeless tires which do not have a tube but use a special rim and tire to seal air without using a tube. This usually requires a tubeless sealant, which is a liquid that plugs any air outlets.
Tubeless tires are more commonly used on mountain bikes, but the technology is moving to road bikes.
Tubeless sealant also seals punctures, and no tube means much less risk of pinching flats - that's when your inner tube gets pinched by the rim, causing a puncture.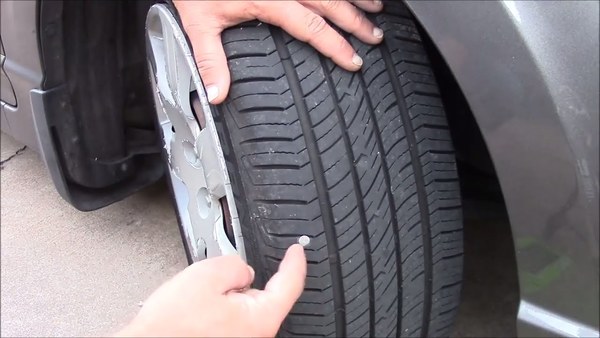 Thus, tubeless tires can run at lower pressures than inner tube tires to improve comfort, speed, and traction.
At the highest level, you also get tubular tires. They are essentially a tire with a tube built into it, but they are rarely seen or used outside of professional racing.
Inflating tires to the correct pressure is an important part of bike maintenance.
Running tires at too high or too low pressure can be potentially dangerous and can also affect your bike's handling.
Later we will discuss the correct pressure, but for now let's look at possible problems.
An under-inflated tire will reduce your efficiency and leave you vulnerable to annoying punctures.
If you drive with tires at too low pressure, the tire may wear out prematurely. Excessive sidewall deflection can lead to carcass cracking and tire brittleness. This can eventually lead to tire blowout.
Excessively low pressure also increases your susceptibility to punctures and can even cause your tires to literally jump off the rim if you turn at speed (the pressure inside is what keeps your tire on the rim).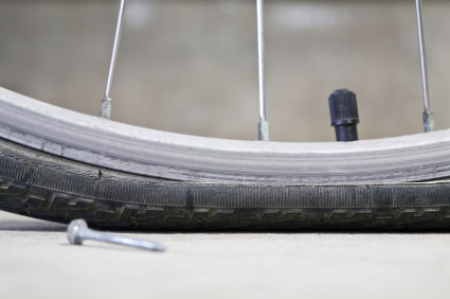
Damage can also be caused by tire deflection up to the rim. This can lead to dents or cracks, which can compromise your wheel and require a costly replacement.
Conversely, too high pressure can cause the tire to come off the rim with explosive consequences. This pressure can also compress the wheel because if it is too high, the compressive force on the wheel can be too great.
From a drivability point of view, low pressure can lead to poor drivability due to the tire squirming under load. Your bike will be difficult to control and will be slow and sluggish.
On the other hand, too much pressure can lead to poor traction and a rough ride, leading to fatigue and in turn poor handling.
There are two possible reasons for your flat tire. Either you have a puncture or your tire has deflated over time.
The adhesiveless patches are great for a quick fix, while the more traditional kit is a versatile option when you have a bit more time.
All tire systems will bleed slowly because the tubes are not completely sealed. For example, standard butyl tubing retains air fairly well compared to lightweight latex tubing, which bleeds relatively faster. Even tubeless setups will slowly leak air.
Old tubes will pass more air than new ones, so if they haven't been replaced in a while, it's worth taking a look at them. It is less likely, but also possible (especially on older tubes), that the valve is no longer sealing properly.
The best way to check what's going on is to try pumping up the tire. If it's holding air, you probably have nothing else to do. If this does not happen, most likely you have a puncture.
If air leaks slowly overnight, you have a slow puncture or just an old tube that needs to be replaced.
The first thing you need to know before inflating a tire is the valve type.
The valve is the key part that keeps the air in the tire but also allows the tire to be inflated (or deflated).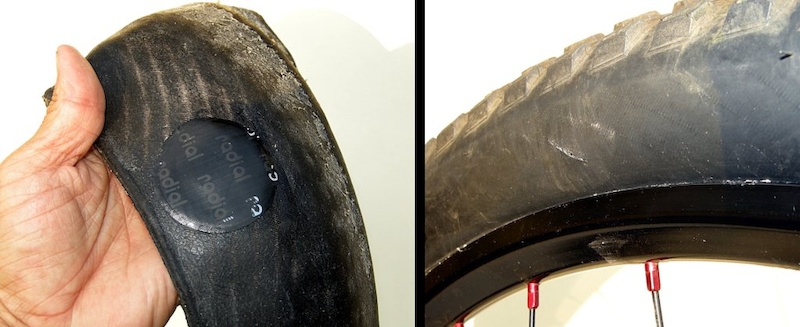
Schrader valve also used for car tires.
Schrader valves are more commonly found on low end bikes and, in the past, mountain bikes. The same valves are used on car tires.
The valve assembly is a hollow tube with a spring loaded valve that automatically closes and screws into the outer housing. The pin comes out of the valve and is usually flush with the end of the outer tube. This pin can be pressed to release air.
The dust cap on Schrader valves is an important part of the design that can help close the valve completely if it is not fully sealed. Essentially, it provides a secondary "backup" seal.
The spring-loaded design of the valve is slightly susceptible to contamination from dirt or sand, so it is important to protect it as well.
These Presta valves are longer and narrower than the Schrader type valve.
Presta valves are only found on bicycles.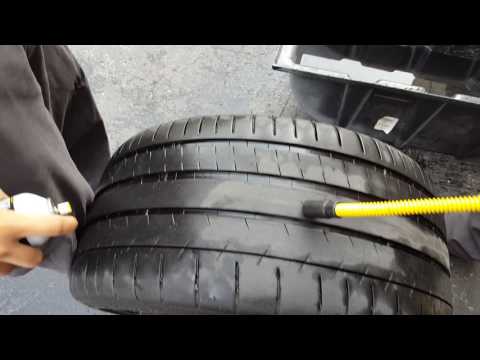
They originated on road bikes, where a narrower valve (6mm versus 8mm for the Schrader) meant a smaller valve hole (usually the weakest part of the rim).
These days you can find them on both mountain bikes and road bikes. Instead of using a spring, the valve is held in place by a nut that holds it closed, although the valve itself seals "automatically" when the pressure inside the tire forces it to close.
With a schrader valve you can simply press the pin to release the air, but with a Presta valve you first need to unscrew the small lock nut. Don't worry about the nut coming off the end of the valve body because the threads are rounded to prevent this from happening.
There seems to be a myth that Presta valves handle high pressures better - this is probably not true given that there are Schrader valves that can handle many hundreds of psi (much more than you'll ever need). in your tire).
However, Presta valves are definitely a bit more fragile than Schrader valves. It is very easy to strike the threaded inner body of the valve, bend it or break it, so care must be taken. However, valve cores are easily replaced with standard tools.
Compared to Schrader valves, this requires a special tool.
Presta valves can be supplied with a retaining ring that secures the valve body to the rim. This can make them easier to inflate. The dust cap is not essential to sealing it, but helps keep the valve clean.
The only other type of valve you may encounter is the Dunlop (also known as Woods) valve. The base diameter is the same as the Schrader valve but can be inflated with the same pump as the Presta valve.
They are very popular on city streets in Europe and elsewhere in the world, but you are unlikely to find one in the UK or the US.
The tubeless valve is difficult to distinguish from a regular Presta valve.
Valves for tubeless tires are attached directly to the rim, not part of the inner tube.
Most often they are of the Presta type, but there is also a Schrader.
If you have a Schrader type valve like the one shown above, the first thing you need to do is remove the dust cap (if there is one).
Simply unscrew the cap counterclockwise to open the valve.
Now attach the pump head.
Inflate the tire to between the minimum and maximum indicated on the tire sidewall and remove the pump. Ready!
If your bike has a Presta type valve like this one, you will first need to remove the plastic valve cover (if any).
The plastic cover will open another threaded valve cover.
Loosen the threads, but be careful not to damage them in the process.
Now attach the pump head of your choice to the open valve and inflate the tire to between the minimum and maximum pressure indicated on the sidewall of the tire.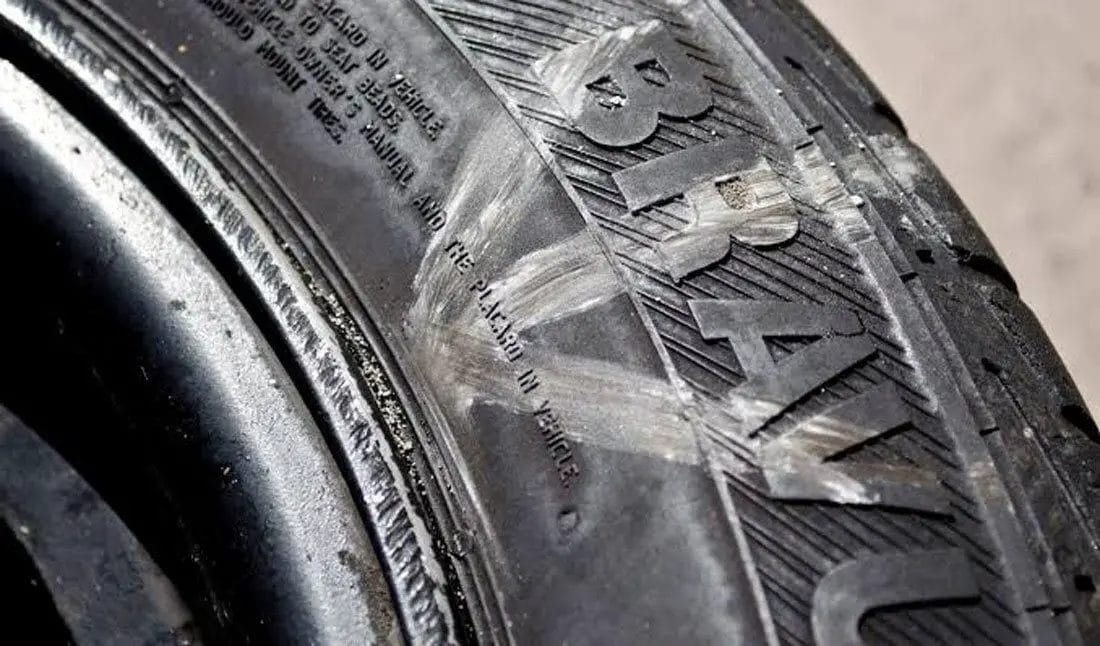
Inflate the tire to the desired pressure and remove the pump.
Finally, close the valve by turning it clockwise and install the plastic valve cover.
If you have a tubeless tire or a tube with sealant inside, there are a few extra steps you should take to avoid contaminating your pump.
Turn the wheels so that the valves are at the bottom and leave for a few minutes to allow the sealant to drain.
Turn the wheels so that the valves are up and inflate the tires. The same thing happens when the tires are deflated to prevent the sealant from splattering all over the place.
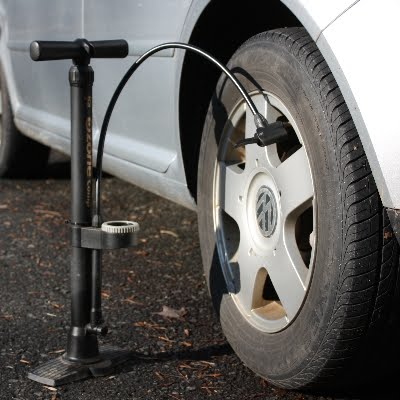
We would say that if you can only own one type of pump, get a foot pump for home use because it is efficient, fast and easy to use.
However, there is no doubt that having an extra mini-pump for the duration of the trip is very useful - otherwise you risk getting stuck on the side of the road in case of a puncture.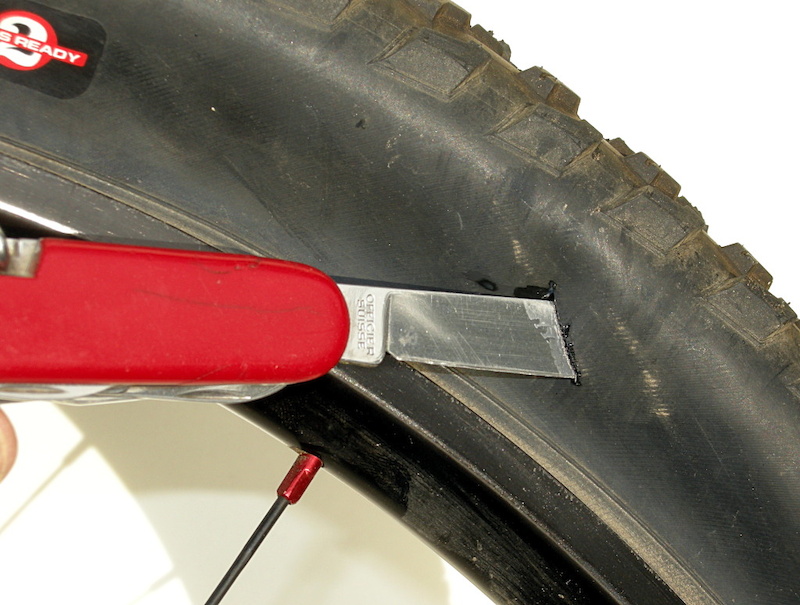
There is no limit to pump selection. Basically, they all do the same job, some of them look better than others.
From budget to outrageously expensive, you'll find something to suit your needs.
Mini pumps work but are much more difficult to use. Again, there are many options that will fit in your pocket. We prefer hose mini pumps because it reduces stress (and potential damage) on the valve.
Another option for your inflation needs is the CO2 pump. They use compressed carbon dioxide in a small cartridge to inflate or fill a tire very quickly. Not something you would like to use on a regular basis, but perfect for emergency repairs.
The first thing to do is attach the pump to the valve.
Remove the valve cap, and regardless of valve type, we find it useful to let some air out to make sure the valve doesn't stick and opens and closes cleanly. Screw on the chuck, or push it in and lock it.
If your tire is completely flat, it may be difficult to install the cartridge at first because the valve tends to move back into the rim. Simply hold the valve at the back while pressing down on the outside of the tire so you can lock the cartridge in correctly.
The locking ring on Presta valves (if equipped) can also help by preventing the valve from dropping, holding it in place for you.
The connection to the valve must be tight. It is normal for a small amount of air to escape when installing the pump, but this should not last long. If so, remove and reinstall cartridge. If the problem persists, it might be worth checking the rubber seal in the chuck to make sure it's not worn out and needs to be replaced.
Remember to be careful with the valves - they are fragile. This is especially true if you are using a mini pump without a hose.
Be sure to secure the pump by hand to avoid applying too much force to the valve, which could cause damage.
When you start pumping, make sure you use the full stroke of the pump. You will find that most of the stroke is compressing the air to the point where it will be forced into the tire.
If you don't run the pump all the way, the air won't be forced out of the bottom - you need to pressurize to move the air from the pump to the tire. Instead, you'll just end up wasting your energy to no avail.
With a floor pump, don't just use your hands, use your body weight to push down and pumping becomes much easier.
Sometimes you may find that the pump does not hold pressure, especially when inflating a tire from a fully deflated position. This may especially apply to older pumps where the seals may be slightly worn.
We find that vigorous inflation first helps to create enough back pressure (i.e. tire side rebound) in the system to ensure that the valves actuate properly and seal the tire. Keep going until you get the right pressure.
When the cartridge is removed from the valve, a hiss of air loss can usually be heard. This usually happens on the pump side, not the valve side. The pressurized air from the hose and cartridge just comes out.
The pump pumps air into your tire. The principle of operation is simple; you increase the pressure inside the pump until it exceeds the pressure inside the tire. This "overpressure" forces air into the tire, which also increases tire pressure.
The pump is simply a manually operated piston. As the pump moves down, a check valve (allowing air flow in one direction) seals the piston chamber, causing the air pressure to rise as the pump is compressed. This pressure increases until it exceeds the pressure inside the tire.
At this point, the second one-way valve will allow air to flow from the pressure pump chamber into the tire. You extend the pump again, the check valve opens to fill the chamber with air, and you repeat the process.
To prevent leakage of tire pressure, the second check valve at the base of the pump closes.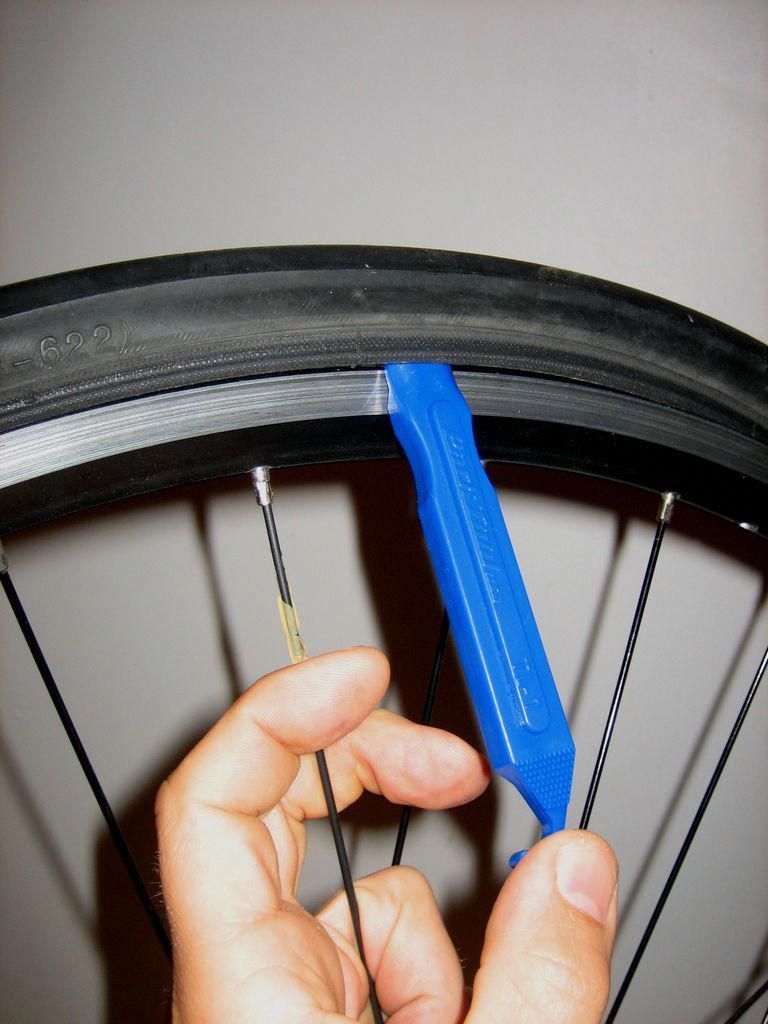 If it wasn't there, the pump would just open up again.
Presta valves close automatically, but spring-loaded Schrader valves are usually held open by a pin in the valve mount (meaning you don't need any additional inflation force to overcome the pressure exerted by the spring).
The pump head is also known as the cartridge.
The cartridge is the part that attaches the pump to the valve and forms an airtight seal over the valve. There is one of two designs: threaded or push-on with a locking lever. Most pumps nowadays can also be adapted to Schrader or Presta valves.
They will either have two different mounting points or a cartridge that can be changed for both types.
For large pumps (and many mini pumps too) the cartridge is often on the hose, preventing your force from damaging the valve.
Pumps are often equipped with a tire pressure gauge.
Proper tire pressure is perhaps one of the most controversial topics, but there are a few guidelines you can follow.
As a rule of thumb, your tire should be strong enough to prevent it from flexing all the way to the rim, yet malleable enough to provide some suspension - after all, the beauty of a pneumatic tire is that you don't have an incredibly hard ride.
Most tires have a minimum and maximum pressure marked on the side. It is advisable not to go below or exceed these limits, because manufacturers have indicated them for a reason. Of course, this means there is still plenty of room to play around with the pressure and what works for you.
For mountain bikes, the problem is relatively easier to solve, as the goal is usually to improve traction, cornering, and damping.
As a rule of thumb, riders try to run as low pressure as possible without making it so soft that the tire squirms under load in a corner or flexes enough to damage the rim.
Things get a little more complicated for road bikes because along with grip and comfort, rolling resistance (how efficiently the tire rolls) is an important factor.
On all but the smoothest surfaces, a stiff tire will have no advantage, and instead of the tire being able to lean and conform to the bumps, causing the bike to move forward, you will bounce.
On all but the flattest surfaces, lower tire pressure can provide greater comfort and efficiency.
Testing showed that 20 percent tire compression (the amount of tire compression when a load is applied, measured by the height from the ground to the rim) was the optimal balance.
Incidentally, some manufacturers recommend the same level of tire compression, although this figure is somewhat controversial.
This value is indeed a good starting point for experimenting with tire pressures.
You don't always have to remove the pump/gauge to check tire pressure.
We recommend that you check your tires before every ride. Usually, you just need to squeeze them with your hand to check the pressure.
No, this is not very accurate, but you will quickly feel the pressure in your tires and be able to determine whether they need to be inflated or not.
If you get serious about this, you can end up with a pressure gauge that can read your tire pressure very accurately.
This is especially useful on mountain bikes where a few psi can make a big difference in handling and grip, but applies equally to a road bike to find the exact pressure that works for you.
You may be interested in:
A flat, damaged wheelbarrow tire with slow leakage of pressure is sure to lead the user to frustration.
When such common problems arise, we rush to fix them and choose a solution that is not the cheapest, just buy a tire, a complete wheel, and even better, a new car. Yes, it's not a typo! Often there are discarded carts in landfills, which still serve and serve. But you can simply repair a flat tire. This is not a complicated, completely doable method for everyone, solved by oneself.
The fact is that there are two main types of wheelbarrow tires. And each of them offers different repair methods, tools, precautions.
In today's blog, we have developed a very handy step-by-step kit that will lead you to the successful retreading of both types of wheelbarrow tires. It includes a list of tools and steps for repairing tubed and tubeless tires.
Let's try together to deal with this sore point and continue to make repairs on our own. Go!
Before proceeding with the repair, we need to evaluate all the damage in order to decide whether to retread an already used tire or not.
Symptoms that can be repaired:
In most other cases, a replacement process follows.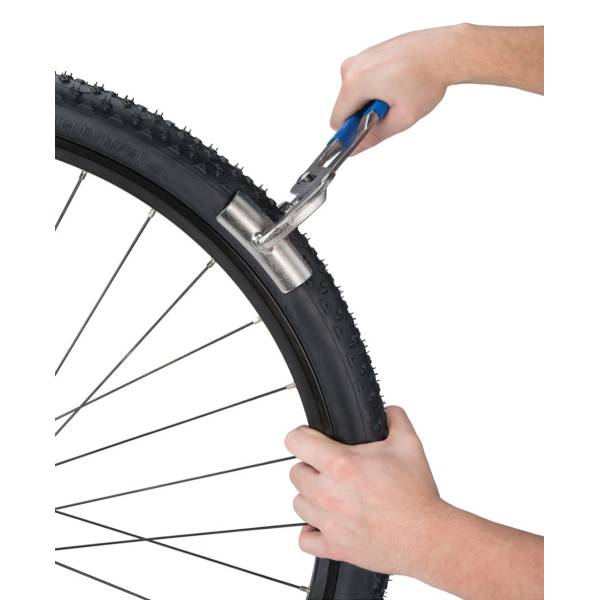 The new kit will always make your manual inventory more efficient and easier to manage.
As you know, the tire is contained on the outside, and the tube is inside. In order for the wheel to work, you need to inflate the chamber.
The situation is reversed with a tubeless wheel. Essentially, it is an all-purpose tire without a tube. The compressed air inside is retained by the single-body tire itself.
Of course, fixing a wheelbarrow tire, no matter how tubeless, is not a manual job. Therefore, here we need a set of tools:
If everything is available, let's start doing the steps:
1. Remove the wheelbarrow wheel with a wrench
To do this, you need to do two things: 1) - turn the wheelbarrow upside down, 2) - use a couple of wrenches. One will hold the nut and the other will unscrew it. Finally, after a few turns, the wheel will come loose, put the wheelbarrow aside and move on to the next steps.
2. Find the cause
It is probably the leak that is causing all the problems in the wheel. It can exhaust all the air from the inside, which will put the cart out of action. How to discover?
Take the air compressor, prepare the compressed air hose. Open the tire air valve and start blowing compressed air into it.
Once the tire is firm enough, you may hear a whistling noise. After examining the tire a little, you can determine the hole in the rubber body.
There are two tips at this stage:
Just in case you can't find an air leak, you can spray the rubber with a few sprays or soapy water. This will show the exact leak point through the bubbles.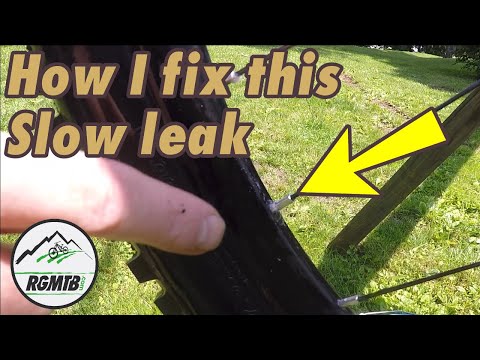
3. Fix the puncture
We assume that you have found the puncture site and are trying to repair it immediately. Here you will need a tire puncture kit. This kit contains things like a rubber stopper, an applicator and a dilator.
After all the above steps, re-inflate the tire and return to the wheelbarrow. Make sure the tightening is perfect. Otherwise, the bus will not go straight.
Tube tires are relatively easy to repair. But the downside is that they are more prone to punctures compared to tubeless ones.
Tools you will need:
When ready, remove the deflated chamber, locate the leak.