1 / of 10
Delivery Estimate: 3-5 Business Days
FREE Shipping on Orders Over $50
Rhino USA is a small, family business founded by a father and his two sons from Temecula, CA.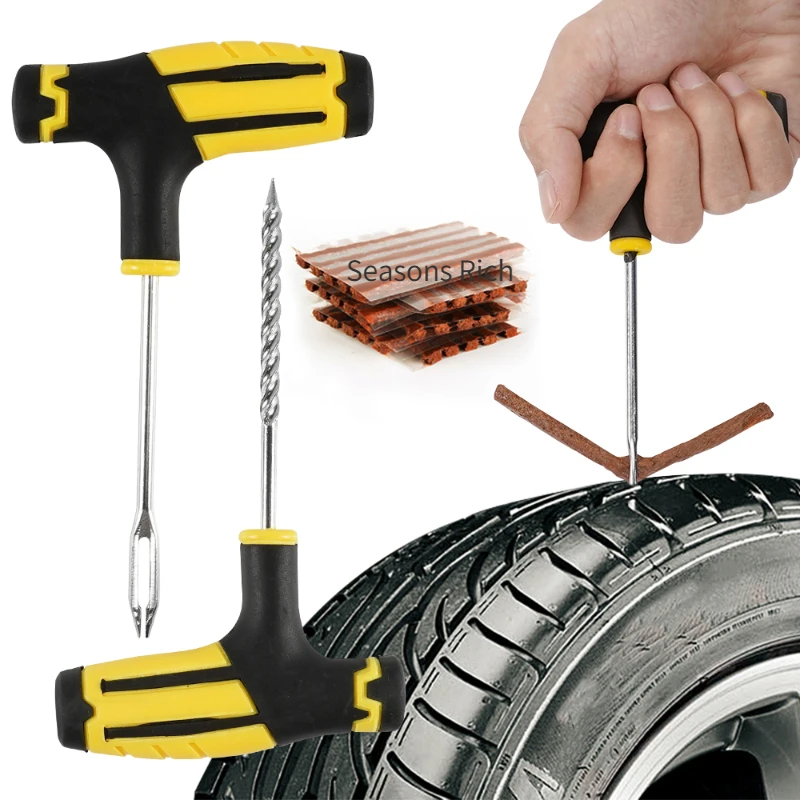 Whatever adventure you choose, the Rhino Team is 100% committed to help you blaze your own trail with confidence.
Remember that all of our products come with a lifetime warranty, and we offer best in class customer service. Give us a call at (800) 575-7310 or send an email to [email protected] if you have any questions or concerns. We’re happy to help!
Q – What are your shipping options and cost?
A – We offer FREE SHIPPING for all USA orders over $50. For orders under $50, shipping cost varies based on size and weight of the product. We do offer expedited service for an additional fee.
Q – Where else can I buy Rhino USA products?
A – Our products are for sale on Amazon.com, Ebay.com, Walmart.com and stocked at physical dealer locations all over the US, Canada and South America. Check this link for dealer near you…
Q – What payment methods do you accept?
A – We accept Visa, Mastercard, AMEX, Discover, Paypal & Amazon Pay
Q – How do I contact your company if I have a question?
A – You can call us toll-free at (800) 575-7310, Mon-Fri 9am to 5pm pst or you can shoot us an email to support@rhinousainc.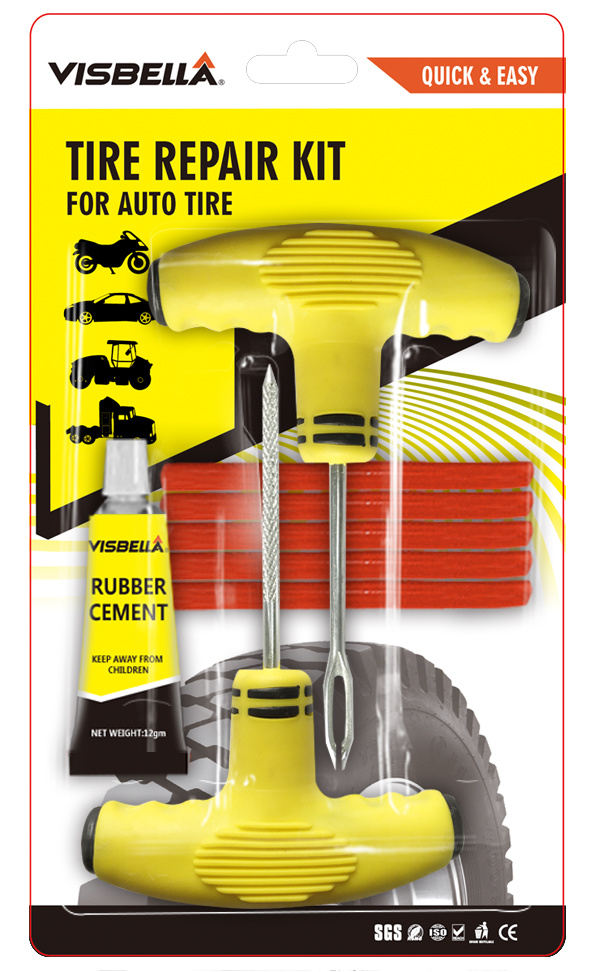 com
com
Q – What do I do if I receive a damaged order?
A – Simply call us @ (800) 575-7310 and talk to one of our friendly staff and we will get you a replacement or fix your issue GUARANTEED!
Q – Do you offer a military, LEO or other discounts?
A – Absolutely! Call our office @ (800) 575-7310 and talk to one of our friendly staff members and they can take your order over the phone or give you a discount coupon code to be used on our website.
Never miss out on exclusive discounts & offers, new product release announcements and much more!
Calculating..
Please wait. Theme installer is being initialized.'; var scDesignData = {"style":"simple","position":"center","width":"500px","codeButtonColor":"#ffffff","codeButtonBackgroundColor":"#00e41b","codeButtonBorderColor":"#ffffff","submitButtonBorderColor":"#000000","loadingBg":"#b9b9b9","spinnerColor":"#ffffff","inputColor":"#535353","inputBg":"#ffffff","inputBorder":"#aeaeae","discountInfoColor":"#535353","discountInfoBg":"#fafafa","discountInfoBorder":"#e1e1e1"} || {}; window.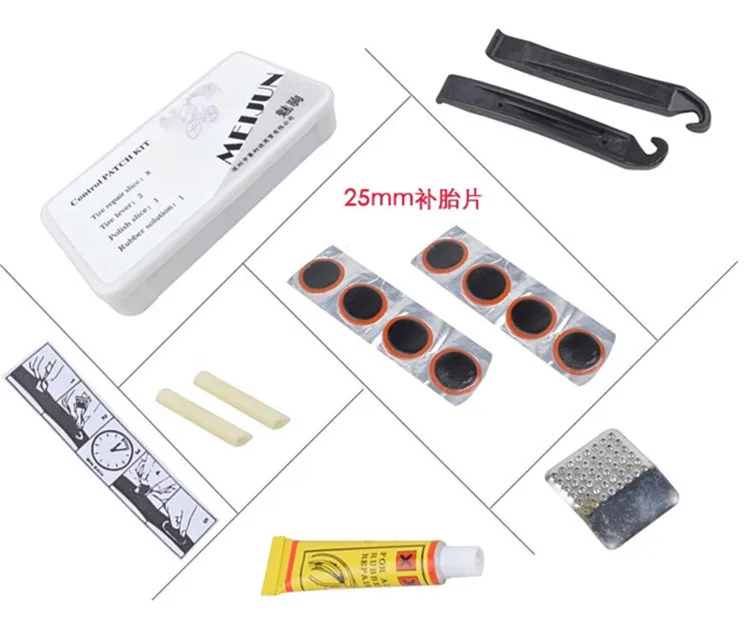 scIsCartPage = false; window.scCartData = {"note":null,"attributes":{},"original_total_price":0,"total_price":0,"total_discount":0,"total_weight":0.0,"item_count":0,"items":[],"requires_shipping":false,"currency":"USD","items_subtotal_price":0,"cart_level_discount_applications":[],"checkout_charge_amount":0}; if (!window.scMoneyFormat) window.scMoneyFormat = '${{amount}}'; window.scDesignConfig = { style: scDesignData.style || 'simple', position: scDesignData.position || 'right', containerWidth: { width: scDesignData.width || '350px' }, codeButton: { color: scDesignData.codeButtonColor || '#fff', backgroundColor: scDesignData.codeButtonBackgroundColor || '#5aaa34', border: '1px solid ' + (scDesignData.codeButtonBorderColor || '#5aaa34') }, submitButton: { borderColor: scDesignData.submitButtonBorderColor }, loadingBg: { background: scDesignData.
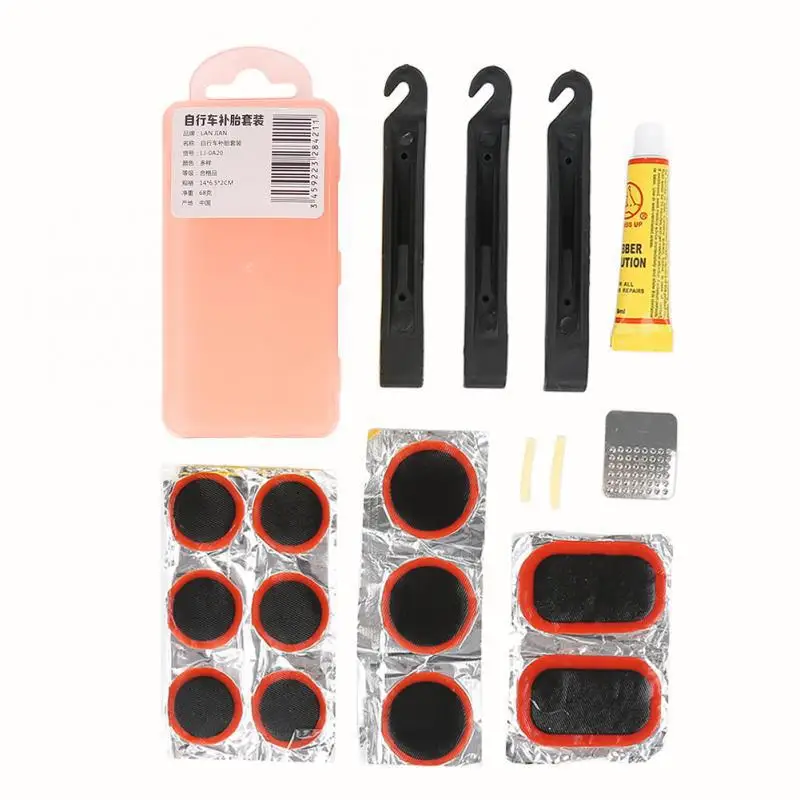 loadingBg || '#339933' }, spinner: { stroke: scDesignData.spinnerColor || '#ffffff' }, codeInput: { borderColor: scDesignData.inputBorder || '#aeaeae', color: scDesignData.inputColor || '#339933', backgroundColor: scDesignData.inputBg || '#ffffff' }, discountInfo: { background: scDesignData.discountInfoBg || '#fafafa', border: '1px solid ' + (scDesignData.discountInfoBorder || '#e1e1e1'), color: scDesignData.discountInfoColor || '#535353' } }; if (!window.scTranslationConfig) { window.scTranslationConfig = {"placeholder":"Discount code or gift card","submitBtn":"Apply","codeLabel":"Code:","discountLabel":"Discount:","giftCardLabel":"Gift card:","total":"Total:","errorAutomaticDiscount":"A discount has been applied to this order. You can’t add another discount","errorCode":"Unable to find a valid discount matching the code entered","tooManyAttempts":"Too many attempts please try again in a few minutes","errorNetwork":"Network error occured.
 You may enter your discount code during the checkout","authorized":"Discounts are available only for authorized users","messages":{"shopify.checkout.order_summary.cart_does_not_meet_discount_requirements_notice":"\u003cstrong\u003e{{ code }}\u003c\/strong\u003e discount code isn’t valid for the items in your cart","shopify.checkout.order_summary.discount_requires_customer_notice":"Enter your shipping information to apply the \u003cstrong\u003e{{ code }}\u003c\/strong\u003e discount code","shopify.checkout.order_summary.customer_does_not_meet_discount_requirements_notice":"\u003cstrong\u003e{{ code }}\u003c\/strong\u003e discount code isn’t available to you right now","shopify.checkout.order_summary.shipping_information_does_not_meet_discount_requirements_notice":"\u003cstrong\u003e{{ code }}\u003c\/strong\u003e discount code isn’t available for your shipping address","shopify.checkout.order_summary.customer_already_used_once_per_customer_discount_notice":"The {{ code }} discount code has already been used","shopify.
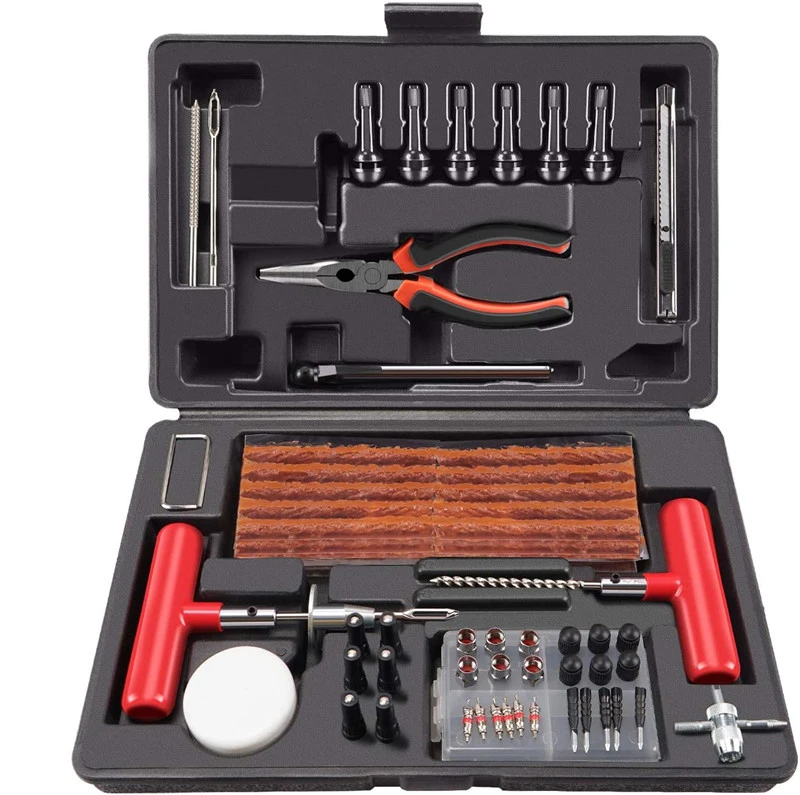 checkout.field_errors.reduction_code_code_not_found":"Enter a valid discount code or gift card","shopify.checkout.field_errors.reduction_code_discount_not_found":"Enter a valid discount code","shopify.errors.discount_not_found":"Unable to find a valid discount matching the code entered","shopify.checkout.order_summary.discount_already_applied":"A discount has been applied to this order. You can’t add another discount","shopify.errors.discount_disabled":"This discount has been disabled","shopify.errors.discount_expired":"This discount is not valid anymore","shopify.errors.discount_limit_reached":"This discount has reached its usage limit","shopify.checkout.field_errors.reduction_code_gift_card_code_invalid":"Enter a valid gift card","shopify.checkout.field_errors.reduction_code_gift_card_unusable_with_subscriptions":"You can’t use a gift card to buy a subscription","shopify.checkout.field_errors.reduction_code_gift_card_unusable":"You can’t use a gift card to buy another gift card","shopify.
 checkout.field_errors.gift_card_already_applied":"This gift card has already been applied to your order","shopify.checkout.field_errors.gift_card_disabled":"This gift card is no longer available","shopify.checkout.field_errors.gift_card_expired":"This gift card has expired","shopify.checkout.field_errors.gift_card_depleted":"This gift card has no funds left","shopify.checkout.field_errors.gift_card_currency_mismatch":"Only gift cards in {{ checkout_currency }} can be used with this order","shopify.checkout.field_errors.physical_gift_card_invalid_quantity":"Physical gift card line items must have a quantity that matches the number of gift card codes","shopify.checkout.field_errors.physical_gift_card_duplicate_code":"Physical gift card line item contains duplicate code","shopify.checkout.field_errors.physical_gift_card_invalid_code":"Physical gift card code is invalid","shopify.checkout.thank_you.gift_card_confirmation_by_text":"Gift cards are sent by text. If you haven’t received yours, try sending them again or contact us","shopify.
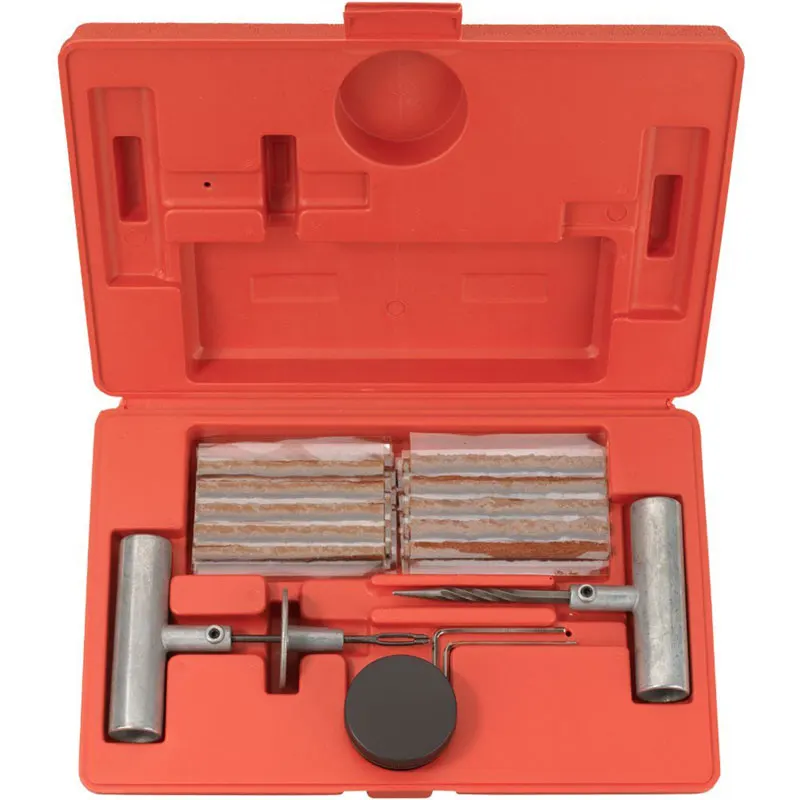 checkout.thank_you.gift_card_confirmation_by_email":"Gift cards are sent by email. If you haven’t received yours, try sending them again or contact us","shopify.errors.gift_card_already_applied":"Code has already been applied to your checkout","shopify.errors.gift_card_code_invalid":"Code is invalid","shopify.errors.gift_card_currency_mismatch":"{{ gift_card_currency }} gift cards can’t be applied on {{ checkout_currency }} orders","shopify.errors.gift_card_depleted":"There are no funds left on this gift card","shopify.errors.gift_card_disabled":"Gift card is disabled","shopify.errors.gift_card_expired":"Gift card is expired","unexpected":"Unknown error occured. You may enter your discount code during the checkout"},"freeShippingLabel":"Free Shipping"} || {"placeholder":"Discount code or gift card","submitBtn":"Apply","codeLabel":"Code:","discountLabel":"Discount:","giftCardLabel":"Gift card:","total":"Total:","errorAutomaticDiscount":"A discount has been applied to this order. You can’t add another discount","errorCode":"Unable to find a valid discount matching the code entered","tooManyAttempts":"Too many attempts please try again in a few minutes","errorNetwork":"Network error occured.
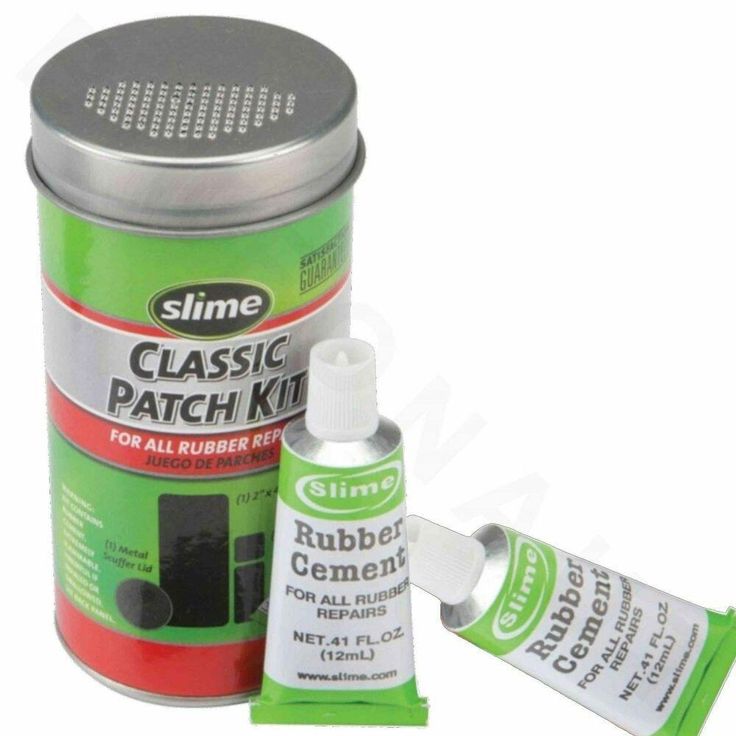 You may enter your discount code during the checkout","authorized":"Discounts are available only for authorized users","messages":{"shopify.checkout.order_summary.cart_does_not_meet_discount_requirements_notice":"\u003cstrong\u003e{{ code }}\u003c\/strong\u003e discount code isn’t valid for the items in your cart","shopify.checkout.order_summary.discount_requires_customer_notice":"Enter your shipping information to apply the \u003cstrong\u003e{{ code }}\u003c\/strong\u003e discount code","shopify.checkout.order_summary.customer_does_not_meet_discount_requirements_notice":"\u003cstrong\u003e{{ code }}\u003c\/strong\u003e discount code isn’t available to you right now","shopify.checkout.order_summary.shipping_information_does_not_meet_discount_requirements_notice":"\u003cstrong\u003e{{ code }}\u003c\/strong\u003e discount code isn’t available for your shipping address","shopify.checkout.order_summary.customer_already_used_once_per_customer_discount_notice":"The {{ code }} discount code has already been used","shopify.
 checkout.field_errors.reduction_code_code_not_found":"Enter a valid discount code or gift card","shopify.checkout.field_errors.reduction_code_discount_not_found":"Enter a valid discount code","shopify.errors.discount_not_found":"Unable to find a valid discount matching the code entered","shopify.checkout.order_summary.discount_already_applied":"A discount has been applied to this order. You can’t add another discount","shopify.errors.discount_disabled":"This discount has been disabled","shopify.errors.discount_expired":"This discount is not valid anymore","shopify.errors.discount_limit_reached":"This discount has reached its usage limit","shopify.checkout.field_errors.reduction_code_gift_card_code_invalid":"Enter a valid gift card","shopify.checkout.field_errors.reduction_code_gift_card_unusable_with_subscriptions":"You can’t use a gift card to buy a subscription","shopify.checkout.field_errors.reduction_code_gift_card_unusable":"You can’t use a gift card to buy another gift card","shopify.
 checkout.field_errors.gift_card_already_applied":"This gift card has already been applied to your order","shopify.checkout.field_errors.gift_card_disabled":"This gift card is no longer available","shopify.checkout.field_errors.gift_card_expired":"This gift card has expired","shopify.checkout.field_errors.gift_card_depleted":"This gift card has no funds left","shopify.checkout.field_errors.gift_card_currency_mismatch":"Only gift cards in {{ checkout_currency }} can be used with this order","shopify.checkout.field_errors.physical_gift_card_invalid_quantity":"Physical gift card line items must have a quantity that matches the number of gift card codes","shopify.checkout.field_errors.physical_gift_card_duplicate_code":"Physical gift card line item contains duplicate code","shopify.checkout.field_errors.physical_gift_card_invalid_code":"Physical gift card code is invalid","shopify.checkout.thank_you.gift_card_confirmation_by_text":"Gift cards are sent by text. If you haven’t received yours, try sending them again or contact us","shopify.
 checkout.thank_you.gift_card_confirmation_by_email":"Gift cards are sent by email. If you haven’t received yours, try sending them again or contact us","shopify.errors.gift_card_already_applied":"Code has already been applied to your checkout","shopify.errors.gift_card_code_invalid":"Code is invalid","shopify.errors.gift_card_currency_mismatch":"{{ gift_card_currency }} gift cards can’t be applied on {{ checkout_currency }} orders","shopify.errors.gift_card_depleted":"There are no funds left on this gift card","shopify.errors.gift_card_disabled":"Gift card is disabled","shopify.errors.gift_card_expired":"Gift card is expired","unexpected":"Unknown error occured. You may enter your discount code during the checkout"},"freeShippingLabel":"Free Shipping"}; } window.scPrimaryLocale = 'en'; if (!window.scThemeConfig) { var scThemeConfig = { cartDiscountSelector: {}, ajaxDicountSelector: {}, ajaxTotalSelector: {}, cartTotalSelector: {}, }; } var scProduct = 41294382137535; var scProductUrl = '/products/sxs-utv-atv-pro-kit'; var cartTotal = 0; var __assign = (this && this.
 __assign) || function () { __assign = Object.assign || function(t) { for (var s, i = 1, n = arguments.length; i
 I chose the best tire repair kits by looking for products that are designed for easy, on-the-road use when tires spring a leak or get punctured. I took a look at many different types of tire repair kits, from plug style to patches, considering options for car tires as well as motorcycle, bike, lawn mower, and ATV and UTV tires. Those that were easy to use and could reliably stop a leak – at least long enough to travel additional miles so you can make it home or to a tire shop – were my top picks, and I looked at the patching style, security, and reported durability to determine which were the best of the bunch. Repair kits that included coverage and items for a variety of different kinds of tire woes were also top choices.
Our reviews are driven by a combination of hands-on testing, expert input, “wisdom of the crowd” assessments from actual buyers, and our own expertise. We always aim to offer genuine, accurate guides to help you find the best picks.
Learn more
Best Overall: Rhino USA Tire Repair Kit
Best Value: Pittsburgh Automotive Radial Tire Patch Kit
Honorable Mention: Husky T-Handle Tire Repair Kit
Best for Small Vehicles: Slime Patches with Rubber Cement
Best for Off-Road Tires: GlueTread External Patch Kit
Best Comprehensive: Smittybilt Tire Repair Kit
Rhino USA Tire Repair Kit
SEE IT
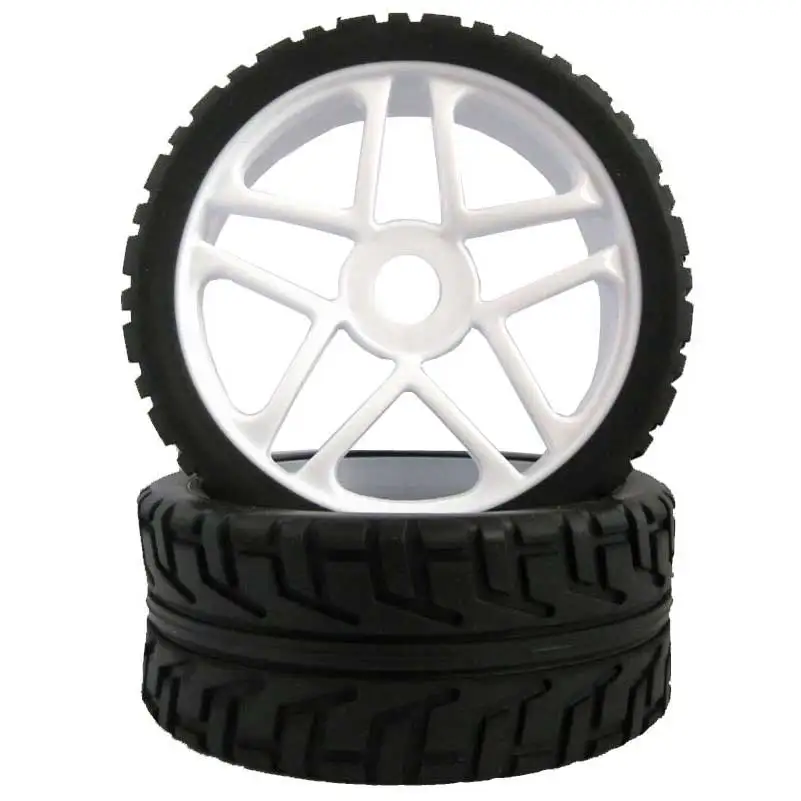
When it comes to tough tires and dependable repairs, the Rhino USA Tire Repair Kit is your top choice. This kit is versatile and highly capable, providing repairs for tire punctures of all kinds. It’s comprehensive, providing you with durable, heavy-duty plugs as well as well-built tools that’ll make repairs a little easier. Featuring 86 pieces packaged in a convenient and compact storage kit, you’ll have everything you need to quickly plug up tire problems, seal them, and get back on the road without waiting for a tow. The entire process is simple enough that it takes just 15 minutes to get you driving safely once again. And it’s a suitable fix for everything from your car tires to your RV tires to bike, lawnmower, and off-road vehicle tires.
However, it’s important to remember that this kit is only meant to be used on tubeless tires.
Pittsburgh Automotive Radial Tire Patch Kit
SEE IT
With a budget-friendly price and an incredibly easy application method, the Pittsburgh Automotive Radial Tire Patch Kit is a great value pick.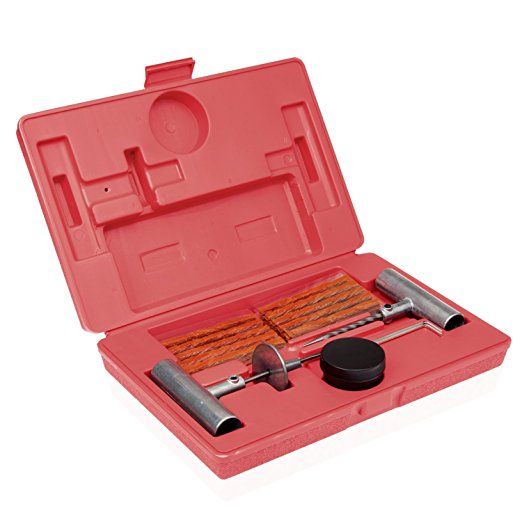 In this affordable kit, you’ll get a selection of 56 rubber patches in sizes from 1 inch to more than 4 inches and in various shapes. Plus, this kit also includes two tubes of rubber cement for a strong, secure patch seal and two small metal scuffers to ensure your patches can properly adhere to the tire. With a little roughing up and the strongly adhesive rubber cement, these patches should cover tears and punctures fast. And best of all, there are enough to cover many kinds of tires. These patches work on any radial tire, but they’re also a quick fix for bike tires, inflatables, rafts, and more.
The only drawback is that these patches tend to work best on smaller tires. While they’re technically suitable for use on all radial tires, the best performance isn’t found on heavy-duty tires or tougher, thicker off-road tires.
Husky T-Handle Tire Repair Kit
SEE IT
The Husky T-Handle Tire Repair Kit is a great all-in-one kit that’ll have you covered no matter what you happen to roll over on the road. With tools and sealing solutions that work for both punctures and tears, this comprehensive option includes plugs and patches for every kind of seal. It’s got both tire plugs and tire patches, plus a tube of rubber cement for sealing, a tire rasp, a tube scuff pad, and insertion tools so you have everything you need in one compact kit that stashes in your glove compartment. These assorted tools are made for roadside use, and their design cues, like a pistol grip design on the tools and handheld scuff pad, are comfortable though small.
Unfortunately, the tools require quite a lot of strength to use properly, and getting plugs and patches in place can be a challenge for some users. It’s also somewhat tough to get a secure enough seal to prevent slow leaks, so you’ll only want to rely on this repair kit for a quick fix to get to the shop.
Slime Patches with Rubber Cement
SEE IT
When it comes to small vehicles and smaller tires, a set of Slime Patches with Rubber Cement is a handy tool to keep nearby.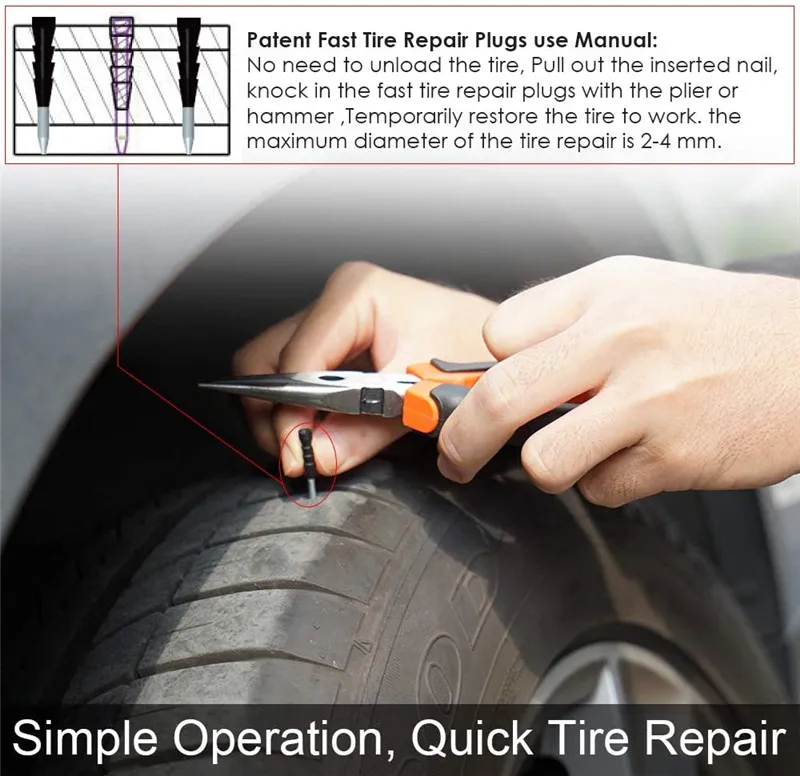 This tire repair kit includes 56 patches, with a selection of rounded rectangle, round, square, and rectangular patches in sizes from 21 mm to 75 mm. Plus, those patches come with a pair of tire scuffers to rough up the rubber for better adhesion and two tubes of strong rubber cement. Made specifically for puncture-related flats on the tires of ATVs, lawnmowers, bikes, and similar vehicles, you can apply your tires easily and get a longer lifespan out of them, and this kit includes plenty of patches for multiple repairs over time.
This kit is not meant for use on car or truck tires. It’s designed for smaller vehicles such as ATVs, UTVs, lawnmowers, and bikes. Additionally, because the patches and rubber cement need to sit and set for a while, you shouldn’t expect to be able to slap a patch on and get back to work.
GlueTread External Patch Kit
SEE IT
If you need a tougher solution for off-road tires, the GlueTread External Patch Kit might be your best bet.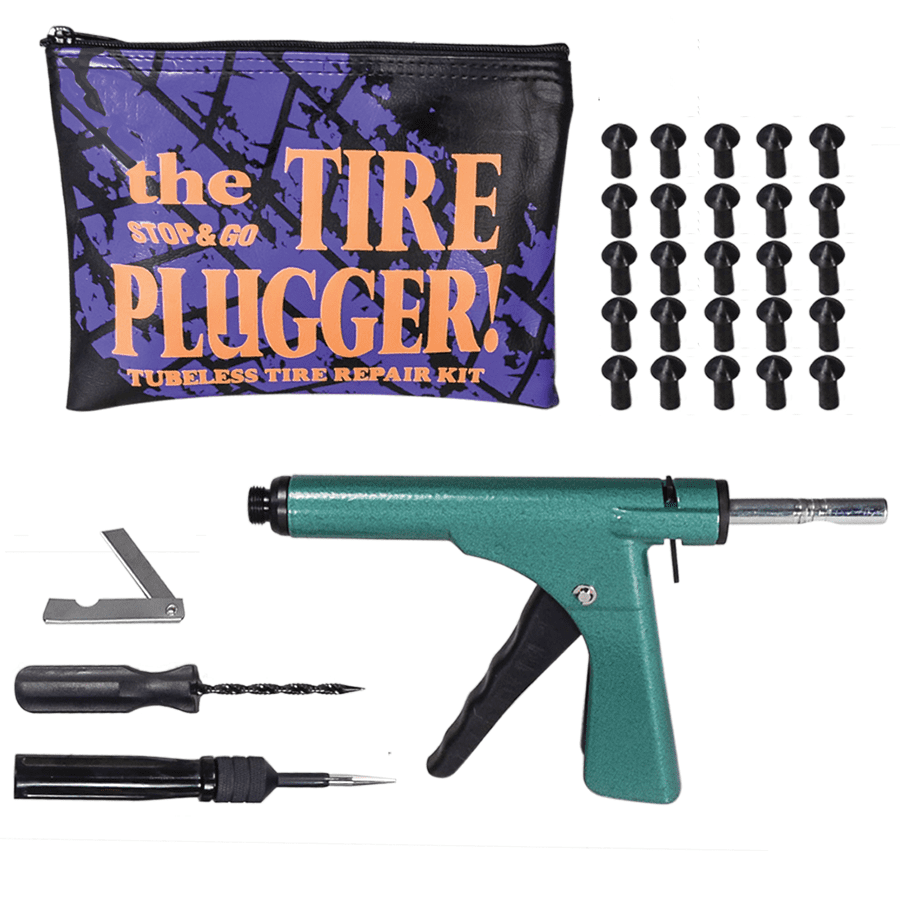 Made specifically for repairs on off-road tires, this kit is able to stop leaks, cover punctures, and fix tears. You can use these rubber compound patches on all types of off-road tires, whether you’re driving a car, crossover, or ATV. Meant to be extra easy to apply, these patches come with durable GlueTread adhesive, which dries and bonds in just minutes. Plus, they’re so easy to apply that you don’t need any special tools (aside from the included sandpaper), and you don’t have to remove your tires or wheels. As an added bonus, there’s so little down time that you can repair your tire and get back to normal use the very same day.
The only disadvantage of this tire repair kit is it doesn’t include a lot of patches. With just two of each patch size, you won’t be able to make more than four total repairs; you may need to purchase a second if you’re prone to punctured or torn tires.
Smittybilt Tire Repair Kit
SEE IT
The Smittybilt Tire Repair Kit has it all. Whether you’re in need of a set of plugs to stop puncture leaks or want to patch up your tire from the inside to fix damage, this set includes everything you need. And there’s no rubber cement required to get the job done. Featuring an array of tools that includes lubricant, a folding knife, needle nose pliers, and a tire pressure gauge, you’ll get both interior tire batches and a set of self-vulcanizing plugs that bond with your tire’s rubber compound. This kit’s items are tough enough for car and truck use, but they’ll also work well for trailers and off-road vehicles. The entire kit is compact and lightweight, with tools made from aluminum so it’s easy to carry anywhere.
As with many other plug and puncture repair kits, this tire set comes with some challenges. Its tools and its plugs can be difficult to securely seal up. You’ll need hand strength and force to get the job done.
The Rhino USA Tire Repair Kit is your best bet for fixing tire punctures on the road, with a set of highly versatile repair items and tools that can withstand wear once applied. However, if you’re looking for an affordable price and super speedy fixes, the Pittsburgh Automotive Radial Tire Patch Kit is another great value-rich pick that includes patches alone.
Before you grab any set of tire patches, know what qualities and components make for a quality tire repair kit. Here’s what to think about as you’re equipping your vehicle with a kit that’ll help you perform quick tire fixes.
Tire patches are simple; they’re pieces of rubber with adhesive backing. When your tire gets punctured or torn, you can stick a patch over the problem area to reseal the rubber. Patches can provide a strong, lasting seal, but they do have limitations. They require a bit more work to get in place, and they can’t be used for sidewall holes, big holes and punctures, or other not-straight, oddly located problem spots.
Tire plugs are made for punctures and holes rather than tears, rips, or similar tire issues. Slim strips made out of leather and rubber compounds, tire plugs are inserted into a hole with a handy tool (which is usually included in the kit) to create a seal on the inside of the tire. Plugs are ideal if you’ve rolled over a nail, screw, or similarly sized item, as they can fix small holes. However, they can be tough to use correctly, and like patches, they have limitations when it comes to sidewall holes, flat tires, and bubbled areas of rubber.
An all-in-one tire repair kit is exactly what it sounds like: A single solution that includes everything you need to both patch and plug your tires. These more expansive kits include tire plug strips and tools, plus tire patches. They can also include additional accessories meant to make roadside repairs easier and quicker. These are a great item to keep in your emergency kit.
Tire repair kits are usually affordable. If you’re looking for patches that’ll repair smaller tires, such as tubeless bike tires, lawnmower tires, or even ATV and UTV tires, you can get a set of two to 10 patches for $2 to $15. Typically, these patches cost less than $10. For car tires, you’ll spend a little more; patches alone can run between $5 and $20. And if you want comprehensive tire repair, you can find all-in-one kits that include both patches and plugs, plus any tools you need to stop leaks or fix punctures, for $20 to $35.
You’ve got questions. The Drive has answers.
A: As long as they’re used correctly and you follow the instructions, tire repair kits shouldn’t ruin your tire. Most of these products are meant to be a temporary fix for damaged tires, so you’re going to ultimately need to replace your tire in the long run.
A: While tire plugs might seem more secure than a rubber patch you stick on, patches are actually considered the most durable repair option. Sure, plugs are a reliable fix, but tire repair patches last longer and tend to stay securely in place better.
A: Quick tire fixes aren’t meant to be used for long-distance driving. Whether you’ve applied a tire plug or tire patch, it’s best to only rely on these repairs for a few miles.
A: Patches can safely cover holes up to a quarter-inch long in your tire. Anything bigger, and a quick patch fix likely won’t be as secure or hold in air as well.
There is not always a way to call a tow truck, and driving on a flat tire, “chewing” the rubber and killing the rim is at least uncomfortable.
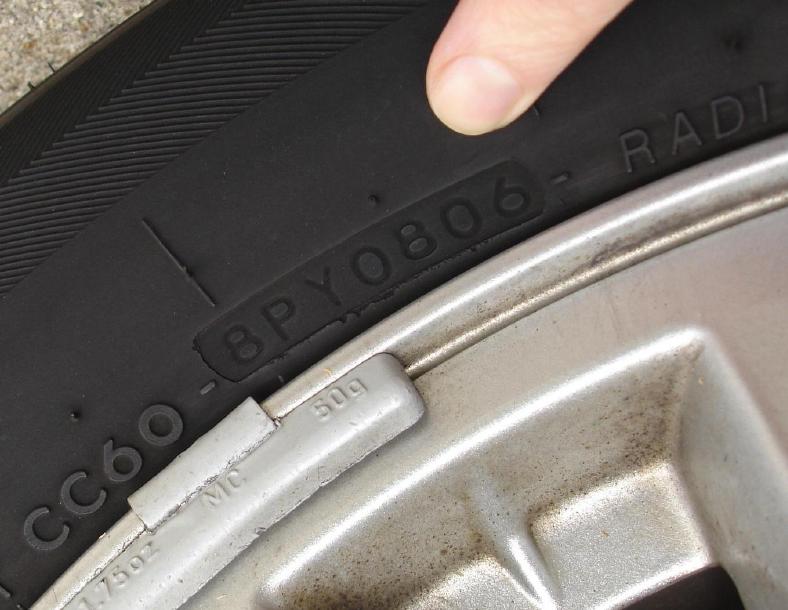
The very first replacement of rubber on a motorcycle or scooter gives reason to think - what is better in terms of quick repairs: tubeless ones that do not require wheel disassembly to eliminate a puncture, but leave the rider helpless if, along with damage, it “led” and flattened the edge of the disc? Or chambers - allowing sealing almost ring breaks (if only there were enough patches), but requiring the removal of rubber from the rim for this? The unequivocal answer is no. Few classics, straights or tourers today remain "loyal" to tube rubber models: tubeless tires are lighter, softer, warm up and cool down faster thanks to simplified heat transfer. In sports, more precisely - enduro and motocross, chamber - on the contrary, prevail: only spoked wheels can "play", withstanding strong alternating loads during landings and impacts.
The nuance is that a tire with a chamber can be put on any spoked or cast disc, and a tubeless one can only be placed on a cast one, because only it can ensure tightness. Tube – can be installed in a tubeless tire as an emergency measure. In case of major damage to the sidewall, cracks or curvature of the edges of the rim, this will make it possible, after pumping up the wheel, to reach the nearest tire service (and there already - straightening, balancing and other maintenance according to the rules). True, for such a focus, it is advisable to take a camera with a face value one less than the diameter of the disk, otherwise it will create folds inside that will rub for a couple of hundred kilometers. The resource of such a “treatment” is large - until the next puncture, like a new one.
It depends on the magnitude of the damage whether it will be possible to eliminate it on your own, or whether you will have to “surrender” to the motorized tow truck. In tubeless - holes up to 5–6 mm are patched, in chambers - as much as there is enough glue and patches, the main thing is the condition of the tire. To determine the extent of the disaster - find a place where you can safely stop without violating traffic rules (where it is prohibited - you will have to sacrifice tires and drive on).
If the wheel deflates slowly, and the object that pierced it is still inside, you can try to carefully drive to the tire shop. A completely deflated "pancake" will have to be resuscitated on the spot, or - remove the wheel and take it to the service.
To find a hole in a tubeless tire, if it is very thin and not immediately visible, the wheel must be pumped up, slowly pouring water - bubbles will go. In place, tubeless tubes can be “harnessed”, or filled with sealant inside, without removing from the motorcycle.
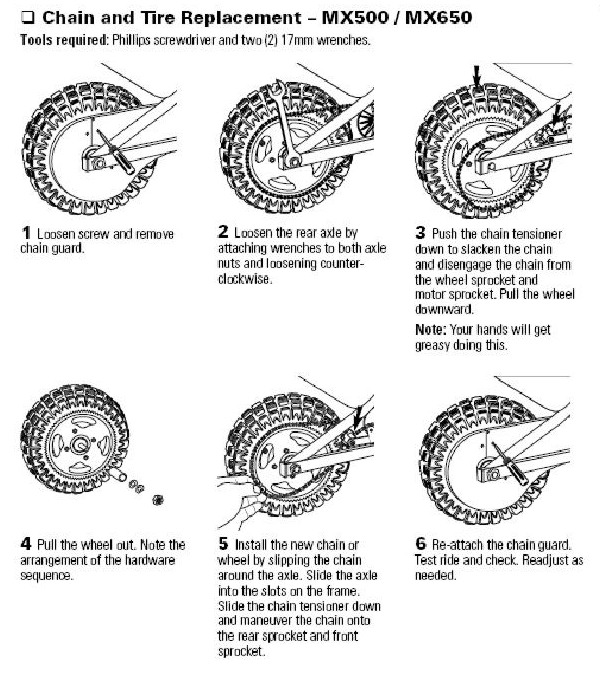
With the second type of tires - more difficult. A torn balloon must be removed from the tire to detect a defect and seal. In a good way, the wheel must be removed from the motorcycle and disassembled on a clean, flat, hard base. Suppose such a “patch” can be provided even off-road, but how to remove the wheel on a motorcycle if it does not have a central stand? And shooting is not required. The motor must be carefully laid on its side, after making sure that the faucet is closed, gasoline does not flow out through the tank cap (antifreeze does not flow from the tank if the motor is “dropsy”), and removing the plastic or wardrobe trunk with fragile contents (if any).
You will have to unscrew the wheel from the motorcycle only if you need to replace the tire, or it is decided to patch the tubeless tube with a “fungus”. In the absence of a central stand, this will also have to be done on a lying bike, or - make this stand from improvised materials (bricks, stump, car jack), placing them under the crankcase protection from below, the central tube of the frame, the duplex jumper (but not under the plastic, itself engine crankcase or attachments!), under both footrests - if they are not folding, or - under the pendulum. Before removing the rear wheel on a motorcycle, the front fork must be loaded with something, or an even higher lining is made.
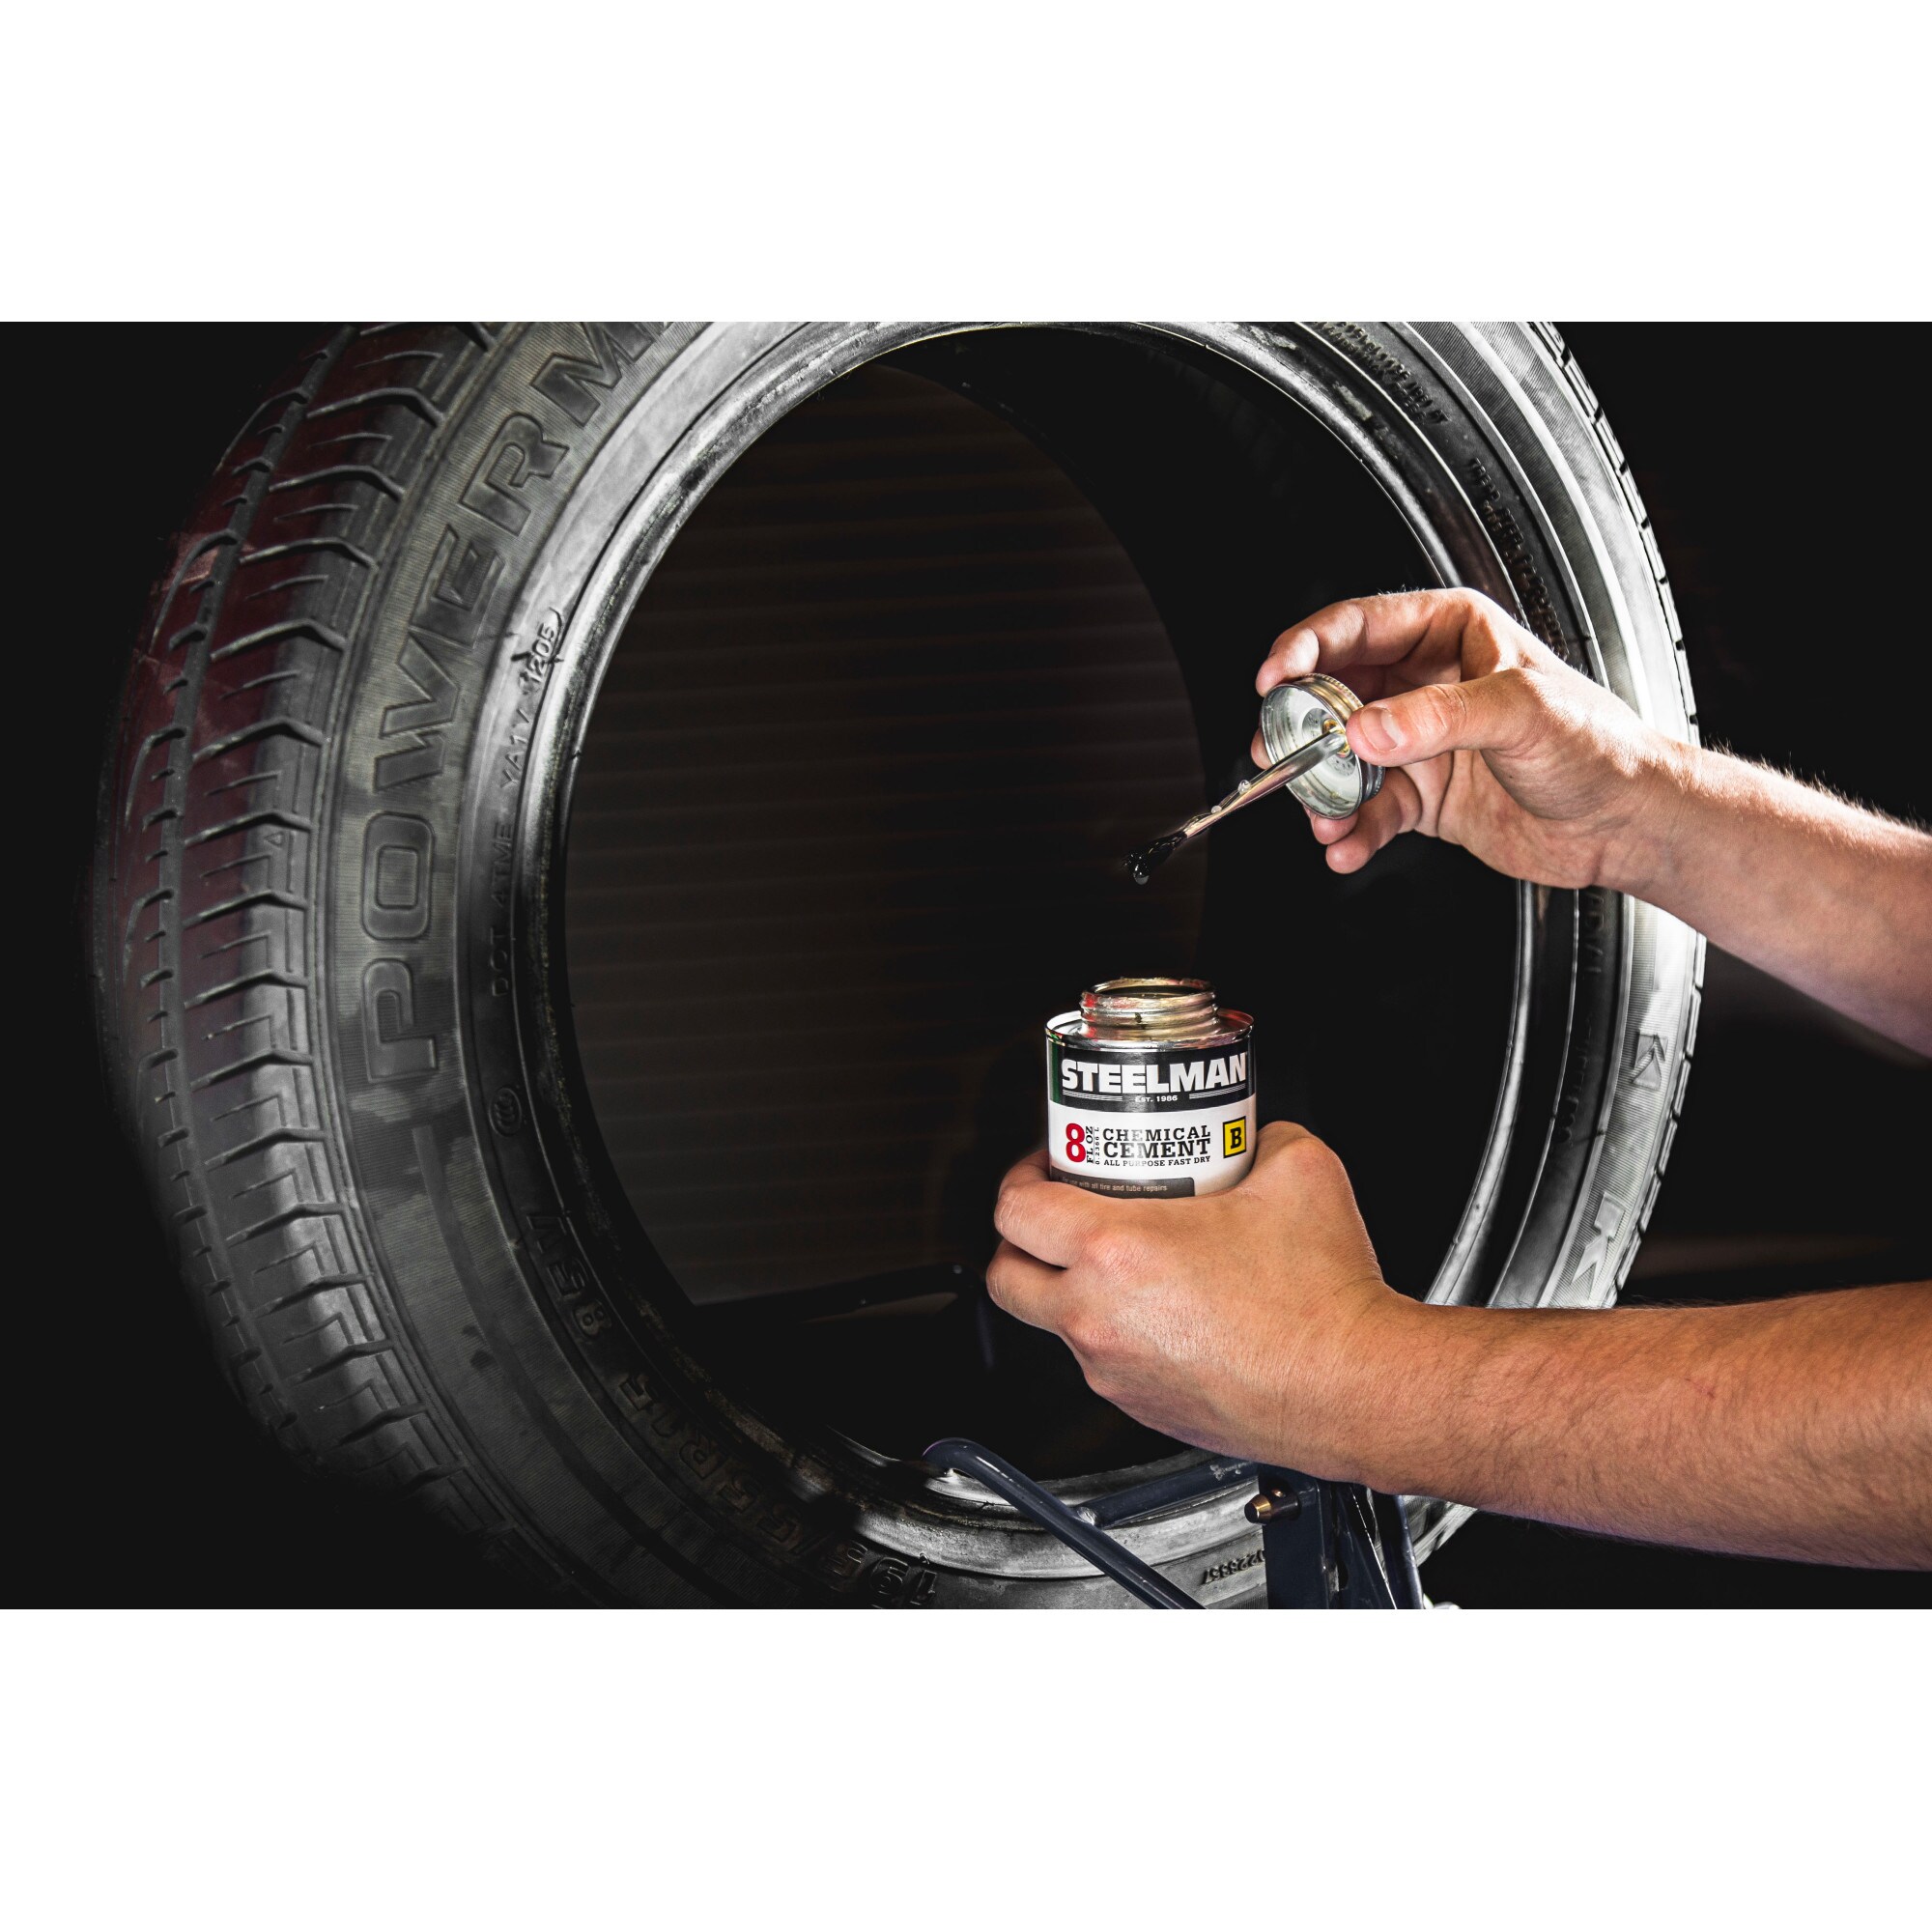
In a motorcycle tire fitting shop, tubeless tubes are repaired by cold vulcanization. They are removed, disassembled, the puncture site is cleaned from the inside, degreased, lubricated with glue and a calibrated “fungus” patch is inserted into the hole from the inside. The fungus itself is a thin plate of rubber with a “leg” tube in the center. The leg - by the guide wire is dragged through the hole of the damage, and the "hat" seals it.
After half an hour - you can put the tire back. The reliability of such a repair is high, the patch does not cause a significant imbalance, the service life of a sealed tire does not decrease.
This method is also applicable on the road, the main thing is to have the necessary equipment and materials with you:
The fungus repair procedure does not require much experience. The main thing is to keep it clean, fully clean the place where the patch fits, let the glue dry slightly to a dull finish and press (roll) the surface of the fungus with high quality, expelling all the air between the layers. If necessary, you can degrease the place before gluing with gasoline, but without the rest of the above, it will not be possible to fully carry out repairs.
The compressor is sometimes replaced by a small cylinder of compressed air or carbon dioxide. Unlike a mechanical pump, it will immediately create a “throw” of pressure, pressing the tire beads against the rim flanges (in emergency cases, even a fire extinguisher was used to pump flat tubeless wheels). When connecting the compressor, start the bike's engine before you start inflating the tire - let it idle. Otherwise, the motor can "land" the battery, and you will not start.
Manometer - needed for control. It is undesirable to pump over the repaired tire. It is recommended to "inflate" 0.2 atmospheres less than the nominal value. Inflating too little is also bad: a flat tire has a larger contact patch with the road, so the place of a fresh patch will deform more.
“Burning” a tubeless tube and sealing its internal cavity through a nipple are quick, simple methods that do not require special skills. To repair the damage, you only need the materials themselves, and how to pump up the wheel.
Now in Moscow, and not only, 6-5 varieties of cans with a sealant are sold - a quickly hardening "liquid rubber", with a volume of 800 to 250 ml.
Applying "Anti-Puncture" is simple: put a tube with a fitting on the nipple of the camera, turn the can over, and hold the button according to the instructions. Then - pump up the wheel, cleaning the nipple from the foam, roll it, making a full turn to distribute it.
The sealant is blown out with air into the puncture hole and clogs it, solidifying. After 20 minutes - you can go. Reliability of repair is high. Resource - until the next puncture.
If you have a compressor, start immediately pumping up the wheel, so it will be easier to work with a puncture, insert a patch, and it will swell faster.
Procedure:
You can go in 5 minutes, you just need to make sure that it doesn’t descend anywhere else.
Outwardly identical, repair kits for harnessing wheels can differ in price by almost half. This variation is explained by different configurations - one will have only three items, the other - six or seven.
A complete tubeless tire repair kit contains:
Regardless of the cost, you need to choose a kit in which the harnesses will be reinforced, and the awl - with a deep spiral winding (notch), and not a “needle file”. Inserting a flagellum is sometimes easier with a regular thin screwdriver. If there is no glue in the kit, or it has dried up, the flagellum is moistened with gasoline.
At motorcycle service stations and car services, holes in the chambers are closed by hot vulcanization: a layer of raw rubber is applied to the cleaned, fat-free puncture site and, after squeezing it well, it is heated with a special “iron”. Iron - burns, layers - are fused into a single whole. Reliability of repair is high. The resource will be almost like a new one.
Cold vulcanization (patching) - used if the workshop is not equipped with a vulcanizer. In this case, the quality of the service and the reliability of the repair will depend on the accuracy of the master. For the convenience of gluing, the camera is completely removed in the service, but, I repeat, this is not necessary. It can be repaired on the spot in the same way (there are no other options except for replacing the camera), but without removing it from the motorcycle.
This can only be done if you have two metal mounting blades. At least one, the second can be replaced with another flat tool. You can still disassemble the wheel with a wide screwdriver and a “family” key wrapped with electrical tape. But this is only as a last resort, otherwise you can damage the cord.
Sequence of work:
The fencing must be carried out twice as carefully and more slowly than dismantling, lubricate the side with water or soap, “help” more with your hands, otherwise there is a risk of picking up the edge of the chamber with a spatula and tearing it.
Important! If the wheels of the motorcycle are equipped with tow bars - before pressing the tire bead from the rim, you need to loosen this tow bar! But do not unscrew the nut completely, do not disassemble to the end.
A standard “first aid kit” (a set for repairing classic motor rubber) contains only patches and glue, so it is advisable to supplement it yourself with a piece of “skin” or a needle file. You can degrease with gasoline, or apply a little glue first and wipe off immediately, rolling up the dust with it.
Now there is no shortage of specialized motorcycle workshops not only in Moscow - in all major cities there are motorcycle helpers who help motorcyclists directly on the track, or tow to where you can quickly change the camera, or patch the tubeless correctly, so that there is no trace left. Where there is a guarantee.
Self-replacement of a tire on a motorcycle requires a certain physical condition, and for the first time - a “kilometer of nerves”. At the service station, instead of you, automation will “sweat”, which will not lock up the board and will not scratch the disc coating with a spatula. The main thing is to do it quickly (if you need to go urgently, the price sometimes does not matter).
Repair at the service - may be the only possible one if, due to driving on a flat tire, the tire nipple is turned and torn off. Especially if he flew off and got lost, but there is no spare. In mototiremontazhke - there is always a set of consumables for any wheel diameter. In the same place, in extreme cases, you can buy a new tire, or a used dokatka.
In addition to the patch, for normal operation of the wheel, balancing must be ensured. This is generally a useful procedure during any change of rubber, otherwise if there is a strong imbalance, the wheel bearing will inevitably break due to vibrations, and the hands will quickly get tired and “buzz” after long rides.
The first couple of tens of kilometers - do not drive, go at the speed of the stream. Stop, check for a flat tire. If the patch is not of high quality, it will manifest itself almost immediately. Parking will tell about the long-term perspective: if the cylinder has not lost volume in the first day or two, then everything is in order, you can drive as before.
Knowing what to do if a flat tire is on the road is important not only “for yourself”. To help a newbie or a fragile girl is to earn an important “plus in karma”, which will later return at the right moment. But, I hope, this knowledge will be useful to you only in theory. Good luck on the roads, no nail, no wand!
Minor damage to the running surface and sidewalls of a tire, such as foreign object punctures, can be repaired with a tire repair kit.
Tire damage larger than 4 mm and rim damage cannot be repaired with a tire repair kit.
Driving with too low tire pressure or a flat tire causes invisible damage that cannot be repaired with a tire repair kit. Park the car and contact a service station for help.
| Fig. 1.266. Tire repair kit location |
The tire repair kit is located in the trunk compartment, in the spare wheel well (Fig. 1.266).
Using the tire repair kit
Remove the bag containing the tire repair kit from the compartment. Carefully remove the kit parts from the bag.
Remove the compressor.
Remove the power cord and air hose from the compartments on the underside of the compressor (Fig. 1.267).
| Fig. 1.268. Compressor Air Hose Installation |
Screw the air hose of the compressor to the union of the flask with sealant (Fig. 1.268).
Insert the bottle of sealant into the holder on the compressor.
Install the compressor close to the wheel so that the bottle of sealant is upright.
Unscrew the valve cap of the damaged tire.
| Fig. 1.269. Screwing the inflation hose onto the tire valve |
Screw the inflation hose to the tire valve (Fig. 1.269).
The compressor switch must be in position .
Plug the compressor cord into an accessory socket or cigarette lighter socket.
Switch on the ignition.
| Fig. 1.270 . Compressor on/off button |
Set the toggle switch on the compressor to position I, the tire will begin to fill with sealant (Fig. 1.270).
| NOTE When the sealant bottle is empty (approx. |
The sealant will be fully pumped into the tire. The tire is then inflated with air.
The specified tire pressure must be reached within 10 minutes. Turn off the compressor when the specified pressure is reached.
If the prescribed tire pressure is not reached within 10 minutes, the tire repair kit must be removed. Push the vehicle about 2 m (per tire revolution) in the direction of travel or backwards. Reinstall the tire repair kit and continue the inflation process for another 10 minutes. If the prescribed tire pressure cannot be reached within this time, the tire is too badly damaged. Park the car and contact a service station for help.
| NOTE Relieve excess pressure using the button above the pressure gauge ( fig.  |