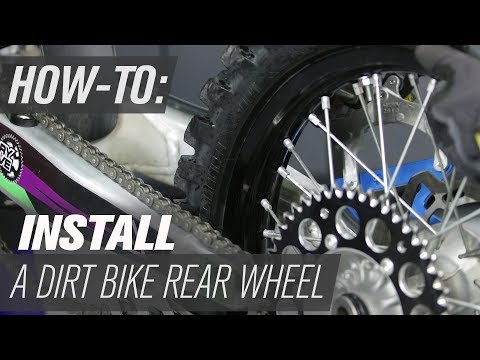
Removing an inner tube for repair or replacement can sometimes be a real fight but with a bit of patience and a few pro tips, you can make things a lot easier for yourself.
Our tech team are switching tyres and tubes on a weekly basis so here are their top tips to get the job done.
If you're looking for more helpful maintenance advice, Cyclingnews is bringing you a series of guides so that you can learn how to perform basic bike maintenance tasks yourself. Check out the other guides that are available:
If you can get the tyre on and off without levers then that minimises the accidental pinch risk, but that’s a big ask with some tyre and rim combinations. Invest in quality levers, as cheap ones can bend or snap, and beware old-school metal levers particularly if you’re using carbon rims.
You also need a decent pump. A hand pump will be fine for lower pressures on a gravel bike, but if you’re heading upwards of 60psi then a proper workshop track pump makes things much easier. Obviously, you’ll need a fresh inner tube that’s the right size for your tyre and has the right valve type and valve length.
Today's best deals
Lezyne Power Lever XL
$11.99
$9.94
View
See all prices
Lezyne Alloy Floor Drive pump
$89.86
View
See all prices
 Deflate the tyre
Firstly you need to remove the wheel from the bike. Now if the tyre isn’t already fully deflated, let the air out of the inner tube by loosening the small barrel at the top of the Presta valve slightly and then pressing it down. Now unscrew and remove the knurled collar at the base of the valve.
If you’re working on a kid's bike or mountain bike with the car-style Schrader valve, then depress the pin in the centre of the valve to let the air out.
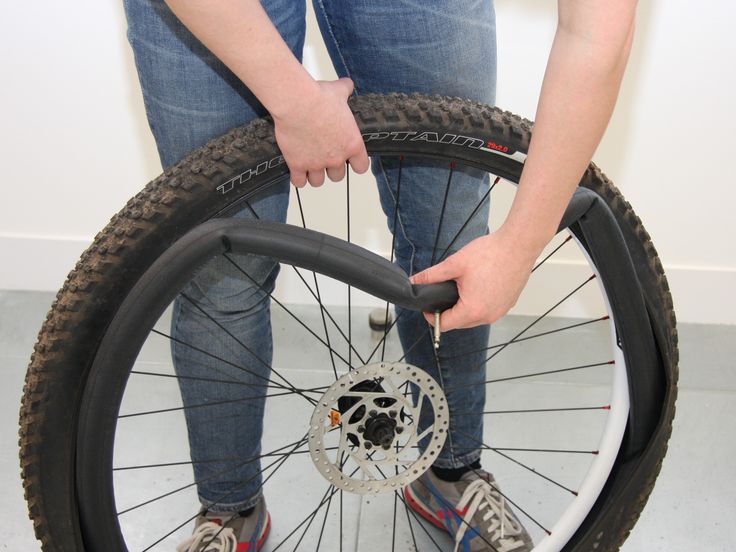
Unseat the tyre from the edge of the rim to create slack (Image credit: Mick Kirkmann)With the innertube deflated, squeeze the tyre inwards to push the bead into the centre of the rim. Do this all the way around the tyre on both sides so it feels baggy on the wheel.
Gather all the slack to one point and push the tyre over the edge of your rim with your thumbs (Image credit: Mick Kirkmann)If the tyre is a loose fit, you can lift the whole wheel by the tyre and give it a shake to get all the slack to one place.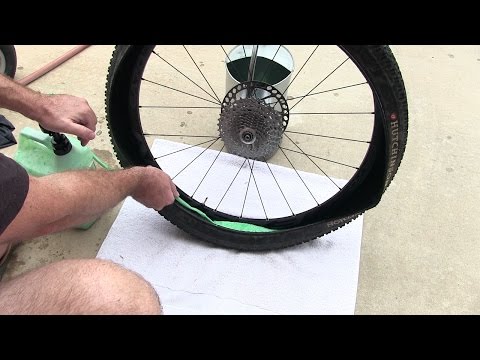 Otherwise, you’ll have to collect that slack manually by pushing the tyre around the wheel in both directions simultaneously, aiming to make it as baggy as possible when your hands meet again at the bottom of the wheel.
If there’s plenty of slack or you’re just feeling strong, push the edge of the tyre off the rim with your thumbs. This isn’t just about flexing your skills and tendon toughness, it also removes any chance of trapping the inner tube between the rim and the tyre lever, and puncturing it. It’s worth persevering if you can.
Image 1 of 2
Hook the tyre lever under the tyre and lever it out of the rim (Image credit: Mick Kirkmann)Slide the tyre lever along to rim to unseat the tyre (Image credit: Mick Kirkmann)Don’t be ashamed if you need to use tyre levers though, just be careful. Sneak both levers under the bead about 2cm/1inch apart with the spoon side hooking under the bead of the tyre. Make sure you haven’t trapped the inner tube against the rim with the other side or you’ll create another puncture you need to fix.
Press one of the levers down to hoist the tyre edge over the rim, then press the second one down to pull a longer section of the tyre clear. Hook one of the tyre levers around the nearest spoke to keep the tyre from creeping back onto the rim.
If the tyre is really tight then you might need to use both levers simultaneously to pry the tyre over the rim. If you're using two levers to work away at a very tight tyre, be careful, as there's often a risk of things going flying. Watch yourself and keep the danger zone away from valuables.
Once removed the tyre can be easily inspected for cuts or wear (Image credit: Mick Kirkmann)Now work around the whole tyre with the levers until it’s completely off the wheel all the way around. Leave the far side of the tyre in place and push the valve back through its hole before gently pulling the inner tube out.
With the inner tube removed it’s a good time to check the tyre for any damage or splits in the tread. Check for thorns, nails etc. that might have penetrated through to the inside and remove them, otherwise they’ll puncture the fresh inner tube as soon as you put it in. Be careful if you’re running your finger around inside the tyre without looking first, as you don’t want to puncture yourself! Check the rim of the wheel for cracks, dents or sharp edges too.
If it isn’t already lined up, pull the tyre around so the name or logo matches up with the valve hole. It makes it much easier to find the valve in a hurry, gives you an easy reference point for finding punctures, and it looks better in pictures too.
To reduce the risk of pinching, inflate the inner tube enough for it to take some shape. Remove the threaded collar, keeping it handy for later, and then push the inner tube valve through the rim. Massage the inner tube into the belly of the tyre, so it doesn’t push out over the rim edge. Be mindful as you do this, and avoid twisting or pinching the inner tube.
Some tyres can be slid on using only your hands (Image credit: Mick Kirkmann)Starting opposite the valve use your thumbs to start persuading the tyre back onto the rim. If you're working with tight tyres, remember how you moved the slack of the tyre into one place before removal, and try to emulate that movement as you push the tyre back onto the rim. You want to be left with as much slack as possible for the last part of the process. Be super careful not to trap and puncture the inner tube between the bead and the rim.
Try to get the tyre on with your thumbs as far as white knuckle, tendon straining determination will take you. When you really can’t get it on any further by hand insert the levers carefully under the tyre edge. Position them about an inch/2.5cm from each unfitted end. Brace one lever against the tyre to stop it slipping back and then use the other lever to lift the tyre onto the rim. Alternate this action working inwards towards the valve.
Carefully inflate the tyre whilst checking for pinches or bulges (Image credit: Mick Kirkmann)Once the tyre is on, double-check that there are no bits of inner tube poking out. Push the valve back into the tyre to check that it's not trapped and then thread the lock ring back onto the valve to secure it into the rim. Keep checking all the way round as you gradually inflate the inner tube, watching for any inner tube hernias or weird bulges and bumps in the tyre. Increase pressure until the tyre pops into place all around the wheel, using the line on the bottom edge as a guide to check it’s properly positioned all the way around.
With the tyre up to the right pressure, remove the pump and spin the wheel to double check alignment both side to side and vertically. If there’s anything weird going on, deflate and massage the affected area to re-centre the tube and tyre before re-inflating.
Once you’re happy that everything is settled, you’re ready to ride. Make sure you check the tyre frequently on the first couple of rides, in case something sneaks out of place. Finally, always check both tyres for pressure, damage or debris after every ride.
Today's best road bike tyre deals
Schwalbe Pro One tubeless tyres
$59. 99
99
View
See all prices
Continental GP5000 Clincher Road Tyre
$48.99
View
See all prices
Vittoria Corsa G2.0 TLR Road Tyre
$87.99
$44
View
See all prices
Specialized S-Works Turbo RapidAir tyres
$79.99
View
See all prices
Vittoria Rubino Pro Graphene 2. 0 Road
$59.99
View
See all prices
Pirelli PZero Velo Road Tyre
$63.05
View
See all prices
Individuals carrying out the instructions in this guide do so at their own risk and must exercise their independent judgement. There is a risk to safety if the operation described in the instructions is not carried out with the appropriate equipment, skill and diligence and therefore you may wish to consult a bike mechanic. Future Publishing Limited provides the information for this project in good faith and makes no representations as to its completeness or accuracy. To the fullest extent permitted by law, neither Future Publishing Limited, its supplier or any of their employees, agents or subcontractors shall have any liability in connection with the use of this information, provided that nothing shall exclude or limit the liability of any party for personal injury or death caused by negligence or for anything else which cannot be excluded or limited by law.
Thank you for reading 5 articles in the past 30 days*
Join now for unlimited access
Enjoy your first month for just £1 / $1 / €1
Already have an account ? Sign in here
*Read any 5 articles for free in each 30-day period, this automatically resets
After your trial you will be billed £4.99 $7.99 €5.99 per month, cancel anytime. Or sign up for one year for just £49 $79 €59
Join now for unlimited access
Try your first month for just £1 / $1 / €1
Already have an account ? Sign in here
The latest race content, interviews, features, reviews and expert buying guides, direct to your inbox!
Contact me with news and offers from other Future brandsReceive email from us on behalf of our trusted partners or sponsorsSKI SNOWBOARD GEAR EDUCATION BIKE GEAR EDUCATION TEACH CHILDREN SKIING GEAR SIZING CHARTS
Once you learn this skill, flat tires won't be such a daunting task. It is very simple as long as you have the right tools and the proper technique.
Tools you'll need for the job:
Tire levers
Bike pump or CO2 inflator
New inner tube and/or tire
Firstly, remove the wheel from your bike. Then, nature usually does the second step for you, which is to deflate the tire completely. Once you have done these two steps, it's time to get down to business.
Use your lever to start removing half of the tire's bead (the part that touches the inside of the rim on both sides is the bead). To do this, you need to use the end of the lever that is hooked to get under the edge of the bead. Use the lever to peel the bead over the edge of the rim. Once you have it over the rim, slide the lever along the rim to continue peeling the bead off one side of the rim. Always start peeling the bead off at the valve stem!
Now that you have half of the tire off the rim, you can easily pull the tube out.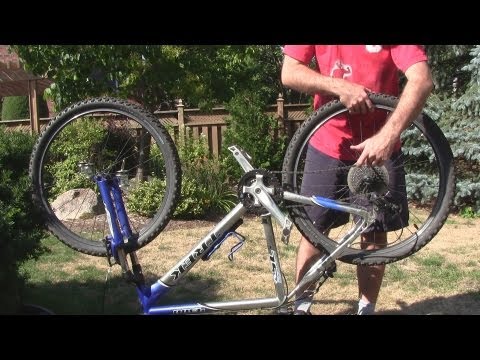 You can either chuck the tube, or find the hole and patch it. Next, check the inside of the tire for the object that punctured your tube. It is very common that you will find a thorn or piece of glass still embedded in your tire. To do this, take a rag, or carefully run your thumb along the inside of the tire where your tube touches it. While you're doing this, you can also inspect the outside tread of the tire to check for cuts. If you feel anything but smoothness, take a razor blade, awl or fingernail and remove the obtrusion.
So, we got a flat, figured out what caused the flat, now we need to replace the tube and be on our way. The best way to do this is to blow a tiny bit of air into the tube to give it shape before putting back into your tire. Start by putting the valve through the valve hole and work your way around, stuffing the lightly inflated tube back into the tire and rim. Once it's all the way in there, start at the OPPOSITE SIDE from the valve and begin putting the bead back onto the rim with your hands. By starting at the opposite side of the valve, it will give you a tiny bit more room to get the last part of the bead over the rim, making life a little easier. So, work your way around the rim setting the bead back onto it. I like to use both hands working in opposite directions from each other. When it gets hard to put the bead on, deflate the rest of the air from your lightly inflated tube.
Now, the hardest part is the last bit. Some tire and rim combinations are worse than others, but most of the time you can do this with your hands. You will find that the last part of the tire's bead is the tightest. It is best if you can do this with your hands, but if necessity presents itself, carefully use the tire lever. The reason it is bad to use the tire lever is because you run the risk of pinching, and puncturing your new tube… So, grab the tire and tube and use your thumbs to lift the bead over the last bit of the rim. It might take a little bit of grunting, but 90% of the time this can be done with your hands.
You've done a great job so far, but you're not quite done! The next couple of steps are important so that you don’t cause your tube to explode in your face!
Once your tire is completely back on your rim it is time to pump it up. If you are using a CO2 inflator to do this, pay close attention! First, you want to push the stem into the tire to prevent the tube from being pinched under the bead of the tire. Then, add a little bit of air to your tube to give the tire shape. I usually put about 20-30 psi in the tire. Now, pick the tire up and spin it in your hand while holding the hub. Inspect the edge of the tire to make sure that the bead is "seated" against the rim evenly around the whole wheel. If it isn't, you will either see a bulge or a depression of the tire against the rim. Use your hands to either pull these depressions out, or push the bead down into the rim. This should be easily done with 20-30 psi in the tube. This is also another good time to look for any big cuts in the tire as the tube will be bulging if there is a cut.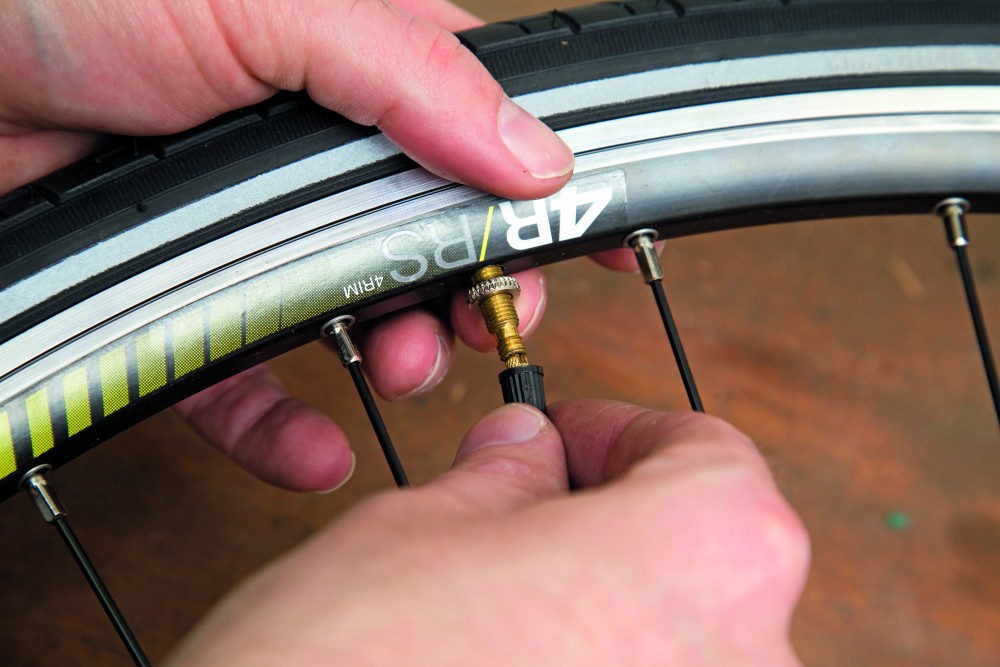 Once you're done inspecting, and everything looks good, it is safe to continue pumping your tire up to the specified psi, install the wheel on your bike, and continue on your way!
With a little bit of practice, this whole process can be done in about 10 minutes. With a lot of practice, you can do it in the rain in 5 minutes!
If you are a cyclist, you need to be able to deal with a number of common problems that can happen on the road. A punctured wheel is one of the main ones. Unfortunately, you can run into a nail, a piece of metal or a broken bottle almost anywhere, and sooner or later it happens to everyone. Already happened? Read our review, which we prepared together with Onliner, on how to change or seal the tube, tire on a bicycle.
To remove the damaged tube from the wheel, you need to remove it from the bike - this is much more convenient to work with.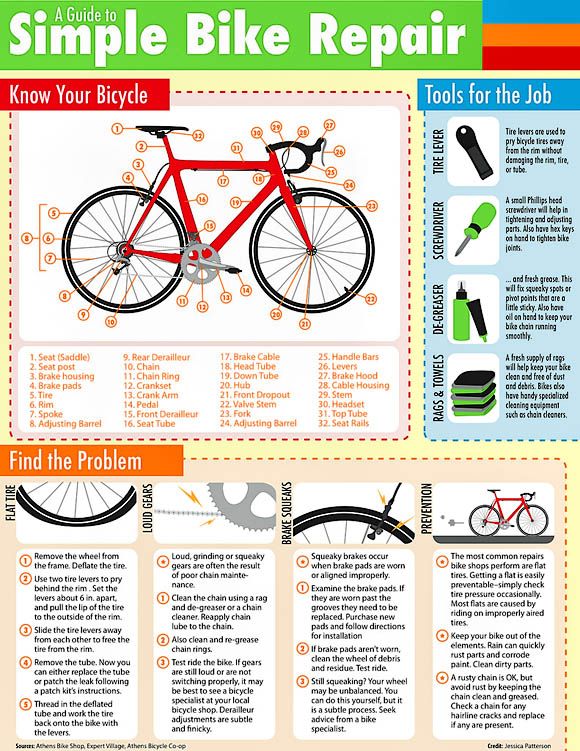 Then follow the step by step instructions:
1. Unscrew the protective cap from the nipple. If necessary, completely deflate the wheel. This will make the job easier, as there will be no unnecessary resistance.
2. Using a pry bar, hook the edge of the tire and pull it out of the rim. Special tools allow you to carry out this procedure quickly and as painlessly as possible. If there is no pry bar, you can try using any thin and durable object, such as a spoon. Her handle has repeatedly rescued cyclists who did not have repair tools at hand. Just make sure she doesn't bend over.
Important: The tool should not have sharp ends, so a screwdriver is not the best solution, although it fits the given shape. With it, you can only damage the wheel more. If you want to keep the tire, don't.
3. It is optimal to use two mounts. First, pick up the edge of one, then, when you fix the position, in 2-3 centimeters, pick up the tire with the second mount. This will be followed by a release of pressure, and the work will go easier. While continuing to support the first mount with your hand, continue prying the tire in a circle with the second until it is completely released from the rim.
4. Now that one end of the tire is completely out, release the nipple and remove the damaged tube.
We will consider the installation process with the installation of both a new camera and a tire. If you are keeping the old camera, skip the first step.
1. We put a new tire on one “rib” of the wheel, so that we have a free pocket for inserting the camera.
2. We take a new chamber (deflated) and, starting from the nipple, lay it along the rim.
3. While the camera is not yet closed, pump it up a little to make sure that it is laid flat and not twisted anywhere. If the tube is installed with a kink or twisted during installation, it will most likely burst as soon as you get on the bike. Agree, you don’t need such unnecessary frustrations, because these are not only spoiled plans, but also additional financial costs.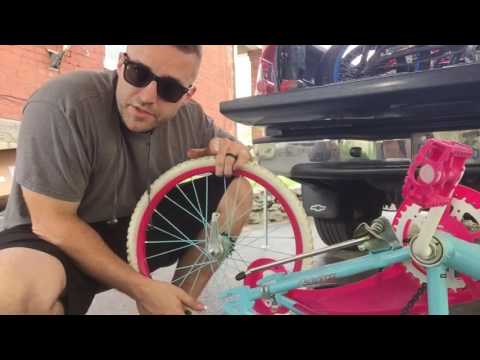
4. Now you need to "fill" the tire into the rim. In the first steps, this is done manually, but at the end, installation will again be required. You can do it with one, but it's better to use two. Use it to pull the tire towards you a little so that it easily enters the rim. You can push the tire a little inward with a mount so that it is better fixed. The main thing is that the attachment depth is the same throughout the circle.
5. After the wheel is closed, pump up the chamber to the desired state. Usually the right pressure is indicated on the tire, check it to properly set your pump.
6. Now screw the cap on the nipple to fix the condition of the wheel.
7. It remains to install the wheel in place and that's it. Now your bike is back on track! Make a small circle on it at low speed to make sure everything is secured properly and you feel comfortable. If necessary, pump up the chamber of the second wheel so that they are equally elastic.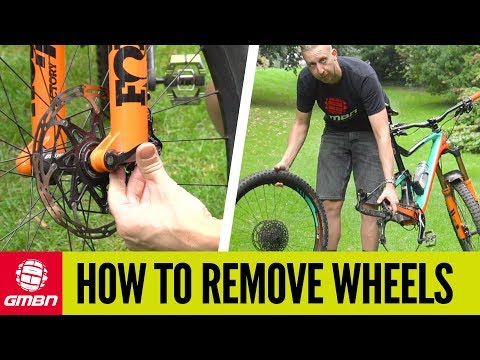 After replacing one tube, many cyclists experience minor discomfort while riding. If everything is fine, you can go to the road. What if something happens, you already know how to change a tire and you can do it even in field conditions.
Try not to rush during the procedure and be careful at every step. Any carelessness can then turn into problems on the road. If you are saving an old tire, be sure to check the inside of it for any piercing or cutting elements. It often happens that part of the object that pierced the camera breaks off and remains in the tire. Doing so may damage the camera again. So, if you managed to find the "culprit" of the tragedy, make sure you extract it completely.
When working with the pry bar, be sure to hold it with your hand, even if it seems to you that it is holding itself. The resistance of the tire can easily push it out. In the best case, it will simply fall and you will have to start work again. At worst, it will fly out with force and can hit you in the face. The sensations are unpleasant, not to mention the fact that it can be traumatic.
Bicycle tires and inner tubes
03/05/2013
Probably the most common failure for a cyclist is a tire puncture, especially if he rides in an aggressive style. Either he hit the glass, then a nail, and sometimes he just ran into the curb at speed. Experienced cyclists can change the camera in the bike with his eyes closed, but what about a beginner who can't even take off the wheel, let alone change the camera.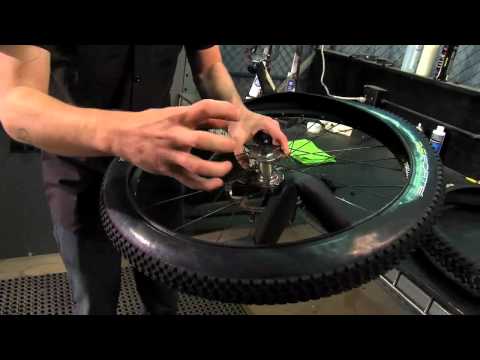 The main thing is not to despair! If you are traveling a long distance (and always better), take a pump with you, a spare tube, or, in extreme cases, a "bike first aid kit" for the wheel. Someday she will save you from the fate of pulling the bike "on yourself".
So, if you punctured the wheel , first you need to get off the bike, in no case continue to move on a flat tire . Firstly, you will tear the tube even more, and secondly, you can ruin the tire, and in the worst case, the rim.
How to change the tube on a bicycle
1) If the wheel has not completely deflated, deflate it to the end, to do this, unscrew the nipple (spool) cap. If you have a nipple (spool) the same as in the car, press something sharp on the small button in the middle and hold until the tire is flat. If you have a cap with a key for the spool, then just unscrew it. If you have a nipple (spool) like in old bicycles, unscrew the lamb and take it out.
2) Remove the wheel. If the wheel is on an eccentric, removal will not cause difficulties, if not, then keys will be needed (depending on the bike and wheel - 13-17).
3) If you have pliers, use them to remove the rim from the wheel, if there are no pliers, you can use an improvised tool (wrenches, etc.), but it is advisable not to use objects with a sharp edge - this can lead to damage to the tube or rim. Tear the tire with your tool and, resting it against the rim, press down until the edge of the tire comes out of the rim, then take the second key or mount and do this action again, while NOT removing the first key. When you feel that the keys do not lean back when you release them - just try to move the second key in a circle away from the first key.
4) Remove the camera by simply grasping it with your fingers. Grasp the opposite side of the nipple (spool).
5) In principle, it is possible to insert a new tube, but I recommend removing the tire completely (this can be done by hand or with tools (wrenches)).
Check the condition of the rim: there are no metal burrs inside, check the condition of the rim tape, look inside the tire. This should be done if you change cameras frequently and don't know where you might have blown a tire.
How to install the tube in a bicycle wheel
.d.)
2) Lightly inflate it, if you removed the tire completely, put it on one rib (if the rubber is directional - make sure you install it correctly (you can peek at the rear wheel if the treads are the same)). Roughly mark where the hole from the nipple (spool) is, put the chamber into the tire without twisting or breaking it. Insert the spool (nipple) into the hole and screw on the cap.
3) With your hands (if the tire is soft) or using the same tool, slide the second rib of the tire onto the rim. BE CAREFUL if using the tool, do not tear the chamber.
4) Immediately inflate the wheel lightly and roll it until the tube settles, then inflate the wheel to the desired pressure (how to find out what pressure to inflate the wheel)
5) Put the wheel on the bike and clamp it.