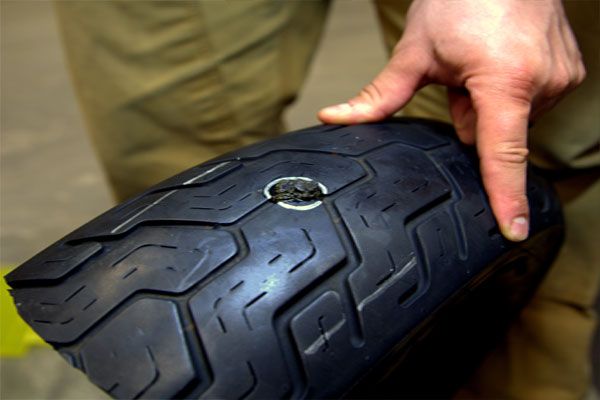
One of the problems you can encounter when traveling by car is a punctured tire. Using a patch is a fairly common option to work around this issue.
Yet, if the hole is in a position like a tire wall, the problem becomes much more complicated because it is likely that the defensive position will not be patched.
So, how close to the sidewall can a tire be patched? A distance of 6 mm or more from the tire shoulder is required to fit a patch. In other words, if a crack is closer than 6mm, there’s almost nothing you can do about it!
Tire Sidewall OverviewFirst, let’s learn about sidewalls and how to identify them on your tires.
The wall is the rubber part from the outer edge of the rim to the road surface. This part also has the largest area, is the most flexible, and continuously deforms under loads when moving.
How Close To Sidewall Can A Tire Be Patched?As you know, the car’s wall is in a particular location, so it is pretty challenging to troubleshoot the hole here.
Manufacturers also recommend that you not choose the patch option if the spot is on the side of the vehicle or too close to this position. Then, how close to the sidewall can a tire be patched.
You cannot use the patch if the hole is close to the wheel with a gap of less than 6mm. In addition, you should note that if the hole is more significant than ¼ inch, the patch should not be used. In this case, if the patch is small, it cannot cover the hole, causing the wheel to deflate still when moving.
On the contrary, using a large patch can make the wheel more bulky, difficult to move, and unsafe.
Fix Sidewall DamageOther Related QuestionsTo better understand the problems that occur with the tires and how to overcome them effectively, you can refer to the following information.
We’ve put together some frequently asked questions that may help answer your questions on this topic.
Plug a flat tire: Is it possible?People are often concerned about whether it is safe to plug or patch a flat tire.
These two options are pretty standard in repairing or overcoming the problem of flat tires caused by rolling nails or other sharp objects.
The manufacturer still recommends that you better replace the tire with a new one when there is a problem because repairing with a plug or patch when a flat one is not a safe solution.
Yet, the cost of new tires is not cheap, and if you have this problem often, it is a big problem. So, many drivers use a plug or patch when a wheel is punctured.
There is a limit to the number of nails or patches on a product. You can use this option to temporarily fix the problem if you find a few small holes. If the wheel has many large holes or previous patches, it is best to replace it with a new one.
For a detailed guide, check out this video:
How close can a tire patch be to another patch?The gap between patches is also a topic that people are very interested in. When traveling on the road, you may encounter a flat one many times.
As you know, when the tires have had previous patches or punctures in close locations, it is better to replace them. In case
Can you patch a tire on the side of the road?In the case of a puncture on the tire side, the use of stickers is unlikely to have as much effect as you think.
The reason is that its wall adhesion is so thin that relatively few materials can adhere. More specifically, damage to the sidewall will seriously damage the structure of a wheel.
The solution to this problem is to insert an extra tube inside the wheel to ensure that you can still turn the whole thing.
How fast can you drive on a patched tire?A patched one will not achieve the same speed and performance as it once was. Therefore, the optimal level you can expect from such a version will not be more than 85 mph. Of course, this is just the limit that many manufacturers recommend, but you should not overdo this limit.
Can you patch a tire with 2 nails in it?The answer is yes! It’s just that the gap between the two punctures is at least 16 inches, and you might seal them with two large patches.
According to many manufacturers, the maximum number of times performed is two times. If more than that, it’s time to get a new one.
ConclusionAs such, a puncture in the side of the vehicle is a unique location where patching is not an optimal solution in this case. It would help if you changed to a new tire to ensure safety when traveling.
Thank you for following this post!
This post was last updated onA tire breakdown on the go can indeed cause several troubles for you if you are in a hurry. Although the patch method seems to be the choice of many people, it does not apply to all punctures.
If you are having this problem, scroll down immediately. We’ve compiled all the information you need under one incredibly detailed insight, which is waiting for you to discover.
Table of Contents
How Close To Sidewall Can A Tire Be PatchedThe sidewall has never been an ideal part for applying hole patching. If the gap is 1″ pouring up, you can consider some measures to overcome or hold out temporarily until support is available.
Within 1″ of refills, any remedial efforts will be pointless, and you’ll need to buy a new tire to replace it.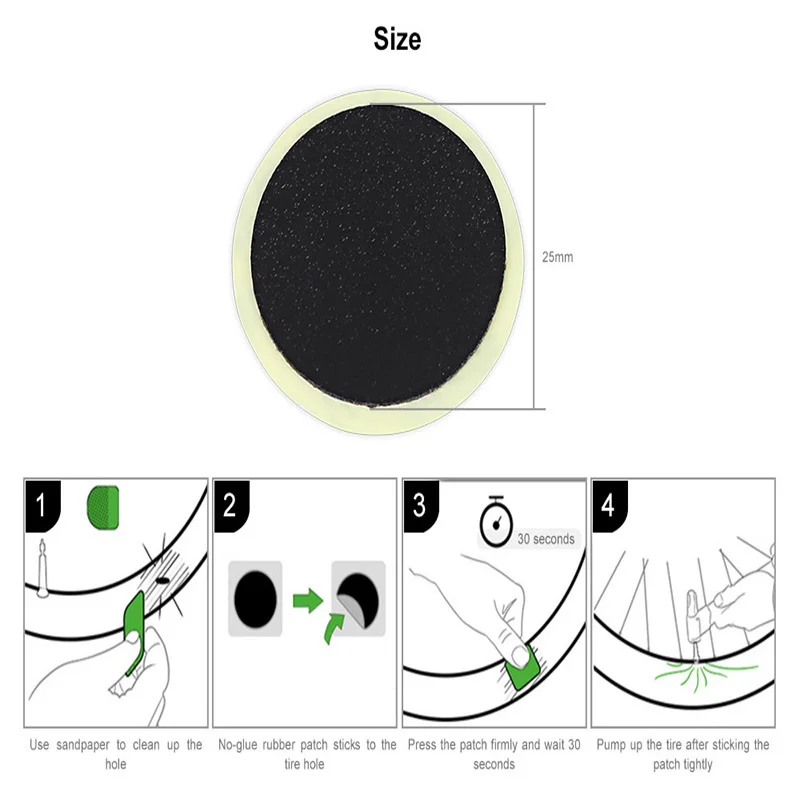
In the below section, we have compiled the most specific information about the three types of surface damage you will encounter. These include sidewall, deadly wounds, and possible solutions. Scroll down for more information!
Understanding Sidewall PatchesIt’s best to learn more about the parts on the tire surface and their role in order to understand how serious the hole is.
If you look at the surface of this product, you will realize it consists of shoulders, crowns, and sidewalls. Inside it, sidewalls are located on either side of the tire to maintain the product shape. Shoulders firmly cover the crown. The hardest parts are the crowns, whose main role is contact and traction.
We want to remind you about these sidewalls more than other parts. They have a fairly smooth surface, consisting of many layers (depending on different models and manufacturers).
Structurally, most manufacturers use polyester as the main ingredient. Some places even reinforced the product with another layer of nylon. That’s why they give the entire tire an incredible amount of stability.
Still, it is the above structural features that make the punctures on the sidewall become fatal to the entire product. Once this part is damaged, it is impossible to repair it. In this case, your only choice is to remove the old one and replace it with the new one.
Deadly WoundsRegardless of the product’s model, the closer the puncture is to the sidewall, the slimmer your hope of repair. The sidewalls’ steel rings are difficult to repair, making the damage more fatal.
However, Once it’s 1″ or more away from the sidewall, you can safely find a remedy.
If you try patching a tire near the sidewall, you won’t be able to seal the holes completely. The humid outside air entering will destroy the tire quality from the inside. Once this goes on for a long time, tread separation is likely to happen unexpectedly to your vehicle.
Indeed, you may still be reluctant to take urgent measures. But this can only help your vehicle operate, and there is no guarantee of the distance behind.
The performance of the car also decreased significantly. You will find out the decline in smoothness besides the decrease in speed.
Possible SolutionsSee more: How Long Does It Take To Patch A Tire
Sometimes, it is impossible to be able to find out relevant replacement parts on your journey. These extreme circumstances will force you to use a patch (or plug on the sidewall) or continue with a flat tire.
If you were in that situation, what would your options be? Our advice is to use temporary remedies until you reach the nearest auto repair station for those who are still wondering.
Driving for too long with a damaged tire will decrease the driving experience. Besides the decreased speed, the feeling of vibration is also another trouble it cause you.
This also causes minor damage to the overall performance of your tires. Though some tires with minor damage are still repairable and working properly, you might need to throw them away if you insist on moving on a flat tire.
We suggest you cover them with a plug or a patch when the puncture is found at a safe distance from the sidewall. Considering tires with better bearing capacity will also reduce mid-road failures of this product.
If the hole is in the sidewall, all efforts to fix it are futile. It would be best to try to move to the nearest repair station and replace it with a brand-new tire.
How To Fix The Sidewall Damage?Let’s start by removing the tire from the wheel. Then, you need to use specialized tools to disassemble the fixing nuts.
After successful disassembly, check for holes and remove every stuck object (such as screws, dead branches, or nails). Completely remove the air in the tire and give a little cement to the plug.
Next, you need to clean the puncture and refill its air. After applying a sufficient amount of sealant to the plug’s center, plug it in to complete the patching process.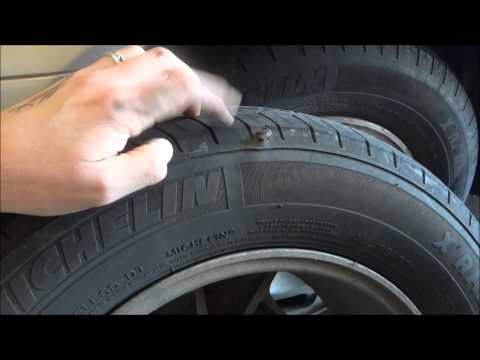
Cut the excess ends of the plug on the outside, then reinstall the wheel and inflate the product. The last step you need to complete is fixing the nuts and shooting the tire to the wheel tightly.
FAQSHow Long Can You Drive on a Patched Tire?See more: How Much Does It Cost To Patch A Tire
Our answers are sure to amaze you! A patch, if done properly, can last from 8 to 1 year. But the quality and durability will go down if you do this measure many times.
This measure will not guarantee you the same performance, speed, and smoothness. You would still face the risk of blowouts and damage along the way. Therefore, you should consider getting a new tire for the safest travel experience.
Can You Patch A Tire On The Side Of The Road?If you are facing this problem, it would be best to combine patching with another reinforcement measure.
Patches can be helpful with punctures that are easy to fix but are not so effective on the tire side. Therefore, the best way is to insert an extra tube inside the wheel to maintain the product shape in the best way.
If you patch your product properly, it can still give you the ideal speed experience. Specifically, you can hit 80 mph with a patched product.
Our Final ThoughtsWe surely do not expect to encounter vehicle problems during their journey. Once that happens, understanding and mastery of the new approach is the key to solving your problem quickly and efficiently.
Through this article, we believe that the answer and all the problems related to it are no longer a headache for you. See you in the next articles.
Tuning spreads along the roads of Russia at the speed of lava after the eruption of Vesuvius. Thousands of official dealers, network services and garage workshops will willingly take on the transformation of a car, whether it is a domestic “classic” at the price of a TV or a premium sedan that costs the price of a good apartment in the capital. Hundreds of exhibitions, festivals and competitions are held annually throughout the country. But does all this mean that there are no "white spots" on the tuning map? No. Now we will talk about a popular phenomenon, which, nevertheless, still raises many questions - tire preload, or stretch.
The word "stretch" is a Russian transcription of the English stretch - "pull", and is pronounced similarly. The common spelling "stretch" is a misnomer. Simply put, rubber is a “house” when a tire of a smaller width is put on a disk than is calculated by the manufacturer. For example, a 195mm tire instead of a 255 on a 9" wide rim. This is achieved by tensioning the sidewalls of the tire, the so-called profile. Now the profile is not perpendicular to the contact patch, but is at an obtuse angle.
How blunt is determined by the amount of interference, and it, in turn, depends on several factors: the difference in the width of the disk and tire, the height of the profile, the tire manufacturer and a number of others, but more on that later. In most cases, when stretching, the inner and outer edges of the disc bulge outward. Now that you associate the word "stretch" with more than just jeans, it's time to answer the main question.
Depending on the area of use, the answer to this question will be different. Below is a complete list of the "pros" and "cons" of stretch, now we will talk about primary sources. Historically, the method of stretching narrow tires on a wide disk appeared almost simultaneously in Germany and Japan at the end of the last century. But if in the east the cause was drift , then in the old world it was legislation, or rather attempts to get around it.
In Germany and Belgium, the law prohibits the operation of cars if the contact patch is outside the arches - this left no choice for lovers of a wide gauge. By pushing the disc out of the fenders, the stretch allowed the tire to stay inside and everyone was happy. As for drifting, the tension is appropriate here for several reasons: a narrow tire is easier to break into a skid, it costs less, and due to the “house” it breaks less under lateral loads that occur in sliding.
Decades later, all the reasons were intertwined, and now light stretch can be found even on some cars coming off the assembly line, such as the Infiniti Q60, but it was most widely used in the stens style.
In order not to get confused, it's time to put together all the terms related to stretch. "Stens" (from English stance - "landing", "posture", "posture") is a style in which stretch is used in most cases. According to his canons, the car should be pressed to the ground as much as possible, and the wheels to the arches. The latter has its own name - “fitment” and denotes the relative position of the disk, tire and wheel arch, or fender (wheel arch extension).
Such a fitment is considered ideal when the edge of the wheel arch is in the gap formed during a strong stretch - it is called a poke. The latter is often possible only when using an air suspension, which allows you to raise the car while driving, saving the arches from contact with the disk. Examples of a static, that is, without height adjustment, fitment are distinguished by a larger “rim gap” (rim gap is the distance from the edge of the disk to the wheel arch). Due to the operation of the suspension, the rim gap of a static car can range from a few millimeters (with an extremely stiff suspension) to five centimeters. In any case, the stronger the tightness, the more likely it is to secure the wheel arch and achieve a better appearance.
Let's say you've made the decision to stretch. What is needed for this? First, define your goals. If this is drifting or another sports discipline in which handling is at the forefront, then you should start by looking for tires in the right parameters, after which the required disk width will become clear.
Example: for track days, tires of dimension 225/40 R18 are selected, the recommended wheel width for which is 7.5 inches. Increasing the width of the disk by an inch, we get a slight tightness, and by two or three - a strong one.
On the contrary - if the appearance is more important than driving characteristics, then we are looking for discs of the maximum width that the wheel arches can accommodate. Suppose it is 10 inches in the seventeenth diameter. It is recommended to install tires of at least 275 millimeters on them, which means that a width of 245 or less is suitable for stretch.
It should be borne in mind that the height of the tire profile has an almost stronger effect on the ability to preload than its width. Low-profile tires have stiffer sidewalls, which make them harder to stretch, but give more effective stretch compared to 50% or more profile height.
In order to understand the variety of sizes, enthusiasts create entire photo libraries, the most popular of which is tyrestretch.com. The name that speaks for itself will allow you to decide on the size and model of tires without resorting to experiments - hundreds of people have already tried different combinations. But even in spite of this, the choice can turn into an epic: tires of the same marking, but from different companies, can differ markedly in size, composition and characteristics.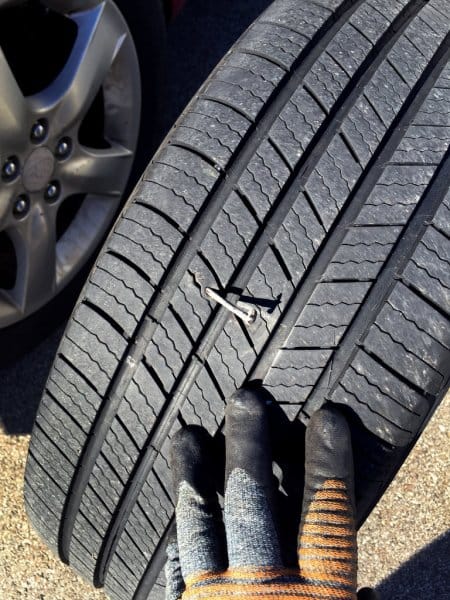 Decided? Buy.
Alas, the purchase of stretch wheels is no less “exciting” than the choice. Let's start with disks - it's easier with them. The only defining parameter here is the width. There is also a departure, but it has nothing to do with tightness, so we will not dwell on it. The rest is determined by personal preferences and budget: stampings or forged composites, new or used, ready-made version or "custom" in a single copy.
With tires it is more difficult, and even if we are talking about new ones. The fact is that “new” often means opposite things: produced a few months ago or never put on wheels. The latter may be ten years old - despite the fact that the shelf life of car tires is five years. Information about the production date is located on the sidewall of the tire and consists of four digits, the first two of which are the week of manufacture, and the second are the year.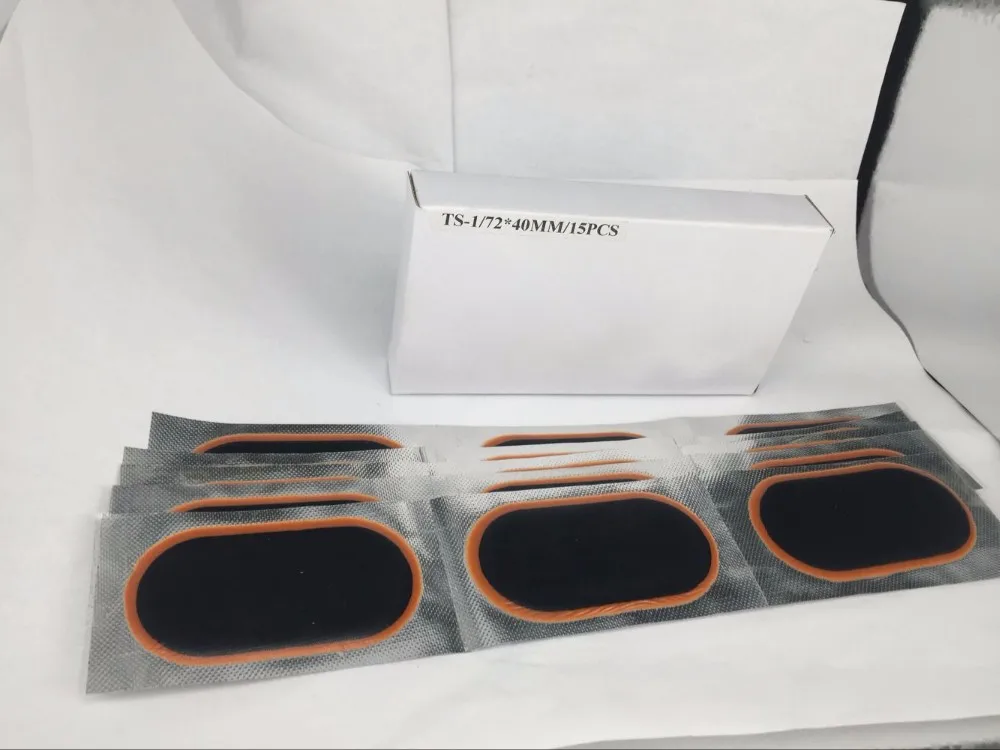
If for some reason the choice falls on used tires, among other things, you need to pay attention to the condition of the toe - this is the inside of the bead. It should be free of cuts and cracks, as it ensures the tightness of the "stretched" tire. Without stretch, damage to the toe is not critical, because the tire is adjacent to the disk with the entire plane of the bead. You should also pay attention to the geometry of the inner ring - its curvature due to improper storage will prevent you from pulling a narrow tire on a wide rim. Finally, when everything is bought, the most interesting thing lies ahead.
It is better to assemble wheels where they have experience in explosion and installation of non-standard sizes. If you do not approach the choice of a tire shop carefully, at best you risk simply not putting the tire on the rim, and at worst - damaging both. Let us focus only on the pumping procedure, because the rest of the actions do not differ from ordinary tire fitting.
The problem here is that the tire will take the desired stretched position only at high internal pressure (from 3 to 15 atmospheres). The narrow size of the tire prevents such pressure from being generated. Humps (sides on the disk that do not allow the tire to get off inward) are located far from the tire beads, therefore, you have to resort to various non-standard methods.
There are two options: seal the missing space with an auxiliary chamber or resort to an explosion. The second option is simpler and more technologically advanced. He, in turn, has two methods: explosive pumping (booster) and setting fire to a flammable liquid. In the first case, air is pumped into a cylindrical receiver with a volume of about 20 liters, after opening the valve of which, within a tenth of a second, it enters the tire, inflating it.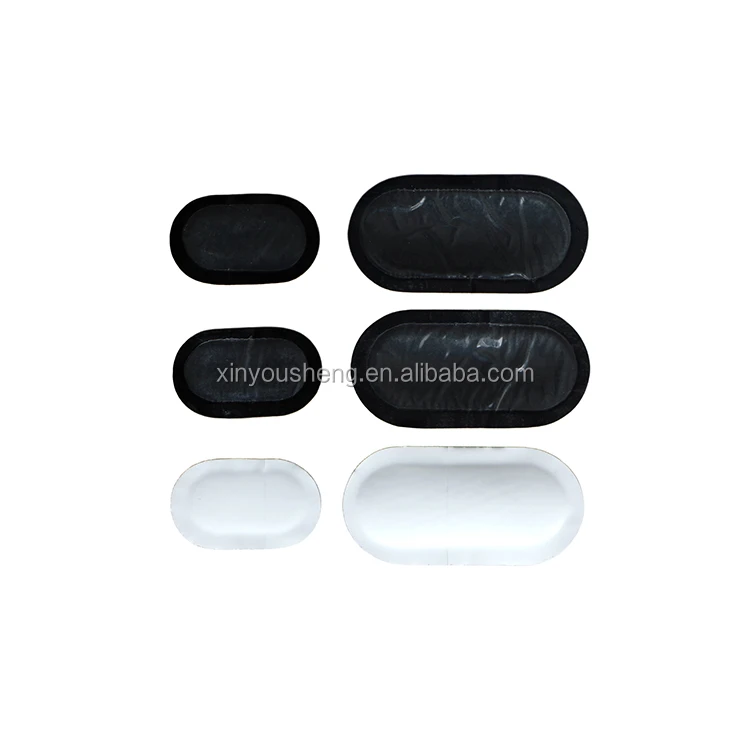 When ignited, high pressure is created by the expansion of instantly heated air. Gasoline (or another flammable liquid) is applied to the entire circumference of the inner rim of the disk and set on fire with a torch. At the same time, air is supplied through the nipple, which does not allow the tire to jump back to its original position after the explosion. After the tire has taken the desired position on the rim of the disk, the operating pressure is set from 2.5 to 4 atmospheres.
+ less tendency to break under lateral loads
+ the ability to take out the disks from the wheel arches while maintaining the track
+ reduction of the height of the profile when preloaded
+ lower cost of narrow tires compared to wide
+ the ability to lower the car more
+ visual enlargement of the disk
- lack of protection of disks from curbs
— high requirements for the condition of tires
- Less ride comfort
- more labor-intensive installation procedure
- high probability of disassembly in case of pressure loss
- increased load on the tire profile
practice
Articles / Popular questions What is an electronic PTS, why is it needed and how does it work Electronic PTS in the EAEU countries were approved back in 2015, actually appeared in Russia in 2018, and from November 1, 2020, all new PTS began to be issued only in electronic form. One... 71 0 0 11/28/2022
Articles / Used cars 5 reasons to buy and not to buy Volkswagen Passat CC "King of the track, but in the city he tears everyone"; "does not go at all"; "model of reliability"; “is pouring, without waiting for 100 thousand”; “great interior, quality materials”; “the interior is miserable, like in Polo”; "... 776 eleven 0 11/27/2022
Articles / Tests Taxi fleet test: check what you know about the first generation Renault Logan "Citizen of the World", known to us under the name Logan and produced in the world under several different brands, this year celebrates its 18th anniversary. In honor of the "coming of age" of this involuntary love... 2682 0 2 11/26/2022
Test drives / Test drive Haval Dargo vs Mitsubishi Outlander: the dog is barking, the stranger is coming In the Haval dealership in the south of Moscow, life is in full swing: buyers look at cars, communicate with managers and sign some papers. While I was waiting for the test Dargo, the same cross... 17667 7 205 13.09.2022
Test drives / Test drive Motor from Mercedes, emblem from Renault, assembly from Dacia: test drive of the European Logan 1. 0 It would seem that what's new can be told about the second generation Renault Logan, known to every Russian taxi driver, as they say, up and down? However, this car has... 14230 ten 41 08/13/2022
Test drives / Test drive Geely Coolray vs Haval Jolion: Free Cheese? If! Do you want to buy a car today with a full warranty, on credit at an adequate rate, without wild dealer markups? Now this is still a task, because a full-fledged chain of "representation - s... 11392 26 thirty 08/10/2022
Vic room
After talking on the cell phone, inspect the documents lying on the floor and bed. Then inspect the mask that lies on the table, and then try to use the laptop. It turns out that the battery of the computer is dead. To charge it, take the charger from the locker next to the bed. Before you attach it to your laptop, open your smartphone and read the SMS that came to it. After receiving the code to the FBI database, turn on the computer and first read all the information on the Internet, and then view the information in the database.
Killer's house
Go to the table and open the drawer. Take out a nail file from there, then look in the mirror - you will see that a collar is fastened around your neck, which will shock you if you get too close to the exit.
Remove the antenna from the TV and then pull out the cable behind the TV. Next, inspect the panel in the corner. At the bottom of the panel there is a cover screwed to the panel with four screws. Use a nail file to loosen the screws and remove the cover. After that, go to the exit from the room.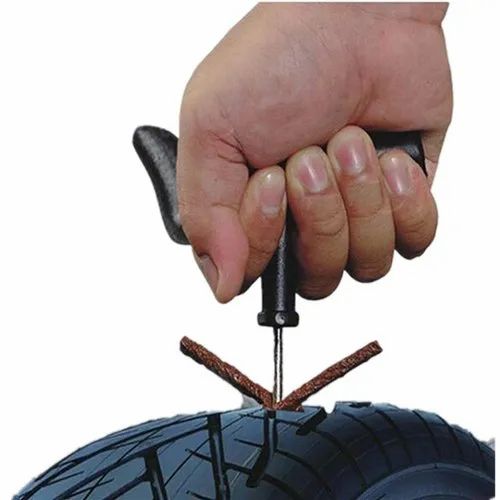 There, use the antenna on the switch located on the wall to the left of the door. Now you can attach the cable pulled out of the TV to the security panel.
Go to the stove. Inside it you will find burnt flyers, and next to the stove, pick up a poker and use it on the boards that board up the window. Next, look out the window. After that, open the closet and put all the things in your inventory there. Take the mattress from the bed and use it on the window. Now Paloma will be able to get out into the fresh air.
Go behind the house. Take a stick from the woodpile and go to the truck. Look into the cockpit and see your phone. Try to open the door. After an unsuccessful attempt to get inside, use a stick on the door. Take the mobile phone and the small key from the cab, which lies under the driver's seat. Next, inspect the body of the car, there you will see an iron box. Open it with a small key. Take the voice recorder with the charger attached to it from the box. After that, take all things to the trash can, which stands at the entrance to the house.
Go around the corner of the house and take the ladder from the woodpile. Drag the ladder back to where you jumped out of the window and place the ladder against the wall. Take the voice recorder and mobile phone from the box. Dismantle the voice recorder in inventory to get a charger. Attach the charger to the phone and go up the stairs to the room. Once inside, use the phone on the socket, which is located at the bottom of the wall to the left of the front door. After contacting Vic by phone, tell her about your kidnapping.
Room Hernandez
Talk to your partner, get a set of evidence from him, start work. Use the 3D scanner on the bootprint that the criminal left on the floor near the bed. Next, analyze the trace on the computer. After that, listen to the answering machine by recording the voice on your smartphone. You need to analyze the voice on the computer, then go to the other side of the bed. There you will find the remote control, which lies on the floor under the bed. Use the powder on it, and then the scanner. Analyze the result on a computer. There is a laptop under the TV - use the computer key on it to access the saved files. Analyze and read the resulting file.
Go to the bathroom. Examine the bath - you will see a small stain on the corner. Use a developer sprayer on it first, and then a cotton swab to take a sample. Next, conduct a chemical and computer analysis of blood. Then pay attention to the door to the bathroom. On it you will find black fibers, pull them out of the door with the tweezers that are in the kit. Conduct chemical analysis of tissues. Next, inspect the closet in which the suitcase lies. Try to open the "diplomat", then talk to Harris about the master key. From your partner, you will receive a universal master key, with which opening a suitcase is a trifling matter. Inside the "diplomat" you will find a mini-DVD disc. Insert it into the portable camera that lies to the left of the TV. After watching, Paloma should call you.
Camera
Go to the door, pick up the mobile phone from the floor and talk to the killer. It turns out that you were injected with poison, and a counter will appear in the upper right corner, which will count down the time until your death.
Put the mobile phone in the closet and take the mattress from the bed. Put it on the broken glass scattered on the floor and go to the wall. From the box on the shelf, take the memory card and hex key. Use it to open a large cabinet and take a fire extinguisher from there. Then move the bed to the first aid kit and take everything that is there from there.
Take the cones in inventory. From the faucet, pour water into the vial of green liquid. Next, pour the diluted solution into the flasks. In which of them the liquid turns black, that one needs to be drunk. Move the bed, pick up the metal tube from the floor, then move the bed again and use the tube on the grate in the floor. In the sewers you will find a cut off human hand, in which lies the key. Rats will prevent him from taking it, in order to drive them away, you need to use a fire extinguisher on rodents. After taking the key, open the door and exit into the next room.
After a short conversation with the killer, move the electric chair and sit on it. Using the lever, make a full turn, reading the names and numbers appearing on the doors. After that, return to the previous room. Use the fire extinguisher on the switchboard located on the wall next to the shelf - you will get a short circuit. Return to the room with the chair and open the electrical panel there. It's a bit dark. There is a switch on the wall to the left, with which you can turn on the lighting in the shield. When the insides of the shield become visible, take the wire from there, raise the lever and take the light bulb. Go to the first room to the bed. On the right wall you can read the inscriptions and numbers. The last you need to remember is 2324. This is the code for your collar. Go to the washbasin and look in the mirror. Zoom in on the collar, take the wire in your inventory and start entering numbers from left to right, i.e. you must press the wire button under the square the required number of times.
After removing the collar, return to the room with the chair and sit in it. Turn on it to face the door on which your name is written. After that, open the control panel, which is located next to the right armrest. There are several switches on the remote control with different ratings for increasing electricity and one for decreasing. You need to achieve a voltage of 129 volts to open the door. Turn the 50 volt switch twice, turn the 5 volt switch twice, and turn the 20 volt switch once. Finally, lower the voltage by 1 volt and press the red button. Paloma will be shaken a little by an electrical discharge, and the door will open.
After leaving the room, open the cupboard and take the empty spray from there. Return to the first room and type in a bottle of water, then go back and up the stairs to the morgue.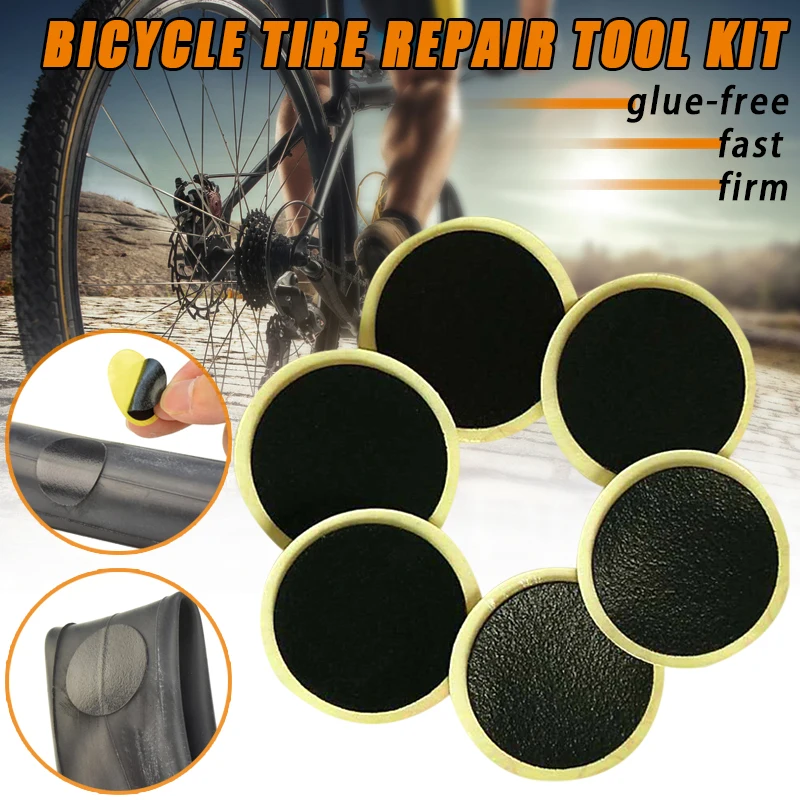
There you will talk to the killer again. After finishing the conversation, enter some numbers through the panel located on the wall to the left of the door. Here are the numbers: 0113, 0229, 1022. You can find them out by looking at the dates of the files in your voice recorder. When the freezers open, inspect them and remember the letters that will be underlined on the labels that hang on the dummies: P, E, N. Next, go to the surgical table, which is located at the back of the room. Take the surgical instrument and the developer bag from there. In inventory, combine the water sprayer and the developer. After that, use the resulting solution on the tile tiles on which the letters are visible - the inscription PRESS HERE will appear. At this point, the killer will report that poisonous gas has been released into the room. To stop the room from filling up with gas, click on the three tiles with the letters that you remember when you examined the labels - the danger will pass and the door located at the back of the corridor will open. However, behind it will be a stone wall.
Go get the fire extinguisher and use it on the poster with the cow carcass. When you climb into the hole, you will see a panel in the dark. Use a light bulb on it to make it brighter. Then use a surgical instrument to unscrew the plate. When this is done, place the tool between the contacts, then short the circuit by inserting steel wire into the panel.
Go upstairs and go through the door. However, you won't be able to get free.
Killer's house. October 24
After talking to the local sheriff, get to work. Near the stairs there are tire tracks and boot prints, apply a scanner on them and analyze the results on the computer. Next, go to the place where the killer's truck was standing, there you will find more tire tracks and bare foot prints. Apply a scanner to them, and then analyze the results. Then go behind the house and inspect the wooden beam holding the roof of the woodpile. Finding a symbol carved with a knife, photograph it and analyze it on a computer. After Claire's call, go through the gate.
Near the porch, you will find traces of an explosion and evidence. On traces of blood, use a stick with a cotton swab, then use the scanner on the boot print left on the ground. Do not forget to analyze the evidence found. Next, pick up a canister of kerosene, which is next to the barrels, and enter the house from the back porch.
Move the rack, examine the elevator door, and then use the universal lockpick on it. After the door opens, inspect the mine. You will need a rope to climb down, but more on that later. Examine the refrigerator, which will be empty, then switch your attention to the sink, where there are dirty dishes. Apply powder from the field kit to the ladle, and then use the scanner to take fingerprints. Analyze the print - it turns out that it belongs to Paloma. Next, examine the newspaper lying on the kitchen table, and then exit through the door into the corridor. From there, go to the living room.
Examine the cabinet against the wall to the right of the entrance to the room. In it you will find an open cache. Use the powder on the cover of the hiding place, then take prints with the scanner and analyze it. The owner of the print will be Sheriff Holuway - wonder why she didn't say anything about the stash? Next, examine the book lying on the table. Between the pages you will find a strand of human hair. Using tweezers, take the hair and analyze it. Next, inspect the safe. Apply powder from the field kit to the buttons of the numeric keypad of the combination lock to get the code - 19A46. Having opened the safe, inspect the documents that are there, and then take prints from them. Take the box out of the safe and place it on the table. Use the universal lockpick on it to open the box. Inside, you will find strands of hair from the victims of the serial killer. Pay attention to the matches that lie on the fireplace. Exit the living room and go to the door located next to the stairs leading up.
Once you've got your motorcycle trail, open the doors and go downstairs. On the wall you will see a kerosene lamp. It will be empty, but you have a can of kerosene. After filling the lamp with flammable liquid, return to the living room and take the matches from the fireplace. When you light the lamp, pay attention to the boards to your right. Pushing them aside, you will see an electronic lock, which you will not be able to crack. Leave this job to Agent Harris, and go down to the basement yourself.
Read the inscription on the blackboard, then remove the school equipment from the wall. Next, go to the second room of the basement. There, take the sledgehammer from the table, and then go to the stove. On the floor next to her you will find pieces of a credit card. Examine them, and then use a digital microscope. Through it you will see pieces of hair. Use tweezers to lift them up and analyze them in the field lab. Next, return to the wall on which the blackboard hung. There you will notice a piece of fresh putty - use a sledgehammer on it to break a hole in the wall.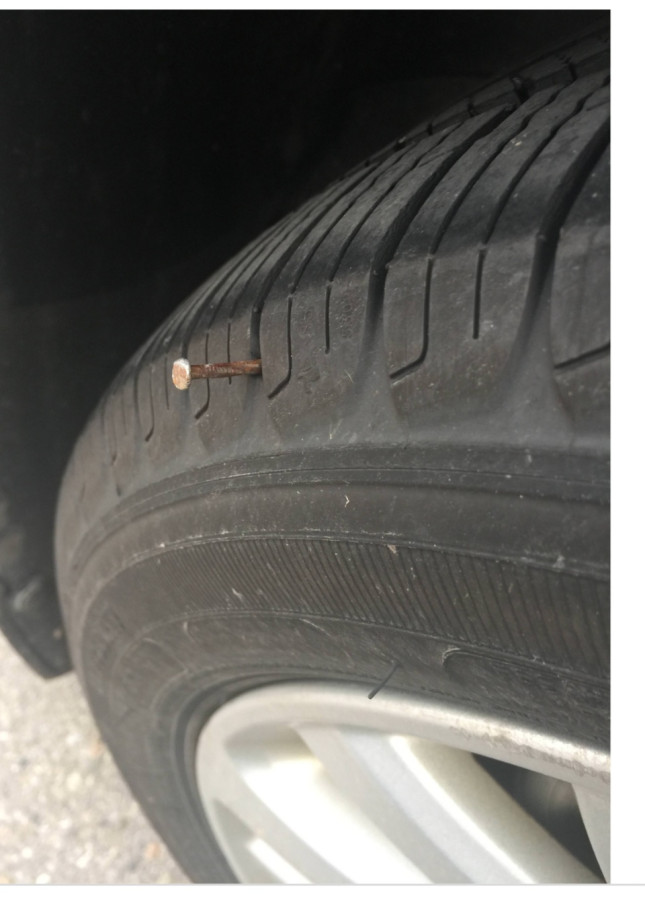 Through it you can get out to the morgue.
Immediately you will find a bare foot print on the floor. Use the scanner from the set on it, and then analyze the trail. After that, examine the blood stain on the dissecting table. Use sticks with a cotton swab on it and analyze the taken blood sample. After completing the laboratory work, open the door located nearby. On the wall you will notice barely noticeable traces. Use a microscope on them, and then use sticks with cotton wool, and then analyze the data obtained. Next, spray a bathrobe hanging on the wall with a spray bottle, and then take samples with cotton swabs. Near the pipe there are traces of blood, take samples with cotton swabs. Analyze all evidence. Exit the morgue and examine the floor near the door. Use a spray bottle and cotton swabs on this place - analyze the evidence. After that, go to the room where the electric chair is located. Some fragments lie next to him. Use a microscope on them, then pick them up from the floor with tweezers and analyze the evidence.
Press the button located to the left of the door. Open the electrical panel, remove fingerprints from the knife switch and analyze them. Next, go to the cell where Paloma was kept.
Pick up the collar lying under the washbasin, inspect the mattress and use cotton swabs on it, then analyze the evidence found. Take a picture of the wall next to the washbasin - analyze the photo. Next, move the bed and climb onto it to open the first aid kit. A snake will jump out of it and bite you. Quickly return to the living room.
Go up to the second floor while talking to the sheriff. Enter the room opposite you. Open the first aid kit and take the antidote with the recipe from there. Open inventory and use the antidote on Vic's ID to heal. Examine the bathroom, there is a pool of blood next to it; use cotton swabs on it, and use tweezers on traces of blood on the edge of the tub to take the fibers. Analyze the found evidence. Take a dry sponge from the sink and go out into the hall.
Enter the door to the left of the closet. You will find bloody bandages by the bed, take a blood sample with cotton swabs and analyze it. Next, examine the mirror on the table. Apply the powder from the set on it, and then the scanner. Analyze the found prints. Exit the room and examine the remaining doors. One of them is locked with an electronic lock, and the second is very flimsy. You can break this door with a sledgehammer.
Climb up the stairs and get out onto the balcony. There you will find an electronic jammer. On it you will find a piece of chewing gum, which you can pick up with the tweezers from the field kit. Next, inspect the keyboard of the device, and then apply a USB flash drive from the set to it. After analyzing the evidence obtained, go to the room where Paloma was kept and soak a sponge in the sink. Get out of the house.
Talk to the Sheriff, then go behind the house and talk to Agent Harris. Give him the electronic collar, then tell him about the electronically locked room you found in the basement. Return to the street and call Claire (in inventory, select a smartphone, go to the "notes" section and select "call Claire"). After talking with the lab assistant, talk to the sheriff again. At the end of the conversation, you will receive two clues and an electronic key. You need to analyze the evidence, and with the key you can open the door in the basement.
After entering the basement, open the cabinet with the lockpick. Examine the box with the chain, then use the spray and cotton swabs on it. Next, inspect the dissecting table and take blood samples from it using cotton swabs. Go to the table next to the filing cabinet and examine Paloma's documents and belongings on it. Open the desk drawer and examine the documents lying there. Finally, take the speaker from the music center from the table. Next, take the piece of cable that lies on the filing cabinet. After that, inspect the computer desk. Apply the flash drive from the kit to the system unit - analyze the results. Next, open the cryogenic chamber and take a piece of skin from the corpse lying there - analyze it.
Open the second door with the smart key and leave the house. Go to the back yard. Inspect the trailer, wipe its numbers with a damp sponge. Knock down the lock with a sledgehammer and take a piece of rope from the trailer. Call Claire and give her more information. After a while, the laboratory assistant will call you back and tell you the name of the killer. After that, go up to the second floor, where Harris has already opened the door.
Chicago
Examine the rack on the right, then switch your attention to the table on the right. On it, examine the outline of the picture, and then photograph them. Then immediately grab a sharp sculpting tool. Next to the stairs on the table, take the flexible tool and combine the two tools in inventory. You should get a semblance of a master key. Use them on the blue file cabinet that is against the right wall. Having opened it, inspect the letters lying inside, photograph the most important ones. Open the second drawer and extract Ackerman's confession from there.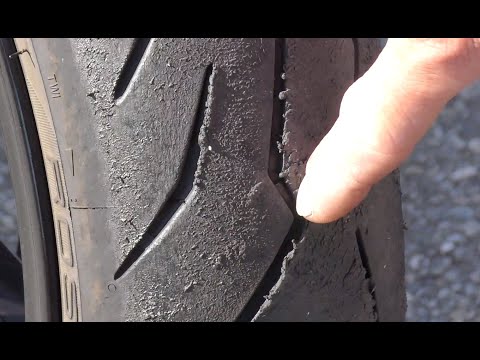 After that, open the large cabinet with master keys. Inside you will see a pile of rags - tear it, you will find an assassin's cape.
Killer's house (continued)
Take the poker lying on the floor by the stove. Pick up the charger under the table. Next, connect the speaker to the computer, and in the inventory, combine a piece of cable and charger. Connect the resulting device to the computer too. Examine the control panel located on the table, then open the balcony door with a master key and examine the balcony railing. You need to spray them with a spray from the kit, and then take a sample with cotton swabs. Finally, take a blood test and leave the house.
Talk to Harris about the control console, then talk to the arrived Hawker on all possible topics. At the end of the conversation, go into the house and go up to the charred room. There, talk to Harris again. After that, go to the kitchen, where use the rope on the elevator shaft. Then talk to the sheriff and take the car keys from her.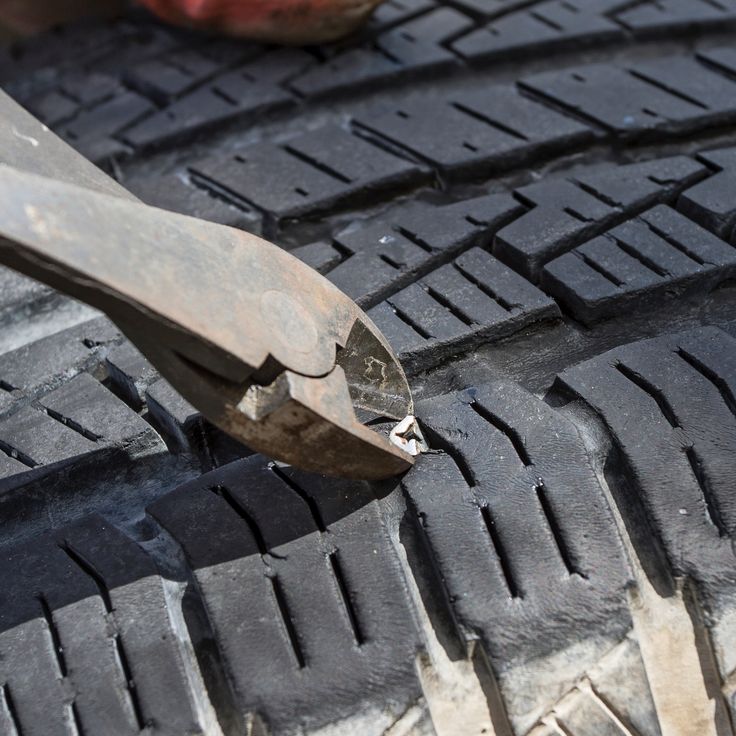 Leave the house, open the police car with the keys and take the metal detector from there. Take him to the backyard. Put the device in the third position and use it on the barrels. When Vic finds the hatch, try to open it, and after an unsuccessful attempt, inspect the hatch and remember the number.
Go to the house and go to the living room. Call Claire and ask a question about Hawker. After the phone conversation, talk to your former partner. During the conversation, choose a calm tone to arrange with Hawker to look at the locked computer that is in the basement.
The computer will be hacked and all the information stored on it will be made available to you. Examine all documents, photos and videos, view data from surveillance cameras. After that, go online and find a technical description of the console that Harris is repairing. Print out the information and take it to the agent working on the second floor in the burnt room.
Examine the control keyboard, then activate it - hear Paloma's voice.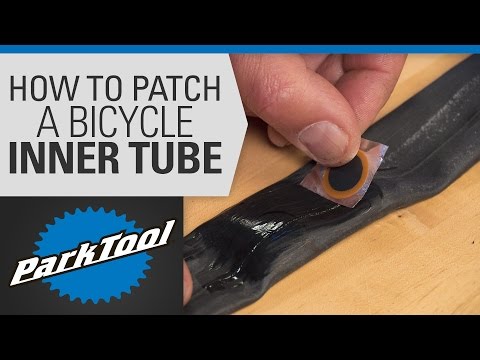 Record her voice on your smartphone and analyze the recording in the field lab. Go to Hawker, use the computer key on the system unit. Go to the "passwords" folder and open the file. You need to remember the names opposite the names of Paloma and Victoria - Martin (Martin) and Stanton (Stanton). Using the "access control" section, open the bunker by entering the password H103123D55. Next, go to the bunker, talking to the sheriff along the way.
Chicago
Interrogate Richard.
Nuclear bunker
Paloma
Talk to the killer. When he leaves, look through the window at the bottom of the door. Through it, you can talk to the person who is sitting in the cell opposite. Anderson will turn out to be Anderson, who, after a conversation, will throw you a fork, but it will fall at the door, and you have to get it.
Move the drawer next to the bed, take the pipe, then move the bed. Use the pipe to open the cabinet against the wall and take the plastic canister and magnet from there. Take the coil of rope from the rack and combine it with the magnet in inventory. Next, look again at the window at the bottom of the door - you will see a fork lying on the floor. Use your "magnetic fishing rod" on it, then go to the ventilation hatch. After examining it, use the canister on the wall, then climb on it. Once flush with the ventilation grille, use a fork on its upper corners to remove the mounting screws. Get into the ventilation.
After jumping down the corridor, go left to the digital lock door. Enter the code 1215265 to open the door. To solve the code, remember the list with names and surnames. Number the letters of the Latin alphabet from 1 to 9, i.e. A-1, B-2, etc. When you get to I-9, the next letter J will have the number 1. So, after opening the door, take the gingerbread from the table, then talk to Vic McPherson about all the topics that are on the list. Exit to the corridor.
Give the gingerbread to Anderson and go forward around the corner. At the end of the corridor, there is a pharmacy cabinet hanging on the wall. Open it and inspect the empty pack of amphetamines, pick up the first aid kit and spray, which you need to put in the closet located nearby. Go to Anderson and talk to him about vitamins. The young man will agree to give you the pills if you find his wedding ring, which he hid in the cell where Paloma was kept. Log in to your cell by entering the code 219295. Put the bed in place and inspect the gap in the wall, located between the racks - you will see a ring. Use a fork on it to take out the item. Give the ring to Anderson, in return you will receive amphetamines, which you need to use on Vic so that she wakes up.
Vik
Talk to Paloma, take the metal detector and go out into the corridor. There, talk to Anderson, then take the first aid kit and spray from the closet. After finishing the conversation, press the button located in the wall, to the left of the vertical stairs, and go upstairs.
At the porch of the back entrance you will find a mine - dig it out, then bring a target from the far corner of the house and put it on the mine. Open the gate... Here I didn't understand - probably the gate was also mined, but after using the first-aid kit after the explosion, Vik returned to normal, and it was possible to move on - so I will go ahead, using the first-aid kits that are inside for treatment at home.
Enter the house from the back entrance. Take the red envelope from the refrigerator, which contains the memory card. After reading the message, go up to the second floor and go to the bathroom to pick up a first aid kit from there. Next, go to the charred room and pick up the second red envelope there, lying under the mannequin. After reading the next piece of information, go up to the roof. Raise the control panel from the floor, and then go down to the basement to the room where the computer is.
After examining the trap in the form of several reflectors, return to the hall. Before entering the living room, examine the dead rat, then use the aerosol on the entrance to the living room - find a trap.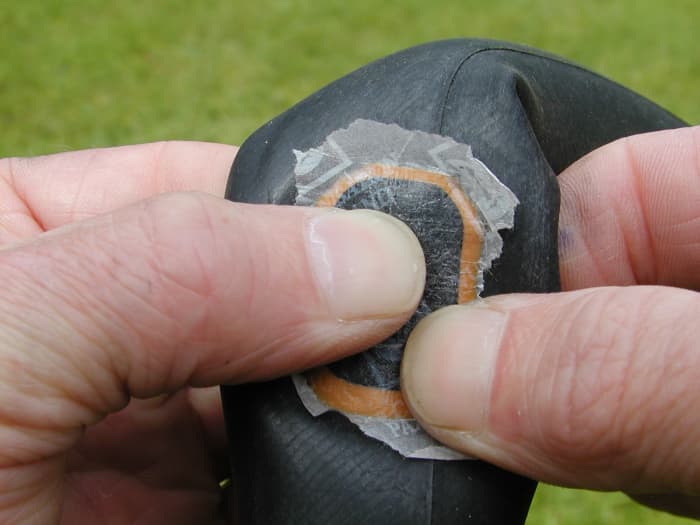 Go outside and open the trunk of the police car, take away the multispectral lamp from there, and then inspect the corpses of the policemen lying in the yard. At one of them you will find a quartz watch, at the second a knife. With a knife, you need to cut the trap located at the entrance to the living room.
Pay attention to the reflector and emitter in the living room, you will pick them up later. Go to the backyard through the kitchen. There, examine the box hanging on the grate, which was not there before. Next, take a metal detector, turn on the 4th mode in it and inspect a piece of the road located opposite the gate. After digging up a piece of an old bicycle wheel, break off the spoke from it. From it, Vic will make a master key, which you need to use on the box hanging on the fence in order to open it. Examine the panel screwed to the box, and then return to the bunker to pick up a fork from storage, which you can use to unscrew the screw holding the number pad. After putting everything in storage except for the lamp, clock and remote control, return to the transformer box and remove the panel.
Go to the living room. Take away the reflector or emitter from there and go to the basement. Hang the lamp on the corner of the wall above the near reflector. Connect the emitter that you brought from the living room to the outlet. Go inside the room through the yellow beams. In the lower left corner of the screen, you will find a place for a reflector. Next, you need to rotate the emitters to change the ray paths. First turn the emitter, which stands by the blue cabinet, then turn off the device that collects the rays, which is located in the lower left corner of the room. Then turn the emitter to the right of the device and go to the lower right corner of the room to the table on which the computer stands. Next to it on the wall, there is a second device that collects rays - turn it off.
As soon as you sit down at the computer, the killer will call you and tell you that he is coming to kill you. Climb into the cryogenic chamber and sit there until he leaves. From the basement, run to the backyard to the transformer box. Insert the number pad back, and place the remote control to the left of it. Enter the code 8541, pick up the remote and run to the entrance to the bunker. From there, call the killer from your smartphone.
After the cutscene, inspect the pockets of the corpse and take the electronic key lying next to the leg. Next, run to the basement and use the computer by entering the password namlecko. Look through Carson's file, then open the east hatch and run inside the bunker.
After going downstairs, go straight along the corridor to the far door, along the way, inspect the grate, on which traces of blood are visible. Use the electronic key to open the door to the killer's room.
Examine the table, lift the extension from the floor, study the reports, view the photos and take the rotator key from the table. Pick up the lockpick pistol from the floor. In inventory, combine the plug and clock to pull out the battery. You need to use it on the lockpick pistol. There is a box in the corner of the room, take mines, ammo and a first aid kit from there.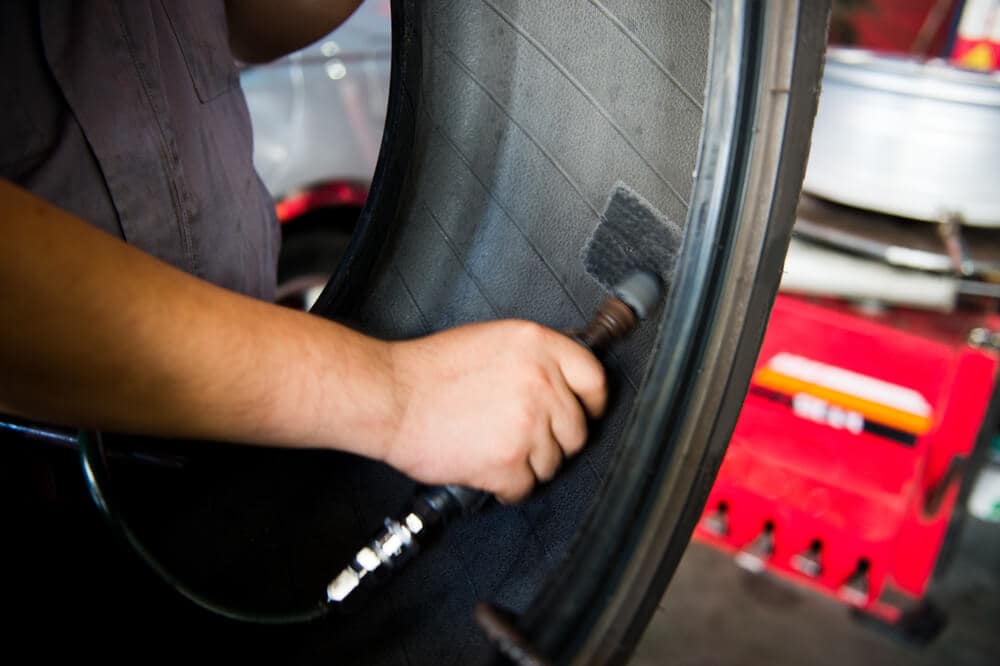 Nearby on the right is a suitcase with your field laboratory on the floor - take it. Next, pay attention to the second table. Take the jackknife, electrical tape and nylon rope from there. Examine the magazines lying on the floor near the bed and remove fingerprints from them. Exit to the corridor.
Take a blood sample from the ventilation grate, then enter the chamber located to the right of the door. There, remove the prints from the magazines lying on the floor, then climb onto the bed and inspect the ventilation grate. It will be sealed tight. In inventory, combine the duct tape and the mine, then attach the mine to the grate. Next, you need to use a nylon cord on the mine. After the explosion, climb into the ventilation shaft.
After getting out into the corridor, go left to the door. Under it on the floor you will find a blood stain. Take a sample with cotton swabs and analyze it in your field kit. Next, use the master key to open the door located opposite the ventilation shaft. From the table standing in the room, take the keyboard and adjustable wrench. In the same room there is a vertical ladder, climbing which you can get out to the street through the hatch.
Examine the sign under the fence, then use the switchblade on the rope to remove the corpse. Agent Harris will be hanged. Examine the corpse, next to it you will find a memory card. Analyze the data in the set, then return to the murderer's corpse and cut off his finger. Return to the room with the computer, put the severed finger on the system unit to enter the system. After entering the code 1884, insert the computer key and view data from camera groups #4.
Paloma, a few minutes earlier:
Try to get the key from the table - it won't work. Move to the workbench, which has a circular saw. Use it to remove the clamps on your arms. After that, make a second attempt to pick up the key.
McPherson
View camera data from group 4. On the cistern in the basement, you will be able to see the code with which you need to open the upper door by entering the "access control" on the computer.
Paloma, a few minutes earlier:
Take a metal rack (shelf) in the closet and support the front door with it.
Victoria McPherson
Get out of the bunker, answer the phone. Next, go to the main entrance porch. Examine the bullet hole on the left support post, then use the tweezers from the kit to remove the bullet. After analyzing it in the field set, go to the bunker - to the place where Hawker shot Carson.
Examine the bullet hole in the wall - remove the bullet and analyze it. Examine the body and take the electronic key. After that, call Hawker, and then go to the room on the left. Examine the printer, then open the cabinet and inspect the mask lying there. After that, log into the computer with the password "betrayal". After viewing the photos, call Hawker, and then go down to the basement where the furnace is located. Entering there, Vic will smell; take a soil sample at the end of the corridor, then inspect the furnace. Call Hawker again - there will be no answer. However, soon Hawker will call himself and invite you to return to the computer and see the files in it. After viewing, return to the furnace.
Workshop
Lift the hook and chain from the floor. Combine them in inventory. Next, soak the assassin's cape in the sink. Put the wet cape on the burning barrel on the left. Take the pole. Go right past the sink, use the pole on the window to open it, and then use the "cat" on the beam on the left. You are saved.
Basement again
Take the soldering iron from the table, then unscrew the boiler handwheel with an adjustable wrench. Next, go to the kitchen, where you will meet Hawker. After the "exchange of pleasantries" use the first aid kit to improve your health. Then take the explosives and detonator left by the killer from the tabletop. Open inventory, combine explosives and detonator to make a bomb, then combine extension cord and soldering iron. Go to the basement and open the windows there, using the levers that are located on the walls in the left and right parts of the room.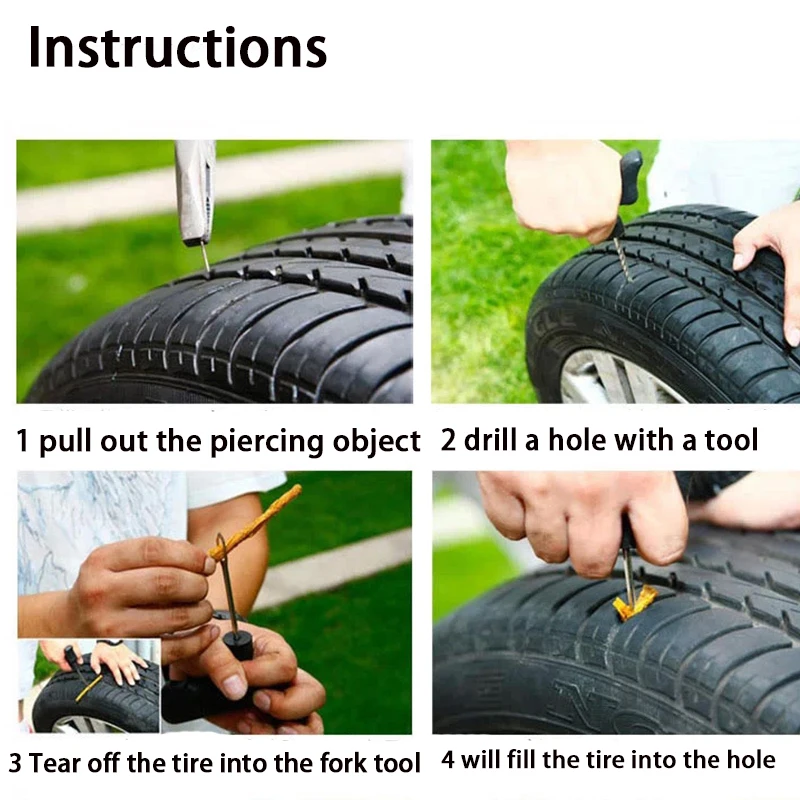 Next, remove the digital panel from the boiler and attach it to the door connector. Enter code D090746B2 and enter the door.
Screw the handwheel to the box on the wall and turn it to open the door. Next, go to the only locked door. Put your mine under this door, then connect a soldering iron with an extension cord to the bomb and insert the plug into the socket.
After entering the room, inspect the computer, then connect the keyboard to it. View the data from the cameras of group E. Take the "bug", load the gun and go out into the corridor. Follow it straight to the end, where you turn on the ventilation. Go back and go to the tank, behind which the killer is hiding, fix the "beetle" on it, and then go to Hawker on the other side of the listening device.
After watching the cutscene, take the PDA, inspect the corpse, take the pistol and the electronic key. Next, go to the room opposite, where take the Hawker's lockpick pistol and the cable. Connect the cable and the PDA, open the drawer with the skeleton key found, from where you will take the metal cutter.