ATV rims take a battering when out adventuring. Sometimes they end up bent but not broken. There are ways you can recover your ATVs bent rim and tire and other cases where you shouldn’t. Here is how to repair your bent ATV rim and tire.
Your rims take the weight of your ATV and were designed to resist some impacts such as rocks and big falls. But it may be one too many for your ATV rim and you may end up with yours bent. Now this method will not make them exactly back to normal, and if the tire damage is too much - it is best to replace both a bent ATV rim and tire.
Image from www.grizzlycentral.com
For slight bending you first need to work out if your ATV rim is steel or alloy. Alloy has a greater risk of further damage to the wheel; steel is easier to fix but will not result in a perfect finish.
If you need to take your wheels/tires off to get better access, it’s best to do so now. Find the bent rim by rolling the tire and seeing any inconsistent rolling or hopping.
Three items you need are a block of wood, blow torch and a dead blow or rubber hammer.
To begin repairing your bent ATV rim get the bent piece hot using your heat gun – taking measures not to heat the tire rim.
Use your block of wood to cover the bent rim. The more curved the wood (to match the profile of the rim and tire), the better.
ATV are the core piece of riding gear for off-road riders
Find out the best look for you
If the wheel or tire has buckled and showing any signs of cracks or permanent damage, then do not attempt to repair. If the bead area is bent then it is possible to repair, otherwise avoid repairing the bent rim.
If you are able to create a small flat area by hammering the opposite side of your bent rim. You can use a car jack to push the bend out again. A block of wood can help here to protect the tire and rim against the jack.
When dealing with a bent tire lip on your ATV, a crescent wrench to gently move the bent lip in or out depending on the damage. Crescent wrenches are ideal as they adjust to the size of your ATV rim and tightly grip the edges.
A specialist mechanic or repair shop that handle ATVs will be able to use high tech equipment to refurbish and repair the bent rim. Search online to see if there is someone that can help with bent rims in your area.
If all else fails or if you have damaged your ATV rim, then the best advice is to replace it with a new or used rim and tire. It can be hard to source a new rim as some owners have classic ATVs and parts are scarce.
HIT
ENDURO LIGHT Graphite
the most durable
458 EUR
HIT
ENDURO Camogrey
the most durable
657 EUR
ENDURO Graphite
the most durable
279 EUR
HIT
ENDURO Graphite
the most durable
657 EUR
-28%
AQUAMASTER-ZIP LIGHT Camogrey
with central zipper
598 EUR
430.40 EUR
HIT
ENDURO LIGHT Camogrey
the most durable
458 EUR
-12%
AQUAMASTER LIGHT Red
reliability & comfort
438 EUR
386.20 EUR
NEODRY Black
17 EUR
11.90 EUR
ENDURO Camogrey
the most durable
279 EUR
AQUAMASTER Blue
reliability & comfort
647 EUR
-20%
HIT
AQUAMASTER Red
reliability & comfort
259 EUR
207. 20 EUR
-40%
HIT
AQUAMASTER Orange
reliability & comfort
259 EUR
155.40 EUR
AQUAMASTER Red
reliability & comfort
677 EUR
BELT
9 EUR
ENDURO BF Camogrey
bootfoot waders
528 EUR
ALL SEASON Black
62 EUR
ENDURO BF Camogrey
bootfoot waders
329 EUR
MUDWAY Graphite
179 EUR
MUDWAY Camogrey
179 EUR
NEOSENSOR Camoarmy
12 EUR
8.40 EUR
Explore all
ATV Riders Forum > ATV Riders Mechanical Section > ATV Steering & Suspension > how to check for a bent frame ASAP!!!!
PDA
View Full Version : how to check for a bent frame ASAP!!!!
Tommy 17
08-19-2004, 10:12 PM
well after putting my quad on the wheelie bar and not lookin at it for about 2 weeks (still waiting on parts go figure). .. anyways i noticed that my right wheel is MAJORLY toed in... the left tie rod is bent for sure the right one don't look to be bent... now when i looked at it on the wheelie bar u can tell something is majorly bent bc my bars have to be 1/8 of the way turned so the right wheel is straight and the left is totaly messed up...
also the right wheel was not the wheel that came apart in the crash it was the left...
i think my frame is bent so how can i tell if its bent... what can i measure or check to make sure... i think when the left a-arm hit it may have pushed that side of the frame back and twisted it but i can't tell looking at it... what can i do to check if this frame is straight... i have 8 days till i leave for college and no time to really rip this thing apart... so if i could do it without the front end on it that would be perfect...
basically i need to know how to check for a bent frame... i'll get a picture in the daylight tomorrow....
BSTURDIVANT
08-19-2004, 10:34 PM
Visually look at the frame just behind the lower rear a-arm mount. If bent much it will wrinkle there!
You can get a accurate measurement by running a string down the bottom of the frame- rear to front. First measure the frame between the footpegs in the rear and mark the center. Do the same at the frame in the front where the outer frame taper stops (narrow point about 1' back from bumper). Anchor the string at the center point in rear and pull tight toward front bumper. When the string lines up on front mark(1' back), have someone measure front left and right of string. Measurements should be fairly equal. Probably has a bend spindle where hub bolts on.
Tommy 17
08-20-2004, 10:10 AM
k... i'll try that tonight when my dad gets home to help me with it...
08-20-2004, 01:42 PM
my frame is just like yours but prob aloot less..ii call it tweaked...anyways my front right tire is towed out....if you feel underneath the frame you can maybe see where it wrinlkes up like the other guy said...also... have your dad or someone help you set it up onto its grabbar (of u cant do i t by yourself,,,its difficult for me too) & then you will definately be able to tell if its as bad as you said it is.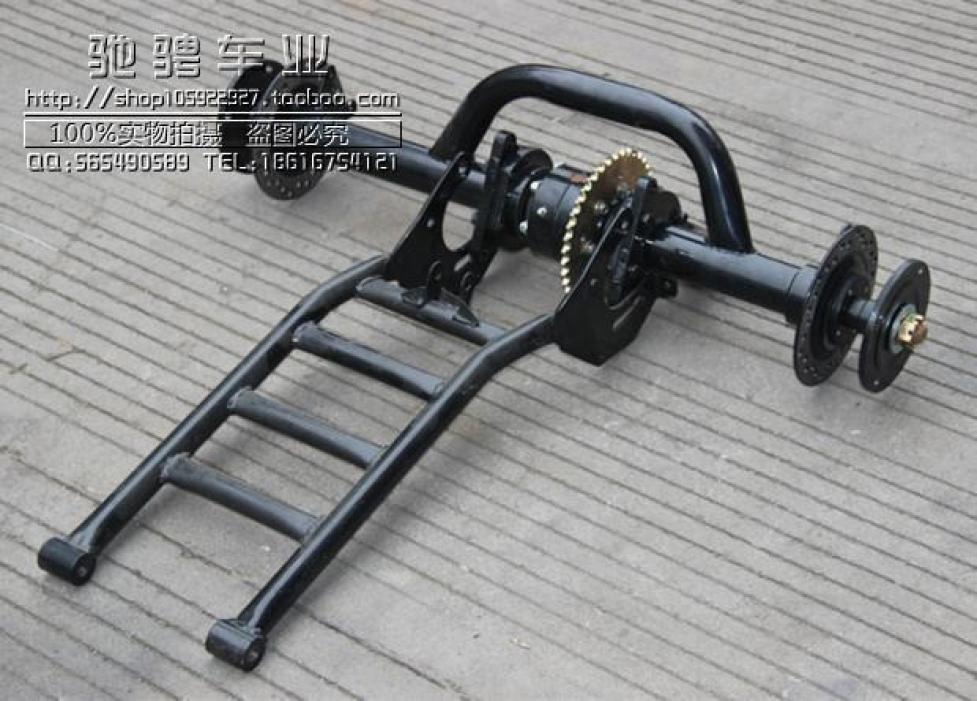 ..good luck & 400ex frames are a dime a dozen..my 450r frame isn't..:( stuff happens....be glad your not hurt & have fuin at college
Tommy 17
08-20-2004, 02:27 PM
its easy to get on the wheelie bar haha...
we measure the frame and we don't think its bent but we think it twisted the steering stem... so i have to take that off and check it out...
cletusEX
08-20-2004, 09:40 PM
I found out my frame was bent with a level. I stood the bike up on the grab bar and placed a level on where the bumper bolts up then moved the level back to where the oil tank bolts up. The frame was level at the oil tank but not level at the bumper. It is not really precise but mine was bent enough to notice a significant difference. This won't work all the time because both measurement might be unlevel due to the axle or grab bar being bent. But if they are different you know there is a tweak somewhere in the front of the frame.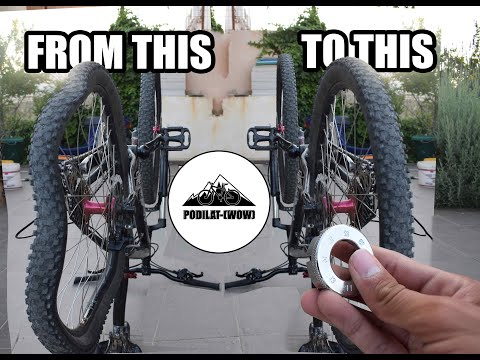 Hope this makes some sense.
Tommy 17
08-20-2004, 09:45 PM
i'll do that just to double check tomorrow...
been to tomahawk latly cletus??? i wanna go back bad but i don't have a quad right now:(
cletusEX
08-20-2004, 11:44 PM
Originally posted by Tommy 17
i'll do that just to double check tomorrow...
been to tomahawk latly cletus??? i wanna go back bad but i don't have a quad right now:(
Yeah I was up at Tomahawk a few weeks ago. It was really muddy but was still a good time. I might be racing a mx race there on Sunday but I just got my wisdom teeth, so I kinda have to play it by ear.
wvspeedfreak
08-21-2004, 08:14 PM
Hey Cletus or Tommy,is there an area for spectators at Tomahawk?I would like to go check out the race tomorrow.
cletusEX
08-21-2004, 08:54 PM
Originally posted by wvspeedfreak
Hey Cletus or Tommy,is there an area for spectators at Tomahawk?I would like to go check out the race tomorrow.
Yeah there is plenty of places to watch the race at Tomahawk. I won't be up there, I just decided to go out and play ride a little due to having my wisdom teeth removed on Friday. Have fun.
wvspeedfreak
08-21-2004, 09:07 PM
Thanks for the info Cletus.Good luck recovering from the dental work.
Woodsrider
08-22-2004, 04:14 PM
Im betting its a bent spindle, Mine was the same way. I did a lot of measuring of the frame, re-aligned the front end and everything I finally pulled the spindles off and looked at both of them and the left was bent. Mine was so bad that at one point, with the wheels cranked to left stop the back inner edge of the wheel was rubbing on the lower a-arm:o I was in a bind so to stop it from rubbing I welded a bead on the steering stem to lessen the turning radius on that side. This was a temporary fix to get me through a ride I couldnt miss. And I wouldnt reccomend it for any thing but that. I found a used spindle on E-bay pretty cheap.
JOEX
08-22-2004, 09:29 PM
Originally posted by Woodsrider
Im betting its a bent spindle, Mine was the same way. I did a lot of measuring of the frame, re-aligned the front end and everything I finally pulled the spindles off and looked at both of them and the left was bent. Mine was so bad that at one point, with the wheels cranked to left stop the back inner edge of the wheel was rubbing on the lower a-arm:o I was in a bind so to stop it from rubbing I welded a bead on the steering stem to lessen the turning radius on that side. This was a temporary fix to get me through a ride I couldnt miss. And I wouldnt reccomend it for any thing but that. I found a used spindle on E-bay pretty cheap.
Hey, Mike, at what location did the spindle bend? I have wondered about mine after a few hits, one you know of:p
Woodsrider
08-23-2004, 10:11 PM
Originally posted by JOEX
Hey, Mike, at what location did the spindle bend? I have wondered about mine after a few hits, one you know of:p
At the back where the tie-rod bolts on. It was shoved out almost an 1/8th inch:eek: Honestly I think the whole spindle may have had a little twist to it but thats where it was most noticable, and logically its the weakest point when your tire hooks a stump and slams hard to one side tossing you over the bars:o
2001-400ex'er
08-24-2004, 01:46 PM
When you guys say Tomahawk what state is that in? j/w
Powered by vBulletin® Version 4.2.1 Copyright © 2023 vBulletin Solutions, Inc. All rights reserved.
From time to time, the ATV will be naughty and behave differently than you would like. Nothing beautiful lasts forever, right?
One of the most common problems you may encounter is the ATV suddenly pulling to the left or right.
If you are lucky, your problem may have a simple solution)
Let's take a look at some of the most common reasons why an ATV can pull to the side, and of course, here we will talk about how to get rid of these problems.
The most common problem that causes the ATV to pull to one side is the difference in rolling resistance due to different tire pressures. Also, the problem may be associated with natural wear or damage to various components of the chassis of the ATV and, as a result, a violation of the angle of the wheels.
So how do you determine what is causing problems when riding an ATV?
As you probably already understood, there can be several reasons.
To understand why an ATV wants to pull off the road and dive into a ditch when you really don't want to, you need to do a number of checks.
Although I don't have exact statistics to tell you which malfunction occurs most often, I still recommend that you start with what is easiest to check and fix before spending time and money on more unusual and potentially more complex searches.
In my experience, the most common cause, and by far the easiest problem to check and fix, is uneven ATV tire pressures.
Let's look at what happens when ATV tires have different pressures.
A flat tire has a larger area of contact with the road surface than a normally inflated wheel, as a result of which the friction force, and hence the rolling resistance force, applied to such a wheel will be higher. The wheel will roll more slowly. The opposite wheel will run ahead and try to turn the ATV around the slow wheel. That is, if the ATV pulls, for example, to the left side, most likely, the fact is that the left wheel is lowered.
To solve this problem, you need to equalize the air pressure in the ATV tires. It is best to refer to the operating instructions, which must indicate the required air pressure in the wheels recommended by the manufacturer. The pressure in the wheels installed on the same axle of the ATV must be the same.
At the same time, you should be aware that due to the design features and weight distribution of the ATV, the tire pressure on the front and rear axles may differ.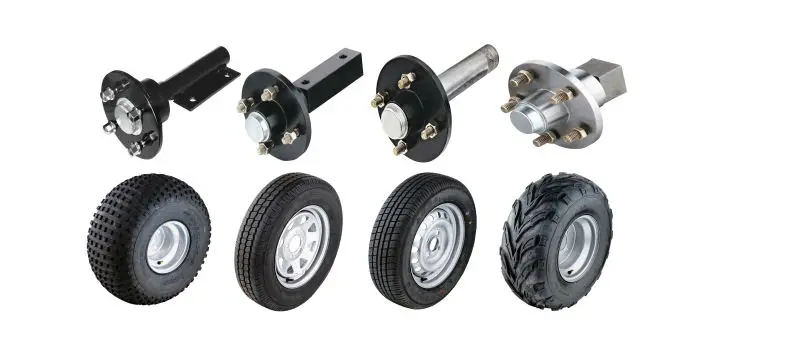
Check with a good tire pressure sensor.
Most manufacturers complete the ATVs with a set of tools and a sensor for checking air pressure in wheels, such as ATVs Yacota SELA 200 , Yacota SELA 150 , Yacota Cabo 200035, Yacota Cabo 20035, , , 9003 MOTAX 200 , MOTAX GRIZLIK and MOTAX RAPTOR .
ATVs MOTAX and YACOTA have these sensors in the standard tool kit. If there is no such device in your kit, I recommend that you definitely purchase it. A very slight difference in air pressure in the tires may well be the reason that the ATV pulls to the side when driving in a straight line.
The air pressure should be checked in both front and rear tires. True, uneven pressure in the rear tires, most likely, will not be the reason for the withdrawal of the ATV from a straight path. Different pressure in the rear tires can provoke another malfunction - premature wear of the rear differential, due to the increased load on it. But this is a story for a separate review.
I always keep this inexpensive instrument in my toolbox, its accuracy is good enough to use.
Also make sure that the maximum tire pressure is not exceeded.
Over time, ATV wheels can wear differently, resulting in the diameter of one wheel being different from the diameter of another wheel. This can also cause the ATV to pull to the side.
To check if the front wheel diameters are the same, you can do a simple check: place the ATV on a flat surface and use chalk to mark the sidewall of each front tire at the lowest point.
Wheels must be pointing straight ahead, gear lever in neutral position. Roll the ATV forward until one of the wheels has made two or three revolutions and the mark you just made is back to the very bottom, to its original position. Look at the mark on the opposite tire. Ideally, it should also be at the very bottom. If this is not the case, the wheel circumferences do not match.
If the reason for the ATV pulling to the side lies in the difference in wheel circumference, then when driving to the right, the right tire should have a smaller circumference, and when driving to the left, the left one.
Wheel circumference can vary not only due to uneven wear, but also due to air pressure differences in the tires.
The wheel is like a balloon, the higher the pressure, the larger its diameter and vice versa.
For this operation, you need to lift the ATV, place it steadily on the supports so that all the wheels are in a suspended state.
It is very convenient to use the bike racks to lift the ATV. If you do not have them yet, and you plan to service the ATV yourself, I recommend purchasing them. They are relatively inexpensive. Tackles will greatly simplify the ATV maintenance process.
Check that there is no excessive play in the ATV suspension and steering joints. Start with the tie rods and steering rack. This operation is more convenient to carry out with an assistant. Have an assistant move the ATV handlebars to the right and left, often and with a small range of motion. And you, in turn, keep your hand on the swivel, which are subject to verification. Check the steering tips and tie rods one by one. You will feel the excess play in the hinge with your hand. If the ATV steering wheel has excessive play, but the tie rod and steering tip are in order, then the steering rack itself or the steering shaft bushing may have play, which can also be checked by hand. The steering column bushing usually wears out over time. The same goes for the ball joints on the tie rods.
Tighten any loose bolts and replace worn parts. Worn parts can break soon, so replacing them won't be a waste of money, even if their wear isn't the reason your ATV pulls to the side.
In addition, the wheel bearings must be checked for excessive play.
To do this, have a helper grab the top and bottom of the wheel and shake it while you check for play in the ball joints and wheel bearings.
Check how easy the wheels turn. The wheels should rotate freely, without noise and crackling. The presence of noise indicates wear on the hub bearing. And the tight running of the wheel is about bearing wear or souring of the brake pads. As we said, if one of the ATV's wheels is spinning at a slower speed than the other wheel, the ATV will pull towards the slow wheel.
If necessary, replace the bearings and service the front brake calipers. Sometimes the caliper is easy enough to clean, and sometimes you can’t do without replacing the brake cylinders or the caliper bracket itself.
Complete the work with suspension lubrication. The chassis of ATVs of the brands YACOTA , MOTAX , AVANTIS is equipped with special grease fittings through which you can easily lubricate the desired suspension unit.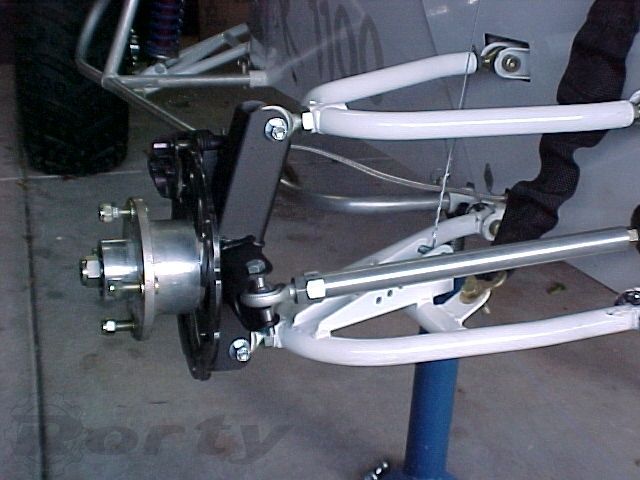 We have already told, in one of the reviews, using the example of a gasoline 125 cc ATV MOTAX T-REX , about the features of maintenance of the ATV suspension. Regular maintenance of your ATV will definitely prolong its life.
Control check three: check the running gear for geometry violations.
If you use the ATV for active riding or sports, then it is possible that you have bent some part of the suspension on the next jump. ATV front suspension A-arms are especially prone to damage if you hit a stump or rock while riding. "Fast-growing" trees suddenly appearing in front of the ATV as you drive, a common story!)
A-arms are designed to absorb heavy suspension shock and, through their integrity, retain more expensive and hard-to-find ATV parts that are more difficult, more expensive or even impossible to repair, for example, an ATV frame. It is not always easy to see if the suspension arm is bent or not. It happens that the levers do not have a symmetrical shape, because the ATV suspension was originally designed this way by the manufacturer.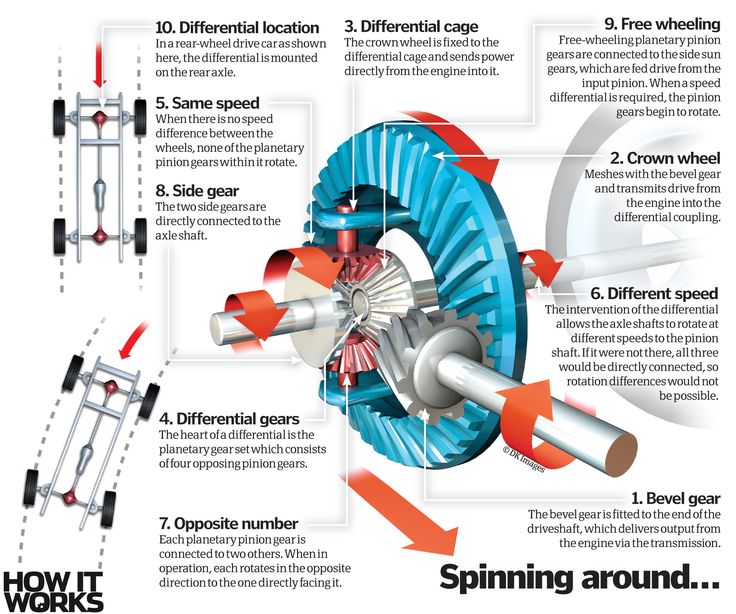
Compare the distance between the axles of the front and rear wheels of the ATV on the right and left sides. If there is a difference, then one of the suspension arms is most likely damaged.
The camber and toe angle can be adjusted by eye yourself, but it is better to contact specialists who have the necessary measuring equipment and data on the required wheel alignment values.
I hope you find this article useful.
For all questions related to the purchase, selection and repair of ATVs and other equipment presented in the VEZDEHOD online store, please contact our consultants. We will be happy to help you choose a new ATV according to the specified parameters and solve any technical issue related to the malfunction of already purchased equipment.
so that you do not tumble on the killed equipment and do not spend money for repair you have to check it very carefully. How exactly this is done - we will tell in this article.
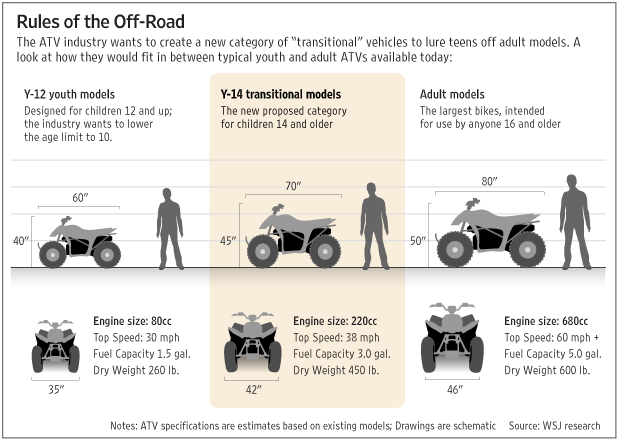
Since the ATV must be inspected not only from above, but also from below, it is advisable to check it at a service with a lift. As an option, a garage with a pit or a flyover is also suitable.

 If the reflectors are cloudy, the ATV dived for sure.
 Now jack up the front end and continue checking.
 The second should rotate in the opposite direction. Then we turn on the differential lock, and turn any wheel again. Now they should rotate in the same direction.
 If it is possible to inspect the ATV from below, we inspect everything that is visible: bottom protection, frame, suspension. Should alert:
Once the ATV has been inspected from all sides, it's time to check how it works.
What we are doing:
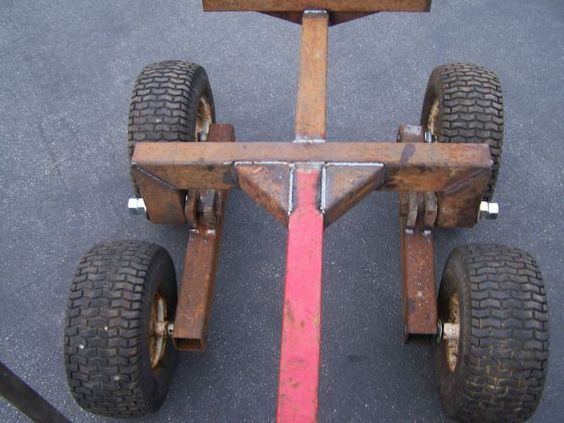 The sound should be clear (no rattle) and smooth, without noise reduction/increase.