I’ve been a mechanic for over twenty years, and if there’s one thing that can kill an engine, it’s a low oil level. I’ve seen it many times, and it always makes me feel sad for both the owner and the bike.
Checking ATV oil level is a simple five-step process, begin by:
In this post, you’ll learn how to find and check your ATV oil level. You’ll also learn which oil to use and how to add it.
Page Contents
Park your ATV on level ground, and if you’ve been running your engine, shut it off and allow the engine to cool for five minutes.
The oil, as you know, moves around your engine through a series of small oil galleries. It will take a few minutes for the hot oil to make its way back to the oil pan. This is important. Checking the oil level immediately after shutting down will give a false reading.
The dipstick is exactly what it sounds like – a metal or plastic stick with high and low-level markings. It will usually be somewhere convenient on either side of the engine. The dipstick or cover will also likely be marked “OIL” or have an oil symbol.
The dipstick is usually screwed into the engine, and to remove it, requires turning it anti-clockwise. But before removing the dipstick, using a clean cloth, clean around the dipstick.
Dirt and grit will collect in the recess and can fall into the engine when the stick is removed.
Go ahead and remove the dipstick. The most common type turn anti-clockwise. Clean the stick and familiarize yourself with the high and low marks.
The low-level marks – Some sticks may read “ADD” or “LOW” or “L” or have a stamped line or dot. Whichever your dipstick has, the lower mark always represents the low oil level, ie danger area.
Allowing the oil level to get close to or below the low mark is risking serious engine damage.
The full level marks – The full mark on a dipstick will always be the uppermost mark. Common full marks include “F” or “Full” or a dot or stamped line.
The Hatched markings – The hatched markings are the crisscross markings you’ll see on most dipsticks. If present, they will be located between the high and the low oil level marks.
An oil level that reads anywhere within the hatched makings is, in theory, OK. However, it’s always best to run your engine only when the oil level reads full, especially older engines.
Now that you are familiar with the stick markings go ahead and dip the stick back into its seat. At this point, some bikes may differ. Some engines will require you to screw the stick all the way in and remove it to read.
Others will only require you to seat it and remove it to read. Your bike manual will tell you which. It may be stamped into the dipstick itself. If in doubt, just seat the dipstick and remove to read.
When you remove the stick, hold it virtually. Some dipsticks can be challenging to read, especially on a sunny day. You may need to re-dip to confirm the first reading.
Moving to the shade to read dipstick helps, or lay it on some kitchen towel to help identify the oil height.
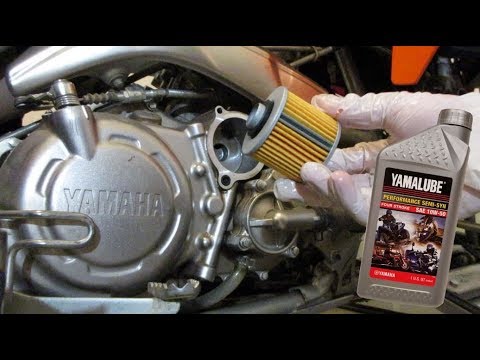
OK, so you’ve dipped for oil, and you need to add some. Adding oil is easy. You shouldn’t need a funnel, but it does help. When adding oil, add only a little and allow a minute to settle before checking the level. Too much oil is bad for your motor. It’s not as bad as too little but can damage your engine.
Symptoms of too much oil include:
Your engine maker will dictate your oil type, but your model will also include a temperature chart.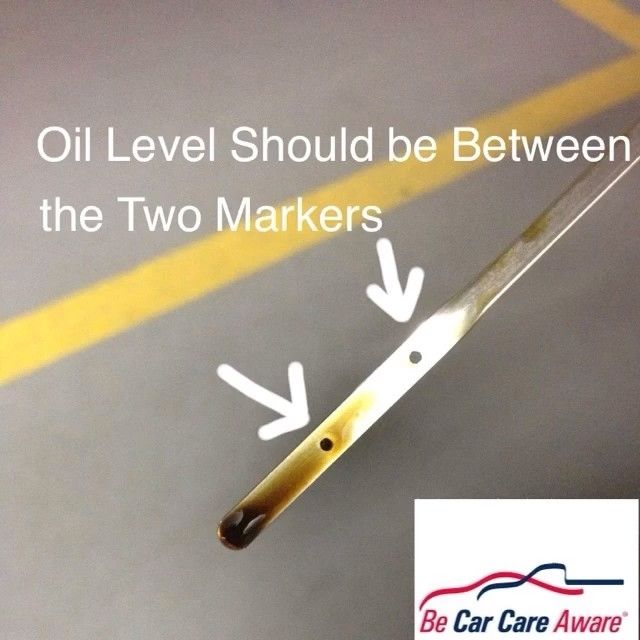 If you use your bike in extreme weather temperatures, check the oil type chart. Colder climates will require lighter oil types.
You may find the following posts helpful:
ATV oil drain leaking
How often to service ATV?
Will the bike start without oil?
Oil leaking from manifold
ATV Riders Forum > Sport ATV Model Information > Honda TRX 400EX & 400X ATV Info > Proper method to check oil?
PDA
View Full Version : Proper method to check oil?
Blodg
01-06-2014, 01:26 PM
I see a discrepancy. In OZ-T's thread about his new 400 he was given advice to let the quad sit for a few min after warmup before checking the oil. I looked in the sticky section and didn't see anything on this so I thought I would start a thread to discuss.
When I read the advice in the thread mentioned above I thought they were wrong. But I looked at the 2002 400EX manual that I had downloaded off the web a while back and sure enough it says:
1) level ground
2) warmup for 5 min (extra 5 min if below 50 deg F)
3) stop engine
4) after a few minutes remove dipstick, wipe, and check oil level
This does agree with most of the advice I have seen on here. It is not correct, however, according to my manual! My 2006 manual does not say to wait a few minutes before checking. As a matter of fact, it does not even say to shut the engine off!
My 2006 400EX manual says:
1) level ground
2) warm up for 5 min (extra 5 min if below 50 deg F)
3) remove dipstick, wipe, and check oil level
SO WHICH IS IT?
The first few times I checked mine I actually kept the engine running and checked it at idle after a warm up. Now I warm up, shut-off and check immediately (all I had to go by was my manual which never mentioned waiting). After seeing the alternate advice in the old manual the other day I did warm up, shut off and waited 3 min and when checking it this way it was way over the full line. I immediately checked it again using the method in my manual and it was right on the full line so which is it?
I suppose checking the level and then measuring the amount drained out during an oil change might indicate which is correct.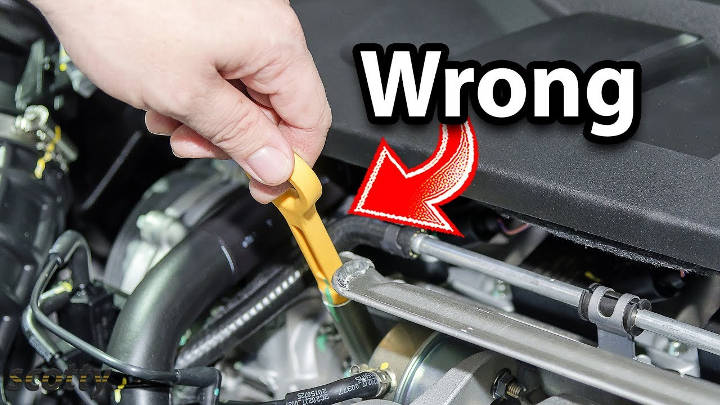 Or is it possible that both methods are correct for the proper years and the newer models with reverse use a different method? Or did Honda change the instructions for another reason? Any ideas or has this been discussed before?
DragonGunner
01-06-2014, 03:26 PM
My 1999-2000 manual says what your first oll check was. And thats the way I do it.
If you check with engine running it will spray out......I do this not to check oil, but if I want to see if the oil pump is working.
KKiowaTJ
01-06-2014, 03:51 PM
I let mine warm up for 5-10 mins and let sit for the same amount. Dead on every time, If I watch a clock and check it in 3-5 then 8-10 minutes, There is no difference on my dipstick of the oil level being higher or lower.
CJM
01-06-2014, 05:12 PM
Yea someone got something mixed up in the newer manuals I guess. You cant check oil with anything running, it will spray out or give you a totally inaccurate reading.
I always warmed mine up for about 5-10 min, shut off and let sit for about a min then checked. It is better to be slightly overfull than under. If anything since the 400 circulates the oil through an oil tank unlike alot of other smaller engines-being overfull a bit wont hurt it-just dont fill it up like a moron all the way to the brim or check cold.
Blodg
01-06-2014, 09:44 PM
I got the same reading with the engine running as I did when shutting it off and checking immediately. There were a few small splashes of oil coming out every once in a while though...
I think checking immediately after shutting off makes sense as that is the way it is when running and since we are checking an oil tank and not the engine case it shouldn't need time to drain back down.
KKiowaTJ
01-06-2014, 09:54 PM
It so the oil is at its thinnest and warm enough that is in all crevices of the motor. When shut down, It takes a few minutes for it to all drain and collect and the level in the dry sump has perfect pressure.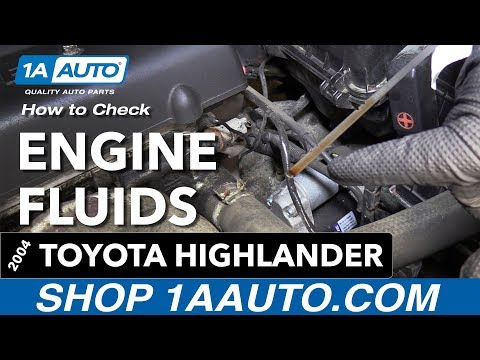 That's why you need level ground so the oil sits through out the system un restricted and get the best reading.
You have to account for all the oil sitting in the tank, Cooler and case, Then warm it up to operating temp so it will flow to the bottom when checked.
MtnEX
01-06-2014, 10:46 PM
LOL... so now... what if I want to install one of those big high capacity oil tanks?
Then what?
I guess what I am trying to understand there is... when guys install the big oil tanks to run more oil is it then measuring vertical level and reaching the same height of oil, and holding more with a wider tank?
KKiowaTJ
01-07-2014, 01:34 AM
Every sump tank is made for that application. When I change my oil, I always change the filter and let it drip for 15-20mins. Replace filter and add two courts. Fire it up for a few and let it run. The oil level is always a tad over. If you ge a system to hold 2.5qts, Put that in and find the measurements on the stick and if off, Mark them full, Add etc.
But I highly doubt its a problem being these are 15 year old machines now and they have it down to a science by now.
2001400exrida
01-07-2014, 08:52 AM
u can check oil running any machine that has an oil tank. On the 450's it's real easy cuz there is a site glass so no dipstick. Best method on any vehicle is to get engine completely warm.....shut down motor. let sit for 3 minutes and check the oil level. I do this on my cars, atvs, lawn mowers, etc.
When you have an oil tank such as the 400ex and nearly every other atv out there besides the honda 450's.....you get more room for error. A tank is basically the oil resevoir so as long as you're within the dipstick lines on a tank you should never have a problem, that being said i always keep my 400's at the full line. In the case of the honda trx450r and 450er, you do not have a tank, so it's important to make sure you don't put too much or too little oil in the honda 450's.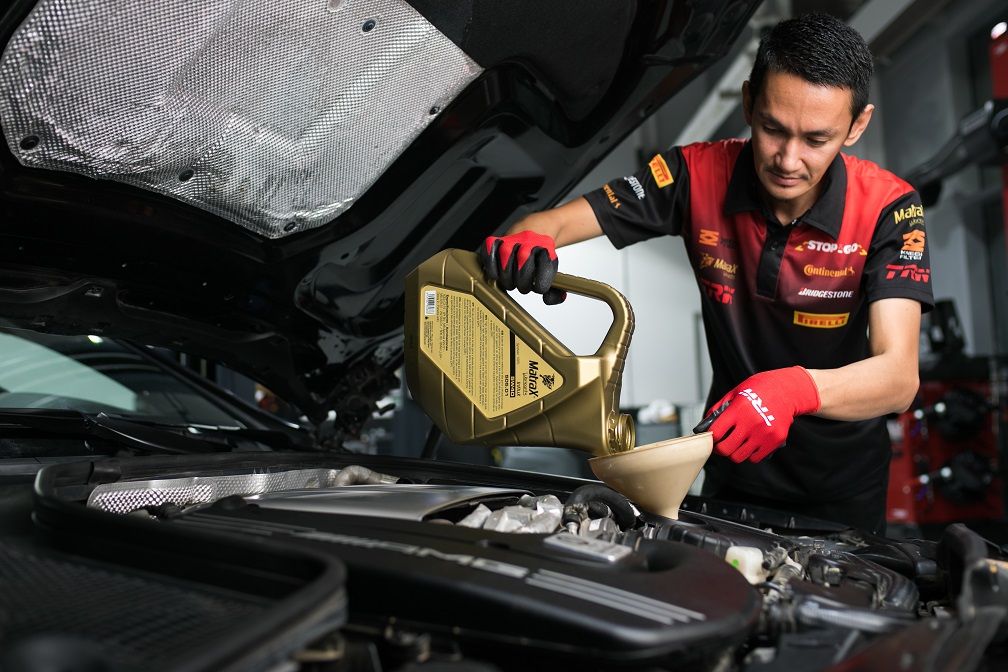 I put exactly .86 qts in and have never had a problem. I always check the site glass to be sure i'm near or at the full line just to be sure.
buck440
01-08-2014, 12:20 AM
I always check it before I turn it on...cold. never had an issue. I think people overthink things.
400man
01-08-2014, 01:53 AM
I always check it before I turn it on...cold. never had an issue. I think people overthink things.
same here. if mine sets for a long time and/or I haven't checked it in awhile, sometimes its pretty low on the stick when I check it cold. so I just add a lil bit and don't worry about it.
2001400exrida
01-08-2014, 08:02 AM
here's what the owners manual says, with a little paraphrasing.
To check the oil level, the engine must be warm, a cold engine will give an inaccurate reading. Let it idle (without goosing the throttle) for five minutes, or 10 minutes if it is less that 50 degrees wherever the quad is.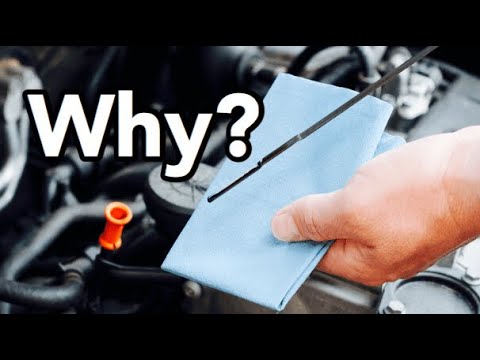
Shut the engine off. After a few minutes, remove the dip stick, wipe it clean, put the dip stick back in, but without screwing in any of the threads, then remove it to show the oil level.
The oil level should be between the two marks.
Blodg
01-08-2014, 05:44 PM
here's what the owners manual says, with a little paraphrasing.
Did you read the first post in this thread? I already listed what the owners manual says, and it is different from 2002 to 2006...
Powered by vBulletin® Version 4.2.1 Copyright © 2022 vBulletin Solutions, Inc. All rights reserved.
All ATVs have their own "term" of life. This applies even to expensive branded devices that cost tens of thousands of dollars. There is nothing to be done about the fact that key components of equipment gradually wear out and fail. But you can increase the life of the components by using quality oil. Even if you decide to buy an inexpensive ATV, you need to find the right lubricants for it. Therefore, let's figure out which oil is better to choose for an ATV.
It should be noted right away that a special oil is used for each of the units of the apparatus. The lubricant composition is poured into:
It is not recommended to save on oil, as it not only reduces friction, but also removes excess heat. Due to this, the mechanisms work correctly, do not overheat and “live” an order of magnitude longer.
Refer to your ATV documentation for information on lubricant formulations. Each device has its own requirements, so be sure to study them.
Although it is worth following the manufacturer's recommendations, this does not mean that you need to buy the first suitable composition. All oils consist of a base and special additives. And it is on the basis that their operational features depend. There are 3 types of oil:
It is up to the rider to decide which oil to put in the ATV. However, experienced motorists are advised not to save on lubricants, since repairing an engine or gearbox will cost many times more.
There are several oil characteristics that a rider should pay attention to. The first step is to determine the viscosity of the liquid. To do this, look at the label. If it has the letter W (winter), then the liquid is designed for low temperatures. The following numbers show what weather conditions the composition is intended for (0 - mild winter, 25 - severe frost).
The situation is similar with summer liquids. There are 5 classes of compositions (by viscosity) from 20 to 60. There are also universal oils that are used both in winter and in summer. You can recognize them by special markings, for example: "20W40"
You also need to pay attention to:
The API system is used to classify oil by quality. The marking looks like this: S (common name) + A, B, C, D, etc. The lowest quality is marked with the letters "SA", and the highest quality is marked with "SL".
When deciding which oil to fill in an ATV engine, you need to take into account the characteristics of the vehicle itself. Because the ATV is subjected to considerable stress, the engine becomes very hot. This means that the oil must be resistant to high temperatures and conduct heat well.
Plays the role and basis of the composition. Ideally, you should use only synthetic or semi-synthetic fluid. You need to pay attention to the labeling: the country of origin, season, quality standard.
Important: For gearboxes and gearboxes, you need to use special compounds that differ from engine oil in a set of additives.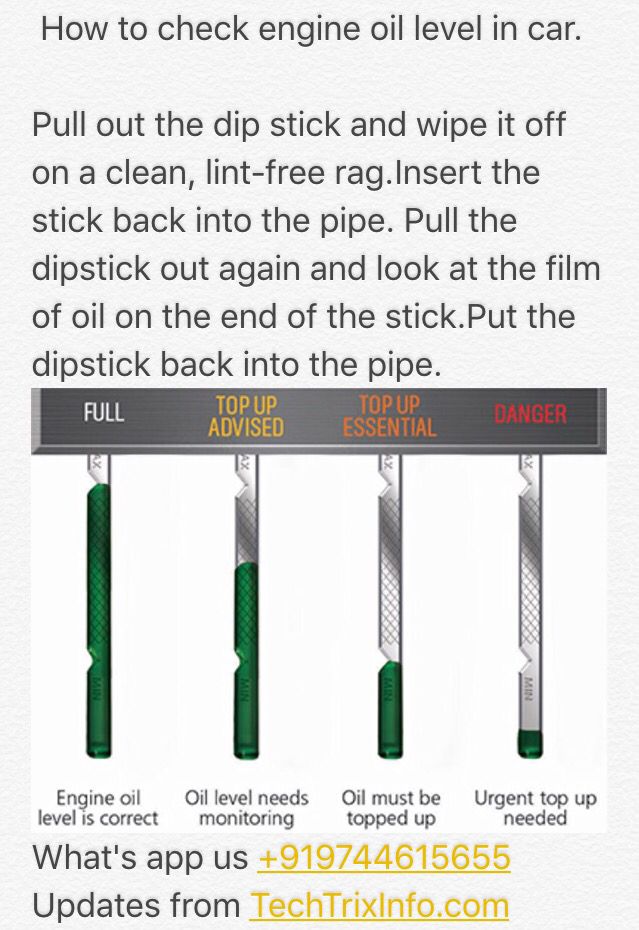
The first thing a rider needs to figure out is how often to change the oil in an ATV. Each manufacturer has its own recommendations, but experienced motorists advise filling in new fluid every 160 hours. In this case, the first replacement is performed during the break-in, after the device has worked for 20 hours.
To change the oil you need:
You also need to know how to check the oil level after adding new fluid. To do this, warm up the engine, wait 10 minutes, unscrew the oil tank cap, remove and wipe the dipstick. After that, the rod is lowered into the crankcase and removed after 3-5 seconds. The oil level on the dipstick determines the fluid level.
06/16/2020 6653
Suspension. Shock absorbers must be free of oil, and CV boot boots must be free of holes through which moisture can enter. To check the condition of the wheel bearings and hub bushings, you need to raise the ATV with a jack and shake the wheels vertically and horizontally - if there is play, one of these parts is worn out. Most often these are bearings. You also need to check all the suspension arms for play - perhaps ball bearings or silent blocks need to be replaced.
ATV with working shock absorbers lowers and rises evenly - when pressing on the rear or front, one of the sides should not sag.
Transmission. Gearboxes must be free of oil leaks and cracks. The oil in them can be checked by lowering a plastic clamp into the filler neck or unscrewing the drain bolts: it’s bad if the liquid is opaque, it contains chips or other foreign particles. To check the modes of operation of the transmission, you need to jack up the front of the ATV. When all-wheel drive is on, when turning the left wheel, the right wheel should rotate in the opposite direction, and vice versa. When the differential lock is engaged, both wheels rotate in the same direction. Transfers should be included without effort and crunch.
Engine. It must be free of oil. A serviceable motor starts in 2-3 seconds and works without a metallic rattle, an arbitrary increase and decrease in idle speed.
Bad sign - black oil or with foreign particles. Normally it is transparent.
A malfunction is also indicated by black, white or blue smoke from the exhaust pipe, as well as a burning smell. At idle, the exhaust gases of a serviceable ATV are almost transparent.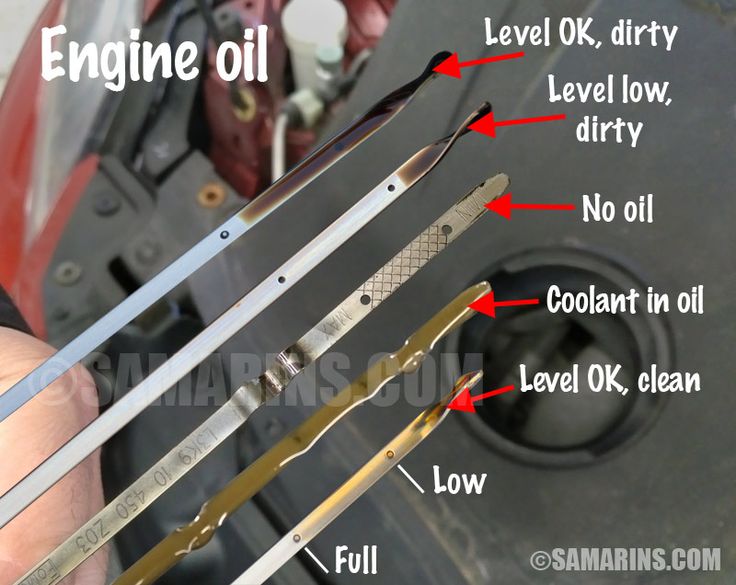
It is advisable to measure the compression in the cylinders - this will require a compression meter with adapters for different threads of the candles and knowledge of the normal compression value in the cylinders of a particular ATV model, taking into account the decompression meter.
Coolant . You need to check with a cold engine. The antifreeze level must be between the minimum mark "LOW" and the maximum "FULL". The liquid should not be cloudy. If there is sediment or dirty “flakes” under the radiator cap, the motor was poorly maintained and may have overheated.
Air filter . If there are oil stains on it, most likely the ATV turned over.
Electrical . It is necessary to check the operation of the parking lights, high and low beams, turn signals, alarms, horns, heating, winches. Error indicators - for example, an electric booster - should go out when the engine is started.
Electric power steering .