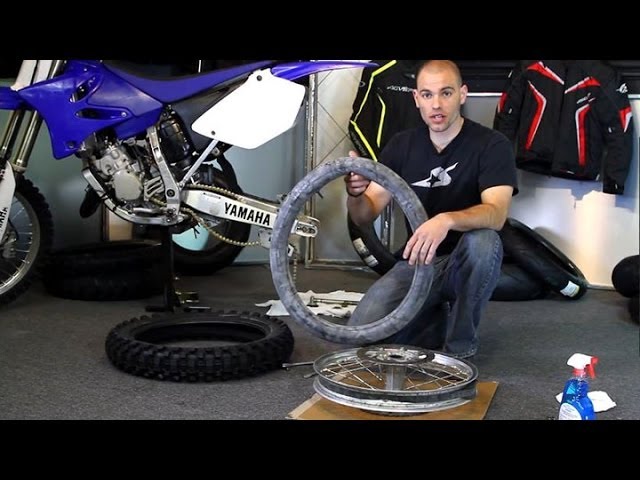
As an ATV owner and off-road riding enthusiast, it makes sense to learn how to do basic maintenance tasks yourself. This not only saves costs but will allow you to make adjustments when you are out on the trail, and something goes wrong. Learning how the brakes work on you ATV and making your own adjustments is the perfect place to start.
Tightening the brakes on your ATV can be achieved by a simple 5 step process.
The process for adjusting the front and back brakes differ slightly from each other. The back brake also has the hand brake, if your ATV is fitted with one, which will require adjustment as well. We detail this process for the front and back brakes and also the adjustment of the rear brake pedal and handbrake.
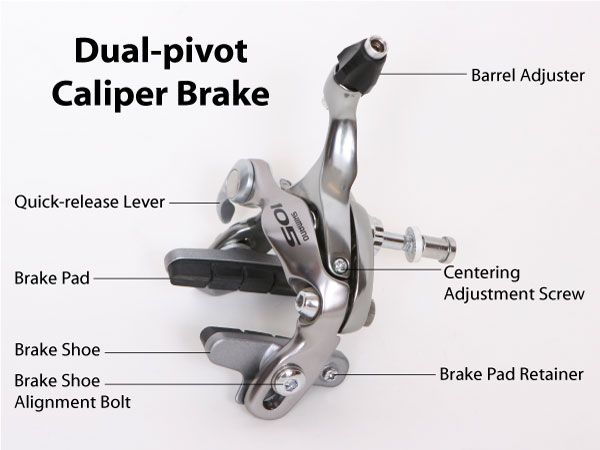
Establishing whether your brakes are drum brakes or disc brakes is essential because if the brakes are disc brakes, they cannot be adjusted.
Disc brakes work on a hydraulic system that does not require adjustment. If you have disc brakes on your ATV and they are causing you problems, then you should check fluid levels in the brake fluid reservoir or check to see if the brake pads have worn down.
If the brake pads have worn down, you would usually be warned by a squealing noise when you apply the brakes.
Other problems can go wrong on hydraulic disc brake systems such as replacing seals and pistons I the master cylinder of the system, but this is probably best left to professionals if you are unsure how to tackle it.
If your ATV has drum brakes, then we are in business and can make adjustments to the brakes. This brake system is mechanical as opposed to hydraulic, and we can adjust the distance of the brake shoes from the drum.
A jack or a stand that can lift the ATV so that all four wheels are off the ground is the ideal position to work on the brakes of your ATV, and it makes the job quicker and safer!
If you don’t have this equipment, jack up the end of the ATV that you will be working on. Remember, for safety, place chocks behind the wheels that are still on the ground to prevent the ATV rolling off the jack and potentially causing injury to you or damage to the ATV.
With the wheels you are working on lifted off the ground, you will easily be able to turn the wheels by hand while you are adjusting the brakes. In this way, you can make sure you have not tightened the brakes too much, causing the wheels to bind and not spin freely.
The front brake adjustment and the back brake adjustment processes differ due to the different adjustment mechanisms for the two brakes.
Each of the front wheels has an access port through which you can reach the adjustment wheel for the brakes. You can remove the front wheel for easier access, although this is not completely necessary. This access port is often covered with a dust-plug, which on some models of ATV is red. You will need to remove this dust-plug to access the adjustment wheel through the access port.
It is handy to have a small torch on hand to shine into the access port so you can locate the adjustment wheels inside the drum.
With the plug removed as per the previous step, turn the front wheel by hand so that the access port is located at the six o’clock position. From this position, you can move the wheel to access each of the two adjustment wheels, one to the right of the 6 o’clock position and one to the left of the 6 o’clock position. The adjustment wheels have little arms on them, so they look like a cog. You can use a flat screwdriver through the opening to turn the wheel in the required direction.
Once you have the adjustment wheels located, move on to the next step to make the actual adjustment.
The rear brakes have two adjustment points, one for the pedal brake and one for the hand brake. Both these are cable adjustments and can be accessed via the rear brake panel, on the right rear axle of the ATV.
The adjustment can be accessed without removing the wheels, as the adjustment nuts face the rear of the ATV. The rear brake panel will have two cables coming into it, one for the hand brake and one for the foot brake.
Each of the cables will have a wingnut at the end, which is used for adjusting the tension or length of the cable.
Due to the difference in procedure between the front and rear brake adjustment, we will cover them separately.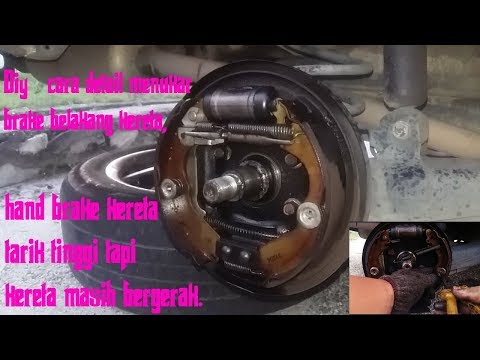
You will need to turn both the adjustment wheels to get the correct adjustment on the brakes. Turning the adjustments in one direction will pull the brake shoes in, effectively tightening them. Turning the adjustment wheel the opposite way will push the brake shoe away from the drum, effectively loosening the brakes.
The direction to turn to tighten and loosen depends on your ATV, so you will need to turn it one way to see if it tightens or loosens to establish which direction works for your ATV.
When adjusting the rear brakes, you will have to adjust both the foot brake and the hand brake. Both these brake mechanisms are activated with a cable, one running to the foot pedal, and one to the hand brake mechanism. The adjustment for both cables is via the wingnuts on the brake panel on the rear axle.
The wingnuts are usually one above the other, with the top wingnut being the adjustment for the hand brake and the bottom for the foot pedal. This configuration may differ for your ATV, so you may need to trace the cables to confirm where they go.
The adjustment is achieved by tightening the wingnuts to tighten the brakes or loosening the wingnuts to loosen the brakes. Tightening the cable effectively pulls the brake shoes closer to the brake drum, and loosening the cable allows the shoes to move further away from the drum.
While adjusting the wingnut, hold the cable with a small wrench or a pair of pliers to stop the cable from twisting. There is a hex-shaped section on the cable for this purpose. If the cable twists while you are tightening the brakes, it can weaken the cable and cause it to snap, which will require the cable to be replaced.
Adjust the foot pedal cable till the pedal engages the brake without having to be depressed very far. Then, with the ATV in neutral, spin the back wheel to make sure the brakes are not binding on the wheel. If they are binding, slacken the cable off a half turn at a time until they are no longer binding.
Then adjust the tension on the hand brake cable to accommodate the changes made to the foot pedal cable.
If the adjustment of the cables does not tighten the brakes sufficiently, then the drum and or shoes may be worn to the point that they need to be replaced. If you are uncertain how to do this job, rather take it to a professional who can fit the new parts for you.
Lower the jacks and remove them from under the ATV. As a final check, put the ATV in neutral and push around a little to make sure there is no binding of the brakes.
This is important because if the brakes bind, it will wear them out faster, generate heat, which could cause a fire, and use more fuel.
If there is still binding, repeat the adjustment procedure to alleviate the problem, if there is no binding, you have successfully set your ATV brakes!
Mastering these basic maintenance tasks on your ATV will make you more confident when you need to make adjustments while out on the off-road trail. Set yourself some goals to learn how to do more of these types of tasks and basic maintenance, you will be a more confident off-roader as a result!
Happy ATV’ing!
Fast Free U.S. Ground Shipping Easy Exchanges No Restocking Fees Lowest Price Guaranteed
Please sign in to review products.
You Always Get:
Was:
Guaranteed Lowest Price! Call Us Sale: $36. 21
21
WARNING: This product may contain chemicals known to the State of California to cause cancer, birth defects or other reproductive harm.
For more information go to P65Warnings.ca.gov
Lowest Price:
$22.95 See Details
Years of constant research and brake dyno testing - Yielding the latest technology in pad performance - Made at a factory that supplies Japanese OEMs - The highest quality and perfect fit - Formulated for high performance stopping power and long service life - Excellent feel and feedback - Superior fade resistance - Reliability and a name you can trust - See models listed for fitment - Fits the following Honda models: - CBR1000 HURRICANE 1987-1988 (rear) - CBR600 HURRICANE 1987-1990 (rear) - GL1200 GOLDWING 1984-1985 (5mm rotor models; front - two sets required, or rear) - GL1200 GOLDWING...
Lowest Price:
$28. 95 See Details
Severe Duty ATV Pads High density sintered copper alloy for longest possible life in utility applications on ATV especially in wet mud dust and dirt conditions Contains one set of disc brake pads for one disc NOTE: MUST BE FITTED IN COMPLETE FRONT AXLE SETS TO AVOID PULLING LEFT OR RIGHT WHICH COULD RESULT IN A DANGEROUS SITUATION! All disc front brake models
Lowest Price:
$69.95 See Details
CNC-machined billet aluminum construction - Replaces the stock rubber pad - Made in the USA - Fits the following Harley Davidson models: - FLT 1985-2010 - FLHT 1985-2010 - FLHS 1985-2010 - FLHR 1985-2010 (excludes 04-10 FLHRS/SI Road King Custom models) - FLST late 1987-2010 -
Lowest Price:
$75.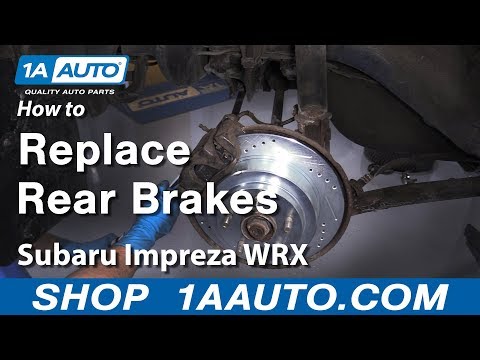 00 See Details
The Extreme Pro brake pad is a range targeting the race market for both street and off-road including popular sport bikes and cruisers The pads are a VERY expensive blend of sintered bronze including new age materials such as Tungsten and Moly metal to bring you the grippiest most fade resistant pad ever tested More stability Better heat cycling Faster bed-in Longer life More bite Reduced rotor damage Stainless radiator plates Contains one set of disc brake pads for one disc Please Note: The image displayed is representative of the item. Please double check description prior to...
Lowest Price:
$25.95 See Details
Years of constant research and brake dyno testing - Yielding the latest technology in pad performance - Made at a factory that supplies Japanese OEMs - The highest quality and perfect fit - Formulated for high performance stopping power and long service life - Excellent feel and feedback - Superior fade resistance - Reliability and a name you can trust - See models listed for fitment - Fits the following Kawasaki models: - GPz1100 1995-1997 (front, right; includes ABS models) - NINJA 650R 2006-2010 (front, right) - VERSYS 2008-2010 (front, right) - VULCAN 800 DRIFTER 1999-2006 (rear) - VULCAN. ..
..
Lowest Price:
$69.99 See Details
Will withstand friction ratings of 0.7u and does not require any heat to deliver friction Advance ceramic technology allows for pads to cool off as soon as pressure is released from the brake lever Requires very little brake pressure effort under repeated braking Recommended for those looking for the edge or ultimate stopping feel and control Pad location: Front Note: All Galfer brake pads must be properly Bedded-In to achieve maximum output and reduce unnecessary rotor wear Sold in pairs Please Note: The image displayed is representative of Galfer sintered brake pads, but may vary in size...
When we’re not helping our customers, we’re building and racing some of the baddest bikes on the planet.
Meet Our Race Team
About Contact Our Blog
Copyright © 2004-2022 RidersDiscount.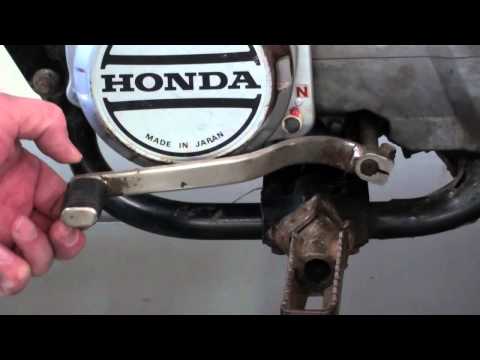 com - All Rights Reserved
Riders Discount, Inc. 4665 Broadmoor Ave SE, Suite 140, Grand Rapids, MI 49512 USA
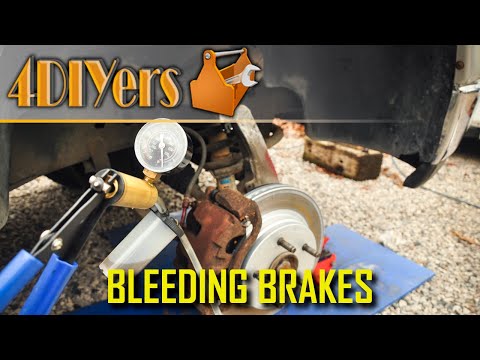
ATV brakes are a basic safety system and should work perfectly. And if you notice the slightest slippage or decrease in the efficiency of the nodes, the system needs to be checked. Therefore, let's figure out how to pump the brakes on an ATV and diagnose all the components.
The first fluid change is recommended as soon as the rider has purchased the ATV. The fact is that many manufacturers fill in the cheapest composition, which does not have a high operational resource.
After buying a used ATV, you also need to service the brake system: change the fluid, check the hoses and pads. Remember that during the operation of equipment, moisture and air enter the composition. This leads to the formation of corrosion and even freezing of the liquid in winter.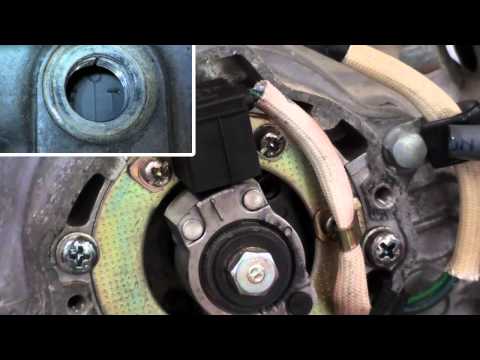 For example, if the composition contains only 3% water, its operating temperature drops from 230 to 165 degrees.
You need to figure out how to pump the front and rear brakes of an ATV even in case of their “failures”. If the lever has lost its elasticity, then air or moisture has accumulated in the system, which has affected the characteristics of the fluid.
Before you adjust the brakes on your ATV, have the necessary tools ready. To bleed the system you will need:
It is worth noting that in order to pump the ATV, you need a partner who will clamp the brake lever. If there is no assistant, you can fix the position of the brake lever with a belt.
Bleeding the brakes scares many motorists. However, the procedure itself is very simple, so even a novice ATV rider can handle it. The rider only needs:
 The container is located near the steering wheel.
 This procedure is carried out for all calipers (front and rear). But if the brakes on the ATV do not pump, then you need to find places in the system where air accumulates and eliminate them.
Experienced motorists recommend using only high-quality brakes that are suitable for specific temperatures.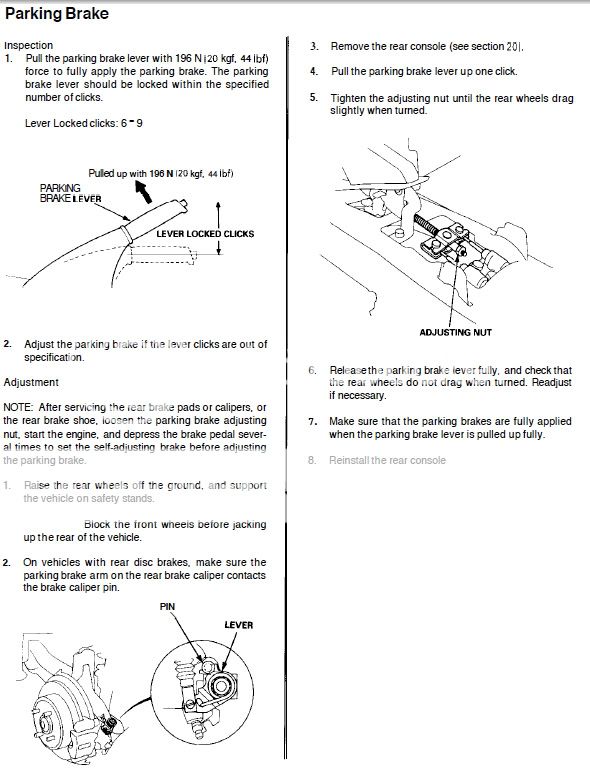 This means that for summer and winter you need to choose different compositions.
Riders also advise:
Also buy a spare brake. If the documentation indicates that 0.5 liters of fluid is needed to bleed the system, buy 1 liter of the composition. The fact is that the recommended volume is indicated based on the experience of specialists. A novice ATV rider can spend more brakes.
19.02.2021 3948
Buying a reliable ATV is great. But in order for it to be really reliable and not fail at the most inopportune moment, it must be regularly serviced, and in particular, the brakes must be bled after the repair of the elements of the brake system.
To bleed the ATV brakes yourself, you will need the following tools:
ATV's brake circuits operate from the front and rear brakes. The first is located on the frame of the vehicle, and the second is on the steering wheel.
To complete this procedure, and Linghai ATVs are no exception, you need the help of a friend. Bleeding the rear and front brakes of the ATV is as follows:
 These actions must be continued until all the old brake fluid has poured out of the barrel and a new one has come out;
 Checking if the ATV's brakes have been bled correctly is quite simple, just press them. If you feel a moderate hardness, then everything went well, and if they are still soft, then this means that air has entered the brake system. To get rid of it, slightly loosen the brake hose fasteners.
Among the most common breakdowns of the brake system of an ATV, it is worth highlighting:
If your ATV's disc brakes are deteriorating, it is recommended that you bleed them by changing the brake fluid.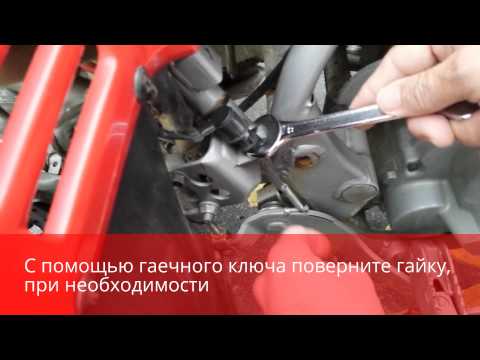 Preliminary check all elements of the brake system for serviceability and absence of damage in order to exclude the possibility of their wear. If any part of the ATV is still out of order, then it should be replaced with a new one.
Brake pads break more often than other functional motorcycle components because they are made of composite materials instead of metal. The pads can be replaced both independently and by contacting a service center. Quite often, the brake calipers of the ATV also break. With sudden braking, they overheat, which negatively affects the service life of this component. In order not to have to repair the brake calipers too often, it is recommended to change the oil regularly. Sometimes calipers from OKI are put on ATVs, but before that they need to be somewhat modified on a milling machine. A good option if the original calipers cannot be repaired.
Bleeding the brake system on children's ATVs is the same as on full size motorcycles. The main thing is to choose a high-quality and reliable brake fluid that will cope with its task at a decent level.
The most wear and tear-prone component of a child's ATV is the brake pads. Fortunately, you can determine this malfunction by eye. If the pads look frayed and worn, then it's time to change them. Among other signs it is worth highlighting:
Although children's motorcycle brakes are not subjected to excessive stress, they should be checked for stability and performance at least twice a season.
Diagnostics and timely repair of the brake system of an ATV should always be given special attention, since the safety of the rider largely depends on its operation. Regular maintenance of the rear and front brakes of the vehicle can be done both on its own and by contacting the services of service center specialists for help.