You will certainly be very worried if your car has a problem and you have to remove the tires. After fixing the problem, It's not easy to put the tire back on the rim.
There are practically countless ways to advise how to fit a tire to the rim, either by machine or by hand. This is also what makes many people interested to find out if a person who is not an auto mechanic or a professional can do this by himself at home.
So, how to put a tire back on the rim? You need to use fire to do this, which requires high safety.
The following article will guide you through the steps and important notes to handle this error effectively.
Contents
Before starting a job, especially using a lot of tools like putting a tire back on the rim, you need to prepare:
Below, we will describe the steps in the most detailed and complete way. Each step will need specific notes and manipulations. In addition, there will be notes for each stage. Check it now!
This step is the first step in all your processes. What you need to do is make sure they are smooth. You need to raise your wheel part off the ground, which will make it easier for you to disassemble with the help of a lifting tool.
At the same time, you should only re-install the wheel in the vehicle when you have fixed the problems encountered. Errors that you need to improve after removing them. Make sure you've selected it all and don't have any doubts.
There are a number of causes leading to tire removal such as cracked or blown tires, punctured tires due to obstacles while moving. After the repair, you need to put the rim on the tire. Moreover, your car will be safe with a perfect wheel.
At this 2nd step, you will get a bottle of Fluid. They are often used as a support tool when you have difficulty starting the engine or cold. They will do the job perfectly under normal conditions.
Then, you use the spray in a circular direction around your wheel. In this next operation, carefully spray the liquid into the space between the sidewall tire and the rim. However, you should also ensure you're not taking too much of it.
The reason for adequate fluid is that too much of them can cause sidewall problems and even lead to failure, damage, and replacement.
At the same time, you should also spray on each ground in one line just below the edge. The effect of this activity is to help limit fires while you use matches/lighters and Starter Fluid.
Moreover, when using the above liquid, you need to be extremely careful when spraying on the wheels. Due to their flammability and flammability that can cause a fire, it isn't easy even to end it.
Therefore, you need to equip yourself with a fire extinguisher and the skills to manipulate them before assembling.
The third step in the process needs to be as soon as finishing step 2. This action will prevent the tire's granules from drying out and the solution from evaporating.
Then you start lighting it using matches, lighters, or other sources of fire. You light up the fluid associated with the components above from the ground. At the same time, it will help keep you safer in potentially explosive conditions.
But don’t worry your goal is to just light it up and then turn it off as soon as you can and that smoke is going to fill the tire, so you can do it a couple of times.
In addition, fire causes the air to expand rapidly, at the same time, the particles will move along the wheel and return to their original position.
After the tire bead is exposed to fire and when you hear the sound within 2 seconds.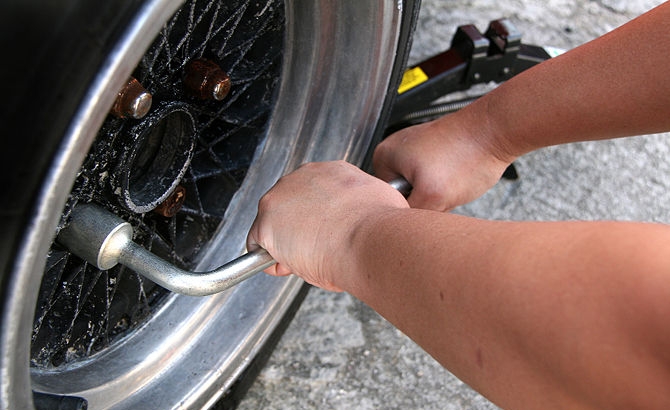 At this point, you need to put out the fire immediately. The faster you act, the sooner the fire is extinguished.
Moreover, the fire extinguisher at this time will also come into play.
When you hear the popping sound, it is time to end with the tire in place on the rim.
You need to use an inflator and pump outside air into your tires.
When the tire inflates, you can start or continue your journey on the vehicle that has changed the tire.
This method is standard when replacing a wheel on a rim, especially when you don't need a repair shop.
If you can't replace them yourself and are close to a store, you should take them out there. The staff will support and replace you. Then the safety will be more assured.
When taking any action, you need to be careful with what happens. The same goes for changing car tires. The effect you may experience is called Pyrolysis.
They are the decomposition process of substances by the effect of high temperature and long time.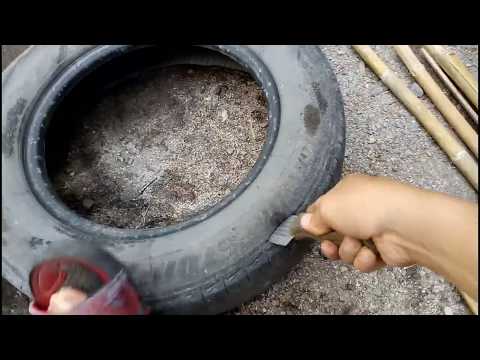 Likewise, Pyrolysis will overheat the tires, create layer pressure, and even blow the tire.
In addition, the wheel is hot due to the inflator. It can weld near or above the wheel and cause breakage at high temperatures.
It is also the reason described in the above section when it is necessary to pump the fire immediately. After you hear the sound, you only have two seconds to start putting out the fire.
This chemical phenomenon will occur even when a low temperature of 183 - 185 degrees Celsius. In particular, they do not need to use oxygen to perform. They continue to develop in the tire, even after removing the source of fire and heat.
This problem is difficult to detect and occurs from some seconds to several hours later. They push the tire pressure to 7000 kPa.
With such class pressure, people around the event may suffer some problems and damage their health if standing close.
Therefore, you need to ensure safety in all steps of this process. It will be awful if someone gets hurt, even if you are not driving on the road.
This problem is often when your vehicle is traveling on uneven surfaces. Here are the steps for you:
All you need to do now is stay as calm as possible. Things will get better when you fix it.
Next, try to move further to a safer place like the curb while still ensuring your rims. Moving to a nearby location is ideal. However, if you can't do that, warn everyone on the road, so they know and avoid it.
Once more stable, you need to remove the tire and place it on the ground. At the same time, flatten the tire and tighten it with the ratchet belt.
As described above, you will inflate the tire until you hear a sound and make sure the tire is in place.
Always carry tools in the car to make sure you can adapt and handle the best if you encounter this situation.
You can see more instructions here: Video created by Garage Boys
Thus, the article has provided the steps in putting a tire back on the rim. Hopefully, you can do this activity yourself.
Please note that using fire is convenient and easy but also extremely dangerous. You must ensure your safety.
Car repair shops can also help you do this assembly very well for a small cost.
Do you look at putting your tire back in the rim with apprehension? It’s not that difficult, you know. You need the right tools and the willingness to do it. So, I will show you how to put a tire back on the rim.
To install your tire back on its rim, you have to follow this simple procedure:
 The front side of the rim should be facing up.
By installing the tire yourself, you can save money. But you need to be sure that you are installing the right tire size to the size of the tire rim. That means you should install a 15-inch tire to a 15-inch tire rim.
Read on to learn more about how you can install a tire on your own, the steps you should follow, and other relevant information about this topic that you should know.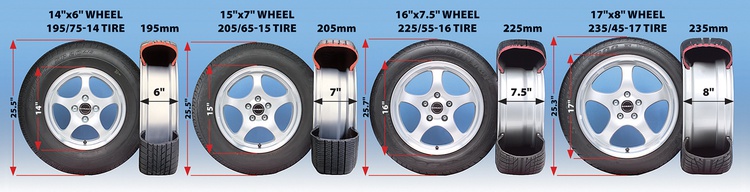
You don’t need to go to the tire service shop to get your brand new tire installed on a tire rim. Prepare a screwdriver or a pry bar and your readiness to do it. Putting the tire back on the rim yourself can save money that you otherwise have to pay to a technician in the car shop.
Installing a tire to a tire rim is just a matter of following this procedure.
 Do this in small increments of two to three inches at a time until the entire front bead is inside the lip of the rim. You have now successfully put the tire back into the rim.
As you can see, you can do it yourself without the help of a tire mechanic. It takes some effort, though. But if you are ready to do it, it can be done. And you will save some money. Be sure that the tire you are installing is suited for the size of the tire rim of your vehicle.
This short video will show you how you can easily do it in your garage. If you practice doing it several times, you will be able to install a tire inside a tire rim in just a matter of a few minutes:
The above procedure is simple enough to follow if you put back a regular tire on its rim. A complete method that tire mechanics follow ensures that the tires installed on rims will hold. They call it mounting a tire manually.
Here are the steps:
The valve stem is where the air is introduced when inflating the car. It is pressed into its designated hole in the inner part of the tire rim. The tire will cover it later:
Apply a generous amount of lubricant to the insides of the bottom tire bead and the outer edge of the tire rim.
Place the tire rim with its front on a flat and solid surface, and then put the tire on top of it with the bottom bead of the tire touching the front side of the rim. If the ground is rough, use cardboard to protect the rim from scratches.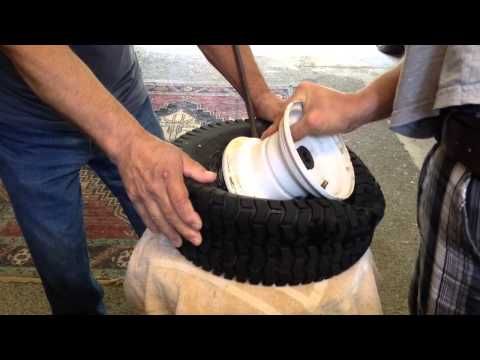
Step on the tire with both feet and press its bottom bead onto the lip of the tire rim. Force the entire bottom bead to go inside the tire rim. You can hop on the tire to force it to go inside the lip of the rim. Be careful as you do this, and always keep your balance.
The next step is to insert the front bead of the tire into the rim. To make it easier, lubricate the front bead and the tire rim.
To insert the tire’s front bead or upper lip into the rim:
Use a pry bar or a screwdriver and insert it between the bead and the rim. Now start inserting the bead into the entire rim by sliding the pry bar over the rim. Do it in small increments of two to three inches until you have inserted the entire bead on the lip of the tire rim.
Once you are sure that the whole tire is seated snugly inside the rim, you can now inflate it. Attach an air hose from an air compressor to the valve stem and inflate the tire. Make sure that the front and back beads of the tire are free from any obstructions before inflating the tire.
Most tire shops mount tires by using tire mounting machines. This method is safer, more accurate, faster, and more convenient. Knowing how they do it with a machine will help you see if it’s more practical for you to do it this way and not the other way:
Apply or spray tire lubricant generously onto the front and back beads of the tire and the outer edge or lip of the tire rim. This will make it easier to seat the tire on the rim. They don’t use dish detergents in tire shops because of insufficient lubrication.
A valve stem is required to inflate the tire. So, it should be installed on the wheel if it has none. Insert it in the hole on the rim’s interior, which passes through the outside. The valve stem should poke out of the tire rim when properly mounted. Use a pair of pliers to pull it through until it stays firm in its place.
Put the tire onto the machine with its rim facing up. The machine is designed to accept the rim in this way. Press the pedal beneath the machine. This engages the hydraulic press to secure the rim in place. Most machines have two pedals: one for engaging the press and another for rotating the rim.
At an angle, start sliding the tire over the rim. Do it so that the tire’s bottom edge is lower than the top edge of the rim on one side.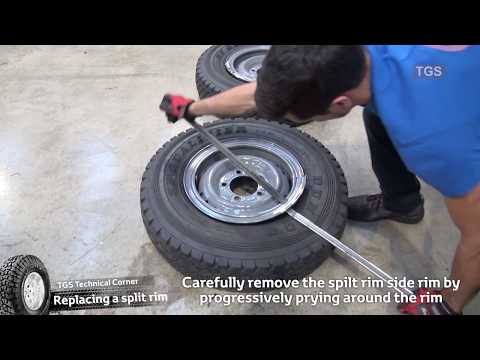 If you do this right, the tire should be at a 45° angle. The tire should not fall and should be able to sit on its own.
Now, swing the machine’s mounting arm down to the edge of the rim. This arm should contact the outer edge of the rim in the exact spot where you have angled the tire. If it’s difficult to squeeze the arm in that spot, you have to modify the placement of the tire so there will be enough room for it to get in.
The mounting arm serves the same function as the pry bar or screwdriver used in manually inserting a tire on a rim.
Angle the tire so its lower bead is pointed at the mounting arm. Adjust the tire’s position to contact the arm as the wheel and tire rotate. Make sure that they are at the correct angle, and the arm is pressing the lip down past the rim’s lip as it is rotating. If the tire falls off, it is not at the correct angle.
Rotate the tire and the rim by pressing the corresponding pedal of the tire mounting machine.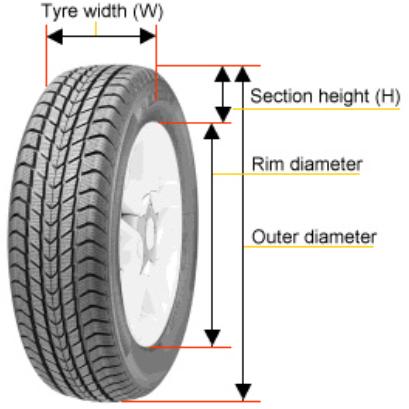 As the wheel and the tire rotate, the arm will force the tire’s bottom or back bead over the top edge of the tire rim.
Continue rotating the machine until the bottom bead of the tire has completely passed the top edge of the rim.
Shift the mounting arm’s position to guide the upper lip of the tire onto the rim. To do this, press one side of the tire down using your hands until it goes under the rim’s upper edge. Then lower down the mounting arm onto the edge of the rim in the space you have formed with your hands.
Press the pedal again to rotate the tire and the rim. As the rim and tire rotate, the arm will force the upper bead of the tire down to the rim’s edge. Perform a full circle so that the upper and lower beads of the tire go completely past the upper lip of the rim. The tire is now ready to be inflated.
Get the air hose from the air compressor and connect it to the valve stem installed on the wheel. Ensure no dirt or other obstructions on the tire and the rim. Turn on the compressor, and the tire will quickly inflate. Be sure it is inflated at the right psi (pounds per square inch).
It’s not that difficult to install a tire on a tire rim. Here’s a simple procedure that you can easily follow:
 You have successfully put the tire back on the rim if you did it right.
Read next:
When to Repair Tire Sidewall Damage?
How Long Does It Take to Change Tires?
What Color Rims Match a White Car?
Nikolaev bicycle shop "Sportek"
Published: 02.02.2021
Beading tires on a bicycle wheel is a fairly common and not complicated procedure.
We will not tell you in full how to remove and put on a tire on a wheel rim - there are many different videos and articles about this on the Internet. Let us dwell on only one important moment, but not often discussed by the authors of videos and articles, when, when putting the tire on the rim, the last 10-20 cm remain, and the tire does not want to “sit down” in any place.
In order to tighten the last part, you need to make sure that as you put on the previous parts of the tire, the bead cable does not start to get into its “rightful place” in those parts of the wheel where the tire has already sat down.
That is, during the beading process, you should try to keep the edges of both beads of the tire with the bead ring in the center of the rim - where its “deepest” place is. Thus, slack is formed and the last centimeters of the edge of the tire are much easier to throw over the high side of the rim.
This is illustrated more clearly in the picture:
In case it doesn't work out at all, of course you can use the usual bead blades that many cyclists use.
But for these purposes, in addition to the commonly used blades, there are also special combined blades designed also for putting a tire on a wheel, and not just for removing it.
For example:
Featured Products
11 UAH
BauTech bead blade for bicycle tires (plastic)
15 UAH
BauTech bead blade for bicycle tires (metal)
Comments (0)
x
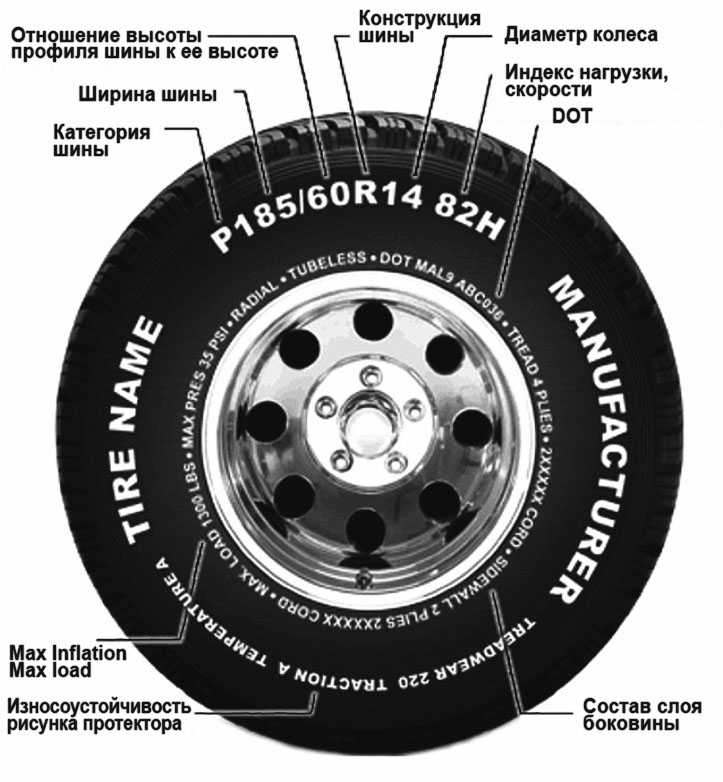
TIRE SIDEWALL MARKING
Indicates the type of rim the tire is compatible with. Unless otherwise noted, should be used on rims with hooks.
Nominal profile width and suitable wheel diameter in millimeters according to ETRTO.
Country of manufacture.
Minimum and maximum pressure in bar and psi. inch.
Specifies the direction in which the tread pattern should be directed when the wheel is rotated forward.
Specifies that the tire should be installed with an inner tube only, not tubeless or otherwise.
TIRE TYPES
TUBE TYPE: A tire for use with an inner tube only.
TUBELESS: A tire for use on tubeless rims only, which can be fitted without an inner tube. Can be used with internal chamber.
TUBELESS READY: A special type of tubeless tire that requires a sealant inside to maintain pressure. Can be used with internal chamber.
TUBULAR: A fully enclosed, stitched or vulcanised, tire construction (tube) that requires a special tubular rim and is glued to it when mounted.
TIRE INFLATION RECOMMENDATIONS
Never exceed the recommended tire pressure.
Proper pressure affects the load, speed and handling of a bike and is vital to performance and safety performance such as braking, maximum traction and tire life.
Inflate tires "cold", that is, not warmed up on the road.
Do not exceed the maximum pressure indicated on the tire sidewall.
Insufficient tire pressure causes excessive creasing and rapid wear.
Excessive pressure causes discomfort when driving and reduces the contact area of the tire with the road surface, which impairs handling and traction.
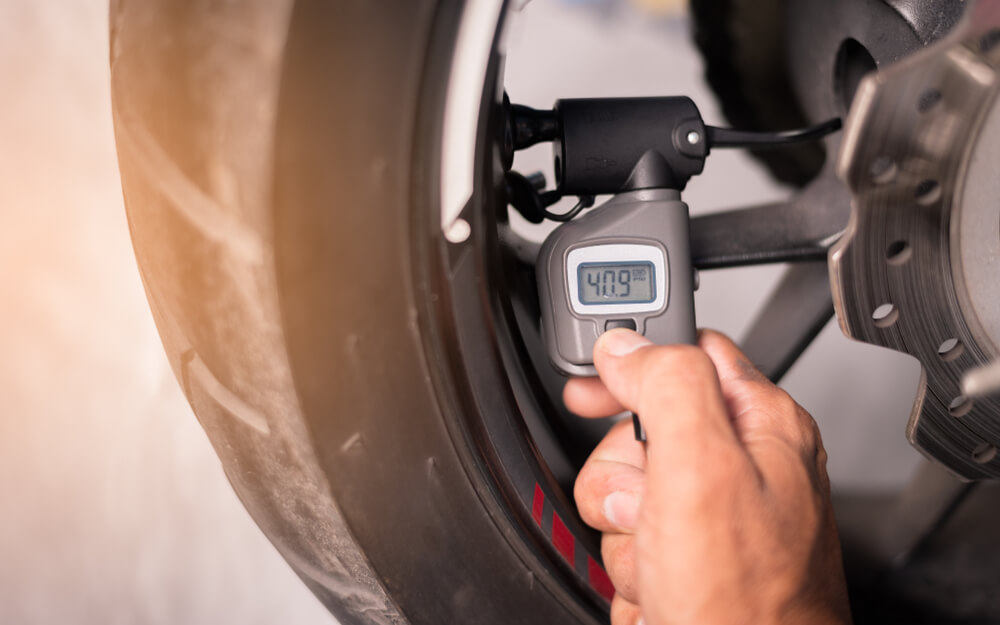
Before every ride, it is essential to check and maintain the correct tire pressure (while the tires are “cold”), especially on tubeless systems, which are more prone to sudden pressure loss.
WARNING: Driving with tires with incorrect air pressure is dangerous! This can lead to an accident, accident, serious injury or even death.
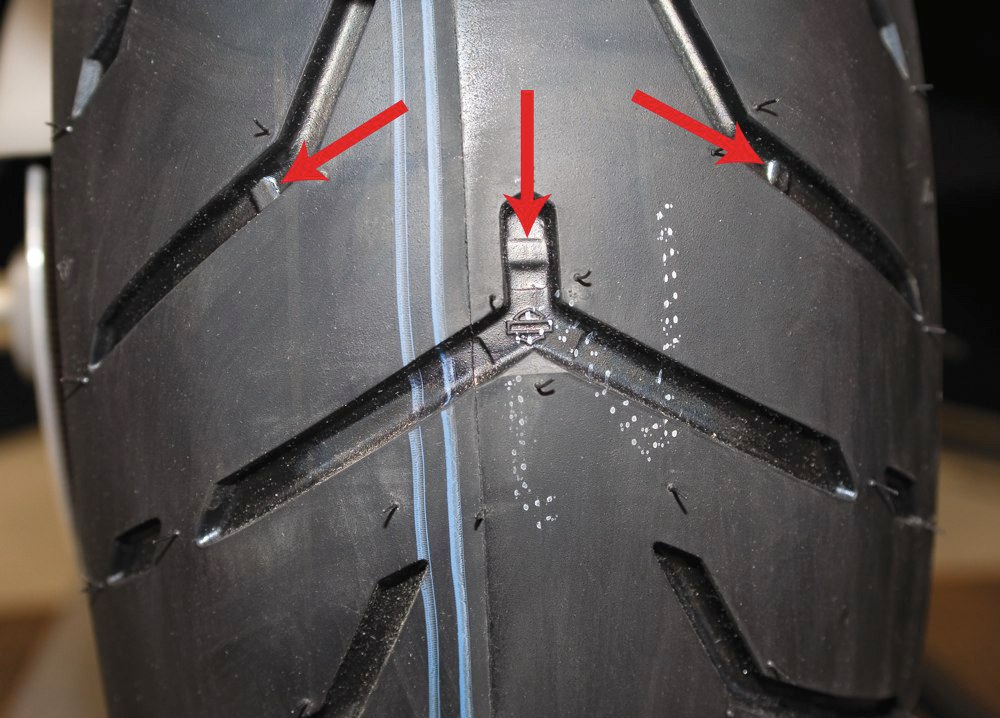
TIRE CHECK
The condition of the tires and the air pressure in them should be checked before each trip, and also, and even more carefully, after hitting any object on the road. If the tread is worn and the body material (cord) becomes visible, bulges, cracks, cuts, holes, uneven wear appear on the tire, or the tire shows signs of any other damage, it is recommended to replace it immediately.
Over time, the condition of the tire will in any case deteriorate under the influence of external forces, such as contact with the road, punctures, improper repairs, mounting-dismantling, inflation-deflation, heating-cooling, excessive exposure to ozone, improper storage conditions, etc., etc. . To reduce the impact, tire manufacturers add anti-ozonants and antioxidants to their products.
Since it is not possible to accurately predict what external forces a tire will be subjected to, there are no scientifically based limits on the life that a tire can be given. It is recommended that the condition of the tires (as well as tubes and rim tapes) be checked regularly by a bicycle specialist who can assess their suitability for further use.
As for tubeless systems with liquid sealant inside, it is necessary to check the condition of the sealant itself and change it regularly in accordance with the instructions.
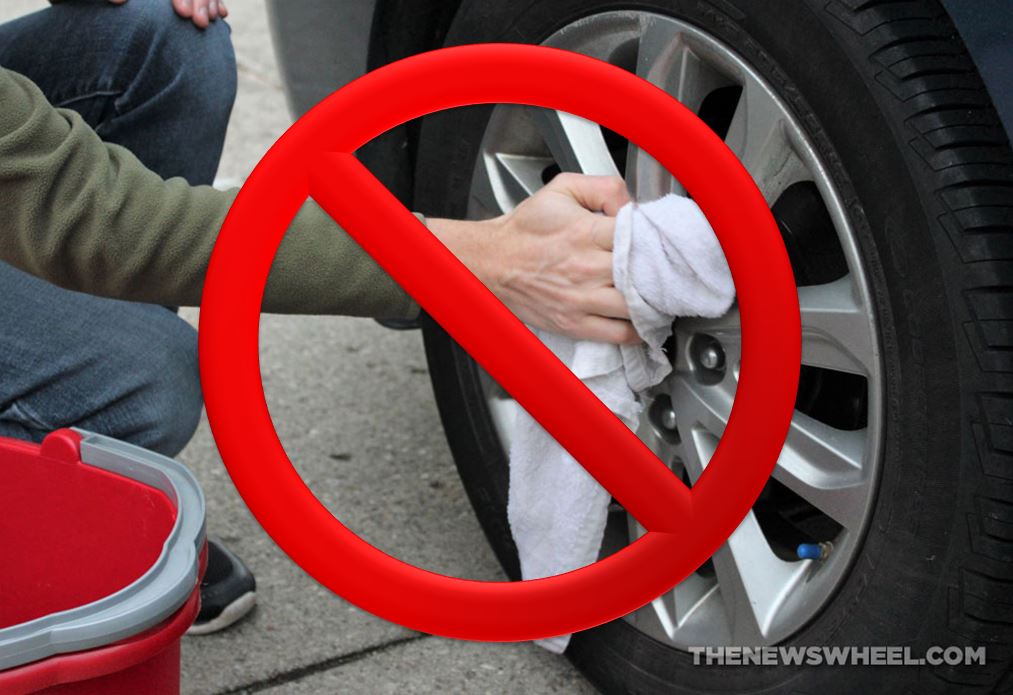
To avoid cosmetic damage, use low-pressure tap water to clean and wash the tire sidewalls. Never use cleaners to improve the appearance of the sidewall, otherwise you will remove antioxidants, which can degrade the quality of the rubber and lead to cracking of the sidewalls. Using hydraulic sprayers with high water pressure can also cause damage to the sidewall.
Avoid excessive mechanical stress on tires and tubes (for example, do not brake by blocking the wheel, do not run into sharp objects, do not drive with insufficient or excessive tire pressure, etc.).
If your bike has rim brakes, the rim is subject to constant wear and tear, which over time can lead to tube failure and puncture. In any case, if you have any doubts about the condition of the tires, consult a bicycle specialist.
High tire pressure can damage the rim, so check the maximum pressure allowed for the specific rim before installing the tire (check with the wheel dealer or rim manufacturer for information on whether the rim can withstand tire pressure).
CHANGING TIRES
PREPARATION
1. Before installing or removing a wheel, read the bike manufacturer's instructions and make sure you know how to handle the wheel mounting mechanism.
2. Verify that the rim, tire, and tube are compatible with each other by checking the instructions for each component manufacturer. A mismatch between tire and rim can cause the tire bead to come off the rim or damage to the inner tube, resulting in a rapid loss of air pressure. If you're unsure, be sure to check with a bike specialist.
3. Make sure that the mounting area of the tire is clean and that foreign objects do not get into the tire, as they can damage the tube, rim tape, the tire itself, or contaminate the sealant (in the case of a tubeless tire).
4. Make sure the rim is in good condition. If it is damaged, then it must be replaced.
5. Check the condition of the rim tape, if used. If it is damaged or does not completely cover the spoke holes in the rim, it must be replaced. Poor quality rim tape is very often the cause of a sudden loss of air pressure.
6. Check the maximum allowable pressure for the given rim type. It must be equal to or higher than the tire. Tires that allow a pressure reduction equal to or greater than 3 bar (43 psi) must be mounted on lug rims.
7. A tire capable of inflating more than 5 bar (73 psi) must be mounted on a lug rim. Hooked rims are marked with a "C" in the size label. If you have any questions, please contact a bicycle specialist.
8. In the case of installing a tire with a tube, talc helps to properly place it in the tire. For latex cameras, its use is mandatory, but it is also recommended for butyl cameras. It is also recommended to install a new tube each time a new tire is fitted or after a puncture.
9. When installing a tubeless tire (Tubless), always check the condition of the valve (nipple) and change it if it looks damaged or if air pressure is lost.
10. When installing a Tubeless Ready tire, always check the sealant and change it if it is dry. Also read the sealant manufacturer's instructions carefully to make sure it's right for your tire.
TIRE REMOVAL PROCEDURE
1. Unscrew the valve cap (nipple) and locknut, completely deflate the tire.
2. Peel off one side of the tire all around from the edge of the rim by applying pressure starting from the area opposite the valve. Tubeless tires may require more effort for this.
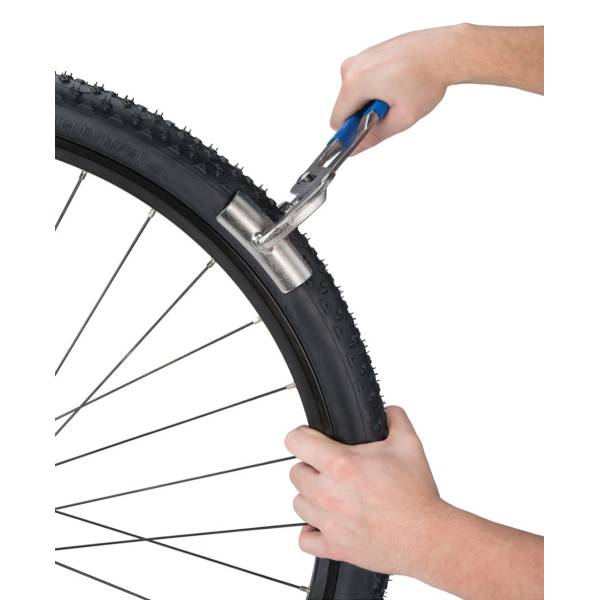
3. Position the tire pryer next to the valve and carefully insert it between the tire and rim, being careful not to pinch the inner tube (if any). Then, using a lever, lift the sidewall of the tire off the rim. To make the job easier, always make sure that the other bead is in the rim bed.
4. While holding the first rig in this position, insert the second rig about 10 cm from the first and repeat the above operation. Then run the pliers around the circumference of the tire to completely separate one bead from the rim.
5. Remove the inner tube, if present, or liquid sealant, if present and still liquid, and then remove the second tire bead from the rim with your hands.
TIRE INSTALLATION PROCEDURE
1. If installing a tubeless tyre, make sure the rim is sealed, tubeless tyre-compatible, or tubeless-compatible. If the rim is tubeless compatible, you will also need a tubeless rim tape that will completely cover the spoke holes.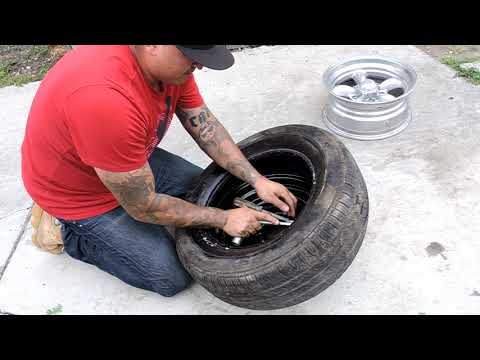 It is possible to lubricate the entire circumference of the rim with a special tubeless lubricant (do not use oil or grease) - this will facilitate the installation procedure and the correct positioning of the tire on the rim.
2. Insert the first bead of the tire into the rim, observing the direction of rotation of the tire indicated on its sidewall, starting opposite the valve.
3. If installing a tire with a tube, slightly inflate the tube, but only so that it becomes rounded, and gently insert into the tire, starting at the valve and completely carefully placing it in the rim.
4. Starting on the side opposite the valve, press the other bead of the tire into the rim and push it around the rim in both directions until it fits properly in the rim. For tubeless installations, add the recommended amount of sealant before inserting the last bead piece. If the tire bead becomes difficult to push into the rim, or the last part of the bead does not snap into place, make sure that the bead around the entire circumference of the rim is in place.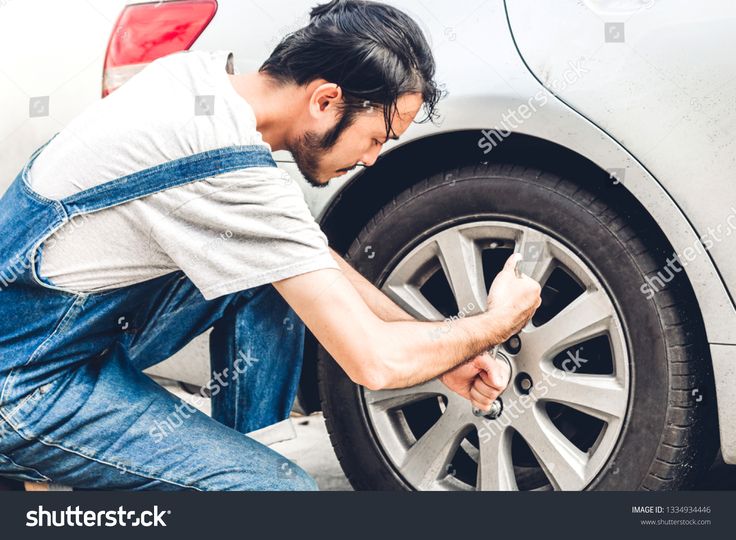 If necessary, squeeze the sidewalls of the tire into the rim with your hands.
5. If fitted with a tube, make sure it is not pinched between the tire and the rim or valve, and then secure the valve to the rim with a locknut.
6. Inflate the tire to the maximum allowable pressure using a pressure gauge pump so that the beads are properly seated on the rim. Tubeless tires click into place with a characteristic popping sound. Rotate the wheel by hand at low speed and at an angle to check that the beads are correctly positioned and also that the liquid sealant is spread inside (if the installation is tubeless).
7. The tire is properly seated when the thin line above the side of the rim is equidistant from the edge of the rim all around. Then reduce the pressure to your preference (within the markings on the sidewall of the tire) and close the valve. Do not exceed the manufacturer's maximum pressure for tire, rim and rim tape.
8. When inflating a tubeless tire for the first time, a strong jet of air is required, so you may need a compressor.
9. Before each ride, check the air pressure, tire bead fit, wheel-to-hub attachment, and brake pads (disc or rim).
10. Before using newly installed tires, be sure to first brake test and do a few test maneuvers.
USING TIRES ON FULLY SEALED CARBON AND ALUMINUM CLINCHER RIM WITHOUT RIM TAPE
Fully sealed carbon and aluminum rims, such as tubeless rims, usually don't have spoke holes in the rim, so manufacturers don't mandate the use of rim tape.
However, keep in mind that in the case of bikes equipped with rim brakes, the heat generated during braking directly enters the tire system, significantly increasing the thermal load on all components, such as the tire, the inner tube (if any) and the rim itself. In the event of prolonged braking, riding without a rim tape can cause the tires to deflate quickly, with the risk of losing control of the bike.
This becomes even more relevant in the case of latex and lightweight tubes, as well as tubeless installations. In order to minimize the chance of failure due to overheating, it is recommended to use rim tape for any installation, and to avoid continuous, prolonged braking when descending a mountain, if possible.
USING CLINCHER TIRES WITH CARBON RIM
Carbon rims sometimes pose a risk of tire edge damage due to sharp rim edges. Therefore, before mounting the tire, it is recommended to make sure that there are no sharp edges on the rim hooks. To verify this, carefully run your finger along both edges of the rim - there should be no nicks, sharp protrusions or excessive roughness on it. If there are, then the rim needs to be replaced.
If in doubt, please consult a bicycle specialist.
TIRE STORAGE
Tires should be stored in a cool, dry place at 10°C - 21°C, avoiding contact with heaters.