Whether you’re going on a road trip or making a quick stop at the community center, it’s crucial that your car has a functional spare tire at all times.
It’s equally important that you’re able to get the tire down from under the vehicle when you need it. Some cars come with specialized tools to lower the spare tire and quickly make the change.
However, if the tool is unavailable for some reason, you can still bring down the tire and be back on the road in no time. Let’s take a look at how to get a spare tire down without the tool.
Removing a spare tire without the factory tool is easy when you follow these steps:
Removing a spare tire without a tool might appear daunting at first. However, with the right equipment and process, it’s not too difficult a task.
There are two methods to lowering a spare tire on a Ford truck. Each method uses different tools. As such, your choice will depend on the equipment you have to hand.
This method involves pulling out the key from the spare tire drop assembly and using stock spare tire tools to lower the tire.
To make up for the lack of the factory key, you will need some standard tools like joint pliers, small pieces of wood and an optional helping hand.
After you’ve collected the tools, follow the steps below to remove the spare tire.
As you already know, the tire hangs from the truck’s underside toward the vehicle’s rear. As such, you will need to go under to gain access.
Before you get under the truck, remember that safety comes first. Therefore, ensure that you park the vehicle properly, on a surface that’s as flat as possible, with all brakes engaged.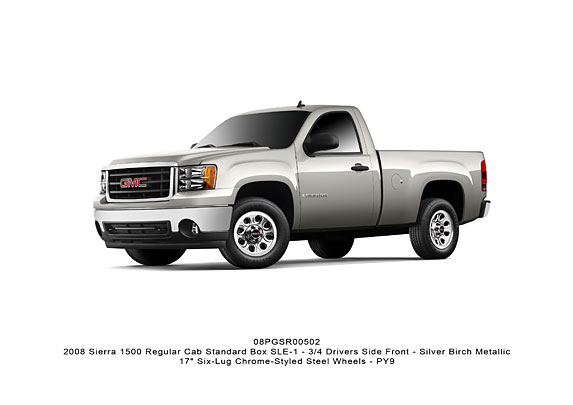 These precautions are to prevent the vehicle from moving while you work under it.
Locate the guide tube under the vehicle. This is a long, black, plastic pipe near the tire. Twist the tube back and forth while pulling it in the direction of the vehicle’s rear to reveal the drop mechanism for the spare tire.
Still under the truck, move to the passenger side and pull down the tire on this side, putting the wood in the gap between the top of the tire and the truck bed frame.
At this point, you may need that optional helping hand to put in the wood while you hold the tire down.
The reason for putting in the wood is to give you easy access to the drop mechanism without having to move the tire away from the truck bed continually.
Put your hand through the space created by the wood and feel for the key to the spare tire drop mechanism. The key roughly resembles a wheel lug nut, and when you find it, pull it out using the jack or working pliers.
Sometimes, just pulling the key may not be enough, and you may need to wriggle the pliers as you pull.
With the key out, the hole left behind is almost identical to the jack crank. Thus you can use the stock tire tools to lower and remove the spare tire. Insert the jack crank into the hole and turn counterclockwise to lower the tire.
The second method differs considerably from the first. Accordingly, you need a different set of tools, including:
With the tools above, you can bring down the spare tire by following the steps below.
Attach the 14mm socket to the extender. You don’t need to use a high-quality socket, as any low-end one will do. It’s also best to use an extender long enough to reach from the bumper to the spare tire. Aim for an extender that’s around 60–70cm long.
Insert the socket into the hole located on the left (or right, in some trucks) of the license plate. The hole leads directly to the key.
Use a hammer to strike the extender when you feel the socket touching the key. Hitting the extender pushes the socket over the key, providing a better grip.
Four to five blows from the hammer should be enough. Additionally, do not apply too much force to the hammer to prevent damage to the drop assembly. You don’t necessarily have to use a hammer; any object large and tough enough can serve.
With the socket firmly in place, use a wrench to turn the extender counterclockwise. The drop assembly key is similar to the one used on wheel lug nuts. Thus, it will turn as the socket turns.
It may be hard to turn the wrench at first, but it becomes easier as you continue turning, and the tire gets closer to the ground.
By the time the tire hits the ground, the key will be loose and you can remove it. Withdraw the extender from the hole, and use a flathead screwdriver to pry the nut out of the socket.
While the tire is now on the ground, you can’t use it until you detach it from the hoist. To disconnect the tire, reach into the large opening in the middle of the wheel. Next, locate the metal flange connected to the cable and turn it from a horizontal to a vertical position, pulling it out of the rim vertically.
Finally, the hole left behind by the key can fit a jack crank. Put the crank through the opening near the license plate till it gets to the hole vacated by the key. Turn the crank clockwise to raise the hoist back up
While Chevys store spare tires under the truck bed like other trucks, the removal process differs. So, if you’re wondering how to lower spare tire on Silverado without tool, follow the steps below.
You will need a couple of tools, including an ignition key and a jack kit to make a chevy spare tire removal tool.
Like other trucks, the access hole is on the rear license plate’s right side and covered with a rectangular shaped plastic.
Newer models may have a lock over the hole as a security measure. In such cases, use the ignition key to remove the lock assembly covering the hole.
Open the jack kit and select the rod with the broader end and flanges on all sides. This rod is the “female” rod and the one you’ll insert into the now open keyhole.
Get another rod from the tool kit, and attach it to the end of the female rod to make it long enough to reach the spare tire from the bumper. Ensure that the press locks enter properly to prevent the rods from disconnecting while you’re turning it.
Insert the composite rod into the spare tire hole. Press and turn the rod simultaneously until the end locks into the cable crank.
Put a wrench on the other end of the extension rod and turn counterclockwise. The tire will begin to drop as you turn. Continue turning until the tire touches the ground when you can remove the cable flange from the rim.
Furthermore, you can use the procedure above on different models of Chevrolet trucks. As such, you can follow the steps if you’re wondering how to remove spare tire from Chevy suburban.
It’s always an unpleasant experience when you get a flat tire. It’s even worse when you can’t get the spare down for lack of the specialized factory tool.
However, there are other ways to bring down the spare tire even without the tool. These methods are straightforward and use common tools like extenders, flathead screwdrivers, sockets, ignition keys, chunks of wood, pliers and hammers.
Thus, with or without a factory tool, you can get the spare tire out in minutes and be back on the road quickly.
by Smart Motorist
If you want to know how to lower spare tire without tool, you’re at the right place. This guide contains everything you need to know to complete the task. The step by step instructions given below doesn’t leave any room for confusion or mistake.
They are also easy to follow and practical. You don’t have to be a mechanic to put them to practice. Anyone who has ever held a tool in their life can use them to get their vehicle back on the road in little to no time. That isn’t where the good news end.
Our experts prepared these directives with the assumption that anyone using them would be on their own. That there might not be anyone assisting them in lowering their spare tire. It’s a good thing if you ask us as it means you can complete the task without any help.
Here’s what you need to do:
Before you go about reading our instructions, it’s important to make sure that you indeed have a spare tire in your vehicle. Most people assume this scenario without ever bothering to verify their assumption by looking at the spare tire. Such persons are often left with nothing at the end.
To verify the presence of the spare tire, discard the rectangular plastic cover under the passenger side of your vehicle’s license plate. If you can see an entrance for a key beneath the plastic cover, then you can be sure that your car does indeed has its spare tire.
That you’re going to lower the spare tire without ‘tool’ doesn’t mean you are going to go about the task with bare hands. Doing that would be counterproductive. You will still need some supplies to compensate for the lack of the key. Here’s what you’ll need.
Purchase a jack kit (without the jack). You can buy one from your local hardware store or Amazon. The next item on your ‘to-get’ list is an ignition key. Alongside the components of the Jack kit, the ignition key will loosen the tire’s connection with the wheel.
Experts tell us that one should never change tires on a slope. The same advice is applicable when you’re lowering a spare tire. Vehicles parked on an incline are extremely likely to go backward, thereby putting the safety of the person under the vehicle at risk.
Once you’ve done that, apply the hand brake. Turn on the emergency lights if you’re on the roadside. Put your vehicle in gear (if manual) or in parking (if automatic). Make sure that no one is sitting inside the car and put chocks or similar heavy objects behind all the wheels.
Follow these instructions to lower spare tire without a tool:
Picture in your mind the exact location of the spare tire. Or you can just fall to your knees and look beneath the vehicle. Fixate your attention to the back of the vehicle. There you’ll see a bulge protruding downwards. That is the spare tire that you’re going to lower.
The exact location of the spare tire will be just behind the tow hitch bar and under the bumper. You can further verify that the bulge is a spare tire by pressing your hand against it. The tire’s trenches will let you know that it’s indeed what you’re looking for.
Insert the ignition key in the hole beneath the plastic cover you discarded earlier. Drag the key towards you and you’ll end up detaching it from the hole. Doing this is vital as it will allow you to fix the assembly at the rear of your vehicle.
Get the crowbar and a couple of rods. One of the roads will have a wider end. Mechanics usually call this end the ‘female’ end. You’re going to insert this end of the rod into the hole that you disclosed in the previous step with the ignition key.
Doing this will help you in two ways. It will provide you enough space to add the male end of the pulley to the female rod. You will also be left with enough space to remove the bumper.
Look closely to make sure that the fitment between the female end rod and the 2nd rod is perfect. Then put this end through the hole.
You have by now one end of the rod into the hole. The other end, which is staying out of the bumper, should now be added to the crowbar. Follow that up by turning the crowbar in an anti-clockwise direction.
This will allow you to swivel the pulley and, by extension, the spare tire to the ground. Keep on rotating as long as the spare tire isn’t entirely on the floor.
This will let you detach the tire from below the vehicle. Keep one hand on the tire and the other on the middle gap of the rim. Apply full force to pull both ends apart and off the peak.
Lowering a spare tire without a tool isn’t exactly straightforward. You have to apply a lot of effort and the whole process will take about an hour for an amateur. Yet it is better than the alternative, which is to wait for hours on the roadside for help. You should therefore be aware of how to accomplish this task.
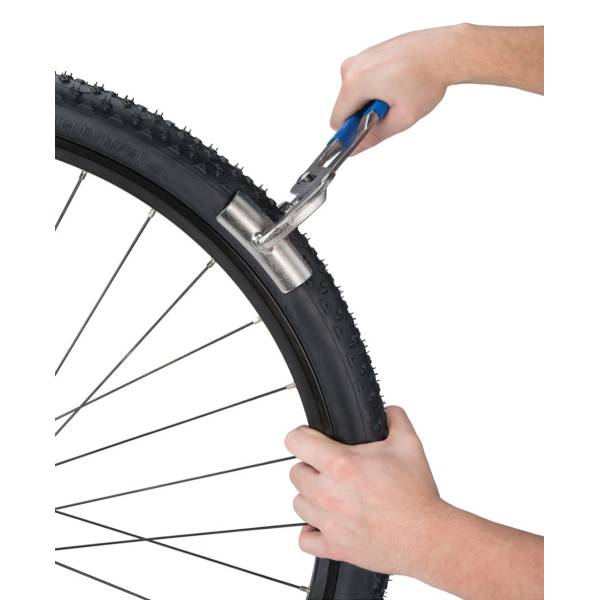
In this article we will try to help you solve all the problems that you may encounter with the wheels of your car. And, basically, how to remove a car rim? If you want to change your flat wheel or tires, you will find all the information you need on this page. To do this, we will first see how to remove the tire from the car rim, and then, in the second step, how to remove the stuck rim of the car , then how to remove the flat rim from place to put the spare tire, and finally, how to unlock the jammed rim nuts .
So we start our article by explaining how to change a car tire. You may have made a good deal by buying your tires online, but it's quite difficult to find mechanics who will agree to install tires bought elsewhere than at home on your car's rims. Therefore, the question of the desire to install them yourself is more than legitimate.
It is technically possible with a lot of force and a crowbar to change the tires of your car yourself, however, even if you manage to remove both sidewalls of the tire, loosen it and reinstall a new tire, you will not be able to balance the tire without a special machine, and without it your tires will wear out prematurely . Keep in mind that very often installation and balancing costs only about twenty euros. If you want to buy tires online at a discounted price, please note that many sellers offer free installation at a partner car center.
Now we move on to the part that you are certainly most interested in, namely, how to remove the car rim stuck to the hub, or rather, a rather classic case of a rim that has not been removed for a long time and which, due to rust stuck to your wheel hub.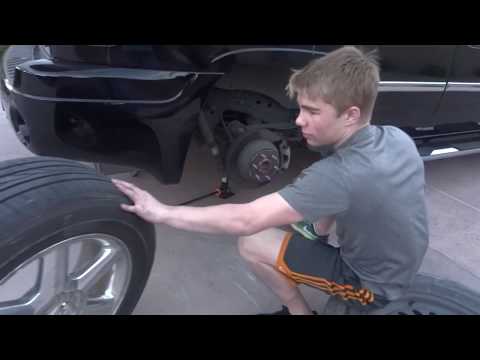 Indeed, many motorists find themselves in this situation and do not know what to do. This can be especially frustrating if you have a flat tire and need to change the rim on your car. Here are the various solutions available to you:
Now we are going to explain to you the most classic procedure, but which no one knows about, how to remove the rim from its place if you have a punctured wheel and want to replace it with a spare tire? This procedure is simple, here are a few steps to follow:

Finally, it may happen that in order to remove the rim of your car, you have to deal with jammed nuts. In this case, you will have more or less the same solutions for the case of rim sticking to the wheel hub. The best solution would be to use Rust Protection Grease or Rust Protection Grease and let it run for several tens of minutes before loosening the nuts. Another possibility, try to find, some are battery powered stun wrenches, they create much more torque than your hand plus a socket wrench and will help you loosen the nuts.
If you have any further questions about the GMC Sierra, do not hesitate to contact us. GMC Sierra category.
4. REPLACING A WHEEL
If any wheel is deformed, cracked, severely rusted or corroded, the wheel must be replaced. If the wheel nuts are constantly loosening, the wheel must be replaced along with the wheel studs and nuts. Some alloy wheels can be repaired with minor damage, but other wheels require replacement if damaged.
Use only new genuine GM parts. To purchase these parts, contact your dealer.
WARNING
The use of unsuitable or poor quality replacement parts is dangerous. This may result in poor braking performance and handling of your vehicle. You could lose control of the vehicle, and you and others could be injured.
It is dangerous to install previously used wheels and tires on a vehicle. You may not know how long a given wheel or tire has been used or how many miles it has.
WARNING
It is dangerous to stand under a raised vehicle to perform maintenance or repairs without proper safety precautions and without sufficient qualifications. The jack supplied with your vehicle is intended solely for replacing a damaged tire and should only be used for that purpose. If you use the jack for any other purpose, the raised vehicle may slide off the jack, resulting in serious or even fatal injury.
To avoid further damage to the tire and wheel rim, drive slowly to a flat, level area to change the wheel. Turn on the hazard warning lights. Incorrect operation when changing a wheel can lead to injury. The vehicle could come off the jack and injure you or others.
To prevent the vehicle from rolling while changing a wheel, proceed as follows:
- Apply the parking brake fully.
- Move the automatic transmission selector to P (Park).
- If your vehicle has an all-wheel drive transmission, make sure the transfer case is in one of the gears for driving, not neutral. Otherwise, the vehicle may roll even if the automatic transmission selector is in the P (Park) position.
- Stop the engine.
- Do not start the engine while the vehicle is jacked up.
- Unleash all passengers before jacking up the vehicle.
- Place wheel chocks front and rear under the wheel farthest from the damaged wheel. The necessary equipment is located in the luggage compartment behind the left side upholstery panel.
Press the release lever to open the upholstery panel.
1. Loosen the wing nut to remove the tool kit.
2. Remove the bag.
3. Remove the jack handle.
4. Remove the jack handle extension.
5. Remove the wheel key.
6. Remove the jack.
To release the jack from its lock, turn the handle on the jack counterclockwise to lower the jack head.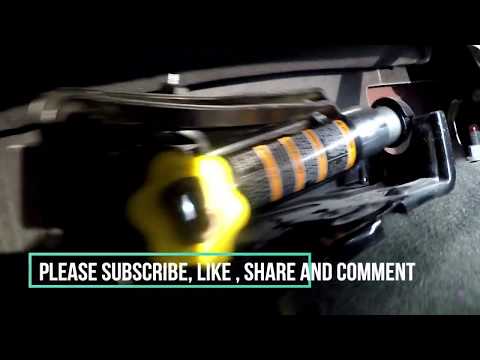
7. Loosen the wing nut to expose the wheel chocks.
The spare wheel is located under the bottom of the vehicle.
WARNING
To avoid injury or damage to the vehicle, do not remove or stow the spare wheel while the vehicle is jacked up. When reinstalling a spare or damaged wheel in its underbody storage location, be sure to fully tighten the fastener.
You may need to remove the vehicle's rear registration plate to access the spare wheel lift shaft.
If your vehicle has a spare wheel lift lock, open the spare wheel lock cover located in the rear bumper and open the lock with the ignition key.
Connect the wheel wrench to the two jack handle extensions.
Insert the lift end of the extension (open end) into the hole in the bumper. Connect the extension to the hoist shaft.
Turn the wheel wrench counterclockwise to lower the spare wheel. Turn the wheel wrench until you can remove the spare wheel from under the vehicle.
Using the hook on the wheel wrench, pull the hoist cable towards you so that you can reach the spare wheel.
If the spare wheel does not lower to ground level, the secondary mounting must be released.
After the spare wheel is completely lowered, tilt the clamping bar attached to the end of the cable and remove it from the center hole of the wheel rim along with the cable. Remove the wheel from under the car.
If the wheel has a smooth trim cap, carefully remove it using the flat end of the wheelbrace as a lever.
If the wheels have decorative caps that are bolted on, remove the cap by fully loosening the wheel nut caps with a wheel wrench. The caps won't come off completely. Then carefully press the edge of the decorative cap until it separates from the wheel.
Loosen the wheel nuts with the wheel wrench. However, do not unscrew the nuts all the way.
If necessary, connect the jack handle extensions to the jack handle.
Position the jack under the jack provided closest to the damaged wheel.
CAUTION
Raising the vehicle with an incorrectly or insecurely installed jack can damage the vehicle, and even cause the vehicle to fall off the jack. To prevent injury to persons and damage to the vehicle, make sure the jack head is in place before lifting the vehicle.
If one of the rear wheels is damaged, you will need to attach both jack handle extensions. Attach the jack handle to the jack. If the front wheel is damaged, place a jack behind that wheel where the two sections of the frame side member overlap.
If the rear wheel is damaged, the jack should be installed behind this wheel, under a special jacking platform located on the rear axle housing. Put the wheel wrench on the jack handle or on the extension and, turning it clockwise, raise the jack head until it rests on the platform.
Raise the jack until its head rests on its socket. Then jack up the vehicle to a height that allows the spare tire to be fitted.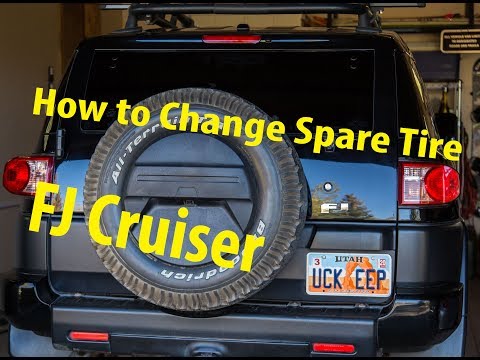
WARNING
It is dangerous to be under the vehicle when it is jacked up. If the vehicle slips off the jack, serious injury or even death could result. It is forbidden to stay under the car when it is supported only by a jack.
Loosen the wheel nuts and remove the damaged wheel. Remove dirt and rust from the wheel bolts and hub surfaces, as well as from the surface of the spare wheel adjacent to the hub.
WARNING
Dirt or rust on the wheel or on the parts to which it is attached can cause the wheel nuts to loosen. The wheel may come off and cause an accident. When replacing a wheel, it is necessary to remove dirt and rust from all surfaces to which it is attached. In an emergency, you can use a piece of cloth or paper towel to do this. Then, at the first opportunity, you need to finish the operation using a scraper or a wire brush to remove all dirt and rust.
WARNING
Do not lubricate the wheel studs or nuts with oil or grease. Otherwise, the nuts may come loose. The wheel may come off while driving, resulting in a serious accident. Using the wrong wheel nuts for your vehicle, or incorrectly tightening them, can cause the wheel to loosen and even lose the wheel while driving. This could lead to an accident. Make sure you are using the correct wheel nuts for your vehicle. If wheel nuts need to be replaced, make sure you are using the correct type of wheel nuts.
Slide the spare wheel onto the centering collar and studs.
Screw on the wheel nuts with their ribs facing towards the wheel and tighten them by hand until the wheel is pressed against the hub. Turn the wheel wrench counterclockwise to lower the vehicle.
Fully lower the jack. Tighten the nuts to the stop with a wheel wrench in the sequence shown in the figure.
WARNING
Using the wrong wheel nuts for your vehicle, or incorrectly tightening them, can cause the wheel to loosen and even lose the wheel while driving. This could lead to an accident. Make sure you are using the correct wheel nuts for your vehicle. If wheel nuts need to be replaced, make sure you are using the correct type of wheel nuts. At the first opportunity, stop and tighten the nuts with a torque wrench to the required torque.
Incorrectly tightened wheel nuts can cause braking pulsation and damage to the brake disc. To avoid costly brake repairs, tighten the wheel nuts evenly, in the correct sequence, and to the correct torque.
When refitting a full size wheel, the center cap (if provided) must also be reinstalled. Place the wheel cover on the wheel and gently push or tap it until it sits in place. The hood can only be installed in one position. Make sure that the lug of the cap matches the shoulder on the wheel.
When installing a wheel nut trim on a full size wheel, first tighten the plastic nut caps by hand and then with a wheel wrench.
Remove the damaged wheel and tool kit and put them back in the reverse order. Make sure the tire air valve is facing away from the vehicle.
With the removed wheel lifted and pressed against the bottom of the vehicle, continue to turn the wheel wrench until you hear two clicks, or until you feel the wrench turn twice. The mechanism of the underframe spare wheel holder is designed in such a way that the cable cannot be overstretched.
To be more secure, tug on the wheel to make sure it is properly secured.
WARNING
Storing and transporting an improperly secured jack, spare wheel, or other equipment in the vehicle can result in personal injury. In case of emergency braking, sudden maneuvers or an accident, the tools can injure passengers. Therefore, store such items in places specially designed for them.
Storing an alloy wheel with a damaged tire under the bottom of a vehicle for a long time can cause the wheel to lose its marketability. To prevent this from happening, always install the wheel with the air vent facing down. In addition, try to repair the tire and install the wheel on the car as soon as possible.
For the secondary mounting to work properly, the spare wheel must be stowed with the vent down. To release the secondary fastener, proceed as follows:
WARNING
Read all of the following instructions carefully before starting work. Failure to follow these instructions may result in breakage of the subframe holder and injury to you or others.
1. Look under the vehicle to see if the cable is visible.
2. If the cable is not visible, go to step 4. If the cable is visible, tension the cable by turning the wheel key clockwise until it clicks or turns twice. The cable tension mechanism is designed in such a way that it cannot be overstretched. Loosen the cable by turning the wheel wrench three or four turns counterclockwise. Tighten and loosen the cable at least two times.
After the spare wheel is completely lowered, tilt the clamping bar attached to the end of the cable and remove it from the center hole of the wheel disc along with the cable. Remove the wheel from under the car. If the wheel does not drop to the ground, continue this procedure.
3. Turn the wheel wrench counterclockwise until the cable is released by about 15 cm.
4. Install the wheel chocks on their smaller side so that they are facing each other with their main bearing surfaces.
5. Position the jack on the wheel chocks, spreading them apart so that the jack base is firmly seated on the wedges.
6. Attach the handle, extension and wheel wrench to the jack. Place a jack (with wheel chocks) under the bottom of the vehicle in front of the rear bumper. Center the jack so that its head is under the center of the spare wheel.
7. Turn the wheel wrench clockwise to raise the head of the jack until it touches the locking collar at the end of the spare wheel cable.
8. Continue to raise the jack until the spare wheel stops raising and rests on the bottom of the vehicle. The secondary mount should unlock. The spare wheel should now rest on the jack head.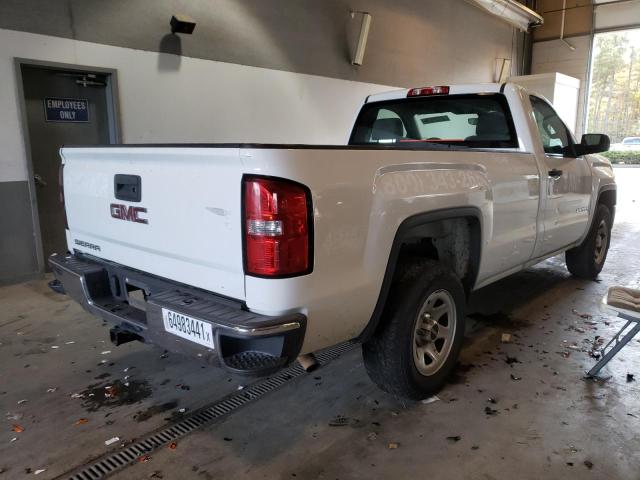
9. Lower the jack by turning the wheel wrench counterclockwise. Continue lowering the jack until the spare wheel slips off the jack or hangs from the cable.
WARNING
If the spare wheel is not completely off the jack, make sure no one is standing behind you, to your right or left, before you remove the jack from under the spare wheel. If anyone stands too close during this procedure, they may be injured by the jack if they fall.
10. Disconnect the handle from the jack and carefully remove the jack. With one hand, rest against the spare wheel, and with the other hand, forcefully pull the jack from under the spare wheel.
11. If the spare wheel is hanging on a cable:
- Insert the jack handle with extension and wheel wrench into the end of the lift shaft through the hole in the bumper.
- Turn the wheel wrench counterclockwise to lower the spare wheel. Turn the wheel wrench until you can remove the spare wheel from under the vehicle.