Good quality belts in an ATV will enhance the performance of the ATV. No matter what your riding style is and where your ride, if you follow the owner’s manual, use low gears in low speed situations and not using putting your ATV on gear while idle will ensure a longer belt life. In this article, we’ll look at how long does ATV belts last, signs that indicate belt replacement and what type of belts to use in your ATVs.
Contents
Generally, branded ATV belts last for a long time, if you follow the riding guidelines mentioned in the owner manual properly. If maintained properly, belts can last between 3000-5000 miles.
When do you need to replace your ATV belts?If you ride only on the weekends for fun, it is recommended to replace the belt once in 3 years. For people who clock more than 8-10 hours per week, they need to get their belts changed every year. And if you are professional ATV racer, then it is highly important that you keep a constant eye on the belts and change it after 2-3 races.
Apart from preventive maintenance, there are factors that need to be considered to replace the ATV belts. When you notice belt slippage, then it is time to replace your belts immediately. At times, you can see the top of the belts eroded, that could be due to the constant wear of the belts. This also indicates a belt replacement, or it can largely affect your horsepower to a great extent. Even leaking oil and other contaminations can reduce the life of an ATV belt.
How to increase the lifespan of an ATV belt?One of the common mistakes that rider do that will decrease the lifespan of the belts to a great extent is letting the ATV in gear while it is idle. It is not a big issue, if you are stopping for a minute, when your ATV is idle for a long time and also in gear, it means the belt is not moving but the clutch is spinning on the belt.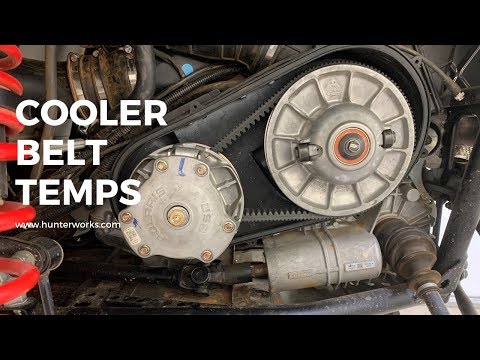 It creates a lot of friction and heat on the belt and will drastically reduce the performance of the belt. It is always better to put your ATV in neutral, even while you are stopping for a short time.
Another problem with riders, especially people using the ATV for the first time, unknowingly use higher gears on low speeds that will cause a lot of load on the belts. When you are climbing up a hill in a higher gear, it means you are transferring heavy load on the gears and will eventually burn the belts.
Frequently Asked QuestionsQ: Which is the best ATV belt? Aftermarket or OE?
A: Belts recommended by the manufacturer are specially designed for casual and recreational riders. They are not generally preferred for high-performance or aggressive riders. Aftermarket belts are specially tested in tough conditions and withstand the wear and tear to a great extent.
Q: What is the function of a belt in an ATV
A: The major role of an ATV belt is to transfer the power generated from the engine to the transmission.
Explaining the function of a drive belt is simple: The belt transfers power from your engine to your transmission.
Don’t be deceived by the straightforward explanation, though. The drive belt carries a large amount of responsibility when it comes to keeping your ATV or UTV on the trails. To put it briefly: if the belt explodes, your ride is done-zo.
The drive belt is a “wear and tear” item, so you know yours will need replacing at some point. Chances are, you’ve already replaced one (or twenty). And although it’s impossible to know how much life is left in your drive belt, you can pay attention to certain factors and make an educated guess.
If you know the behaviors that decrease belt performance, you can avoid them and be better prepared to replace that belt when it gives out. So let’s take a deep dive into drive belt lifespans.
How Long Does a Drive Belt Last?There is no cut-and-dry answer to how long it’ll be before your drive belt needs replacing.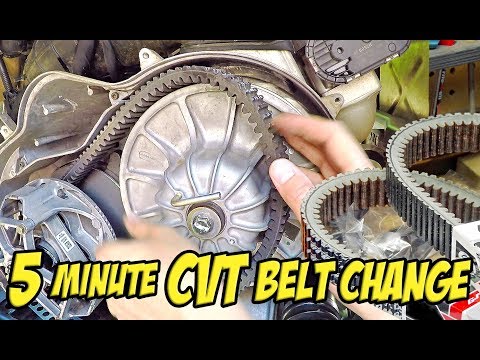 It could be 5 miles or it could be a couple thousand.
That distance depends on a lot of things. In fact, you can’t even accurately hammer down a range. Evaluating the health of your clutch parts and the intensity of your driving can give you an idea of how long you have before your next replacement.
But that still doesn’t explain everything. Like how is it that Johnny down the street has been able to get 1,500 miles out of the same belt, while you’re replacing them every 200?
Here are some of the variables surrounding the lifespan of a drive belt.
High temperatures, harsh climates, and rough riding can do a number on your drive belt. But what other factors impact how long it’ll last?We can’t tell you how long your drive belt will last, but we can cover some factors that will impact its performance over time. Here are some things to be aware of if you’re trying to maximize your belt’s lifespan.
If you’re still running stock, that’s not necessarily a bad thing. OEM drive belts are designed for casual recreational riding. So if that’s your thing (and barring other factors), you should be able to get several hundred miles out of your belt without issue. But if you prefer to ride on the wild side, just know your stock belt won’t last as long.
The health of your clutch impacts the health of your drive belt. If your clutch isn’t clean or is out of alignment, you’ll notice that your belt might not last as long as it should.
The rougher you ride, the more stress you put on your belt and the quicker it will wear out. We’re certainly not cautioning against getting wild on the trails—we live for that kind of stuff. But just be aware that kicking it into high gear and putting the pedal down means you’ll be replacing belts more often.
It’s not only about how you ride—it’s about where you ride too.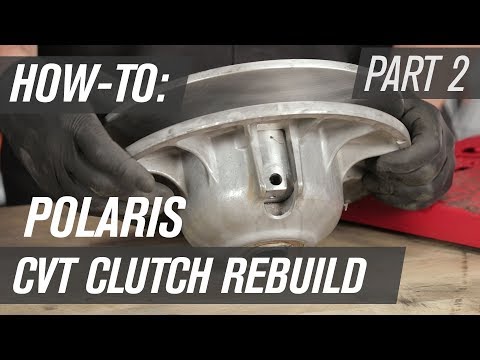 Harsh climates and rough trail conditions can negatively impact your drive belt. Exposure to mud, water, and dusty environments can do a number on your belt. Extreme temperatures are the main thing to watch out for, though. High heat is the number-one killer of ATV/UTV drive belts.
Certain machine modifications can also put additional strain on your drive belt. Anything that adds weight to your ATV or UTV—think lift kits, portals, and bigger tires—can cause your belt to wear out faster than normal. The more modifications you make, the stronger drive belt you’ll need.
Making Your Drive Belt Last LongerNow that you know the factors that can kill a drive belt’s lifespan, you can take the necessary precautions to keep your belt healthy for as long as possible. Here are some tips for getting the most out of your ATV or UTV’s drive belt.
Breaking in your drive belt is crucial if you want to avoid burning it up.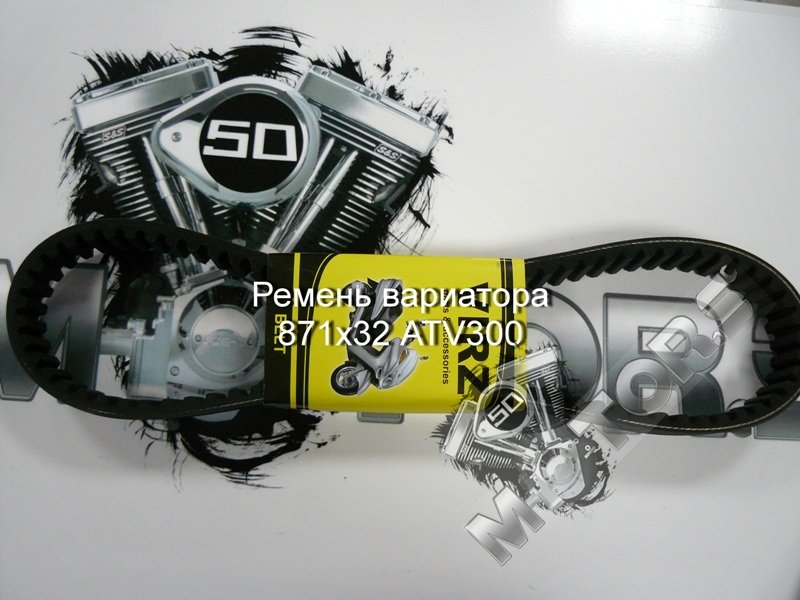 Why is this break-in period so vital, you might be wondering? We mentioned earlier that heat is the main culprit of drive belt deaths. Well, heat is generated by the belt slipping. When the belt slips, extra heat is created, and your belt is more likely to go kaput.
Breaking in your new drive belt ensures that it’s properly seated in the clutch. Proper seating = less slippage = less heat generated = a healthier drive belt.
Some riders prefer to play it safe by changing the belt every 1,000 miles even if they haven’t had any trouble out of it. Keeping a schedule like this gives you more control over when you replace your belt. After all, it’s way more convenient to change a belt in the garage than it is while broken down on a trail.
We’re not saying you can’t let loose and ride like hell. Just be smart about it. Stick to low gear in low-speed situations—the less time you spend in high gear, the happier your belt will be. And give your machine some time to warm up before totally hammering it.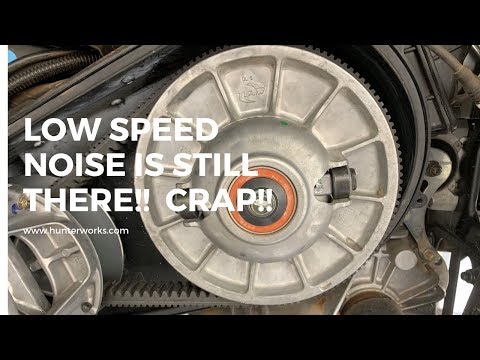
Also, be sure to follow manufacturer recommendations when towing or plowing. Ignoring those guidelines is a good way to blow a belt fast.
Drive belt temperature is directly related to drive belt lifespan. And using a belt temperature gauge is the only way to make sure yours isn’t running too hot. Keep an eye on your temperature gauge while riding to make sure your belt’s temp doesn’t go past 200° Fahrenheit. The general consensus in the industry is that temps over 200° F aren’t great, and temps over 400° F are critically bad.
Do Drive Belts Have a Shelf Life?Since belt life is so unpredictable, we can’t stress enough the importance of keeping a spare on hand at all times. You want to make sure your spare is in good condition, though, because a busted spare is helpful to no one.
The main thing to keep in mind when storing your spare is sun exposure. Heat and UV rays can cause the rubber to deteriorate, damaging the belt before it ever makes it to your machine. So as long as you keep the belt out of the sun, it should be good.
Want to make sure your spare is still good after a year or two in storage? Just turn it inside out and squeeze it together on the ends. If you start to see cracks, you need a new one. If not, you’re good to install it and get back on the trails.
They may look similar to the untrained eye, but not all drive belts are created equally. SuperATV’s drive belts are specialized for specific terrain types and environments.You can’t always know when your drive belt is going to snap, but you can monitor the affecting factors to minimize risk. And that starts with getting the most specialized, high-quality drive belt on the market. With a GBoost Belt from SuperATV on your ride, you can ride confidently knowing you’re getting the most out of your drive belt’s lifespan.
SuperATV’s drive belts are designed for the way you ride. We have four styles to choose from, each catered to a specific type of terrain or environment.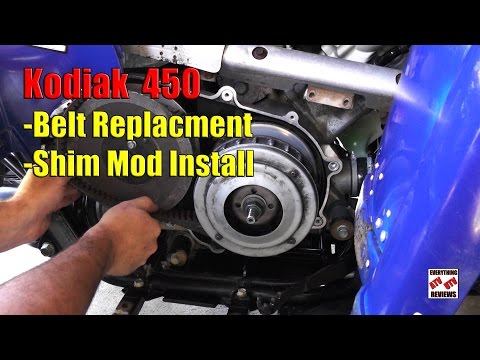 Sand Storm Belts are made for dune riders, Mud Monster Belts for peanut butter lovers, Extreme Badass Belts for hardcore off-roaders, and World’s Best Belts for versatile, do-it-all riders.
So what’ll it be? Get your specialized drive belt now and you’ll be tearing up the trails in no time.
Sooner or later there comes a time when your ATV's CVT belt wears out and needs to be replaced. We often hear the question: “At what mileage should the variator belt be changed?” The variator belt must be changed when indications for its replacement appear, not focusing on mileage. This is explained by the style of riding, the route chosen for trips, the quality of the belt, the experience of the rider and many other factors.
So how do you know if the belt needs replacing?
If you notice belt slip at low rpm, smell burnt rubber, see smoke coming from the CVT, notice a sudden decrease in top speed (with normal compression and a tuned carb), or you can't move at all when gas is applied , then most likely the variator belt needs to be replaced, or at least unscrew the variator cover and inspect.
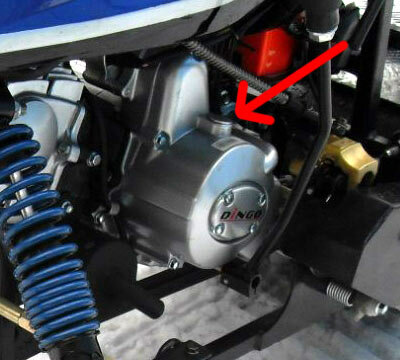
How do I get to the drive belt?
It is very common to remove the plastic footplate to unscrew the CVT cover (on some ATVs you can avoid removing the plastic by using a flexible shaft socket to remove the cover).
Do not lose the bolts you unscrew, prepare a tray in advance for dismantled parts and connections.
After the footboard is dismantled, proceed to the removal of the variator cover. Carefully inspect the surface of the cover, some bolts are hidden and not immediately noticed.
After removing the cover, the CVT mechanism of your ATV will be available for inspection, visually determine the integrity of the belt and its wear, if necessary, proceed to replace the CVT belt.
To remove the belt, it is necessary to separate the variator pulleys, to do this, find a hole with a bolt thread on the pulley (most often M8 - a length of 55-80mm, depending on the ATV model).
We screw the necessary bolt into the hole and loosen the belt for its easy removal. We work without fanaticism and constantly check the belt tension.
After the puller bolt is screwed in, start removing the CVT belt from the bottom, gradually turning the pulleys clockwise and moving up. The belt comes off fairly easily.
The belt has been removed, and now you need to inspect the running surface of the pulleys for deformations, chips and mechanical damage. It will not be superfluous to clean the pulleys and all accessible parts of the variator from contamination.
Next, proceed to install the new belt.
Please note - it is important to install the belt correctly!
Most belts have an arrow: when installing, it should look forward in the direction of travel, if there is no pointing arrow, then be guided by the letters printed on the belt, when installed correctly, all letters should be readable (not upside down, not backwards).
Install in reverse order, starting at the bottom of the pulley, but moving counterclockwise.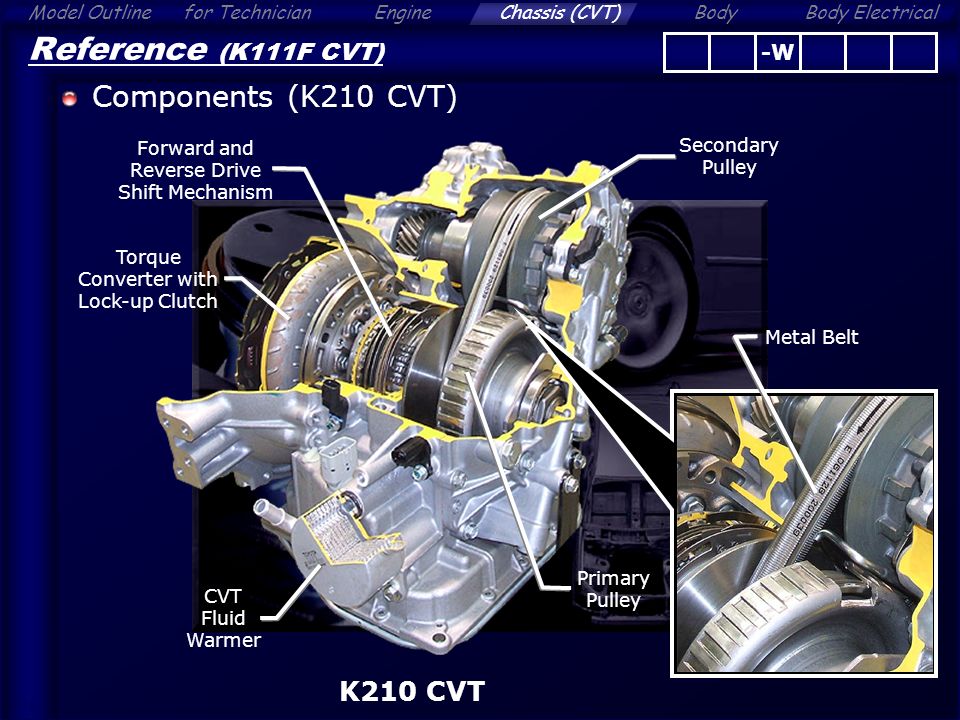
Once the belt is in place, slowly unscrew the puller bolt by turning the pulleys in any direction: this will allow the belt to fit better.
Next, proceed to install the CVT cover and assemble the removed footboard.
Make sure you don't miss any fasteners.
This completes the replacement of the variator belt on an ATV, as you can see, there is nothing complicated in this procedure, and absolutely everyone can handle it. I would like to add that when going on a trip on an ATV, it will not be superfluous to take a spare belt and tools for changing it with you: now you will not be at a loss in an emergency and will be able to deal with this problem in the field.
Finally, a video clip about replacing the variator with your own hands:
CVT transmission is a good compromise between automatic and mechanical. It is not as expensive and difficult to repair as an automatic, and does not require as much driver attention as a mechanic.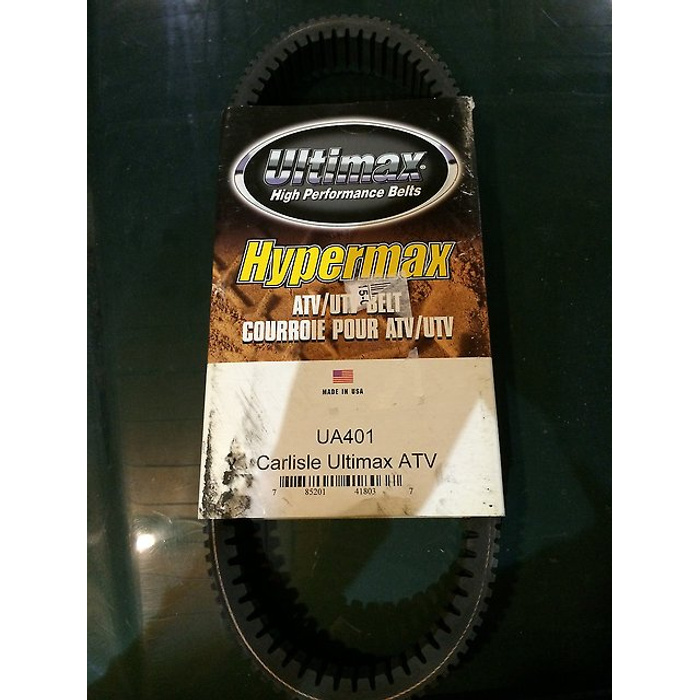 Therefore, all CFMOTO ATVs are equipped with CVTs from the Canadian company CVTech. This is a world-famous manufacturer that develops CVT systems specifically for ATVs.
In this article, we will look at the CVT mechanism and tell you what to pay attention to in maintenance and care in order to reduce wear on parts.
The device of the variator on the example of CFMOTO X4: 1 - drive pulley, 2 - bolt, 3 - driven th pulley, 4 - belt, 5 - washer, 6 - weight block - weight, 8 - slider.
The CVT adjusts the ATV's speed based on the engine RPM. It consists of two parallel pulleys with movable conical disks or jaws.
The crankshaft rotates the drive pulley, and from it the torque is transmitted to the driven pulley using a toothed belt. The higher the number of revolutions, the stronger the effect of centrifugal force. The discs of the drive pulley come together, pushing the belt to a larger radius.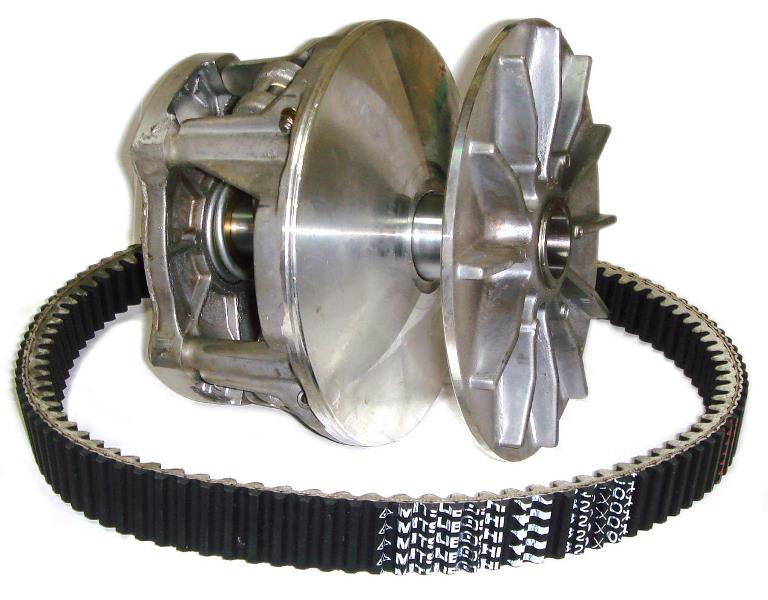 At the driven shaft, the disks converge, compress the spring, and the belt goes to the center between them, thereby smoothly changing the gear ratio. The spring is responsible for ensuring that the belt is always tensioned. As the RPMs increase, the belt tightens proportionately to keep it from slipping.
The variator has a drawback: it is necessary to monitor the cleanliness of the mechanisms and the condition of the belt. If the ATV often has to ride through deep and muddy puddles, do not be lazy to periodically open the variator cover and inspect the mechanism.
Sand and clay trapped inside interfere with the operation of the variator and accelerate the wear of its elements. Most often, the situation can be corrected - just rinse the mechanism with water from a hose after a trip. If the clay is dry, you need to completely disassemble the mechanism, remove the pulleys and clean it.
https://youtu.